Looking good! I've been following this from the first posting, and must say I applaud your efforts and I'm glad to see that it is slowly evolving towards your finished product. Keep up the excellent work, and keep looking at that light at the end of the tunnel - I know it must be getting brighter every day!
Navigation
Install the app
How to install the app on iOS
Follow along with the video below to see how to install our site as a web app on your home screen.
Note: This feature may not be available in some browsers.
More options
You are using an out of date browser. It may not display this or other websites correctly.
You should upgrade or use an alternative browser.
You should upgrade or use an alternative browser.
Project: PrometheusCu
- Thread starter SaibotC
- Start date
@matrix563 - Here you go (the cat's name is "The Boob", haha):

@madaba - Thanks a lot mate.
@Adidas4275 - I'll be posting performance stats on the drives in and out of RAID, with and without the HighPoint card. =) I haven't even had a chance to plug it in yet.
@UT-Jackal - Thanks man.
@BrainEater - Thanks a lot.
@edinator - www.cableorganizer.com - check there. Thanks.
@cnealjr - It never seems bright enough. Thanks a lot man, I appreciate that.
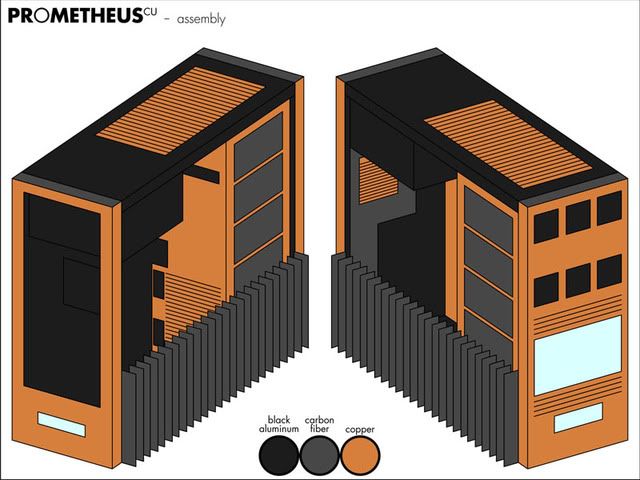
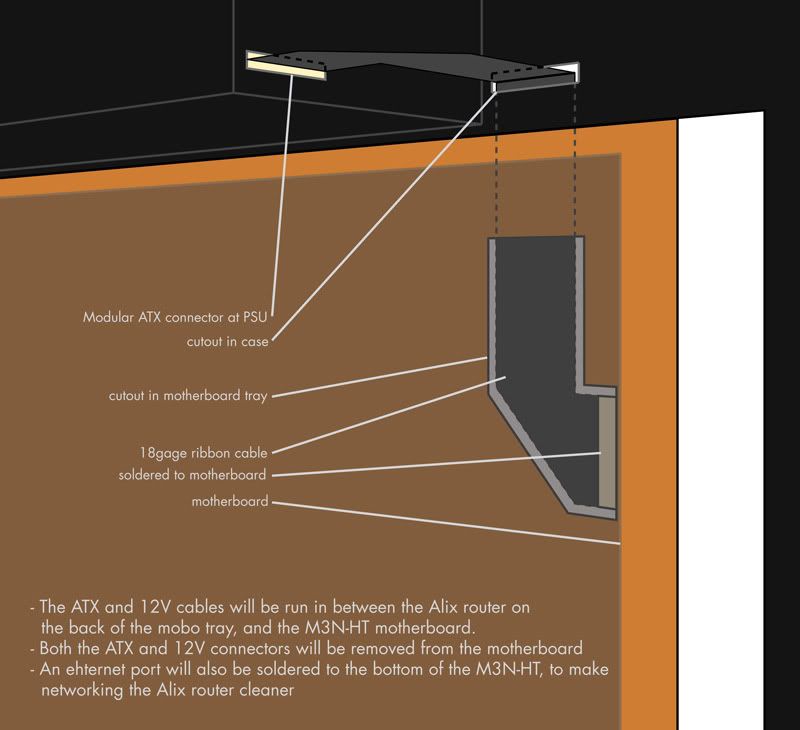
You wont see anything in the front of the case, the entire front will be encased in copper/carbon.
There are a bunch of diagrams showing this, and some early aluminum mockups at the beginning.
This is the piece that will be bent to form a shroud.
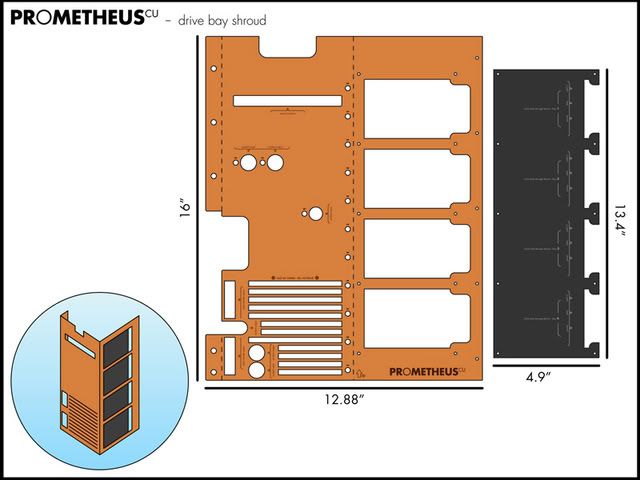
It will also act as a HDD mount for the 4 SSDs.
Here's a rough, very much out of perspective illustration:
There are a bunch of diagrams showing this, and some early aluminum mockups at the beginning.
This is the piece that will be bent to form a shroud.
It will also act as a HDD mount for the 4 SSDs.
Here's a rough, very much out of perspective illustration:
I'll hunt down the cats later. =)
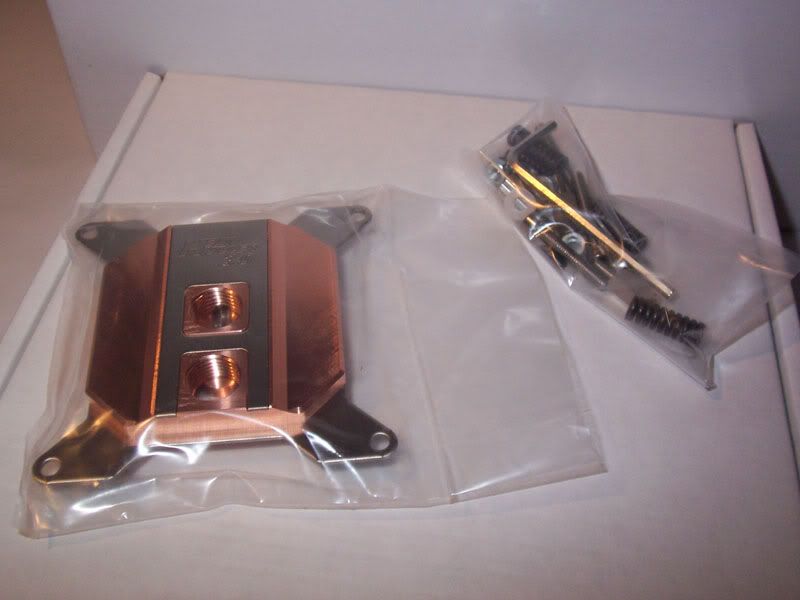
Rico from Watercool told me today that my PrometheusCU edition Heatkiller rev3.0 was shipped and is on it's way to me.
I also had Rico send me some pics of his shop...
First up, here's the link to the watercool website:
*click for link*

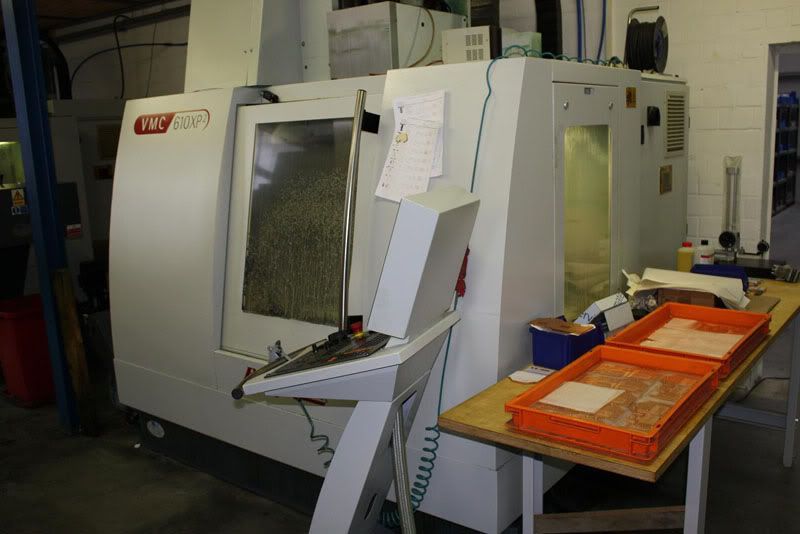
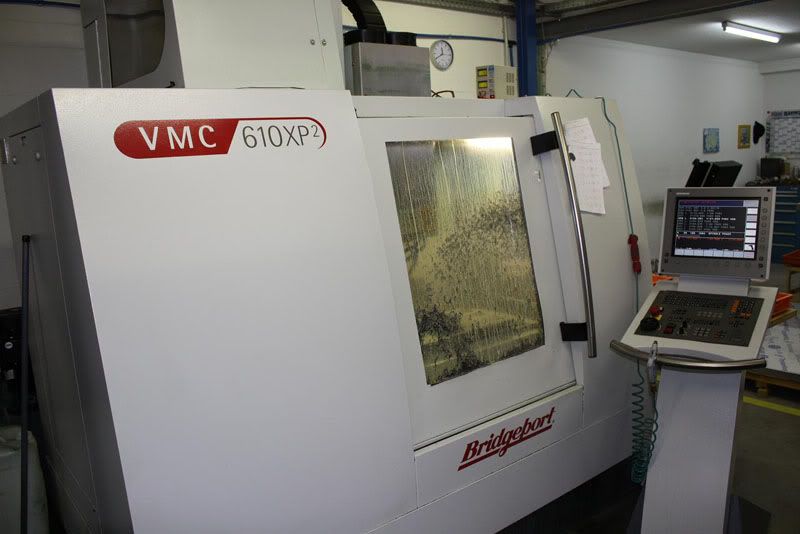
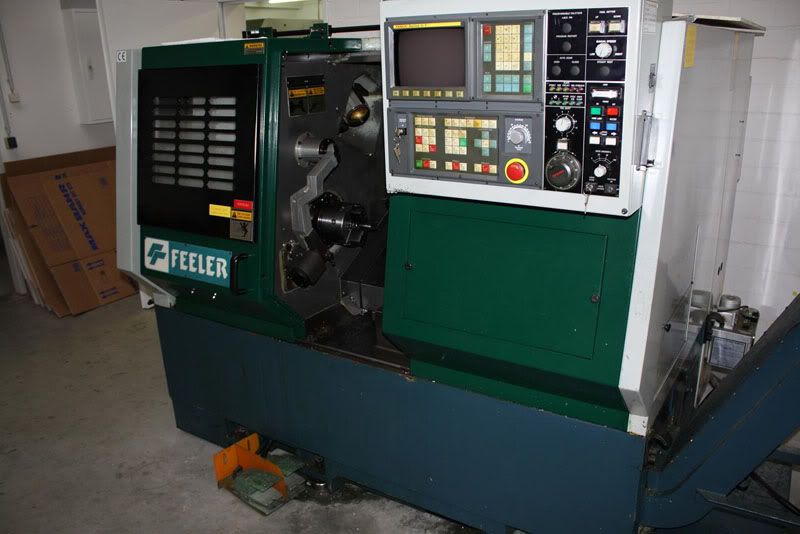
the Watercool workshop - Rico's left the captions up to me because he says his English isn't very good.
Outside the shop:

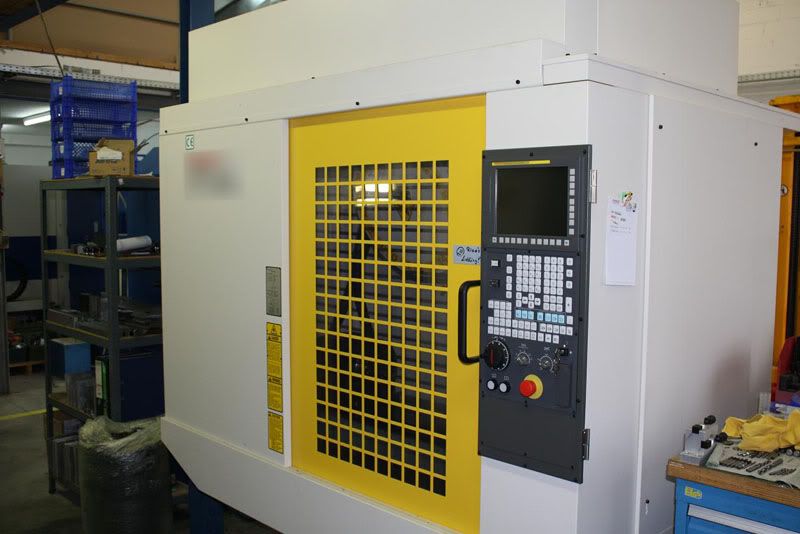
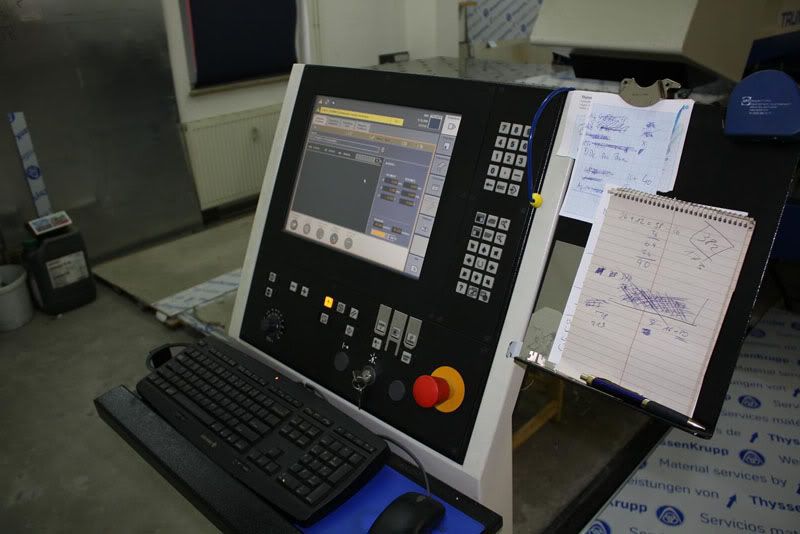
What looks to be a couple of 5-axis CNC mills - some very impressive equipment for the machinist among us. You can see a bunch of what look to be GTX280 waterblocks in the bins:

This looks like some delrin Heatkiller 3.0 tops.
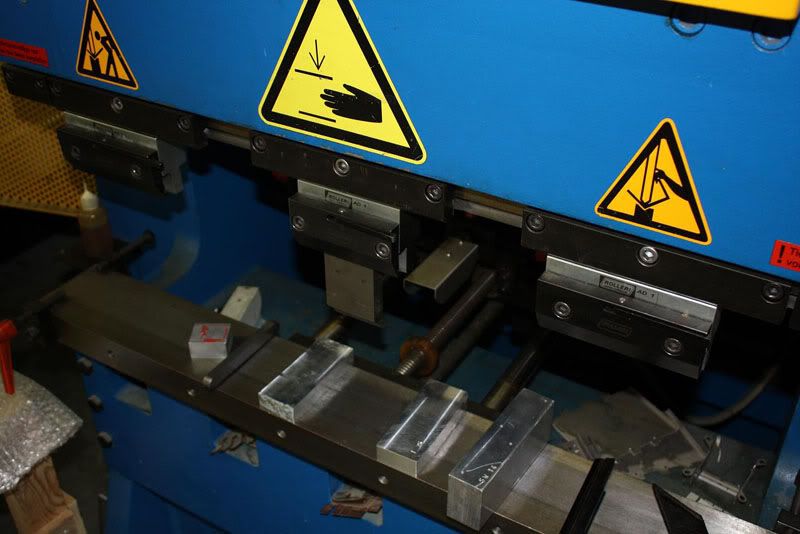
A bigass bending break, a piece of equipment that I REALLY REALLY want.
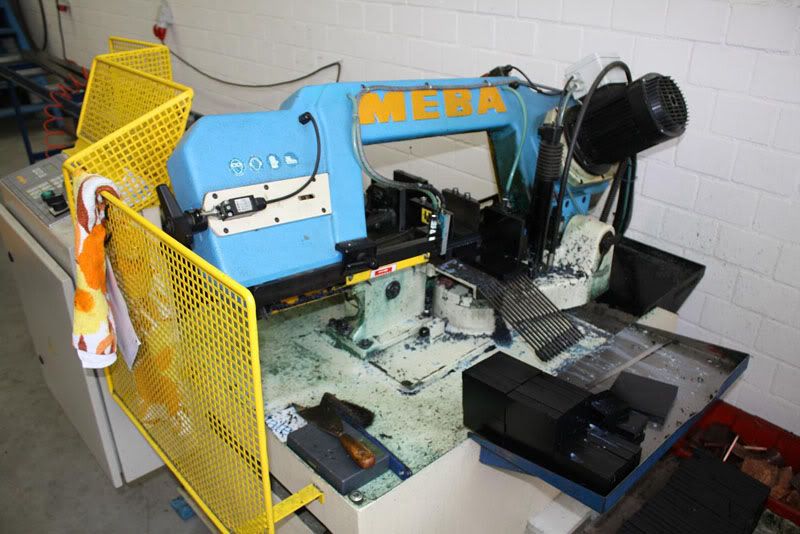
A hydraulic drop saw, cutting what looks to be delrin slabs for waterblock tops:
A CNC lathe... another bit I'd kill to own:
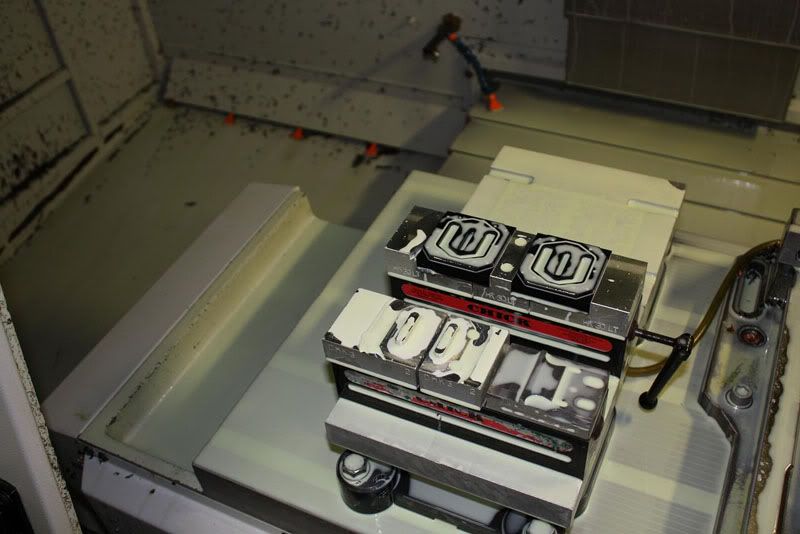
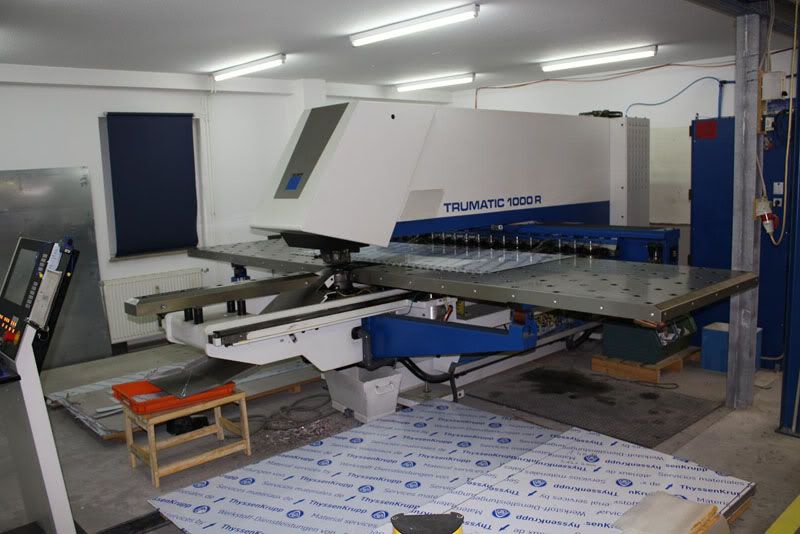
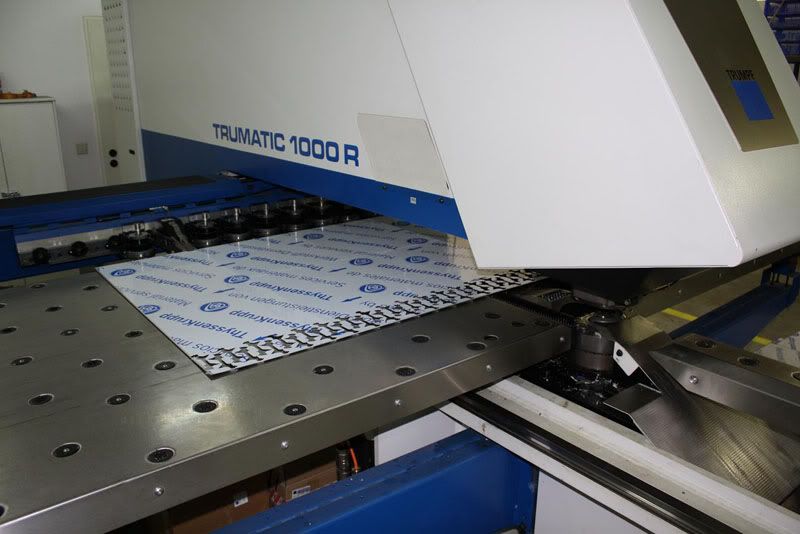
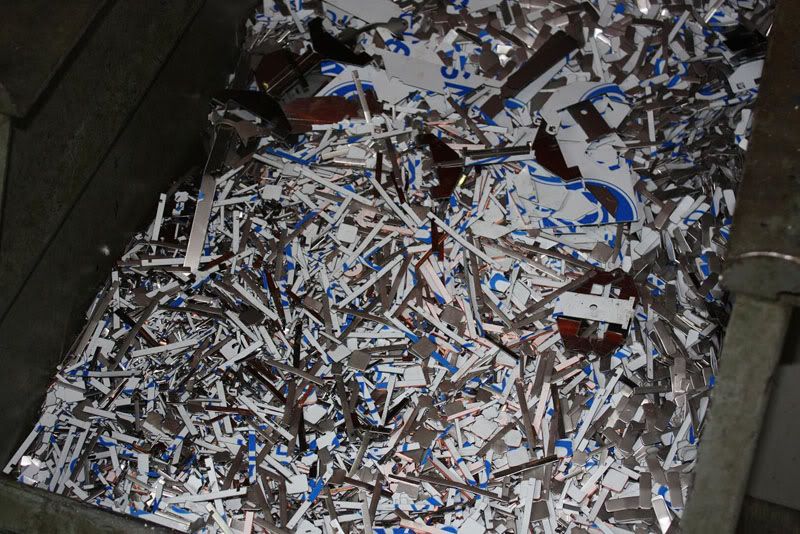
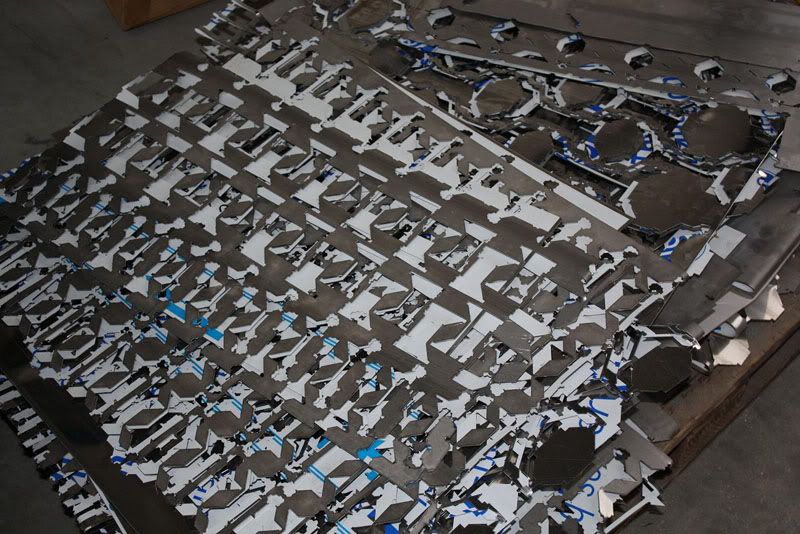
A MASSIVE CNC metal stamping punch making waterblock details, and mounts:
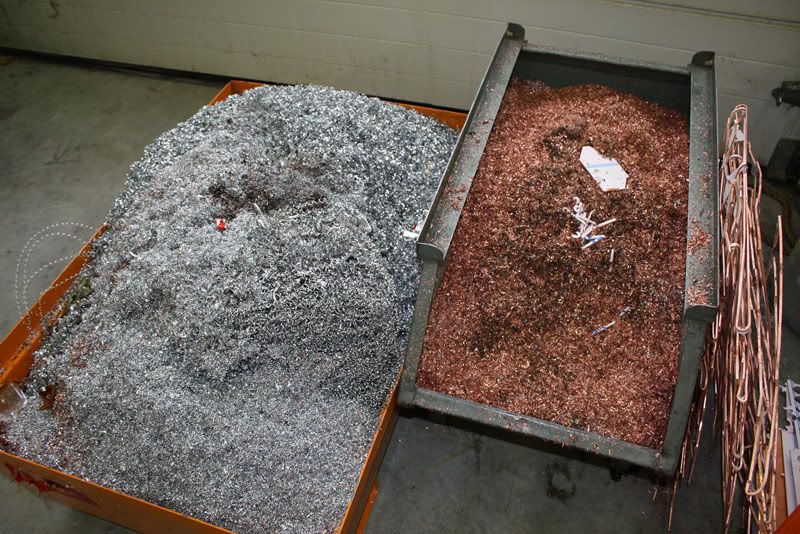
To be recycled scrap metal and shavings:
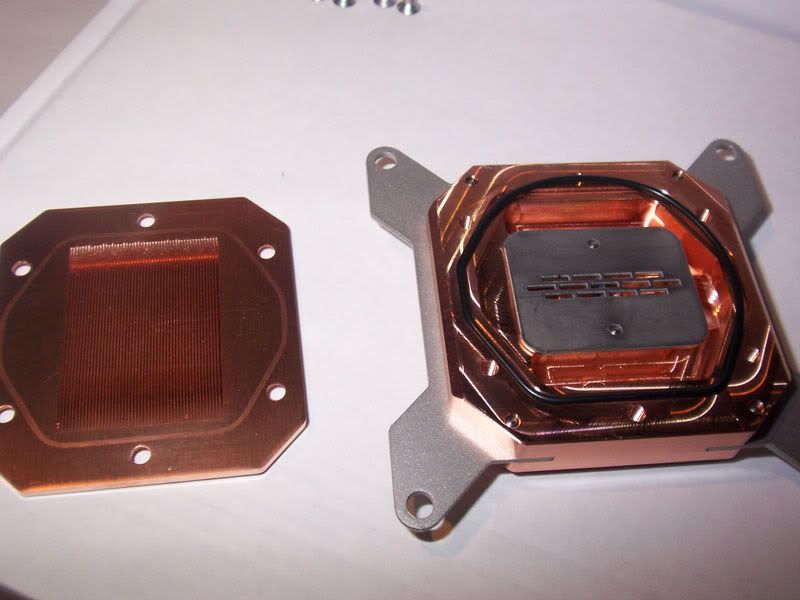
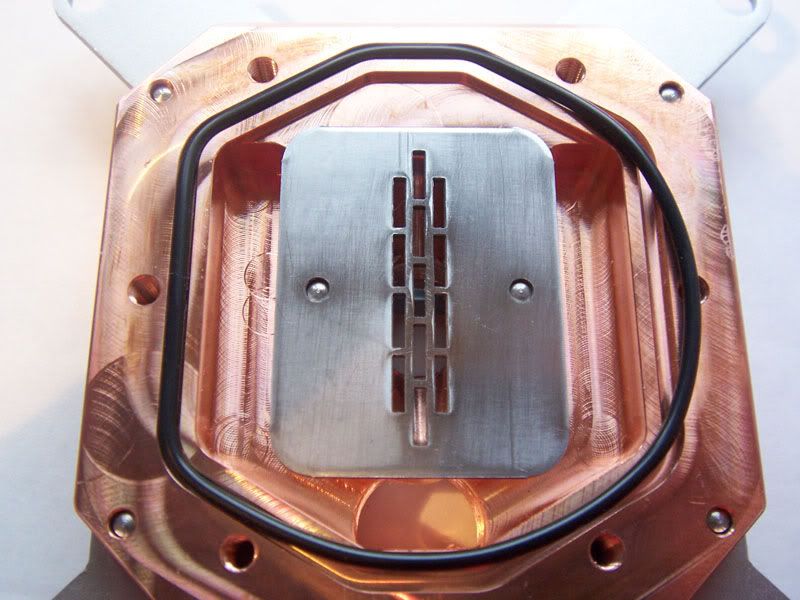
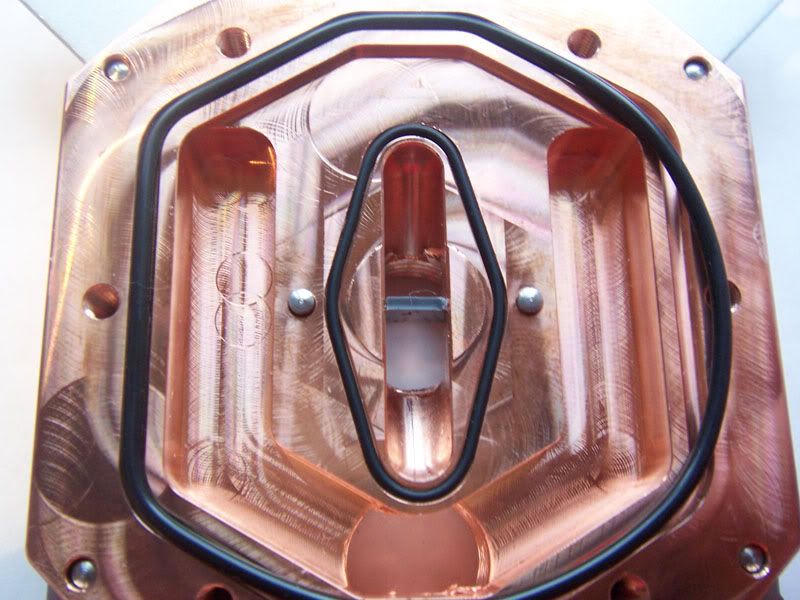
Some of you asked for some interior shots of the Heatkiller 3.0 CoolingMasters.com did a quickie review of the block and took pics of the inside:
Rico from Watercool told me today that my PrometheusCU edition Heatkiller rev3.0 was shipped and is on it's way to me.
I also had Rico send me some pics of his shop...
First up, here's the link to the watercool website:
*click for link*
the Watercool workshop - Rico's left the captions up to me because he says his English isn't very good.
Outside the shop:
What looks to be a couple of 5-axis CNC mills - some very impressive equipment for the machinist among us. You can see a bunch of what look to be GTX280 waterblocks in the bins:
This looks like some delrin Heatkiller 3.0 tops.
A bigass bending break, a piece of equipment that I REALLY REALLY want.
A hydraulic drop saw, cutting what looks to be delrin slabs for waterblock tops:
A CNC lathe... another bit I'd kill to own:
A MASSIVE CNC metal stamping punch making waterblock details, and mounts:
To be recycled scrap metal and shavings:
Some of you asked for some interior shots of the Heatkiller 3.0 CoolingMasters.com did a quickie review of the block and took pics of the inside:
Blazestorm
Supreme [H]ardness
- Joined
- Jan 17, 2007
- Messages
- 6,940
Don't you mean ::insert dramatic pause:: cool
lol for dramatic pauses...
I 'finished' the GFX power lines.
I added the quotes, along with some slack in the lines, because I'm going to solder the wires to the cards... to clean it up a bit.
The heatshrink is also temporary
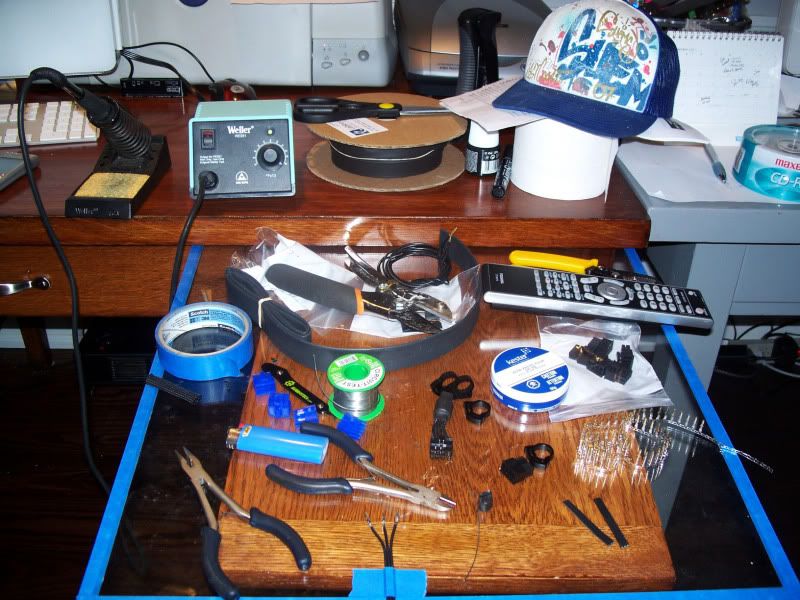
The tools I used:
Here's my 'needle nose crimp job':
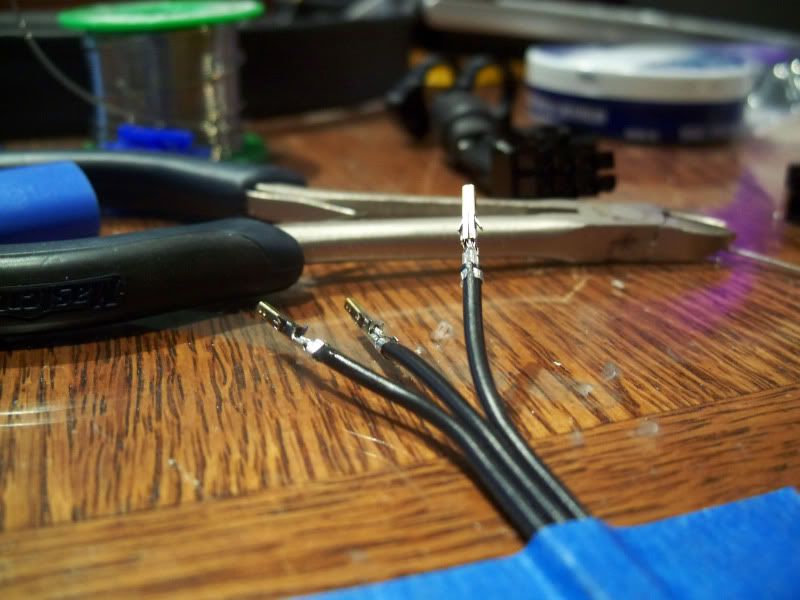
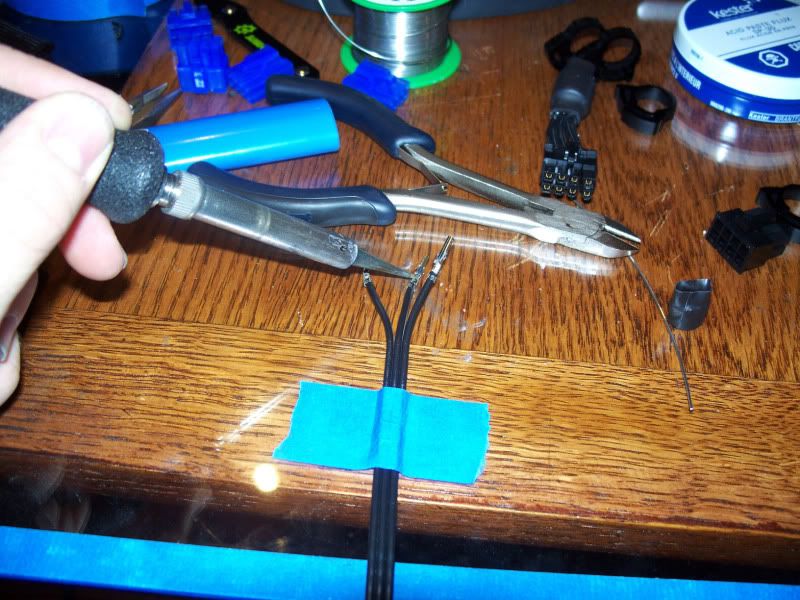
Add solder:
Result:
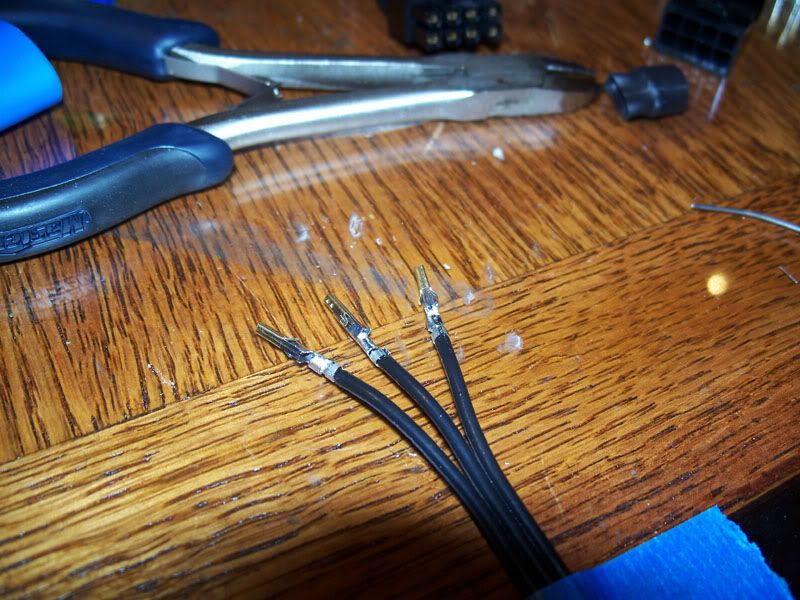
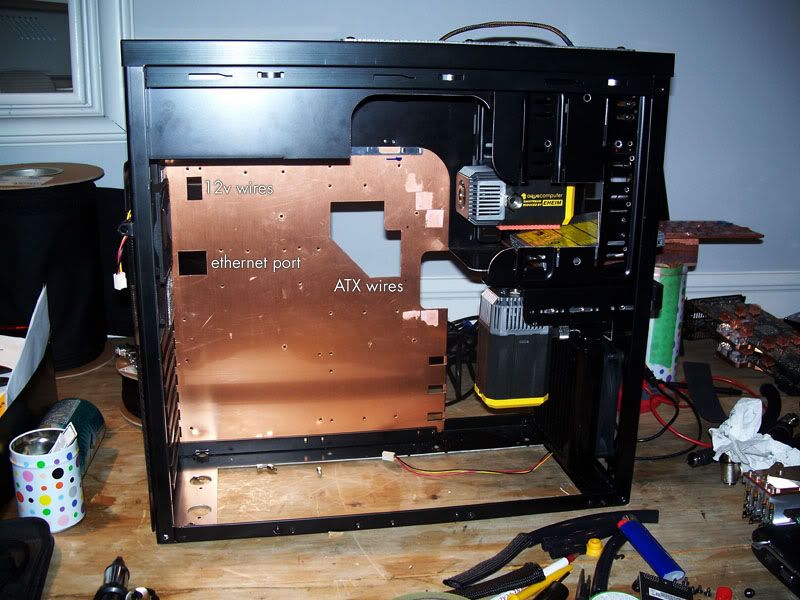
Here are the wires in place, the heatshrink needs to be finalized, but I cut all the wires on an angle so they feed in the correct direction out of the PSU without straining.
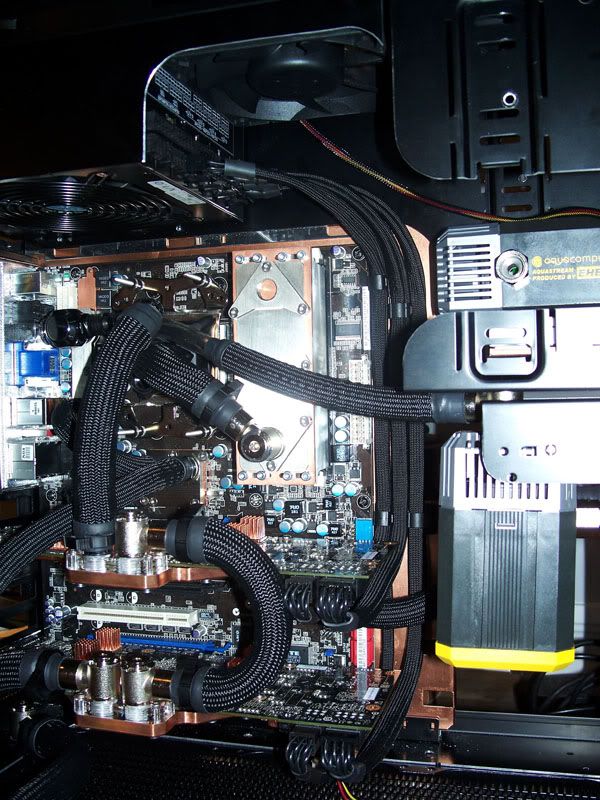
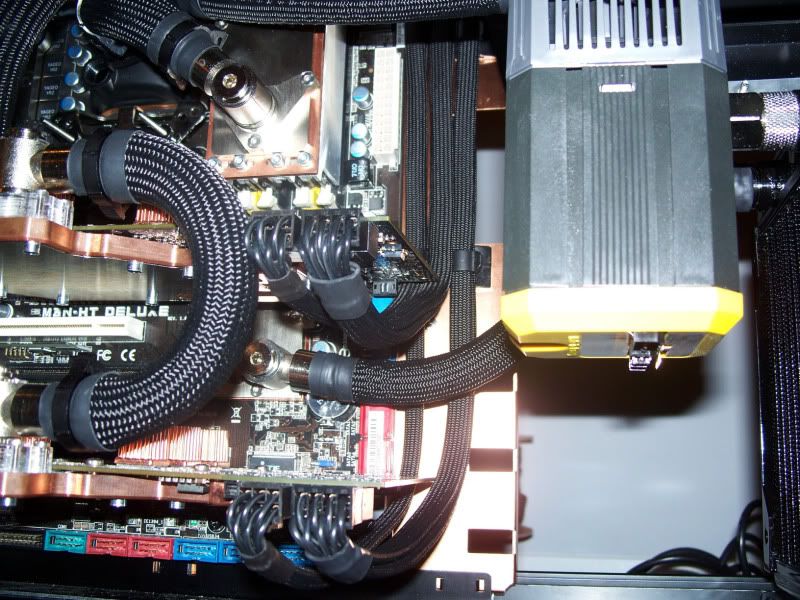
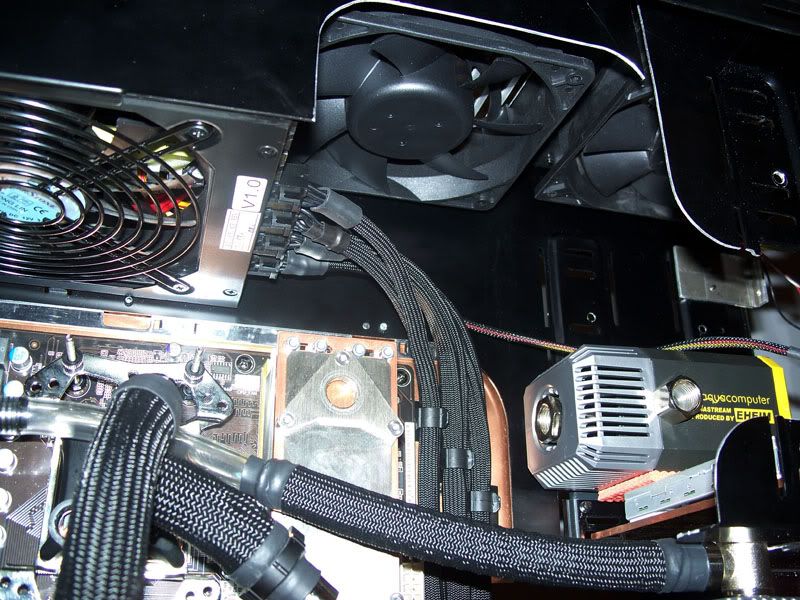
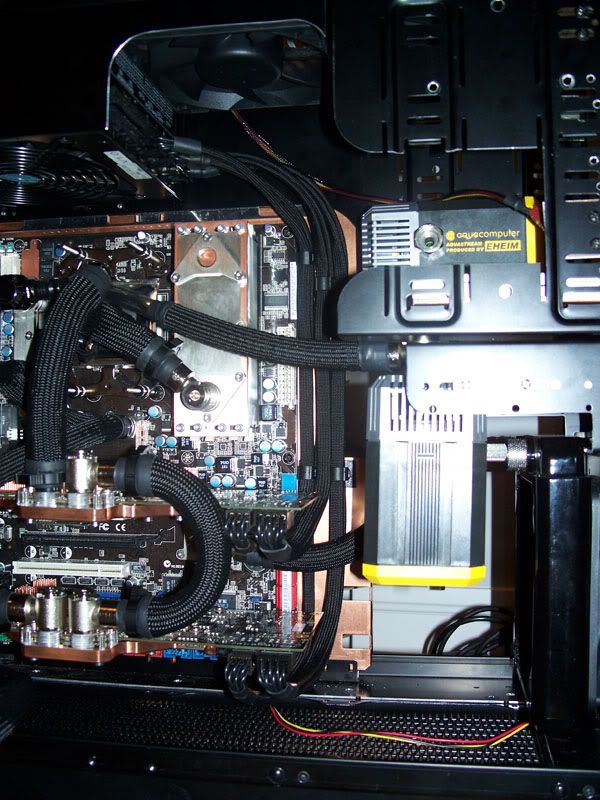
I'm also going to relocate the little black cable clips on the motherboard tray - to be neater.
Thanks for reading. Tune in soon - NEXT I tackle the soldered ATX and 12v lines! =)
I added the quotes, along with some slack in the lines, because I'm going to solder the wires to the cards... to clean it up a bit.
The heatshrink is also temporary
The tools I used:
Here's my 'needle nose crimp job':
Add solder:
Result:
Here are the wires in place, the heatshrink needs to be finalized, but I cut all the wires on an angle so they feed in the correct direction out of the PSU without straining.
I'm also going to relocate the little black cable clips on the motherboard tray - to be neater.
Thanks for reading. Tune in soon - NEXT I tackle the soldered ATX and 12v lines! =)
silent-circuit
[H]F Junkie
- Joined
- Sep 18, 2005
- Messages
- 16,136
Love the project, but I'm going to go ahead and say what I'm certain many others are thinking -- soldering leads to components is crazy, bordering on stupid. Should the board or one of the cards give out you will have hours of work ahead of you just to get it out, and hours more to prep and install a replacement. That doesn't make sense to me no matter how I look at it.
The power lines are modular at the PSU... so removal is easy enough. .
I'm not going to upgrade, I'm starting a new project once this one is complete. Then this one will be put in storage and re-opened many years later. So-on and so forth.
Thanks though mate... but I've thought of everything... I'm certain.
.I'm not going to upgrade, I'm starting a new project once this one is complete. Then this one will be put in storage and re-opened many years later. So-on and so forth.
Thanks though mate... but I've thought of everything... I'm certain.
Markistehnamezor
Gawd
- Joined
- Jun 16, 2008
- Messages
- 808
Langers got the dough. I understand since you did say you were going to do product development I believe. This is like something he can put on a resume, If they don't believe him he can just bring the entire case to the next interview to prove it lol. He will then dig through all the pictures to show he did it, and get a high salary afterwards.
I'm not going to upgrade, I'm starting a new project once this one is complete. Then this one will be put in storage and re-opened many years later. So-on and so forth.
Can I have this system once you're done with it? ^_^
best [486]
Limp Gawd
- Joined
- Aug 28, 2005
- Messages
- 476
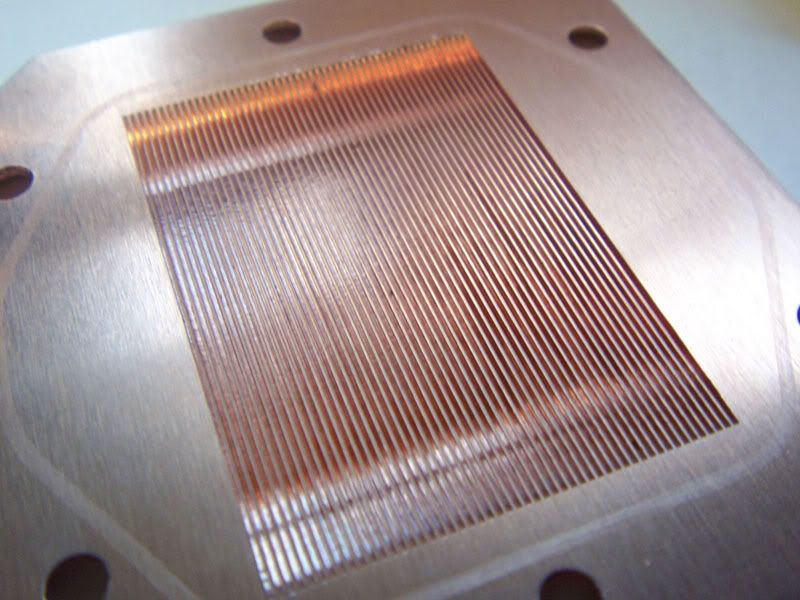
I wonder what kind of machine they use to cut those, it seems a horizontal mill would work, but a tool that thin would be prone to breakage...
@Markistehnamezor - Exactly!
@best [486] - I asked myself the same question, and it's one I plan to ask Rico in my next correspondence. I was thinking some kind of thin saw-blade because it looks like there is a radius to the end of the grooves... but I've never seen a computer controlled cutter with a blade like that before. Perhaps something with 50 spinning blades that cuts all the grooves at once?
@best [486] - I asked myself the same question, and it's one I plan to ask Rico in my next correspondence. I was thinking some kind of thin saw-blade because it looks like there is a radius to the end of the grooves... but I've never seen a computer controlled cutter with a blade like that before. Perhaps something with 50 spinning blades that cuts all the grooves at once?
...@best [486] - I asked myself the same question, and it's one I plan to ask Rico in my next correspondence. I was thinking some kind of thin saw-blade because it looks like there is a radius to the end of the grooves... but I've never seen a computer controlled cutter with a blade like that before. Perhaps something with 50 spinning blades that cuts all the grooves at once?
It is probably a slot cutting tool. Basically a really thin metal cutting saw blade.
Uberbob102000
2[H]4U
- Joined
- Apr 29, 2006
- Messages
- 2,243
That's kind of what I was thinking.
AWESOME build by the way Langer!
AWESOME build by the way Langer!
Markistehnamezor
Gawd
- Joined
- Jun 16, 2008
- Messages
- 808
nestea spilling on your motherboard?
filthysanchez
2[H]4U
- Joined
- Jul 19, 2006
- Messages
- 2,669
You're soldering the ethernet jack on the back, right?
LibertySyclone
[H]ard|Gawd
- Joined
- Apr 9, 2007
- Messages
- 1,366
I am pretty sure he is moving that fugly 24pin to the back of the mobo the question is, is he moving the slot or doing a direct solder?
I have been stalking Langer for a while now, my Syclone needs a G/F in the form of his GN, along with a certain copper computer as soon as its done.
Dont worry I wont steal the cats.....
the question is, is he moving the slot or doing a direct solder?I have been stalking Langer for a while now, my Syclone needs a G/F in the form of his GN, along with a certain copper computer as soon as its done.
Dont worry I wont steal the cats.....
silent-circuit
[H]F Junkie
- Joined
- Sep 18, 2005
- Messages
- 16,136
I assume you've got a bit of experience desoldering and soldering?
Based on the equipment in use alone I feel fairly confident that he is.
Based on the equipment in use alone I feel fairly confident that he is.
That's true, yes
Based on the equipment in use alone I feel fairly confident that he is.
I don't know, he has all those expensive parts, I'm sure he could afford a nice soldering iron
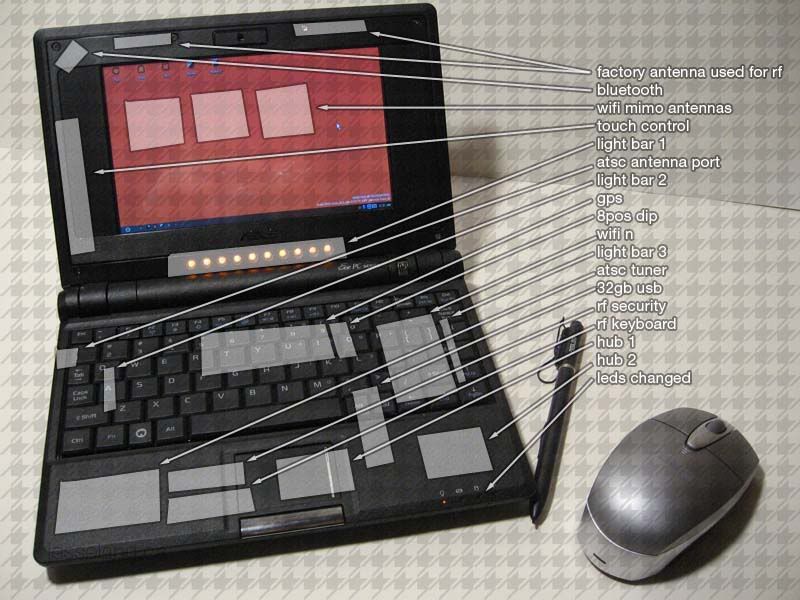
I guess you guys never saw my eeePC then?
I actually modded my eeePC before it was cool - I still stay I did it first.
I've added the following internally to my eeePC
2GB RAM (OCZ)
USB 32GB Flash Drive (Corsair) *tale of woe and sorrow below*
16GB SDHC (SanDisk)
USB 4-port Hub 1 (Logix)
USB 4-port Hub 2 (Logix)
USB 7" Touch Screen 1 (Kiddshop)
USB ATSC wireless digital TV-Tuner (Artec)
USB Bluetooth Adaptor (Asus)
USB GPS Receiver (Route66)
mini-PCIe Wifi-N card (Intel)
Wifi-N MiMo antenna (x3)
USB Wireless Security AutoLock
USB 10-LED Light Bar 1 for keyboard illumination
USB 10-LED Light Bar 2 for internal "PIMP" lighting (w/ DIP on/off)
All onbard LED's and LED light bars swapped to 5000MCD Amber LED's
Not only was mine first, but AFAIK it's the most heavily modded eeePC out there with 16 additions (18 additions as it stands today).
here's a log on bit-tech
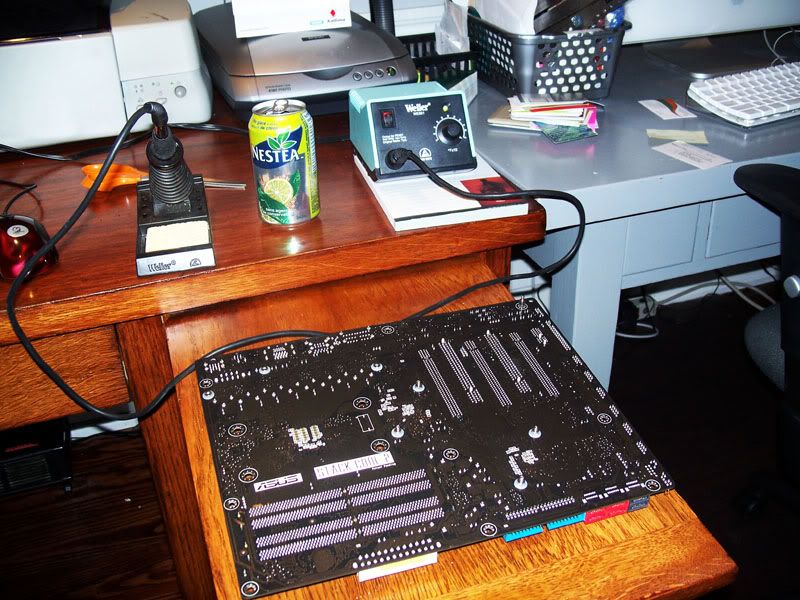
I wanted to be done by now... but...
I love my Weller WES51 iron, It's a great unit but it's not getting hot enough. In fact none of my irons are working for me... even the massively overpowered 260WATT Weller D550, and the 40WATT Weller SP40LK.
Do motherboards use some kind of super high temp solder or something?
None of my irons get hot enough to make it properly workable, it just refuses to melt like one would expect it to. Pumps, and braid have very little effect. I've removed about %90 of the solder material from each joint but that last %10 wont budge, it wont even melt and I'm not buying a $600 hot air desoldering station - yet.
I've even tried using my solder to heat the factory solder... no dice.
This is the first time I've ever had this much trouble desoldering - figures this happens to me on the first thing that I'd genuinely prefer not to destroy. haha
Methinks I'll have to use a torch, but first I'm going to see if any of my contacts have any heat flow gear I could borrow.
I seem to recall a buddy of mine having a full blown turbine desoldering station.
I assumed it was wave soldered but I didn't think that they used kryptonite to do it.
I just plugged in my clothes iron and my IR thermometer says it's considerably colder than any of my soldering irons... so there goes that idea.
I think the only way I'm going to get this thing off is to use a soldering torch or a concentrated flow from my heatgun. I'm pretty sure both of these methods are quite likely to destroy the board though. If that's the case then when I get a replacement mobo I'll leave the connectors in place and just solder the wires to the bottom of the pins.
I'm going to wait and see if anyone has any suggestions for me, I've posted this dilemma on about a 12 forums... I guess this will have to wait until tomorrow to see what my fellow geeks have to say.
Pain in the ass.
jackofalltrades
2[H]4U
- Joined
- Feb 7, 2006
- Messages
- 3,740
It shouldn't be that hard to desolder but I repaired a mainboard once changing the cps and the same thing happened.... to be honest I ended up tearing the board up got everything too hot. Hope you have better luck it only happened to me once never since who knows some one must have used JB-weld... Ha Ha
filthysanchez
2[H]4U
- Joined
- Jul 19, 2006
- Messages
- 2,669
Markkleb's done it before on a build, you could just PM him
shadowlord
2[H]4U
- Joined
- Jan 6, 2005
- Messages
- 3,109
the mobo probably acts like a giant heatsink.
i had massive problems soldering on my x-fi card when i changed the capacitors and opamp. that was with a 50w soldering station on full power and some solder joints still wont melt.
i had massive problems soldering on my x-fi card when i changed the capacitors and opamp. that was with a 50w soldering station on full power and some solder joints still wont melt.
ya i am interested in a solution, so plz post when you get a result plz!
i had a similar problem with a friends XPS laptop, the power connector was faulty, so i wanted to desolder it.... i couldnt get ANY of the soder off period. would be nice to know how for future references.....
i had a similar problem with a friends XPS laptop, the power connector was faulty, so i wanted to desolder it.... i couldnt get ANY of the soder off period. would be nice to know how for future references.....