Well supposedly I'm going to Afghanistan this coming December, and damnit, I can't leave my T.V. shows, Music, etc @ home or on a non redundant drive that can fail. So I decided that I will throw together an ammo can P.C. that is extremely portable, rugged, and I won't care when it gets scratched. This first model is for my Dad and is a prototype. So this one will be painted up all pretty. I found that the Mini ITX Intel Mobo fits snugly into the closed ammo can. I will have to test this when I put together the framing, but I'm fairly confident it will hold up.
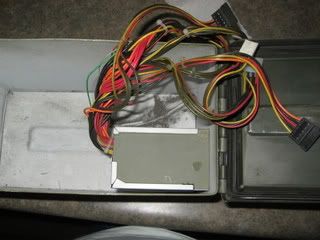
You can see the small PSU I have in the picture above. Unfortunately I cannot make that fit with two 3.5" HDs, so I'm most likely going to get a 12V ITX adapter in the 200W range. This PC will have two mirrored 320's, but the one I travel with will most likely have mirrored 1TB's.
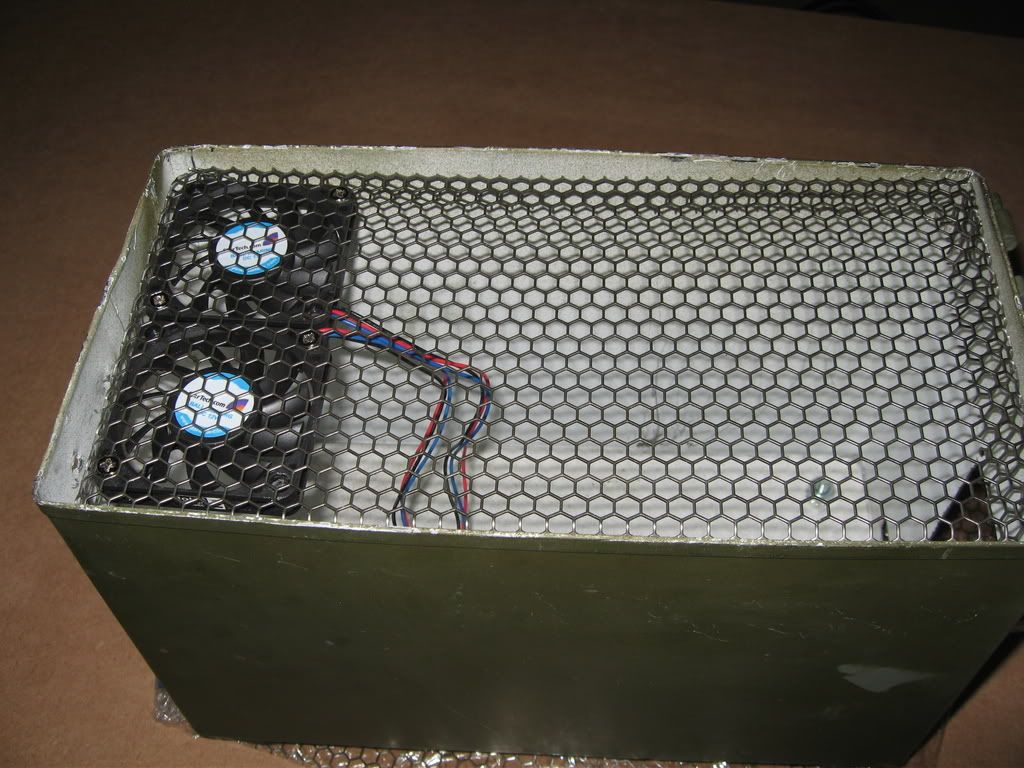
I will have the mobo recessed with wires extending to the rear of the case. (Left hand side) The only wires going out will be Wireless connection, USB connectors, VGA, ethernet, and Sound. I want to cut down on this so I can make it somewhat weather resistant, also I can put the connectors where I want and not how the mobo is laid out. So I will be using a VGA splitter, and putting output for both a DVI and VGA connection (both still only analog) so I can use whatever is available.
Next I will have it either attached to a wireless network or administering one (thanks to PCLINUXOS!) so I have a USB wireless adapter that will allow for an external antenna.
I have to resolder the connector because I broke it while it was connected to a laptop...
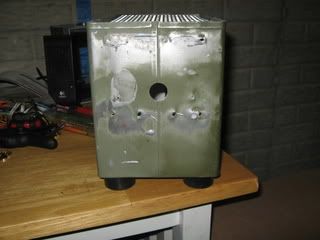
The main problem I have now is that I don't know how to accurately cut through the case. I think that the dremel does not have enough power, and may not be very accurate. (Those fiberglass wheels are pretty big for what they need to cut)
This is about all I have today, tomorrow I hope to sand it down, prime it, and get the framework built using "L stock." I will be closely following Monk3y's similar post for ideas, since he seems to have a hella better idea of what to do. Anyone with ideas on how to do this better, let me hear them.
Thanks
1/7/08
So I've made some progress, but most of that was learning.
Here I got the largest part of the sanding done. I'm going to go over it with a smaller sander to make sure I get everything off, but now the bulk is done.
Also, my frame changed a couple times.

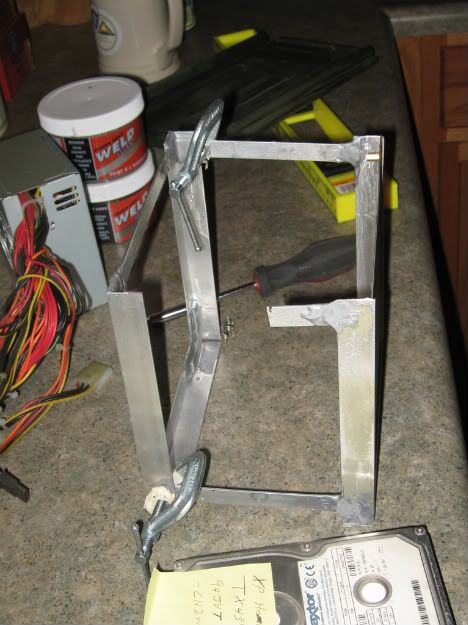
Initially I was going fab my own frame piece by piece, but the Hoobie thought we should make 90 degree cuts in the metal and bend out a square. We spent some time making that not work, so eventually I just got a piece of aluminum or steel from Menards and we started the frame around that.
This will hopefully fit in there perfectly with very little room to spare. I just ordered a Bulgin switch for the switch. This will hopefully give it a nice clean look.
http://www.frozencpu.com/products/1905/ele-71/Green_Illuminated_Bulgin_Style_Vandal_Switch_-_Silver_Housing_-_Ring_Illumination.html#blank
Next I will finish sanding and then begin fabbing the ammo can, as well as figuring out a way to make the board slide in and out.
UPDATE 6/5/08
Yes, I know - I'm speedy Gonzales...
I've been doing a lot of work and learned a lot of lessons.
This is my epoxied frame
The goal is to weld a steel form of this with some possible adjustments - but for now it may work. Epoxy is really cool and all, except it just cannot take the stress a good weld can. Hoobie7 is going to get a 220V drop so we can start playing around with that idea.
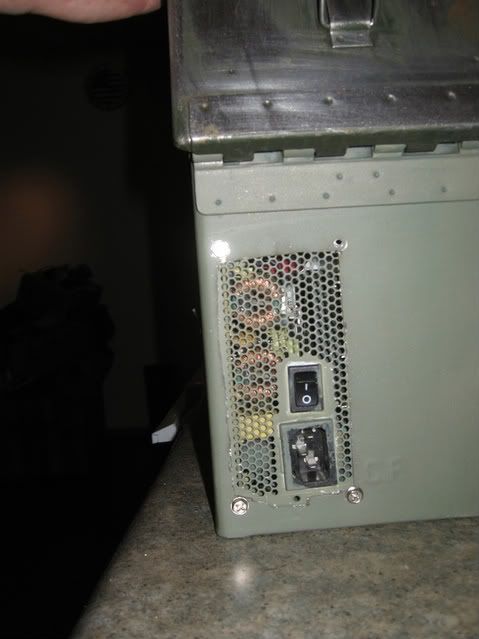
Next I have a pic of the mounted PSU. This isn't what I would perfer to do, however there were time and budget constraints that prevented me from getting the pico psu. I'll save it for ver 2.0.
UPDATE 6/25/08
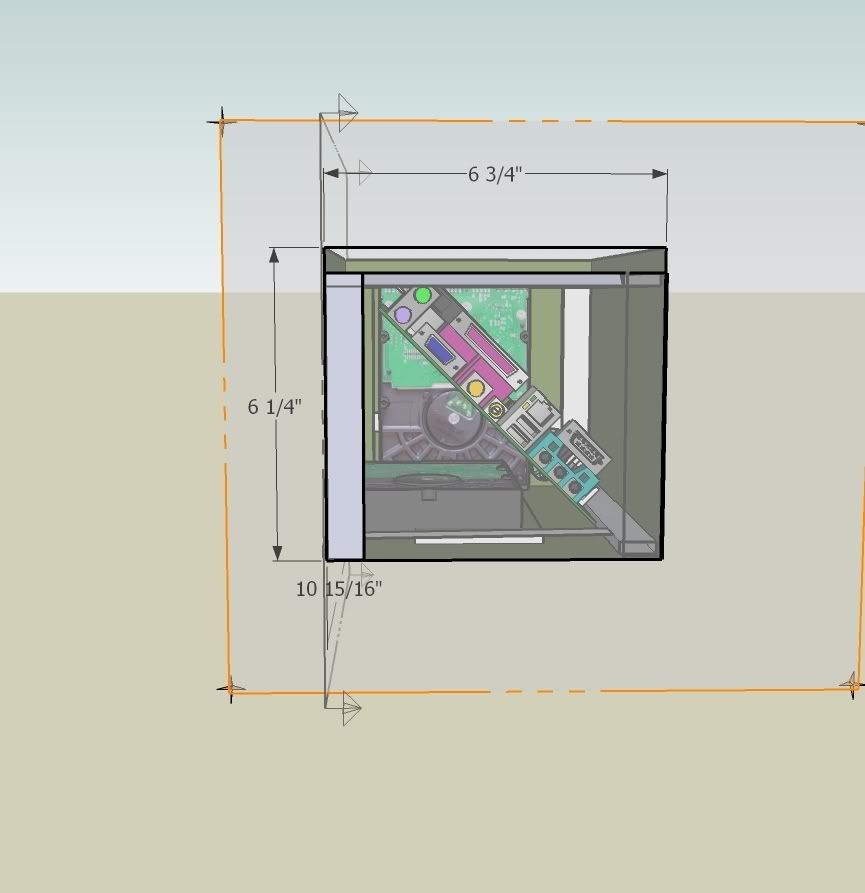
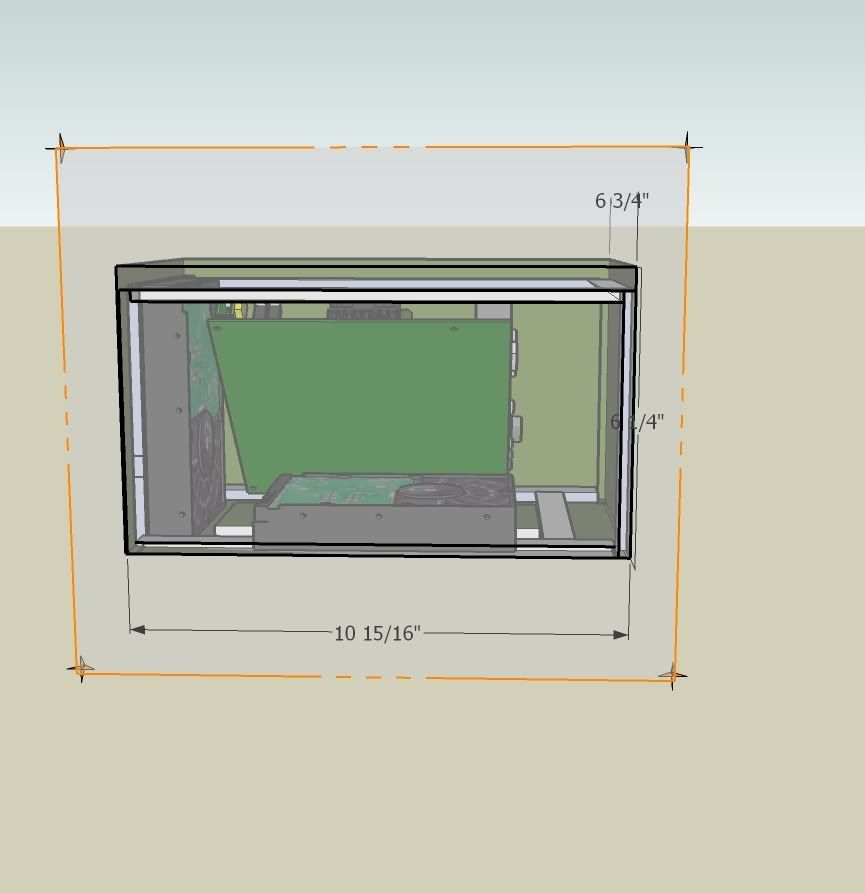
Okay, back to the drawing board. I decided to actually map this out and try to have a plan instead of winging it and repeatedly screwing it up. So here is what I'm looking at with Google Sketchup. I canted the board because it was way too close when the top of the can was closed. If anyone has any welding advice for my frame I would appreciate it. I have no idea how to weld so... we'll see how that goes.
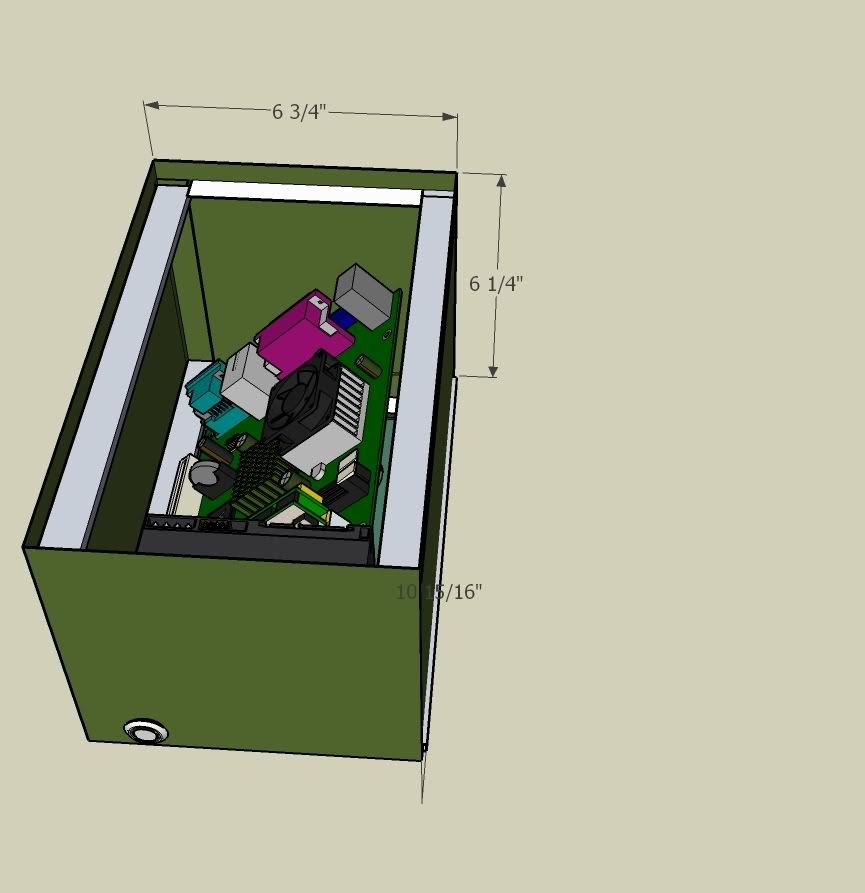
Let me know what you think. I know the measurements are a little off.
Update - Cut out some of the unnecessary pics
You can see the small PSU I have in the picture above. Unfortunately I cannot make that fit with two 3.5" HDs, so I'm most likely going to get a 12V ITX adapter in the 200W range. This PC will have two mirrored 320's, but the one I travel with will most likely have mirrored 1TB's.
I will have the mobo recessed with wires extending to the rear of the case. (Left hand side) The only wires going out will be Wireless connection, USB connectors, VGA, ethernet, and Sound. I want to cut down on this so I can make it somewhat weather resistant, also I can put the connectors where I want and not how the mobo is laid out. So I will be using a VGA splitter, and putting output for both a DVI and VGA connection (both still only analog) so I can use whatever is available.
Next I will have it either attached to a wireless network or administering one (thanks to PCLINUXOS!) so I have a USB wireless adapter that will allow for an external antenna.
I have to resolder the connector because I broke it while it was connected to a laptop...
The main problem I have now is that I don't know how to accurately cut through the case. I think that the dremel does not have enough power, and may not be very accurate. (Those fiberglass wheels are pretty big for what they need to cut)
This is about all I have today, tomorrow I hope to sand it down, prime it, and get the framework built using "L stock." I will be closely following Monk3y's similar post for ideas, since he seems to have a hella better idea of what to do. Anyone with ideas on how to do this better, let me hear them.
Thanks
1/7/08
So I've made some progress, but most of that was learning.
Here I got the largest part of the sanding done. I'm going to go over it with a smaller sander to make sure I get everything off, but now the bulk is done.
Also, my frame changed a couple times.
Initially I was going fab my own frame piece by piece, but the Hoobie thought we should make 90 degree cuts in the metal and bend out a square. We spent some time making that not work, so eventually I just got a piece of aluminum or steel from Menards and we started the frame around that.
This will hopefully fit in there perfectly with very little room to spare. I just ordered a Bulgin switch for the switch. This will hopefully give it a nice clean look.
http://www.frozencpu.com/products/1905/ele-71/Green_Illuminated_Bulgin_Style_Vandal_Switch_-_Silver_Housing_-_Ring_Illumination.html#blank
Next I will finish sanding and then begin fabbing the ammo can, as well as figuring out a way to make the board slide in and out.
UPDATE 6/5/08
Yes, I know - I'm speedy Gonzales...
I've been doing a lot of work and learned a lot of lessons.
This is my epoxied frame
The goal is to weld a steel form of this with some possible adjustments - but for now it may work. Epoxy is really cool and all, except it just cannot take the stress a good weld can. Hoobie7 is going to get a 220V drop so we can start playing around with that idea.
Next I have a pic of the mounted PSU. This isn't what I would perfer to do, however there were time and budget constraints that prevented me from getting the pico psu. I'll save it for ver 2.0.
UPDATE 6/25/08
Okay, back to the drawing board. I decided to actually map this out and try to have a plan instead of winging it and repeatedly screwing it up. So here is what I'm looking at with Google Sketchup. I canted the board because it was way too close when the top of the can was closed. If anyone has any welding advice for my frame I would appreciate it. I have no idea how to weld so... we'll see how that goes.
Let me know what you think. I know the measurements are a little off.
Update - Cut out some of the unnecessary pics