• Some users have recently had their accounts hijacked. It seems that the now defunct EVGA forums might have compromised your password there and seems many are using the same PW here. We would suggest you UPDATE YOUR PASSWORD and TURN ON 2FA for your account here to further secure it. None of the compromised accounts had 2FA turned on.
    Once you have enabled 2FA, your account will be updated soon to show a badge, letting other members know that you use 2FA to protect your account. This should be beneficial for everyone that uses FSFT.

Slightly Modified P180

Eastcoasthandle

[H]ard|Gawd
Joined
Jan 27, 2006
Messages
1,041
Hello,

I finally decided to cut 2' 2" from my loop and mod my P180 to accommodate the smaller loop. Here are a few photos. The loop is cloudy because there are still bubbles in the loop at the time the photo was taken

WC_Case.jpg

This photo shows the look of my loop prior to modding

modified_P180_pt4.jpg

This photo shows the look after modding the P180

modified_P180_pt3_pt3.jpg

This is a close up of the 2 holes that I drilled. If you noticed I switch the order of how it enters the rad only because the tube would kink if I used the normal method. In all this worked best.

modified_P180_pt1_pt1.jpg

Another view

IMG_1169.jpg

this shows the tools I used as well as how much tubing I cut which is 2' 2"

In order to fit the rubber hole gormments I had to drill a 1" hole in order to accommodate 3/4" gormment. Keep that in mind if you want to drill holes in your case. Also note that you want to buy a metal/wood not the wood kind. You will know you have the right tool because it costs more :p:

Needless to say its still a work in progress.
 
nicely done :)

How are the temps with this dual 120mm rad instead of your previous single one?
 
goodgod said:
nicely done :)

How are the temps with this dual 120mm rad instead of your previous single one?
I'm glad you asked:

Update:

I was getting way to much restriction using a 1/2" T. What I found out is the 1/2" T is the OD and not the ID. So I visited my local hardware store and picked up a copper (could be brass not sure) 3/4" by 3/4" by 3/4" T that has a 1/2" ID.
biggerT_pt3.jpg


Using a Tygon 1/2" ID and 3/4" OD tubing. Surprisingly enough the tygon 3/4" OD, 1/2" ID tubing fits like a charm and I could push it all the way in without much resistance.
biggerT_pt1_edited-1.jpg


After I refilled the Loop with water the first thing I notice was the fact that it it took a lot more liquid then normal. Bleeding of the loop was faster then expected and I was able to start my computer in about 25 minutes of bleeding. So far after an 1 hour the bubbles are almost gone after shaking the rad a few times.

If you are using 1/2" ID tubing I serious recommend that you get a 3/4" T as most 3/4" T already have 1/2" ID by design. Do not use 1/2" T because that only tells you that the OD (outer Diameter) is 1/2". The ID (inner diameter) of a 1/2" T is 3/8". So unless you are using 3/8" ID tubing 1/2" Ts are fine to use!
Here is a photo of the old T
biggerT_pt2_edited-1.jpg


Ok, after about 1 hour 40 minutes bleeding is complete and I took some temp readings (using the 3/4" OD 1/2" ID T). Before bleeding was roughly 6.5 to 7 hours on average with the 1/2" T with the 3/8" ID.

Before, with the extra 2' 2" of loop and 1/2" T with 3/8" ID (small hole) readings are as follows:

Ambient is 25C

-x1900xtx OC 733.5 GPU and 833 MEM
idle 33C and 41C using RTHDTIBL
VC temps is 38C

-660 OC from 3.6 to 4.36GHz
idle 37C and 42.5C using Prime95
MB temps is 27C

Now, with 2' 2" less tubing in the loop making it roughly 6'-7' with 3/4" T with 1/2" ID

AMBIENT TEMPS ARE 30C

x1900xtx OC 733.5 GPU and 833 MEM
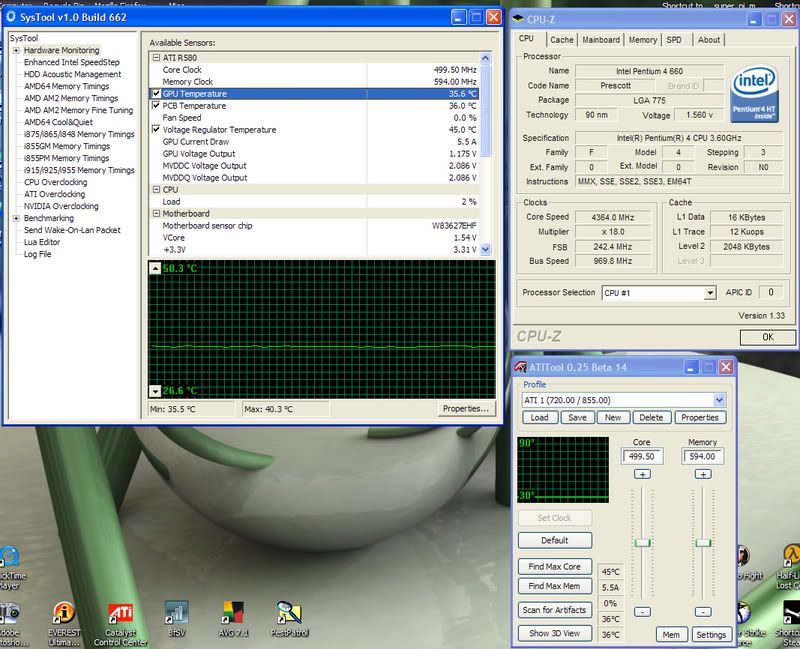
-idle temps 35.6C
idle_temps_VC.jpg


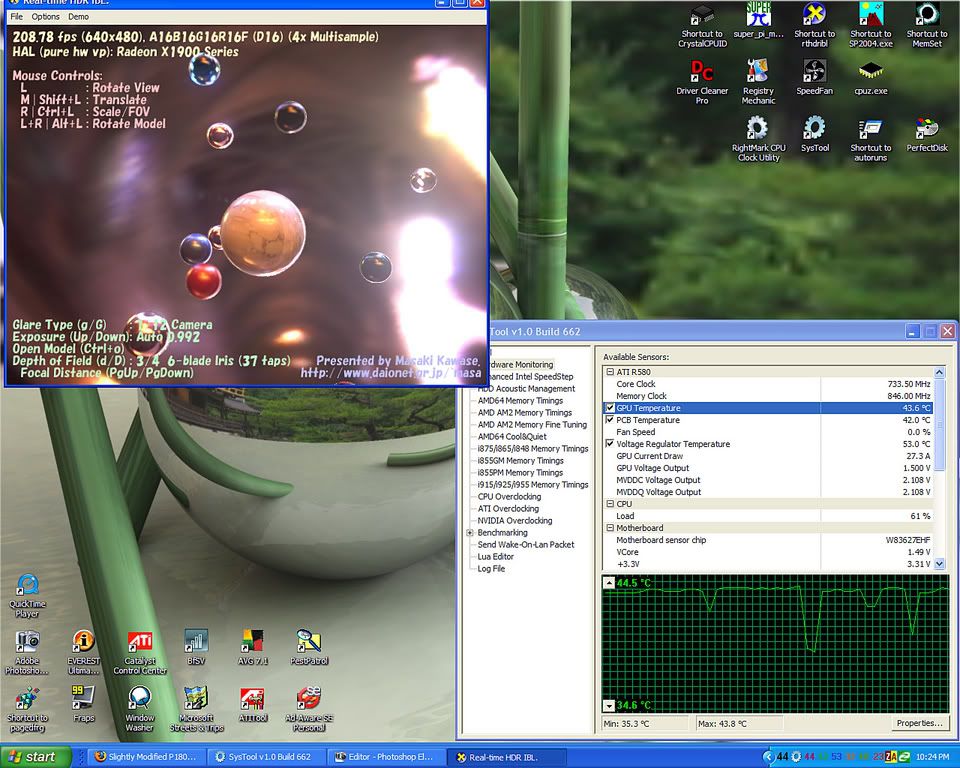
-Load temps 43.6
load_temps_VC_43_6.jpg


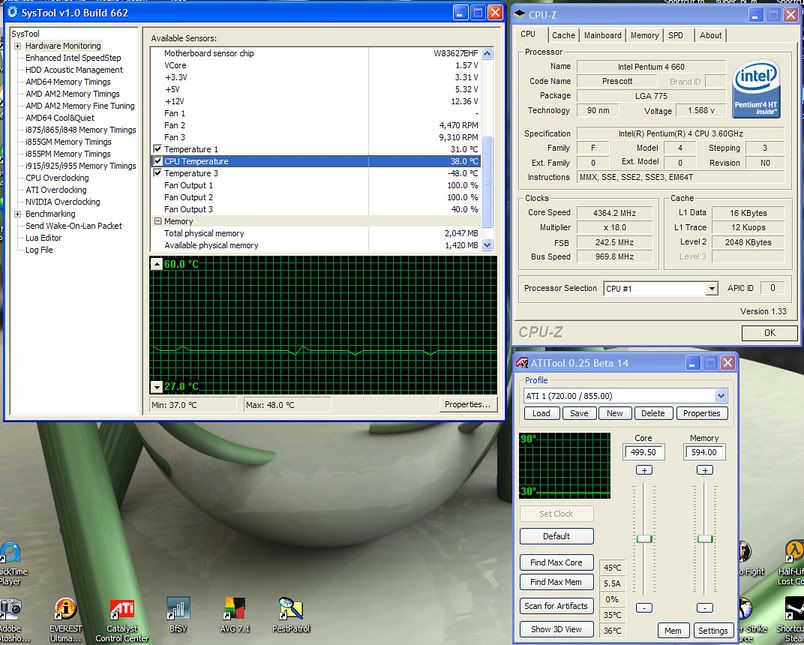
-660 OC from 3.6 to 4.36GHz
-idle temps 38C
idle_temps_CPU_edited-1.jpg


-Load temps 44.5C
load_temps_CPU_44_5.jpg


In all in overall improvement even though there is disparity of 5C hotter on ambient, load temps for:
x1900xtx = 2.6C difference with ambient temps being 5C hotter
660 OC 4.36 = 2.0C difference with ambient temps being 5C hotter. Again, the only difference is:
-2' 2" less tubing
-only using distilled water this time
-used 3/4" T with 1/2" instead of 1/2" T with3/8" ID inwhich there is no restriction
That is basically all that I have changed in this WC setup
 
^^Thats correct and I am also learning that the the 120x3 seems to be the best option so if you WC get the 120x3 and find a way to make it fit in or behind your case.
 
yeah for my next build i'll get myself into WC with a nice DIY high budget rig (selling my current rig)

Swiftech Apogee
Maze4 A8n Chipset Block
Acetal maze 4 Block
Silenstar HDD block
DDC-plus pump
Black Ice GT 360 Stealth
5.25" bay res
3 scythe-flex fans

And I'll fit all that stuff in a lian-li 1200b :)
 
heya ECH! i just fought with my damn T lines and barbs and i thin ki even broke one of my temp sensors... but i like hte idea of using those bigger T's you suggest. im gonna go try and pick up one at the hardware store its jus frustrating trying to get help in the plumbing section fo ball valves and T's like that.

ive always thoguht my temp sensor T's might be fuding with my flow
 
The whole purpose of the larger T is to maintain the same 1/2" ID in the tube throughout the loop. Even though the barbs of the rad, res and pump maybe 3/8" ID, you still want to remain consistent in the loop itself, thus reducing restriction. In essence, there is little restriction at the pump's barb because they are suited for how the pump operates. The only real restriction is the barbs at the rad or res if you use one. In all, you want to reduce as much restriction as possible by maintaining 1/2" ID throughout the loop as much as possible,.
 
sorry for the ol revival but i looked at possibly using the T (couldnt find one with 3/4 all around, they were out) that i got. its 3/4 to 3/4 wwith a 1/2 branching off. which works fine for my temp sensor to slot in the mslal hole if i wanted or simply to put my fill line.

anyhoo 2 things:
1. its so damn hard to work with plastic barbs! my 7/16 tubing just gives me one hell of a time pulling tubing on or off the plastic T's and the radiator's barbs.
2. my 7/16 tubing wasnt even TRYING to go over the 3/4 T barb. :(

so im thinking 2 things. im gonna have to redo part of my loop to add in my second gfx card when i get some parts i was missing and im thinking i should get some tygon. i hear it is softer and gives less problems over plastic fittings. im down to like a foot n half of my original 20ft of tubing from last year anyway.

with that said: ANY TIPS? on how im gonna use this 3/4 T? how should i go about getting the tubing on it? im really looking forward to a t line that doesnt have all the water n bubbles whooosh by. filling and bleeing is bloody annoying with it but i have no res or space or want for one in my case.
 
Back
Top