• Some users have recently had their accounts hijacked. It seems that the now defunct EVGA forums might have compromised your password there and seems many are using the same PW here. We would suggest you UPDATE YOUR PASSWORD and TURN ON 2FA for your account here to further secure it. None of the compromised accounts had 2FA turned on.
    Once you have enabled 2FA, your account will be updated soon to show a badge, letting other members know that you use 2FA to protect your account. This should be beneficial for everyone that uses FSFT.

NAPP-IT corrupted Boot-archive

pcarlsen

n00b
Joined
Jul 30, 2016
Messages
8
Hi.

I have been using NAPP-IT for all-in-one storage for a couple of years now. Works very nice, but after shutting my entire rig down when I went on a holiday I encountered an error preventing NAPP-IT from booting(it went into single user mode) from timeouts.

When I opened up the boot-archive default log I found the following repeating over and over
Code:
cannot find: /etc/cluster/nodeid: No such file or directory
cannot find: /etc/devices/mdi_ib_cache: No such file or directory
cannot find: /etc/devices/retire_store: No such file or directory

No Idea how this happened. I Shut down napp-it normaly before shutting down esxi.
How do I fix this? According to som Oracle docs, I should be able to simply type
bootadm update-archive -R /a
but I am a bit scared of creating even more trouble for my self :(

Any thoughts on how to fix this?

Details: Not using clustered boot, Latest patch of esxi 6, latest patch of napp-it (free). motherboard: supermicro x10sl7-f
 
You can first try a former bootenvironment ex a prior update napp-it.
If this is not a solution:

If its a pure napp-it storage installation (no extra services what you should avoid in AiO):
Simply reimport the napp-it storage VM, set pass-through, import the pool and you are up again within 5 minutes.

Not worth the time trying to repair a corrupted bootdisk on an ESXi filesystem.
 
Last edited:
You can first try a former bootenvironment ex a prior update napp-it.
If this is not a solution:

If its a pure napp-it storage installation (no extra services what you should avoid in AiO):
Simply reimport the napp-it storage VM, set pass-through, import the pool and you are up again within 5 minutes.

Not worth the time trying to repair a corrupted bootdisk on an ESXi filesystem.


Hi, thanks for your quick reply. Been away a couple of days but ready to digg into this again.

This is a pure napp-it server, esxi barebone with napp-it zfs as datastorage for my vm's

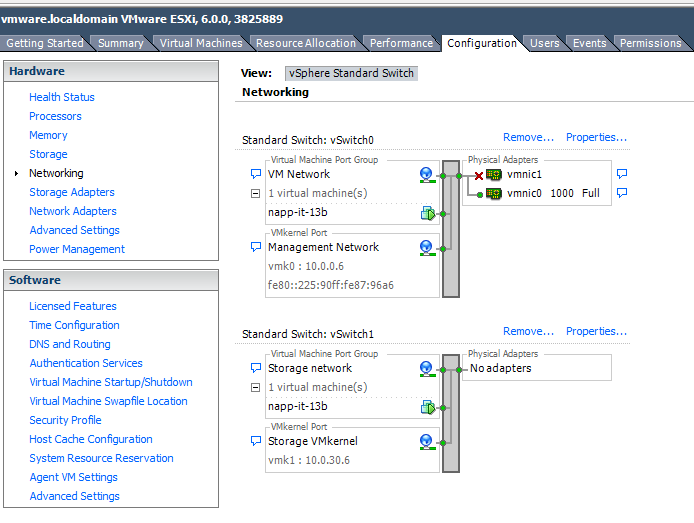
So the easies way for me to fix this is to "Remove from inventory" my napp-it vm in vShere Client. and then add that vm again? Would my configuration with regards to networking etc be ok still? I just made some changes and created a dedicated storage network with MTU 9000 and would rather not do that again.

I understand i would need to sett pass-thru on my storage controllers to this new vm.
esxi 1.PNG

esxi 2 network.PNG
 
The system seems broken so a simple re-add the same to inventory will not help.
You can try if a former systenstate/BE is working, otherwise you need to reimport napp-it from the template. You must then redo all network settings. In this case I would switch to a newer template/OmnioS (free download from napp-it.org)

For AiO with internal datatransfers in software, MTU 9000 does not matter.
 
Hi again.

I was running napp-it 16.05 f (I think). Latest from mid- July. Will not my storage vm for this be ok to import?

I tried to boot one of the other boots in OmniOS boot menu, but it did not work :(

I was really hoping to avoid all the config I have done over the years to this setup (version 13b is some time ago :) ) I have installed and configured sickbeard and SABnzbd directly in OmniOS and it works really well, but I took me a while to get it working.

I have googled this problem quite extensively and a lot of oracle docs and articles point to how one should fix a broken boot archive by mounting a boot image and copying over
from this page: 123HELPDESK - Solaris boot archive corrupt
Rebuilding the Boot Archive
Boot into Failsafe Mode
Reset the machine and select the 'Solaris failsafe' option from the Grub menu.
The system will boot from a standalone image of Solaris (kept at /boot/x86.miniroot-safe),
bypassing the broken boot archive.
Failsafe will try to mount your boot partition on /a
The boot-archive is located in /a/platform/i86pc/boot_archive

Rename or remove existing /a/platform/i86pc/boot_archive before creating a new boot_archive.

Simple Root Partition
If your root filesystem is a simple partition (not mirrored by Solaris) Solaris will offer to mount your
Solaris install on /a, accept this.
You may also be prompted to repair your boot archive, if so follow the instructions and reboot.
If you need or want to manually update the boot archive, run the following command, then reboot:

#bootadm update-archive -R /a

You should now have a working system.

7. Troubleshooting (Solaris x86 FAQ)


According to Oracle docs I should do this:
How to Manually Update the Boot Archive by Using the bootadm Command
  1. Become superuser or assume an equivalent role.
    Roles contain authorizations and privileged commands. For more information about roles, see Configuring RBAC (Task Map) in System Administration Guide: Security Services.

  2. To update the boot archive, type:
    # bootadm update-archive
    bootadm
    Manages the boot archives on a system.

    update-archive
    Updates the current boot archive, if required. Applies to both SPARC and x86 based systems.
    • To update the boot archive on an alternate root, type:
      # bootadm update-archive -R /a
      -R altroot
      Specifies an alternate root path to apply to the update-archive subcommand.

      Note - The root (/) file system of any non-global zone must not be referenced with the -R option. Doing so might damage the global zone's file system, compromise the security of the global zone, or damage the non-global zone's file system. See the zones(5) man page.
  3. Reboot the system.
    # reboot

Is there any danger to trying out this bootadm commands to update my boot archive? I have not tried it yet for fear of making my problem even greater. I assume
mkdir /etc/cluster/nodeid
mkdir /etc/devices/mdi_ib_cache
mkdir /etc/devices/retire_store
would not be enough to fix everything:unsure:
 
Your system is damaged.
Either you can repair or you must install a new one

The pure napp-it storage VM is reinstalled in 2 minutes.
If you add other services that require a complex setup, you must backup the machine ex by creating a template from the setup.

I would use VMs on ZFS for these services and keep the napp-it storage VM on the vmfs filesystem as simple as possible.
 
Your system is damaged.
Either you can repair or you must install a new one

The pure napp-it storage VM is reinstalled in 2 minutes.
If you add other services that require a complex setup, you must backup the machine ex by creating a template from the setup.

I would use VMs on ZFS for these services and keep the napp-it storage VM on the vmfs filesystem as simple as possible.

Ok, gave up on trying to fix the boot record. Will tro to set things up from scratch and make a proper backup of my config(like I should have done, he) after everything is working as planned.

Downloaded latest napp-it image set it up in esxi and after some fidgeting managed to get wmx3net network cards to work.
have passthru my HBA's to the new napp-it image and the disks appear in napp-it gui.
I tried from web GUI to Pools->Import, but it seems like napp-it did not like this command.
Code:
p1--- _lib 06_pools/03_import/action.pl &zfslib_list_pools 26 <- admin.pl &my_action 516 ---

main, /_lib/illumos/zfslib.pl, line 4738
exe: zpool import -D

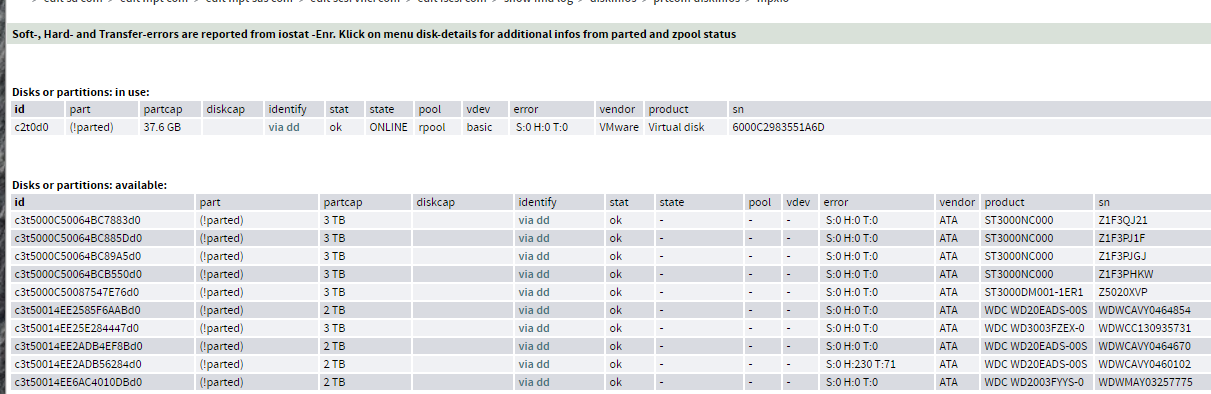
Any thoughts on what could be wrong? maybe better to use console for zpool import? I noticed that all my disks show up in napp-it gui, but I get warned about "soft, hard and transfer errors". Did not have that before, but not sure if this is significant before the pool is set up?

disk info errors -nappit.PNG
 
The log indicates that your pool hangs on import
Try zpool import -D or zpool import at console
 
zpool import -D
gives this result in console:

no pools available to import
however zpool import without any params was more interesting as it lists out available pools.
Code:
root@napp-it-san:/root# zpool import
   pool: BigPool
     id: 6251055242865425899
  state: ONLINE
status: The pool was last accessed by another system.
action: The pool can be imported using its name or numeric identifier and
        the '-f' flag.
   see: http://illumos.org/msg/ZFS-8000-EY
config:

        BigPool                    ONLINE
          raidz2-0                 ONLINE
            c3t5000C50064BC7883d0  ONLINE
            c3t5000C50087547E76d0  ONLINE
            c3t5000C50064BC885Dd0  ONLINE
            c3t5000C50064BC89A5d0  ONLINE
            c3t5000C50064BCB550d0  ONLINE
            c3t50014EE25E284447d0  ONLINE
          mirror-1                 ONLINE
            c3t50014EE2585F6AABd0  ONLINE
            c3t50014EE2ADB4EF8Bd0  ONLINE
          mirror-2                 ONLINE
            c3t50014EE2ADB56284d0  ONLINE
            c3t50014EE6AC4010DBd0  ONLINE

zpool import -f BigPool and everything seems to be working :)

how very relieved I am!

Now, to avoid ending in this stupid situation again, what is an easy and and sensible approach to backup my boot environment?
I am currently booting of and old laptop hdd and feel a bit exposed. I am using a supermicro x10sl7-f motherboard in a norco 24 bay drive rack and use both the onboard LSI controller and an IBM 1005 pci controller as HBAs. (Both flashed to IT mode)

I can live with a semi-manual process as this is only for home use, labs, testing and local bacups etc. And recommendations?
 
"zpool import -D" lists destroyed pools, "zpool import" other importable pools.
Napp-it Pool > Import shows both

To be prepared for problems
- care about a BE that is quite up to date that you can create from time to time
- export your complete VM from time to time as a template that you can import on a disaster

- worst case: re-import the base napp-it VM.
If you avoid complicated setups on the storage VM (that you should do on extra VMs) this is trouble free and fast
 
I can not believe it.

After I had made most of the changes I wanted to i rebootet esxi. What happend? I got trouble with OmniOS boot again! the same boot-archive trouble I had before.

I tried changing to the one backup available in OmniOS grub menu, and it boots with "Warning: kvm: no hardare support" but it works. However this seems like its a copy of default image so all my config changes, pool impors etc are gone.

What am I doing wrong here?? Could it be that I booted esxi without going into maintenance mode first? I have never really do that before. I of course made sure that napp-it was properly shutdown(from web-gui) before I rebootet esxi.

Not really tempted to re-create my entire config again before I figure out why esxi reboot apperantly corrupts my OmniOS boot archive :( Why is it only my updated BE that gets corrupted and not the backup?

Could this be a faulty hdd? I have esxi installed on an old laptop HDD connected to sata and have installed napp-it to the same hdd. I understand this is a bit risky, and was planning to perhaps boot esxi from usb and put napp-it on mirror internal hdd.
 
I would replace the system disk now (or do a low level test)

btw
ESXi +OmniOS on a disk is not risky
A disk/SSD is more reliable than an USB stick

A BE is not a backup.
On a CopyOnWrite filesystem like ZFS, every modified data is not updated but written newly.
The old datastate is marked as available to be overwritten.

A snap is then only a marker that you are not allowed to overwrite but are able to reactivate the old state. This is why a snap is done without delay and does not initially require space. The space consumption of a snap is therefor only the amount of modified data between.

Use a new disk, setup everything and create a template of the state then -
and do an initial BE to go back to this state when needed.
 
Okey.

New USB3 64GB stick loaded with scratch install of ESXi 6, latest patches.
New 120GB ssd added as datastorage1. Installed latest template to this datastore. Seemed to work fine. Started to get vmwnet3 to work, but was uanable to bind/make this network card work.
After a while, I rebootet this and got the same boot-archive error once again. It seems like there is some issue with vmwnet and network configuration which can cause a corrupted boot archive.

I am giving up on advanced network config.

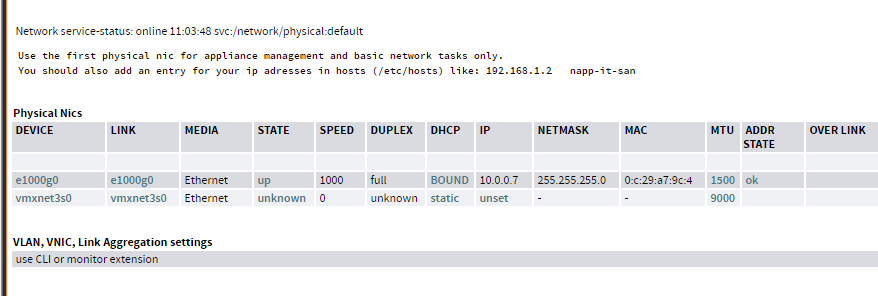
This is how the two network cards in the all-in-one image looks after boot.
Is it recomended to keep using e1000 network, and leave vmxnet3s0 alone? Will the vm network card be used for datastorage without any more config on my part?
network cards.PNG


I have only used vmxnet3 adapters previously, but now I struggel big-time with them and does not seem to be able to configure them safely.
 
Tried a new import of latest napp-it template. Did not touch network cards, imported my pool, rebooted napp-it from gui
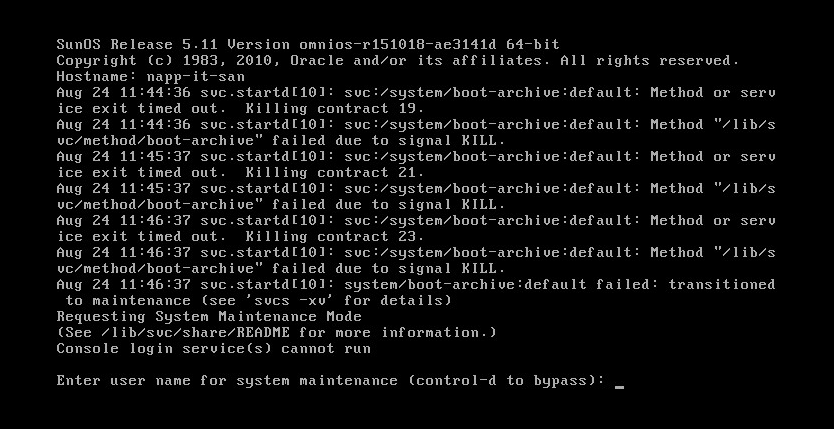
corrup boot archive.PNG


what is going on here? could this have something to do with the zpool config? I turned of sync some time ago, but could this corrupt the os boot?? What can cause this frustrating behavior?
 
Try if you can boot without the datapool.
(ex remove disks)

Maybe its not a rpool problem but a datapool problem.
 
Back
Top