Murdermod Luminous Panel

Genny

Limp Gawd
Joined
Jul 20, 2011
Messages
184
I need the advice of some modders on here far more accomplished than I am.

DSC_6306g%28thumb%29.jpg


DSC_6411g.jpg


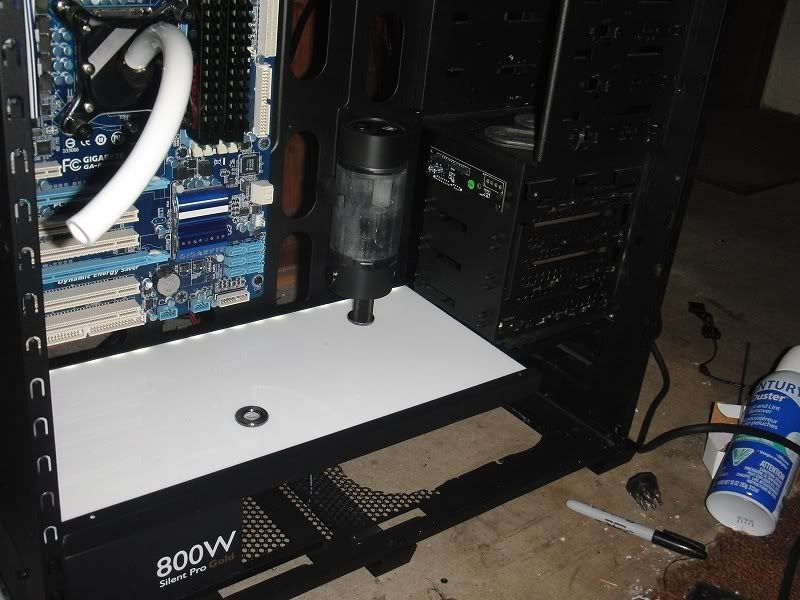
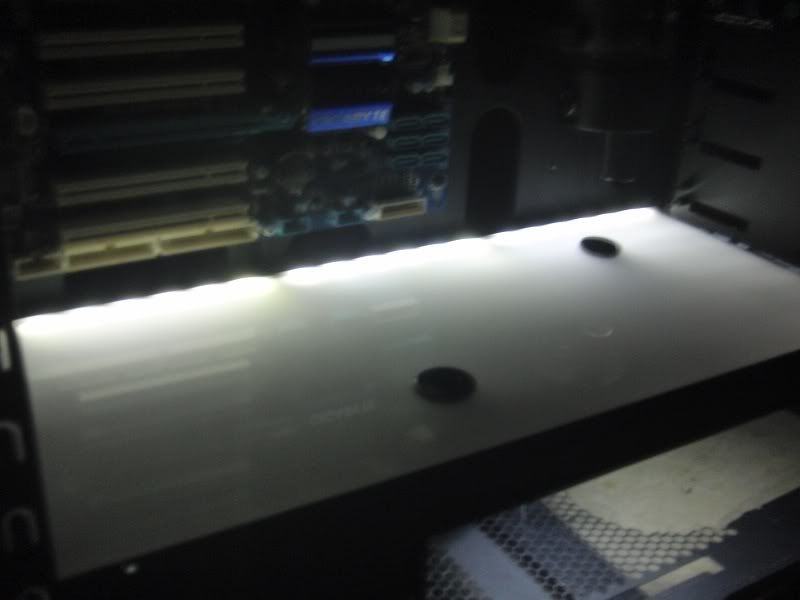
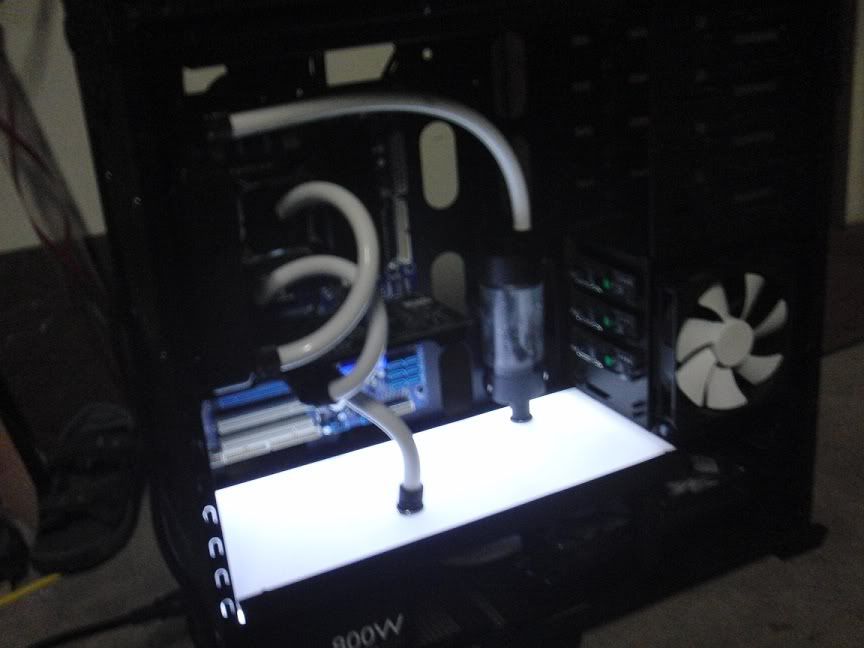
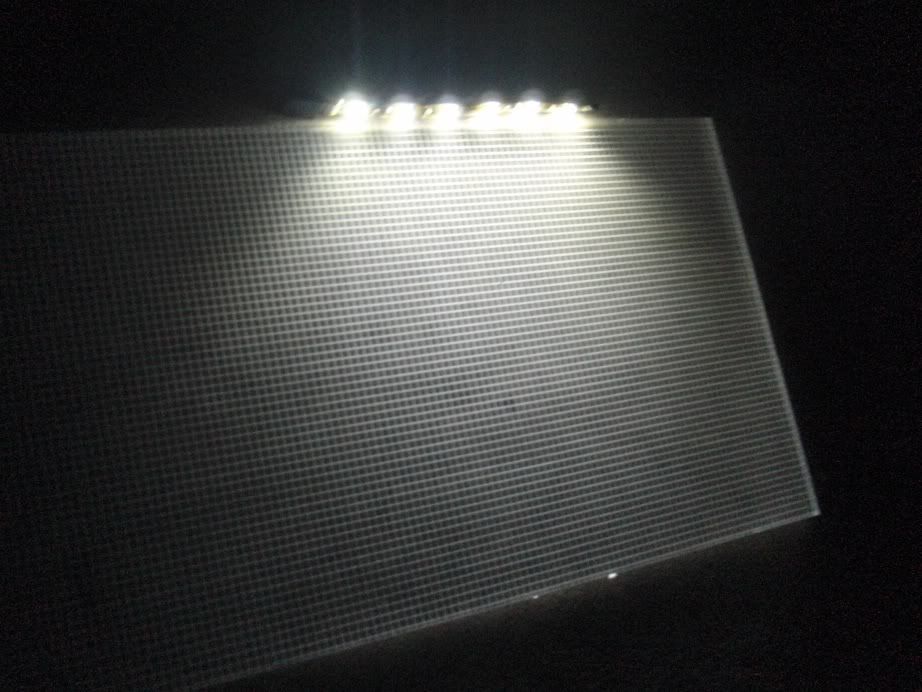
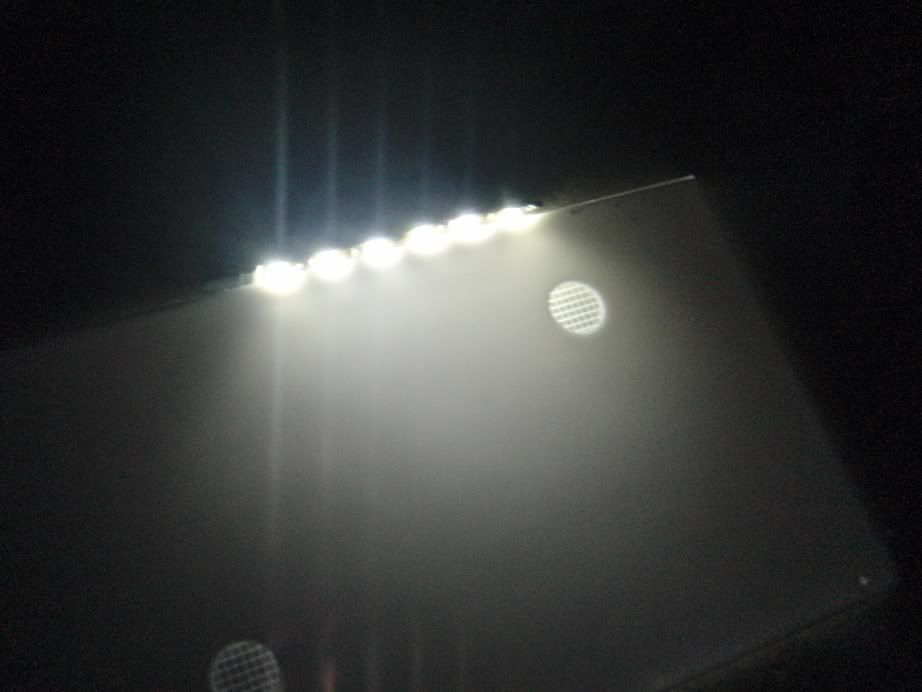
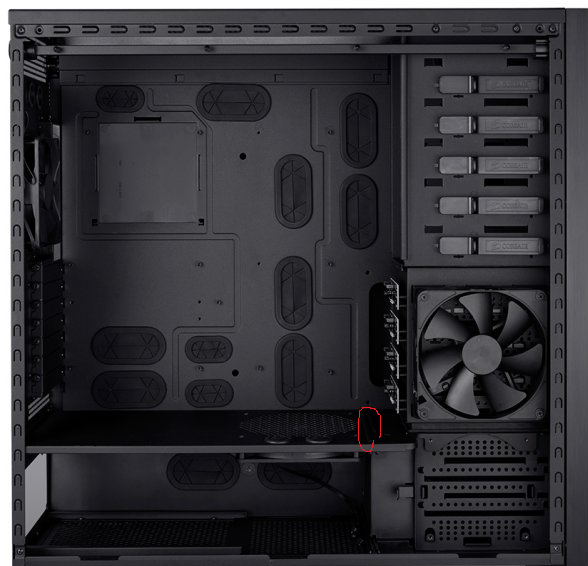
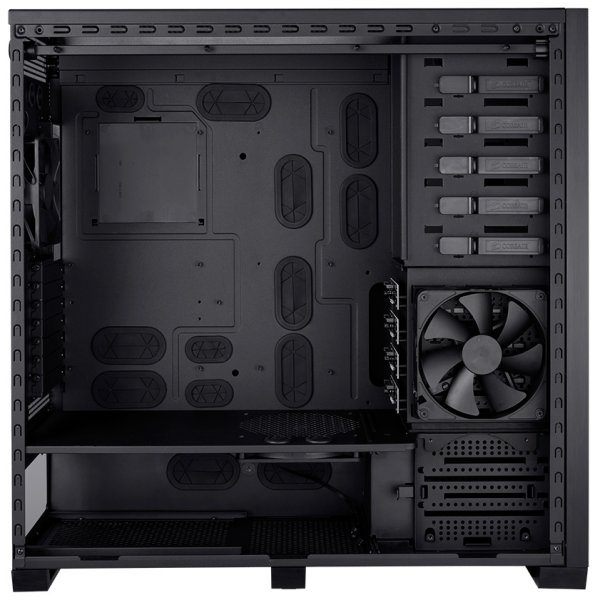
I wanted to recreate something similar in my 800d midpanel. What I was thinking was translucent top piece of white acrylic to diffuse the light, a bottom piece of reflective acrylic and white LEDs sandwiched between.

corsair_800d_2.jpg


Unfortunately murdermod is pretty tight lipped when it comes to their methodologies and even the ones they fabricated for the TJ07 are no longer offered for sale.
 
Last edited:
Hmmm.... I can't remember where I saw it, but someone used a luminous sheet for their mod. It could be cut and shaped in any way needed. I'm sure someone here will know.

Edit, check out this post. http://hardforum.com/showpost.php?p=1035597394&postcount=36

http://www.earlsmann.co.uk/sections/product/id/10

Anyway, I'm not sure if that helps or not. I don't know how bright those get, or if it is white enough for you, but it might be simpler than using LEDs.

Second edit: It looks like those sheets are extremely expensive..... Like $450 for an A1 size sheet. So yeah, probably better off using acrylic and LEDs.

Ah shoot...got my hopes up. :p They looked perfect until I saw the price. I'll poke around and see what I can come up with. Much appreciated.

edit: It looks like there are some options in the $90ish range. That must be how murdermod did theirs.
 
Last edited:
I read that entire thread and it looks like he pulled the EL sheet as it wasn't performing how he wanted. Curious what problems he ran into...
 
I ordered two A5 panels (almost a perfect fit on the 800d), the necessary inverters, one sheet of 40% translucent white acrylic, and one sheet of 20% translucent white acrylic. (Not sure which one will work better, so we'll see).

I'll post here how it turns out.
 
Nice. What did that end up costing you and where did you get them from?
 
Nice. What did that end up costing you and where did you get them from?

The acrylic sheet was ordered from TAP plastics. The two pieces, plus shipping and having them cut it to size was 25 bucks. I've used them in the past to create to create an enclosure to hide the bottom section of the case that houses the PSU.

http://www.tapplastics.com/

The electroluminescent sheets and inverters were ordered from glowhut and were about $75 shipped.

http://glowhut.com/


It looks like some of the sheets can be cut and some can't. The cuttable sheets are a bit more expensive and only come in select sizes, which is why I ended up just ordering two smaller sheets.
 
Last edited:
Alternate methodology that I found on a German forum

dscf281935kl.jpg


dscf284576aa.jpg


dscf2893d5o7.jpg


It's a clear piece of acrylic with laser etched in a checkered pattern with 1mm spacing to act as a diffuser for an LED strip.
 
Last edited:
So EL panels came in today. Apologies for the crappy cell phone pics, but my better half ran off with my camera for the day.

Initial impressions: White is white-ish...has a visible blue tinge to it and is not nearly as white as an LED, but I'm thinking it should become 'whiter' when shining through white acrylic, no? Brightness is okay, but not sure if it will be sufficient.


0928111805.jpg


And here's a problem. When white acrylic is placed over the EL panel, the light turns a peach/salmon color.


0928111806.jpg


Now if I move the acrylic back roughly three inches, it's not too bad, but I don't want to construct a floor that's three inches high.


0928111806a.jpg


Looks like I'll have to explore LED options. Unfortunately, the place I ordered the panels from don't accept refunds, so I'll have to find a use for them with something else. :(
 
Did you happen to have any progress on this? I'm trying to do the same thing.

Ah yes, it's still a work in progress (mostly just waiting for parts).

I ordered the LED strip from bitfenix and...it took some time to get here. :rolleyes: But good god is it BRIGHT. I may have to undervolt it as it's so damn bright. I could use the damn thing as a flashlight. I ordered specifically from them as you want the LED strip to cover the entire sheet of acrylic...you don't want it to be too short or you won't get even lighting. LED strips can be cut in sections of three, so if your strip is too long it's not a problem as long as you keep in mind how long you need it to be.

I've had to modify the tray on the 800d to allow for flush mounting. There's a groove on the midsection that the hotswap bay plastic cover slides into that I had to cut out with a jig saw. I also had to drill out the rivets to remove the hot swap bay to gain access to the rubber pad that sits between the bay and the mid plate, and cut off maybe an inch of the rubber pad to allow the plexiglass to slide in.

I'll be sure to post pictures when it's done...I hope that to be early next week as I'm just waiting for the engraved acrylic sheet at this point. I recommend you check your clearances carefully before hacking your case apart. :)
 
Last edited:
Getting it all put together and a minor set back...


It's incredibly rare for me to say anything negative about a company...however... Bitfenix took 4 days to even let me know the strips I ordered were out of stock. In fact, I had to contact them to ask when it would ship, at which point I was told that what I had ordered was out of stock. I ended up ordering a similar product of theirs instead.

I plugged the LEDs in tonight as I have my acrylic all cut and ready, and as soon as I powered on the PSU, the LED wiring began to smoke. As the LED wiring was closer to me than the power cable for the PSU, my first reaction (mistakenly) was to unplug the molex connector. Unfortunately, when I went to do that, the insulation stripped right off, melting to my hand and exposing red hot, bare copper.

Buyer beware... I would not trust these in your rig.

wiring.jpg
 
A trip to frys and 5 minutes of soldering and here we are...I have a couple ideas to try and even out the light distribution a bit more that I'll play with tomorrow. Here's the basic idea.

Yeah, I know I need a new motherboard. The blue is totally messing with my mojo.

off.jpg


on2.jpg
 
Wow, that looks pretty sweet. Hopefully you will be able to diffuse the light some more. Otherwise it looks very professional.

Did you get a new led strip?
 
Wow, that looks pretty sweet. Hopefully you will be able to diffuse the light some more. Otherwise it looks very professional.

Did you get a new led strip?

Yeah I did...the original tried to kill me. :p I stopped by Fry's and picked up one of their LED strips in their electronics aisle. I had to solder a molex connector on, but no biggy. I know my craftsmanship is nowhere near that of what murdermod was turning out, but I'm pretty happy with how it's coming along.
 
I actually talked to murdermod and he says the LED device he used is 100% flat. I'm still trying to wring more info out of him, but his English isn't the greatest.
 
Has ANYONE taken apart a Murdermod light panel? How did he get it so the light is so uniform?

Did he use some kind of wide angle LEDs or some kind of a cathode light inside?
 
Has ANYONE taken apart a Murdermod light panel? How did he get it so the light is so uniform?

Did he use some kind of wide angle LEDs or some kind of a cathode light inside?

He's stated he did not use cathodes.

I'm making some headway on evening the light distribution. White construction paper under the clear acrylic really helps a lot. I imagine a mirrored surface would be even better. A possibility is that he uses LEDs on both sides.
 
Last edited:
From some of the pics I've seen, it almost looks like there are leds all the way around possible in a strip facing inwards.
 
Success!

Really damn hard for me to photograph properly on my little point and shoot. :( It turned out great though.

success.jpg
 
Last edited:
Looks fantastic. I'm so glad that you were finally able to get it working. You should really post some detailed instructions since it seems that there are a decent number of people out there who want to do this.
Did you end up running LEDs around both sides?
 
Looks fantastic. I'm so glad that you were finally able to get it working. You should really post some detailed instructions since it seems that there are a decent number of people out there who want to do this.
Did you end up running LEDs around both sides?

LEDs are only on one side.


Here's what you'll want to make it work in an 800D.

Three feet of L-shaped aluminum channel. One side 1/2". other side 3/4" (1/16" or 1/8" thick) $8
LED strip of your choice (roughly 10"-12" worth)
TWO sheets White Acrylic (I used the "sign white" from tapplastics.com) 7 7/16" x 16 1/2" x 1/8" ($20 cut and shipped)
One sheet of 1/4" engraved CAST clear acrylic (about $30)

I tried to get perfect diffusion with frosted acrylic, acrylic that I sanded and scuffed up, etc. Nothing was nearly as good as the engraved acrylic in a checkered pattern.


(I painted my L-shaped channel black) This stuff is easy to find at home depot. Rattle can or powder coat to the color of your choice.

L-Chan500blk.jpg


Your LED strip will run along the far side of the acrylic.

1.jpg


You'll sandwich the engraved, clear acrylic between the two sheets of white acrylic (bottom reflects the light up). Alternatively, you can always just use white paper on the bottom and it works just fine. You'll obviously want to use a longer LED strip--this is just to serve as a reference.

2.jpg


Then take your L-shaped aluminum channel and use those as brackets on both sides of your acrylic sheets. I attached one piece to the motherboard tray and the other through the mid-panel. (This also serves to hold the acrylic in place)

off.jpg


The though holes are bitspower bulkhead through hole fittings. http://www.performance-pcs.com/catalog/index.php?main_page=product_info&products_id=28425


You are going to want to cut out the raised groove that the plastic cover slides into it in order for your acrylic sheets to lay completely flat.

midpanel.png
 
Last edited:
Good thread, I was wondering about doing the same thing so this came at the right time :p

What's your air-flow path setup going to be?
 
Good thread, I was wondering about doing the same thing so this came at the right time :p

What's your air-flow path setup going to be?

I haven't really changed it. Top three fans still exhaust on the top 360 rad. The fan on the 120 rad on the back is an intake and the 240 rad in the bottom is also setup as an intake. Even with the area where a fan could go covered, it doesn't seem to make a difference in my temps. Still sitting at 62 C in Prime95 on my i5 750 @ 4.0ghz.

I'm actually really glad it worked out well. If you cut out about a 1/2" of the rubber mat underneath the hot swap bay, it gives you a 1/2" of clearance depth-wise to slide in your acrylic to fit nice and snug. I'm pretty ham-fisted and have a hard time even cutting a straight line, so there was a lot of trial and error involved on my part. I found the below link pretty useful, it's originally in German, so take it for what it is.

http://translate.google.com/translate?sl=auto&tl=en&js=n&prev=_t&hl=en&ie=UTF-8&layout=2&eotf=1&u=http%3A%2F%2Fwww.hardwareluxx.de%2Fcommunity%2Ff141%2Frund-um-das-slight-701766.html&act=url
 
Last edited:
LEDs are only on one side.


One sheet of 1/4" engraved CAST clear acrylic (about $30)


L-Chan500blk.jpg


Your LED strip will run along the far side of the acrylic.

1.jpg


]

Thank you soooo much for your post, but you must tell me where you got the engraved acrylic.

Thanks again!!!
 
Thank you soooo much for your post, but you must tell me where you got the engraved acrylic.

Thanks again!!!

Pretty much any engraving place can do it. I had mine done at a local shop http://www.xpress-engraving.com/ The owner, Jeff, is a great guy and is willing to ship the product to you if you decide to go through him. The upside is he'll know exactly what you need. :p
 
Pretty much any engraving place can do it. I had mine done at a local shop http://www.xpress-engraving.com/ The owner, Jeff, is a great guy and is willing to ship the product to you if you decide to go through him. The upside is he'll know exactly what you need. :p
Thanks sooooooo much. I will use them when the time comes. You think if I showed him the picture of yours he would know what I'm talking about?
 
Thanks sooooooo much. I will use them when the time comes. You think if I showed him the picture of yours he would know what I'm talking about?

1.jpg


Send him that one and he'll know. It may be cheaper for you since he already drew it out, but I can't promise that. :)
 
Genny, Have a read of My work log which shows how I designed and built the light panel in my case.

Looks good. I'm sure that sanding the surface of the acrylic is cheaper than having it etched, though it's hard to tell whether you are getting as good of light diffusion with that method.
 
Looks good. I'm sure that sanding the surface of the acrylic is cheaper than having it etched, though it's hard to tell whether you are getting as good of light diffusion with that method.

There is no way that sanding could get nearly the evenness that the etching can. The light distribution is perfect with the etched panel.
 
I wonder if this could be done with UV light strips instead of LED strips. What I mean is if done that way would you still get the UV reactive components inside the case to react to this type of panel using UV lighting instead of LEDs?
 
Back
Top