
Navigation
Install the app
How to install the app on iOS
Follow along with the video below to see how to install our site as a web app on your home screen.
Note: This feature may not be available in some browsers.
More options
You are using an out of date browser. It may not display this or other websites correctly.
You should upgrade or use an alternative browser.
You should upgrade or use an alternative browser.
What did you print today?
- Thread starter Chance_P
- Start date

D
Deleted member 202674
Guest

Hood prop clip
Bambu X1C
Overture PETG
- Joined
- Jan 15, 2005
- Messages
- 3,370

- Joined
- Oct 20, 2005
- Messages
- 896
Designed (FreeCAD) and printed some friction-fit two-piece enclosures for USB fan voltage controllers I use for extra cooling for my router and modem.
Also decided to print some somewhat comically large 6mm-hole press-fit knobs someone else designed to control the potentiometers in the same filament to make them match (just for the hell of it for fun).
Sunlu PLA+ Transparent (bought a lot of their filament on sale + a dryer and have been very satisfied with it tbh!)
Creality Ender3 V3 SE
Also decided to print some somewhat comically large 6mm-hole press-fit knobs someone else designed to control the potentiometers in the same filament to make them match (just for the hell of it for fun).
Sunlu PLA+ Transparent (bought a lot of their filament on sale + a dryer and have been very satisfied with it tbh!)
Creality Ender3 V3 SE
Attachments


Last edited:
I've only bought SUNLU PLA+2.0 and DeePlee PLA Pro so far from Amazon. Seems to be the best priced when buying 2 or 4 roll bundles. Very happy so far.Sunlu PLA+ Transparent (bought a lot of their filament on sale + a dryer and have been very satisfied with it tbh!)
Creality Ender3 V3 SE
- Joined
- Oct 20, 2005
- Messages
- 896
Yeah they had some spring sales on their website with free shipping and a decent percentage off for bundling 6 rolls, so I did that, and then when buying the dryer I could add random extra rolls (can't choose color) for very inexpensive as addons to the dryer (like $8/roll or something) so I tossed in a couple of extras. All in all came out with like 8 rolls + a S1Plus dryer for like $125I've only bought SUNLU PLA+2.0 and DeePlee PLA Pro so far from Amazon. Seems to be the best priced when buying 2 or 4 roll bundles. Very happy so far.
It was a bit overkill of a purchase when I'm just printing for myself, but I wanted to give myself enough to not have to think about it for a good long while
Last edited:
Technically this was yesterday's print: a flexi axolotl and parts of the base of a 3d printer. Right now I'm at the start of reprinting the axolotl much larger: I've got a 350mm bed, and I rotated the thing diagonally 45 degrees and scaled it up so it's nearly as large as it can physically be, which will be around 430mm tail to snout.

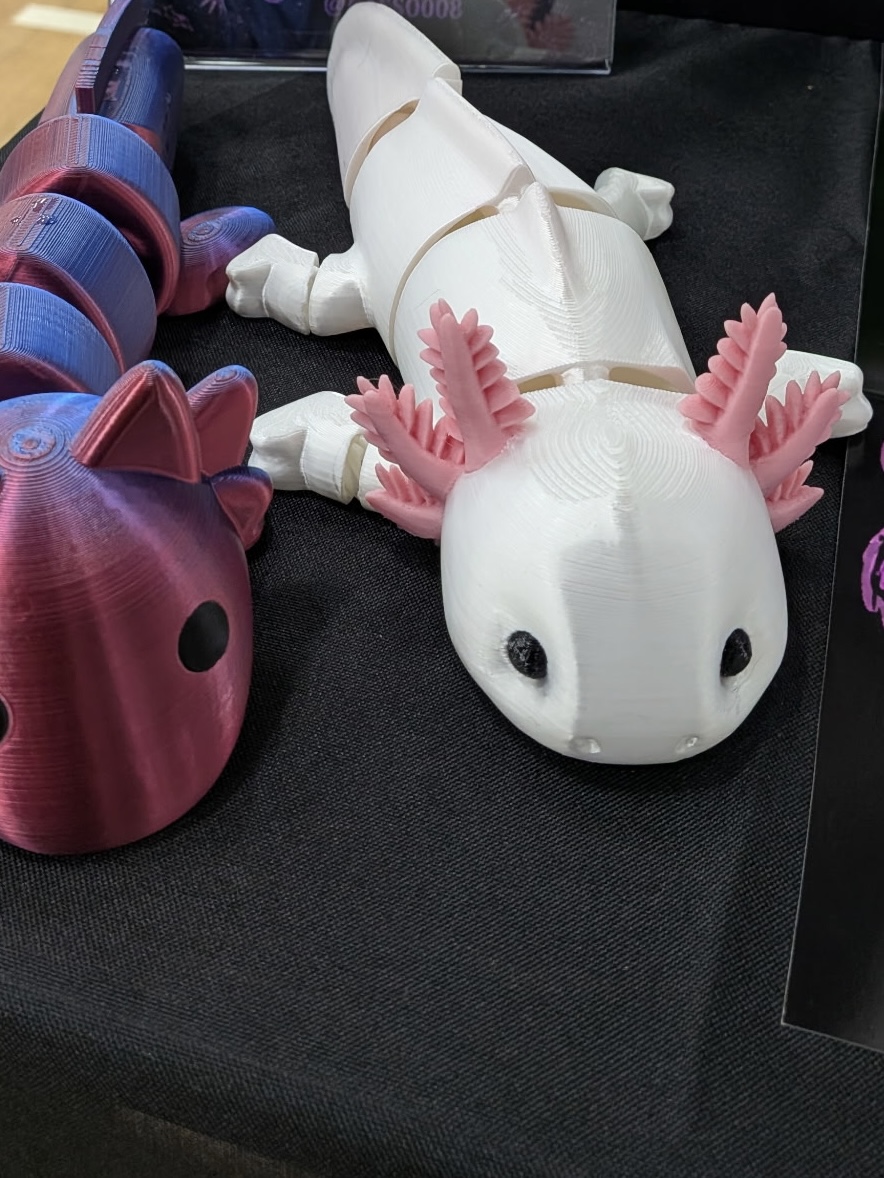
I did some axolotls for my sister earlier this summer. Came out pretty good.Technically this was yesterday's print: a flexi axolotl and parts of the base of a 3d printer. Right now I'm at the start of reprinting the axolotl much larger: I've got a 350mm bed, and I rotated the thing diagonally 45 degrees and scaled it up so it's nearly as large as it can physically be, which will be around 430mm tail to snout.
View attachment 832865
Bambu x2d
Elegoo pink pla, sunlu black pla, sunlu white pla silk
Attachments
Nice! Did you use an AMS or multi toolhead printer, or print the colors separately and glue 'em? The one I printed above I don't think had a separate color breakdown and I printed it on a one-toolhead machine so I could get it that large. I'm gonna wear it into the office on my shoulder tomorrow, and see about getting some double-sided tape or glue dots or something and stick it on my window.I did some axolotls for my sister earlier this summer. Came out pretty good.
Bambu x2d
Elegoo pink pla, sunlu black pla, sunlu white pla silk
Edit: I should say the one in the pic wasn't the giant one, but I posted that in the No Talking Allowed Here thread.
I did ams for mine, using the other nozzle for petg supports. I used the "paint" feature in bambu studio to color the different parts.Nice! Did you use an AMS or multi toolhead printer, or print the colors separately and glue 'em? The one I printed above I don't think had a separate color breakdown and I printed it on a one-toolhead machine so I could get it that large. I'm gonna wear it into the office on my shoulder tomorrow, and see about getting some double-sided tape or glue dots or something and stick it on my window.
Edit: I should say the one in the pic wasn't the giant one, but I posted that in the No Talking Allowed Here thread.
I found using petg for support for pla prints to just not work at all, the prime tower failed every time. Eventually I got some support for pla filament, and used that, with the orcaslicer settings set to print the top support interface with the support pla, and that worked a lot better for me.I did ams for mine, using the other nozzle for petg supports. I used the "paint" feature in bambu studio to color the different parts.
The prime tower bambu studio made for me "contained" the petg within the pla of the prime tower. Maybe that's why it didn't fall apart. I did have a harder time using it just for interface material, so I did the whole support in petg.I found using petg for support for pla prints to just not work at all, the prime tower failed every time. Eventually I got some support for pla filament, and used that, with the orcaslicer settings set to print the top support interface with the support pla, and that worked a lot better for me.
Attachments


- Joined
- Apr 13, 2000
- Messages
- 9,468
Item:
I modified a Microsoft Surface tablet wall mount to hold a small 50mm 5 volt cooling fan. I should have made an adapter for a small VESA mount to wall mount with Left / Right swing adjustment or to a ball joint adapter. Right now it's at a fixed 5 degree viewing angle and in that gap is that 50mm cooling fan on the back, powered directly off USB to prevent the tablet from going into thermal overload shutdowns.
I used a thermal camera to find the hot spot, and I also made a charging cable holder in one of the corner brackets that prevents accidental disconnections.
I didn't create the original model, but the original model was 1mm too short, so I remixed it and published it on Printables -> https://www.printables.com/model/1343219-microsoft-surface-356-pro-and-surface-pro-5-1796-a
Printer: Creality CR10-SE
Filament: KING-ROON PETG Black (AliExpress bulk special)


I modified a Microsoft Surface tablet wall mount to hold a small 50mm 5 volt cooling fan. I should have made an adapter for a small VESA mount to wall mount with Left / Right swing adjustment or to a ball joint adapter. Right now it's at a fixed 5 degree viewing angle and in that gap is that 50mm cooling fan on the back, powered directly off USB to prevent the tablet from going into thermal overload shutdowns.
I used a thermal camera to find the hot spot, and I also made a charging cable holder in one of the corner brackets that prevents accidental disconnections.
I didn't create the original model, but the original model was 1mm too short, so I remixed it and published it on Printables -> https://www.printables.com/model/1343219-microsoft-surface-356-pro-and-surface-pro-5-1796-a
Printer: Creality CR10-SE
Filament: KING-ROON PETG Black (AliExpress bulk special)
Attachments

Last edited:

- Joined
- Oct 29, 2004
- Messages
- 7,469
I started the print Wednesday but it finished around 2am this morning. Printed in SirayaTech ABS-GF.


I need to get back to refining the fitment among other things but I am pretty pleased with it so far.
I need to get back to refining the fitment among other things but I am pretty pleased with it so far.
- Joined
- Oct 29, 2004
- Messages
- 7,469
Because ABS will hold up just fine and it's $6 less per roll. This is not even the long term test version. This was a 26 hour print and used up half a spool so abs-gf gives me all the same mechanical properties in the short term while costing $3 less per test.ABS in your car? Why not ASA?
EDIT: Also not my car

Fair enough. I have only done a little printing of ABS and ASA so far, but people keep saying not to use the former where it'll have long-term UV exposure.Because ABS will hold up just fine and it's $6 less per roll.
- Joined
- Oct 29, 2004
- Messages
- 7,469
I actually have a personal teeny tiny trigger about all of the youtube printing personalities that have been pronouncing ABS a dead filament for a decade and it all seems to be based around old ABS filament that was made from blends that were never intended for FDM printing and were much more problematic. Combine that with how rare an enclosed printer was back then and it was a recipe for propaganda.Fair enough. I have only done a little printing of ABS and ASA so far, but people keep saying not to use the former where it'll have long-term UV exposure.
My own experience with ABS has been pretty good and ASA does seem to be slightly easier to print finnicky things with but overall if I can print something cleanly with ASA I can print it with ABS just as well and ABS is almost always cheaper and sometimes significantly so. If I need to test something for strength and durability in the short term it is just about a perfect analog and once you jump to the fiber-infused version of ABS or ASA it almost doesn't warp at all and becomes as well behaved as PLA.
- Joined
- Oct 29, 2004
- Messages
- 7,469
I have been rebuilding my main rig in a Lian Li V2000B and have been slow to modify the case itself so I'm designing and printing up whatever I want to make it work better in the mean time. I made some simple mounts to adapt the 240mm radiator to the 5.25" bays with a bit of adjustment front to back and tilt. I then came up with this as the first rough draft of the bezel to hide the giant hole.


This test is in PETG and works fine but will be greatly improved by being printed in ABS-GF. It's not as cool as I want it but it's a start.
This test is in PETG and works fine but will be greatly improved by being printed in ABS-GF. It's not as cool as I want it but it's a start.
- Joined
- Oct 29, 2004
- Messages
- 7,469
Subtlety. It's the name of my primary pc since around 2008. It's just a throwback for me that almost no one would know about.Subtety?
Just making sure. The l blends into the line so much it's kind of hard to spot.Subtlety. It's the name of my primary pc since around 2008. It's just a throwback for me that almost no one would know about.
- Joined
- Apr 13, 2000
- Messages
- 9,468
Update: I was printing Kingroon brand PETG black from Aliexpress. Has anyone ever tried Kingroom bulk PETG filament from Aliexpress? I use a filament dryer for it too.
- Joined
- Apr 13, 2000
- Messages
- 9,468
Item: Replacement PC Case Feet.
I modified an existing model to fit my Cooler Master Elite 130 ITX Case. The original model was for a different model Cooler Master case. I modified it slightly to fit the Elite 130 better, and uploaded a remix of it on Printables.com
Printer: Creality CR10-SE
Filament: Kingroon PETG Black
I printed out four replacements and cut out the originals and put the 3D printed ones in, since they seem to be stronger (the case is old and the original PC Case feet are getting brittle).


Link to original model
I modified an existing model to fit my Cooler Master Elite 130 ITX Case. The original model was for a different model Cooler Master case. I modified it slightly to fit the Elite 130 better, and uploaded a remix of it on Printables.com
Printer: Creality CR10-SE
Filament: Kingroon PETG Black
I printed out four replacements and cut out the originals and put the 3D printed ones in, since they seem to be stronger (the case is old and the original PC Case feet are getting brittle).
Link to original model
Last edited:
I mostly use Inland, Overture, and Elegoo. (well, technically also Polymaker and eSun, because they're the ones who apparently make Inland's filaments.)Update: I was printing Kingroon brand PETG black from Aliexpress. Has anyone ever tried Kingroom bulk PETG filament from Aliexpress? I use a filament dryer for it too.
- Joined
- Apr 13, 2000
- Messages
- 9,468
Elegoo PETG is pretty good, I think I got the best bridging quality with Elegoo PETG. Kingroon is just bang for buck and cheap... but it still works great!
I just retuned my retraction settings and the retraction tests are A LOT cleaner now. All I had to do was lower my retraction and detraction speeds by 10mm/s to 15mm/s

I just retuned my retraction settings and the retraction tests are A LOT cleaner now. All I had to do was lower my retraction and detraction speeds by 10mm/s to 15mm/s
Last edited:
- Joined
- Oct 20, 2005
- Messages
- 896
I fought with PETG for quite awhile myself and yeah after dialing in fans/temps, retraction was another step that really helped clean up my results. Mine still aren't absolutely perfect, but close enough for my budget printer and setup that I'm happy with it.
- Joined
- Oct 29, 2004
- Messages
- 7,469
I have always struggled with PETG to the point that I mostly avoid it unless there's some good reason. I don't think I have had a really genuinely clean and perfect PETG print since 2018 on my MK2.5S after working for days to get it to stop stringing and leaving zits everywhere.
Even my H2D prints PETG well enough for structural prints no problem but the stock profile, and my modified ones, just always leave some blemish somewhere on the part if not multiples.
Even my H2D prints PETG well enough for structural prints no problem but the stock profile, and my modified ones, just always leave some blemish somewhere on the part if not multiples.
- Joined
- Oct 20, 2005
- Messages
- 896
My PETG prints (on an Ender 3 V3 SE) still have a bit of fluffy strings but in general the details come out well and even a long 8-hour print with a lot of holes in it came out mostly clean and usable. Probably still an occasional blemish though. I just brush off the strings and it's usually good to go. I don't know if absolutely perfect prints are even possible. Maybe so with tons of tweaking and certain printers and whatnot, but I think PETG is just naturally goopier so much harder to perfectly control.
I don't print with it often and mostly just stick to PLA. But I like having some PETG around when I want something with a bit more flex to it (worked well for a replacement top chassis half for a USFF lenovo box that the flex helps it fit on). It was also the first "clear/transparent" filament I owned so I had some fun with it for that reason.
I don't print with it often and mostly just stick to PLA. But I like having some PETG around when I want something with a bit more flex to it (worked well for a replacement top chassis half for a USFF lenovo box that the flex helps it fit on). It was also the first "clear/transparent" filament I owned so I had some fun with it for that reason.
- Joined
- Apr 13, 2000
- Messages
- 9,468
Yes you can print very well with PETG. I used to have an Ender 3 V2 that could just print PETG support surfaces that were absolutely smooth.
It was a heavily modified printer, though, but damn, I really miss that printer.
This was after I installed a Big Tree Tech Manta E3 EZ motherboard on my printer. I don't know how exactly it allowed me to print PETG like this over the stock motherboard, but that was the one major upgrade.

I'm still shocked that I managed to modify my Ender 3 V2 to print PETG like this. And I had the shitty $99 Microcenter E3V2 that was notorious for rough cut extrusions (leading to a very unsquare gantry) and a bed that would warp and taco like crazy. I did do the dual belted Z mod that compensated for gantry issues, and I think that mod helped quite a bit.

I got this CR10-SE and I still can't get PETG bridges and support surfaces to break off this easily. I'm still tuning the settings to get there.
It was a heavily modified printer, though, but damn, I really miss that printer.
This was after I installed a Big Tree Tech Manta E3 EZ motherboard on my printer. I don't know how exactly it allowed me to print PETG like this over the stock motherboard, but that was the one major upgrade.
I'm still shocked that I managed to modify my Ender 3 V2 to print PETG like this. And I had the shitty $99 Microcenter E3V2 that was notorious for rough cut extrusions (leading to a very unsquare gantry) and a bed that would warp and taco like crazy. I did do the dual belted Z mod that compensated for gantry issues, and I think that mod helped quite a bit.
I got this CR10-SE and I still can't get PETG bridges and support surfaces to break off this easily. I'm still tuning the settings to get there.
Last edited:

- Joined
- Oct 20, 2005
- Messages
- 896
Printed a tiny plastic tab/shim, not designed by me, (https://makerworld.com/en/models/3334445-caliper-battery-saver) to stop battery drain in my knock-off cheap digital calipers when they're turned off. Disassembled, placed the shim in, and re-assembled while holding it steady. It's now trapped in place and I can slide it up and down. It looks almost like it came that way. It slides a little plastic shim between the battery and contact to disrupt the circuit when not in use. I love how far a single roll of filament goes, especially for small items. It was so quick and so little filament as to practically be free and it's a massive quality of life improvement.
The cheapo calipers have a circuit that unfortunately can cause it to drain the battery a lot while off. I can't find the pages anymore- but someone did tests of a number of these and found some of them drain an enormous amount of battery life while turned off. I can confirm that is true for mine. Brand new battery in the calipers, even if i use only once or twice and then turn it off, when I go back to it weeks later it has drained the battery enough to fade the display and show a lower battery life indicator on the screen. These calipers seem fairly accurate and were inexpensive, so rather than invest in better ones, I'm glad to find a fix that means my batteries will go MUCH further.
The cheapo calipers have a circuit that unfortunately can cause it to drain the battery a lot while off. I can't find the pages anymore- but someone did tests of a number of these and found some of them drain an enormous amount of battery life while turned off. I can confirm that is true for mine. Brand new battery in the calipers, even if i use only once or twice and then turn it off, when I go back to it weeks later it has drained the battery enough to fade the display and show a lower battery life indicator on the screen. These calipers seem fairly accurate and were inexpensive, so rather than invest in better ones, I'm glad to find a fix that means my batteries will go MUCH further.
- Joined
- Apr 13, 2000
- Messages
- 9,468
Oh that is interesting, and it looks like it works really well. Parasitic drain happens on a lot of devices, like flashlights, etc. If it's not a physical switch that cuts the circuit, then power button itself needs power.
I used to have a small $10 gram scale that I used to weigh my prints, and one day it started to drain all my batteries while it was powered off.
I used to have a small $10 gram scale that I used to weigh my prints, and one day it started to drain all my batteries while it was powered off.
- Joined
- Oct 20, 2005
- Messages
- 896
Yeah my coffee scale has both a touch on/off switch and a physical power toggle on the side. I don't use the physical toggle as much as I should probably, I bet the batteries would last even longer if I did. That said, they've made it efficient enough (or the battery big enough) that it lasts a long time regardless.
As far as calipers, I've heard that some better models don't have this issue so my assumption is the knock-off probably made a mistake (or a purposeful decision to cut corners) in designing the circuit so that it's just massively inefficient by comparison. Pretty common in knock-off/cheap electronics for them to just skip some components completely, especially ones for protection or efficiency, if it technically works without them
I have been tempted to do the soldered/wired-in AA/AAA battery holder mod instead to use AAs or AAAs to power the caliper. It looks hilarious. I'm still considering it for fun, but maybe I'll wait until I deplete my supply of LR44s
As far as calipers, I've heard that some better models don't have this issue so my assumption is the knock-off probably made a mistake (or a purposeful decision to cut corners) in designing the circuit so that it's just massively inefficient by comparison. Pretty common in knock-off/cheap electronics for them to just skip some components completely, especially ones for protection or efficiency, if it technically works without them
I have been tempted to do the soldered/wired-in AA/AAA battery holder mod instead to use AAs or AAAs to power the caliper. It looks hilarious. I'm still considering it for fun, but maybe I'll wait until I deplete my supply of LR44s
- Joined
- Apr 13, 2000
- Messages
- 9,468
My nephew was buying all these fancy $40 flashlights with tons of features. But one of his flashlights had "a feature" that physically separates the circuit off the battery to extend the life of the battery itself.
- Joined
- Apr 13, 2000
- Messages
- 9,468
This was one of my very first prints when I first got my Ender 3 V2 around 3 years ago. I was just learning Fusion 360 and using a caliper to measure dimensions and I was blown away at how accurate you could make real life objects 1:1 from a virtual 3D model, heh.
I wanted to make a gram scale cover with a circular hole cut out so I could still weigh powders without having to flip the cover (the original cover hinges broke). I never figured out how to make the hinges as that was beyond my abilities with Fusion 360.
Printed with Microcenter Inland PLA.
Eventually, this gram scale would chew through two AAA batteries every 5 days, so I had to get a new scale.


I wanted to make a gram scale cover with a circular hole cut out so I could still weigh powders without having to flip the cover (the original cover hinges broke). I never figured out how to make the hinges as that was beyond my abilities with Fusion 360.
Printed with Microcenter Inland PLA.
Eventually, this gram scale would chew through two AAA batteries every 5 days, so I had to get a new scale.