nikkocortez
n00b
- Joined
- May 14, 2014
- Messages
- 7
It has been nearly 5 years since I have built my first EVGA Classified build that inspired my love for "enthusiast computing". It wasn't long after my first E760 X58 Classy build (dubbed ARSENAL 1.0) that I hopped over onto the SR-2 for two years before returning to a E762 that I built my first water loop on. Since then I have built around 20 X58 systems, for others and myself and this is not including the dozens of LGA775 or the couple of X79s. from a lot of the systems I have built it was clear to me the X58 had a nice sweet spot. You had plenty of overclockable CPUs to choose from(which we may never see again from Intel), ample performance features for heavy gaming or heavy workstation loads, and the EVGA X58 Classified series just seemed to be in a class all on their own in that time in regards to quality and performance. The X58 has since been replaced in the enterprise/enthusiast market with higher performing chipsets and the adoption of new standards in USB, SATA, PCIe, and DDR4 to name a few but the X58 probably marks the end of an era where you could overclock the Xeon CPUs, now leaving enthusiasts locked to a standard three "overclockable" i7 SKUs per generation. In simplest terms since the end of the X58 chipset, overclocking is now a feature you pay for in a CPU. While I was rather late into the enthusiast community I was fortunate enough to experience and appreciate what the X58 and many of its enthusiast class predecessors offered to the enthusiast side of computing.
This project has been a goal of mine since I started my "minion" X58 rigs for folding. I wanted to build a multi-system machine that displayed the potential in gaming and workstation aspects of the X58, along with being a multi-tool platform for teaching and sharing my enthusiasm to others. The purpose behind this build was to create full time game servers for my gaming community of friends, but also have the potential to be used as part time gaming systems for those who do not have a capable system at our LANs as well as a tool to teach the principals behind overclocking to those who were unfamiliar. While these newer UEFI's are nice and convenient with simple click and clock settings there was nothing like getting the true understanding of the basics from starting at a Blue and white BIOS screen and tweaking settings while solving the boot issues through BSOD codes while fine tuning an overclock.
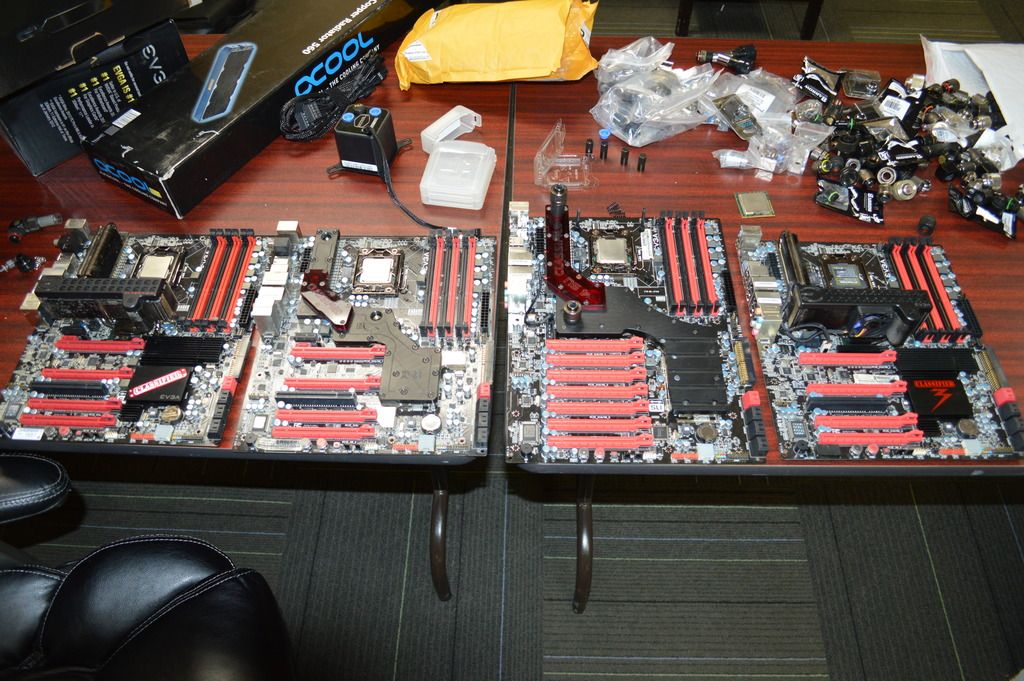
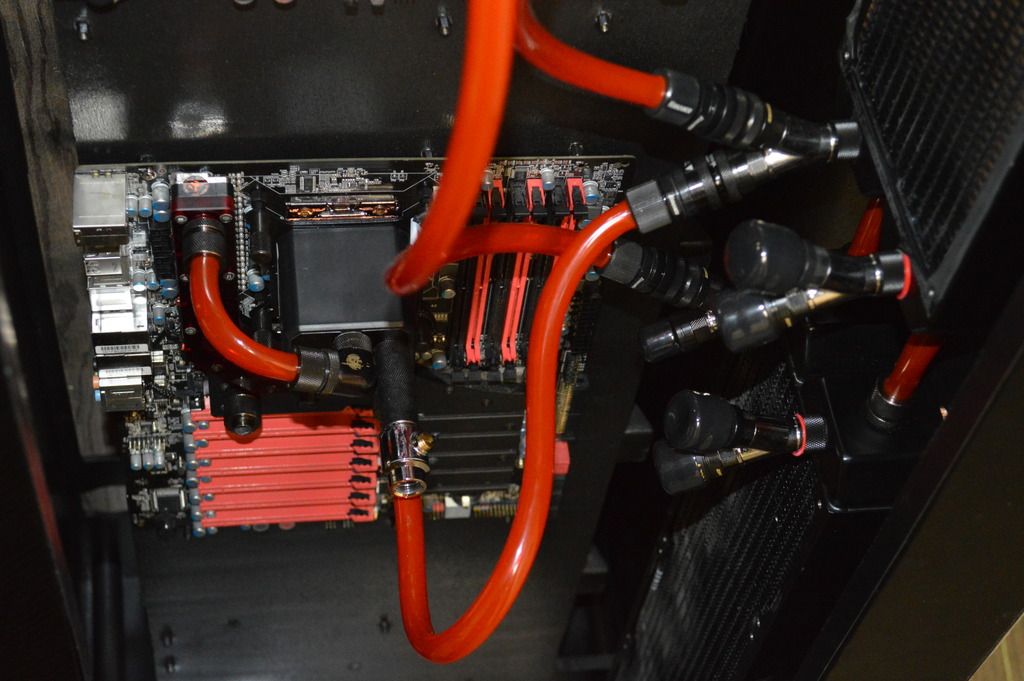
I started off by collecting all four SKU's of the EVGA X58 Classified boards, mainly from fellow forum members at EVGA. The rare E759 featuring the nf200, the standard E760, the notorious E762 featuring 4-way SLI, and the late E770 with the USB/SATA 3.0 update. I also took the time to collect the ECPs so each board had one which will be essential to the build in it's later stage. I also took the time to collect the popular EK full board blocks as each system will be water cooled through a parallel style system. To be honest the blocks were easy to collect, but the hardware for mounting them, not so much. In fact I had to wait a good while before finding an E762 board that actually had the air cooler on it. I am trying to keep both the water blocks and air coolers on hand as each shares an important aesthetic to the boards.
The collecting totaled me at three E760 boards, one E759, one E770, and two E762 boards. I went ahead and built two of the E760 boards into systems for my brothers and kept one, one sadly went up in a blaze of sparks and smoke so it's now a wall hanger.
CPUs are going to be a careful selection as I want to have a diverse set of SKUs for the systems. The i7 920, and either an i7-970(which I have) or the i7-980X would be good ones to display the range in the consumer lineup but then it's choosing from the dozens of Xeons to give a good display of the CPU cross compatibility. I will probably start with a 5639 to show a low end Xeon hex core, and a 5580 or similar for a high end quad core to complement the i7's.
But I guess enough for the write up thus far. Lets move into some images of the build and it's progress. I started in mid March and have been working every few days for a couple hours and still have a long way to go.
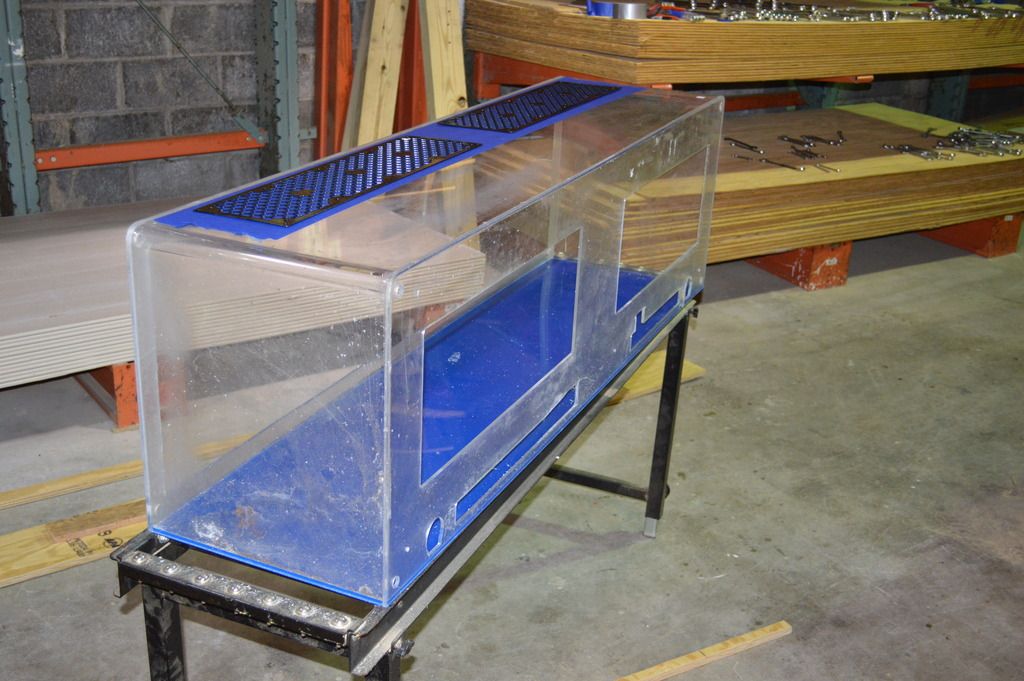
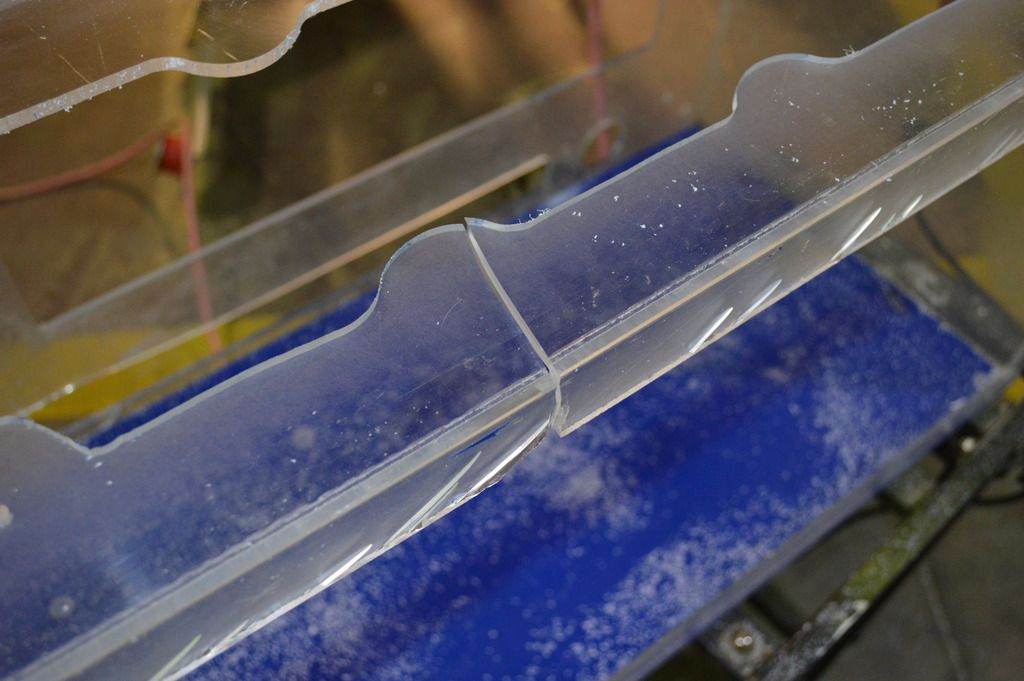
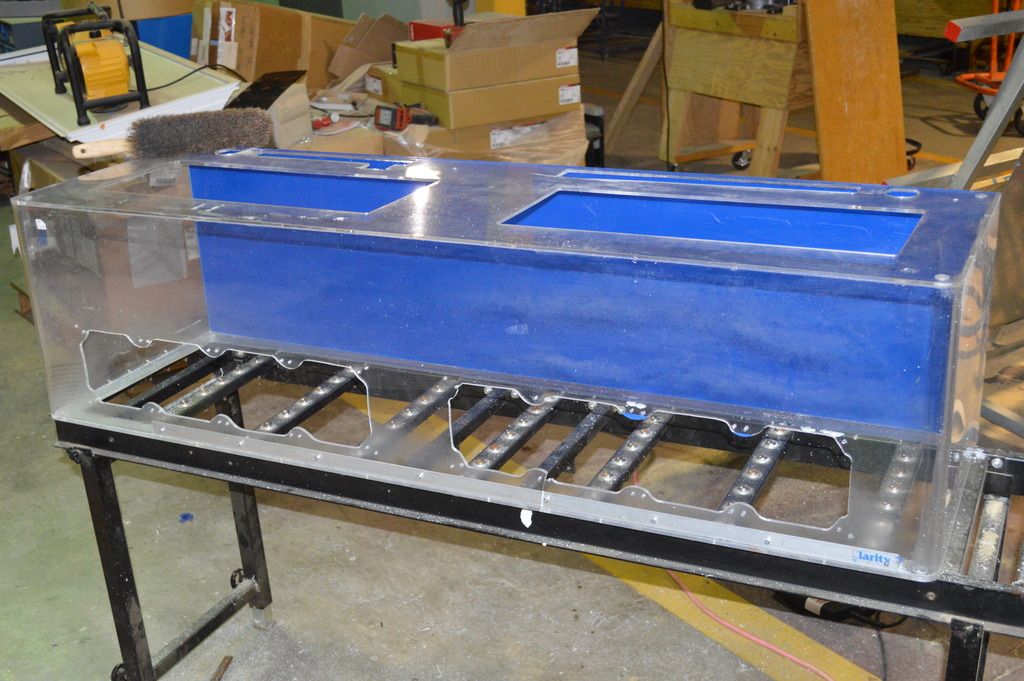
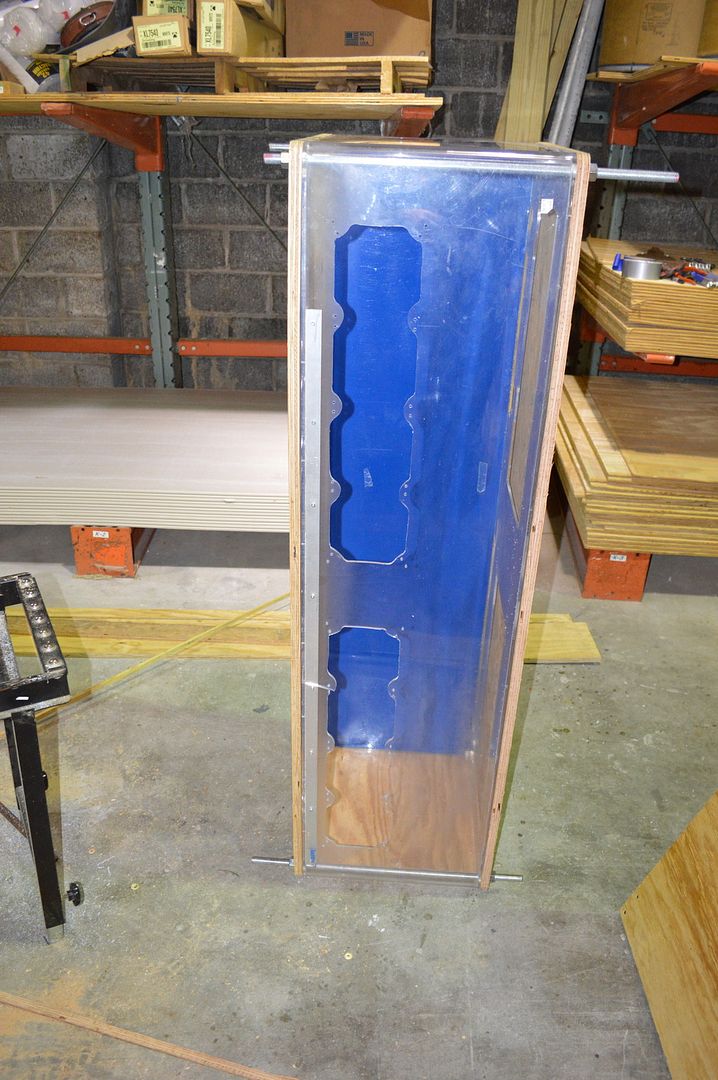
A several weeks ago I started out making a trip to a thrift store with the wife and ran across a stripped down plexi terrarium. To me it screamed as the perfect part to base the case off of but still it would require a lot of work. So off came the top on the jeep to accommodate the 15" X 18" X 60" piece of plastic. I started off with taking some measurements to start cad work for the design and quickly realized there was not a single complementary dimension. This was bad news as the case frame will have to be meticulously built to adapt to the terrarium. I moved on from my cad design and started cutting the terrarium up... Because of a lack in selection of blades at my shop and a poor running jig saw I ran into some bad chipping even after taping the plexi off. I later figured out the right speed using a different jig saw that greatly reduced the chipping.

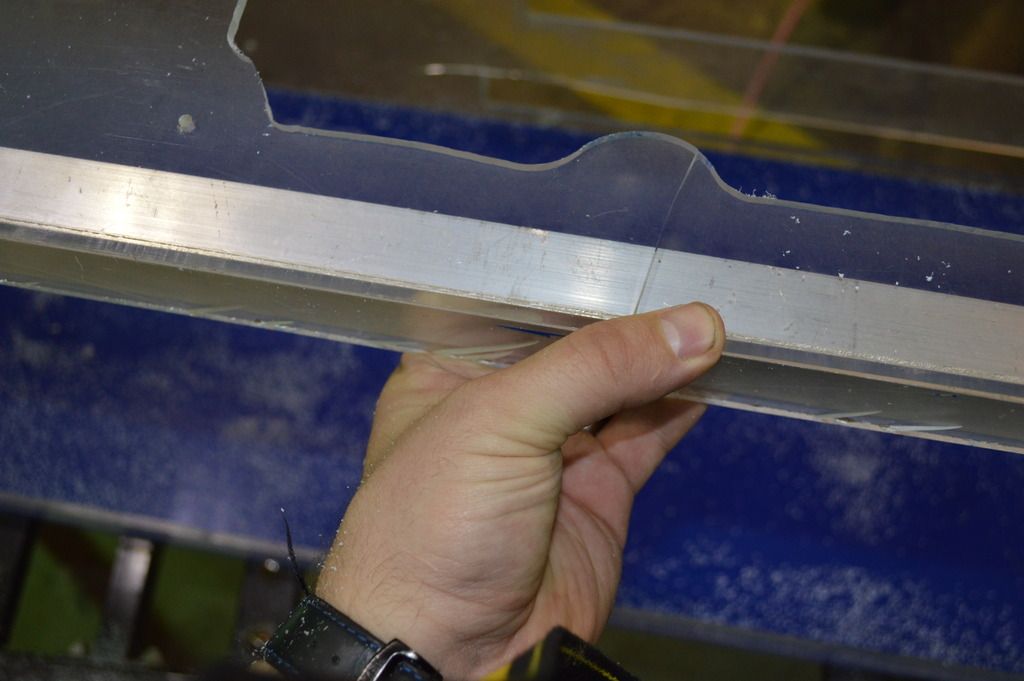

Not a fan of working with plexi using a jig saw but it was what I had at hand.
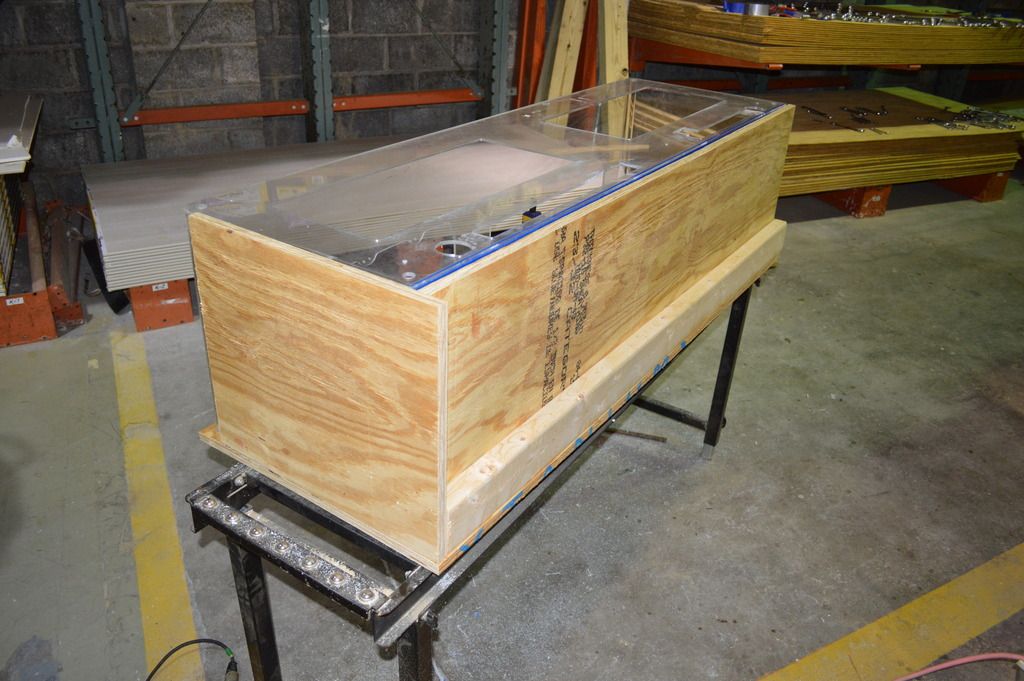
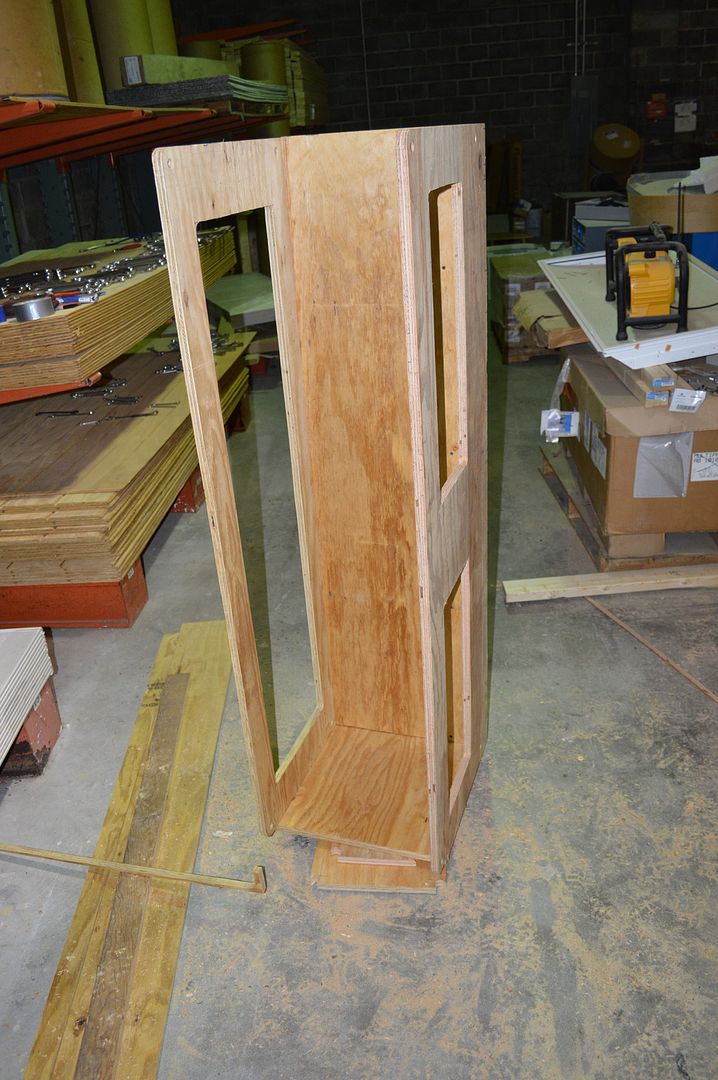
Started building the case frame. I did not want the plexi to be in any way structural for the 50+lbs of hardware going into it so I am using 3/4" plywood and 5/8" all thread for the frame.
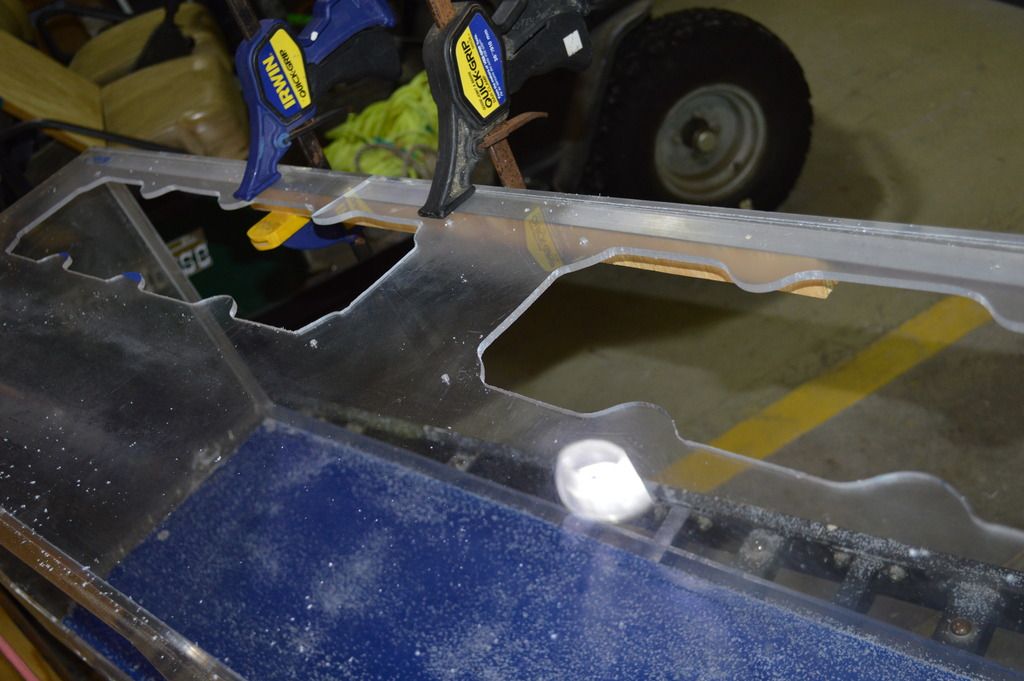
Tracing a close contour of the side as both sides vary slightly to almost a 1/4" on the terrarium.
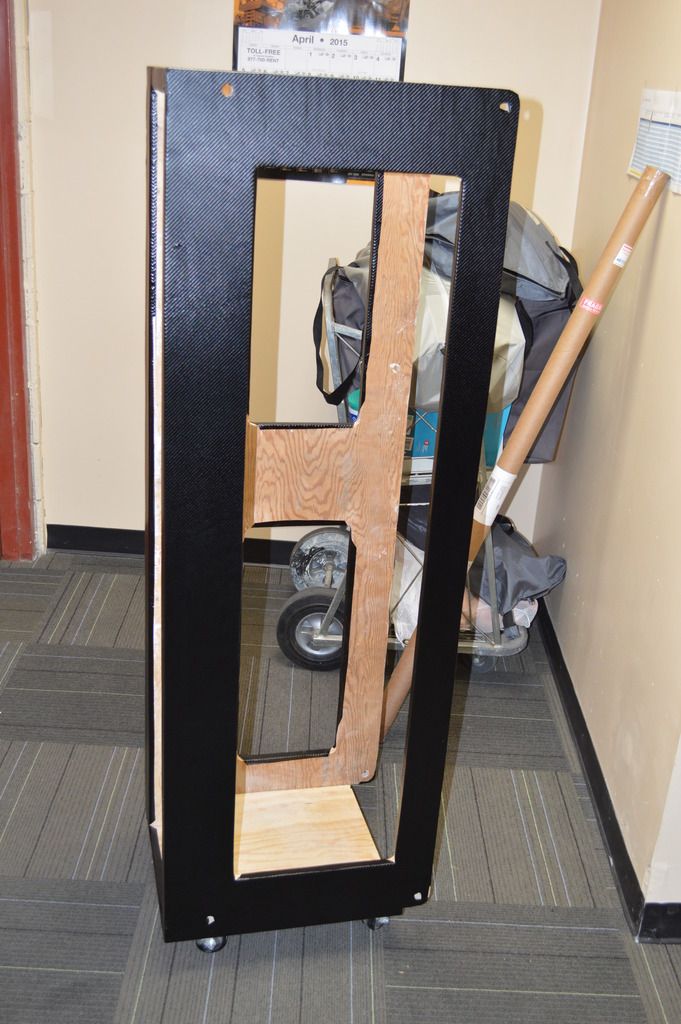
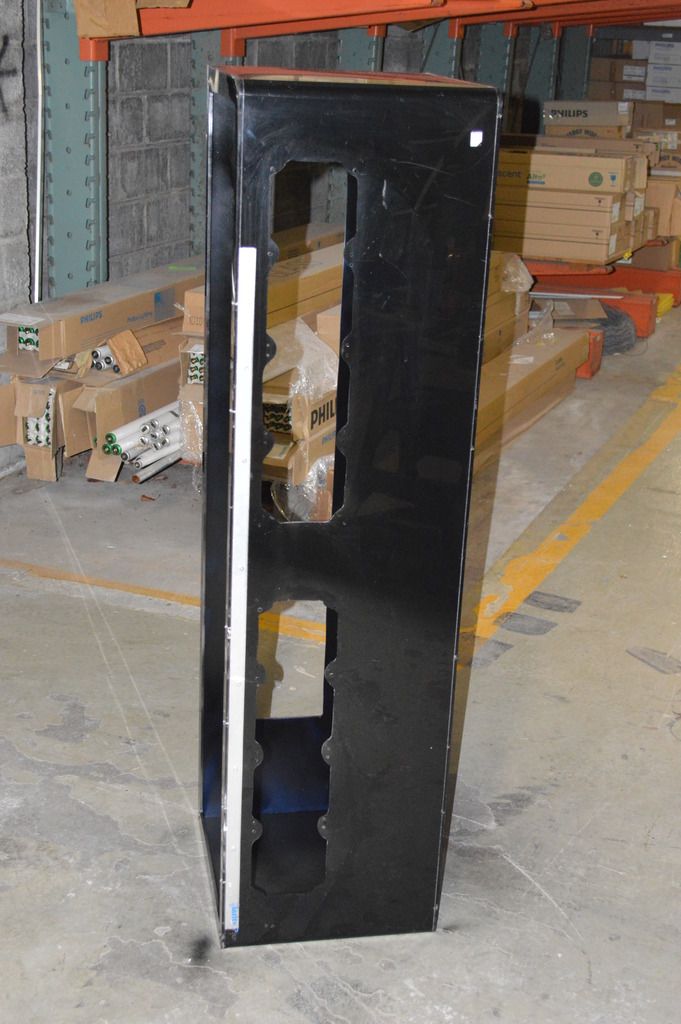
Sides of the frame cut out. Getting close to what it is supposed to be.
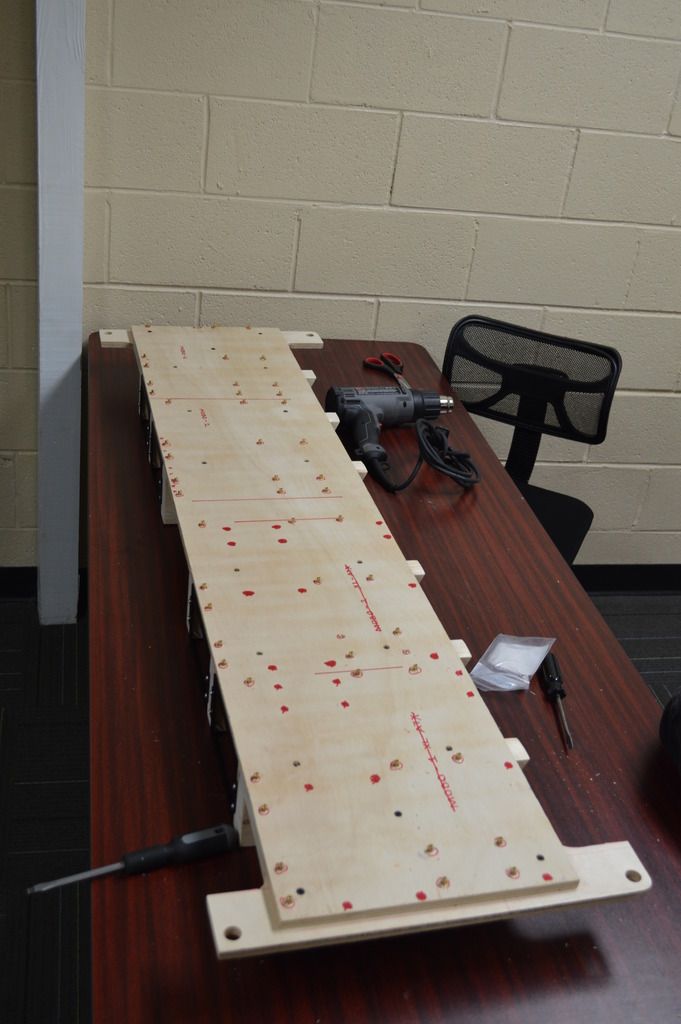
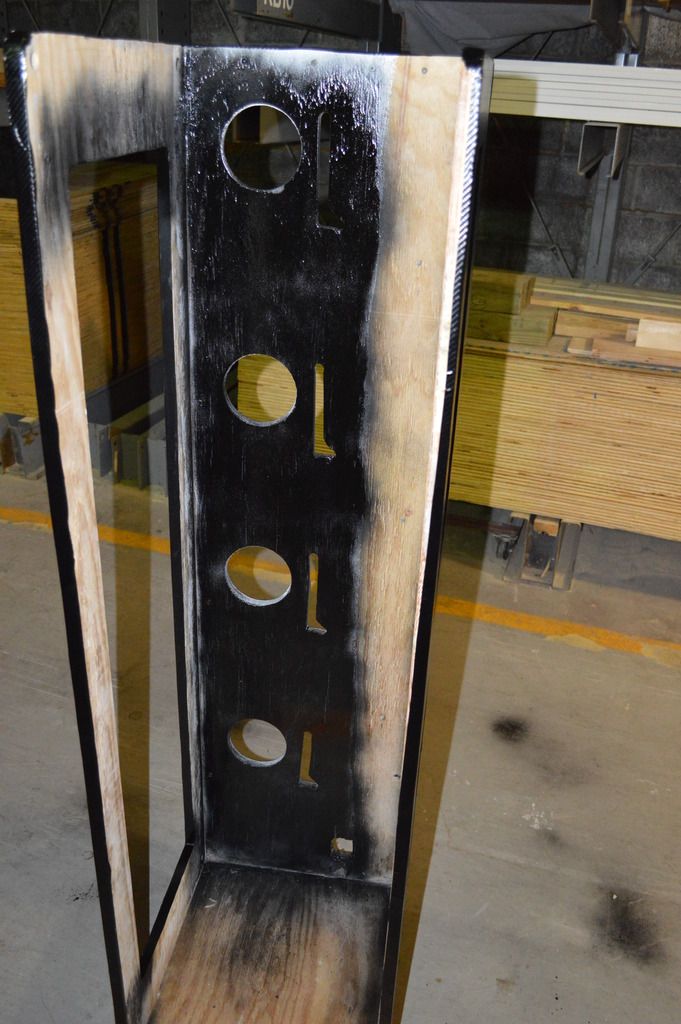
Sanding and hole filling.
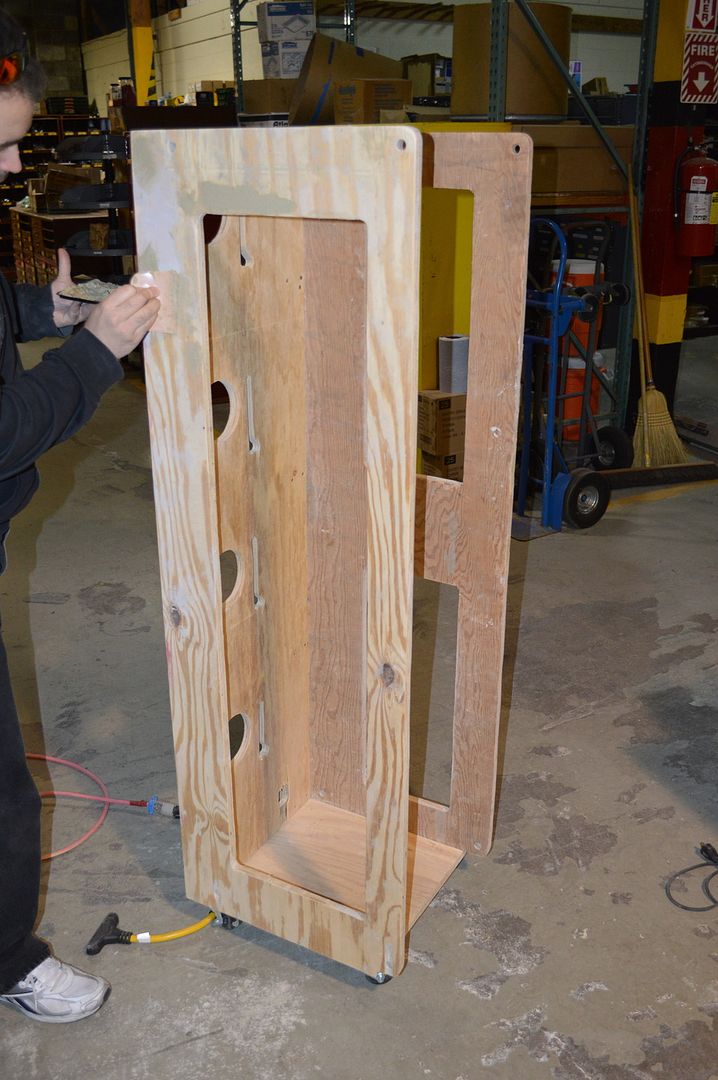
Lots of sanding and hole filling.... the plywood was not of the greatest quality.

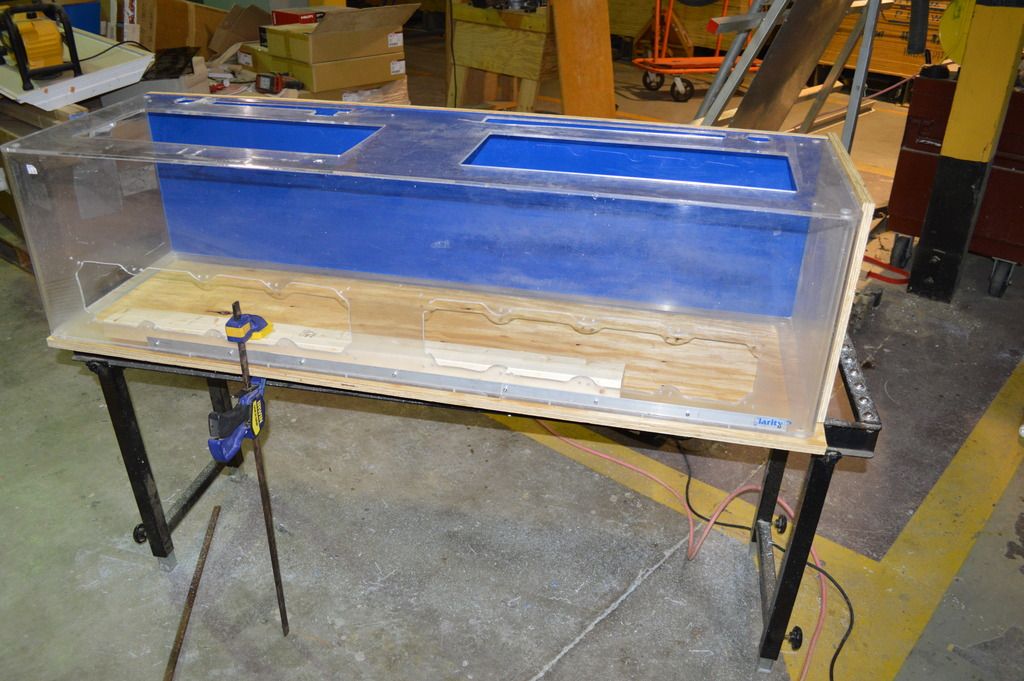
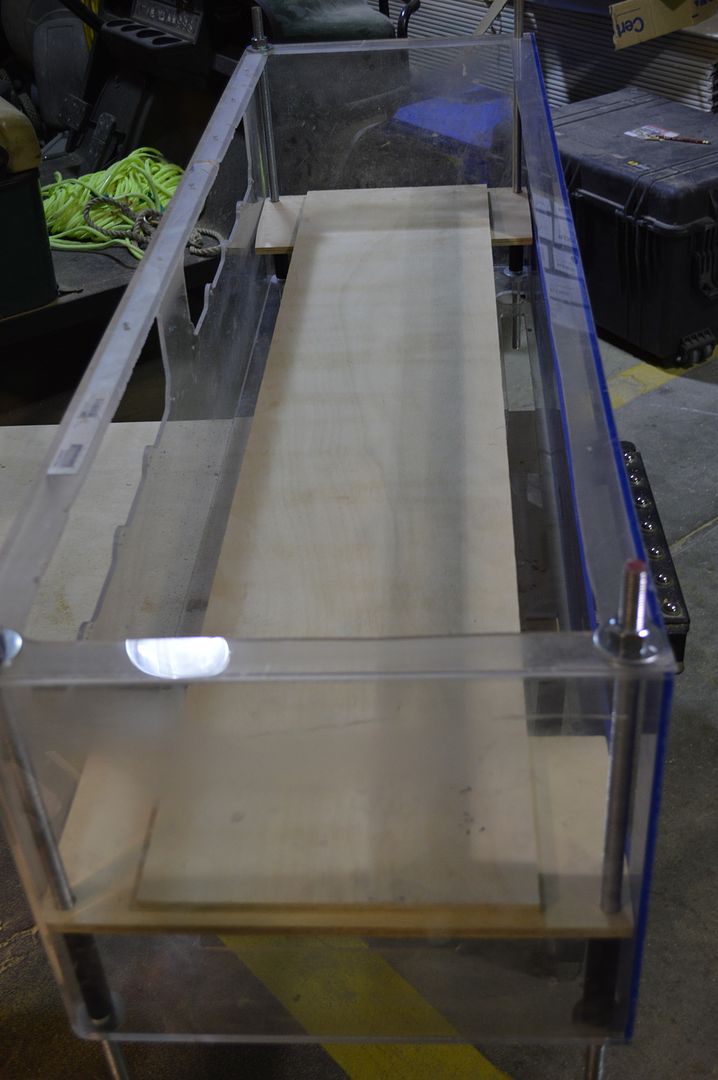
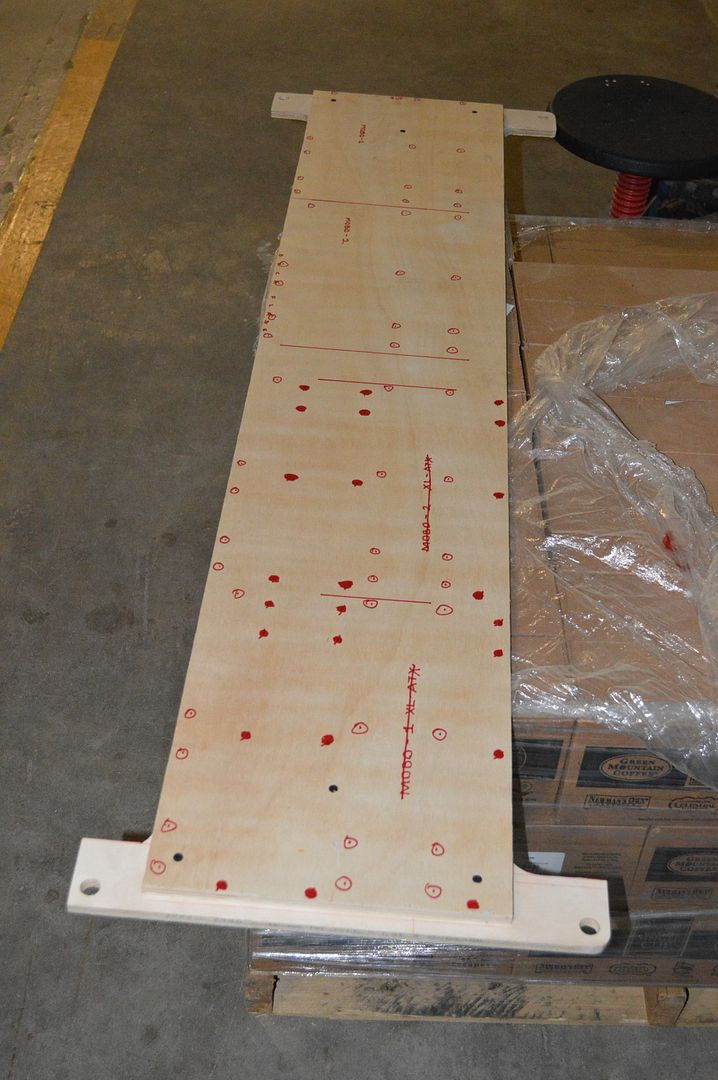
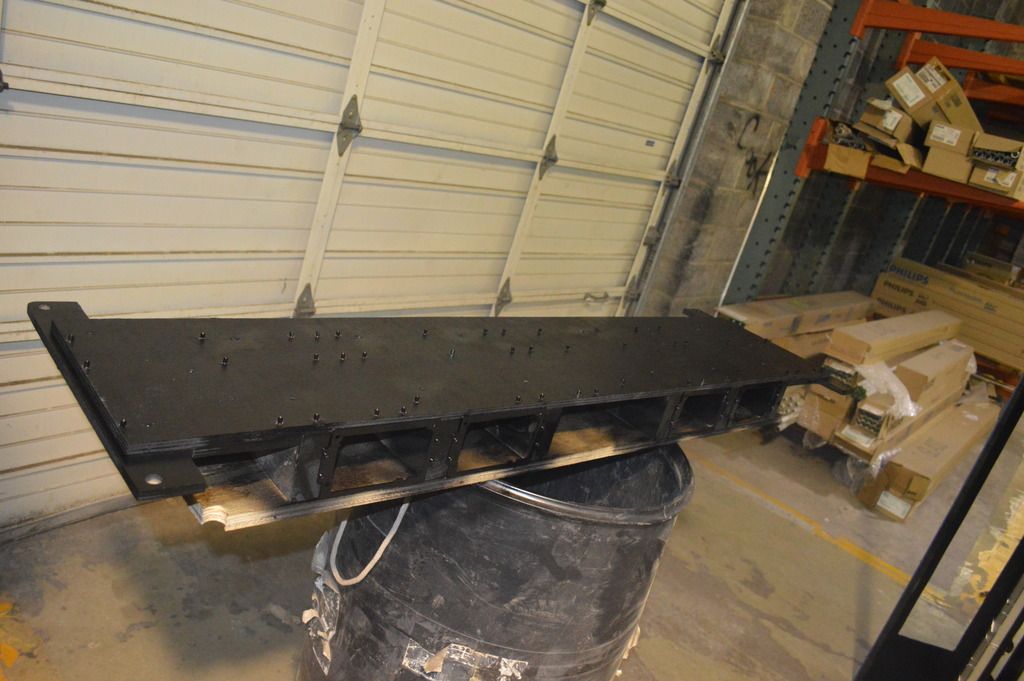
Now lets look at the motherboard tray. it will be suspended and held in place using the 5/8" allthread.
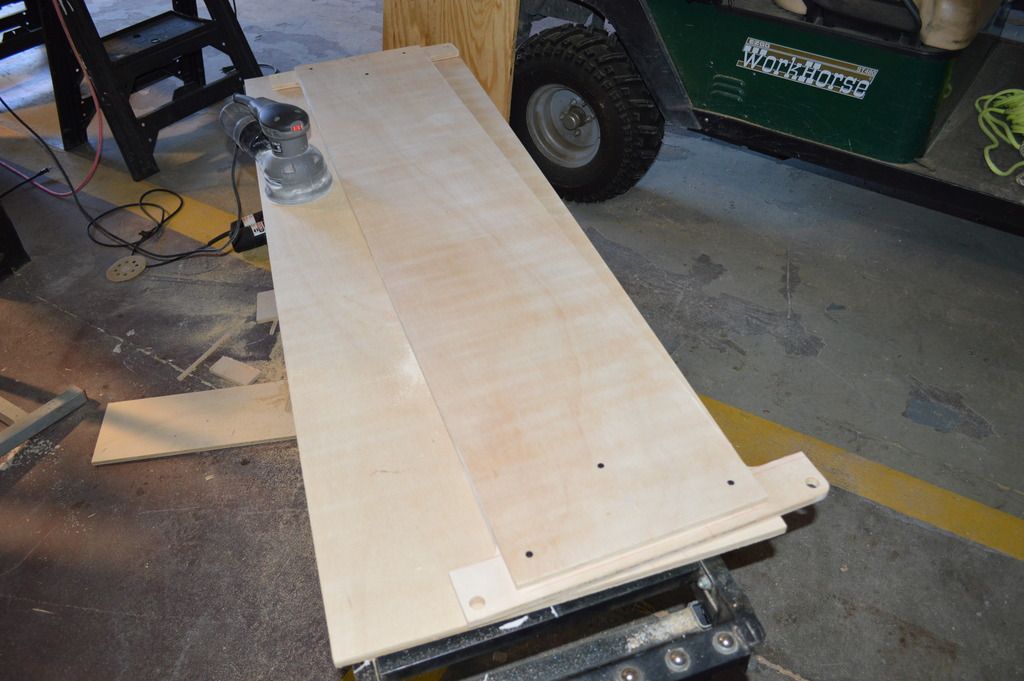
Used one of the EVGA 4-Way X58 Classified boards to trace out the standoff lay out. This system could accommodate up to four of the XL-ATX boards... lots of holes, 52 to be exact.
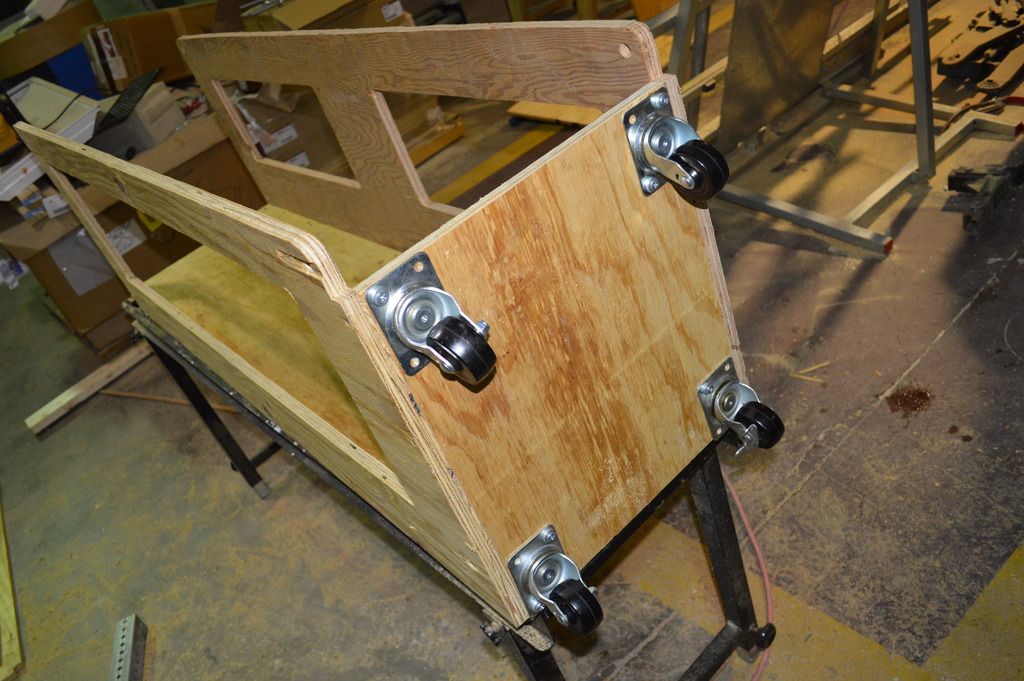
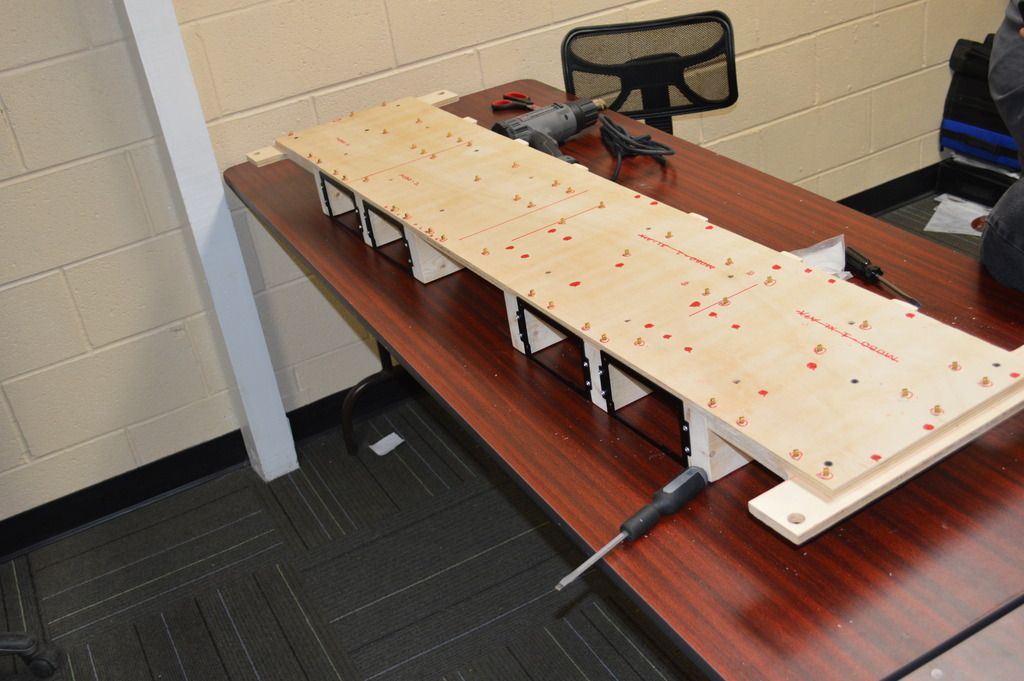
PSU brackets installed.
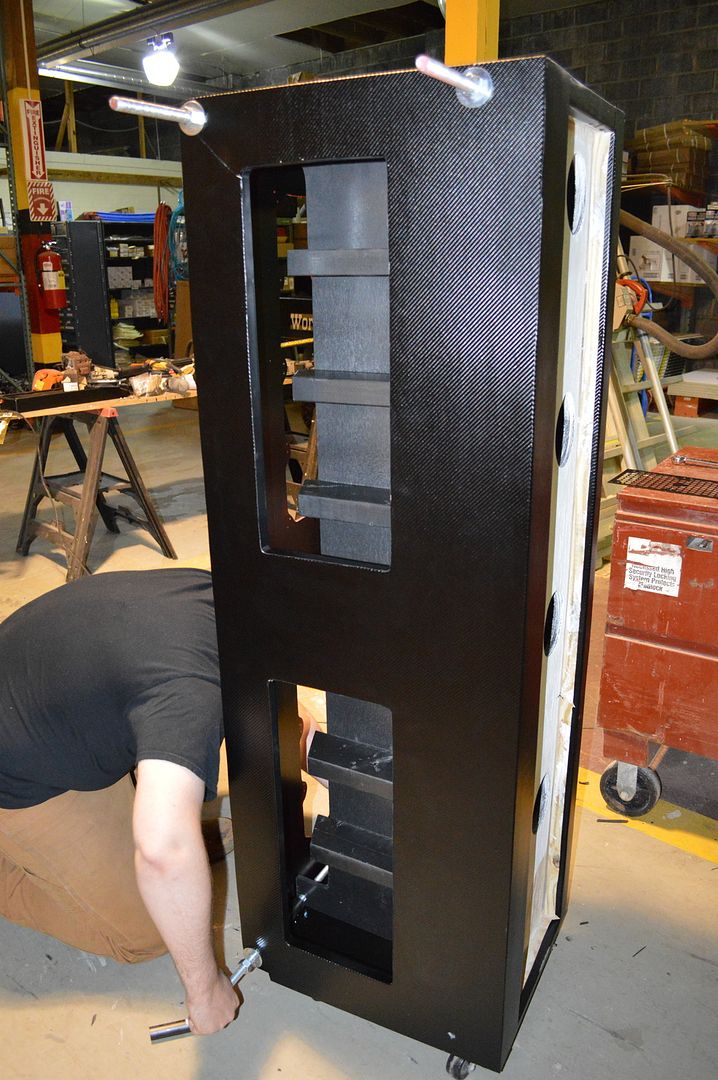
Back to the case. I had a buddy come and help out and I probably should have had two more because wraping something this complex and large with vinyl was extremely difficult. Next time I'll just do it in sections VS ONE BIG piece to save some sanity.
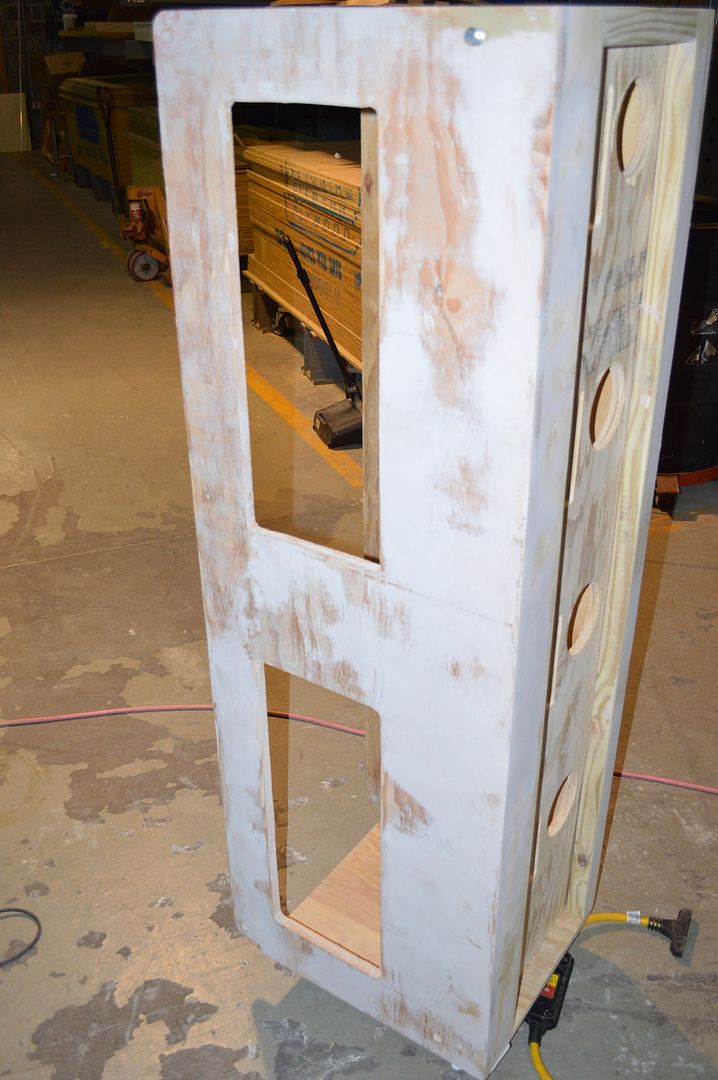
Started hitting the terrarium with its internal coat of flat black primer.
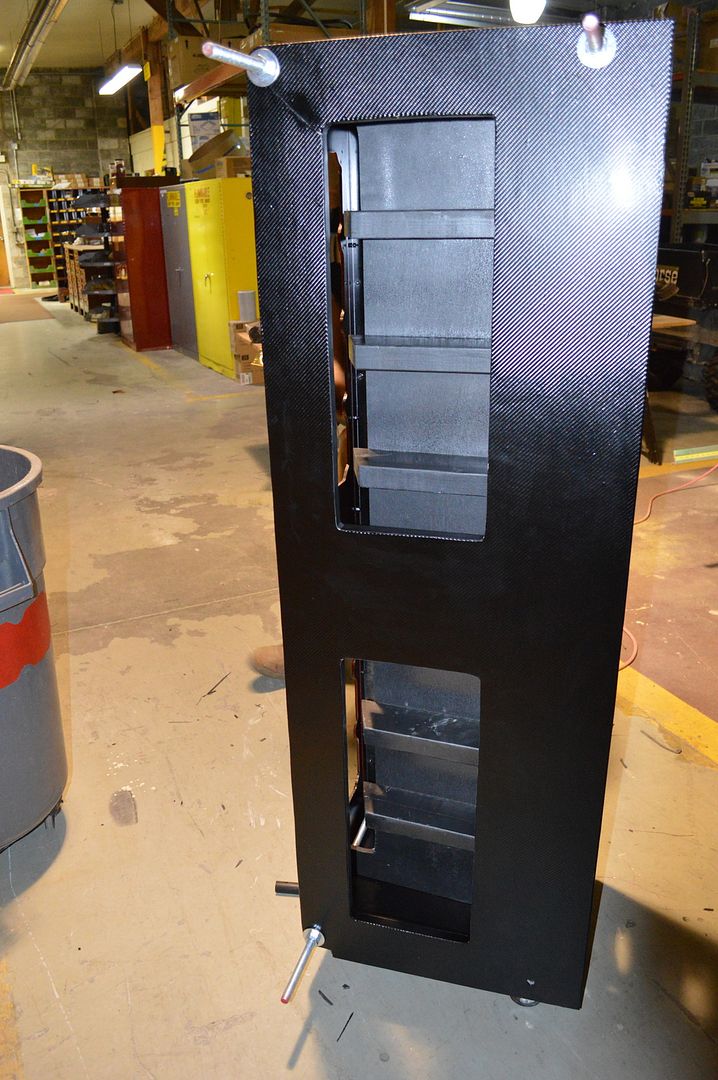
To really get a lot of the finishing done right I needed to use different types of trim. I used automotive chrome trim with a 3M adhesive backing to trim the edge where the frame and terrarium meet. I used black melamine for the interior edges of the frame openings.

Some finishing paint touches on the case frame and mobo tray before installing the terrarium.
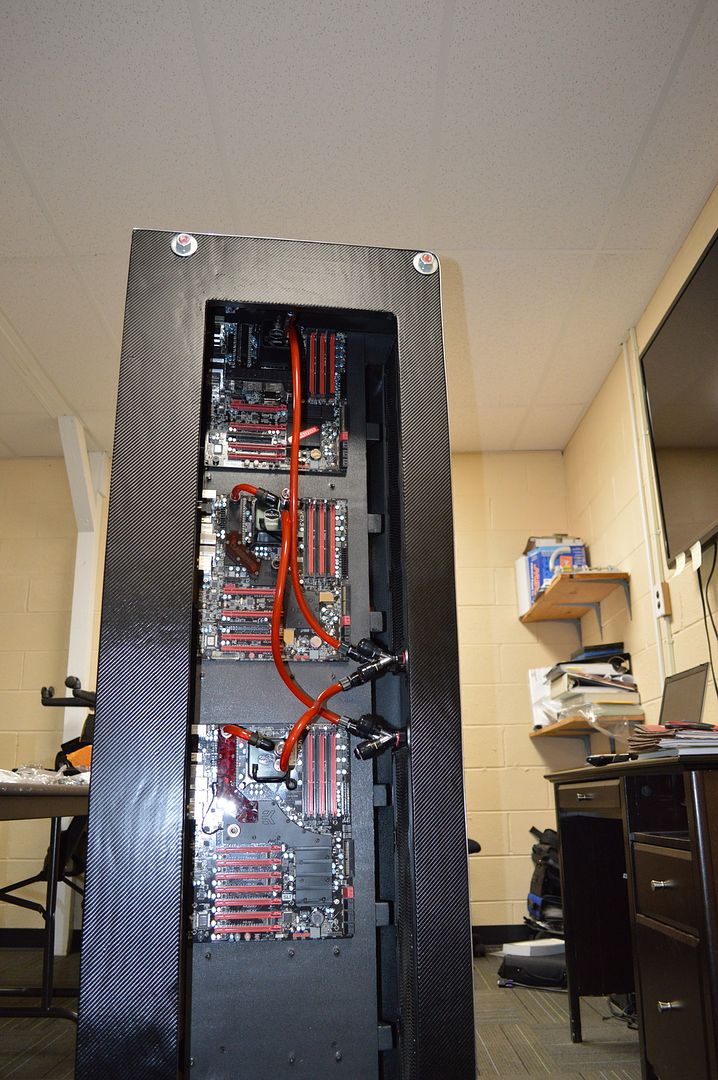
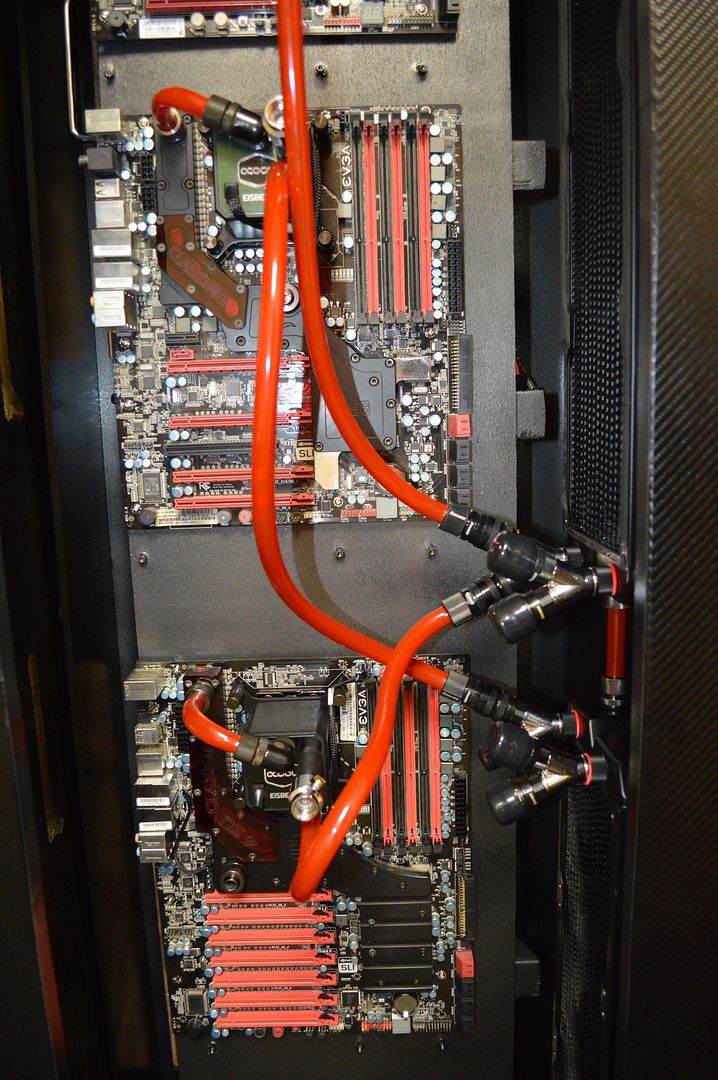
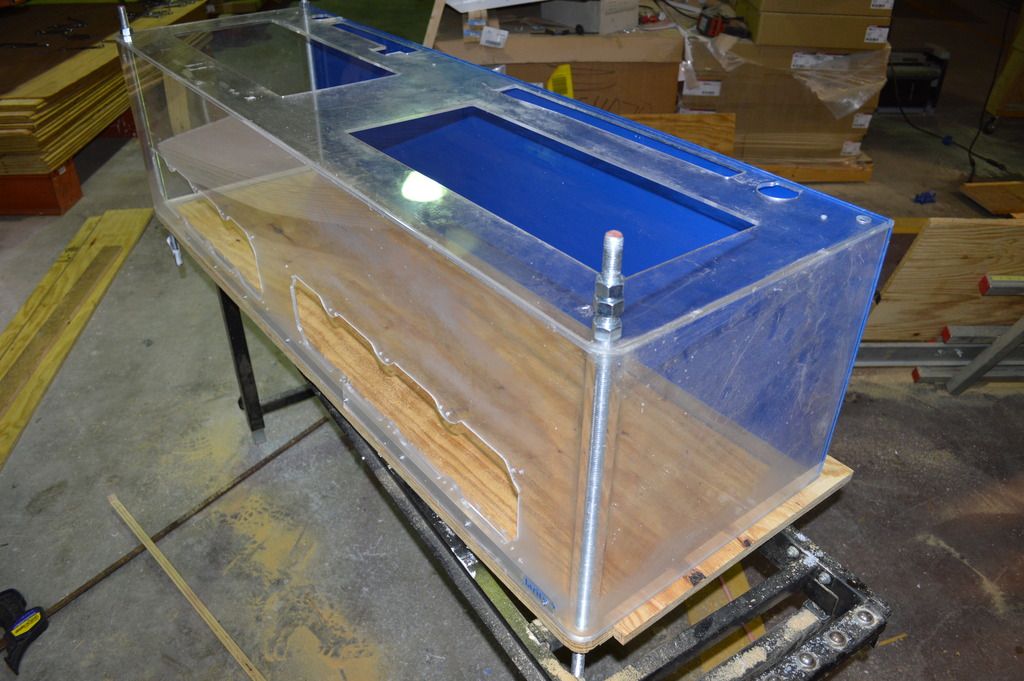
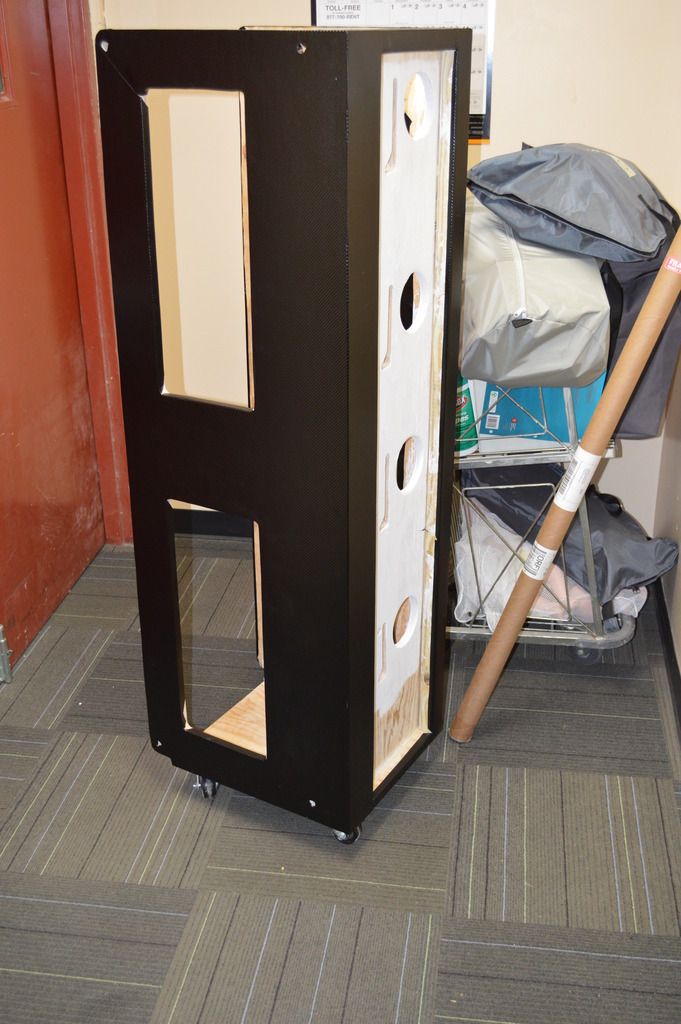
Now for the install of all three major components to this case. It wouldn't require a 1" snap-on wrench if it wasn't serious now would it?")
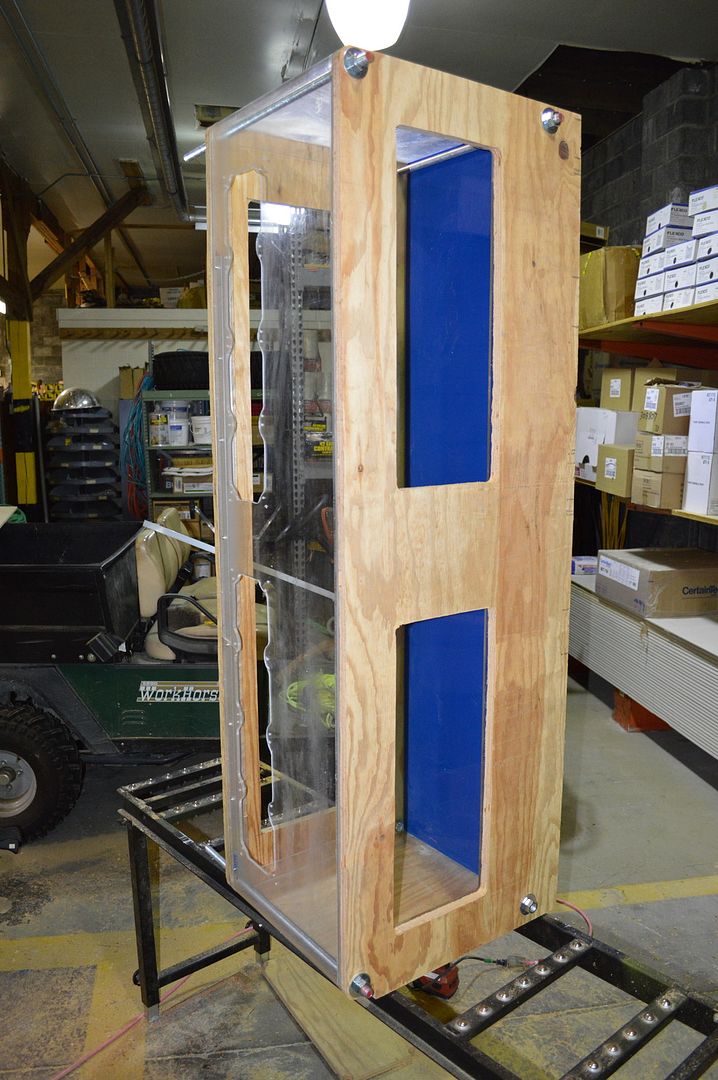
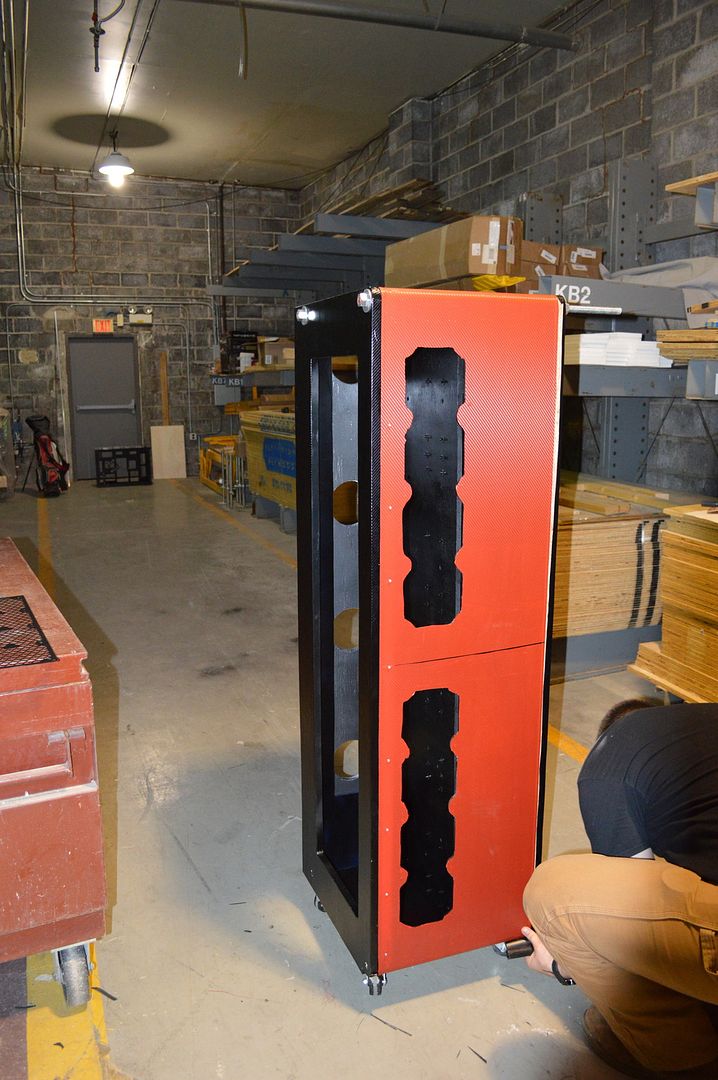
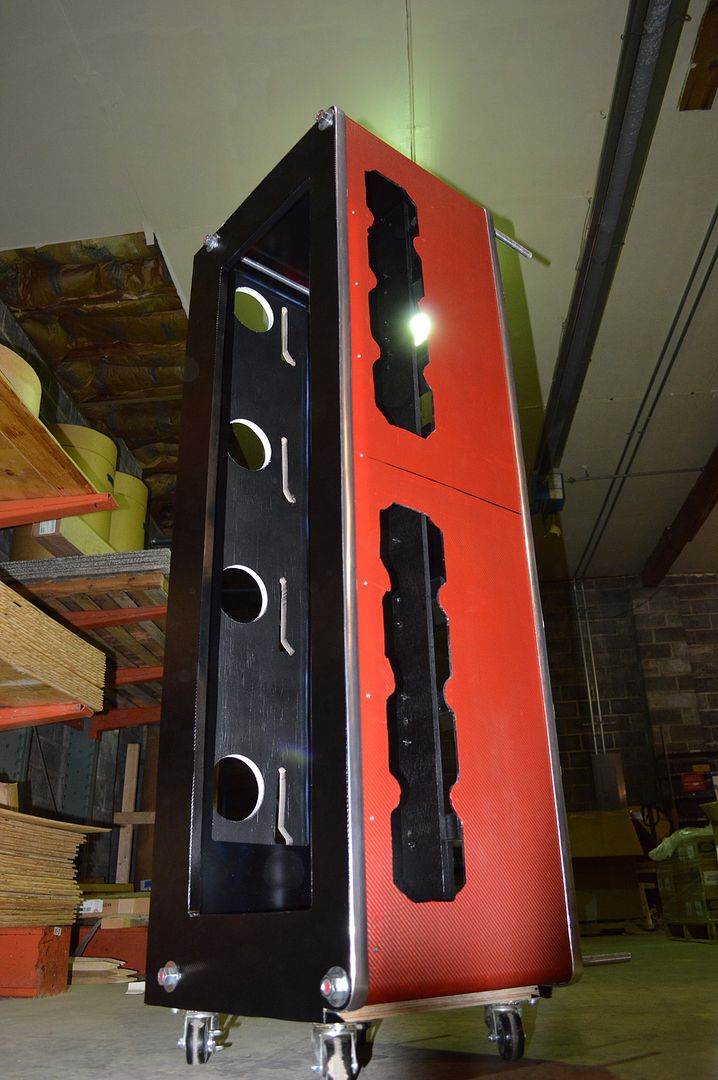
The terrarium got a red carbon fiber patterned vinyl on the exterior. The break in the middle will be covered by the name plate that will be installed later with chrome lettering.
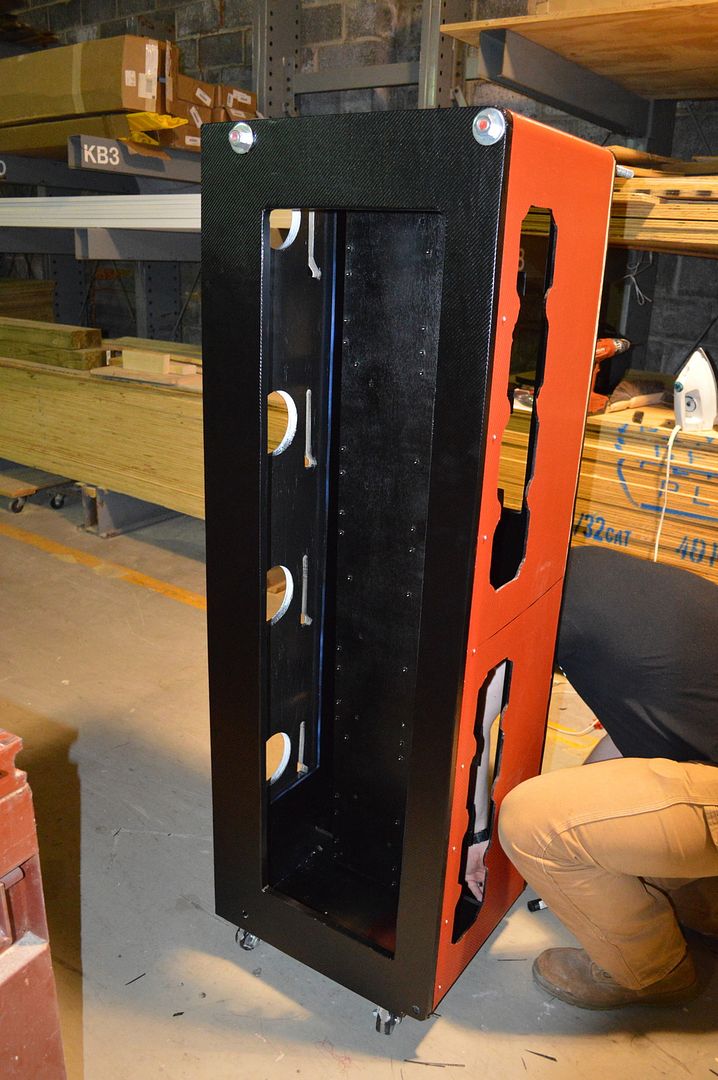
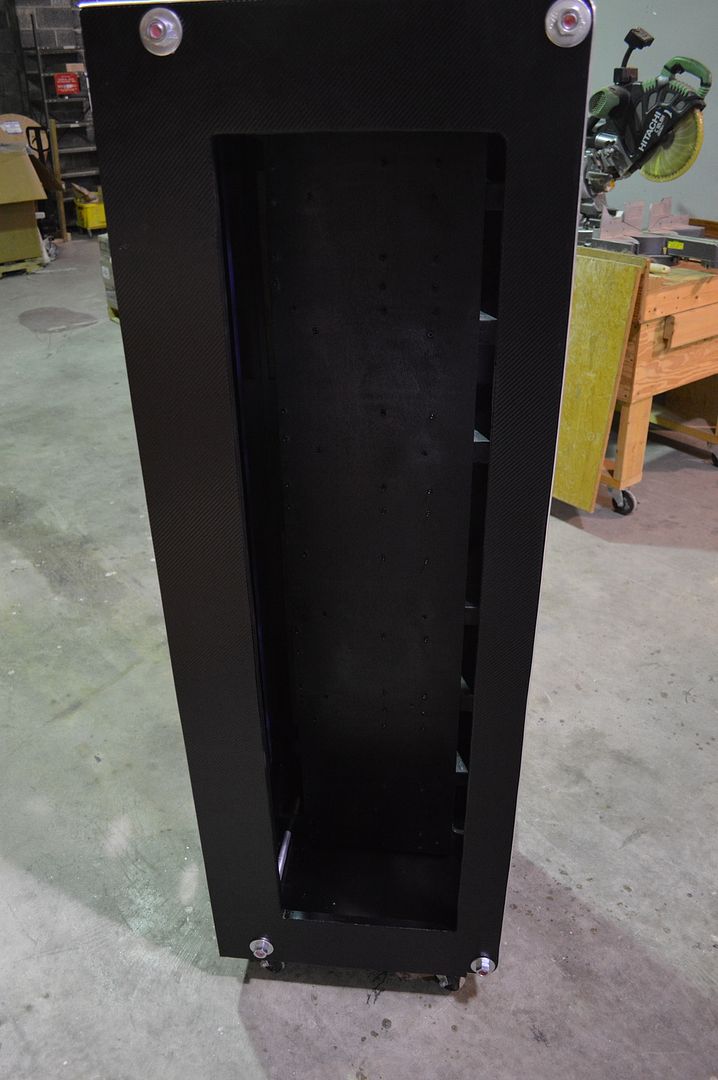
And at last. After about 100 hours into it this far I have added the chrome trim to the edges, and gave the interior a final coat of Rustolium Hammered Black paint.
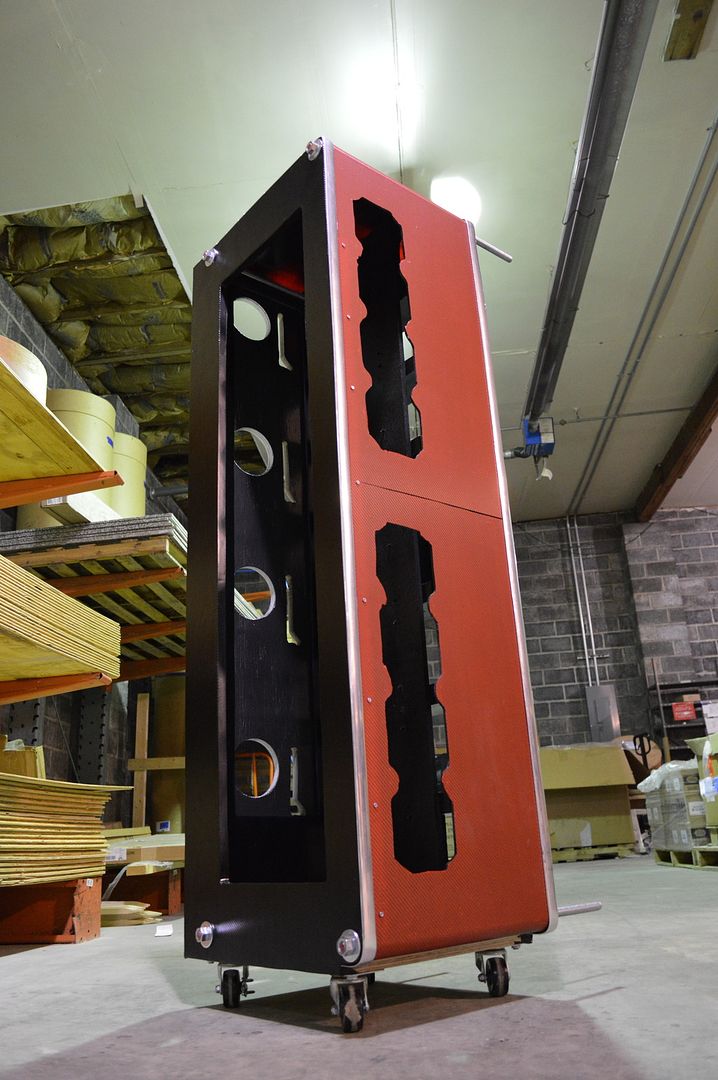
Definitely far from perfect but it certainly had a lot of good lessons in things I have never tried before like the vinyl, and melamine trim. Now that this side of the project is mostly done it's time to get ready for the hardware installations.
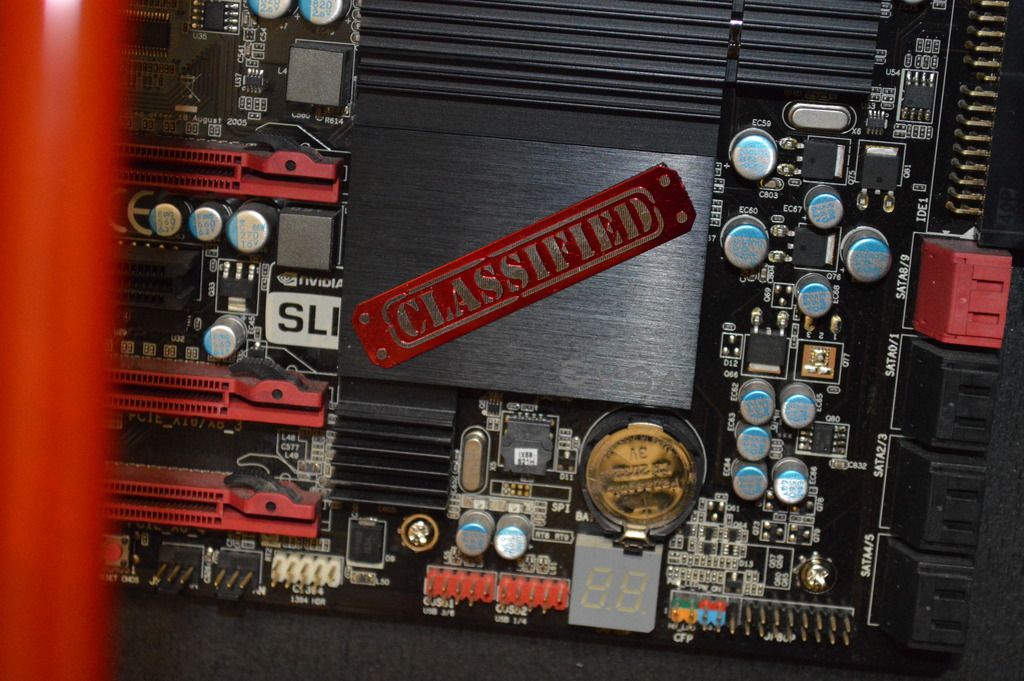
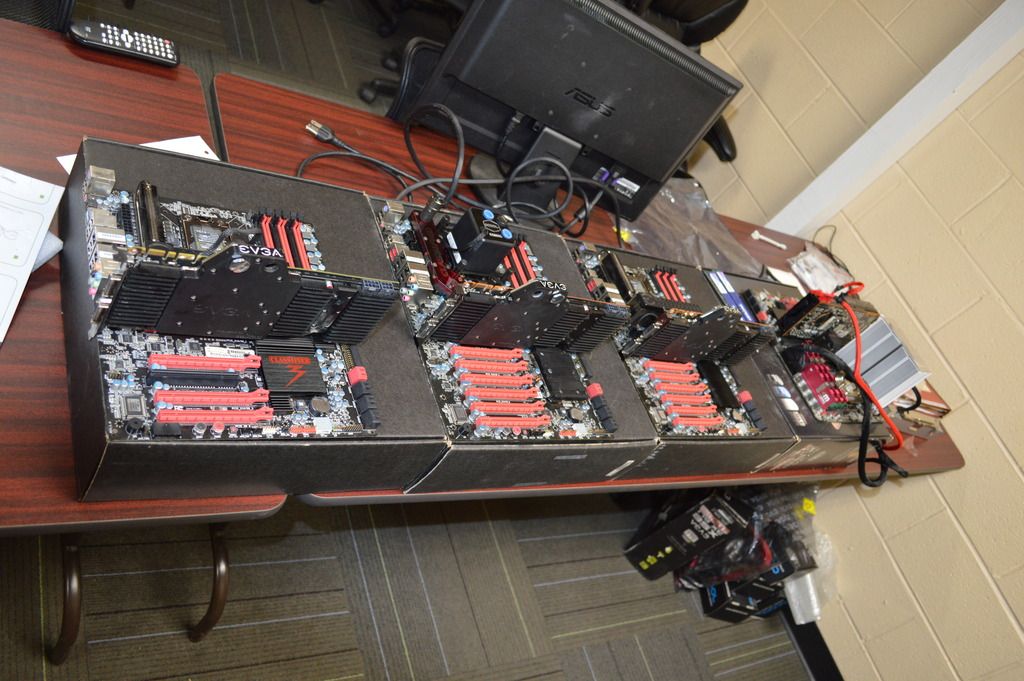
A picture of the X58 Classy boards when I was POST or Toast checking them.
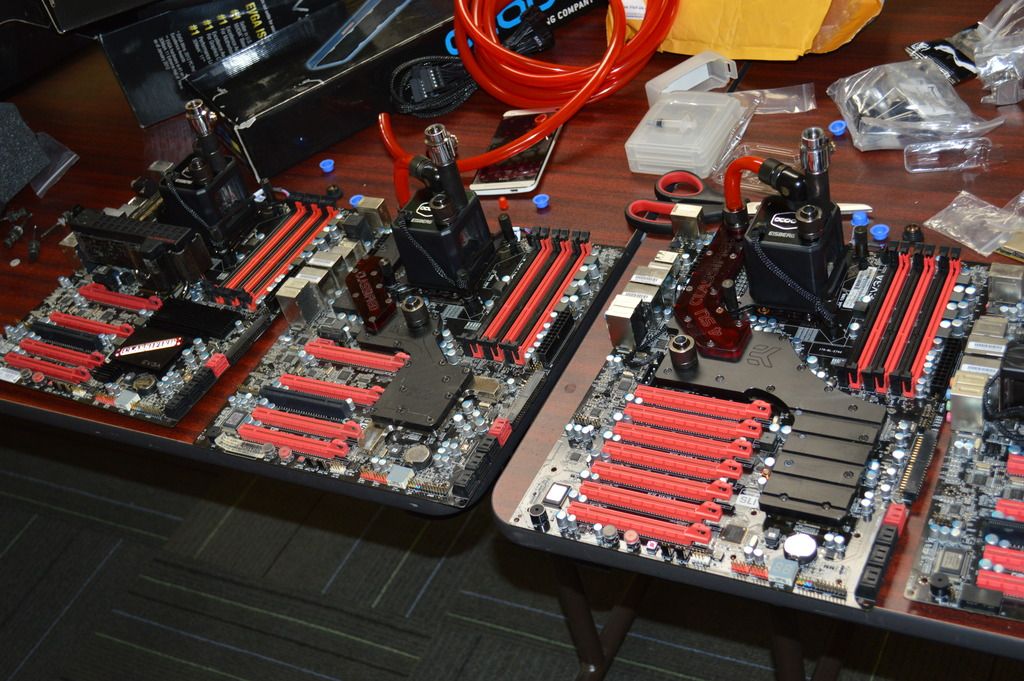
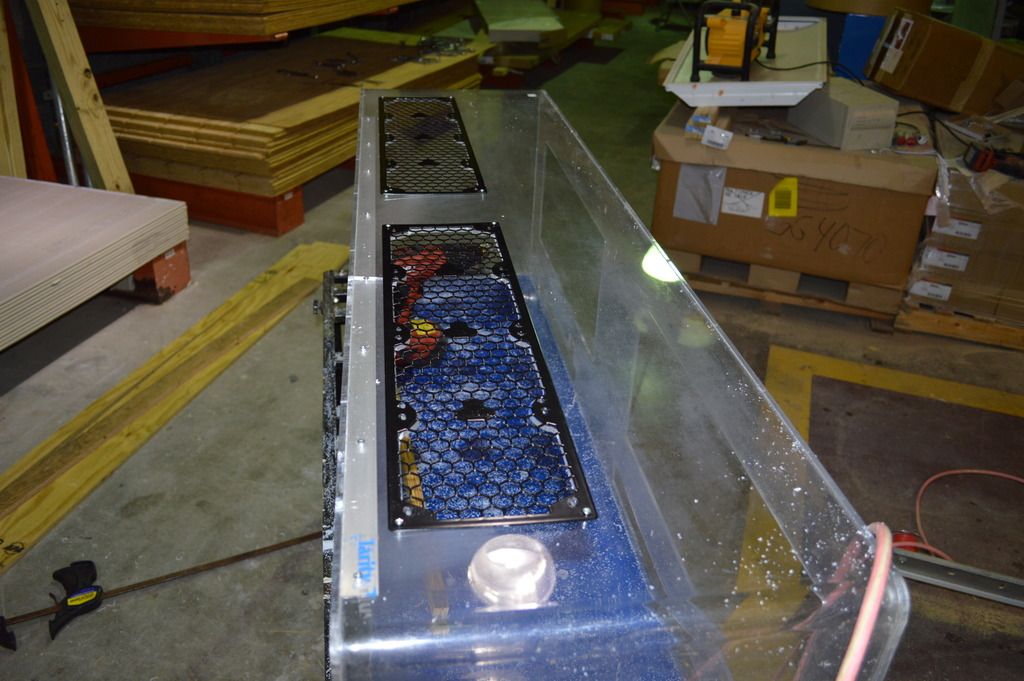
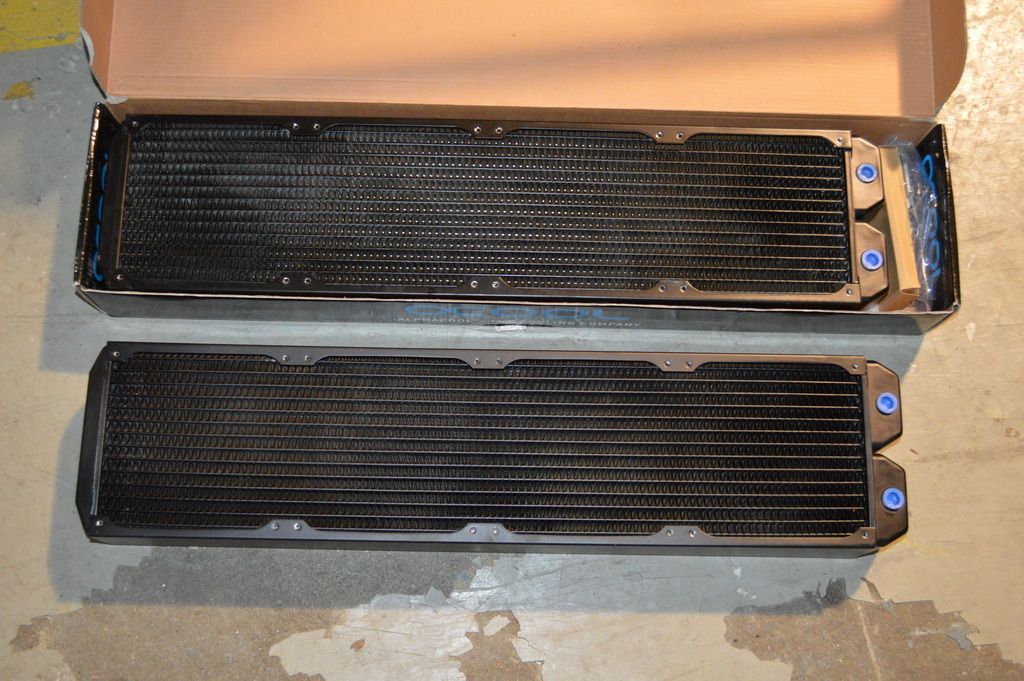
Oh, they will be water cooled as well. Two Alphacool UT60 560mm radiators waiting for install.
More to come!
This project has been a goal of mine since I started my "minion" X58 rigs for folding. I wanted to build a multi-system machine that displayed the potential in gaming and workstation aspects of the X58, along with being a multi-tool platform for teaching and sharing my enthusiasm to others. The purpose behind this build was to create full time game servers for my gaming community of friends, but also have the potential to be used as part time gaming systems for those who do not have a capable system at our LANs as well as a tool to teach the principals behind overclocking to those who were unfamiliar. While these newer UEFI's are nice and convenient with simple click and clock settings there was nothing like getting the true understanding of the basics from starting at a Blue and white BIOS screen and tweaking settings while solving the boot issues through BSOD codes while fine tuning an overclock.
I started off by collecting all four SKU's of the EVGA X58 Classified boards, mainly from fellow forum members at EVGA. The rare E759 featuring the nf200, the standard E760, the notorious E762 featuring 4-way SLI, and the late E770 with the USB/SATA 3.0 update. I also took the time to collect the ECPs so each board had one which will be essential to the build in it's later stage. I also took the time to collect the popular EK full board blocks as each system will be water cooled through a parallel style system. To be honest the blocks were easy to collect, but the hardware for mounting them, not so much. In fact I had to wait a good while before finding an E762 board that actually had the air cooler on it. I am trying to keep both the water blocks and air coolers on hand as each shares an important aesthetic to the boards.
The collecting totaled me at three E760 boards, one E759, one E770, and two E762 boards. I went ahead and built two of the E760 boards into systems for my brothers and kept one, one sadly went up in a blaze of sparks and smoke so it's now a wall hanger.
CPUs are going to be a careful selection as I want to have a diverse set of SKUs for the systems. The i7 920, and either an i7-970(which I have) or the i7-980X would be good ones to display the range in the consumer lineup but then it's choosing from the dozens of Xeons to give a good display of the CPU cross compatibility. I will probably start with a 5639 to show a low end Xeon hex core, and a 5580 or similar for a high end quad core to complement the i7's.
But I guess enough for the write up thus far. Lets move into some images of the build and it's progress. I started in mid March and have been working every few days for a couple hours and still have a long way to go.
A several weeks ago I started out making a trip to a thrift store with the wife and ran across a stripped down plexi terrarium. To me it screamed as the perfect part to base the case off of but still it would require a lot of work. So off came the top on the jeep to accommodate the 15" X 18" X 60" piece of plastic. I started off with taking some measurements to start cad work for the design and quickly realized there was not a single complementary dimension. This was bad news as the case frame will have to be meticulously built to adapt to the terrarium. I moved on from my cad design and started cutting the terrarium up... Because of a lack in selection of blades at my shop and a poor running jig saw I ran into some bad chipping even after taping the plexi off. I later figured out the right speed using a different jig saw that greatly reduced the chipping.
Not a fan of working with plexi using a jig saw but it was what I had at hand.
Started building the case frame. I did not want the plexi to be in any way structural for the 50+lbs of hardware going into it so I am using 3/4" plywood and 5/8" all thread for the frame.
Tracing a close contour of the side as both sides vary slightly to almost a 1/4" on the terrarium.
Sides of the frame cut out. Getting close to what it is supposed to be.
Sanding and hole filling.
Lots of sanding and hole filling.... the plywood was not of the greatest quality.
Now lets look at the motherboard tray. it will be suspended and held in place using the 5/8" allthread.
Used one of the EVGA 4-Way X58 Classified boards to trace out the standoff lay out. This system could accommodate up to four of the XL-ATX boards... lots of holes, 52 to be exact.
PSU brackets installed.
Back to the case. I had a buddy come and help out and I probably should have had two more because wraping something this complex and large with vinyl was extremely difficult. Next time I'll just do it in sections VS ONE BIG piece to save some sanity.
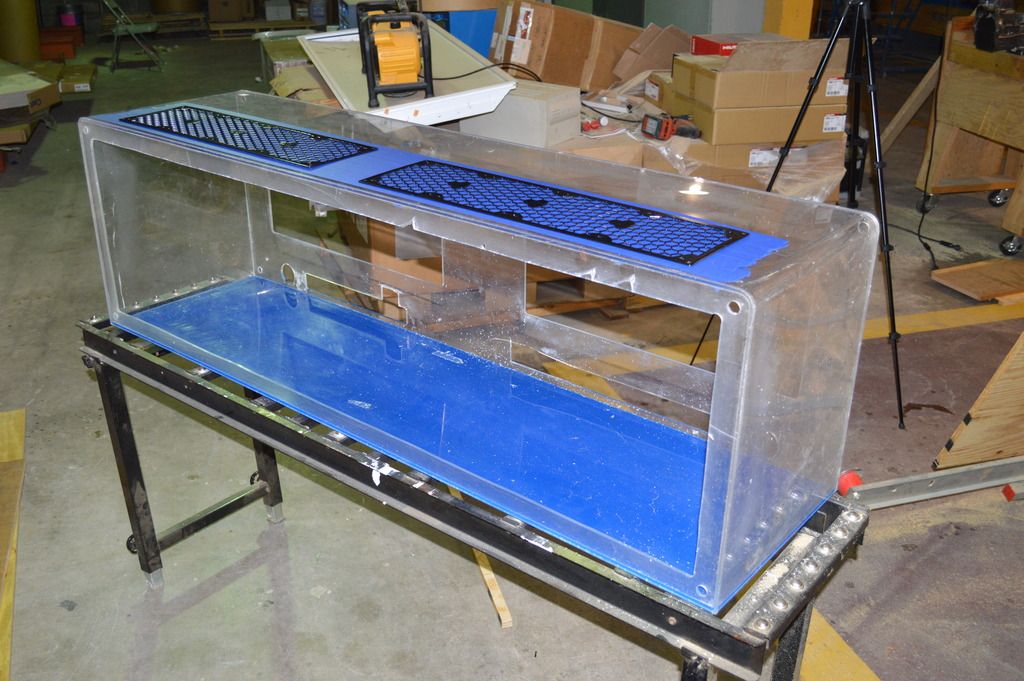
Started hitting the terrarium with its internal coat of flat black primer.
To really get a lot of the finishing done right I needed to use different types of trim. I used automotive chrome trim with a 3M adhesive backing to trim the edge where the frame and terrarium meet. I used black melamine for the interior edges of the frame openings.
Some finishing paint touches on the case frame and mobo tray before installing the terrarium.
Now for the install of all three major components to this case. It wouldn't require a 1" snap-on wrench if it wasn't serious now would it?
The terrarium got a red carbon fiber patterned vinyl on the exterior. The break in the middle will be covered by the name plate that will be installed later with chrome lettering.
And at last. After about 100 hours into it this far I have added the chrome trim to the edges, and gave the interior a final coat of Rustolium Hammered Black paint.
Definitely far from perfect but it certainly had a lot of good lessons in things I have never tried before like the vinyl, and melamine trim. Now that this side of the project is mostly done it's time to get ready for the hardware installations.
A picture of the X58 Classy boards when I was POST or Toast checking them.
Oh, they will be water cooled as well. Two Alphacool UT60 560mm radiators waiting for install.
More to come!
Last edited: