Happy Holidays, Hardforum guru's!
I am a long time lurker, and sometimes poster. I have been into computers, gaming and hardware for years and years. I first cought the bug when I spent all my sumer savings when I was 16, and bought a 166mhz Pentium Packard Bell (remember those?) with- get this, 16megs of ram. No joke. I ordered it from a catalog (tiger direct I think) and when I FINALLY got it delivered, First thing I did was paint it RED.
I wanted a red computer.
My mother grounded me from my beautiful new machine for a whole month.
Since then, I have gone through dozens of desk layouts, from crappy drywall screw repaired furniture from a yardsale, to a glass topped desk that broke when a tree fell through my window, boy what a mess. Needless to say, I have never been more unhappy with desk then when I saw this picture in 2007:
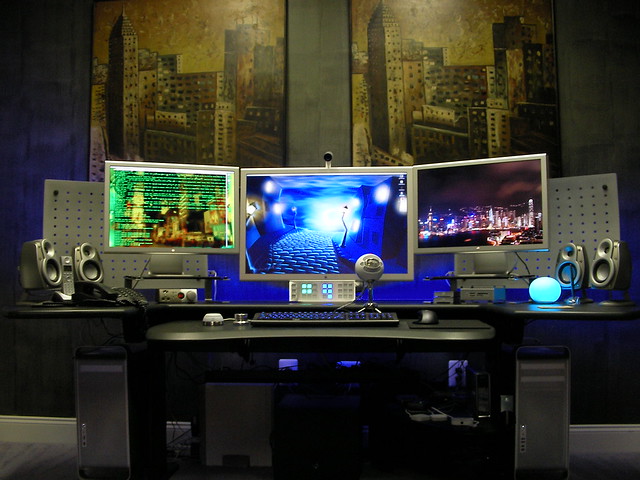
*DROOL*
I thought this desk had it all. Multi ergonomic levels, high production value, very nice curves (which I call a "bean shaped desk") and is just PLAIN sexy. Anyone agree?
A quick google search lager, I found the manufacturer www.biomorph.com and unfortunately for my dreams, the cost. The above desk (as configured) cost over $4000. With that in mind, I had to find another solution.
This desk is what I had back in 2007, and still have to this day:

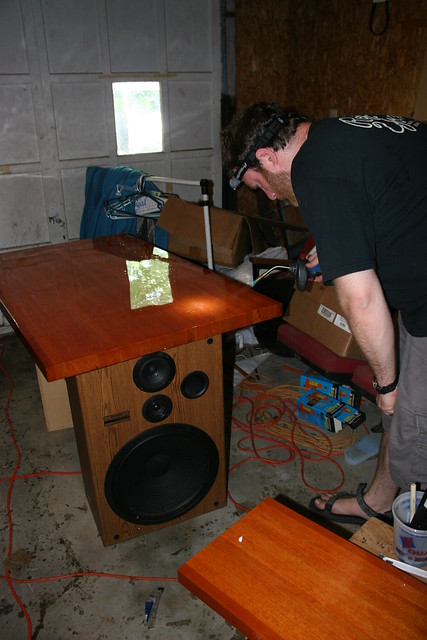
I quickly removed the center 19" monitor, that was a bad idea. And I will also add, that the 19" Dell 1907FP and ONE of the Samsung 24fpw are still going strong, but in different rolls now. A good, solid wood old office desk has done great since then, but I needed change. The large desk drawers were great for stuffing full of crap, but as I got older, I needed less. less is more, right? There isn't a lot of space for your legs (specially with a sub)
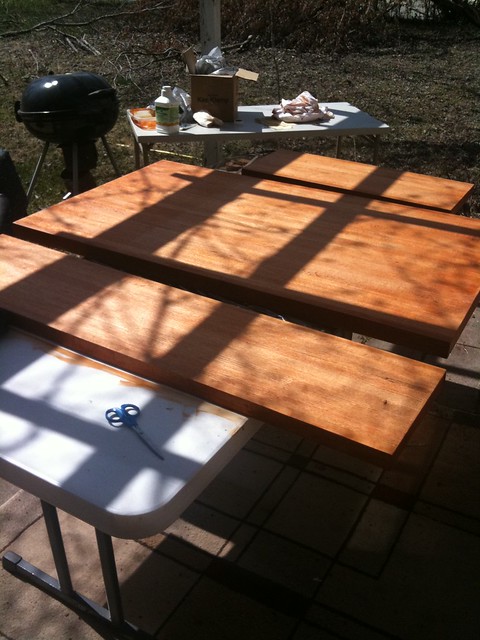
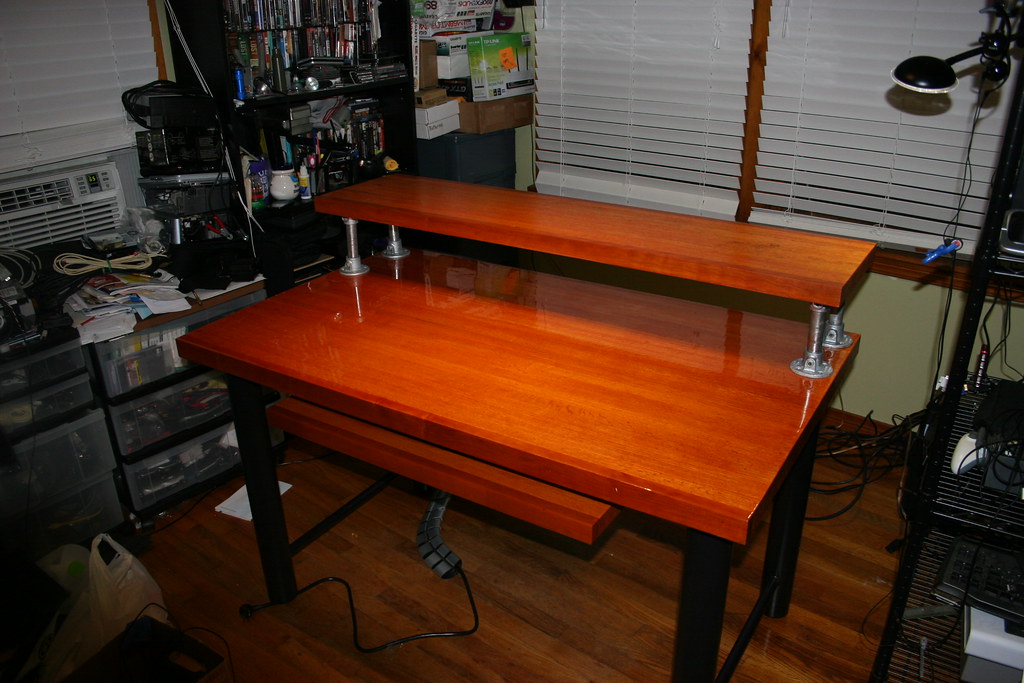
SO fast forward to 2010. keeping a long story shorter, I had a local elderly craftsman (who i might add, was a famous draftsman and designer for the famous E. Fay Jones who was a understudy of Frank. Lloyd Wright who was one of the most famous American Architects. So this Elderly retired draftsman, using local red oak, white oak, maple, and cherry made me this:
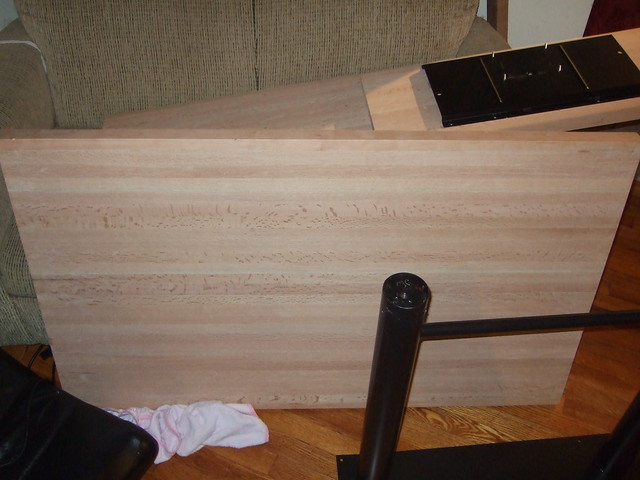
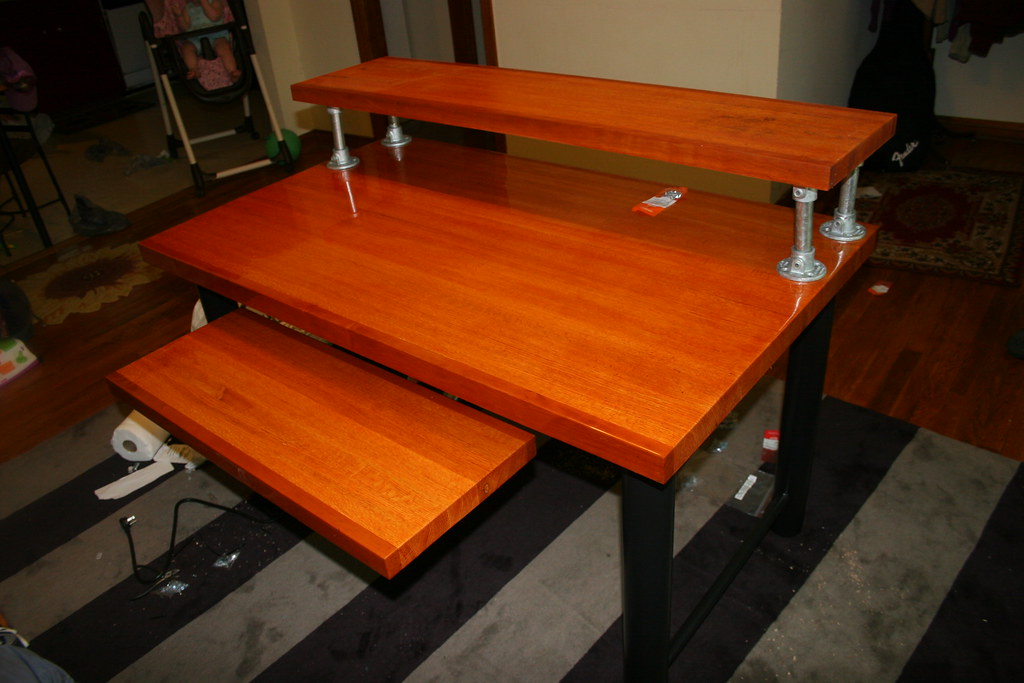
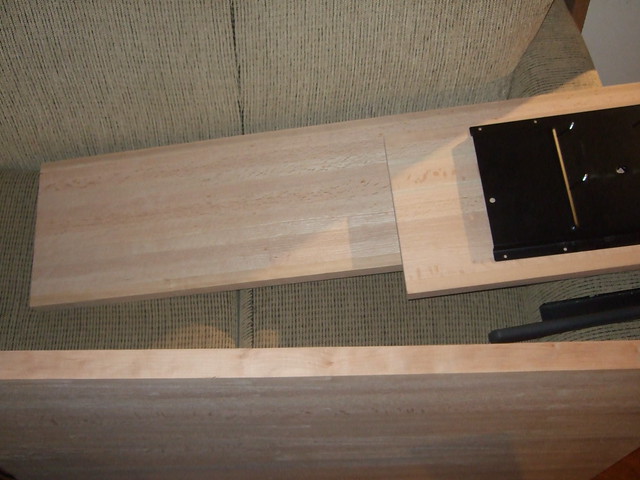
3 pieces total. 2" thick butcher-block desk, monitor riser and keyboard tray. That's one of the legs I am going to alter to fit this desk, I had bought them over a year ago from a yard sale, and they are about 2" too long for the desk.
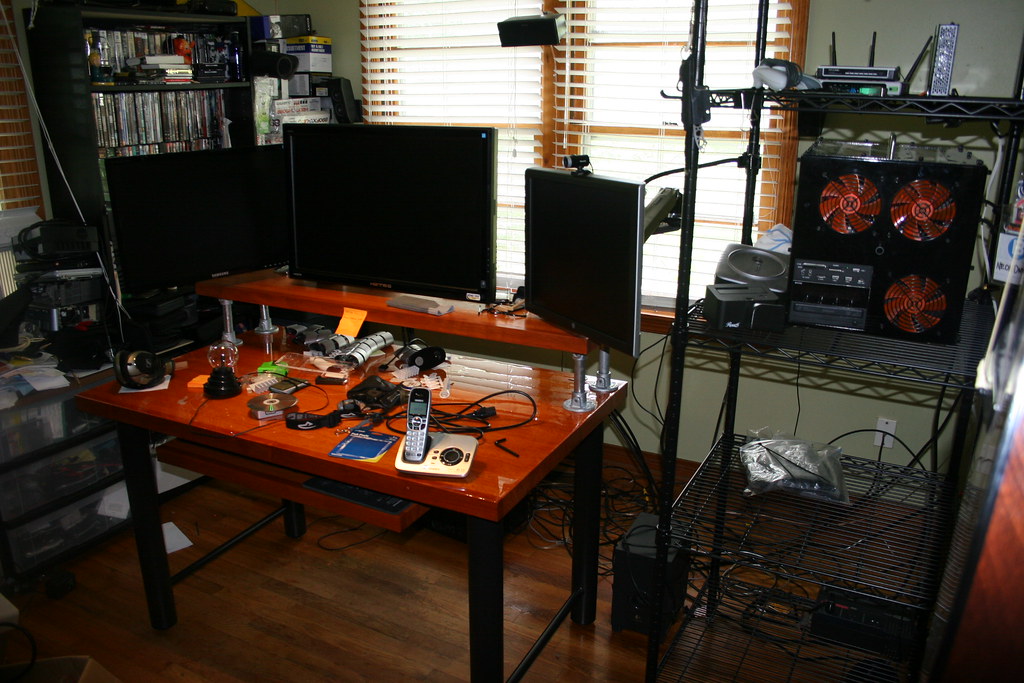
This desk is unstained still. I am still doing the research on finding the perfect stain, and seal. That is the next step in the process.
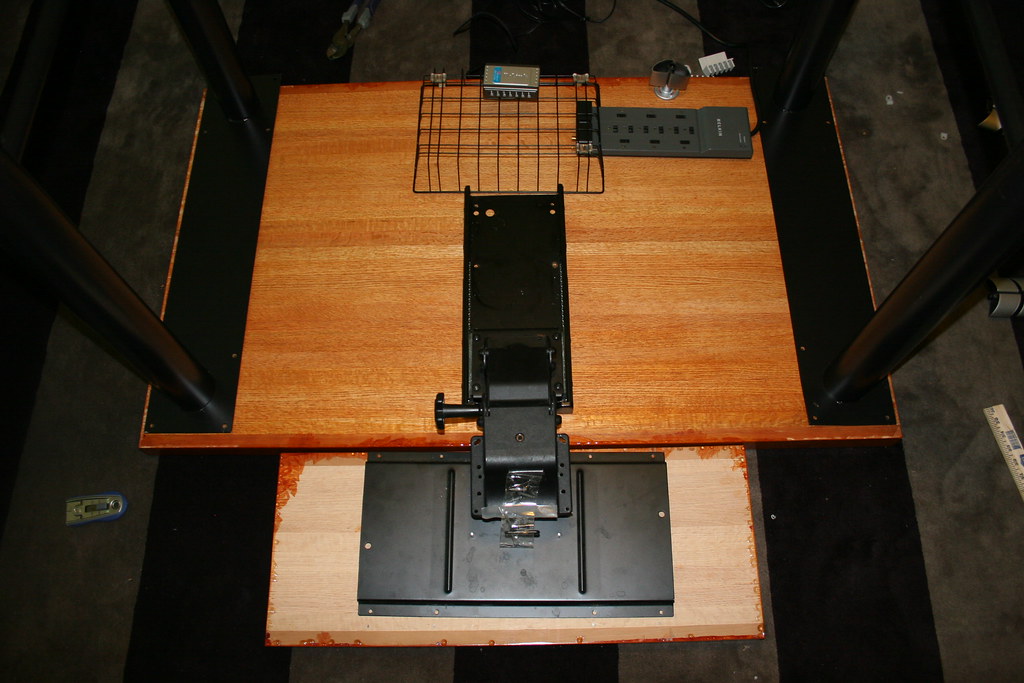
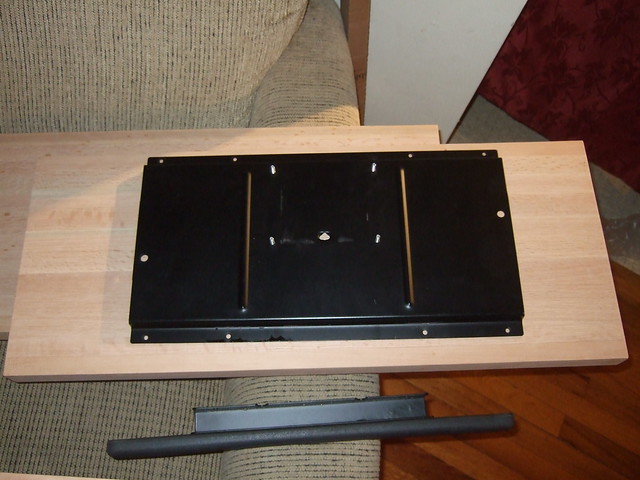
Here is the keyboard tray, with my dissembled (unknown manufacturer) keyboard tray sitting on it. You can see the wrist rest which I will not be using (probably):
And here is where we come current with this project. I am not sure as to how I am going to mount the monitor riser. I was thinking of using some Kee Klamps which are super awesome! I am sure some of you have seen this now famous kee Klamp desk: http://www.simplifiedbuilding.com/projects/custom-ergonomic-computer-desk/ which was designed and buit by the site owner.
I am considering getting 8 of the Flange fittings and some schedule 40 black pipe (from Lowes) to build the riser. This is still just an idea, as to get the parts I need is going to be close to $100. That's a little much. I wish I knew of some sort of bracket or mount I could use. I have seen several using PVC, blocks of wood, etc. I would like something painted black as I have black table legs, and a black keyboard mount.
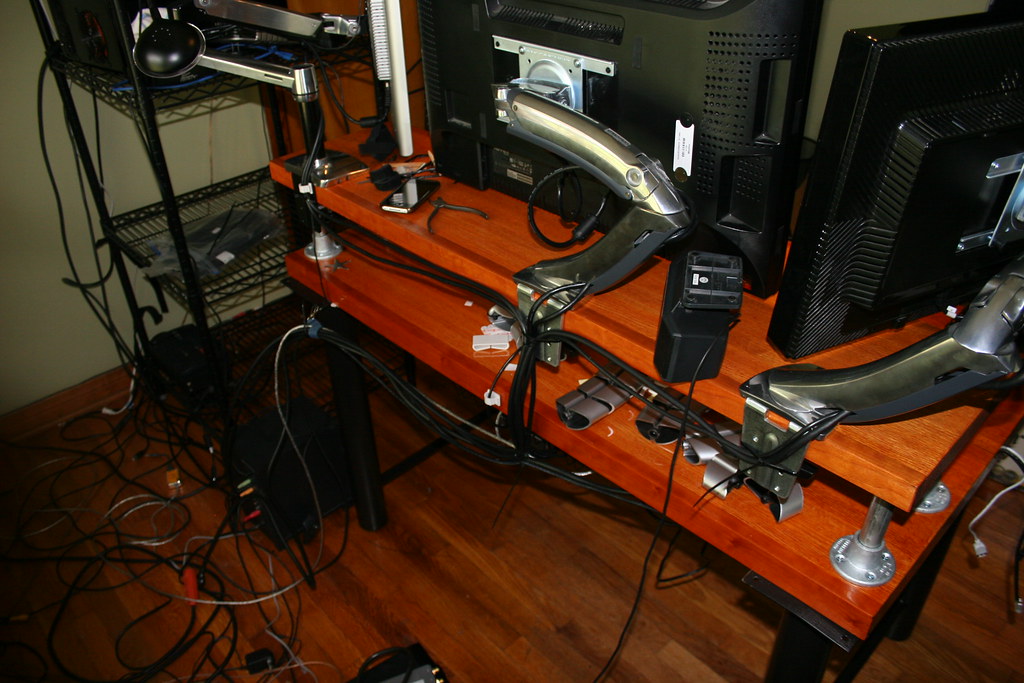
Also, I was thinking of getting 2 of the Ergotron MX monitor arms so that I can have some mobility with my 2 monitors (which i will clamp to the rear of the riser). I have considered doing 3 monitor gaming, but may hold off till this expensive project is over.
Now I need to focus on stain and sealant. I have a 1/3 mixture of Turpentine, Linseed oil and some stain. Then I need a polyurethane seal for the top. I would like a thick glossy coating on it.
Ideas? Thoughts? Concerns?
I am a long time lurker, and sometimes poster. I have been into computers, gaming and hardware for years and years. I first cought the bug when I spent all my sumer savings when I was 16, and bought a 166mhz Pentium Packard Bell (remember those?) with- get this, 16megs of ram. No joke. I ordered it from a catalog (tiger direct I think) and when I FINALLY got it delivered, First thing I did was paint it RED.
I wanted a red computer.
My mother grounded me from my beautiful new machine for a whole month.
Since then, I have gone through dozens of desk layouts, from crappy drywall screw repaired furniture from a yardsale, to a glass topped desk that broke when a tree fell through my window, boy what a mess. Needless to say, I have never been more unhappy with desk then when I saw this picture in 2007:
*DROOL*
I thought this desk had it all. Multi ergonomic levels, high production value, very nice curves (which I call a "bean shaped desk") and is just PLAIN sexy. Anyone agree?
A quick google search lager, I found the manufacturer www.biomorph.com and unfortunately for my dreams, the cost. The above desk (as configured) cost over $4000. With that in mind, I had to find another solution.
This desk is what I had back in 2007, and still have to this day:
I quickly removed the center 19" monitor, that was a bad idea. And I will also add, that the 19" Dell 1907FP and ONE of the Samsung 24fpw are still going strong, but in different rolls now. A good, solid wood old office desk has done great since then, but I needed change. The large desk drawers were great for stuffing full of crap, but as I got older, I needed less. less is more, right? There isn't a lot of space for your legs (specially with a sub)
SO fast forward to 2010. keeping a long story shorter, I had a local elderly craftsman (who i might add, was a famous draftsman and designer for the famous E. Fay Jones who was a understudy of Frank. Lloyd Wright who was one of the most famous American Architects. So this Elderly retired draftsman, using local red oak, white oak, maple, and cherry made me this:
3 pieces total. 2" thick butcher-block desk, monitor riser and keyboard tray. That's one of the legs I am going to alter to fit this desk, I had bought them over a year ago from a yard sale, and they are about 2" too long for the desk.
This desk is unstained still. I am still doing the research on finding the perfect stain, and seal. That is the next step in the process.
Here is the keyboard tray, with my dissembled (unknown manufacturer) keyboard tray sitting on it. You can see the wrist rest which I will not be using (probably):
And here is where we come current with this project. I am not sure as to how I am going to mount the monitor riser. I was thinking of using some Kee Klamps which are super awesome! I am sure some of you have seen this now famous kee Klamp desk: http://www.simplifiedbuilding.com/projects/custom-ergonomic-computer-desk/ which was designed and buit by the site owner.
I am considering getting 8 of the Flange fittings and some schedule 40 black pipe (from Lowes) to build the riser. This is still just an idea, as to get the parts I need is going to be close to $100. That's a little much. I wish I knew of some sort of bracket or mount I could use. I have seen several using PVC, blocks of wood, etc. I would like something painted black as I have black table legs, and a black keyboard mount.
Also, I was thinking of getting 2 of the Ergotron MX monitor arms so that I can have some mobility with my 2 monitors (which i will clamp to the rear of the riser). I have considered doing 3 monitor gaming, but may hold off till this expensive project is over.
Now I need to focus on stain and sealant. I have a 1/3 mixture of Turpentine, Linseed oil and some stain. Then I need a polyurethane seal for the top. I would like a thick glossy coating on it.
Ideas? Thoughts? Concerns?
Last edited:


 " Who would make pipe bombs out of 3/4" pipe? wouldn't you want to use a bigger diameter pipe? What a weird guy. I guess he gets lots of offers to cut pipe bombs?