Navigation
Install the app
How to install the app on iOS
Follow along with the video below to see how to install our site as a web app on your home screen.
Note: This feature may not be available in some browsers.
More options
You are using an out of date browser. It may not display this or other websites correctly.
You should upgrade or use an alternative browser.
You should upgrade or use an alternative browser.
LiLi Reborn - Steath
- Thread starter Arcygenical
- Start date
mikeohara
Limp Gawd
- Joined
- Dec 24, 2002
- Messages
- 368
very nice work Arcy, can't wait to see the finished product!
dragonslayer45895
[H]ard|Gawd
- Joined
- Feb 13, 2007
- Messages
- 1,713
looking really good!
Definetly Subbed!
Definetly Subbed!
Ballashoes
n00b
- Joined
- Apr 30, 2007
- Messages
- 13
Sleeve each of the 24 lines on the power cord, .
.UnknownSouljer
[H]F Junkie
- Joined
- Sep 24, 2001
- Messages
- 9,041
Sleeve each of the 24 lines on the power cord,
That would take soooo much time for so little return.
Anyway, good looking rig so far.
Ballashoes
n00b
- Joined
- Apr 30, 2007
- Messages
- 13
That would take soooo much time for so little return.
Anyway, good looking rig so far.
I think it adds a nice effect but yeah its alot of work.
http://murderbox.com/images/gallery/mb003_0296.jpg
I think it adds a nice effect but yeah its alot of work.
http://murderbox.com/images/gallery/mb003_0296.jpg
single sleeved wires
.....looking goodArcygenical
Fully [H]
- Joined
- Jun 10, 2005
- Messages
- 25,066
Sleeve each of the 24 lines on the power cord,
Did that one time. Then the PSU died, and I couldn't RMA it because of the modification.
I'll never do a perminant modification to a PSU, ever again.
It also adds too many points of failure IMO, a pin could slip out, the catch might break, etc.
Thanks for the kind words everyone, I can't wait for next week when my last package comes in
morpheus6d9
[H]ard|Gawd
- Joined
- Mar 11, 2005
- Messages
- 1,230
nice work i need to paint the inside of case black too
I think it adds a nice effect but yeah its alot of work.
http://murderbox.com/images/gallery/mb003_0296.jpg
Even they didn't sleeve each wire individually! I think murderbox made one of the best aesthetic decisions by grouping the wires like they did. Doing each one separate would have started to look cluttered. Grouping them into small bundles keeps it cleaner.
edit: oh, and nice looking build, Arcy!
Living Weapon
Limp Gawd
- Joined
- Dec 21, 2007
- Messages
- 448
Impressive attention to detail! Looks smooth
What temperature do you bake the paint?
What temperature do you bake the paint?
Arcygenical
Fully [H]
- Joined
- Jun 10, 2005
- Messages
- 25,066
Even they didn't sleeve each wire individually! I think murderbox made one of the best aesthetic decisions by grouping the wires like they did. Doing each one separate would have started to look cluttered. Grouping them into small bundles keeps it cleaner.
Agreed 100%. I HATE cables though... in every way, shape, or form, so I would have rather had no cables, than the murderbox cables, but I digress
What temperature do you bake the paint?
The wet pieces were placed in a 200f oven, and the temperature was then dropped to 180 for 1 hour, and then boosted to 220 for 25m.
The piece was then taken out, and placed in a cold, DRY, dark room overnight.
Gah, I can't wait for Monday... Who knows that the mail man will bring.
Agreed 100%. I HATE cables though... in every way, shape, or form, so I would have rather had no cables, than the murderbox cables, but I digress
I've never liked the look of any kind of sleevingeither: UV, "carbon fiber look", whatever. I think they all look pretty blah. I'm contemplating sleeving mine in a metal pipe or possibly flexible metal tubing (like the water lines running from the wall to a sink faucet, but hopefully closer to 3/4" or 1" ID) for a massive industrial look. I probably shouldn't ruin the surprise for my own worklog, but I'm really excited about what's going to happen when I start cutting my PSU wires.
Arcygenical
Fully [H]
- Joined
- Jun 10, 2005
- Messages
- 25,066
I've never liked the look of any kind of sleevingeither: UV, "carbon fiber look", whatever. I think they all look pretty blah. I'm contemplating sleeving mine in a metal pipe or possibly flexible metal tubing (like the water lines running from the wall to a sink faucet, but hopefully closer to 3/4" or 1" ID) for a massive industrial look. I probably shouldn't ruin the surprise for my own worklog, but I'm really excited about what's going to happen when I start cutting my PSU wires.
I've got a project planned this summer, where I plan on making a case solely out of a mess of copper pipes and red acrylic... I'll paint them smoke grey, and hopefully the look will mimic the MAGI execution core that first got me into computers, back when I liked Anime (I was about 12 at the time I guess... I've come a long way from there). Should be fun.
I agree though, most sleeving doesn't look good to me... Unless it's black, or just plain hidden.
silent-circuit
[H]F Junkie
- Joined
- Sep 18, 2005
- Messages
- 16,136
Seems we're headed very similar places... though I may end up with 2 MCR-320s and a BIP II or MCR-220 internal, eventually. Looking very solid I'll be watching.
Arcygenical
Fully [H]
- Joined
- Jun 10, 2005
- Messages
- 25,066
Seems we're headed very similar places... though I may end up with 2 MCR-320s and a BIP II or MCR-220 internal, eventually. Looking very solid I'll be watching.
I'll be using a single BIP radiator, along with the all copper loop for cooling
.I'll also be tapping my mobo standoffs right into the plumbed line, and soldering them in place to ensure a watertight seal. I've been planning this for two years, but it's going to cost me well over 100$ for all the materials, ergo, It's on the backburner until I can scrape some cash up.
silent-circuit
[H]F Junkie
- Joined
- Sep 18, 2005
- Messages
- 16,136
I'll be using a single BIP radiator, along with the all copper loop for cooling
I'll also be tapping my mobo standoffs right into the plumbed line, and soldering them in place to ensure a watertight seal. I've been planning this for two years, but it's going to cost me well over 100$ for all the materials, ergo, It's on the backburner until I can scrape some cash up.
...seems I should've started at the beginning and paid a bit more attention to boot. Very interesting idea.
Reading back through, no mention I could see, but still a very interesting idea. Looking forward to it.
Arcygenical
Fully [H]
- Joined
- Jun 10, 2005
- Messages
- 25,066
...seems I should've started at the beginning and paid a bit more attention to boot. Very interesting idea.
Reading back through, no mention I could see, but still a very interesting idea. Looking forward to it.
Yep, it's been an "In-Head only" idea
. I've got tonnes of blueprints around that I've drawn up, but I haven't vocalized my plans yet.It should be lots of fun
Arcygenical
Fully [H]
- Joined
- Jun 10, 2005
- Messages
- 25,066
Update!
Wow! I'm damn close to having this system up and running for good again. I got the majority of the work done, that was stopping me from really using her. I had the dying urge to play Oblivion, so I used some crappy vinyl tubing, filled the loop, and checked to make sure the system had survived thus far...
Well, the results were outstanding. I don't have any before/after temperature pictures, so you'll have to trust me. But...
Before:
Core Temps (Load): 63,64,63,66
GPU Temp (Load) 66
(Temperature taken with fans at 12v, after 4 hours of RTHDRIBL + dual orthos.
After:
Core Temps (Load): 53,54,55,51
GPU Temp (Load) 51
(Temperature taken with fans at 5v, after 4 hours of oblivion + dual orthos.
That's right. I reduced my fans to 5v, and I still got a damn good improvement in temperatures. So, what'd I change? Other than cleaning her out, I increased the flowrate of the pump a tiny bit, and swapped out all my 1/2" elbows for 3/4" elbows. I used a new mounting system on the CPU block, with some MX-2 thermal paste. I also changed the orientation of my front radiator, so it expels air out the front, rather than into the case.
Huge improvement!
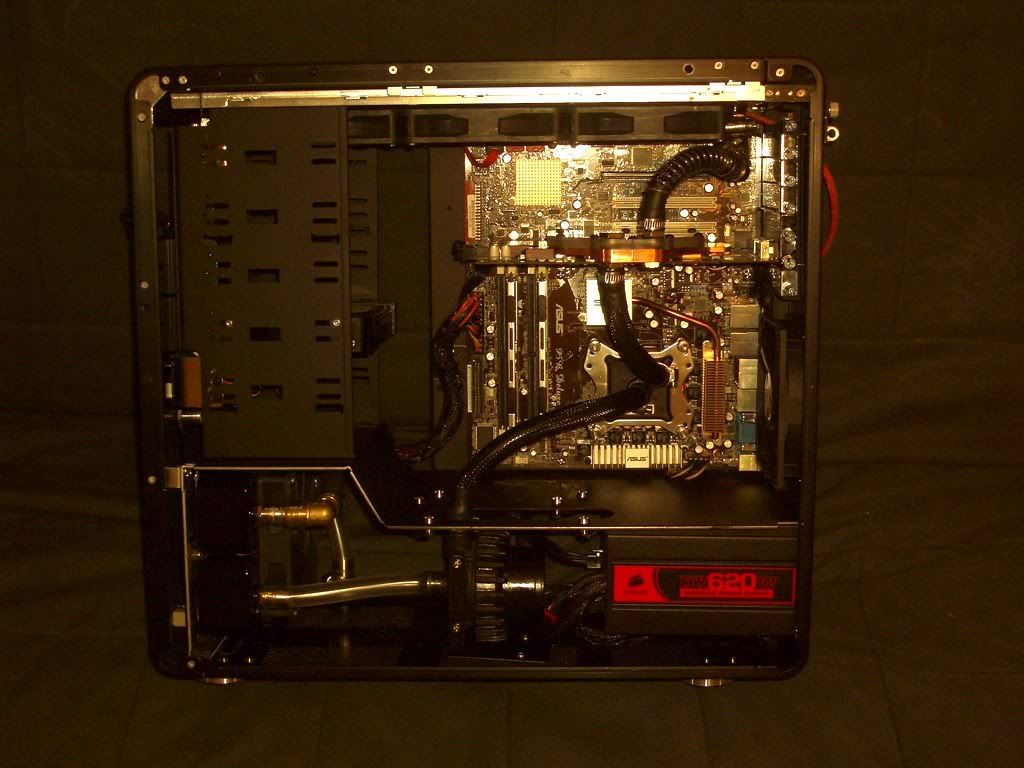
Now, I must appologize for my recent lack of fervor. I normally update daily, but truth be told, I was working on a case for a client. I was commissioned to use a black/purple theme, with purple inside. I chose a metallic flake inside, and it looks really good (Well, for purple!). The paint holds up to the scratch test incredibly well. I tried marring it in an invisible area with a drill, and it barely scraped off. Very pleased. Here's a picture of the system so far:
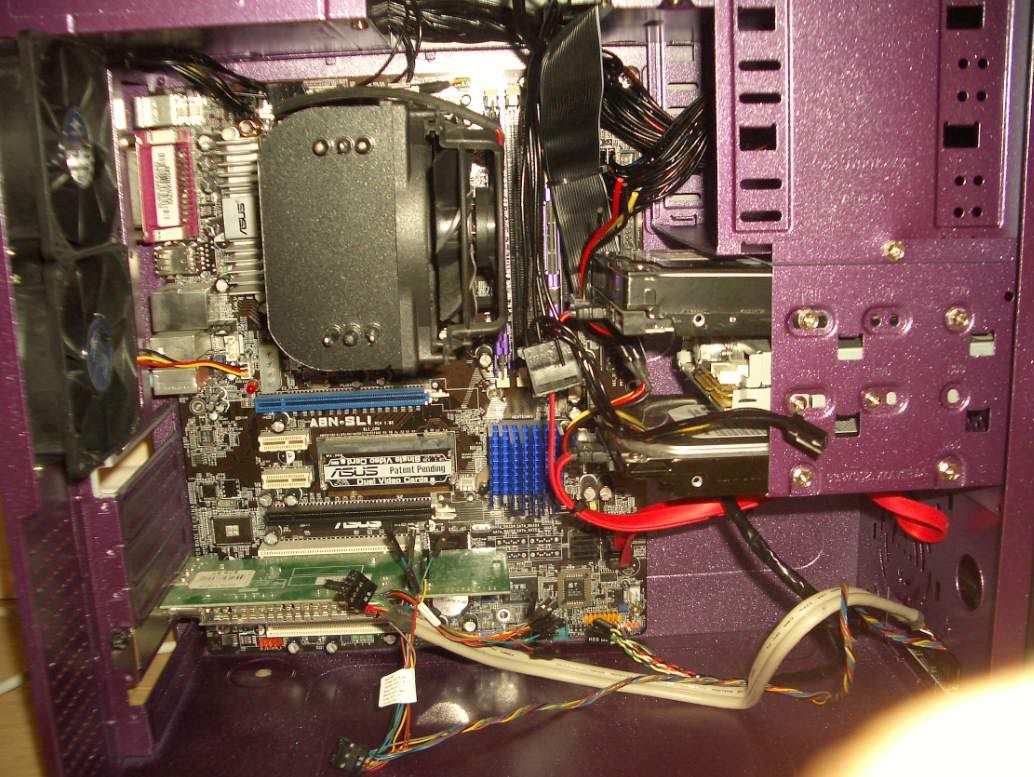
(Sorry for the crappy pic... I got a lot of work to do on wiring, and this was taken with the cellphone camera)
So, let's get onto the new update shall we? First up, I've got my 2nd last order in. All I'm waiting for is some LED strips from eBay now!
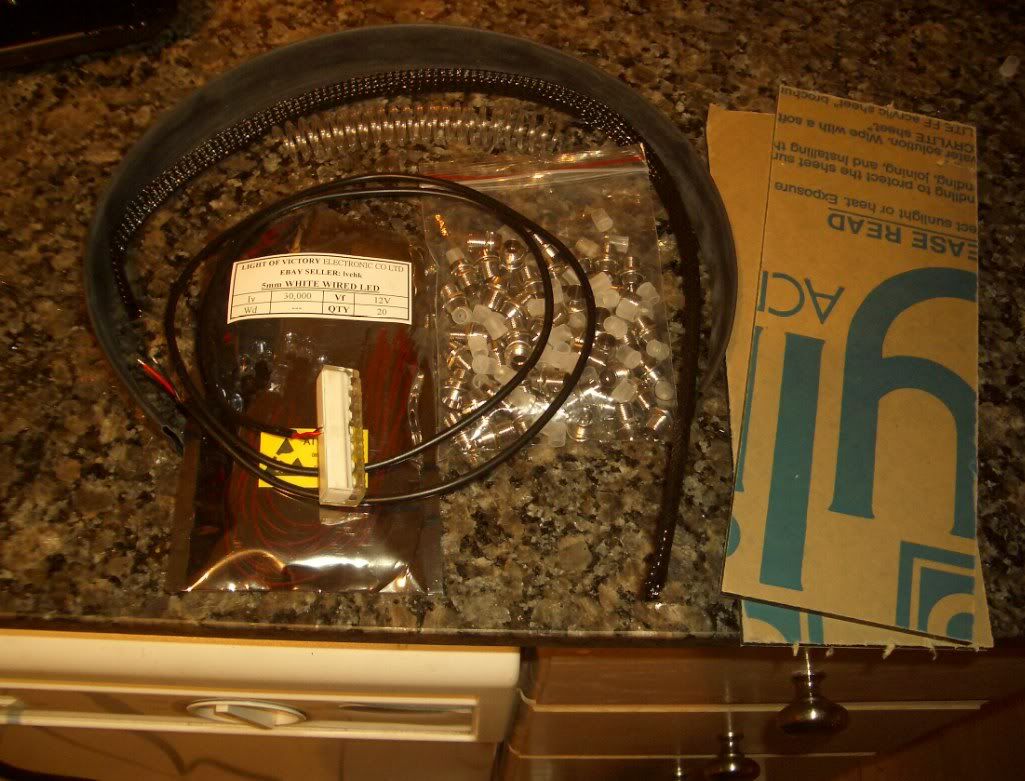
So... This is what I bought:
- Some white tailed LED's with prewired resistors (can't beat the value there... 2 packs of 20, all pretailed, for 7$ shipped. Amazing price when you consider how much work it saved me).
- Some chrome LED holders.
- An LED Array.
- Some Smartcoils (clear).
- Some 3/4" Black heatshrink (not for the PSU).
- Some 1/2" black Sleeving.
- Two 84mm x 220mm panels of smoke acrylic. Both scraps, cost me 11$ shipped. I'll be using these to make the new face for the MDVA, and a motherboard stealth/RAM cooler, later.
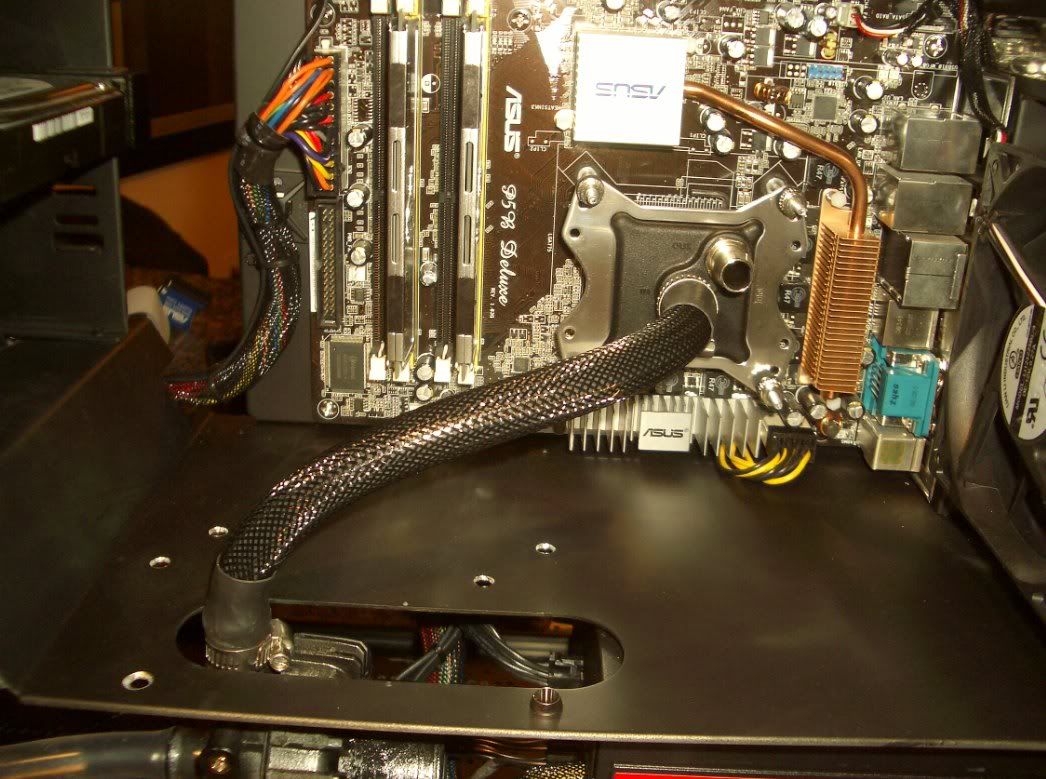
So, the first thing I tackled were my tubes. I was sick and tired of them getting all white and crappy after 3-4 months of use, even with plain distilled water. For example:
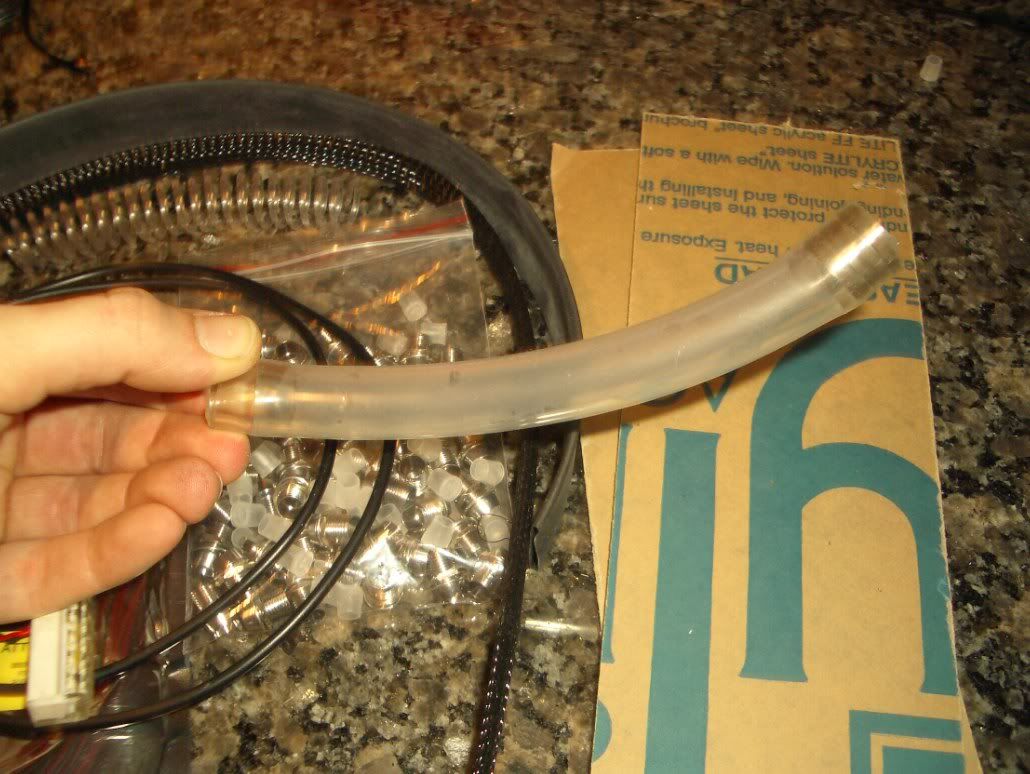
So... I soaked them in alcohol, shined them up... And...
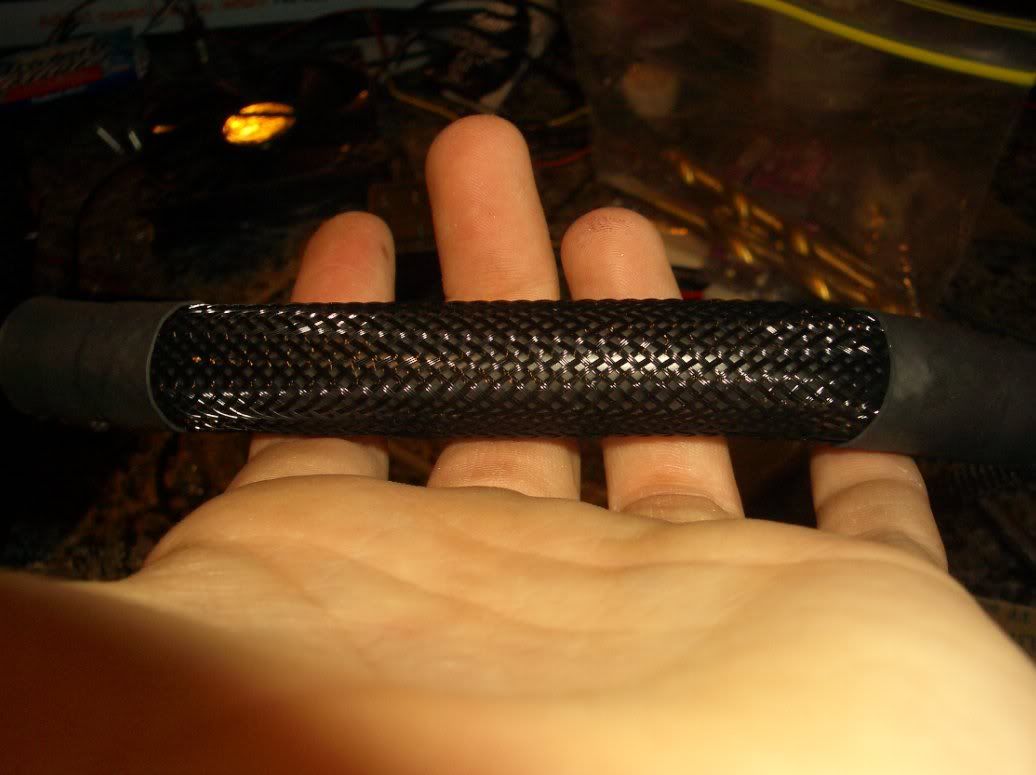
Yep, I sleeved them! Not the most impressive picture right there, but after installing it...
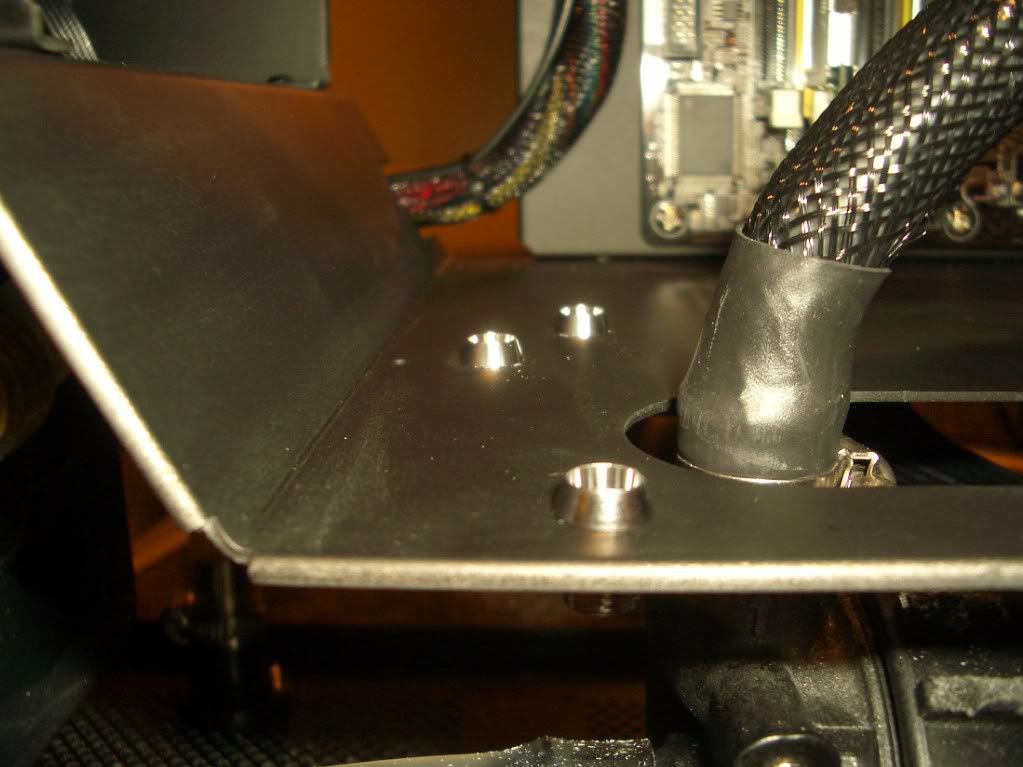
And another angle:

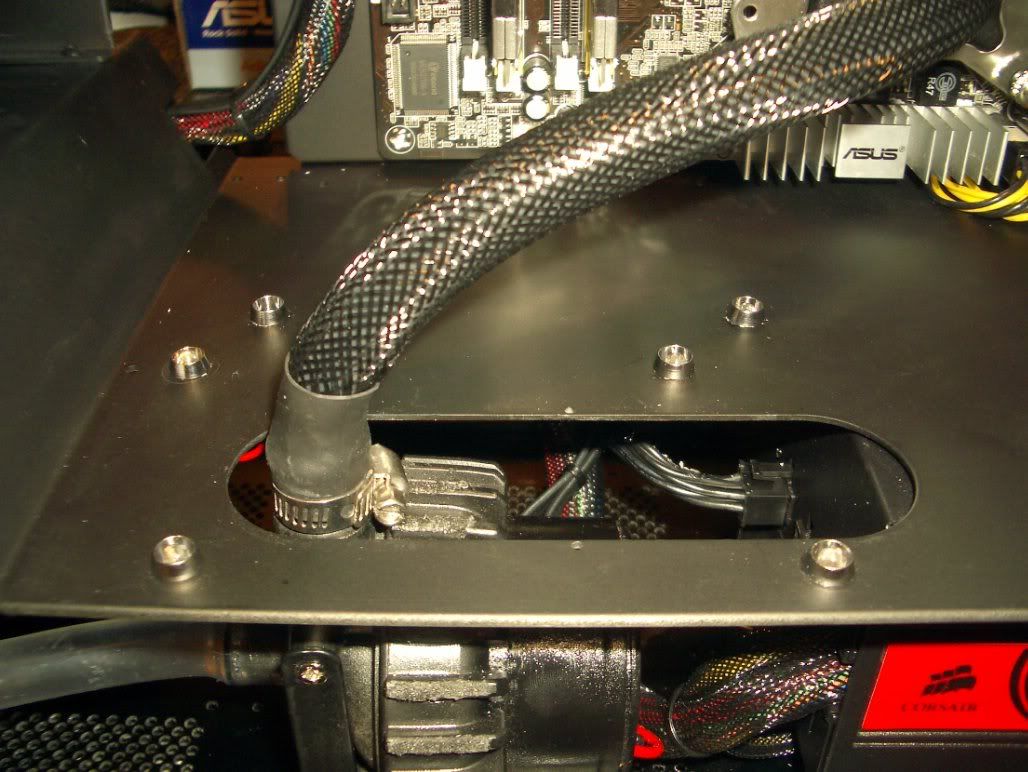
You'll also notice in that last picture, that one of the holes has been filled... With the LED Bezeled holder! Here's another shot, but this time they're all installed.

Side shot, with the LED's in place.
Here's the wiring... Now, this picture breaks my heart. I had to use freaking hot glue to hold the LED's in place, since the cheap chinese LED holders gave me plastic plugs, that were too large. They didn't fit inside the freaking LED holder, I tried EVERYTHING short of hammering them in there
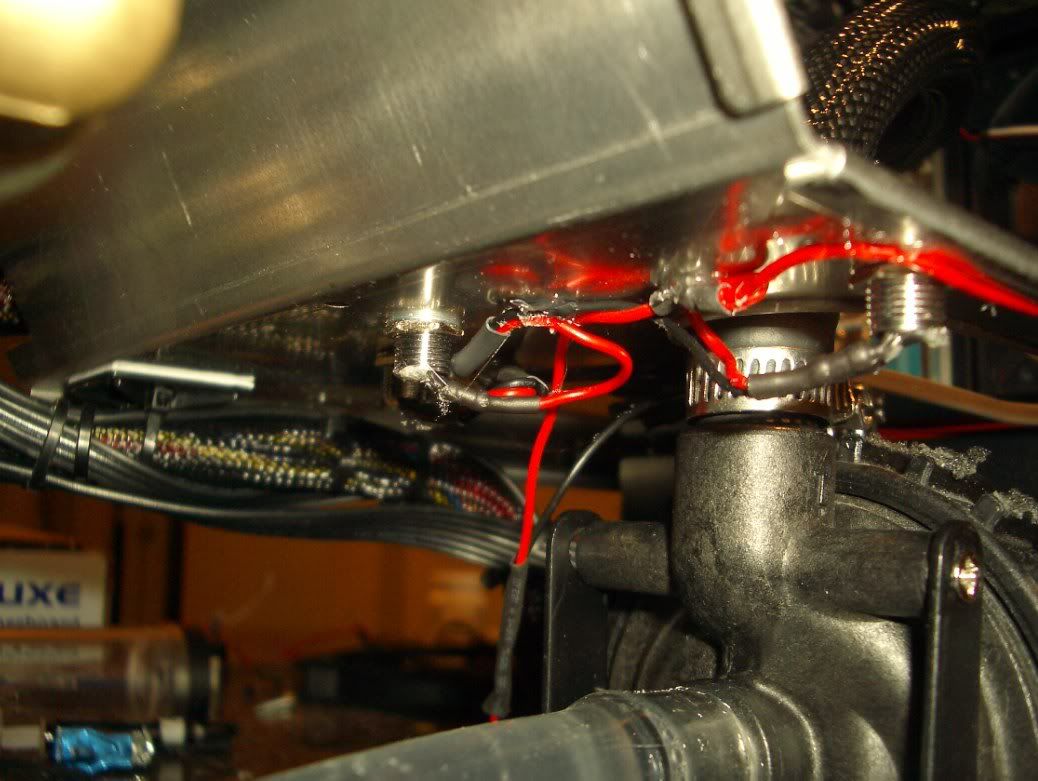
Oh well, hot glue, and messy wires, both out of sight, so sue me. I've got like, 34 more tailed white LED's, so... Ahem, I'll redo it one of these days!
Here's the final shot for tonight... With the LED's in the actual holders.
And that's it for now. I need to start mucking about with my next batch of lights, that 7 LED puck (which, I DO NOT recommend purchasing...! The 5 LED version is much brighter, and spreads the light more evenly, and costs 2$ less!) and some LED arrays I have coming in from eBay.
And, when I get my new MDVA from Mashie (the old one was retired in my dad's HTPC, he was inlove with it, and it looks gorgeous down at our cottage) I need to make the new faceplate... I've got a good idea for this, but I'm not 100% sure I'll go through with it, as it has the potential to go wrong... But you'll see
Cheers!
Wow! I'm damn close to having this system up and running for good again. I got the majority of the work done, that was stopping me from really using her. I had the dying urge to play Oblivion, so I used some crappy vinyl tubing, filled the loop, and checked to make sure the system had survived thus far...
Well, the results were outstanding. I don't have any before/after temperature pictures, so you'll have to trust me. But...
Before:
Core Temps (Load): 63,64,63,66
GPU Temp (Load) 66
(Temperature taken with fans at 12v, after 4 hours of RTHDRIBL + dual orthos.
After:
Core Temps (Load): 53,54,55,51
GPU Temp (Load) 51
(Temperature taken with fans at 5v, after 4 hours of oblivion + dual orthos.
That's right. I reduced my fans to 5v, and I still got a damn good improvement in temperatures. So, what'd I change? Other than cleaning her out, I increased the flowrate of the pump a tiny bit, and swapped out all my 1/2" elbows for 3/4" elbows. I used a new mounting system on the CPU block, with some MX-2 thermal paste. I also changed the orientation of my front radiator, so it expels air out the front, rather than into the case.
Huge improvement!
Now, I must appologize for my recent lack of fervor. I normally update daily, but truth be told, I was working on a case for a client. I was commissioned to use a black/purple theme, with purple inside. I chose a metallic flake inside, and it looks really good (Well, for purple!). The paint holds up to the scratch test incredibly well. I tried marring it in an invisible area with a drill, and it barely scraped off. Very pleased. Here's a picture of the system so far:
(Sorry for the crappy pic... I got a lot of work to do on wiring, and this was taken with the cellphone camera)
So, let's get onto the new update shall we? First up, I've got my 2nd last order in. All I'm waiting for is some LED strips from eBay now!
So... This is what I bought:
- Some white tailed LED's with prewired resistors (can't beat the value there... 2 packs of 20, all pretailed, for 7$ shipped. Amazing price when you consider how much work it saved me).
- Some chrome LED holders.
- An LED Array.
- Some Smartcoils (clear).
- Some 3/4" Black heatshrink (not for the PSU
).- Some 1/2" black Sleeving.
- Two 84mm x 220mm panels of smoke acrylic. Both scraps, cost me 11$ shipped. I'll be using these to make the new face for the MDVA, and a motherboard stealth/RAM cooler, later.
So, the first thing I tackled were my tubes. I was sick and tired of them getting all white and crappy after 3-4 months of use, even with plain distilled water. For example:
So... I soaked them in alcohol, shined them up... And...
Yep, I sleeved them! Not the most impressive picture right there, but after installing it...
And another angle:
You'll also notice in that last picture, that one of the holes has been filled... With the LED Bezeled holder! Here's another shot, but this time they're all installed.
Side shot, with the LED's in place.
Here's the wiring... Now, this picture breaks my heart. I had to use freaking hot glue to hold the LED's in place, since the cheap chinese LED holders gave me plastic plugs, that were too large. They didn't fit inside the freaking LED holder, I tried EVERYTHING short of hammering them in there
Oh well, hot glue, and messy wires, both out of sight, so sue me. I've got like, 34 more tailed white LED's, so... Ahem, I'll redo it one of these days!
Here's the final shot for tonight... With the LED's in the actual holders.
And that's it for now. I need to start mucking about with my next batch of lights, that 7 LED puck (which, I DO NOT recommend purchasing...! The 5 LED version is much brighter, and spreads the light more evenly, and costs 2$ less!) and some LED arrays I have coming in from eBay.
And, when I get my new MDVA from Mashie (the old one was retired in my dad's HTPC, he was inlove with it, and it looks gorgeous down at our cottage) I need to make the new faceplate... I've got a good idea for this, but I'm not 100% sure I'll go through with it, as it has the potential to go wrong... But you'll see
Cheers!
Very ingenious with the sleeving around the tubing, but it looks weird to me for some reason. I'm not taking away from the work you did on it at all mind you. I kind of looks like you maybe have a phase unit. What would an EL wire wrapped around the sleeving look like? Ideas: Check Me
I still Love LEDs & that'll be cool shooting straight up in the rig
That being said, the admiration of your work has not been lost & the temp drops are incredible.
Nice Job dude!
I still Love LEDs & that'll be cool shooting straight up in the rig
That being said, the admiration of your work has not been lost
& the temp drops are incredible. Nice Job dude!
Arcygenical
Fully [H]
- Joined
- Jun 10, 2005
- Messages
- 25,066
Very ingenious with the sleeving around the tubing, but it looks weird to me for some reason. I'm not taking away from the work you did on it at all mind you. I kind of looks like you maybe have a phase unit. What would an EL wire wrapped around the sleeving look like? Ideas: Check Me
I still Love LEDs & that'll be cool shooting straight up in the rig
Yes, in real life, the sleeving looks amazing. In the pictures, it looks really fat... But, it's actually only 13mm thick, which matches the ID of most 1/2" tubing. So, it's nowhere near as "thick". That's the sad thing about my camera skills... Fingerprints show up, smudges show up, sizes are distorted, and paint jobs aren't anywhere near as nice... It literally looks half as good as in real life. Maybe (cf)eclipse should come over and lend me his camera skills
I've used EL wire before, but it never lasted very long. About 5000hrs before burnout... Which, is a major ripoff IMO. I'm also trying to stay away from anything flashy in this build. Some LED's pointed directly at the important components... And a white/red theme, like normal.
Thanks for the compliments!
I'm not done though, I've got a bit of acrylic work to do, and some more LEDing.
The LEDs look wicked, I just got them hooked up
.shadowlord
2[H]4U
- Joined
- Jan 6, 2005
- Messages
- 3,109
the sleeved tubing look awesome, I can't wait to see your work finished
ps.: glad you got that thing with your mvda worked out.
ps.: glad you got that thing with your mvda worked out.
Arcygenical
Fully [H]
- Joined
- Jun 10, 2005
- Messages
- 25,066
the sleeved tubing look awesome, I can't wait to see your work finished
ps.: glad you got that thing with your mvda worked out.
Haha, Thanks! I'm actually working on the front MDVA panel as we speak... I'll update in a few.
Before:
Core Temps (Load): 63,64,63,66
GPU Temp (Load) 66
(Temperature taken with fans at 12v, after 4 hours of RTHDRIBL + dual orthos.
Before:
Core Temps (Load): 53,54,55,51
GPU Temp (Load) 51
(Temperature taken with fans at 5v, after 4 hours of oblivion + dual orthos.
So youve got 2 b4 temps or am i missing something
Arcygenical
Fully [H]
- Joined
- Jun 10, 2005
- Messages
- 25,066
So youve got 2 b4 temps or am i missing something
ahhhahahaha. Bastard
silent-circuit
[H]F Junkie
- Joined
- Sep 18, 2005
- Messages
- 16,136
I went to read this thread today and my immediate thought was "Arcy has lost his damn mind! It's /purple/! With /sparkles/!"
And then I looked more closely. And I read. And I calmed.
And then I looked more closely. And I read. And I calmed.
Haha i see u fixed it lol. And im looking foward to updates to. Are u ordering new parts or using what uve got?ahhhahahaha. Bastard
silent-circuit
[H]F Junkie
- Joined
- Sep 18, 2005
- Messages
- 16,136
I don't know if you can get black dye, but it may be worth it!
Food coloring! (Don't know if that'd work though...)
Living Weapon
Limp Gawd
- Joined
- Dec 21, 2007
- Messages
- 448
Arcygenical
Fully [H]
- Joined
- Jun 10, 2005
- Messages
- 25,066
I don't know if you can get black dye, but it may be worth it!
Actually, with the LED's lit, the clear tubing sparkles under the black sleeving, it's really gorgeous... Kinda like, moonlight
Haha i see u fixed it lol. And im looking foward to updates to. Are u ordering new parts or using what uve got?
Definitely using the same parts. Can't afford to upgrade yet... And besides, I'm waiting for Sandy Bridge and the GeForceX series.
Living Weapon
Limp Gawd
- Joined
- Dec 21, 2007
- Messages
- 448
[...] I kind of looks like you maybe have a phase unit. [...]
Nice Job dude!
not sure if that's the look you were going for, but it does look a bit like a phase cooler
+1 on the nice job - definitely well executed at every step.
BTW, thanks for the tips on baking paint.
filthysanchez
2[H]4U
- Joined
- Jul 19, 2006
- Messages
- 2,669
Wow, I was just thinking about sleeving my tubing. I did it to a piece of tube I had laying around the other day.
bicycle_wreck
[H]ard|Gawd
- Joined
- Nov 16, 2007
- Messages
- 1,202
I went to read this thread today and my immediate thought was "Arcy has lost his damn mind! It's /purple/! With /sparkles/!"
And then I looked more closely. And I read. And I calmed.
Yea, I was like, "WTF did he do now?" I read-on and was quite content and happy that it wasn't really his. You gotta do what the client wants though--its like that in every business...
Arcygenical
Fully [H]
- Joined
- Jun 10, 2005
- Messages
- 25,066
not sure if that's the look you were going for, but it does look a bit like a phase cooler
+1 on the nice job - definitely well executed at every step.
BTW, thanks for the tips on baking paint.
Yeah, it certainly does look similar to a phase cooler... No doubt about it.
When I get the final pictures up, though, you'll see that the tubing isn't anywhere NEAR as large as it looks IRL. I've got some friends that agree, in person, the tubing looks way smaller than in the pictures.
And baking the paint, for an hour at 180f, pretty much triples it's initial resistance to scratches... A hardness that you wouldn't get after even... months, of normal temperature curing.
subbing. maybe i can absorb a few things from someone with style and talent.
Awe, thanks
. Wow, I was just thinking about sleeving my tubing. I did it to a piece of tube I had laying around the other day.
Looks good donchit?
Yea, I was like, "WTF did he do now?" I read-on and was quite content and happy that it wasn't really his. You gotta do what the client wants though--its like that in every business...
. I know... My manliness slipped down a notch. Well, just kidding, Purple is one of my favorite colours (It's the new "Blue" for LED's IMO... Things that glow purple make me heavy in the pants) so, I'm just saying most of that stuff in jest.Arcygenical
Fully [H]
- Joined
- Jun 10, 2005
- Messages
- 25,066
(small) Update, Ladies!
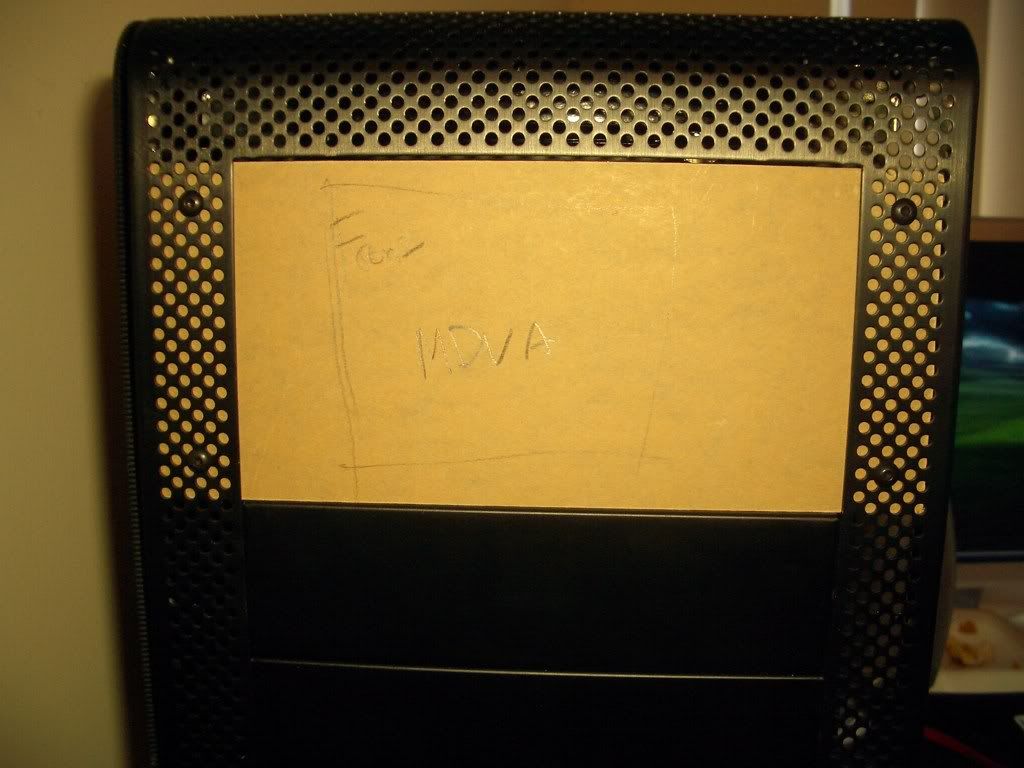
Ok, so... I'm almost done here. I'm waiting on my new MDVA to come in, and I need to make a new front panel for it. I wasn't happy with the old one...
A) it let too much of the green PCB colour through...
B) I didn't like the silver screws.
C) It didn't quite fit in the 5.25" bay... There was a good 3mm gap on either side of it, and a 2mm gap on the top and bottom. This isn't Mashie's problem though, it's Lian Li's... A company that uses oversized 5.25" openings... There's a gap around my freaking fan controller too...
So, I'm making a new one!
Let's clamp the piece of acrylic (0.18" thick, 220mm x 84mm, 10% light transmission smoked plexiglass) that I got from my good friends over at WarehousePlasticSales.com... THE source for plastics if you live in Canada!
Notice the ghetto fan used for pressure
I then marked the holes to be drilled... Thank you Lian Li for making all the holes on the front of your case, the perfect size to be tapped to 6-32.
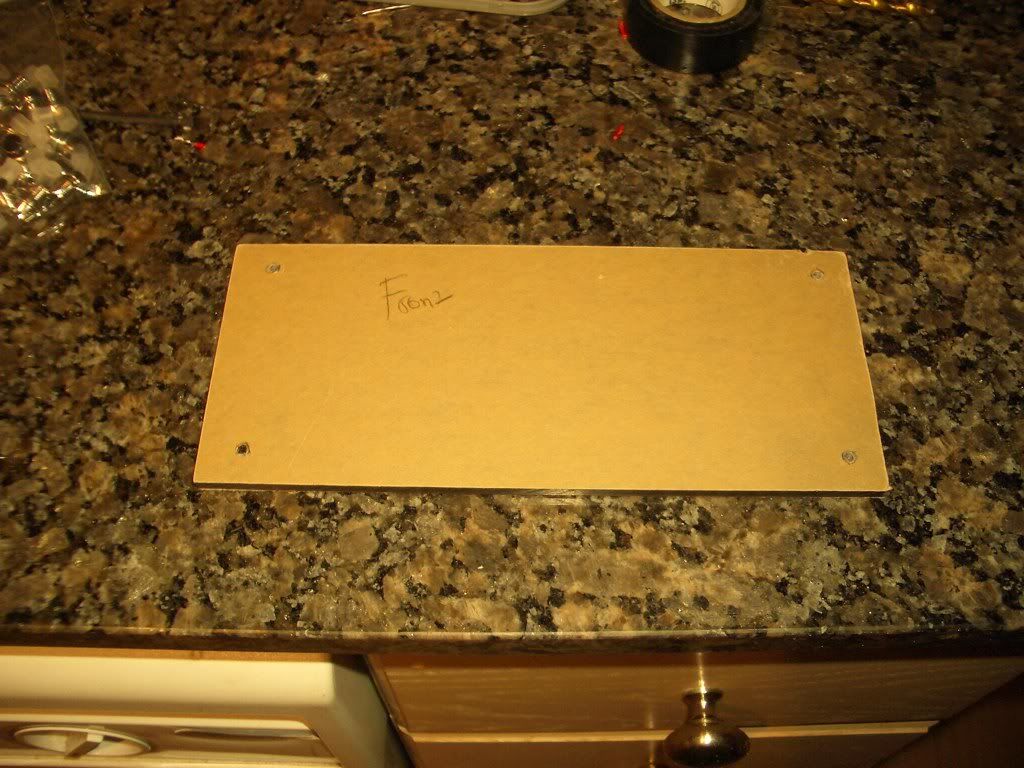
Installed with some nice screws...
And I need the actual MDVA to draw my measurements up, to mount it, cut the holes for the buttons, and mounting screws... And of course take the wrapping off the plexiglass.
Now, if you remember from awhile ago, I purchased two identical pieces of plexi. Now, if I don't fuck up the MDVA panel, I have a nice use for the other piece of acrylic... But I might, since I need to do some precise drilling, without my drill press (for the first time in ages) so...
Here's that 7 red LED array I purchased. Don't buy this. It's dimmer than the damn 5LED ones!
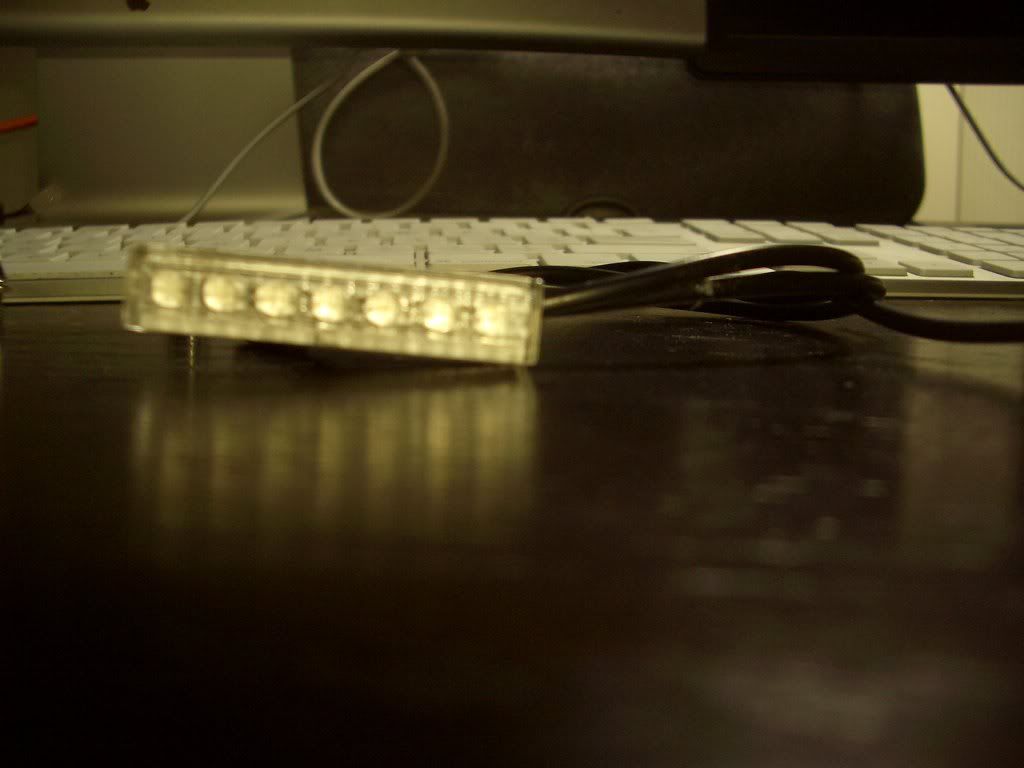
it spits light out too... uniformly (IE, the plastic casing diverts light a full 360 degrees around, throwing light out the BACK of the unit as well, backlighting my MDVA panel... Which I DON"T want...
So, I dyed it (but I has no pickturez of that, I snapped one, then installed the damn thing, without making sure the picture was good. Short story long, the picture sucked) to prevent that from happening.
The lighting looks damn good when it's all on. I'm going to take some pics of that next.
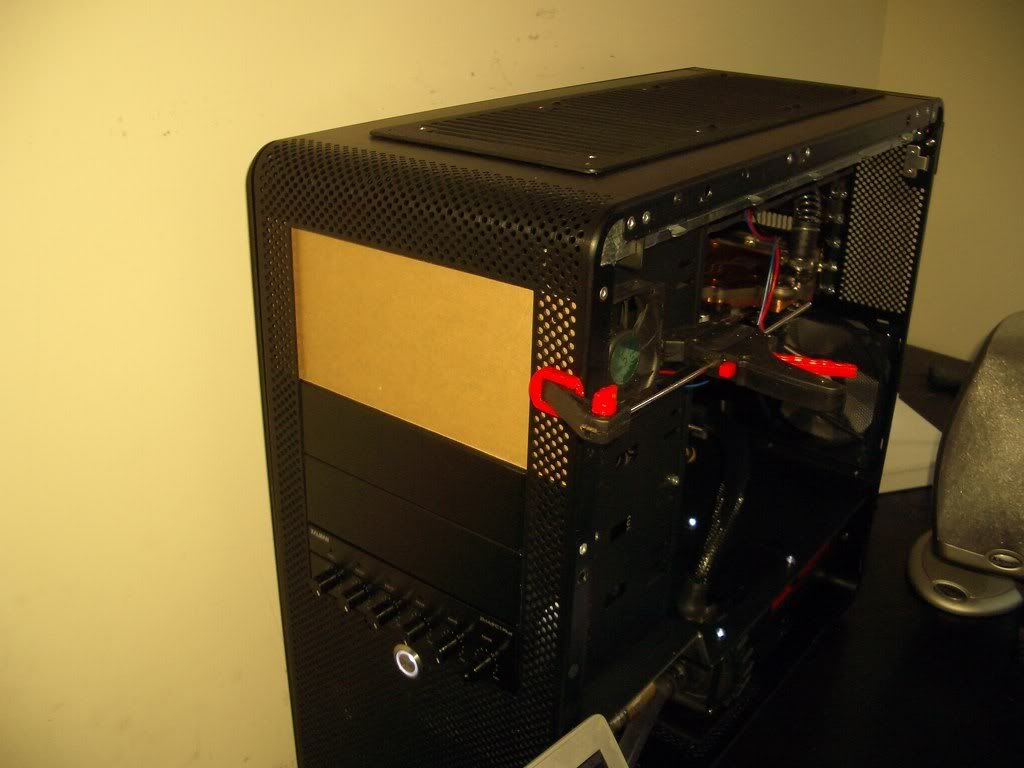
Finally, heres the case, in all it's glory, for right now... exposing it's self on my bed. Pretty fancy.
/bed.
Ok, so... I'm almost done here. I'm waiting on my new MDVA to come in, and I need to make a new front panel for it. I wasn't happy with the old one...
A) it let too much of the green PCB colour through...
B) I didn't like the silver screws.
C) It didn't quite fit in the 5.25" bay... There was a good 3mm gap on either side of it, and a 2mm gap on the top and bottom. This isn't Mashie's problem though, it's Lian Li's... A company that uses oversized 5.25" openings... There's a gap around my freaking fan controller too...
So, I'm making a new one!
Let's clamp the piece of acrylic (0.18" thick, 220mm x 84mm, 10% light transmission smoked plexiglass) that I got from my good friends over at WarehousePlasticSales.com... THE source for plastics if you live in Canada!
Notice the ghetto fan used for pressure
I then marked the holes to be drilled... Thank you Lian Li for making all the holes on the front of your case, the perfect size to be tapped to 6-32
.
Installed with some nice screws...
And I need the actual MDVA to draw my measurements up, to mount it, cut the holes for the buttons, and mounting screws... And of course take the wrapping off the plexiglass.
Now, if you remember from awhile ago, I purchased two identical pieces of plexi. Now, if I don't fuck up the MDVA panel, I have a nice use for the other piece of acrylic... But I might, since I need to do some precise drilling, without my drill press (for the first time in ages) so...
Here's that 7 red LED array I purchased. Don't buy this. It's dimmer than the damn 5LED ones!
it spits light out too... uniformly (IE, the plastic casing diverts light a full 360 degrees around, throwing light out the BACK of the unit as well, backlighting my MDVA panel... Which I DON"T want...
So, I dyed it (but I has no pickturez of that, I snapped one, then installed the damn thing, without making sure the picture was good. Short story long, the picture sucked) to prevent that from happening.
The lighting looks damn good when it's all on. I'm going to take some pics of that next.
Finally, heres the case, in all it's glory, for right now... exposing it's self on my bed. Pretty fancy.
/bed.