Project: First Timer--WC'd Stacker

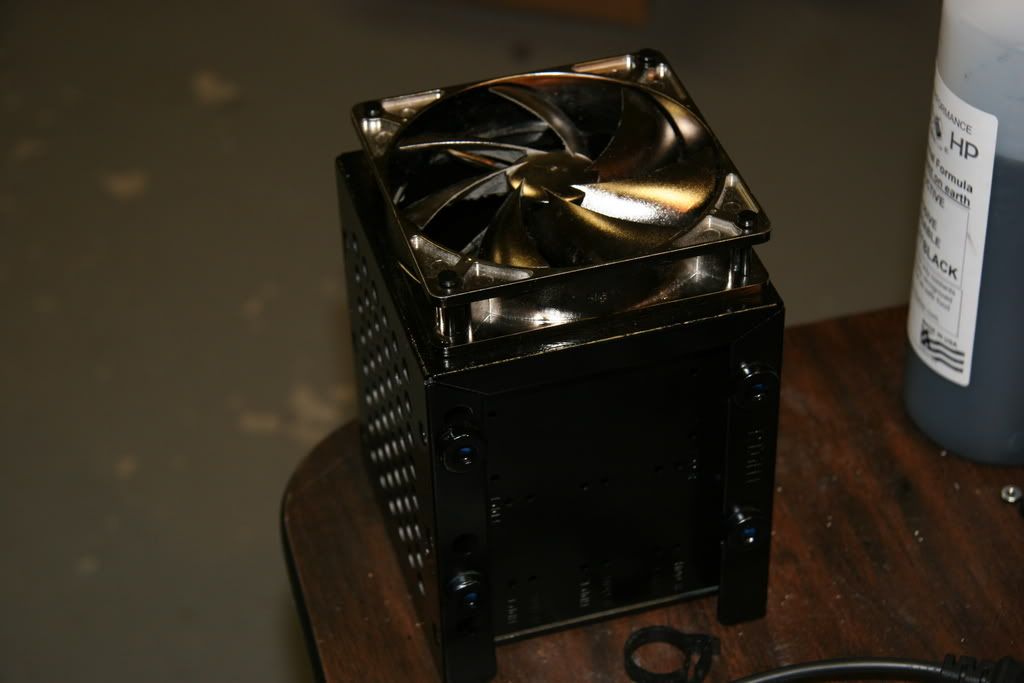
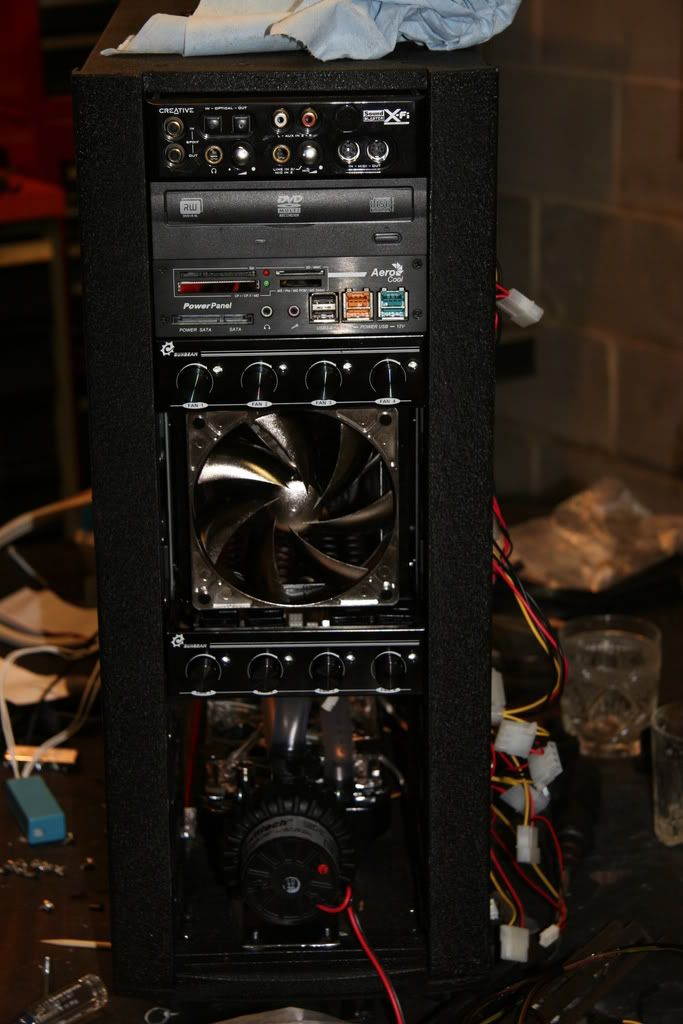
Wassup Bro!!! I just woke up so I'll call you in a little bit.. I stayed up all night and into the early morning modding my Lian Li PC-7A. I see you are coming along nicely. The wrinkle finish is AWESOME.. I tell you what makes it look weird is the FLASH on your camera. I too wrinkle finished some speaker boxes, panel, kick plates, etc.. That stuff is the shizniz.. You can really see how it looks when you took that picture of your side panels. The flash makes the finish look glossy, but in real life, its more of a dull finish. Thats exactly what I am doing to my Lian Li.. I am having the insides powder coated flat / dull black.

I have taken a few pics of my stuff and although I have a LONG way to go, I will send you some links before I post em in a worklog here on [H].. My case internals will be Black powder coated Diamond Plate Aluminum.. its different, thats for sure.
 
Nice Mart! You crazy bastard! :p

Right now I'm sleeving some cable so the inevitable dangling that I will have will at least look better. However I'm blessed with a Mary & Kate Olson 1600 hair dryer so it's taking like 10 minutes for the heatshink to actually mold lol, it's SLOOOW.
 
The same thought went through my mind! However I wanted to see how Fluid XP worked and I also primoflex tubing doesn't come in black, at least I haven't seen it. I wanted to use the most flexible tubing as there are some hard bends as you can see. :)

Thanks for subscribing! At least someone has...lol.

Tygon makes some really flexible tubing & some really quality stuff.

Here's a link to some in black: http://www.sidewindercomputers.com/ty1idx3odlat.html

I'm sure that there are others subscribed to your worklog... I try to look at all of the current mod logs to push me to complete mine. I haven't started a work log because I have to keep changing things up because of lack of the proper tools. This has really caused me alot of fustration because of unsquare/unround holes. I did find something to cover the edges last night, so I might start my log soon.
 
Well wire management has been a PAIN!!!

I bought some Bulgin switches(for power and reset) and a red led for my HDD indicator and I'm going to make a semi-custom panel. The main reason is that I don't have room to put my original panel(it's a long situation to explain) so I'm going to make an original, plus it will look sweet hopefully.

You guys are gonna see the mod of the century later, lol. Just thought I'd give a small update, I should have some more stuff up tonight/tomorrow.

Laters
 
Well wire management has been a PAIN!!!

You need ideas?

I suggest going through Arcygenical & Top Nurse's worklogs.. they are the creme de le creme when it comes to Wire Management in my opinion (I'm sure others have done excellent jobs as well ;) )
 
Indeed, I've been checking their logs. Both of them do amazing work that I envy haha. I know how I want it to work but as far as actually getting it to work is very difficult.
My X-Fi cable is my biggest concern atm. It's the ugliest cable ever and I'm a little apprehensive to sleeve it. Also where I have a slot for it(which is the only slot available, i promise lol) the cable doesn't seem to look long enough. I'm trying to search for other x-fi cables.

Edit: Found one!!!!

http://www.computercablesource.com/round-ide-cable-24-inch-1-drive-ultra-ata-133-black-347.html The X-Fi needs an IDE with all the holes open, and that's not easy to find. Thanks for the guys at the creative forums for that one. I guess I'll be ordering that cable.
 
Here's another small update.

Here's the mod of the century...lol. My hdd cage didn't fit because it bumped into the res because I didn't measure correctly. So here's what I did to fix the problem. If you have a weak stomach please don't click the link. :p

http://i179.photobucket.com/albums/w313/Rsgunter/IMG_1873.jpg
http://i179.photobucket.com/albums/w313/Rsgunter/IMG_1872.jpg

Painted the HDD rack
#84
IMG_1879.jpg

Early wire hiding...
#85
IMG_1874.jpg
 
awesome work, first few pics of the case i didnt care for but the side panels look MUCH better. Keep up the hard work, it will pay off... Doh, this inspires me to build a new comp... damn these worklogs :p
 
awesome work, first few pics of the case i didnt care for but the side panels look MUCH better. Keep up the hard work, it will pay off... Doh, this inspires me to build a new comp... damn these worklogs :p

I was so happy I got wrinkle to come out right in pictures. :) The whole case looks like that.

Thanks!
 
Yeah, looking good!!!

I have to say it;;;;;;;;;;;;; LOOSE THE WASHERS LOL!!!

True Value makes spacers that would work wonderful for that application, plus you should be able to paint them to match.

As far as the IDE cable, make a rectangular hole in the tray behind the mobo to fit the cable through & just peek around the edge of the board enough to plug it in. You'd just need to route it somehow, which I suppose is the main issue. I'm surprised you didn't do that for the 24 Pin connector.

Keep it up dude!!!!
 
Looking very cool so far! :)

I hope you don't mind a little critique...
  • I love the wrinkle finish paint on the inside; that should really resist scratches and such. But, I really don't like it as a case's exterior paint. It's good for covering up scratches and unevenness, but I think your case looked better with the regular black paint because you did a great job with the body filler.
  • Ditch the stock northbridge cooler. If you're water cooling, add it to the northbridge. Otherwise, try an after market one. Those stock fans are noisy and not always reliable.
Nice to see a fellow biker. Is that sportbike a Honda? I don't see any stock markings on it?
 
THAT'S what you meant when you said you had a SH*T load of washers and it wasn't going to be pretty.. lmao. The build is coming along nicely.. You even inspired me to work on my case a little (right before bed). Man, now I can't wait to get my parts done and over to the powder coater.
 
Also, instead of the washers, why don't you just flip those two metal arms around? Or bend them to where you need it mounted?
 
Yeah, looking good!!!

I have to say it;;;;;;;;;;;;; LOOSE THE WASHERS LOL!!!

True Value makes spacers that would work wonderful for that application, plus you should be able to paint them to match.

They are temporary I assure you. Could you link me to that spacer?

As far as the IDE cable, make a rectangular hole in the tray behind the mobo to fit the cable through & just peek around the edge of the board enough to plug it in. You'd just need to route it somehow, which I suppose is the main issue. I'm surprised you didn't do that for the 24 Pin connector.

The reason they are all WTF jumbled is because I was debating on what exactly to do with the wires. I had though of the hole myself, and that's probably what I will do. Again, the power wires are temporary. :)

@Cipher
I dig the paint, I knew not everyone would. :)

As for the NB cooling, indeed I plan to WC, but I want to get everything up and running before I do any more cooling to the board, and I want to put it through some light stress tests. I think that fan is too loud as well, and want to ditch the stock. Also I'm trying to get my financial situation straightened out, only 300 bucks left on the CC! :p

The yellow bike is a Triumph Daytona 600(2004) and the black one is a Honda 954rr(which was sold Monday)

I couldn't flip the arms around because I'd have to repaint, and it takes forever for wrinkle to completely cure. :)

@Martinez
Dude you need to get some pics up, that teaser shit is worse than when a woman teases you for sex, for the sake of the users on this forum, show us that badass work you are doing man!

Glad you dig it!
 
@Cipher
I dig the paint, I knew not everyone would. :)
Oh, I dig it too I'm just think I like the regular black paint on the outside more. :)

I couldn't flip the arms around because I'd have to repaint, and it takes forever for wrinkle to completely cure. :)
Ahhh. How long does that wrinkle paint take to cure? I know most clear-coat takes at least 48 hours to completely cure (unlike base coats, which is like 24 hours or less). Does it take longer than clear-coat to cure? Thanks!
 
Does it take longer than clear-coat to cure? Thanks!

Complete curing takes about 3 days where my computer is sitting. Setting it out in the sun however it can take as little as 12 hours.

It's all dependent, but i don't like to sit my computer out in the sun much because I have curious dogs and a cat and also I don't like any type of debris from sticking on the paint.
 
... also I don't like any type of debris from sticking on the paint.
I hear ya. It's not like regular paint where you can just wet sand out any stuck pollen, dust, or insects, lol. What sticks to the wrinkle paint is what stays. :)
 
I couldn't find them on Ace or True Value's sites, but I did find them searching for 'Spacer' at http://www.mcmaster.com/ .. once the selection loaded, click on 'Spacers and Standoffs' ... The 'Female Unthreaded Round' one is what I'm talking about.

If you had some copper pipe around, that could probably work for ya as well. You just need to measure & cut then.
 
Thanks for the links dudes but I found a metal spacer tonight at lowes. :)

Perfect fit actually! I'll paint and post tomorrow!
 
Wow, you have really motivated me to relocate my radiator to the bottom of the case.

I only have a dual 120 but hell maybe I will upgarde this summer and get a second video card as well.

Your case looks great, I hate the square fan mesh crap on top of mine as well.

The only thing I will do different is leave the stock brushed aluminum, and I'm not a fan of the stacker sidepanel either. I didn't like the way it shows the drive bays so I cut my own copy of it. And I will be keeping all the fans on the radiator inside the case for noise purposes + I don't really see the need for fans on both sides.

keep up the good work and thanks for the idea on using the grinder on the lips on the bottom cut. I just got an anglegrinder for my birthday that I'mm dying to use on something. I have the same case and Jigsaw as you too! I hate cutting steel though aluminum is much easier (Like butter) when you only have a jigsaw.

I've been debating a custom window for a while now. :)

If you just have a dual radiator there is a bracket that fits into the mesh plate at the bottom of the case, but I understand you wanting to use your grinder, it relieved a lot of stress for me, lol.

I know I said I'd post today but that's not going to happen, I got quite busy unfortunately, we'll see what happens tomorrow. :)
 
I've been meaning to ask, what are you securing the RAD with? It looks like some sort of zip-tie contraption.

Glad you found the spacers!
 
I've been meaning to ask, what are you securing the RAD with? It looks like some sort of zip-tie contraption.

3 sets of these

I like them better because they can be manipulated, they are a one time thing though, so if a fan dies or something I'll have to buy a new set.

I might get some work done tonight. Performance-pcs probably things I'm effin nuts because I've placed several orders from them in a short period of time.

I still have to buy some molex to 3 pin connectors, 3 pin extenders, CCFL extenders, and all sorts of stuff lol, I just can't seem to get everything at once!
 
Small Update:
Been really busy and I've hurt my back to a point of barely being able to walk, so progress is slow being that it's hard for me to 1) bend over 2)get up/sit down from a seat 3) move 4) function.

Here's those spacers...painted black.
#86
IMG_1907.jpg


Here's the early parts of wire management. :) Used just a hole saw.
#87
IMG_1906.jpg


Maybe tonight I can get some more done, maybe.
 
Yo Mr. G, looking good so far! That paint job looks tough! Very original. And what a nice set of toys in your garage! You make me jealous with envy with those pics. :D I so miss my two-wheeled rocket. Anyway, I look forward to watching your updates. Keep it up!

btw, I feel your back pain - been there doing it. Very frustrating stuff. I hope it gets better. :)
 
Sorry to hear about the back dude! Mine goes out on me occasionally as well & found out a few years ago that i've got arthritus starting in my back between the 3rd & 4th disks and it flares up when I do any type of lifting/pushing :( .. Go see a doctor for some muscle relaxers.. at least it will help out temporarily... Suppose at 38 all my stuff is gonna start going on me soon lol

I like the spacers... Waaaay better looking than the thousand washers!!!!!

Keep up the great work & go see a doctor!
 
:) Thanks for the concern, my back is starting to feel a little better.

21 is way to young to start having back problems.

So I was going to post up some stuff tonight, my custom panel mainly, but I'm a little pissed.

I ordered 2 pre-wired Bulgin Switches and when I recieved them I noticed that the LED resistor was very fragile, and I'll be damned if I sat the switch on a table and the resistor broke right at the tip, so then i was going to install the other one, and it was broken too, the wiring was never actually touched by my hand, just barely touched because it had to lay on a table. The other one I'm not sure about it's breakage, but it wasn't dropped or even remotely handled improperly.

I emailed performance-pcs and asked them to send me some more resistors mostly on principle even though I wouldn't care to go buy some. I felt the wiring AND packaging/handling weren't done well at all.

So I'll need more resistors, but I assure you the panel is gonna look super sweet.
 
21 is way to young to start having back problems.
Dude, that sucks. I'm sorry to hear about that. Hopefully it won't be a life-long condition. I've been lucky not to have any serious back problems in my 32 years, but I've had my share of other issues, lol. I guess our bodies all get beat-up one way or another.

... resistor broke right at the tip, so then i was going to install the other one, and it was broken too...
Sorry to hear the resistors broke and/or were broken. I ordered two Bulgin Vandal switches with wiring from ForzenCPU and haven't had any problems with the resistors for the switch LEDs. Mine came connected near the pin header, but were sealed well in heat-shrink tubing. The only thing that pissed me off was the quick-disconnects, which were of the large variety. They fit on the Vandal switches' posts, but were too large to fit with all four on at one time. So, I had to clip them off and mount my own, smaller quick-disconnects, without those cheap plastic housings. I covered the connectors in heat-shrink tubing after I finished mounting them. Did you get small quick-disconnects or large ones?
 
Didn't get quick disconnects, or at least I don't think so. :)

I got the standard screw holding down the wire being contacted.

The wire was heatshrinked well but there wasn't nearly enough wire to make the connection even remotely flexible as well as it being the most fragile wire ever. :p I'm just going to go to radio shack or something and grab some 67ohm resistors and maybe they will have some nice heatshrink.
 
I'll do a small update just to keep the thread alive lol. My work space is an absolute disaster right now. :p

My Stacker is well, stacked.
#88
IMG_1916-1.jpg


Making the custom panel --Action shot! Dad drilled these for me, my back was hurting to bad to get enough pressure on the drill, I'm a wuss, I know. :) this is also the entirely wrong tool to use, and actually this the panel we messed up on and tossed it afterword, but the same technique was used on the other. :p
#89
IMG_1914.jpg


Skeleton:
#90
IMG_1917.jpg


Switches look pretty good in there, LED is going to be an HDD indicator.
#91
IMG_1918.jpg
 
Looking good with the switches. Yeah, you're right, that drill bit used is meant only for wood, lol. In the future, you might want to pick up a 3/4" hole saw bit for the Bulgin switches (works great in metal), or use a hole puncher on something as thin as that mesh. I wish I had a drill press, because drilling larger holes with a regular drill is a pain. So, I feel yours. :)

Fortunately, the switches look like they cover up the uneven holes, so no problem there. Keep up the good work and hope your back gets better!

Well, when you are at minimum 30 minutes from a Lowes or Home Depot and all the local hardware stores are closed, you gotta deal with what you have. :p

I have hole saws, just not a 3/4 inch. :p We used a drill bit on the small light, fyi.

Glad you like it!
 
If my pictures go away, don't fret! My free photobucket account only has 75mb of bandwidth left, and I don't get paid until Tuesday, so I'll upgrade it then. :p
 
I love the switches are you ditching the stock front panel? You have moticated me to replace my PA 120x2 with a PA120x3 and cut into the floor. Right now I have my 120x2 mounte din the front and the Hard drive cage moved to the floor behind the radiator. It works great, but I'm kinda bored and I always wondered if I could fit a 120x3 on the floor easily haha. Someday I'm going to buy a drill press I need one WAY to often...


Why fans on both sides of the radiator? Unless your using Extreamly high airflow loud fans I belive the nose to airflow ratio would be better with fans on only one side, and take up less space as well. I have the same Fan controller (just one) and the blue LED's are extreamly annoying (being that the computer is in my bedroom. I pulled the right most LED lead out of the socket so the Blue LED's would not come on anymore, the red still work to warm me my fans are low. I need to solder some resistors but untill I do I could not take it at night anymore. Putting pillows etc in front of the PC at night lol.

Yeah, Sunbeam isn't lying when they say those LEDs are bright. Thanks for the tip on removing the blue LED btw, I might do that and do some resistor work of my own.:)

Yes, I am ditching the stock panel.

I put fans on both sides because I usually use things to their fullest potential. I figured I might as well put some fans on that side just well, because. It might help and it might not but I knew if I only put them on one side then I'd always wonder what would happen if I had them on both. Also the fans on top are RED Led fans which work great when they are turned down because they'll have the dim red look I'm going for. The visible fans are basically purely for looks. :)
 
I forgot to ask you something about the switches. You mentioned you're using the separate red light for the HDD indicator. So that leaves the power LED for one switch. What's the LED function for the other switch?

Also, is that a red LED or a red lamp? I looks rather large to be an LED unless it's one or more LEDs inside a housing with a red plastic cover.
 
Back
Top