Bambu Labs Printers

Bought a 3rd AMS for my original X1Carbon

Gonna have to buy 3 more AMS units for the new printer because last night I swapped out the nozzle on the original X1Carbon to a .2mm so I can print some very detailed stuff that .4mm just can't do.

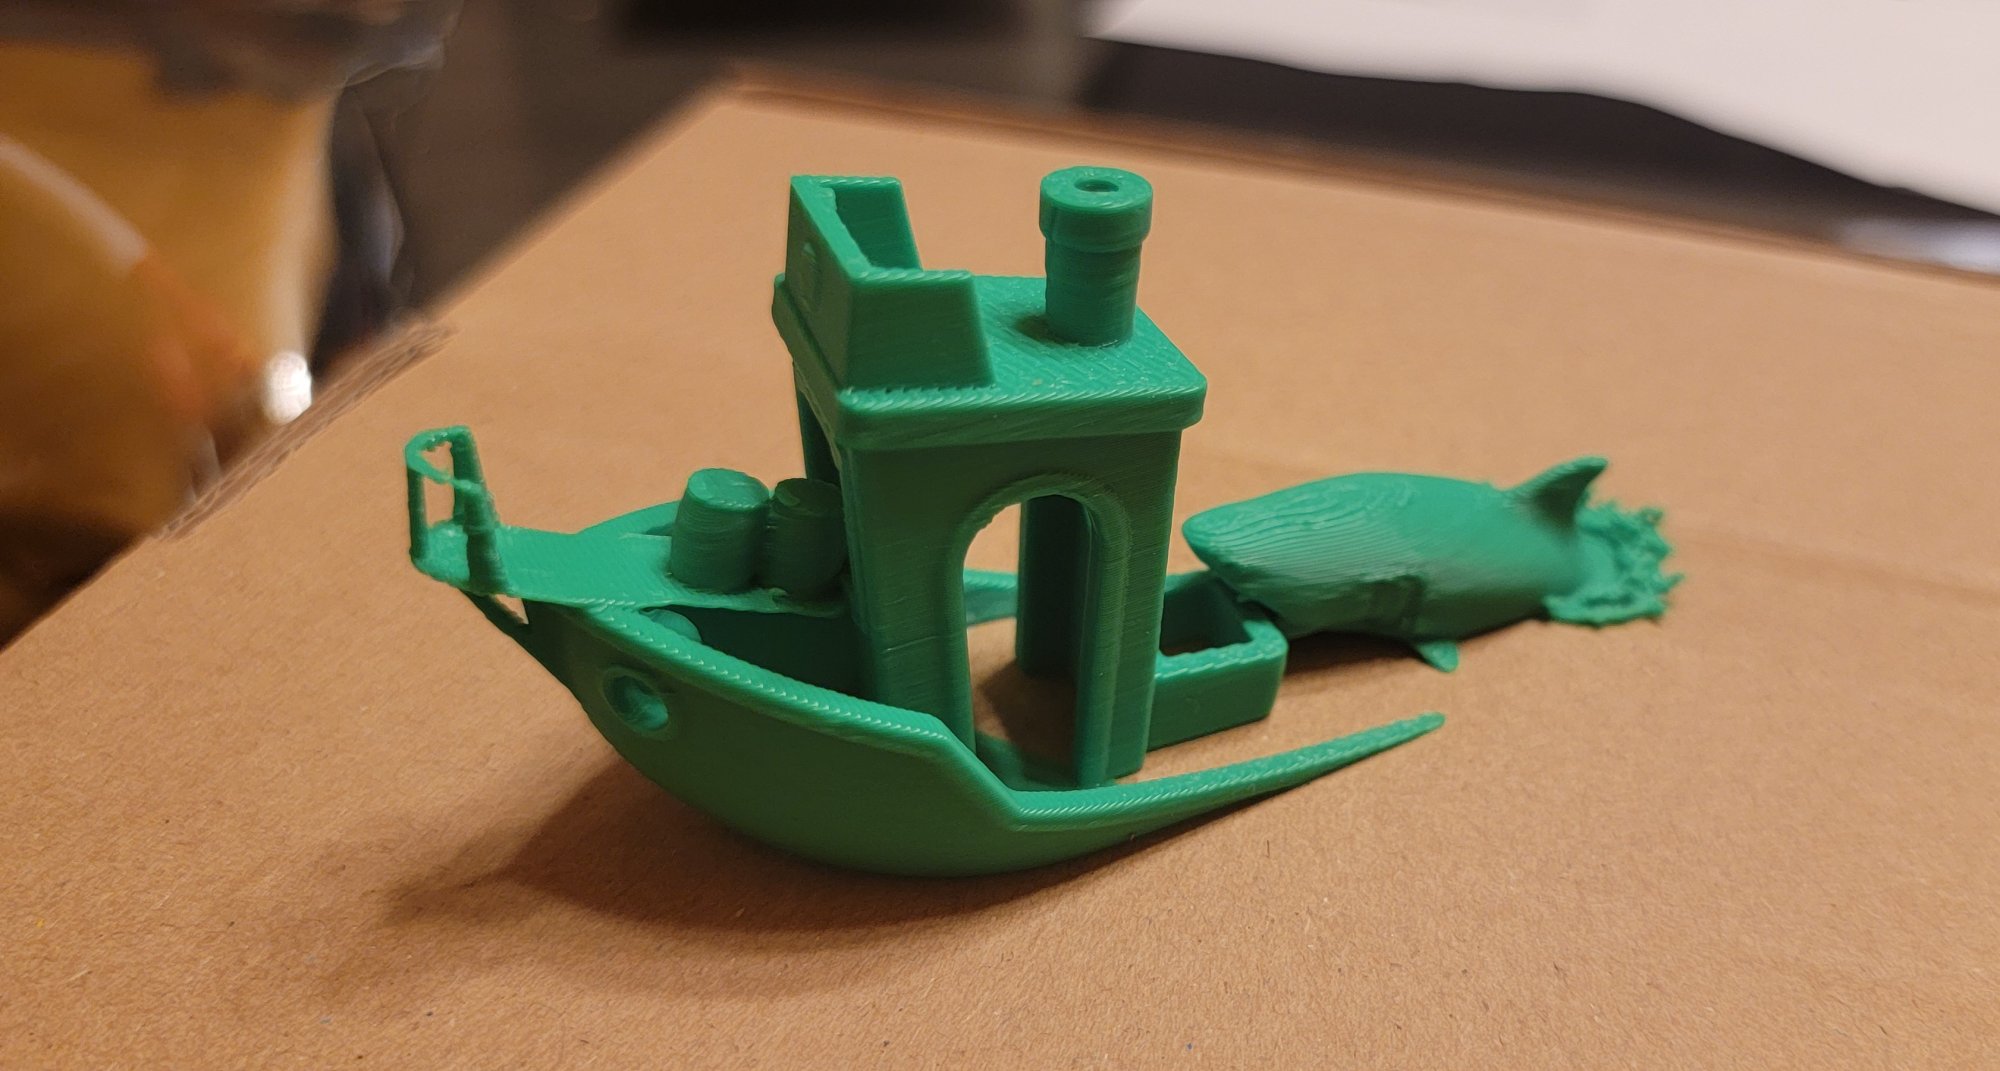
Tested the new nozzle out with this "benchy". It's sitting on a dime. It is far from perfect but perfect from afar.
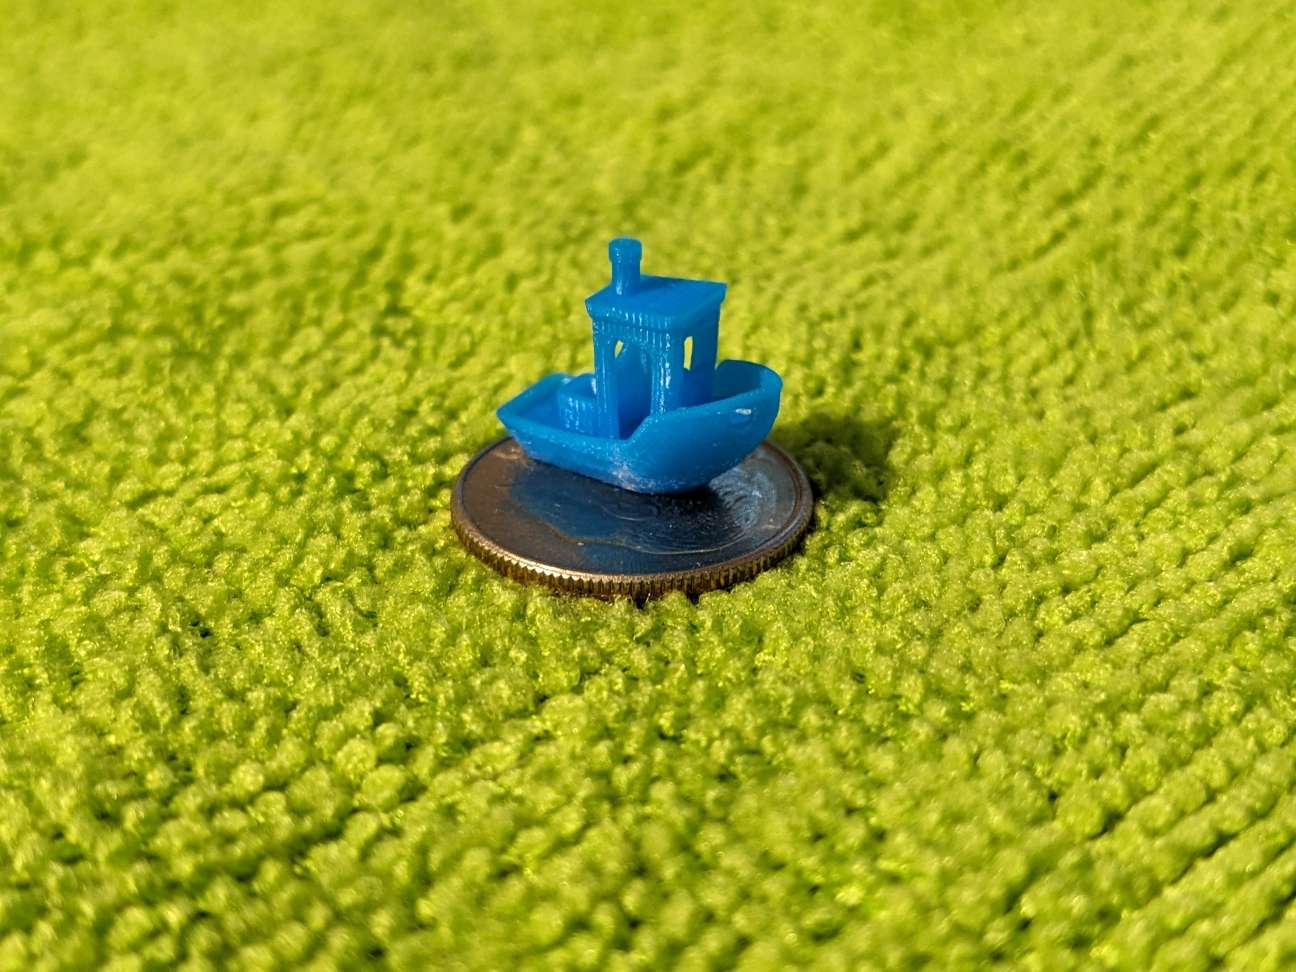
StopsOnaDime.jpg
 
Stupid Tip #219 - If you use spool desiccant holders similar to the ones below, you're already good to go humidity-wise, and your spool is nearly empty, you can put the desiccants back into the container and fill the desiccant holder with coins to weigh down the spool so the AMS doesn't pull it out of its slot
SpoolDisiccant.jpg
 
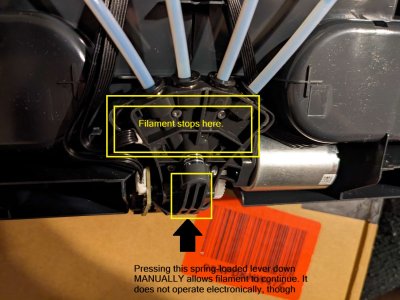
Received my 3rd AMS. It arrived broken. Not happy. Spent 2hrs disassembling it to identify why filament will not feed past a certain point in the AMS. It makes it to the 4-into-1 tube "hub", then stops. Manually depressing the spring loaded lever allows filament to continue feeding out of the AMS but that lever is supposed to be operated electronically. It doesn't operate.


Compress_20240301_180932_2538.jpg

Have checked all electronic connectors and all are seated properly. There are no torn wire sleeves or anything that would indicate a ribbon wire somehow "broke" a strand.

To me, this is something that can be easily quality tested so I am not even a little happy about it.

Just opened a support ticket so I will see what they say (IF they ever get back to me)
 
Received my 3rd AMS. It arrived broken. Not happy. Spent 2hrs disassembling it to identify why filament will not feed past a certain point in the AMS. It makes it to the 4-into-1 tube "hub", then stops. Manually depressing the spring loaded lever allows filament to continue feeding out of the AMS but that lever is supposed to be operated electronically. It doesn't operate.


View attachment 638901

Have checked all electronic connectors and all are seated properly. There are no torn wire sleeves or anything that would indicate a ribbon wire somehow "broke" a strand.

To me, this is something that can be easily quality tested so I am not even a little happy about it.

Just opened a support ticket so I will see what they say (IF they ever get back to me)
Yep. So much dumb stuff passes right through QC when it comes to 3d printers. Regardless of brand.

Hope it gets resolved soon.
 
Just upgraded from the Creality Ender 3 v2 to the Bambu Lab X1 Carbon w/AMS and I have been enjoying it. I am still figuring out what speed settings work the best since I have had 4 failed prints in a row because of how fast it was going. I am printing this https://makerworld.com/en/models/16612#profileId-180444 for additional lighting and dropped all the print speeds by 50%. So far its working, even though its taking longer.

I also have been trying to use a glue stick to see if that helps, but my first go around with it failed. My 2nd attempt that is going right now, I put 2 layers of glue down and it is holding...for now.

Anyone have any recommendations about additional build plates or good speed settings that don't cause the unit to shake like crazy when its doing 200mm/s?
If you are getting failed prints its not because of the speed. Did you prep the build plate? How exactly are they failing?
 
If you are getting failed prints its not because of the speed. Did you prep the build plate? How exactly are they failing?
I have cleaned the build plate using isopropyl alcohol and I have it to a test and level each time. The glue worked last night for what I was printing, but this morning when I went to do the other half, it failed each time even after cleaning and applying glue. The filament is just not sticking to the bed, as if its not hot enough. The filament I have is Inland PLA with print temps between 190-220°C. I remember seeing that the temp of the bed was around 35°C. When it printed last night, it worked great and there was only one small error in the print where a support was. Its just frustrating.
 
Iso doesn't actually remove oils. Wash it in your sink with soap and a little scrubbing. Then try again.
This is a textured PEI sheet, right? Default filament profile with bambu slicer or orca?
 
I have cleaned the build plate using isopropyl alcohol and I have it to a test and level each time. The glue worked last night for what I was printing, but this morning when I went to do the other half, it failed each time even after cleaning and applying glue. The filament is just not sticking to the bed, as if its not hot enough. The filament I have is Inland PLA with print temps between 190-220°C. I remember seeing that the temp of the bed was around 35°C. When it printed last night, it worked great and there was only one small error in the print where a support was. Its just frustrating.

Like ilkhan said, ISO won't remove oils. I use standard dishwasher liquid on a new plate to make sure the oils left on it from manufacturing are removed.

Then, if I want to use glue/release agent, I use the bambu Green liquid glue since it applies better than a glue stick. Personally, I mix the green glue with water at a 50:50 ratio and spray it on using a perfume spritzer...it's pretty amazing how well that works.

As for filaments, I'm pretty picky. While I've found that Inland worked well with my Makerbot Replicator 2 and some of my Creality printers, I generally use Overture the most, followed closely by eSun and Bambu Labs. BiBi Life, SunLu, and Tttyt 3D brand also works well with the X1 Carbon. I've not had much luck with Inland on my X1C, but that spool is about 5-6yrs old and hasn't been dried since opening...

Edited to add - Overture Space Gray with Hilbert Curve for top/bottom layers is frikking amazing. I'll gladly add an additional hour+ to the job time to get that "look".
 
  • Like
Reactions: Liver
like this
Like ilkhan said, ISO won't remove oils. I use standard dishwasher liquid on a new plate to make sure the oils left on it from manufacturing are removed.

Then, if I want to use glue/release agent, I use the bambu Green liquid glue since it applies better than a glue stick. Personally, I mix the green glue with water at a 50:50 ratio and spray it on using a perfume spritzer...it's pretty amazing how well that works.

As for filaments, I'm pretty picky. While I've found that Inland worked well with my Makerbot Replicator 2 and some of my Creality printers, I generally use Overture the most, followed closely by eSun and Bambu Labs. BiBi Life, SunLu, and Tttyt 3D brand also works well with the X1 Carbon. I've not had much luck with Inland on my X1C, but that spool is about 5-6yrs old and hasn't been dried since opening...

Edited to add - Overture Space Gray with Hilbert Curve for top/bottom layers is frikking amazing. I'll gladly add an additional hour+ to the job time to get that "look".
I will give your suggestions a shot. I am even having trouble getting the Bambu Labs filament to stick now and I did wash off the plate in the sink, but maybe I didn't do a good enough job. I will try again.

Edit:

Turns out I am an idiot. I thought that I had the cool plate and figured it was textured. It didn't dawn on me to look at what was written on the plate until I was cleaning it today and realized it was the textured plate, which explains why I kept getting the error that the plate didn't match the G-code. Got that all corrected and changed the initial layer thickness to be a bit thinner. With those changes, I am still using the Inland filament and so far (fingers crossed) its working and I am 19 layers of 940 in and its holding. The previous failures usually let go after the first or second layer.
 
Last edited:
I will give your suggestions a shot. I am even having trouble getting the Bambu Labs filament to stick now and I did wash off the plate in the sink, but maybe I didn't do a good enough job. I will try again.

Edit:

Turns out I am an idiot. I thought that I had the cool plate and figured it was textured. It didn't dawn on me to look at what was written on the plate until I was cleaning it today and realized it was the textured plate, which explains why I kept getting the error that the plate didn't match the G-code. Got that all corrected and changed the initial layer thickness to be a bit thinner. With those changes, I am still using the Inland filament and so far (fingers crossed) its working and I am 19 layers of 940 in and its holding. The previous failures usually let go after the first or second layer.

Don't feel bad. It's happened to all of us at one point or another. The X1's are damned close to being an appliance but they're still not quite there yet. Glad to hear it's currently working for you.

I found my oldest X1C air printing yesterday so I decided to throw a new extruder in while I figure out what happened with the old one. While I had it apart I replaced the cutter blade and threw on a .6mm nozzle to see how fast it is compared to the .4mm on my newest X1C.
 
10 hours in on a 45 hour print. Multi-color is great but its so bloody wasteful and slooowwwwww. Printing at 0.1mm layers instead of 0.2mm doubles the color switches. :(
 
Has anyone put in a memory card and had an issue with printing afterwards? I put in a 512gb card and when I send something to print, it says "downloading" and does nothing. I turn off the machine and remove the card and it works again. I have it formatted correctly so I don't understand what is going on
 
Has anyone put in a memory card and had an issue with printing afterwards? I put in a 512gb card and when I send something to print, it says "downloading" and does nothing. I turn off the machine and remove the card and it works again. I have it formatted correctly so I don't understand what is going on
I print directly from my computer, so never tried a card.
 
10 hours in on a 45 hour print. Multi-color is great but its so bloody wasteful and slooowwwwww. Printing at 0.1mm layers instead of 0.2mm doubles the color switches. :(

Put a .2mm nozzle in and use a layer height of .05mm. Then, load a print with 1,729 color changes. Then slice and be amazed at the number of days the print job is going to take. (in case you're askin'...it was going to take 49d 17h 44m. I noped right the hell outta that. )

Has anyone put in a memory card and had an issue with printing afterwards? I put in a 512gb card and when I send something to print, it says "downloading" and does nothing. I turn off the machine and remove the card and it works again. I have it formatted correctly so I don't understand what is going on
Largest card I ever tried was a 16GB version since I keep my designs on my NAS and don't do many time lapse recordings.
 
Has anyone put in a memory card and had an issue with printing afterwards? I put in a 512gb card and when I send something to print, it says "downloading" and does nothing. I turn off the machine and remove the card and it works again. I have it formatted correctly so I don't understand what is going on

Never put anything above a 32gb.

Bambu lab say's they support up to 2TB with FAT32 formatting per their wiki
 
Put a .2mm nozzle in and use a layer height of .05mm. Then, load a print with 1,729 color changes. Then slice and be amazed at the number of days the print job is going to take. (in case you're askin'...it was going to take 49d 17h 44m. I noped right the hell outta that. )
Ended up getting some layer shift and had to cancel the print. 😭
 
Ended up getting some layer shift and had to cancel the print. 😭

Sorry to hear. It's tough to lose a print like that. I remember once being 68hrs into a 79hr print on my old Creality CR6 Max and had a power outage. It had the power outage recovery setting enabled in the printer at that time, but the power flickered twice when it dropped, and that was the end of that print...

Don't get discouraged.
Not discouraged. I shrunk the turtles I was printing a little and removed a color, they are already done and printed fine.
 
Hi all. Got a quick question for the group. Has anyone heard if Bambu has plans to make a larger X1C? Currently its a 256mmx256mmx256mm printer. People been asking and hoping but I'm looking for actual info if Bambu has actually said anything about making a larger version? Thanks in advance.
 
Hi all. Got a quick question for the group. Has anyone heard if Bambu has plans to make a larger X1C? Currently its a 256mmx256mmx256mm printer. People been asking and hoping but I'm looking for actual info if Bambu has actually said anything about making a larger version? Thanks in advance.
Haven't heard anything about a larger model. Id be first in line if they did.
 
  • Like
Reactions: Skott
like this
As you can see from my previous post on 3-1-24 about receiving the dead AMS I had to place a support ticket with BL.

I received email today from them telling me that the research I did did indicate that the internal hub and motor were defective, so they asked for my address so they could send me a new internal hub and motor.

Not ideal, but not horrible either.
 
I will give your suggestions a shot. I am even having trouble getting the Bambu Labs filament to stick now and I did wash off the plate in the sink, but maybe I didn't do a good enough job. I will try again.

Edit:

Turns out I am an idiot. I thought that I had the cool plate and figured it was textured. It didn't dawn on me to look at what was written on the plate until I was cleaning it today and realized it was the textured plate, which explains why I kept getting the error that the plate didn't match the G-code. Got that all corrected and changed the initial layer thickness to be a bit thinner. With those changes, I am still using the Inland filament and so far (fingers crossed) its working and I am 19 layers of 940 in and its holding. The previous failures usually let go after the first or second layer.
What temps are you using? I have only used Creality PLA and eSun PLA+ since I got mine and it seems to really like 220/35 temps for both. The only failures I have had were due to not cleaning the plate properly after 3-4 prints.
 
What temps are you using? I have only used Creality PLA and eSun PLA+ since I got mine and it seems to really like 220/35 temps for both. The only failures I have had were due to not cleaning the plate properly after 3-4 prints.

After owning a myriad of Creality printers (CR10 S3, S4, S5, CR6Max, E3S1, E5S1) I finally bought a spool of their filament (Brown) and it seems pretty decent!! They were the only company that offered the specific shade of brown I was looking for and, again, it prints really well! I'm surprised at how well it works.

I've only had two failures in 1105hrs of printing (Totaled from both X1 Carbons 447hrs & 658hrs). First time was when I threw ~9yr old, dirty, undried filament at it (for science!) and an honest-to-god bad spool of Overture Matte Yellow PLA+ which flat-out refuses to print properly on ANY printer I own...Creality, BL, Flash Forge).

I think the reason I haven't had a lot of failures is because I print at the upper end of the temp scale and I run my bed warmer than most (45°C - 50°C for PLA and a solid 100°C for ABS/ASA) and I do use the BL green glue. I do, however, run the glue diluted 50/50 with water and applied with a perfume spritzer to use as release agent as much as an aid for adhesion...(It's the best idea I ever had...I got 900+hrs from ONE bottle of the green glue) I just opened my second bottle of green glue on Monday.
Right on.. I feel ya with the overture filament. I have a spool of translucent red PETG that has never worked right. But then I don't have a filament dryer. I was looking at getting one but the X1C has a filament drying mode and going to try that first.

As far as temp I do like you and run towards the hotter end, however with the X1C I only use 35-37C for bed temp as opposed to 60C on the Ender V2 POS I started with.

Edit: here is the filament I have been using lately. Amazon runs it on sale quite often for $25/2-pack.

https://www.amazon.com/Creality-Fil...id=1710475465&sprefix=creality,aps,128&sr=8-6
 
Last edited:
As an Amazon Associate, HardForum may earn from qualifying purchases.
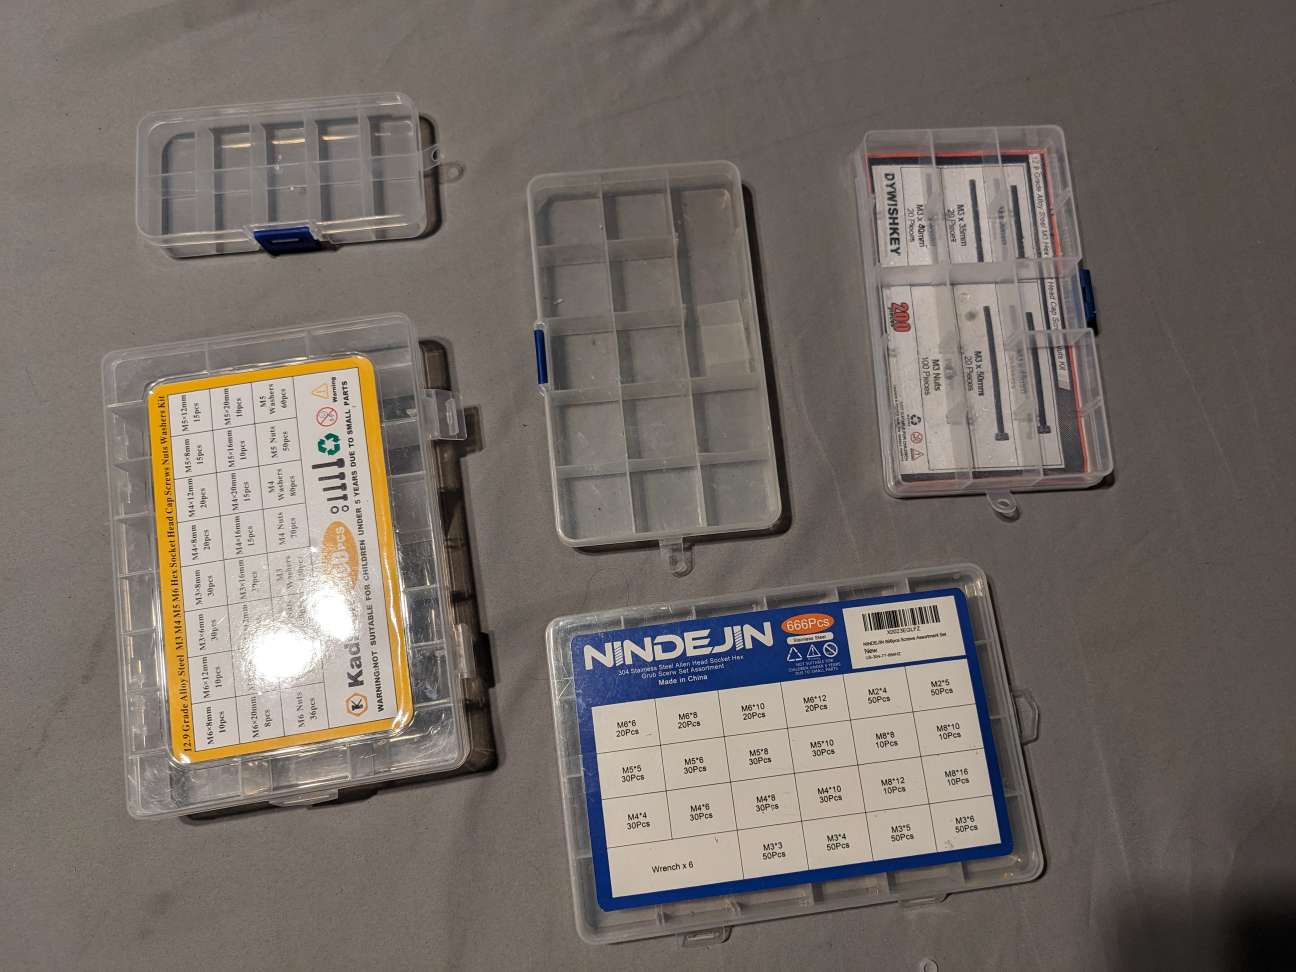
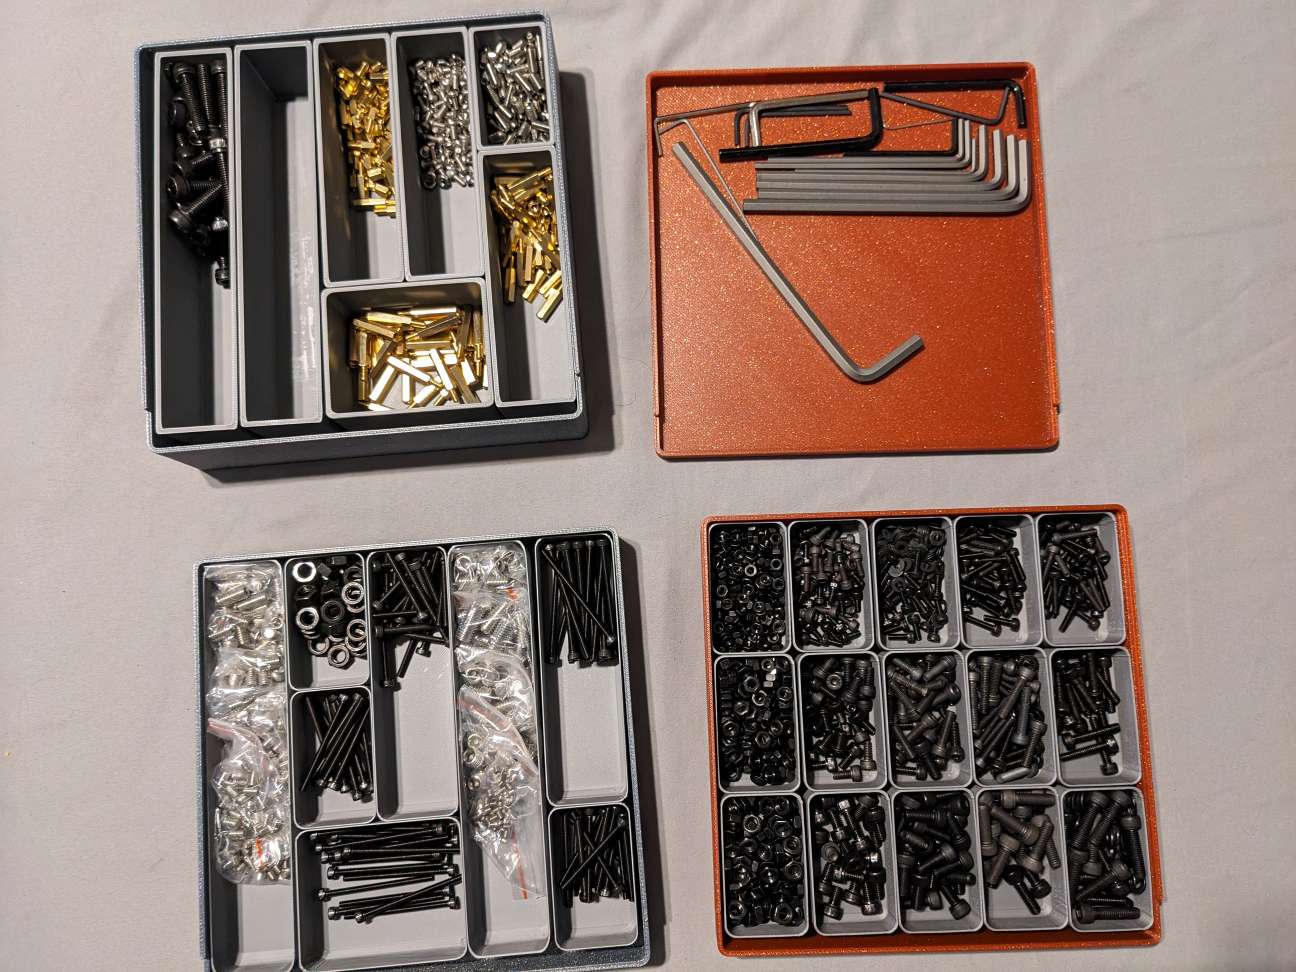
I hate these things. Every time I restock on fasteners for computers or 3D Printers or whatever, I get one of these damn boxes which is just a little smaller/wider/different than the rest of the ones I have. Additionally, those little compartments have dividers that pop out and then the screws/bolts/whatever gets mixed with the others and the only way you can straighten them out is dump them out and sort through them yourself.
Compress_20240317_130833_3144.jpg


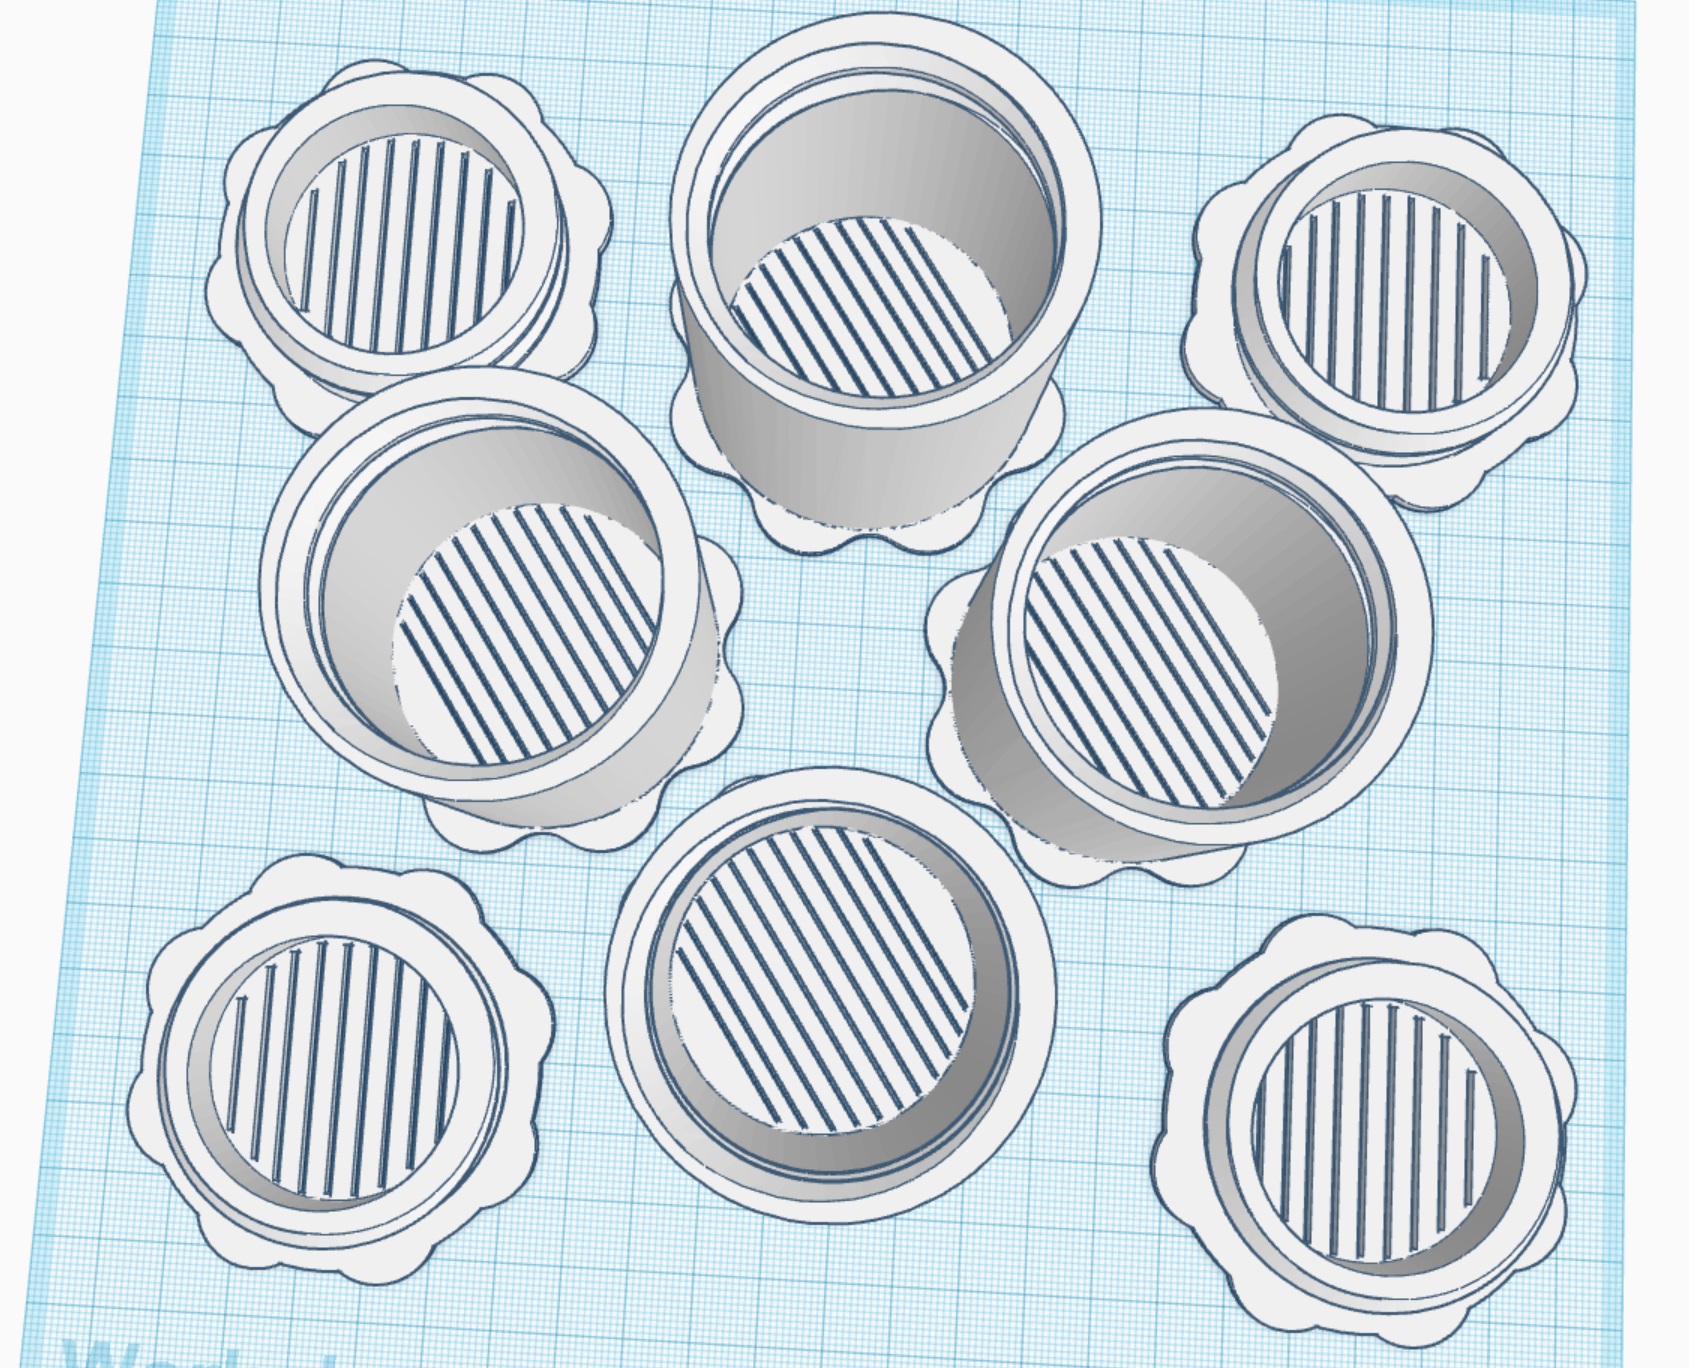
I decided to make a container that holds all those fasteners and came up with this:
Compress_20240317_131415_5611.jpg


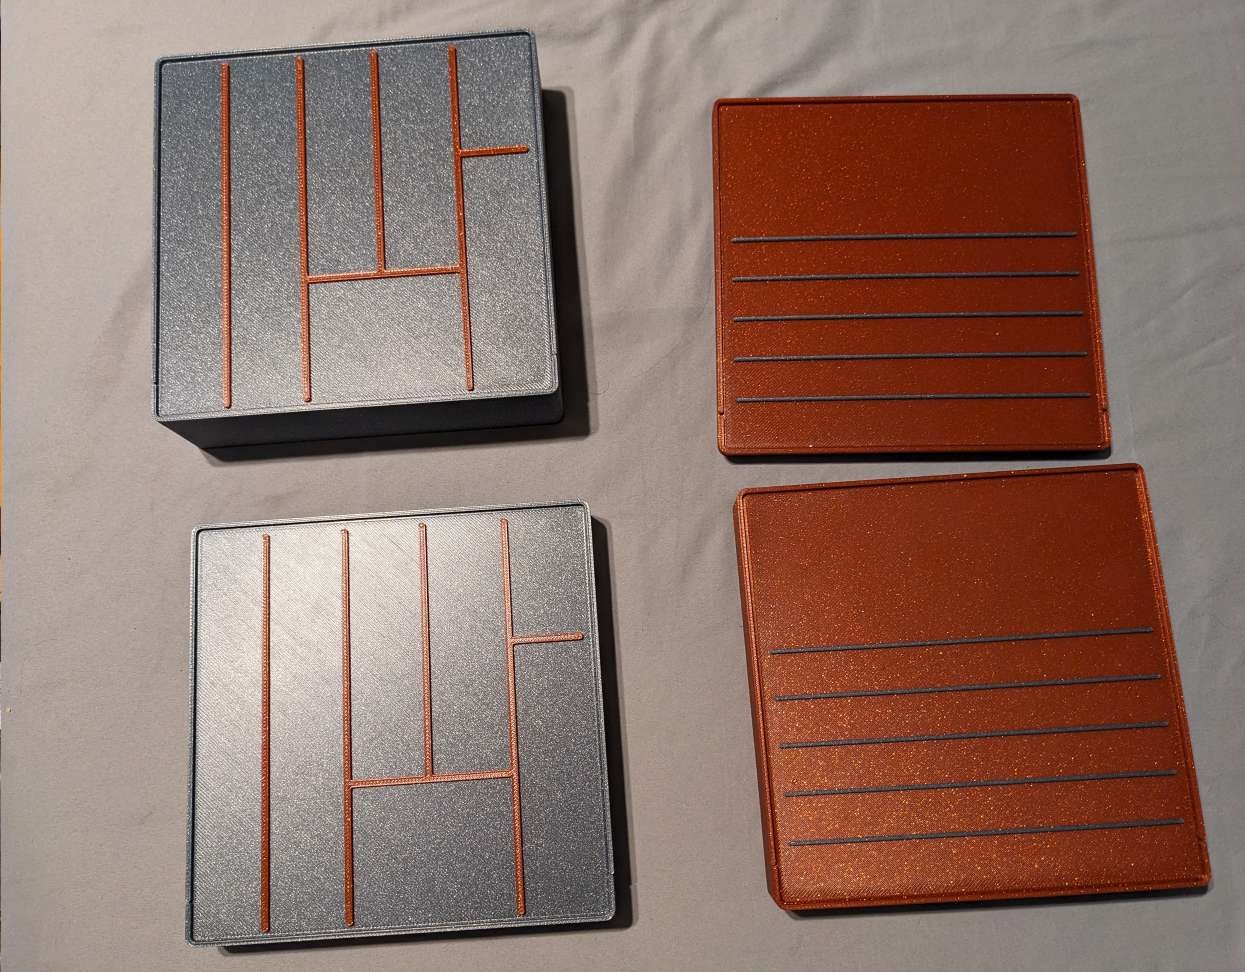
When they're closed they look like the pic below. I started with just the straight lines on the tray covers (like on the red, right-side trays) to make it easier to slide open the lid but, on the silver trays on the left, I started making the lines on the lid reflect the layout of the containers within.
Compress_20240317_131415_5777.jpg


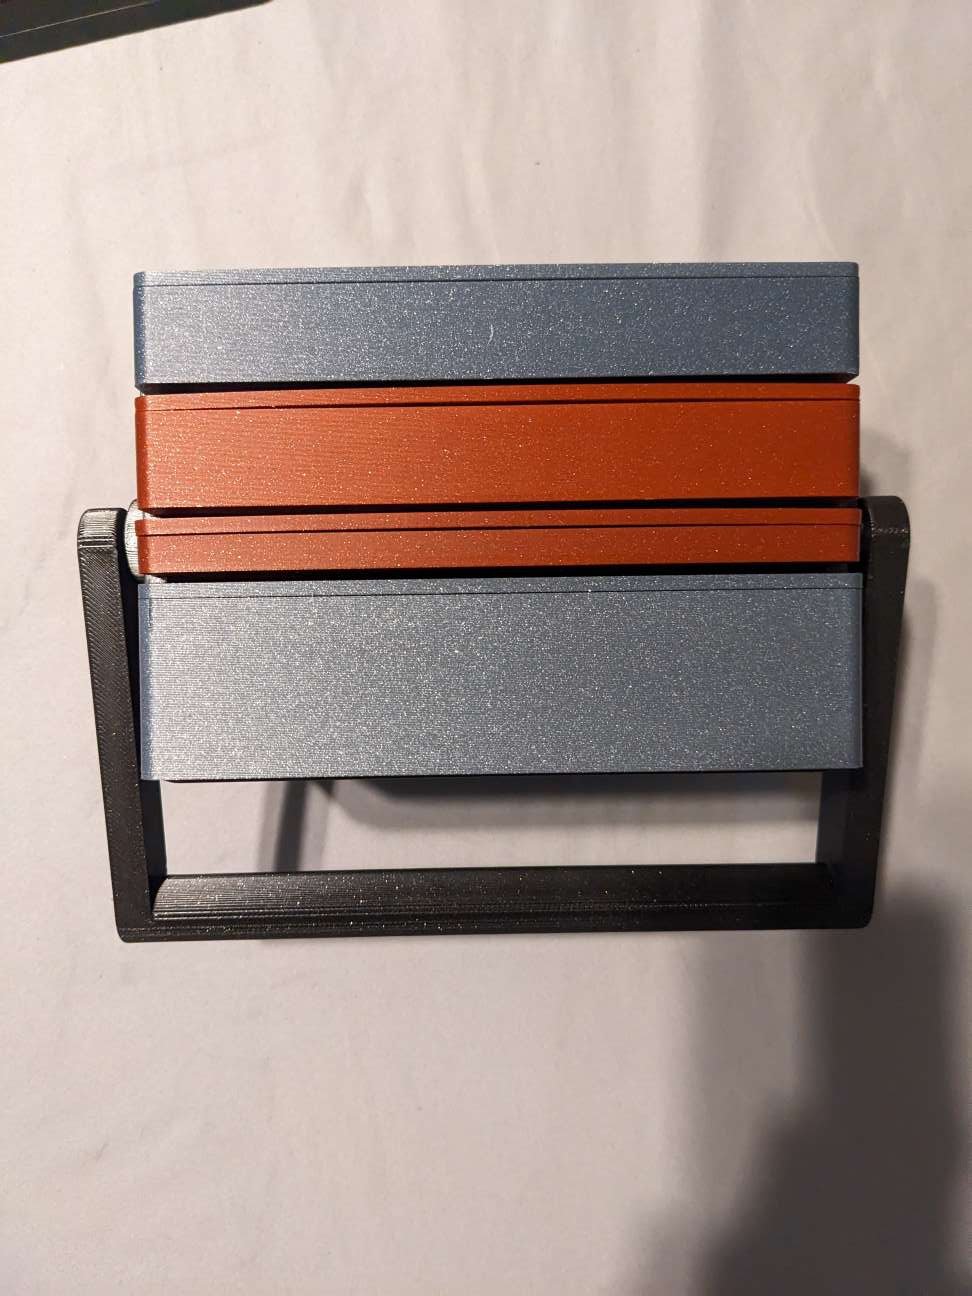
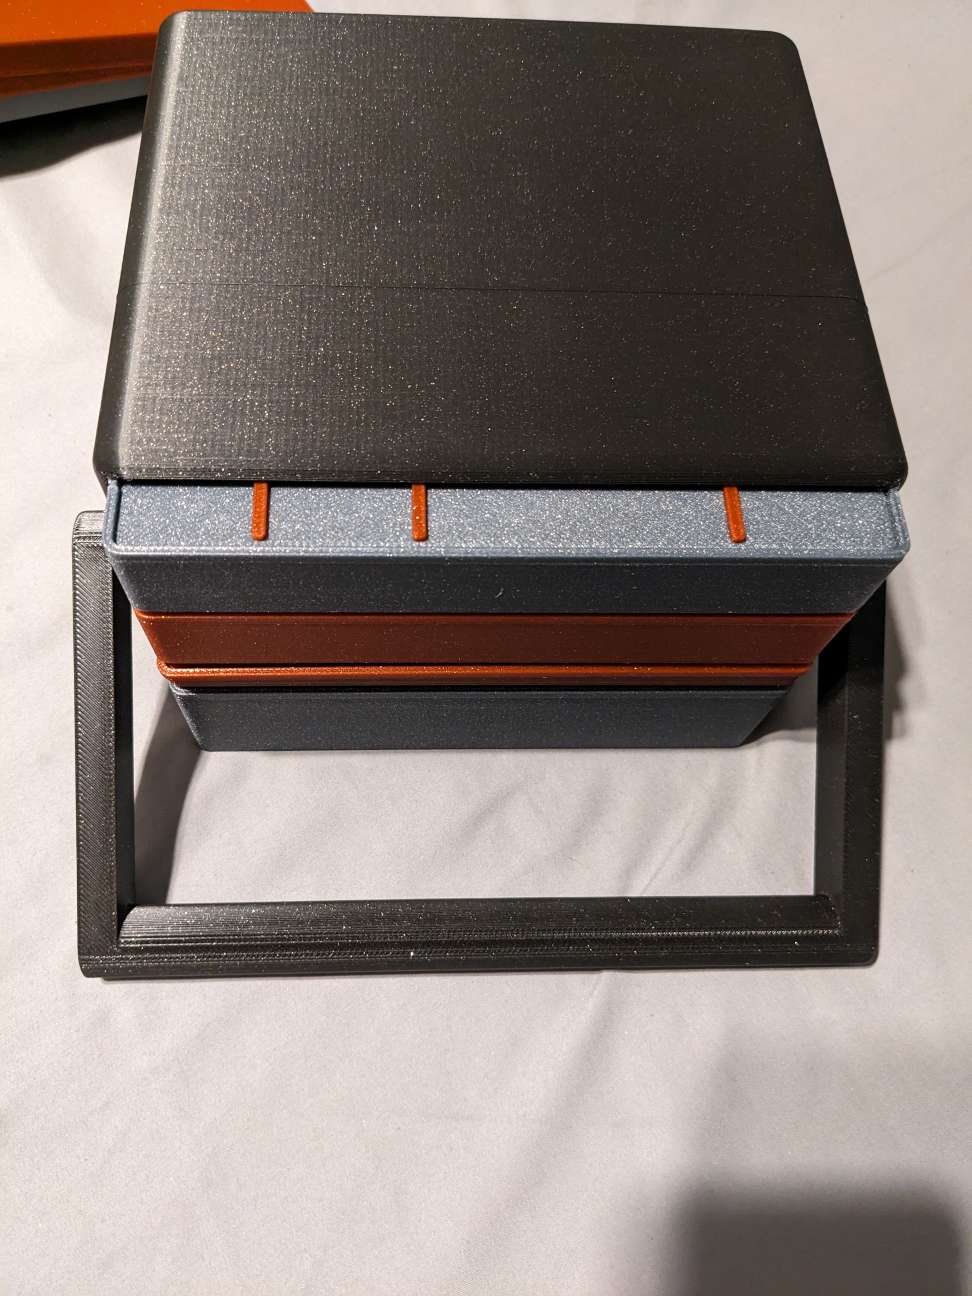
You may think "That's all fine and good, but you still have to carry 4 of these containers around which don't secure to each other so they slide around if you set one on top of another", and you'd be right, but I thought of that and made this carry-all case for them
Compress_20240317_131415_5434.jpg

Compress_20240317_131415_5244.jpg


All printed parts are PLA Sparkle from Bambu Labs. (Slate Gray, Red, and Onyx sparkle)
*All parts were printed using my old X1 Carbon with .6mm nozzle, 50% infill 3 bottom, 3 walls, 3 top with no support
I use (2) washers, (2) M5 nuts, and (2) M5 20mm socket cap screws

* Handle printed at 90% infill because I wasn't sure how heavy the carry-all container would be when the individual containers were filled

I'm not done with the design yet...I am adding knobs to the front of each of the containers so they're easy to slide in/out of the carry case.
 
Has anyone put in a memory card and had an issue with printing afterwards? I put in a 512gb card and when I send something to print, it says "downloading" and does nothing. I turn off the machine and remove the card and it works again. I have it formatted correctly so I don't understand what is going on
From community testing during the early kickstarter deliveries anything past 128gig for the SD card was a no go, and 128gig was a crap shoot depending on the card. I just use 64 gig cards without issue.
 
So who has replaced the nozzle with the .6mm (besides me)

I am seriously considering replacing the .4mm in my other X1 printer because the increased performance so far more than makes up for the loss in resolution...just wondering if others have done the same
 
So who has replaced the nozzle with the .6mm (besides me)

I am seriously considering replacing the .4mm in my other X1 printer because the increased performance so far more than makes up for the loss in resolution...just wondering if others have done the same
I dont have a bambu but every printer i have prints with 0.6. I even changed our fdm at work to the same. The ease of use was worth the trade off of fine details.
 
So who has replaced the nozzle with the .6mm (besides me)

I am seriously considering replacing the .4mm in my other X1 printer because the increased performance so far more than makes up for the loss in resolution...just wondering if others have done the same
I think I have a 0.6mm sitting around, but Im still printing with the 0.4 it came with.
 
I dont have a bambu but every printer i have prints with 0.6. I even changed our fdm at work to the same. The ease of use was worth the trade off of fine details.
I think my next order from the bambu store will include another .6mm since it's faster and it simplifies Bambu Studio since i don't need to keep sixty-leven profiles, lol.
 
So it’s a year later, and after some more research I pulled the trigger on a p1s ams combo. Parts availability is much better, customer service has improved, and the company hasn’t exit scammed.

Anyways other than a spare hardened steel nozzle, (0.4 and 0.6) what else should I have on hand? Not new at all to 3d printing, but new to these printers.

Do I go for the whole hot end assembly or just the nozzles?

Are the hardened steel gears worth the cost?

Personally, I keep 2 spare complete extruder assemblies with the hardened steel gears and 2 complete hot ends. I don't want to be offline more than 10 minutes and this lets me do that. It's not like having 2 spares is expensive...I'm buying "back online FAST"

I also keep spares on hand to completely replace the feeder system for 1 slot of the AMS in case one dies.

I also keep spare charcoal canisters in case I come up with a design that needs ABS/ASA as the material.
 
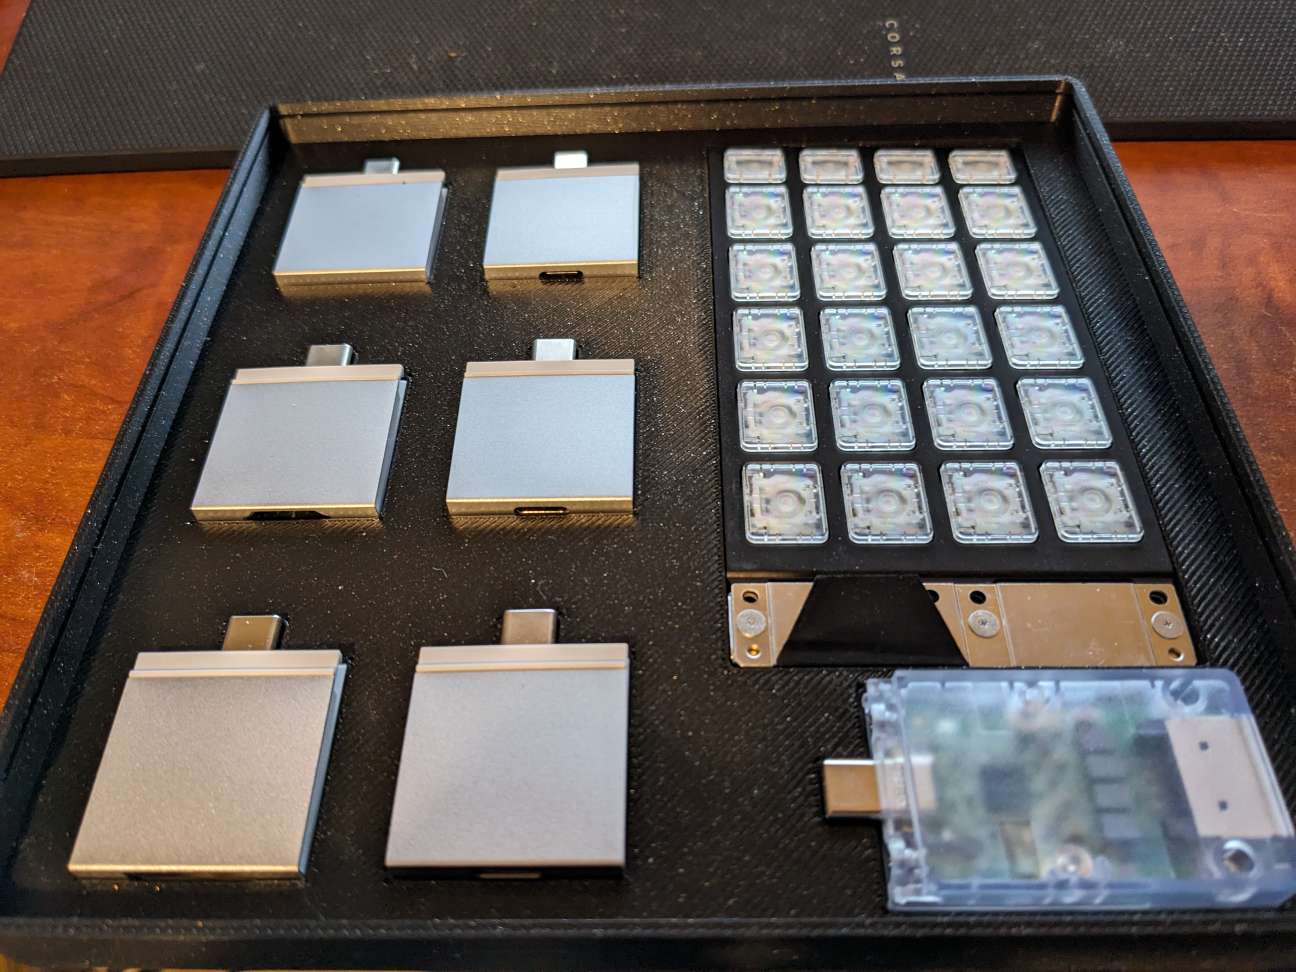
Expansion Port Storage case for my Framework 16 Laptop. I already modded this design to add storage for the Framework screwdriver
2.jpg

1.jpg
2.jpg
 
Back
Top