Navigation
Install the app
How to install the app on iOS
Follow along with the video below to see how to install our site as a web app on your home screen.
Note: This feature may not be available in some browsers.
More options
You are using an out of date browser. It may not display this or other websites correctly.
You should upgrade or use an alternative browser.
You should upgrade or use an alternative browser.
The Mineral Oil PC
- Thread starter legoman666
- Start date
legoman666
Gawd
- Joined
- Dec 21, 2003
- Messages
- 638
If there's no more cake left, could I use your workshop for my next project?
Looking great, marvelous job")
Lol, I made some beer bread today that is absolutely delicious. If you come here, you're welcome to a few slices
*CLAPS* I seriously am amazed at what you are doing. By the way where did you get that LCD from? I wish I could do this but sadly I do not have the tools for this kind of operation.
Thanks
About the LCD: I have no idea what model number or brand it is. I bought it used off another forum member at Bit-tech. He said it was originally used in a fast food restaurant. I spent hours trying to look up information on it. I Googled every number and serial code on the damn PCB to no avail. The little I know about it is from experimenting with it. Wiring up the power was simple, but figuring out the VGA was a pain in the neck. It looks like there are headers for composite and s-video as well. It has a 640x480 resolution which is nice and crisp, but the colors are kind of meh. The same member sold me another ~7" LCD that I haven't bothered to power up. It's not as good quality though.legoman666
Gawd
- Joined
- Dec 21, 2003
- Messages
- 638
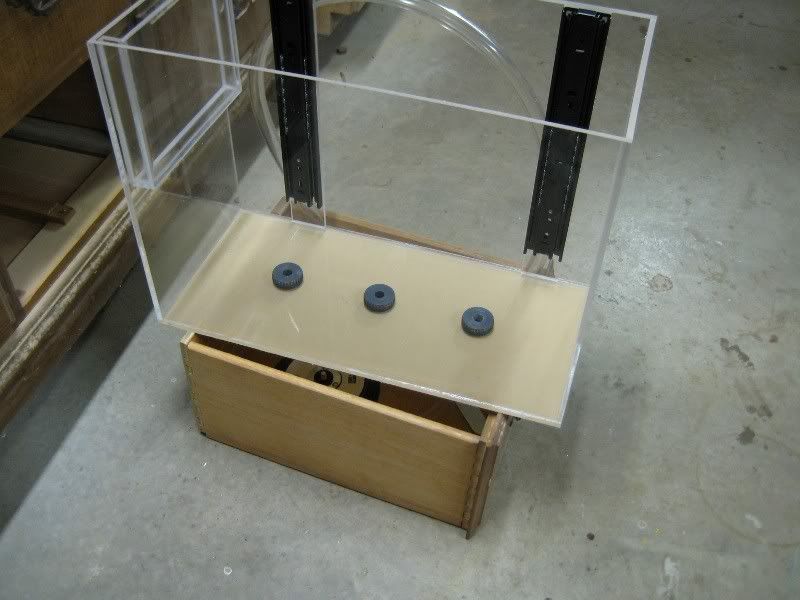
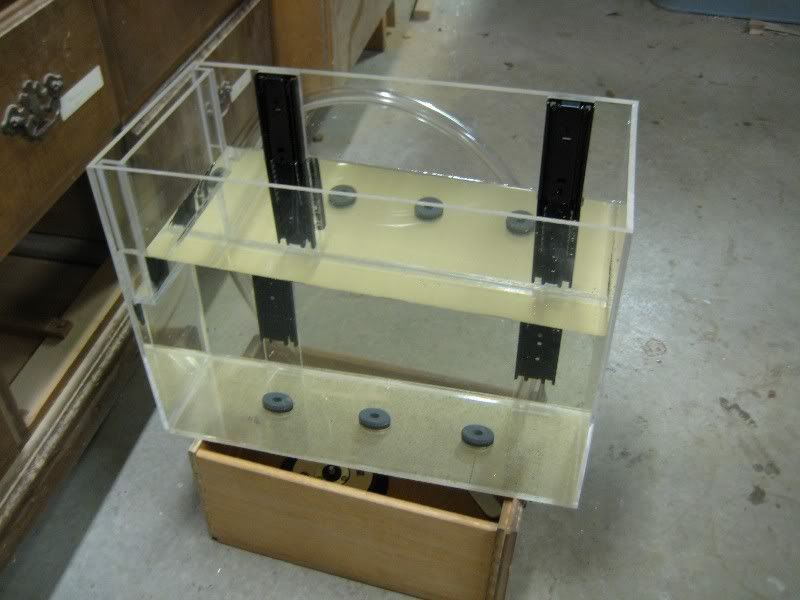
So the plan today was to get the tank done. To accomplish that, I had to prepare the side panels. Yesterday I made the "tank" for the LCD. I had just one thing left to do today before gluing it all together.
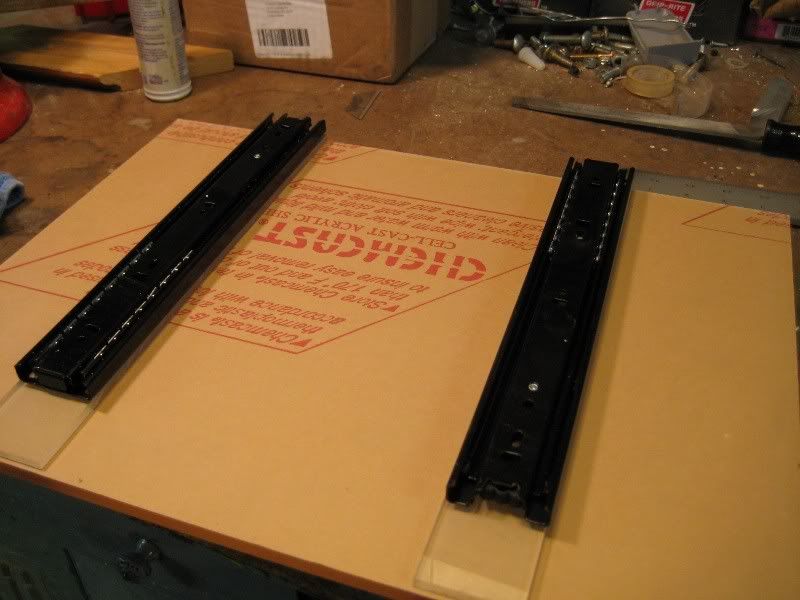
The left side panel needed to have the drawer slides attached to it.
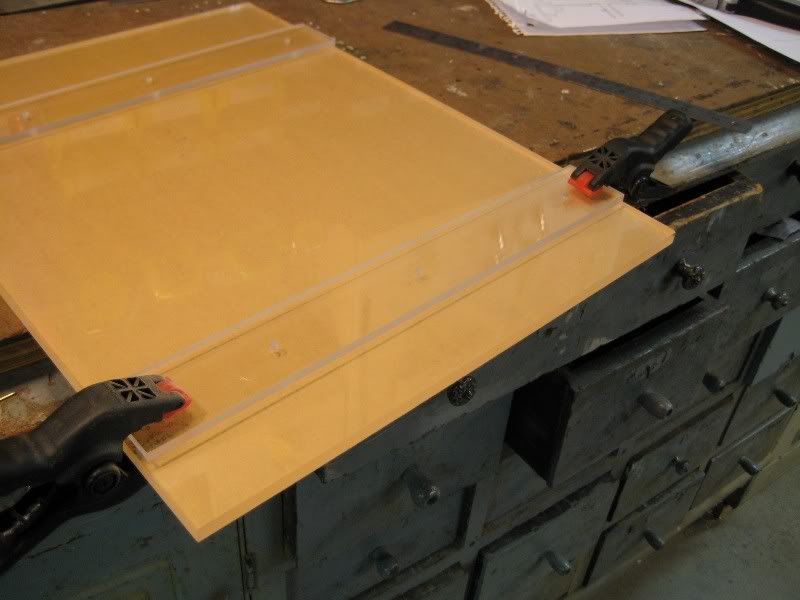
I cut these strips of acrylic a while ago. The holes are already drilled. Gluing stuff with the Weld-On is really easy; just clamp the two surfaces together....
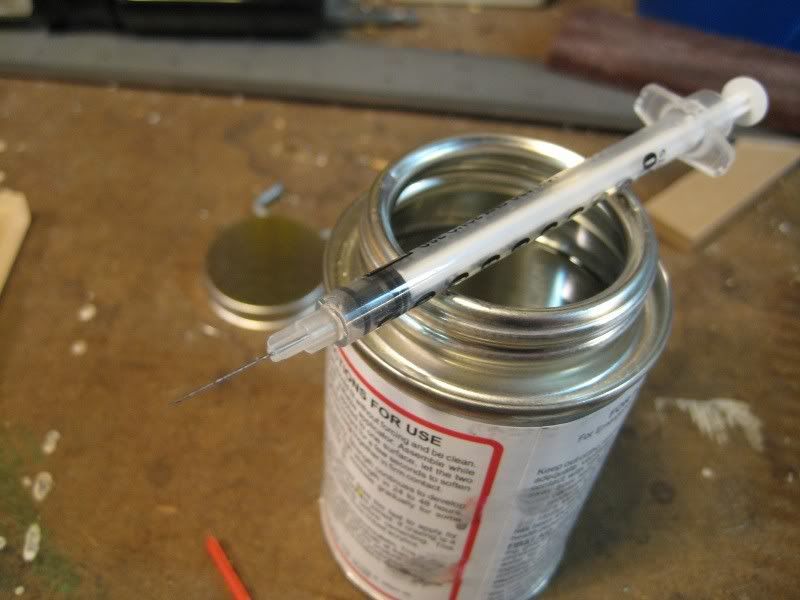
...And apply the glue with a syringe or similar to the joints. It seeps into the tiny spaces between the two pieces of acrylic and dries in about 5-10 minutes.
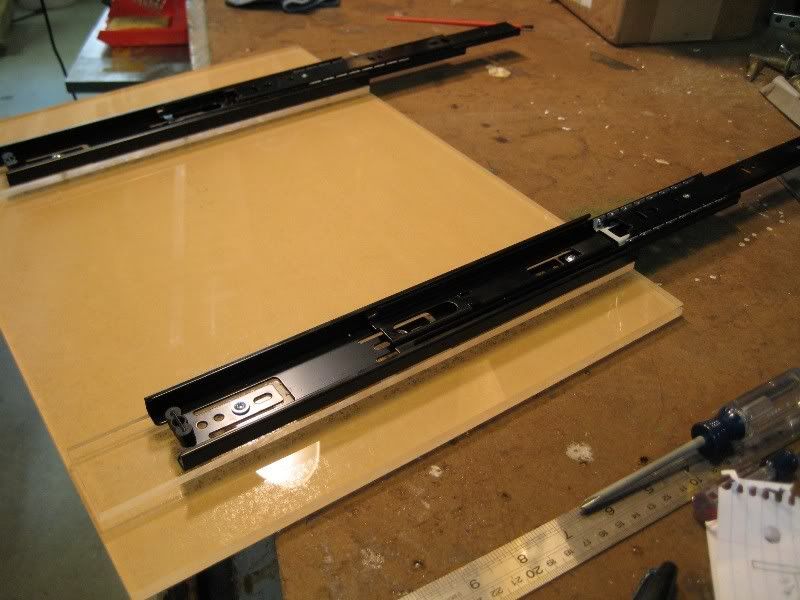
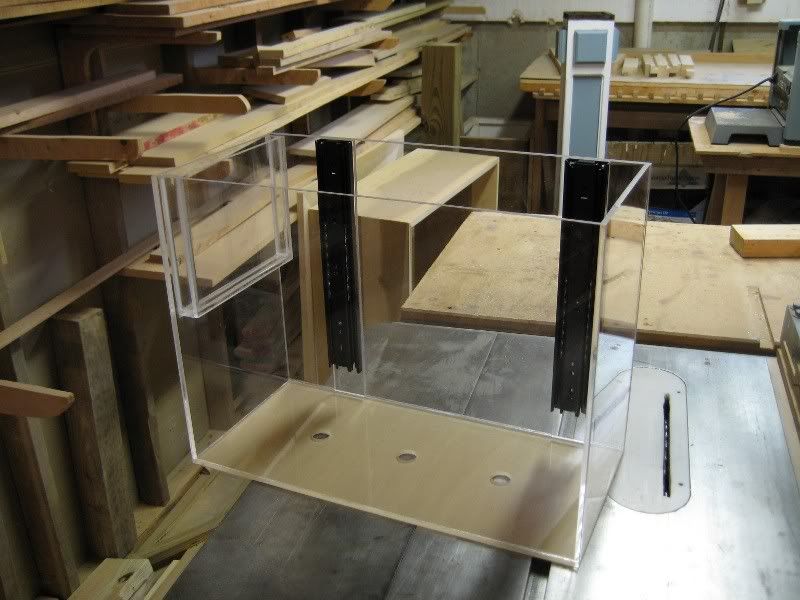
Here it is glued on!
And then checking the fit in the case. Looks like it'll open just fine.
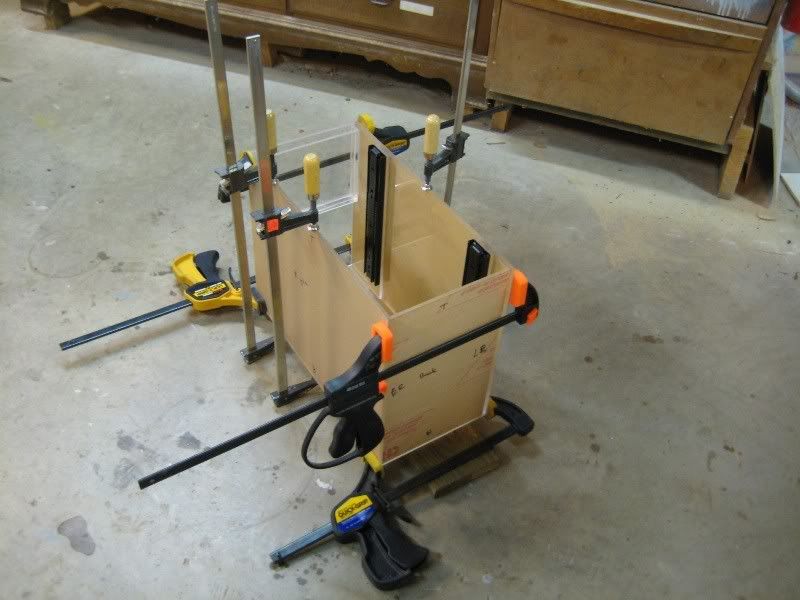
After my experience with the LCD tank and the strips, it was time to glue the tank together. Clamps = win.
About 25 minutes later, it's already dry. I didn't put any silicone in the joints yet. I'm not 100% certain that I'm going to.
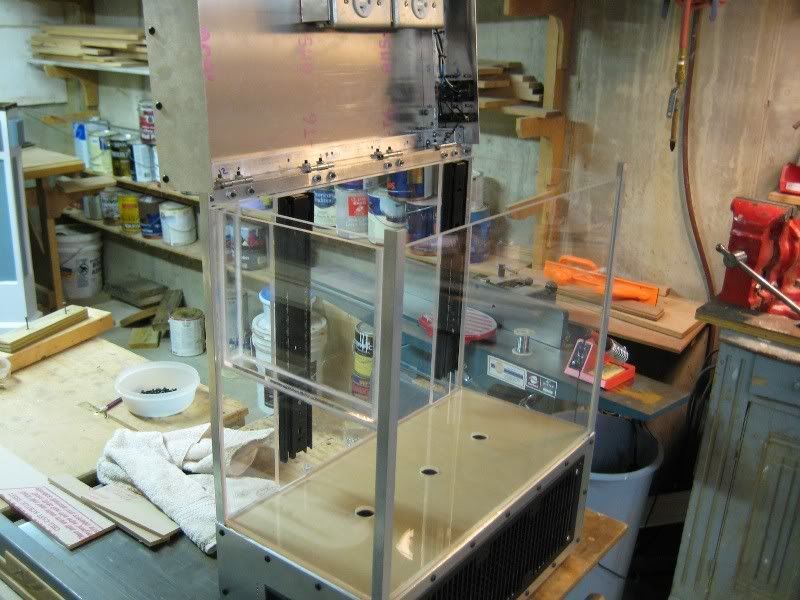
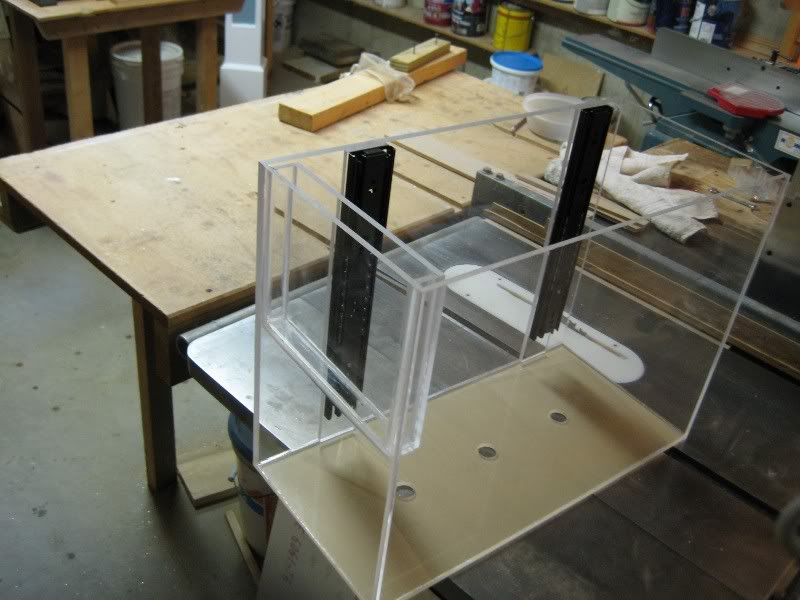
And then dropped it into the frame. It fits!

The lid is a little difficult to close though. I'll see what I can do about that.
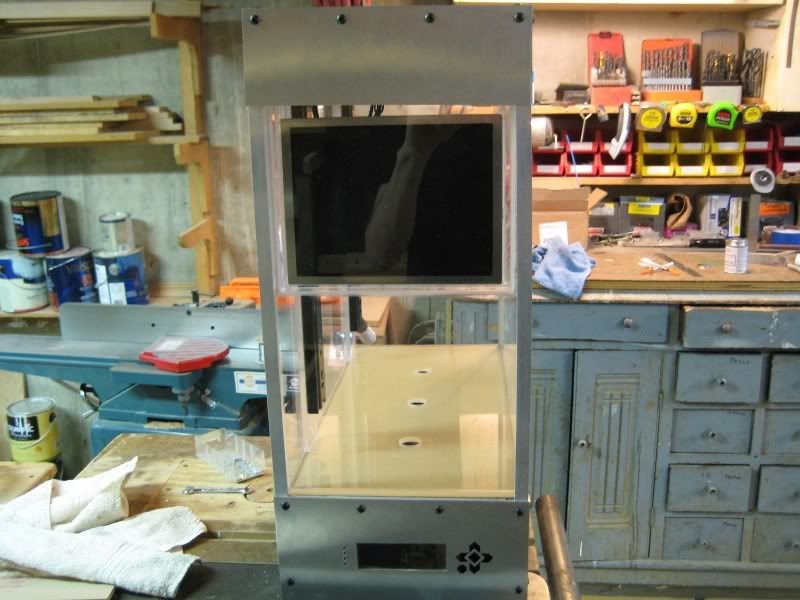
The lid above the LCD is slightly crooked. The lid closes too far; easily fixed.
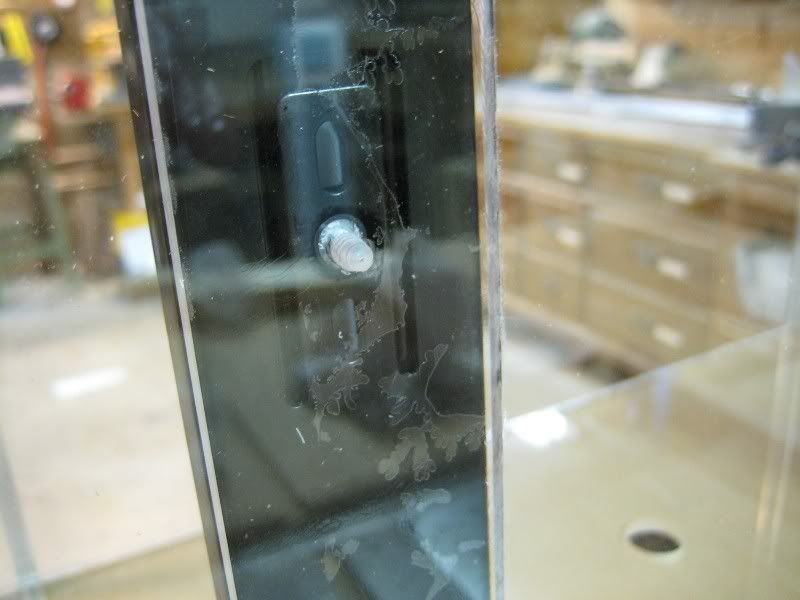
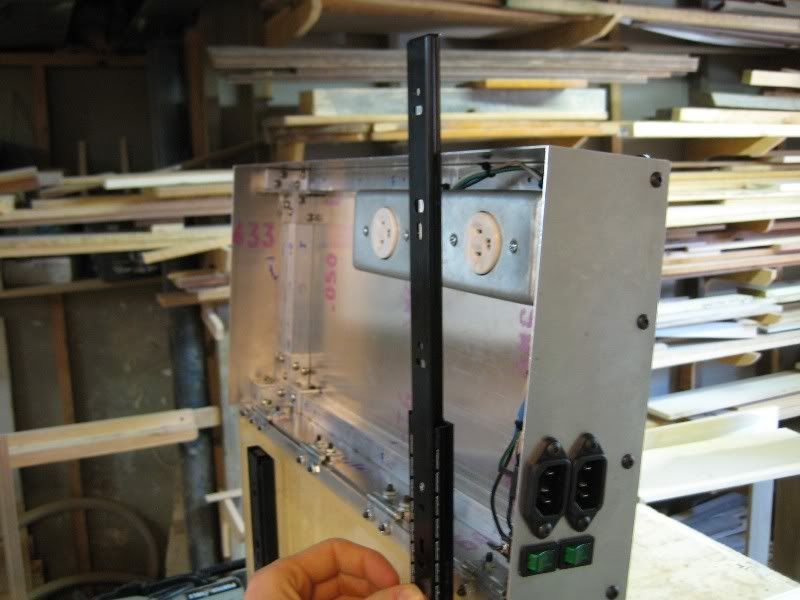
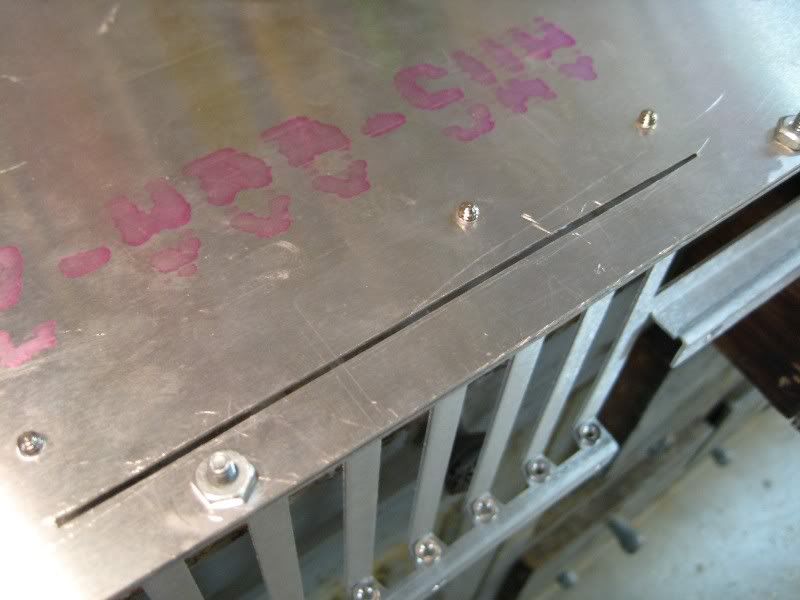
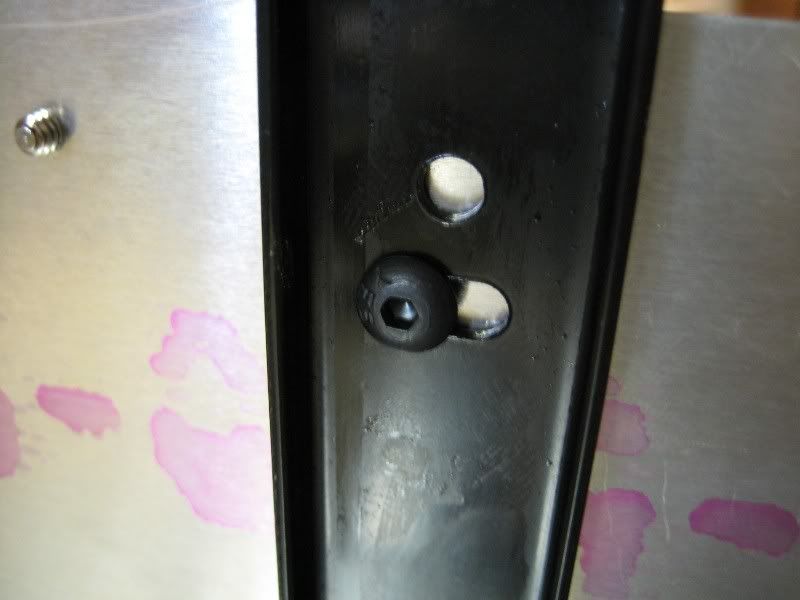
Close up of the rear of one of the drawer slides. The bubbles are where there isn't glue.
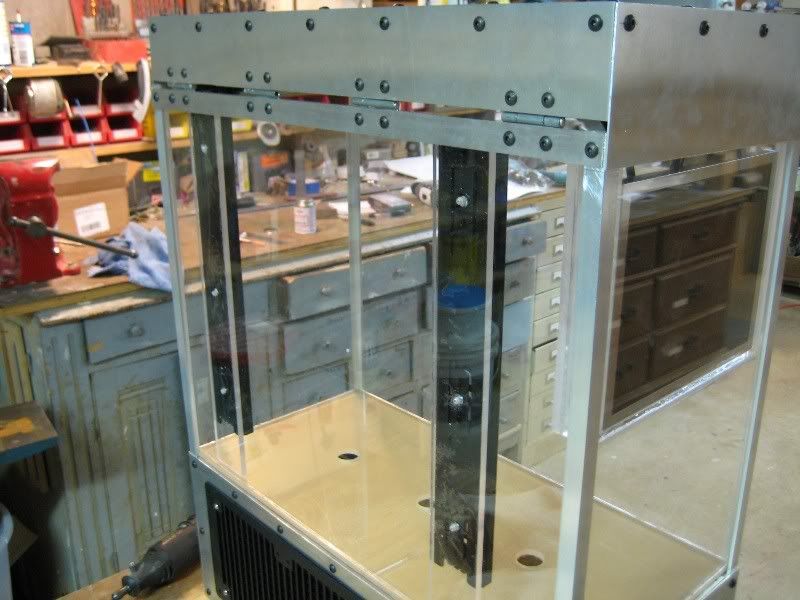
The back.
That's it for today! Comments?
The left side panel needed to have the drawer slides attached to it.
I cut these strips of acrylic a while ago. The holes are already drilled. Gluing stuff with the Weld-On is really easy; just clamp the two surfaces together....
...And apply the glue with a syringe or similar to the joints. It seeps into the tiny spaces between the two pieces of acrylic and dries in about 5-10 minutes.
Here it is glued on!
And then checking the fit in the case. Looks like it'll open just fine.
After my experience with the LCD tank and the strips, it was time to glue the tank together. Clamps = win.
About 25 minutes later, it's already dry. I didn't put any silicone in the joints yet. I'm not 100% certain that I'm going to.
And then dropped it into the frame. It fits!
The lid is a little difficult to close though. I'll see what I can do about that.
The lid above the LCD is slightly crooked. The lid closes too far; easily fixed.
Close up of the rear of one of the drawer slides. The bubbles are where there isn't glue.
The back.
That's it for today! Comments?
Spare-Flair
Supreme [H]ardness
- Joined
- Apr 4, 2003
- Messages
- 7,471
Awesome, I'd put two strips of brushed sheetmetal over the back where the rails are glued on so that the ugly bubbles and screws aren't visible.
Lol, I made some beer bread today that is absolutely delicious. If you come here, you're welcome to a few slices
Sure, just let me get into my private jet and fly to your place
Progress looks good, it's easy to see now how the final case is going to look
legoman666
Gawd
- Joined
- Dec 21, 2003
- Messages
- 638
Sure, just let me get into my private jet and fly to your place
Progress looks good, it's easy to see now how the final case is going to look
I'll be waiting. Better be quick, it's about 2/3 gone
A - Mazing.
Thanks.
Awesome, I'd put two strips of brushed sheetmetal over the back where the rails are glued on so that the ugly bubbles and screws aren't visible.
Good suggestion. I don't know if it's necessary though; it's on the back of the case and you can't really see it unless you put your nose about 5" away from the acrylic. I'll look into it though.
Yea spare-flair has a good point but still looks amazing. How much did you pay for your LCD's?
Thanks. I bought them used from a forum member at Bit-tech for $35 shipped. Good deal if you ask me
This is amazing, I'll be watching this thread and looking forward to completion!
Thanks!
Dude, damn. Good work.
Cheers.
Spare-Flair
Supreme [H]ardness
- Joined
- Apr 4, 2003
- Messages
- 7,471
Good suggestion. I don't know if it's necessary though; it's on the back of the case and you can't really see it unless you put your nose about 5" away from the acrylic. I'll look into it though.
Well, I can see it clear as day from this picture and it is bugging me.
legoman666
Gawd
- Joined
- Dec 21, 2003
- Messages
- 638
Well, I can see it clear as day from this picture and it is bugging me.
Lol, I suppose the screws are easily visible. I see your point.
legoman666
Gawd
- Joined
- Dec 21, 2003
- Messages
- 638
How are you going to get video from it? Are you planning on doing a DVI extension like you did with the power cables?
As for the bubbles on the back, I'd say it'd be hardly noticable once it is full of liquid.
What do you mean exactly?
As for the bubbles, that's how I'm leaning as well. Covering it up with a piece of aluminum would be difficult since there isn't an easy place on the bottom frame to attach the aluminum to. (nor on the top for that matter).
-(Xyphox)-
Supreme [H]ardness
- Joined
- Sep 9, 2004
- Messages
- 6,518
looking great
What do you mean exactly?
As for the bubbles, that's how I'm leaning as well. Covering it up with a piece of aluminum would be difficult since there isn't an easy place on the bottom frame to attach the aluminum to. (nor on the top for that matter).
Well, you could glue on non-transparent strips of plexi to cover it up or so
nlancaster
Gawd
- Joined
- Feb 24, 2005
- Messages
- 700
Awesome work. I personally would not be too troubled by the bubbles on the back. but you could double sticky tape some aluminum strips over the back covering up the drawer slides.
Randominal
Limp Gawd
- Joined
- Jan 14, 2007
- Messages
- 239
You could sand the back plexi peice to make it have a frosted look - would look quite slick imo.
retardude48
Gawd
- Joined
- Oct 30, 2007
- Messages
- 512
Are you going to cover up those screw heads? Looks like rivet all around....and thats what made me change my case over to a P182. Clean look. Maybe you cover it up with aluminum or something to get that clean look.
legoman666
Gawd
- Joined
- Dec 21, 2003
- Messages
- 638
Are you going to cover up those screw heads? Looks like rivet all around....and thats what made me change my case over to a P182. Clean look. Maybe you cover it up with aluminum or something to get that clean look.
I like my screws! Besides, the surfaces with the most screws are the top and back, neither of which are visible unless you get up and look at them. Also, how would you propose to attach the aluminum covers (which I would need to buy), with screws?
looking great
Thanks!
Well, you could glue on non-transparent strips of plexi to cover it up or so
That's an idea... but I'm truly not concerned about them. A: it's on the back, B: it's hard to see anyway. I appreciate the idea though.
Awesome work. I personally would not be too troubled by the bubbles on the back. but you could double sticky tape some aluminum strips over the back covering up the drawer slides.
Thanks, I agree! (I try to steer clear of tape. It's a non-permanent solution.)
You could sand the back plexi peice to make it have a frosted look - would look quite slick imo.
That's not a bad idea but I really think it's OK as is.
Looks amazing so far... cant wait to see this compleated. just curious, knowing how much time you put in so far... and you were going to sell this, what price tag would you put on this?
Hm. The materials minus the computer itself have cost $950. Plus labor, lots of labor.... and planning. If someone were to give me $10000 after I finished it, I'd take it and hand over the case. With $10000, I could make a new one with a beast of a machine inside.
I don't want anyone to think I'm being lazy by me leaving it as is, but I really think it's good right now. I don't mean acceptable or not worth the trouble, I mean it's good.
Spare-Flair
Supreme [H]ardness
- Joined
- Apr 4, 2003
- Messages
- 7,471
What do you mean exactly?
As for the bubbles, that's how I'm leaning as well. Covering it up with a piece of aluminum would be difficult since there isn't an easy place on the bottom frame to attach the aluminum to. (nor on the top for that matter).
Oh, I would just glue or epoxy the aluminum sheetmetal strips to the plexi. It's just those bubbles and glue residue and exposed screws don't look very nice. Could also get sheets of double sided tape and cut out the right size rectangle for the cleanest look.
legoman666
Gawd
- Joined
- Dec 21, 2003
- Messages
- 638
PS - I like the look of the screws myself.
Thank you sir, I as well. (That is how I designed it after all, heh)
Oh, I would just glue or epoxy the aluminum sheetmetal strips to the plexi. It's just those bubbles and glue residue and exposed screws don't look very nice. Could also get sheets of double sided tape and cut out the right size rectangle for the cleanest look.
I've had bad luck epoxying aluminum to plexiglass in the past. I epoxied the window on the side of my last case to the aluminum and it kind of just fell off after a few months. Then I tried double sided tape, which dried out after a while. I kind of want to leave the back piece of plexi as is. It looks fine and I'd like it to let the light in.
Lookin' good.
btw - It's really hard to put a price tag on something like that. It's way more than materials and computer hardware.
Indeed. The materials only cost me ~$1000. But I've put a lot of time and effort into it. Even if someone gave me $10,000, I don't think I'd have the will power or drive to make another identical case. I hate to do things over
My buddy is interested in having me make a case for him out of wood for his living room htpc, so I may have another project lined up anyway.
Spare-Flair
Supreme [H]ardness
- Joined
- Apr 4, 2003
- Messages
- 7,471
I've had bad luck epoxying aluminum to plexiglass in the past. I epoxied the window on the side of my last case to the aluminum and it kind of just fell off after a few months. Then I tried double sided tape, which dried out after a while. I kind of want to leave the back piece of plexi as is. It looks fine and I'd like it to let the light in.
Sheets that are only as wide as your rails won't make a different to the light getting in as the rails block incoming light anyway.
Bah, it's just me. Knowing that something imperfect was visible just drives me insane after all the lengths you go through to fabricate these parts and remake ones you felt were off, etc...seems like a waste.
I also like a clean case and would do something ridiculous like grind all the screw heads flat and jweld some new aluminum on the sides but that's just me.
I like the look of the case. Its like walking into a Chipotle and getting that 'industrial' look to the place.
While the bubbles from the epoxy do detract from the overall finish of the case, I dont think its worth trying to find a solution to cover them up. I think two strips of metal, rail width glued to the other side of the case, would look like a cheap/ quick fix.
While the bubbles from the epoxy do detract from the overall finish of the case, I dont think its worth trying to find a solution to cover them up. I think two strips of metal, rail width glued to the other side of the case, would look like a cheap/ quick fix.
legoman666
Gawd
- Joined
- Dec 21, 2003
- Messages
- 638
Sheets that are only as wide as your rails won't make a different to the light getting in as the rails block incoming light anyway.
Bah, it's just me. Knowing that something imperfect was visible just drives me insane after all the lengths you go through to fabricate these parts and remake ones you felt were off, etc...seems like a waste.
I also like a clean case and would do something ridiculous like grind all the screw heads flat and jweld some new aluminum on the sides but that's just me.
But I don't understand the point of the sheets in the first place, regardless of how small they are. This is on the back of the case, is not easily visible, and doesn't bother me to begin with.
And about the screws, I like 'em
It looks industrial and they prevent the panel from vibrating against the frame.I like the look of the case. Its like walking into a Chipotle and getting that 'industrial' look to the place.
While the bubbles from the epoxy do detract from the overall finish of the case, I dont think its worth trying to find a solution to cover them up. I think two strips of metal, rail width glued to the other side of the case, would look like a cheap/ quick fix.
The industrial look is sort of what I was going for.
I agree with you about the strips of aluminum. I think they would draw attention to the back when you should be focusing on the front and right side.What do you mean exactly?
.
Well, I assume you want to hook up a monitor to the video card. Right? Or is the screen on front going to be the only monitor?
I can't image you're going to run a DVI/HDMI cable straight into the case without allowing for it to be disconnected on the backside(top).
legoman666
Gawd
- Joined
- Dec 21, 2003
- Messages
- 638
Well, I assume you want to hook up a monitor to the video card. Right? Or is the screen on front going to be the only monitor?
I can't image you're going to run a DVI/HDMI cable straight into the case without allowing for it to be disconnected on the backside(top).
Ah, OK. I have 4 monitors + the LCD inside the case. I had planned on making a hole of sorts in the back to allow the cables to go in and out. Your idea is much better, however it will require a lot of time (and potentially money). I'll look into it!
legoman666
Gawd
- Joined
- Dec 21, 2003
- Messages
- 638
I filled the tank about 3/4 full with water yesterday and didn't notice any leaks. I'm letting it sit for a few days though to see if any drips develop. A leak with the oil would be very bad. I got some pics that I forgot to upload.
legoman666
Gawd
- Joined
- Dec 21, 2003
- Messages
- 638
Here are those pics I forgot to post last night:
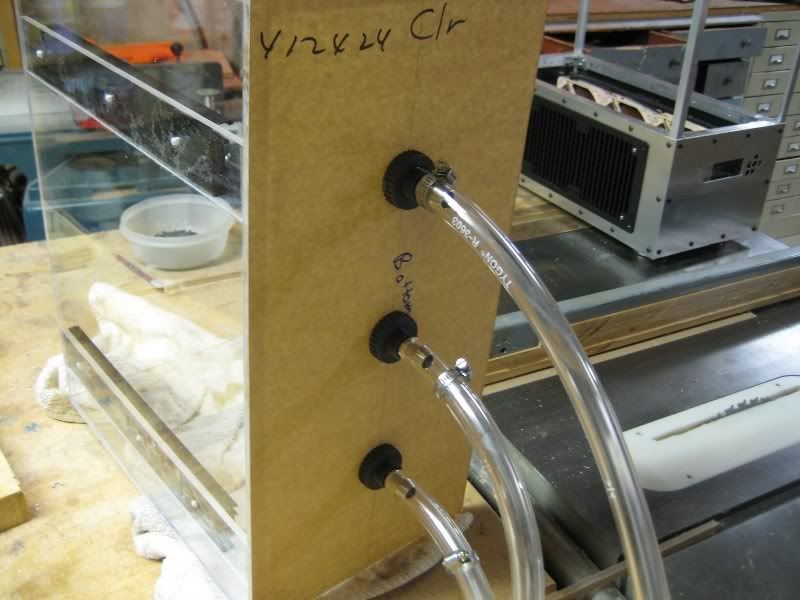
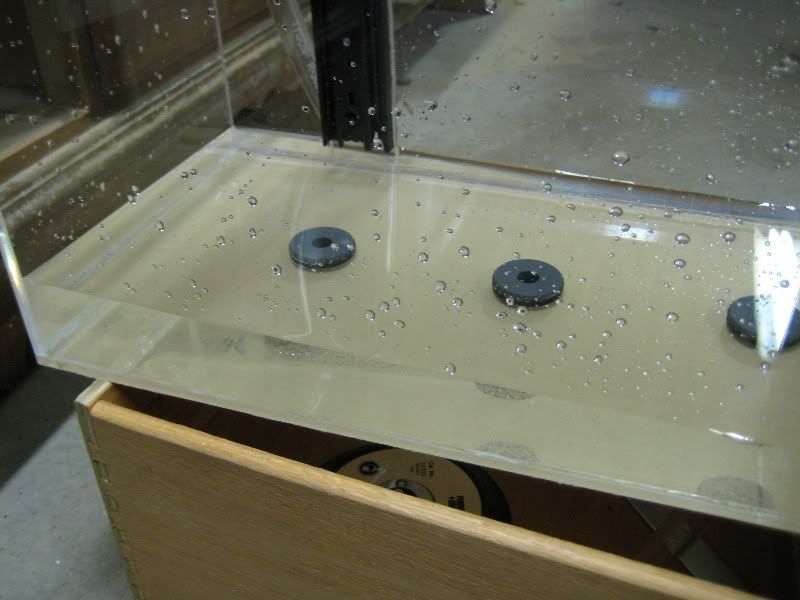
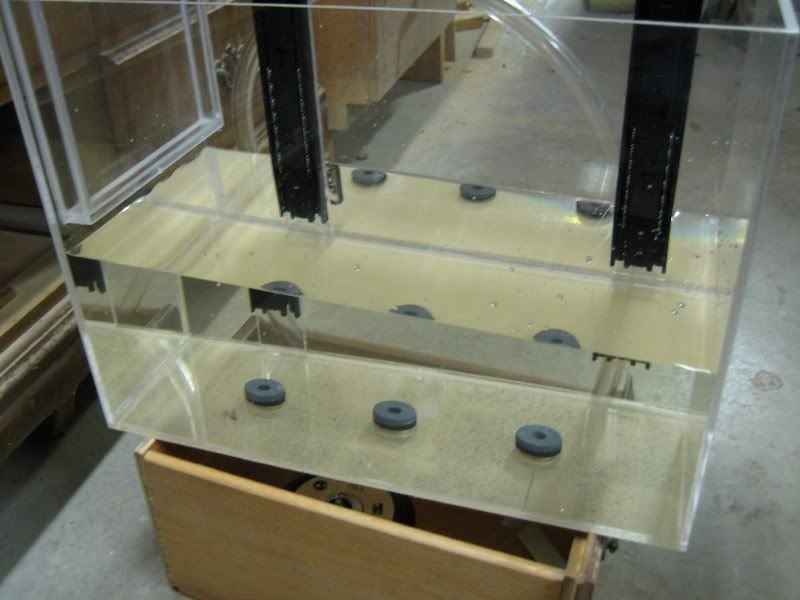
No leaks so far!
No leaks so far!
AverageJoe86
n00b
- Joined
- Feb 20, 2009
- Messages
- 42
Great project log! Always been a fan of these types.
My only suggestion so far would be to put the hot liquid inlet at the top to it takes the hottest material away, otherwise it looks like you might just get a cold loop going on the bottom and the only cold stuff on the processor would just percolate up and not be as efficient as it could be.
Excellent workmanship though!
legoman666
Gawd
- Joined
- Dec 21, 2003
- Messages
- 638
Great project log! Always been a fan of these types.
My only suggestion so far would be to put the hot liquid inlet at the top to it takes the hottest material away, otherwise it looks like you might just get a cold loop going on the bottom and the only cold stuff on the processor would just percolate up and not be as efficient as it could be.
Excellent workmanship though!
Thanks! I got the same question over on Bit-Tech, so I'll just copy-paste it. I should have done so earlier since I didn't make my intentions clear.
Read through the entire log just now, some very impressive work!
One thing bugs me about having both the inlet and outlet on the bottom though, convection in liquids is significantly harder to overcome than it is with gasses, I fear warm oil will collect at the top of the tank, and have difficulty finding its way to the radiator.
Would your design allow for an extension tube on the inlet to draw warm oil from upper part of the tank?
Thank you! Yes, I plan on outputting the cooled oil near the CPU and having the inlet draw in from near the GPU's.
Still looking great!! Can't wait for the completion!!!!!!!
Thanks! You and me both.
legoman666
Gawd
- Joined
- Dec 21, 2003
- Messages
- 638
Hello everyone. I wasn't able to work at all yesterday since my dad was using the shop, but I did a little work today.
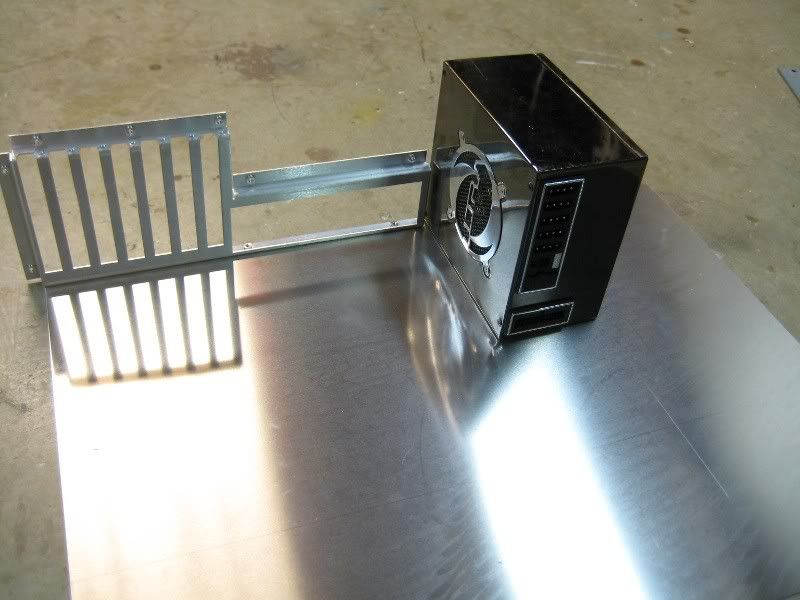
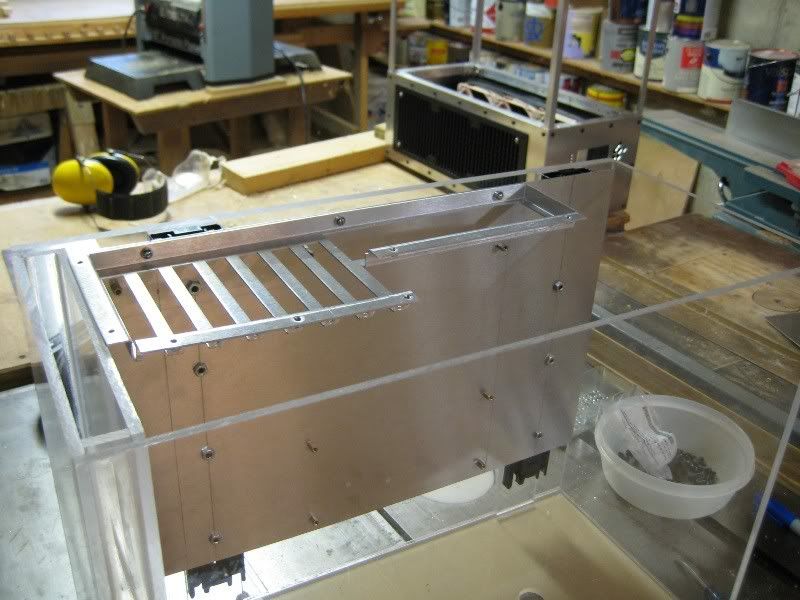
I wanted to get the motherboard tray done today, so I was checking the spacing.
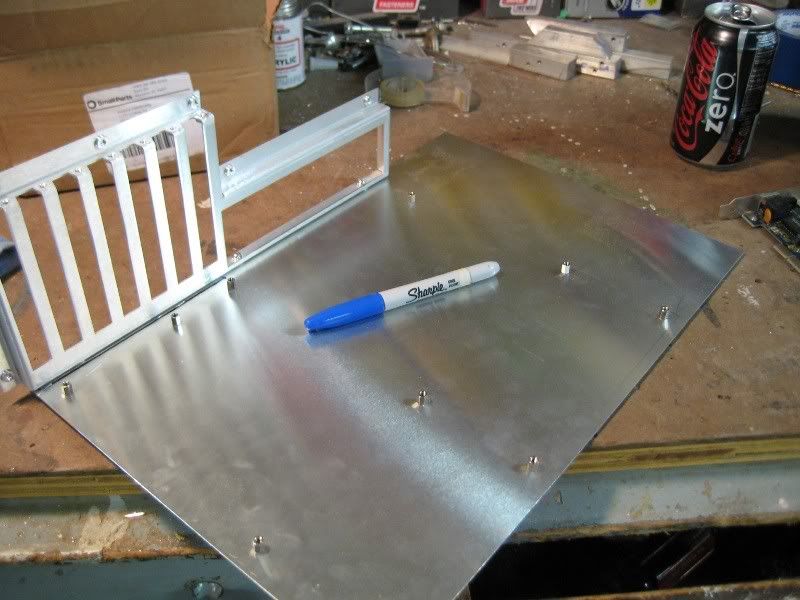
Then I cut the sheet to size, drilled all of the holes for the spacers, and mounted the mobo backpane.
I cut a slot for the little pegs on the bottom of the PCI cards.
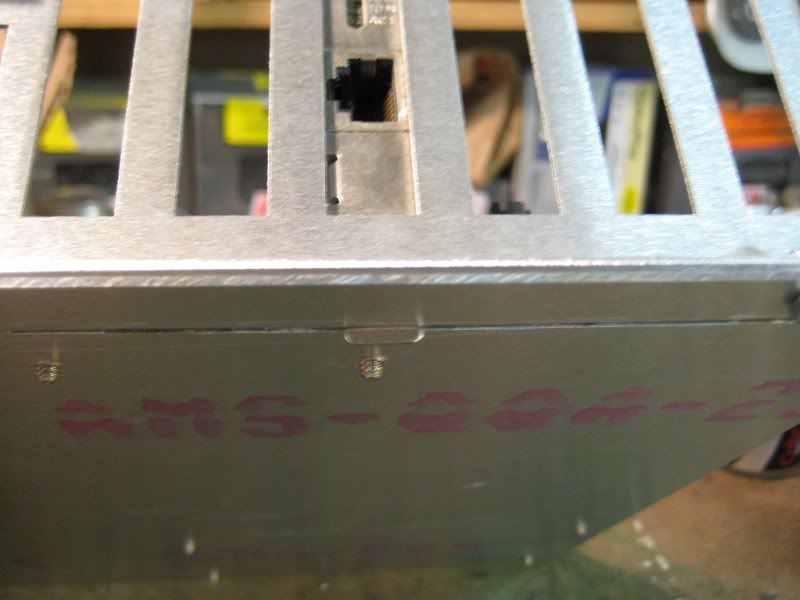
This was a pain in the neck to file to the right size after I completed the initial cut with a Dremel.
I had to use one small washer to get the correct spacing between the motherboard and the motherboard backpane.
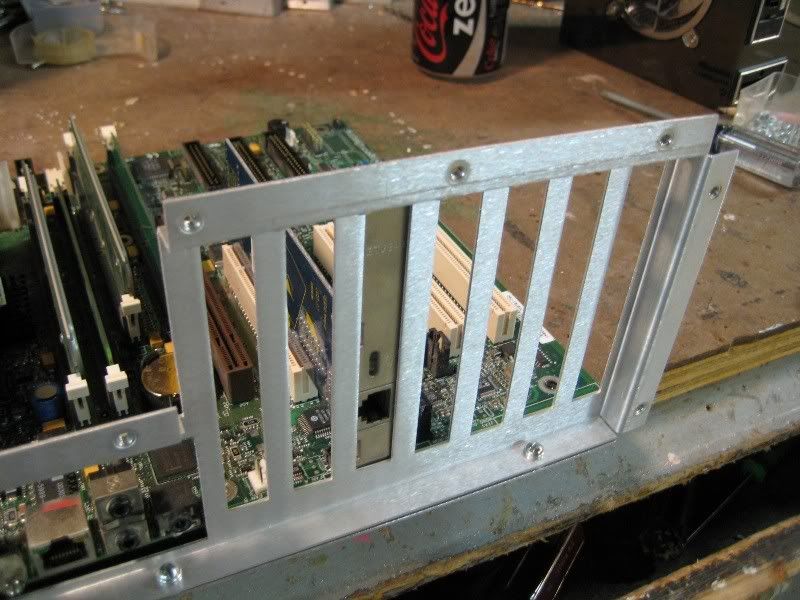

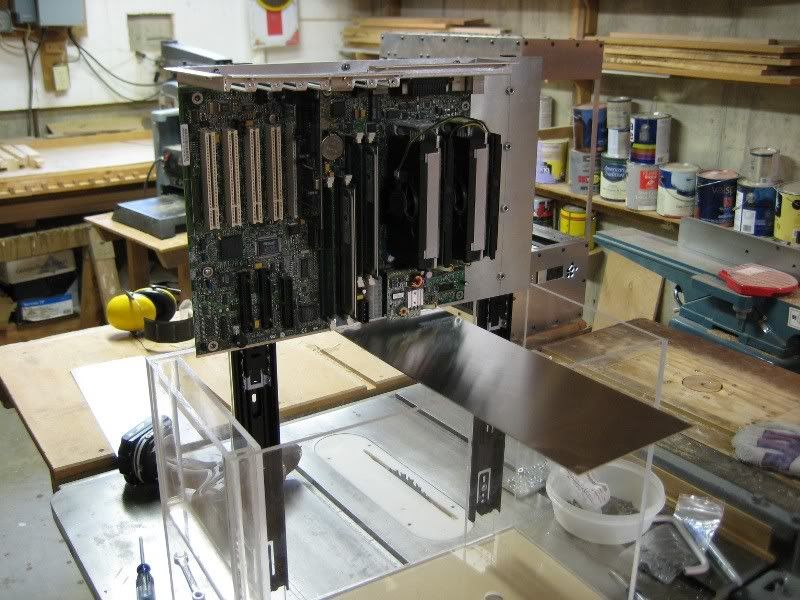
I stuck a motherboard on it and installed a PCI card to make sure I got the spacing right. Looks like it'll work. I'm not sure if the motherboard connector shield (mouse, USB and such) will fit. I don't have one for this particular motherboard that I can test with.
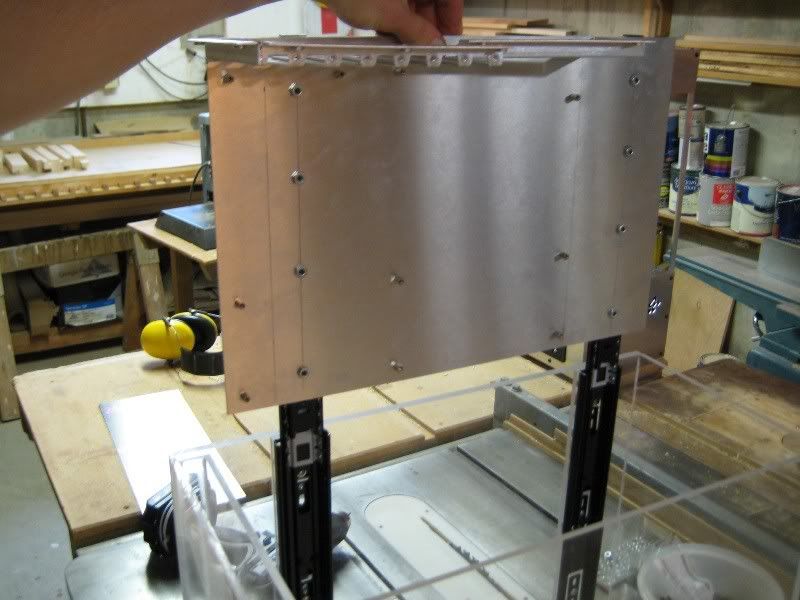
Then I drilled the holes to allow me to attach the motherboard tray to the drawer slides. In this pic, only two screws out of four are attached on one side.
View from the back. As you can see, the holes allow a fair amount of play, which is nice.
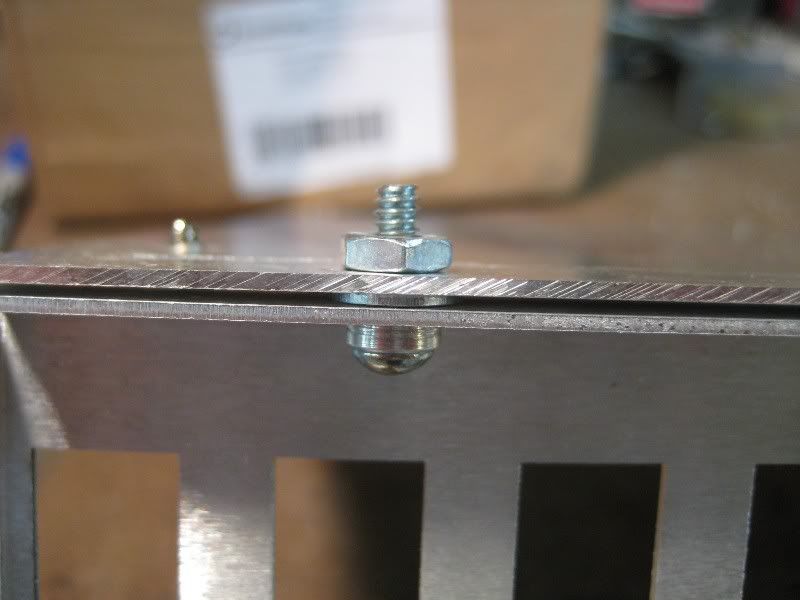
And then with all eight screws holding the tray to the slides. Each is held on with a small nut.
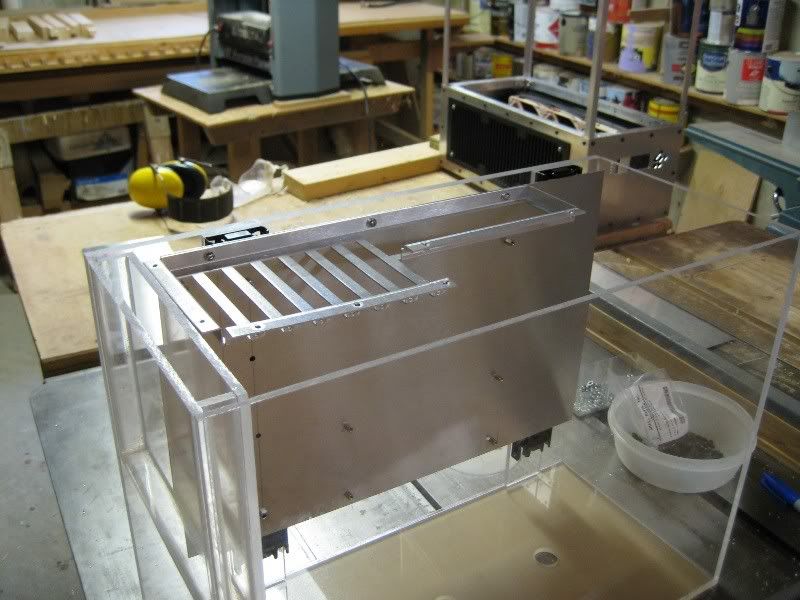
Action shot!
A piece of aluminum works great to hold the tray up so I can work on it.
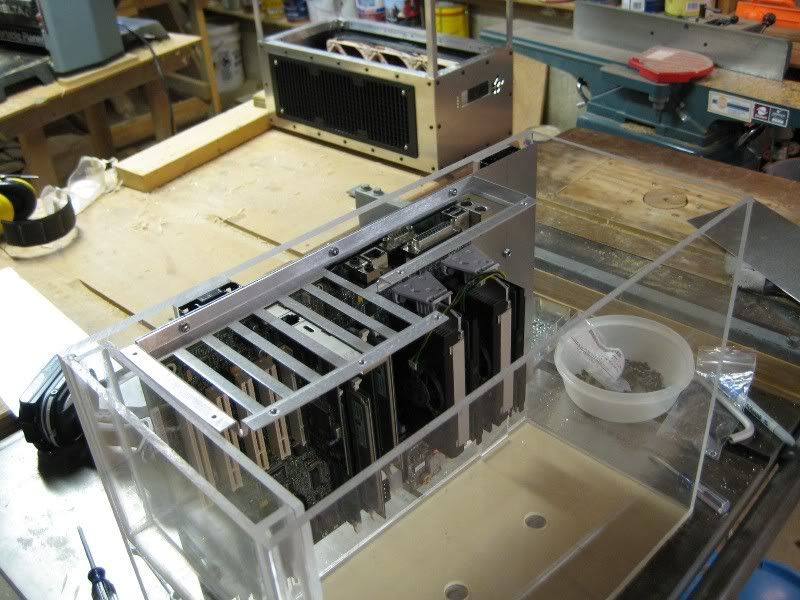
And then closed.
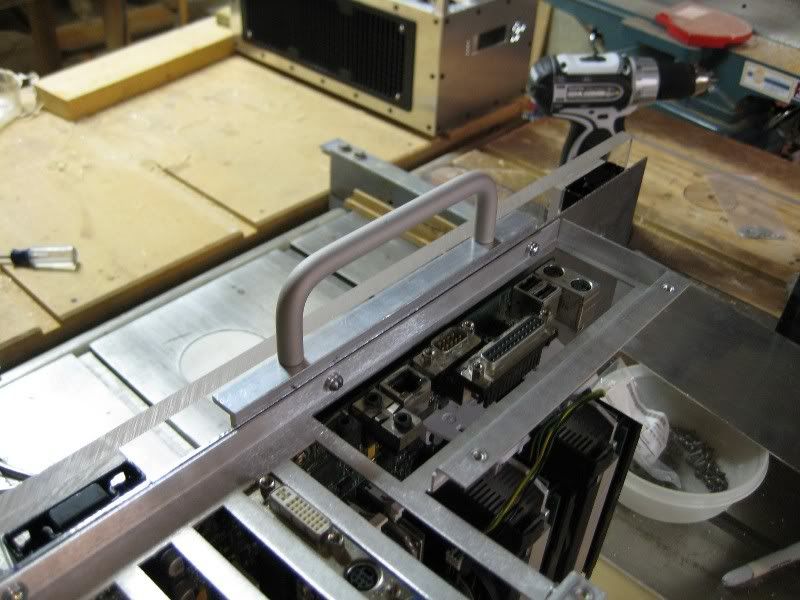
I used a piece of 1/2" angle aluminum to attach my handle. The handle is centered with respect to the entire tray. The screws that hold it on are the same ones that hold the backpane to the tray. That's why it doesn't look centered.
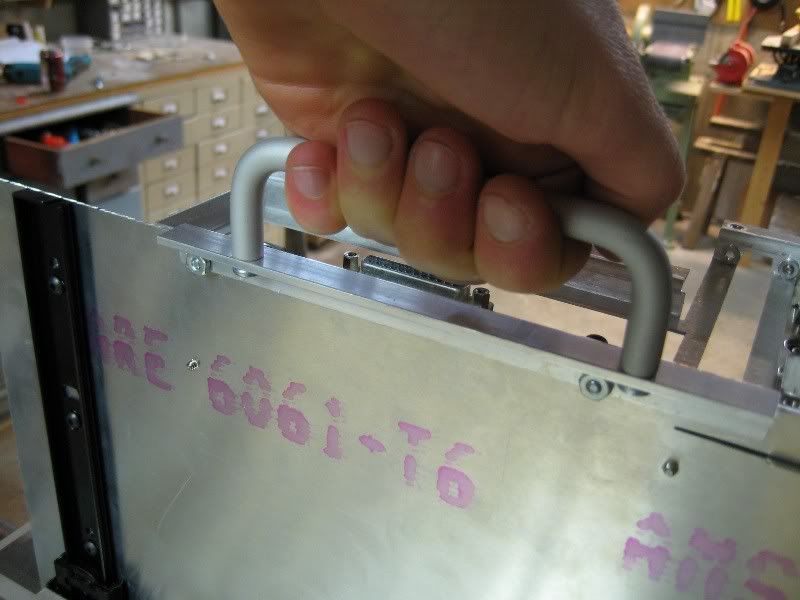
Works great.
That's where I stopped today. Next on the list is to mount the power supply and make a "cover" of sorts for the top of the tank. Comments?
I wanted to get the motherboard tray done today, so I was checking the spacing.
Then I cut the sheet to size, drilled all of the holes for the spacers, and mounted the mobo backpane.
I cut a slot for the little pegs on the bottom of the PCI cards.
This was a pain in the neck to file to the right size after I completed the initial cut with a Dremel.
I had to use one small washer to get the correct spacing between the motherboard and the motherboard backpane.
I stuck a motherboard on it and installed a PCI card to make sure I got the spacing right. Looks like it'll work. I'm not sure if the motherboard connector shield (mouse, USB and such) will fit. I don't have one for this particular motherboard that I can test with.
Then I drilled the holes to allow me to attach the motherboard tray to the drawer slides. In this pic, only two screws out of four are attached on one side.
View from the back. As you can see, the holes allow a fair amount of play, which is nice.
And then with all eight screws holding the tray to the slides. Each is held on with a small nut.
Action shot!
A piece of aluminum works great to hold the tray up so I can work on it.
And then closed.
I used a piece of 1/2" angle aluminum to attach my handle. The handle is centered with respect to the entire tray. The screws that hold it on are the same ones that hold the backpane to the tray. That's why it doesn't look centered.
Works great.
That's where I stopped today. Next on the list is to mount the power supply and make a "cover" of sorts for the top of the tank. Comments?
stryder2720
Supreme [H]ardness
- Joined
- Jun 29, 2004
- Messages
- 5,728
Awesome man, it's looking really nice!!
Modred189
Can't Read the OP
- Joined
- May 24, 2006
- Messages
- 16,320
Subscribed!
Awesome so far. IN terms of the cover, I would make it as rounded as possible, being as it is what you will be staring at all the time.
I would also think about integrating some kind of cable management, as unlike with a normal case, gravity will pull the cables down and together, here, it can make them fall all over the place.