commandercup
Limp Gawd
- Joined
- May 14, 2008
- Messages
- 239
Buy this case here!
Up for review is a Sunbeam Freezing Storm ATX Mid Tower case.
First Impressions
This case is quite heavy and won't be something that you'd want to lug around from place to place... Its made mostly of steel although the front bay panels are made of plastic as well as the plastic mounting clips. The case itself looks incredible for a sub $100 case. You can obviously tell that airflow in the Freezing Storm will be amazing because of the core fan system (Patented by Sunbeam & Tuniq) and the fully ventilated front panel.
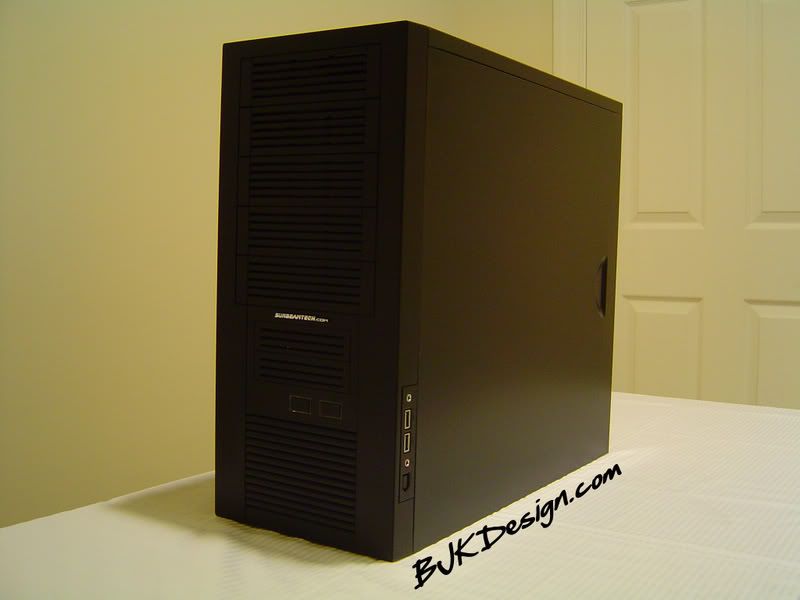
Front Panel
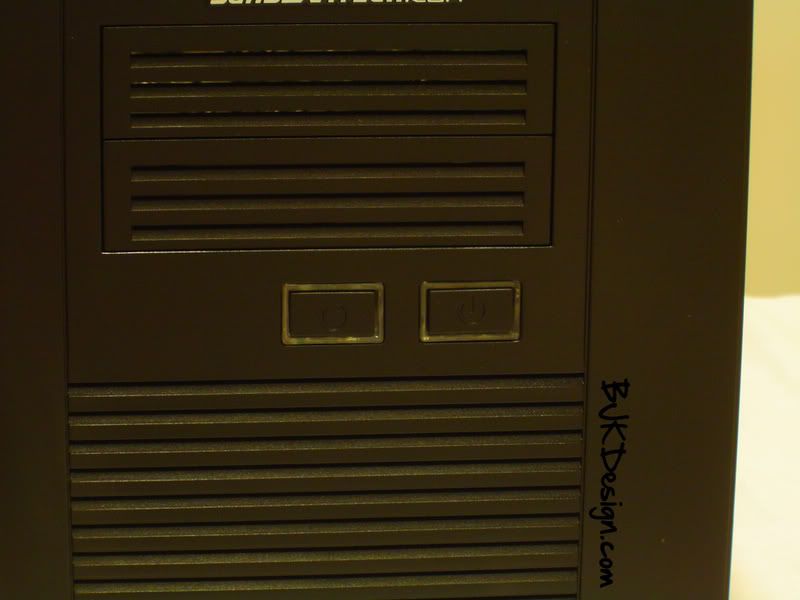
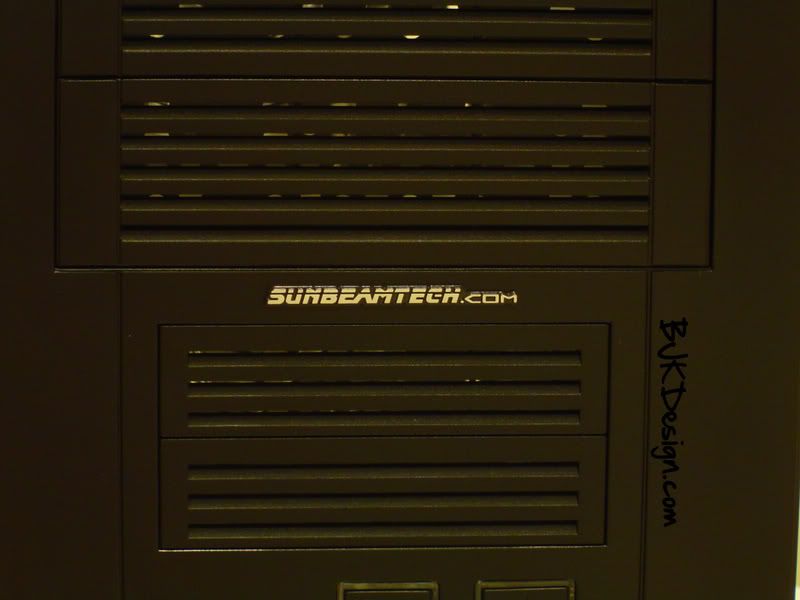
Here is the front view of the case which features ventilated bay covers with 5 5.25" and 2 3.5" external drives. There is also a ventilated area for a single 120mm fan. You can also see two illuminated buttons, one 'Power' button and one 'Reset' button and the SUNBEAMTECH.com text in the center of the case. The text is a reflective metal which creates an interesting rainbow effect when viewed at a certain angle in the correct lighting.
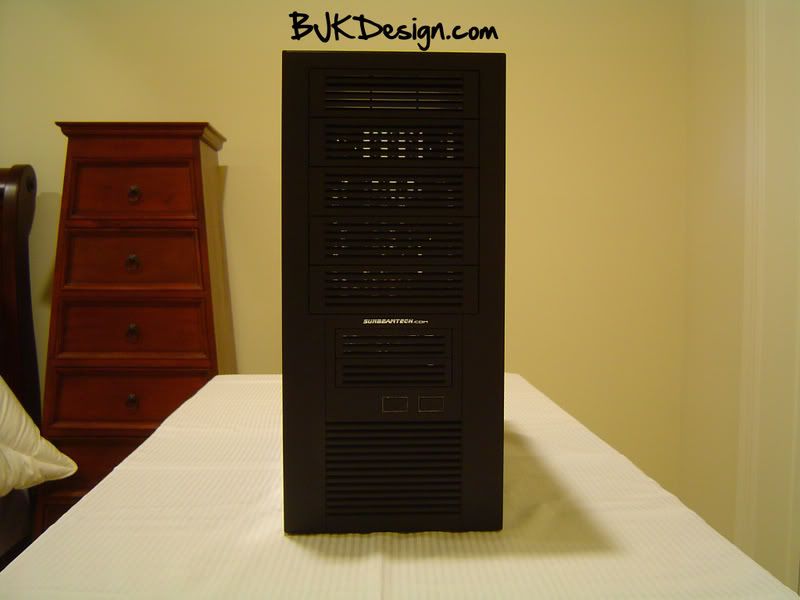
The ventilated drive bay covers are one of the few parts of this case which is made of plastic... and the plastic feels slightly weak. When pushed, the prongs of plastic in the drive bay covers bends and would easily break under constant pressure.
This next picture really shows you how good this case looks out of the box.
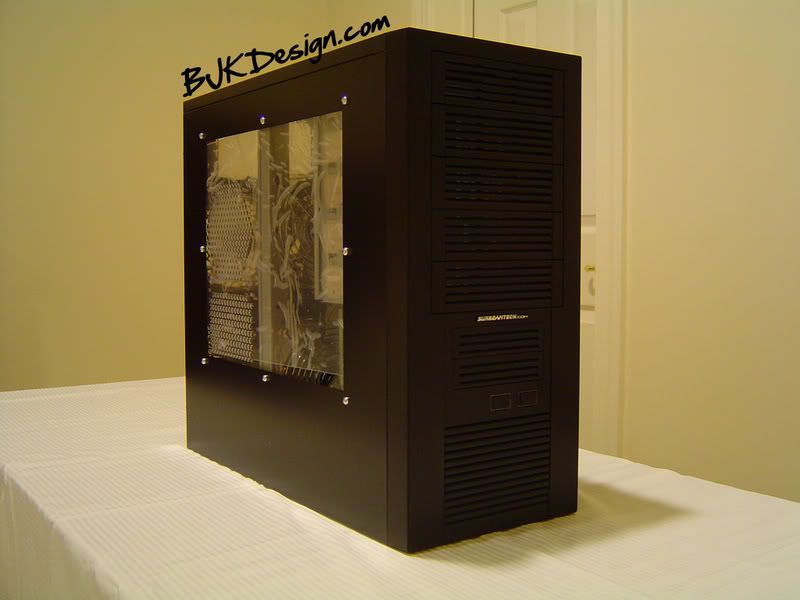
Right Side Panel
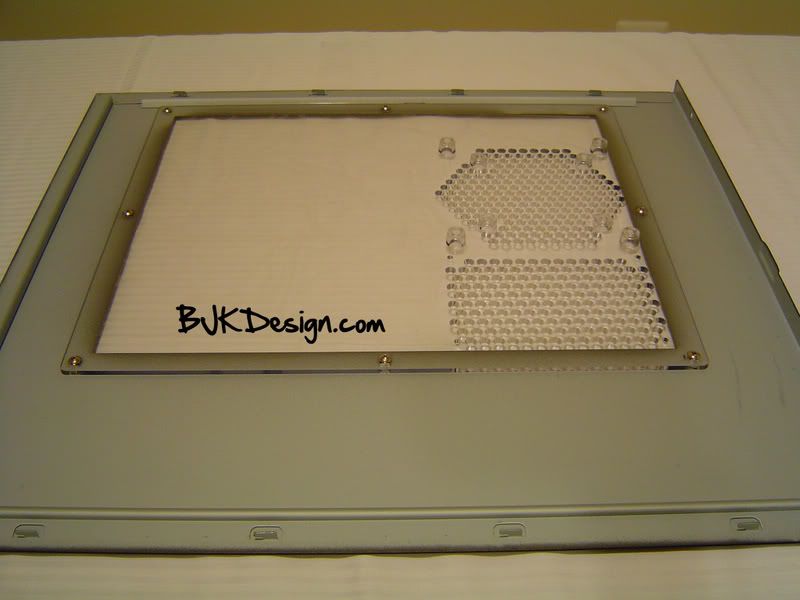
Here is a view of the side panel which features a great looking clear acrylic window with ventilation for the expansion carts and a 80mm or 120mm fan cutout. The window is held to the case with regular screws with an interesting rounded cover on the outside. You'll see how its held on in depth in the next few pictures. The fact that there is a plastic vinyl cover on the outside of the window is a nice addition to a budget case. There are no visible marks or scratches on the window or the panel.
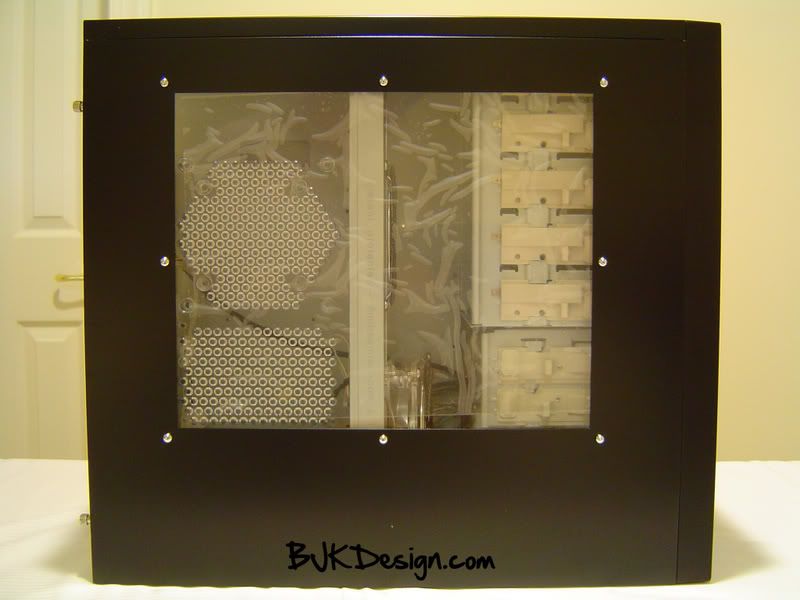
Heres the inside of the panel which at first glance looks quite bland... although we can see some areas where Sunbeam put a good bit of thought and where they cut some corners.
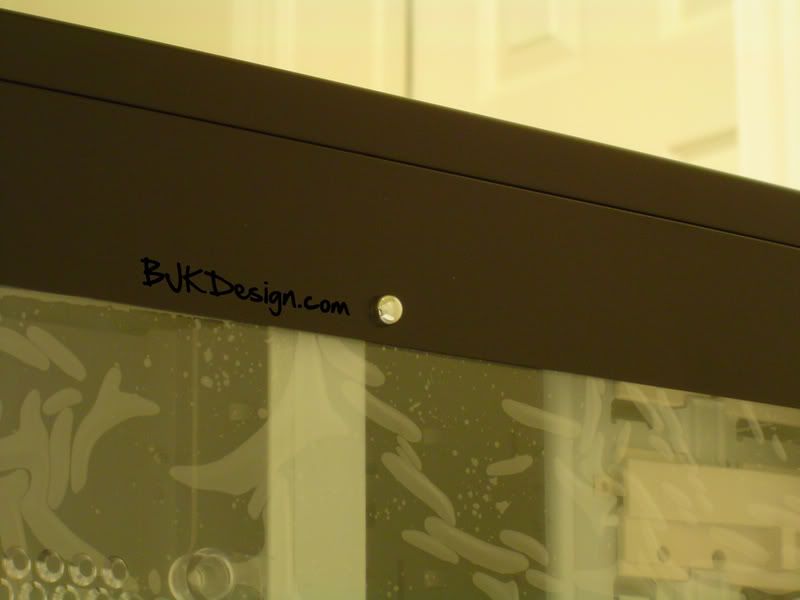
As demonstrated in this next picture, there is quite a bit of overspray from the painting process which has created a faint black edging around the window cut and the outside edge of the panel itself.
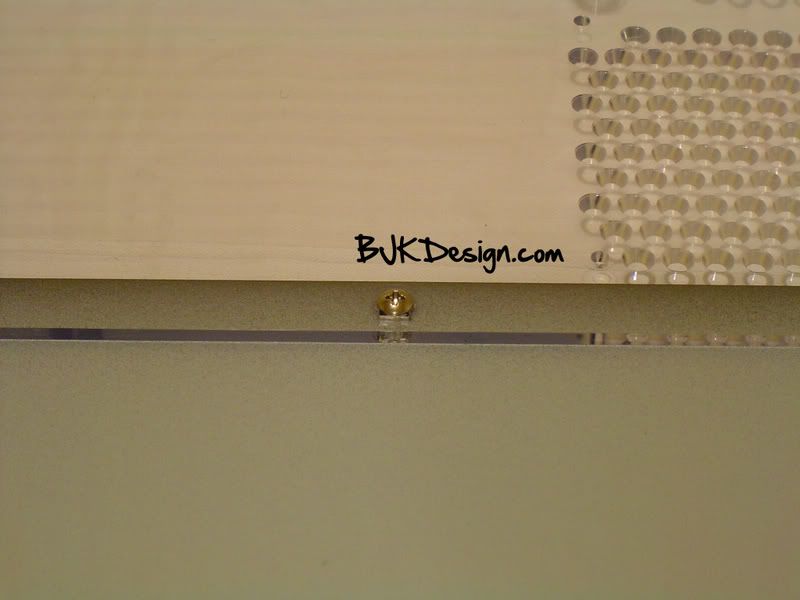
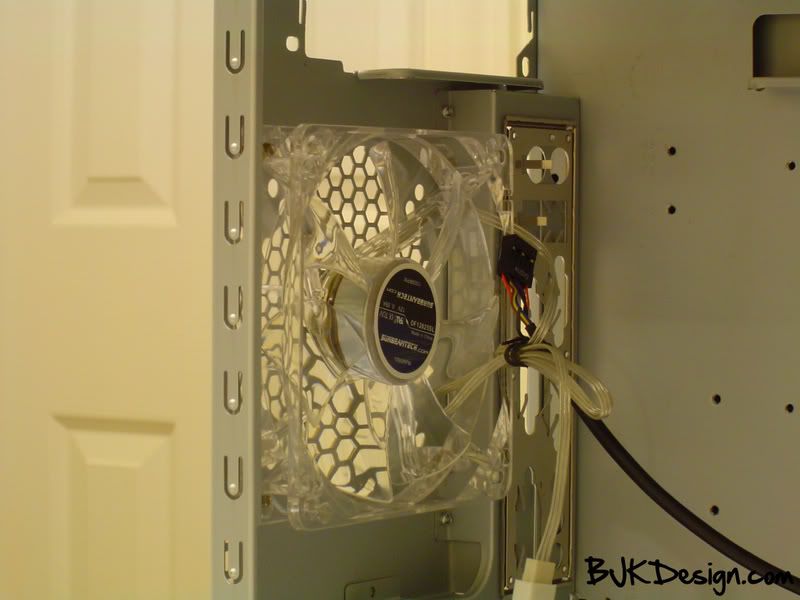
However, Sunbeam has created a mounting system for the 80mm or 120mm fan that makes sure that the screws used to secure the fans is not exposed on the inside. This is a surprising revelation in such an affordable case.
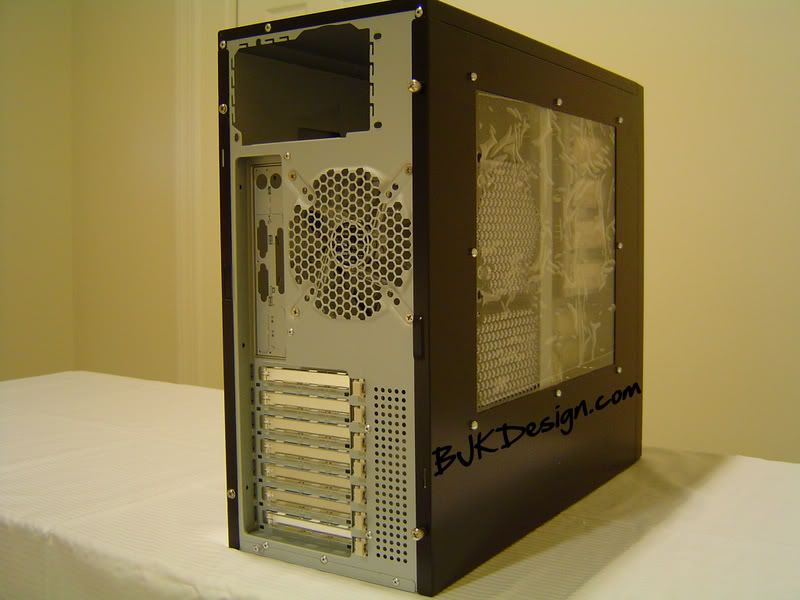
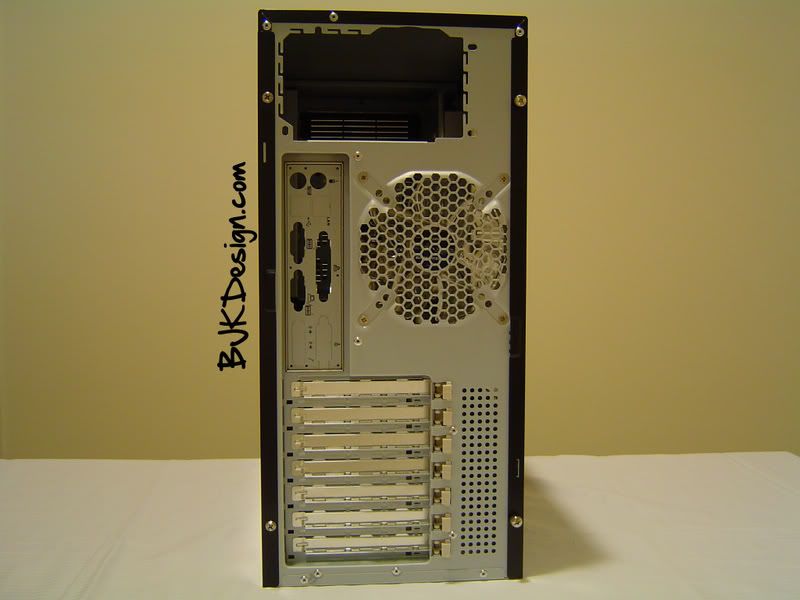
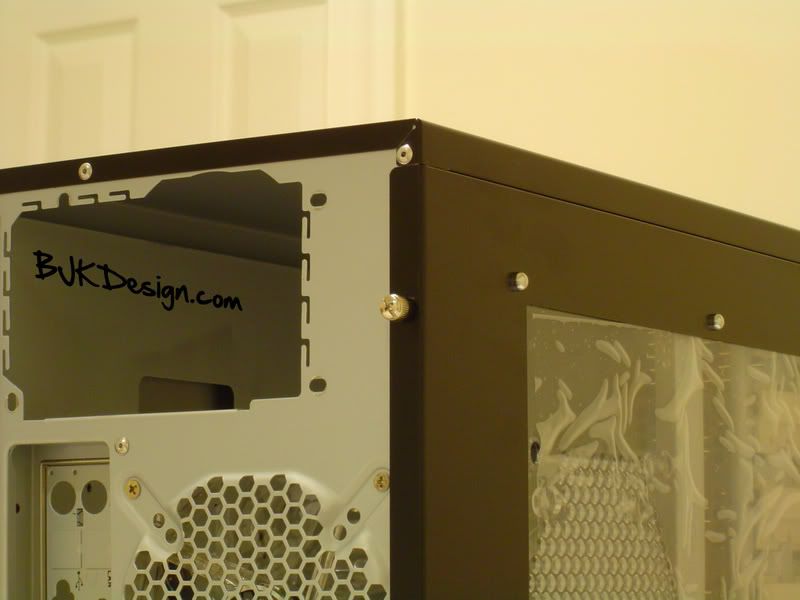
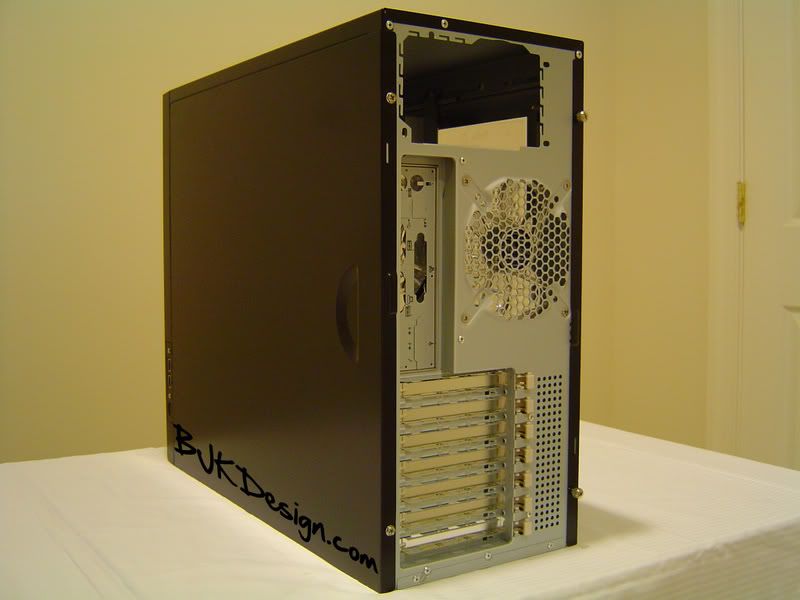
Back Panel
On the back of the case, there is a nicely ventilated 120mm fan mount as well as a ventilated area above the expansion slots. You can also see the stock I/O panel and the PSU mounting area which surprisingly only has 4 screw areas. Finally, there are some interesting expansion slot covers which are not the normal type... these seem a bit more shiny and quite a bit more visually interesting, although it doesn't really effect anything besides the aesthetics of the case.
One thing that would have made this case that much better would be if Sunbeam had included thumbscrews for both panels. Sunbeam instead chose to secure the right side panel with plain screws and only provided thumbscrews for the right, windowed panel.
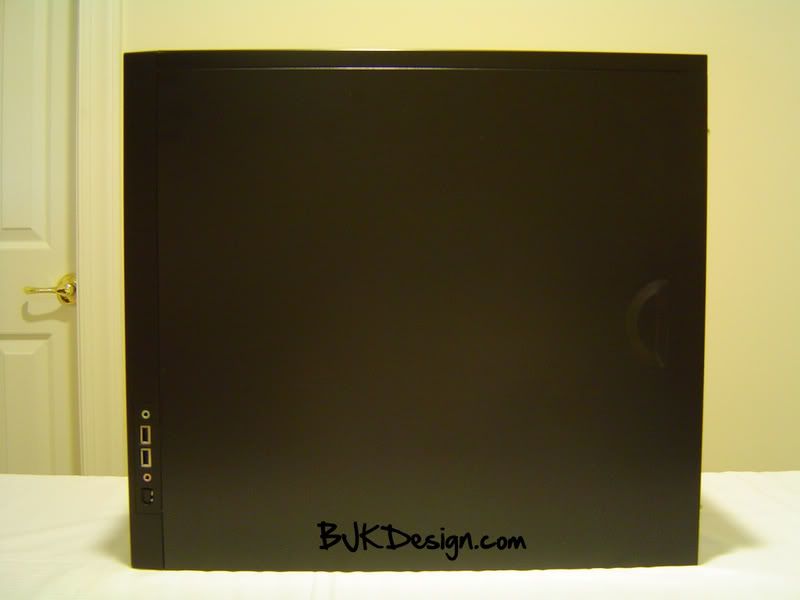
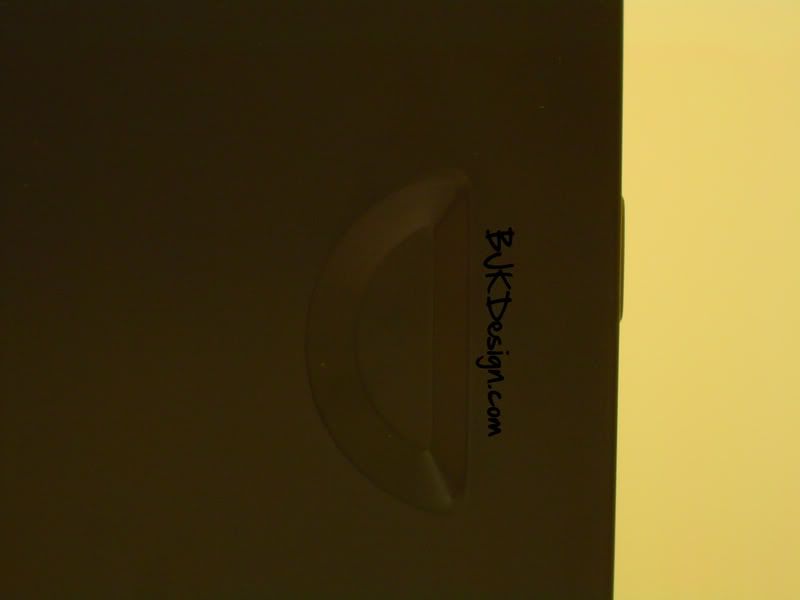
Left Side Panel
The left side panel is quite plain, and has an indent on the far right side near the back to provide grip when pulling the panel off. Personally, I prefer having as plain a panel as possible, but the indent will be helpful during cable management since the panel will be removed often to rearrange cables.
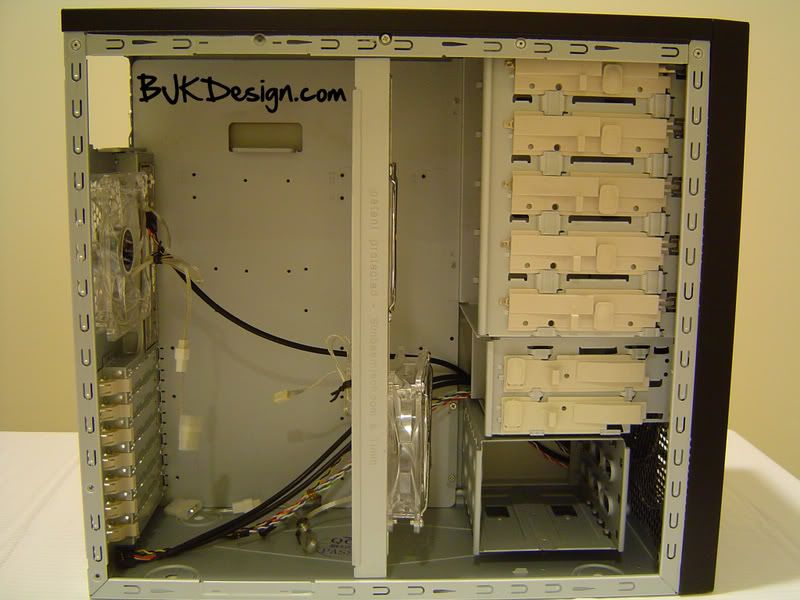
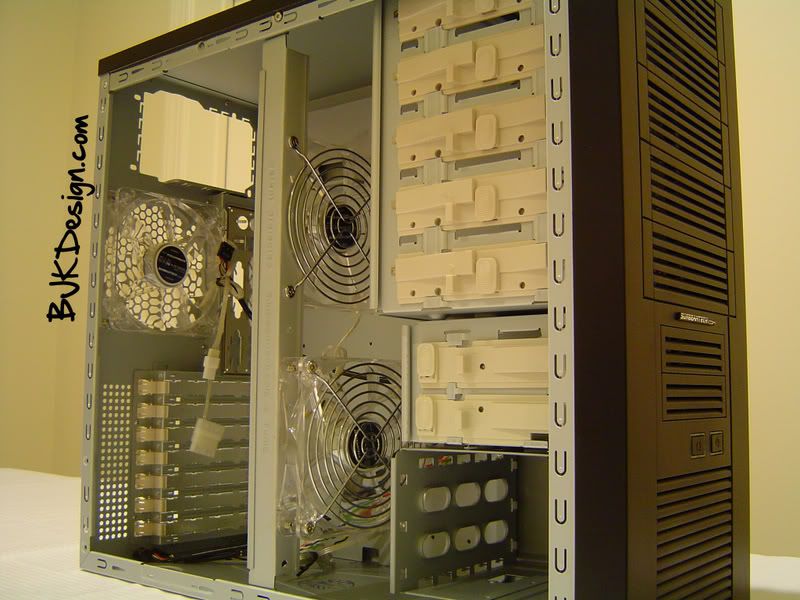
Case Interior
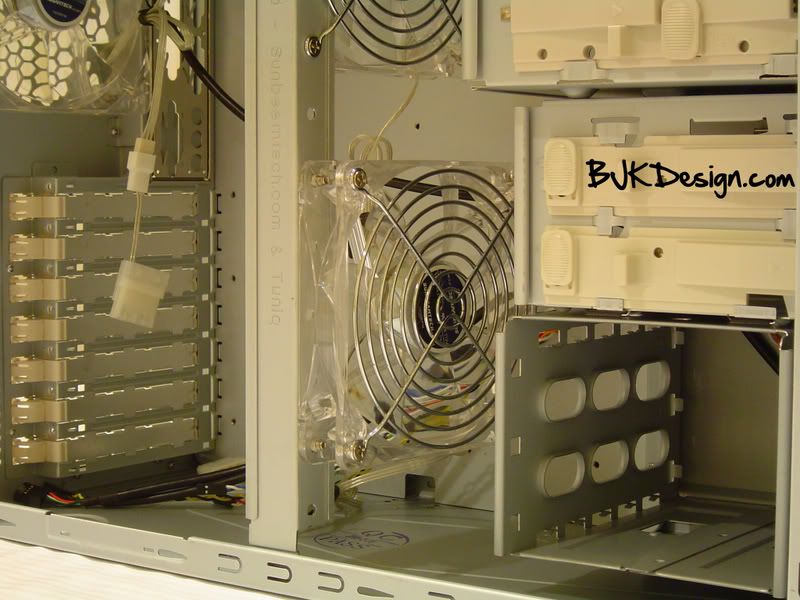
The inside of the case is pretty standard, although the Freezing Storm features a tool-less drive bay installation method. The HDD's are mounted sideways, facing the outside of the case towards the side panel which is usually helpful for cable management. You can also see the Core Fan system with the mounting piece in the center of the case as well as the tool-less expansion slot mounting system and the 3 120mm 1000RPM fans included in the case which is a great addition to an already affordable case.
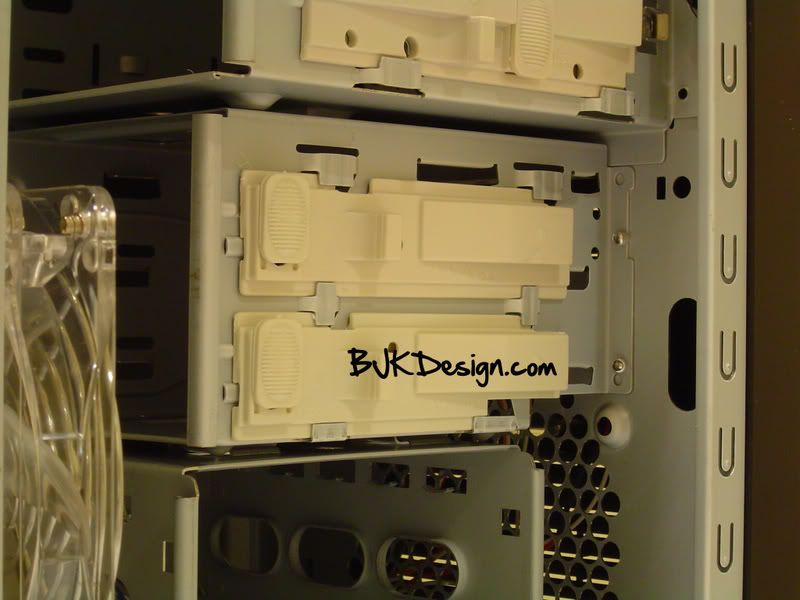
Here is a close up of the 5.25" drive bay mounting system which is quite sturdy and doesn't feel like it will break even though its made of plastic. It's also a nice dark white color which makes it more appealing to look at in contrast to a stark white which is the usual. The mounting is operated by moving the slider back and forth.

Heres the 3.5" drive bay mounting system which is similar to the 5.25" drive bay mounting, but is still slightly different aesthetically.
Here is the sideways HDD mounting system.
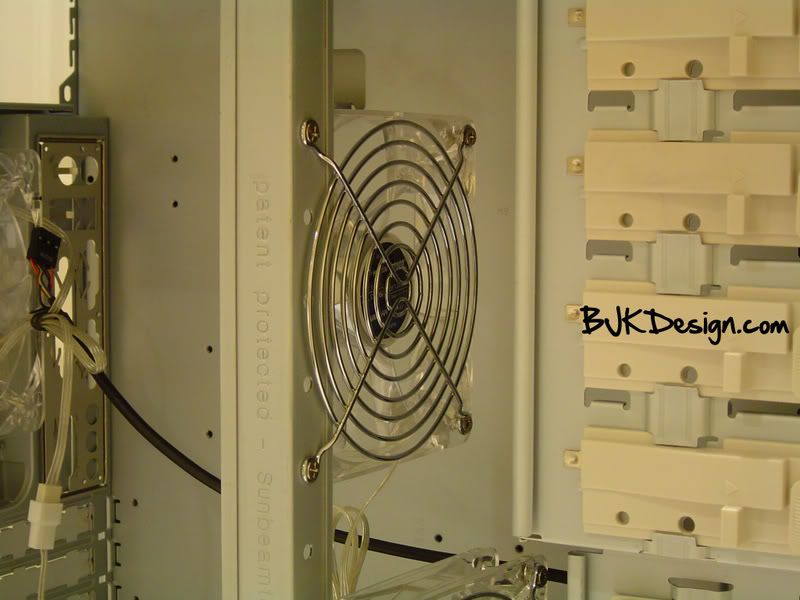
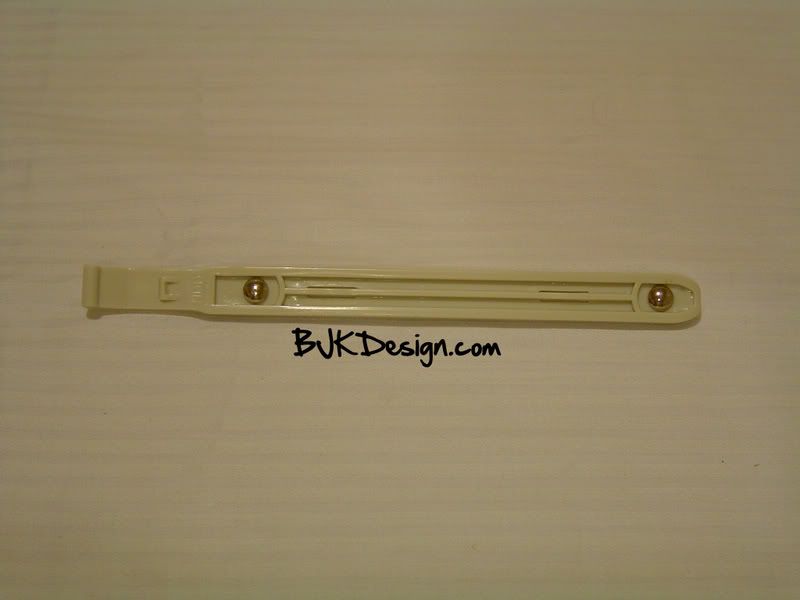
The unique Sunbeam patented Core Fan system mounting bracket is quite a welcome addition to a budget case and gives the case incredible cooling capacity! One con of the this bracket is that it is engraved with 'Patent Protected by Sunbeam and Tuniq' which will be visible through the side window. However... otherwise, this bracket mounting system is amazing and lets you mount fans in two different arrangements all along the bracket.

The fans can be mounted either along the bracket, or on the outer edge. This is useful because if there is limited room between the fan and an expansion card or CPU cooler the fan can be mounted along the outer edge to provide an extra few millimeters of space.
Here is the fan mounted along the bracket itself.
Here is the fan mounted on the edge of the bracket.
Heres a closeup of the expansion card mounting system.

This is the 120mm fan in the back of the case in the 120mm mounting area.
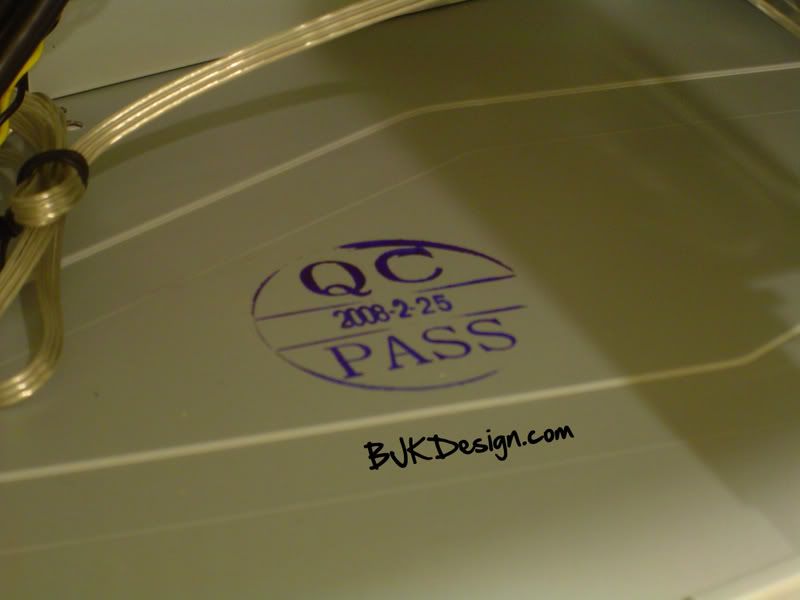
Something interesting to note is that there is a stamped insignia on the bottom of the case... its in purple which clashes with the stock color scheme and seems to be semi-permanent. I'm sure that this was a requirement for some inspection process, but it still could have been placed in a less obtrusive place.
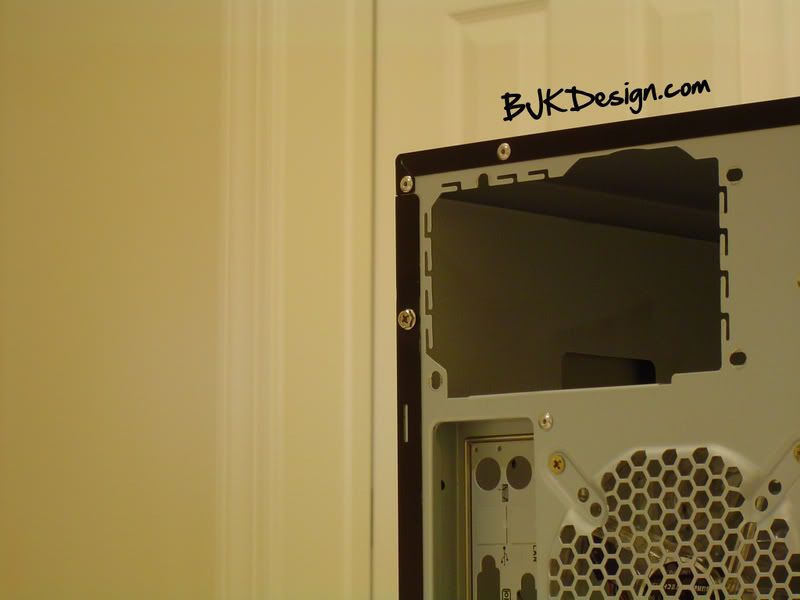
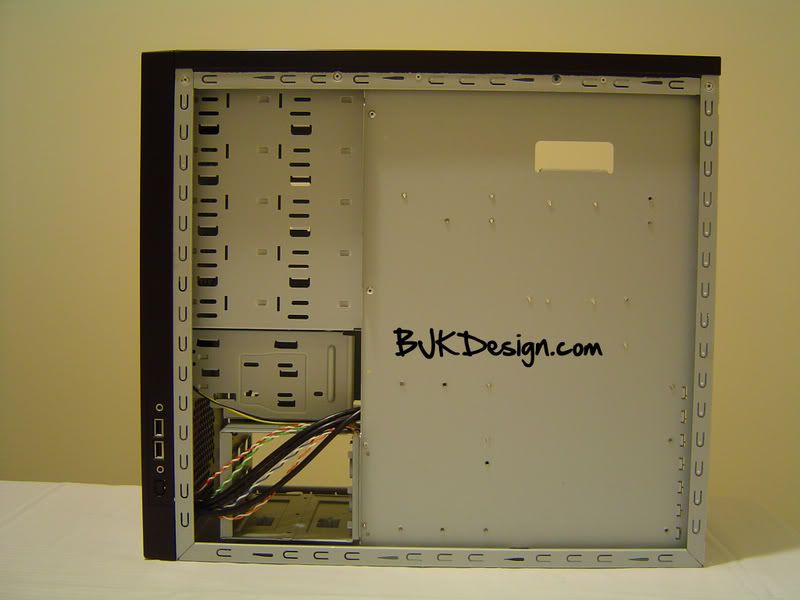
Case Backside Interior
The backside is very plain and has nothing special about it.
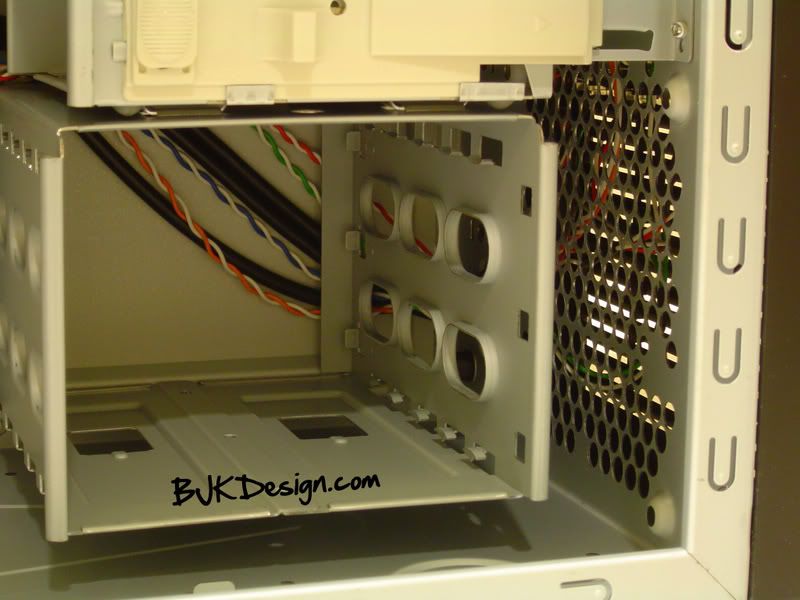
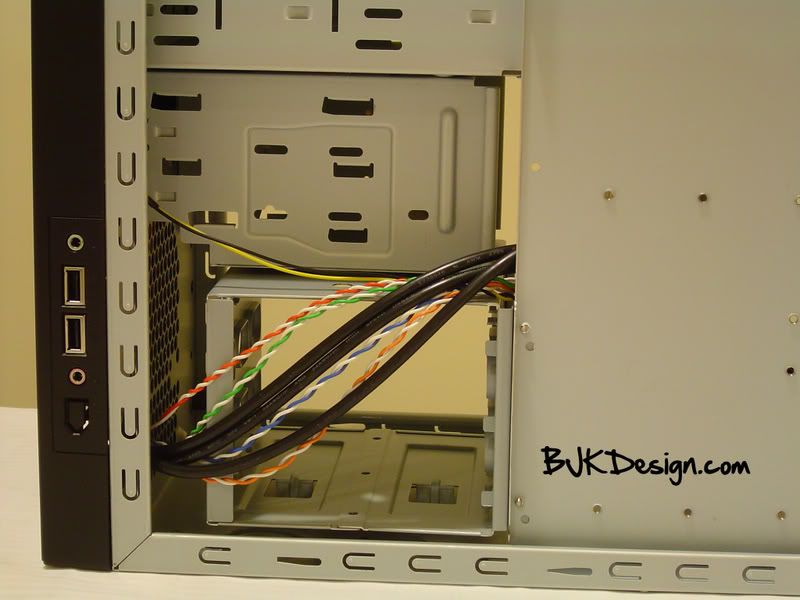
The 3.5" drive bay area is recessed into the interior of the case as is the HDD mounting area so there is ample room to hide cables from view.
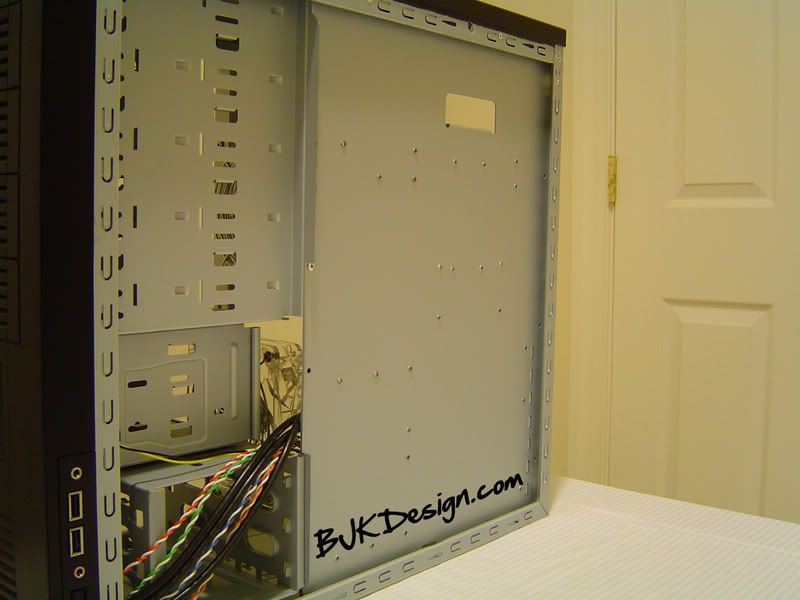
Sadly, the back of the motherboard tray has very little clearance with the side panel, so you can't really fit any cables behind it.
Included Case Accessories
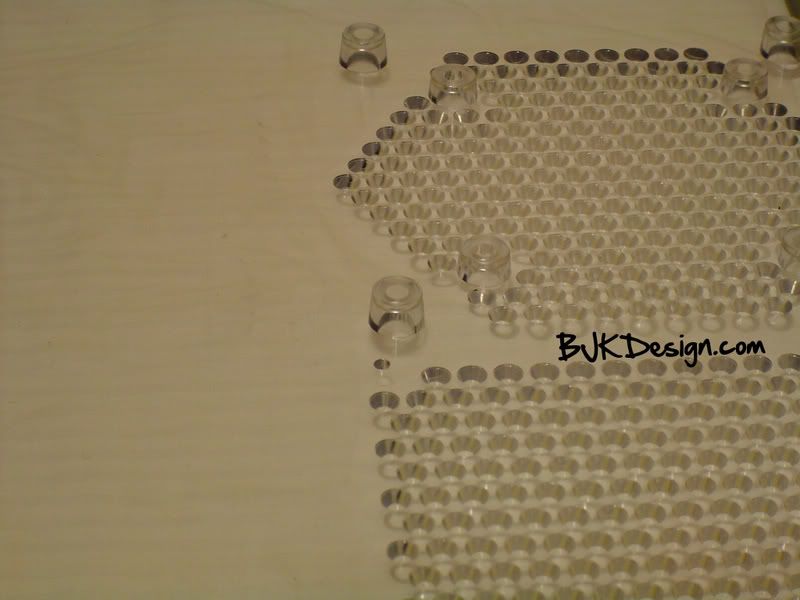
Included with the case are 3 120mm 1000RM fans, a small cardboard box with a pack of motherboard standoffs, various screws and the HDD mounting brackets. Finally, Sunbeam included a nice manual.
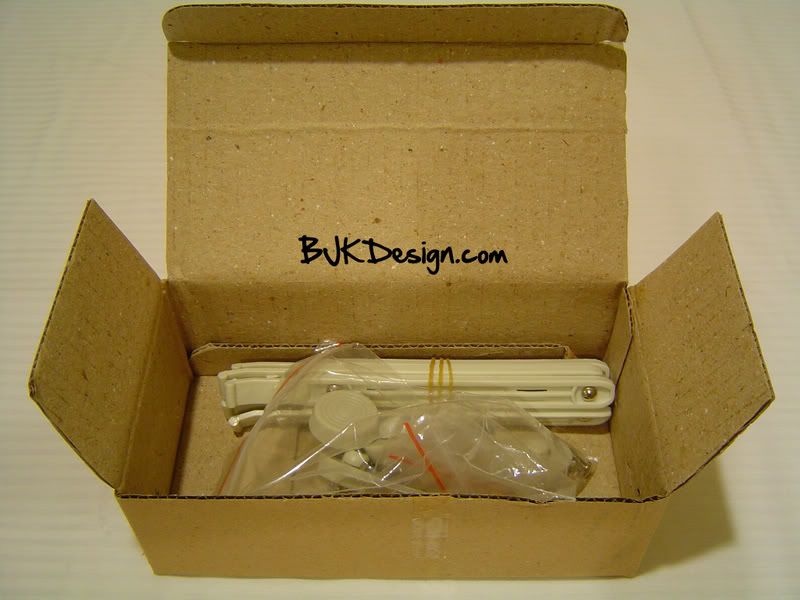
Sunbeam also included a zip tie, and a zip tie management clip and 4 white case feet.
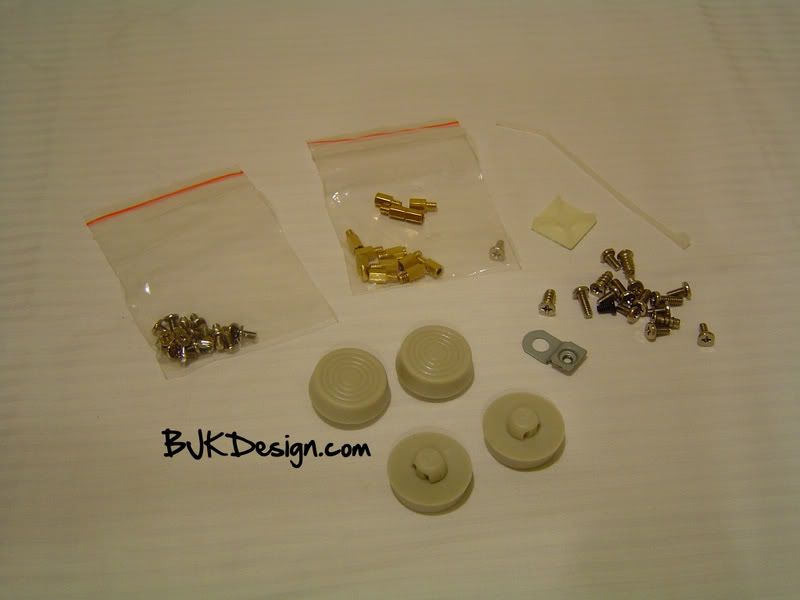
White HDD mounting brackets which match the white of all the tool-less mounting systems in the case.
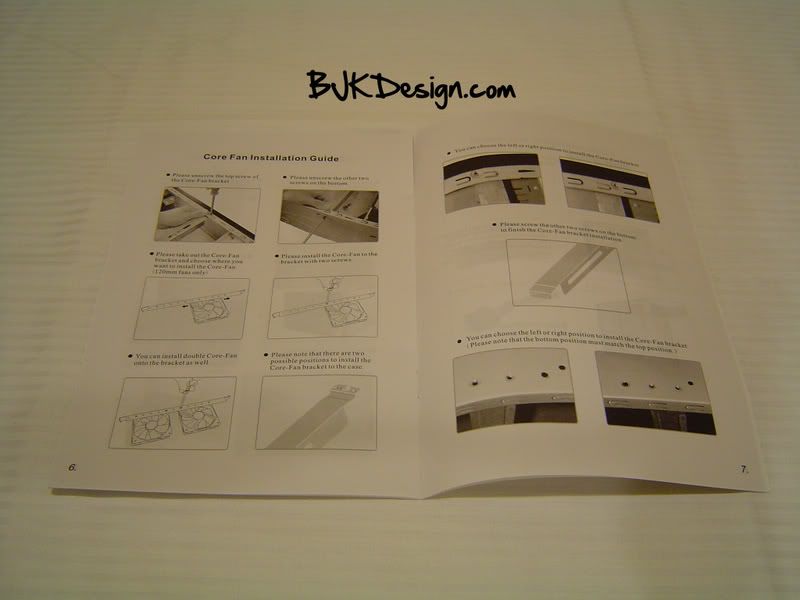
The manual came enclosed in a plastic bag which is uncommon in most cases.
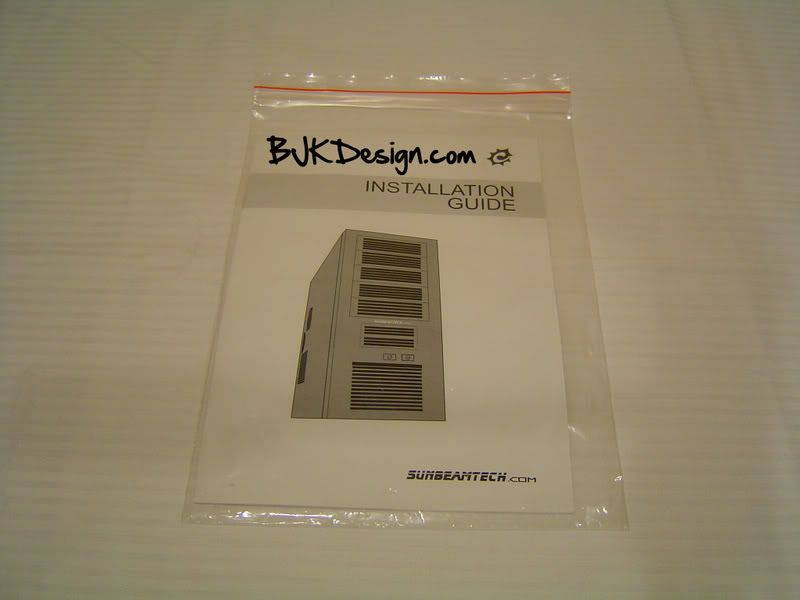
Although it is black and white, it features pictures of everything and shows you how to install fans on the core fan bracket, how to install hard drives, how to use the mounting-systems etc.
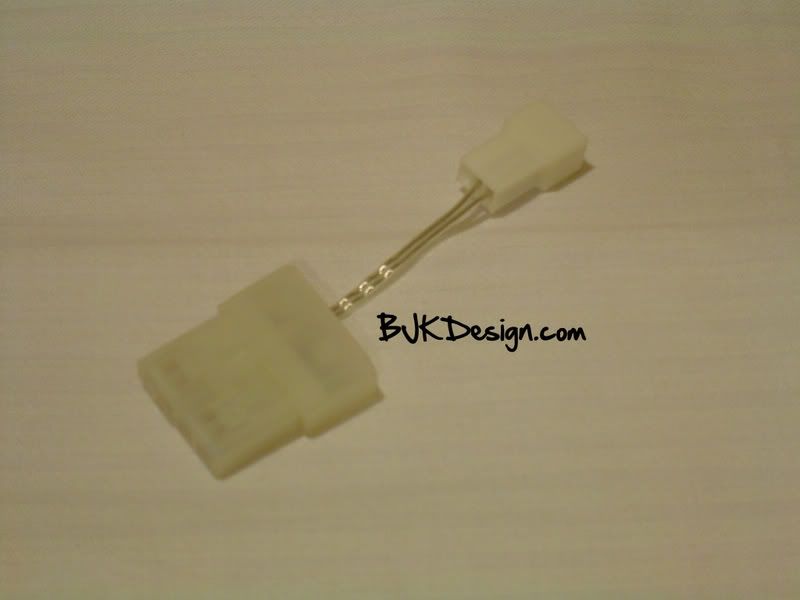
Another surprising addition to the accessories from Sunbeam was that they included 3 cables which switch the standard fan power cables to molex pins. This will definitely help with cable management if the fan power connectors on the motherboard is in an awkward place.
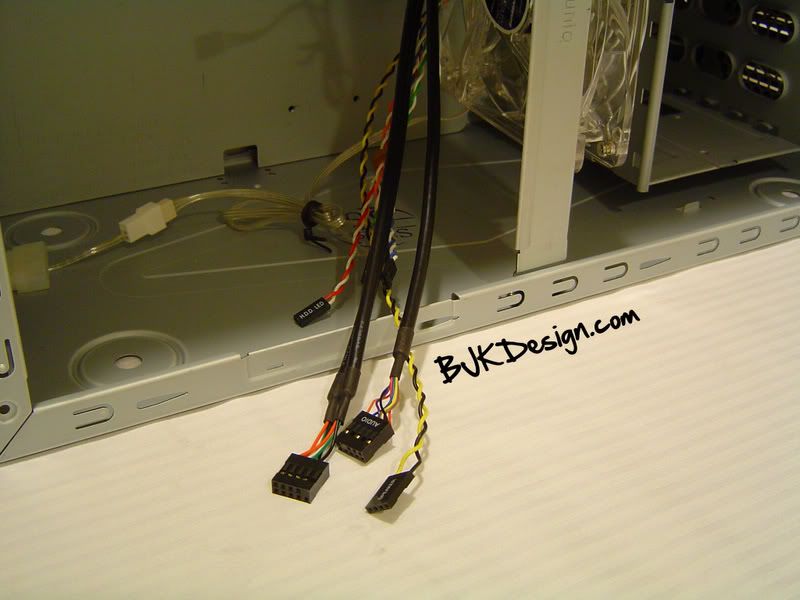
A final interesting note is that Sunbeam sleeved some of the front panel connectors.
Final Notes
Its interesting to me that Sunbeam did not default install a front intake fan for the hard drives... this is a weird choice, although a 120mm fan is installable in the front intake area.
Overall, this case is quite sexy and with it, Sunbeam has accomplished a rare feat: they have created an affordable budget case that incorporates high performance elements into a beautiful case.
Disclaimer
Anything I've written here may be wrong... corrections are welcome and flaming is discouraged. Everything in this post is my personal content. All pictures were photographed by me, and all text is my own.
Up for review is a Sunbeam Freezing Storm ATX Mid Tower case.
First Impressions
This case is quite heavy and won't be something that you'd want to lug around from place to place... Its made mostly of steel although the front bay panels are made of plastic as well as the plastic mounting clips. The case itself looks incredible for a sub $100 case. You can obviously tell that airflow in the Freezing Storm will be amazing because of the core fan system (Patented by Sunbeam & Tuniq) and the fully ventilated front panel.
Front Panel
Here is the front view of the case which features ventilated bay covers with 5 5.25" and 2 3.5" external drives. There is also a ventilated area for a single 120mm fan. You can also see two illuminated buttons, one 'Power' button and one 'Reset' button and the SUNBEAMTECH.com text in the center of the case. The text is a reflective metal which creates an interesting rainbow effect when viewed at a certain angle in the correct lighting.
The ventilated drive bay covers are one of the few parts of this case which is made of plastic... and the plastic feels slightly weak. When pushed, the prongs of plastic in the drive bay covers bends and would easily break under constant pressure.
This next picture really shows you how good this case looks out of the box.
Right Side Panel
Here is a view of the side panel which features a great looking clear acrylic window with ventilation for the expansion carts and a 80mm or 120mm fan cutout. The window is held to the case with regular screws with an interesting rounded cover on the outside. You'll see how its held on in depth in the next few pictures. The fact that there is a plastic vinyl cover on the outside of the window is a nice addition to a budget case. There are no visible marks or scratches on the window or the panel.
Heres the inside of the panel which at first glance looks quite bland... although we can see some areas where Sunbeam put a good bit of thought and where they cut some corners.
As demonstrated in this next picture, there is quite a bit of overspray from the painting process which has created a faint black edging around the window cut and the outside edge of the panel itself.
However, Sunbeam has created a mounting system for the 80mm or 120mm fan that makes sure that the screws used to secure the fans is not exposed on the inside. This is a surprising revelation in such an affordable case.
Back Panel
On the back of the case, there is a nicely ventilated 120mm fan mount as well as a ventilated area above the expansion slots. You can also see the stock I/O panel and the PSU mounting area which surprisingly only has 4 screw areas. Finally, there are some interesting expansion slot covers which are not the normal type... these seem a bit more shiny and quite a bit more visually interesting, although it doesn't really effect anything besides the aesthetics of the case.
One thing that would have made this case that much better would be if Sunbeam had included thumbscrews for both panels. Sunbeam instead chose to secure the right side panel with plain screws and only provided thumbscrews for the right, windowed panel.
Left Side Panel
The left side panel is quite plain, and has an indent on the far right side near the back to provide grip when pulling the panel off. Personally, I prefer having as plain a panel as possible, but the indent will be helpful during cable management since the panel will be removed often to rearrange cables.
Case Interior
The inside of the case is pretty standard, although the Freezing Storm features a tool-less drive bay installation method. The HDD's are mounted sideways, facing the outside of the case towards the side panel which is usually helpful for cable management. You can also see the Core Fan system with the mounting piece in the center of the case as well as the tool-less expansion slot mounting system and the 3 120mm 1000RPM fans included in the case which is a great addition to an already affordable case.
Here is a close up of the 5.25" drive bay mounting system which is quite sturdy and doesn't feel like it will break even though its made of plastic. It's also a nice dark white color which makes it more appealing to look at in contrast to a stark white which is the usual. The mounting is operated by moving the slider back and forth.
Heres the 3.5" drive bay mounting system which is similar to the 5.25" drive bay mounting, but is still slightly different aesthetically.
Here is the sideways HDD mounting system.
The unique Sunbeam patented Core Fan system mounting bracket is quite a welcome addition to a budget case and gives the case incredible cooling capacity! One con of the this bracket is that it is engraved with 'Patent Protected by Sunbeam and Tuniq' which will be visible through the side window. However... otherwise, this bracket mounting system is amazing and lets you mount fans in two different arrangements all along the bracket.
The fans can be mounted either along the bracket, or on the outer edge. This is useful because if there is limited room between the fan and an expansion card or CPU cooler the fan can be mounted along the outer edge to provide an extra few millimeters of space.
Here is the fan mounted along the bracket itself.
Here is the fan mounted on the edge of the bracket.
Heres a closeup of the expansion card mounting system.
This is the 120mm fan in the back of the case in the 120mm mounting area.
Something interesting to note is that there is a stamped insignia on the bottom of the case... its in purple which clashes with the stock color scheme and seems to be semi-permanent. I'm sure that this was a requirement for some inspection process, but it still could have been placed in a less obtrusive place.
Case Backside Interior
The backside is very plain and has nothing special about it.
The 3.5" drive bay area is recessed into the interior of the case as is the HDD mounting area so there is ample room to hide cables from view.
Sadly, the back of the motherboard tray has very little clearance with the side panel, so you can't really fit any cables behind it.
Included Case Accessories
Included with the case are 3 120mm 1000RM fans, a small cardboard box with a pack of motherboard standoffs, various screws and the HDD mounting brackets. Finally, Sunbeam included a nice manual.
Sunbeam also included a zip tie, and a zip tie management clip and 4 white case feet.
White HDD mounting brackets which match the white of all the tool-less mounting systems in the case.
The manual came enclosed in a plastic bag which is uncommon in most cases.
Although it is black and white, it features pictures of everything and shows you how to install fans on the core fan bracket, how to install hard drives, how to use the mounting-systems etc.
Another surprising addition to the accessories from Sunbeam was that they included 3 cables which switch the standard fan power cables to molex pins. This will definitely help with cable management if the fan power connectors on the motherboard is in an awkward place.
A final interesting note is that Sunbeam sleeved some of the front panel connectors.
Final Notes
Its interesting to me that Sunbeam did not default install a front intake fan for the hard drives... this is a weird choice, although a 120mm fan is installable in the front intake area.
Overall, this case is quite sexy and with it, Sunbeam has accomplished a rare feat: they have created an affordable budget case that incorporates high performance elements into a beautiful case.
Disclaimer
Anything I've written here may be wrong... corrections are welcome and flaming is discouraged. Everything in this post is my personal content. All pictures were photographed by me, and all text is my own.

