Project: Large Wooden Tower

Spotswood

Gawd
Joined
Sep 5, 2009
Messages
711
Final pics are here.


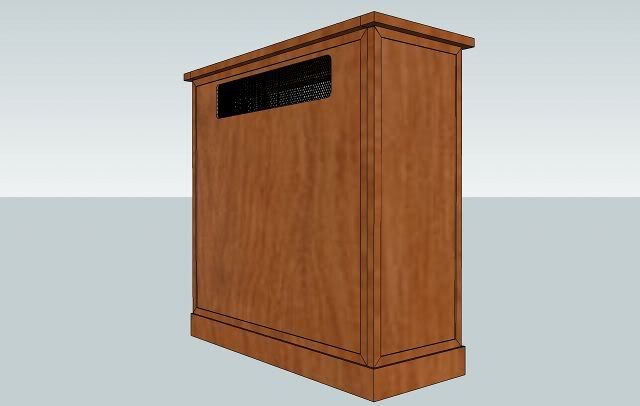
I'm very fortunate to have been commissioned to build a large wooden tower case, to be used to hold a large water cooled rig. The design of the case was born from Mick64's 'Case Design for Liquid Cooling' thread over on XtremeSystems Forums. I'm a wood worker, not a metal worker, so I had to compromise that design somewhat in order for me to be able to build it. (But I also like to think I've made some small improvements over Mick64's initial design.)

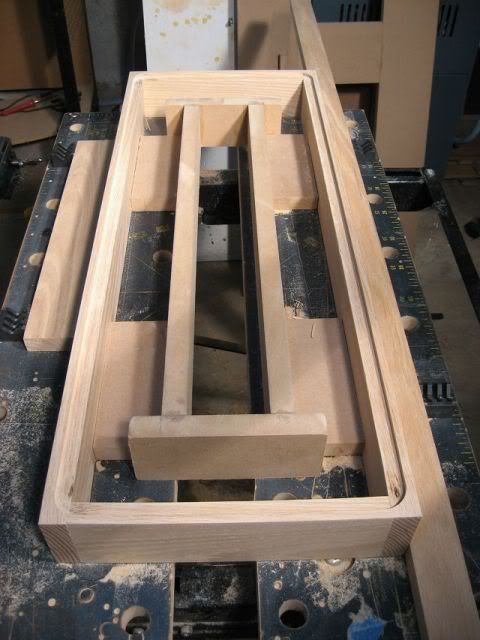
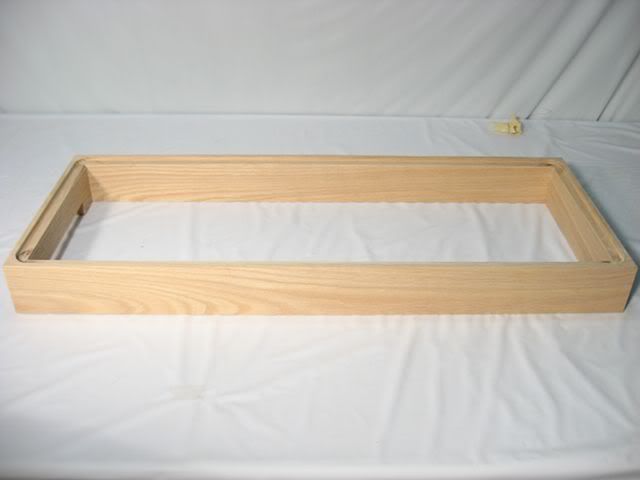
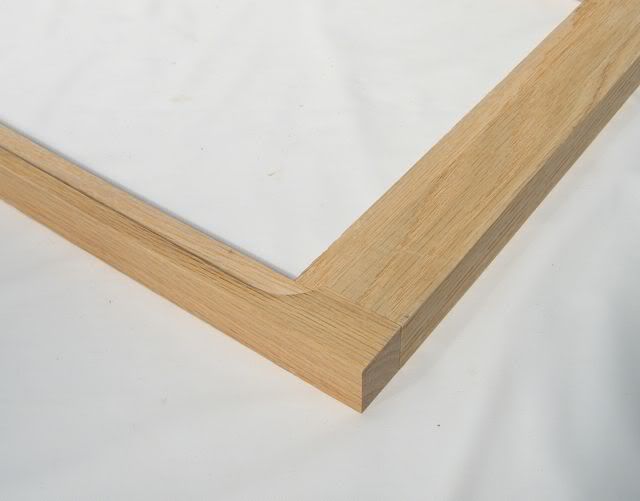
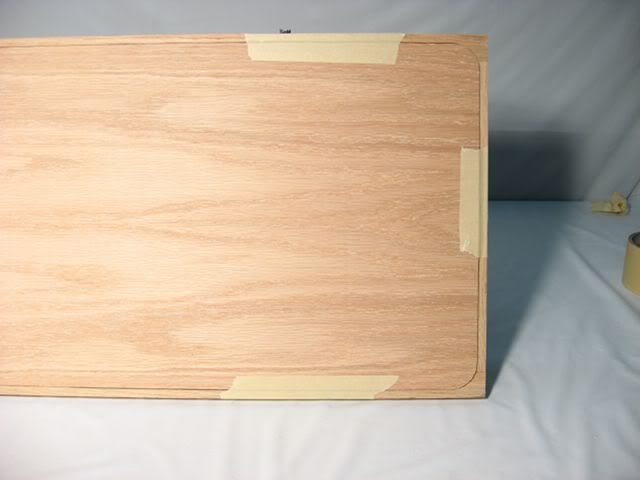
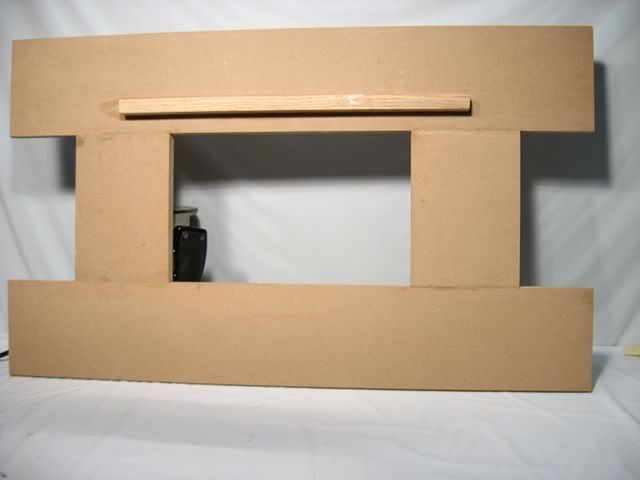
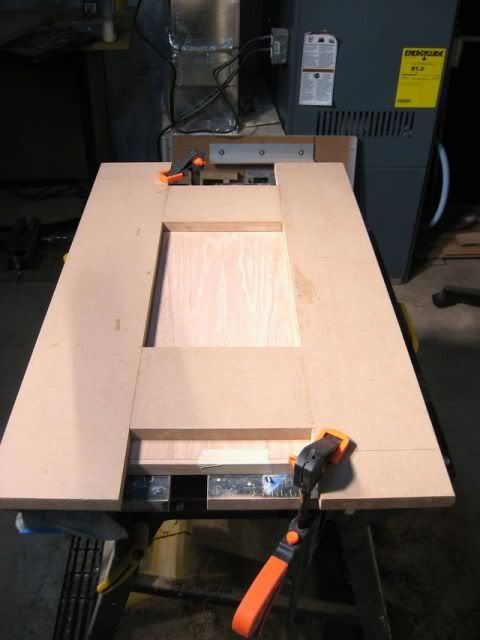
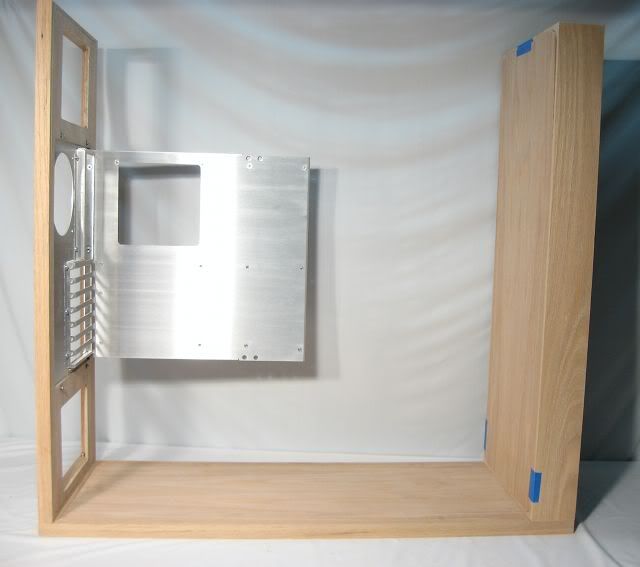
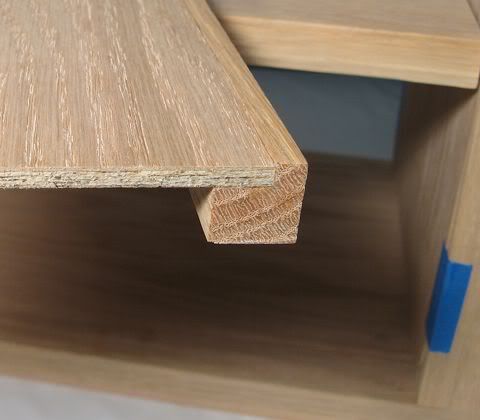
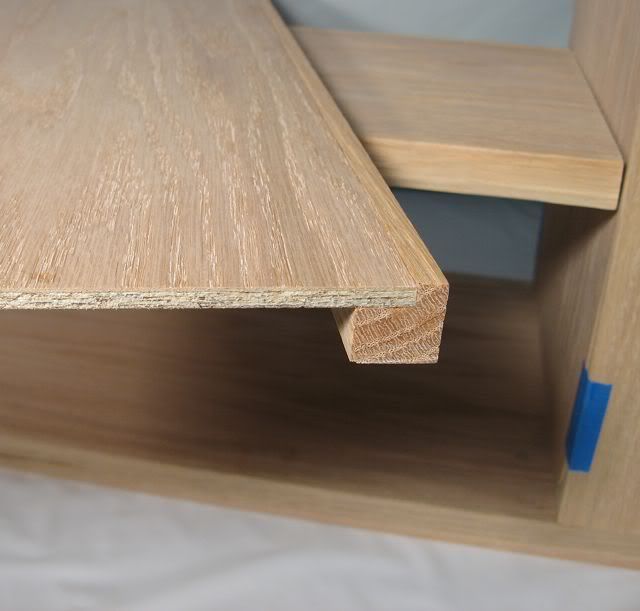
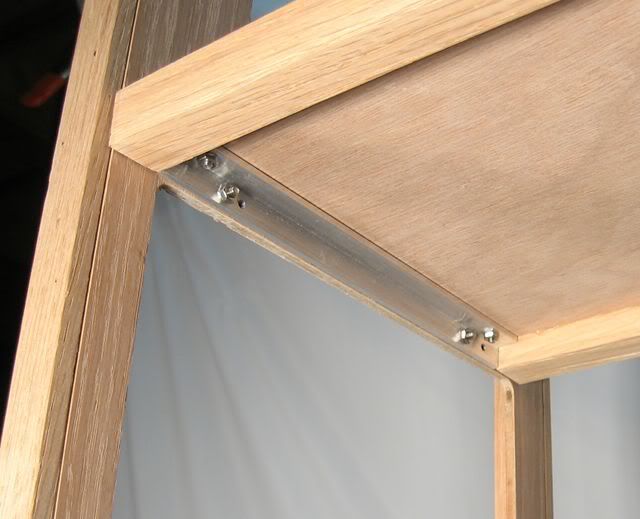
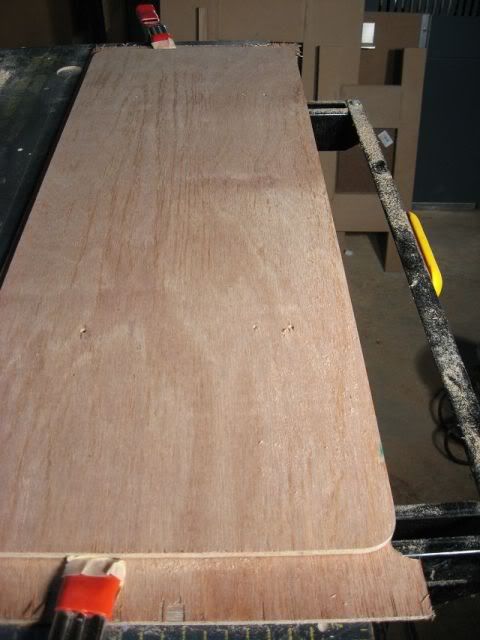
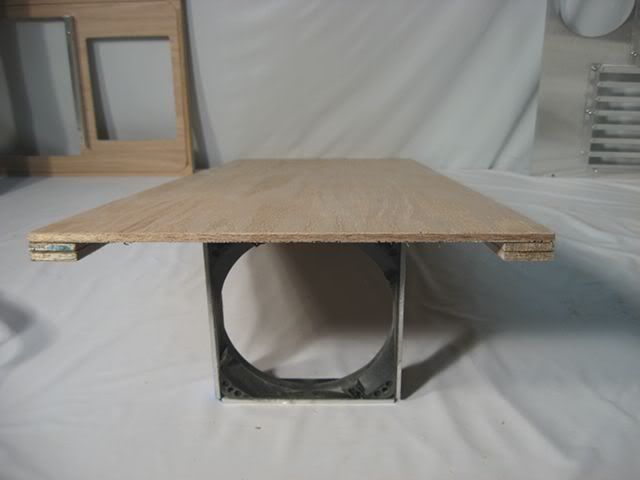
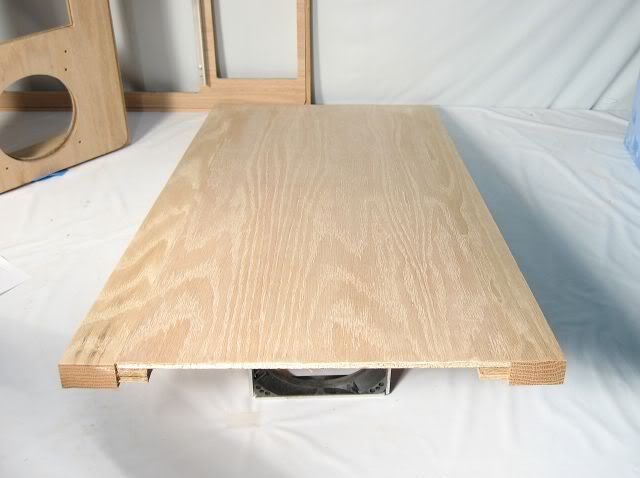
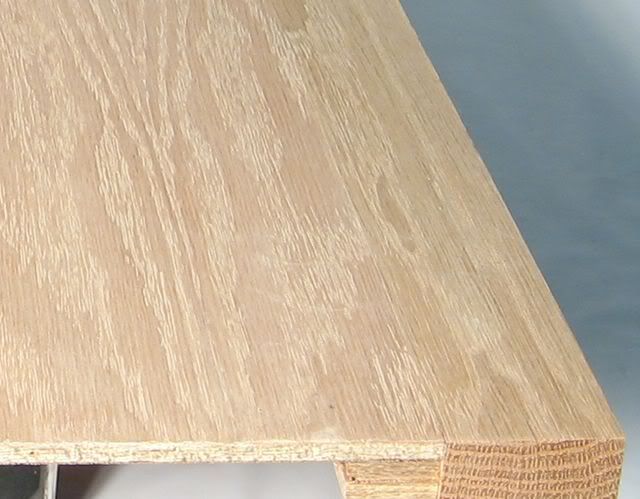
The case will be constructed in such a way that it could be shipped "flat", but yet still be easily assembled when the case arrives at its final destination. To reduce the weight of the case, it will be made from hardwood trimmed 1/4-inch oak veneer plywood.

WoodTowerXSMem15.jpg


WoodTowerXSMem8a.jpg


WoodTowerXSMem10.jpg


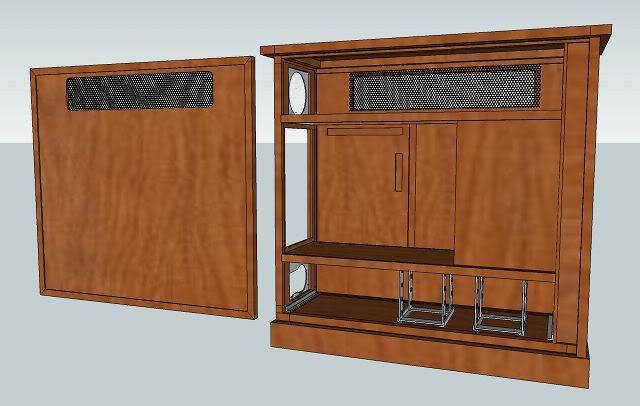
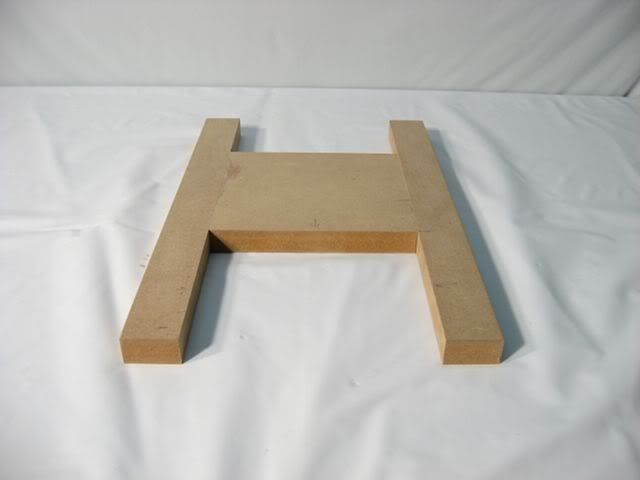
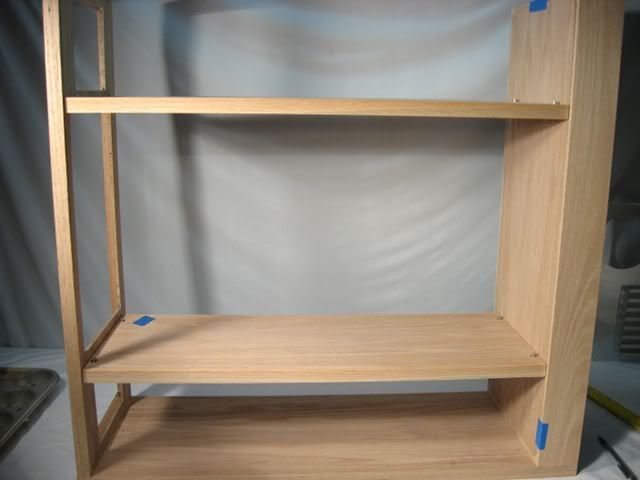
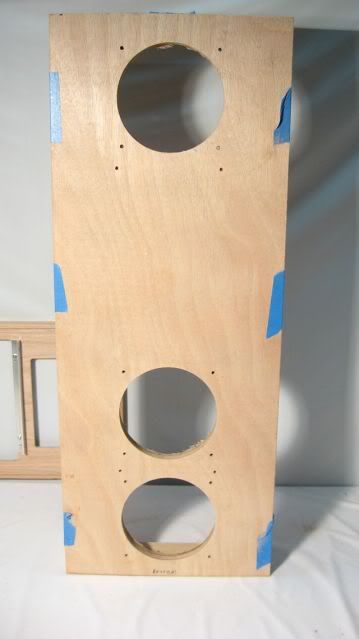
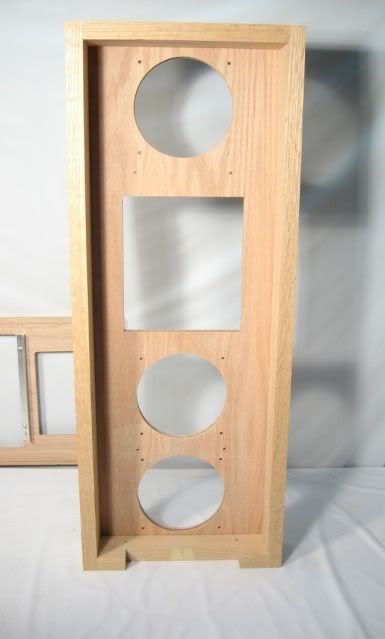
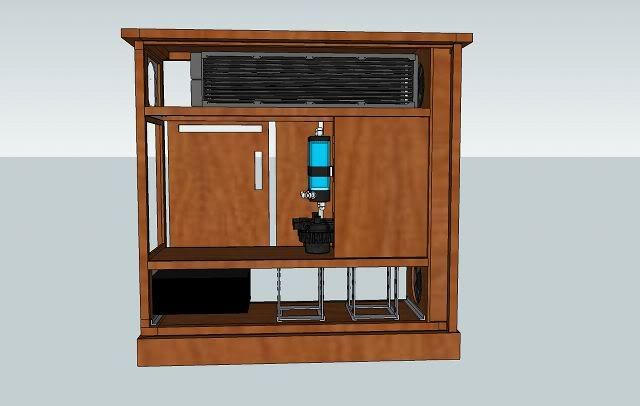
The case is designed to contain an EATX motherboard, seven 5.25-inch drives and eight 3.5-inch hard drives. Two 120.4 radiators will eventually be mounted in the top chamber:

WoodTowerXSMem16.jpg


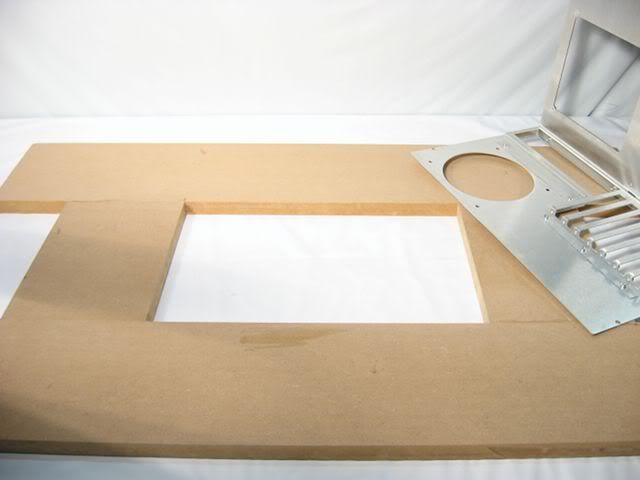
For wire routing/hiding, there's a "false back" between the mother board tray and the side panel:

WoodTowerXSMem13.jpg


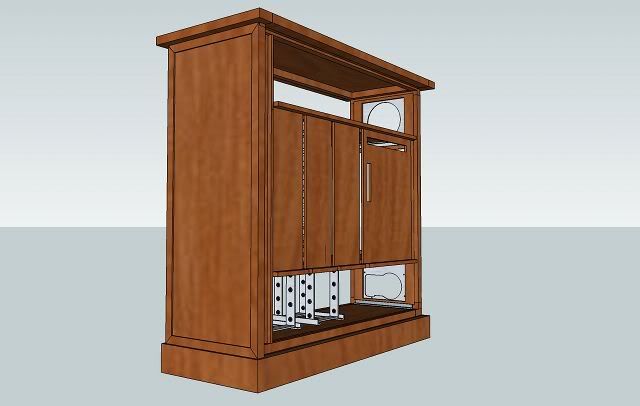
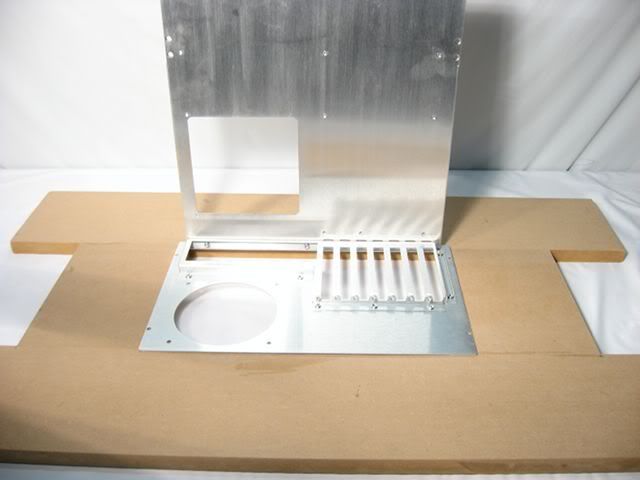
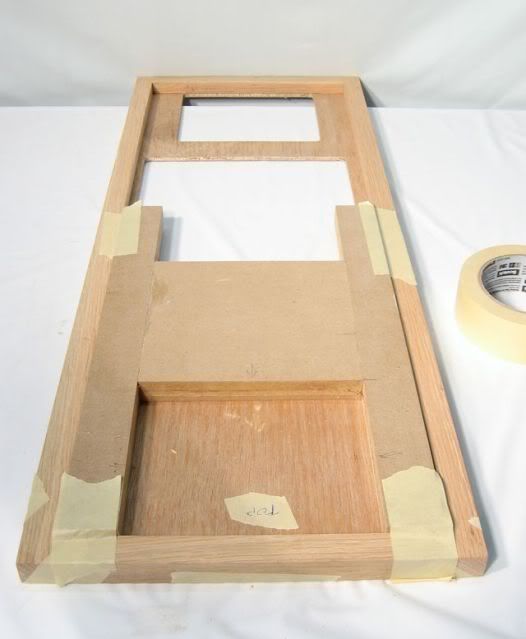
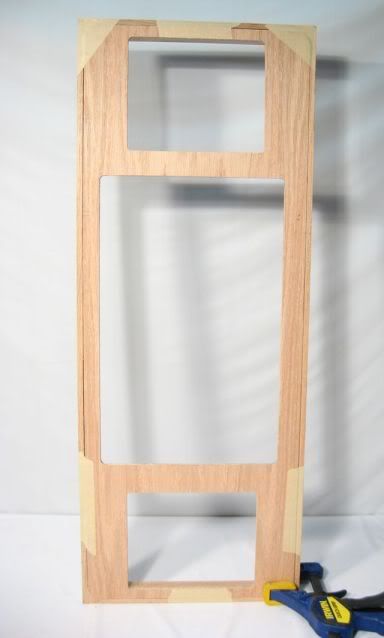
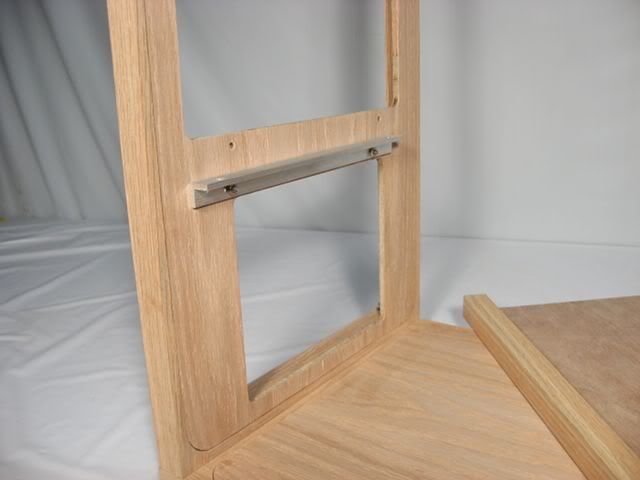
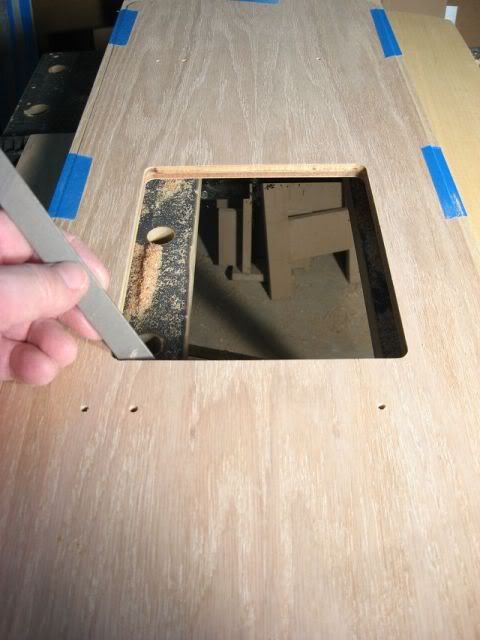
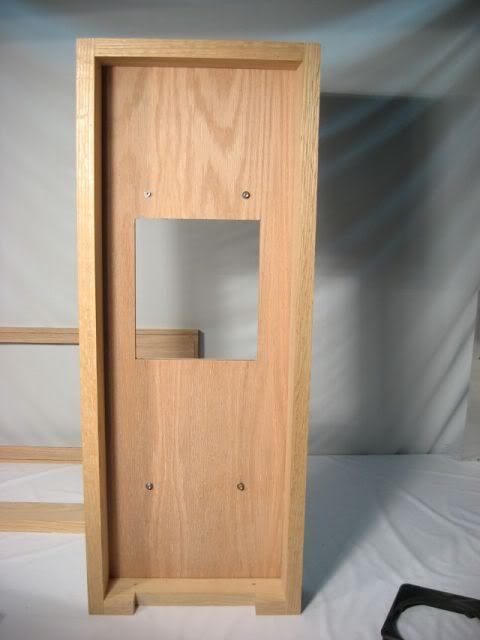
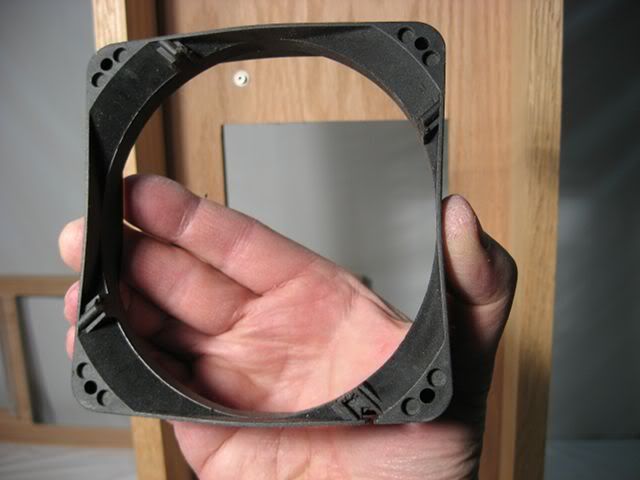
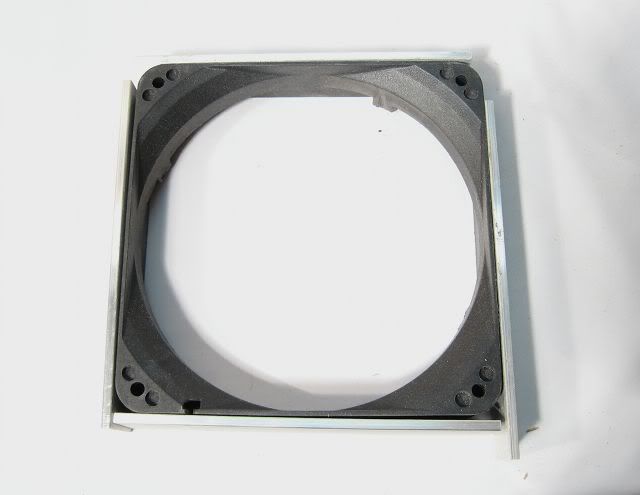
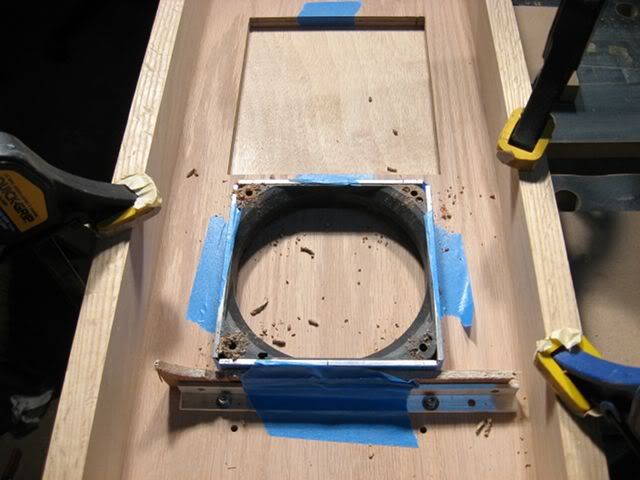
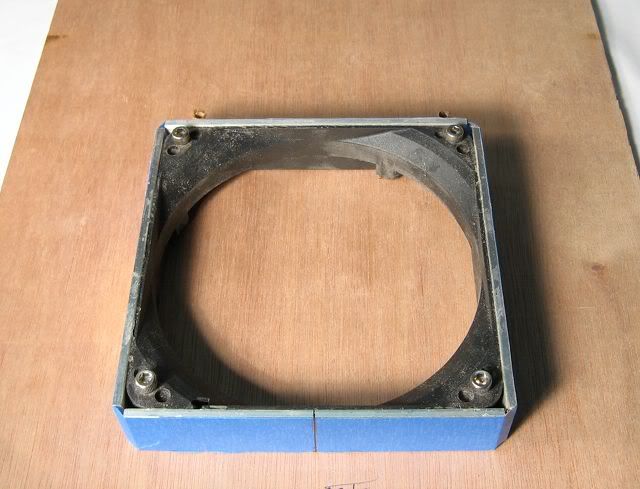
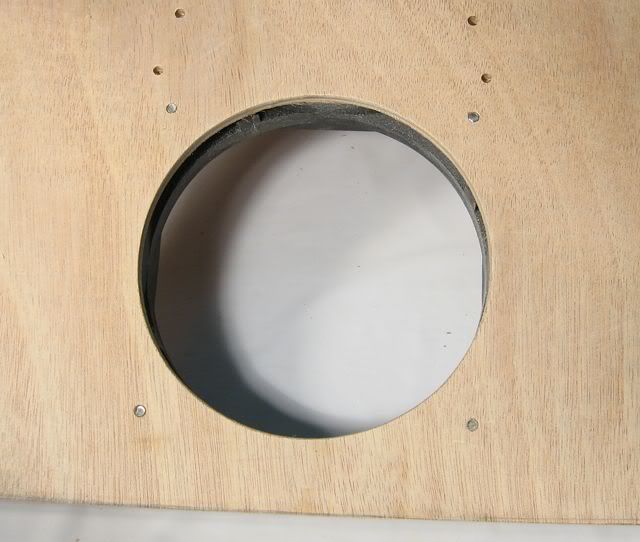
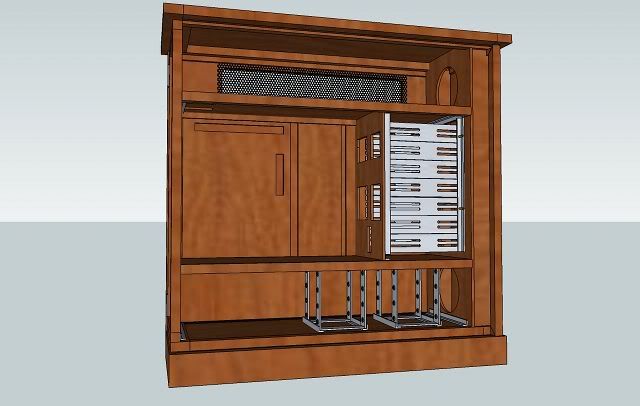
The front fascia/panel is removable (although not on a hinge). Each horizontal "chamber" in the case is fed and exhausted by a 120mm fan.

WoodTowerXSMem14.jpg


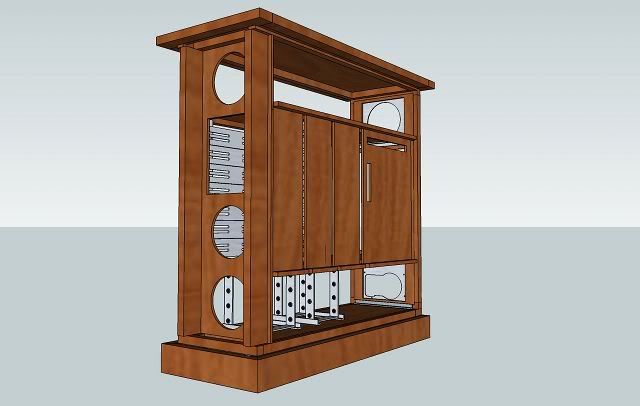
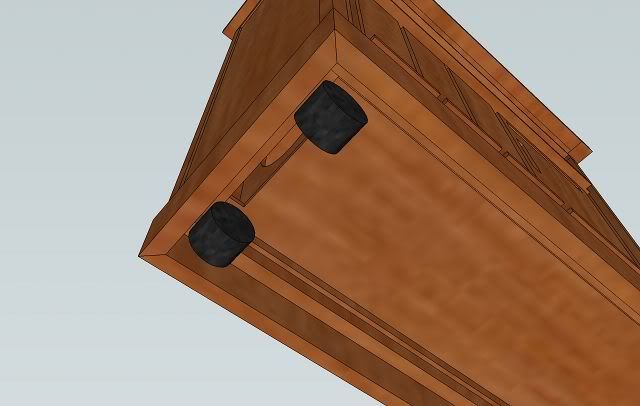
Fresh air is supplied to the front fans via a bottom-fed, built-in air duct.

WoodTowerXSMem17.jpg


The case will stained black throughout:

Ebony-izedOak.jpg


That pretty much wraps-up "the design tour."


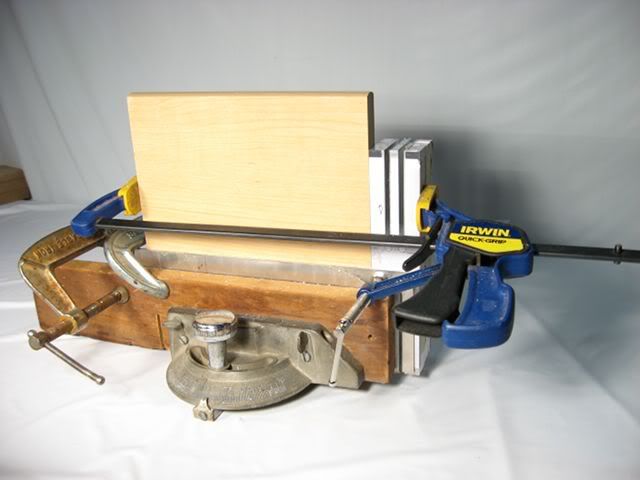
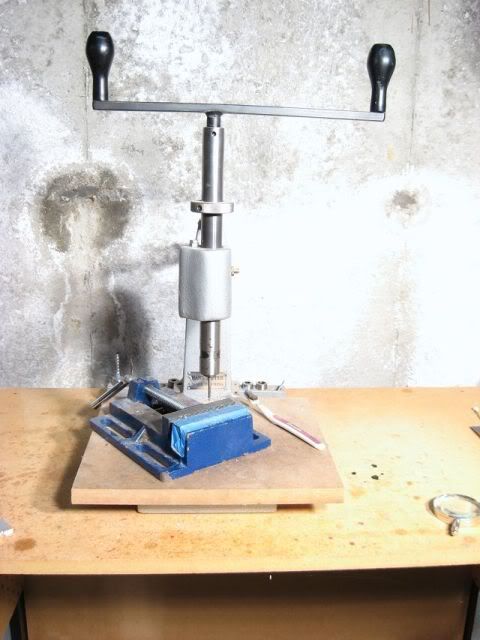
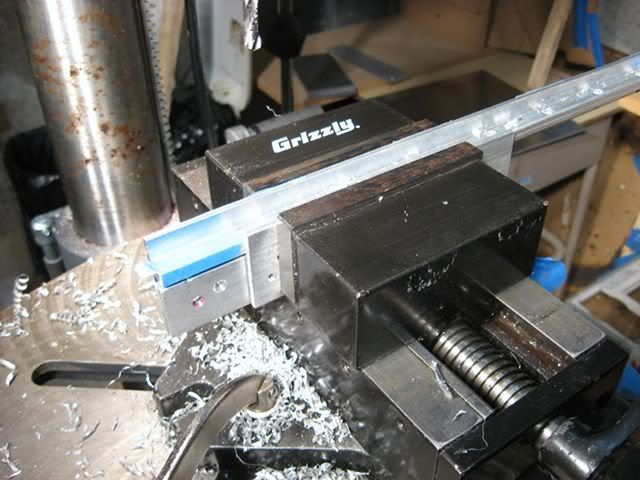
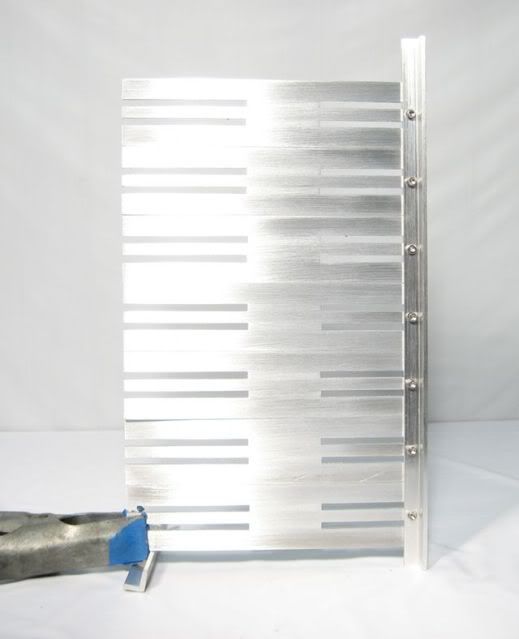
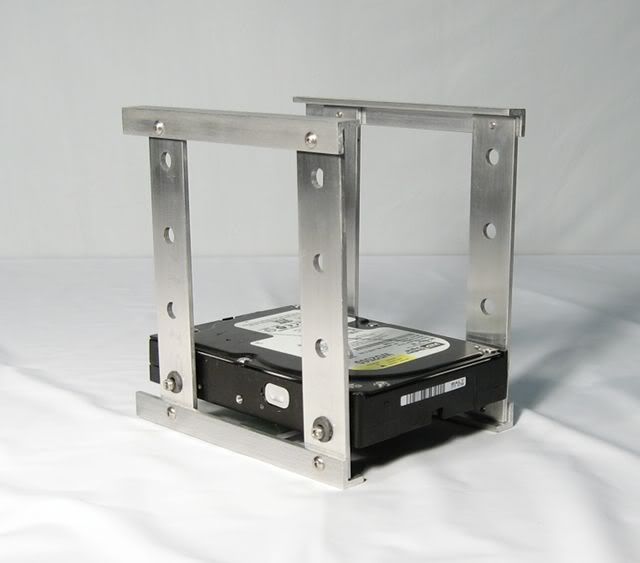
The first order of business is to fabricate the hard drive cages from 1/8-inch aluminum flat bar:

HDCage2.jpg


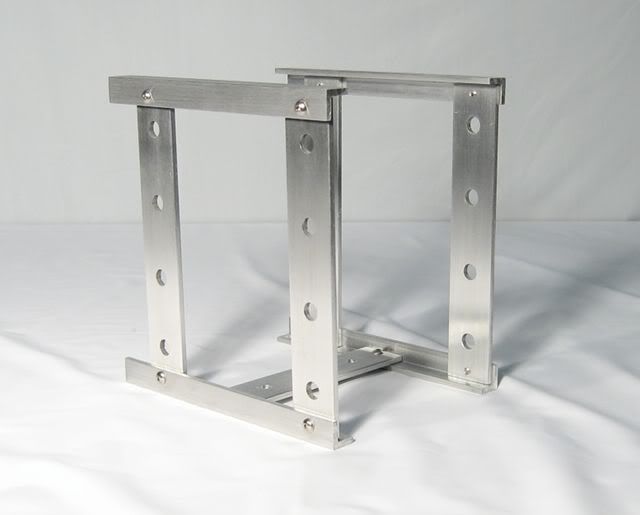
The drives are suspended in soft rubber grommets:

HDCage1.jpg
 
Last edited:
ooh. interesting... why the 2x120.4? you putting 3 separate rigs in this thing? :D
 
subbed...this looks awesome, do you have the approximate dimensions of this bad boy. i have been thinking about building a wooden case for a long time, just dont have half the tools needed
 
subbed...this looks awesome, do you have the approximate dimensions of this bad boy. i have been thinking about building a wooden case for a long time, just dont have half the tools needed

Internal dimensions (HxWxD): 26 x 10 x 25
External dimensions (HxWxD): 30 x 13 x 30. :D
 
teh blue printz!!!! me needz dem....... i have a project that might just become this one but i would like to compare the sizes before i move forward.....
 
The cage/rails for the 5.25-inch optical drives were made from 1/8-inch aluminum sheet and 1/2-inch aluminum angle. The aluminum sheet was easily cut on the table saw (fitted with a carbide tipped saw blade). The strips were then stacked and a full-size template of a rail (drawn in Sketchup) was taped on.

OpticalBlank1.jpg


The strips were then clamped to a home made jig in order to cut the slots in the rails safely and accurately.

OpticalJig.jpg


In the center edge of each rail, a 6-32 thread was tapped (using my awesome hand tapper):

Threader.jpg


The holes in the angle were quickly drilled with the help of a self-centering vice (note the addition of a 1/8-inch plate in order to center the "leg" of the angle in the vice):

CenteringVice.jpg


All of the aluminum pieces were scratched with 80-grit sandpaper. One-half of an assembled drive cage:

Optical2.jpg


Having the ability to remove individual drive rails provides flexibility when it comes to laying out the rig and for easy customizations.
 
Last edited:
looks very professional...... your even using commercial/industrial type tools.....

i look forward to the progress that is to be made in this thread....:cool:
 
After a lengthy illness I managed to drag myself to the lumber yard and into the shop for a few hours. I took it easy on myself and just fabricated a couple of templates out of MDF that will be used to route out the motherboard tray and power supply openings out of the back panel.

Power supply template:
PSTemplate.jpg


Motherboard tray template:
MBTemplate.jpg


MBTemplate2.jpg


I also cut a glued the frame for the back panel out of 3/4x3/4-inch oak:
BackPanelFrame.jpg
 
ah i was wondering why this build went nowhere fast. sorry too hear about the flu, it seems to be pretty rampant these days. hopefully your customer for this build is understanding. looking forward to seeing some more progress!
 
A jig was built to safely rabbet the inside edges of the glued-up front panel frame.

RouterSupport.jpg


The front and back panel frames were rabbeted to accept the 5.2mm oak veneer plywood.

RabitMidPanel.jpg


Rabit.jpg


The plywood was cut on the table saw. The corners were rounded "free hand" on the table saw then finished with sandpaper and a sanding block:
PlywoodBack.jpg


A cleat was glued to the backside of the MB tray template for easy alignment.
MBTemplateCleat.jpg


MBTemplateApplied.jpg


A router with a 1/2-inch pattern/flush-trim bit was used to route out the hole. For the top and bottom power supply holes, that template was fastened to the underside of the panel in order to center it properly and a 3/8-inch pattern/flush-trim bit was used.

PSTemplateApplied.jpg


BackPanelRouted.jpg


Perfect! The plywood pieces can now be glued to the back and bottom frames.

Stay tuned!
 
Last edited:
Thanks guys!

I was interested to see just how big this case really is so I quickly bolted the panels together and fastened the mother tray:

MBTrayTestFit.jpg


:eek: For perspective, that's an EATX motherboard tray. The "huge" Corsair 800D case would fit inside this case. :D
 
You made that EATX tray look like a uATX one :D

I bet you could make a small child walk around inside it quite comfortably :p
 
You could fit a 800D..... a ps3, a 360 another PC strictly for HTPC.... AND have a small child living inside that box bro. Very nice! :)
 
Looking good. I have been toying with wooden case myself but seeing yours in progress intimidates me. Out of curiosity you using oak play wood or 1x's? I work at a home improvement store (who's favorite color is orange) in the lumber department and know either way you go oak is not cheap.
 
Looking good. I have been toying with wooden case myself but seeing yours in progress intimidates me. Out of curiosity you using oak play wood or 1x's? I work at a home improvement store (who's favorite color is orange) in the lumber department and know either way you go oak is not cheap.
I'm using 1/4-inch (5.6mm) oak veneer plywood (from a local lumber yard :D) and 1x's (some from a store who's favorite color also happens to be orange). :D
 
btw i meant oak PLYwood but you get the idea. so i take it you are using the iron on edging to cover the exposed sides after cutting? are you pluging the screw holes at all or using stainable wood filler?
 
btw i meant oak PLYwood but you get the idea. so i take it you are using the iron on edging to cover the exposed sides after cutting?
No. The plywood is a bit too thin/narrow for edging plus it needs some stiffening so 3/4-inch square oak is rabbeted and glued:

ShelfEdgeDetailCloseup.jpg


are you pluging the screw holes at all or using stainable wood filler?

The case is designed to be assembled by the customer, so hiding screws/bolts with plugs is not an option. However, none of the bolts will be visible after the case is fully assembled. :D
 
The "shelves" that separate the case into three chambers was fab'd from 3/4-inch square oak, rabbeted to hide the plywood edge.

ShelfEdgeDetail.jpg


The shelves nestle onto brackets made from 1/2-inch aluminum angle.

ShelBracket.jpg


The angle bracket for the top shelf along the back panel just so happens to land in the same location as the bolts used to fasten the motherboard tray. Originally I was thinking the tray would be bolted onto the back panel (with a nut), but with the angle bracket there, doing so would be very awkward. So instead, I just tapped some 6-32 threads.

ShelfAngleCloseup.jpg


Shelves.jpg
 
Looking good. I have been toying with wooden case myself but seeing yours in progress intimidates me. Out of curiosity you using oak play wood or 1x's? I work at a home improvement store (who's favorite color is orange) in the lumber department and know either way you go oak is not cheap.

1x's are going to be expensive unless you are going to use a low grade pine... which i actually like.... (the knots add character) other wise ply is the best and its also less prone to warping..... this of course is coming from someone who used to work at a store whom had favorite colors of blue and grey. and are direct competition with the store with a favorite color of orange.... >_>
 
1x's are going to be expensive unless you are going to use a low grade pine... which i actually like.... (the knots add character) other wise ply is the best and its also less prone to warping..... this of course is coming from someone who used to work at a store whom had favorite colors of blue and grey. and are direct competition with the store with a favorite color of orange.... >_>

This case is a high-end case, designed for the water cooling enthusiast, so the extra cost of oak over the cost of pine isn't a consideration.


Now onto a small update....

I didn't like the quality of the front panel's plywood "B" side (the good "A" side faces the inside of the case), so I had to cut another piece and sandwich them together, "B" side to "B" side. By utilizing the existing panel as a template for my router, this extra task went fast. After rough cutting another piece of plywood, the two pieces were temporarily held together with double-sided tape. Then a pattern/flush trim router bit was used to "cut" the panel to size.

FrontRouterGuide.jpg


The hole for the optical drives was routed out and the corners squared with a hand file.

FilingOptical.jpg


FrontWall.jpg


The next task was to route three 120mm holes in the front panel, but I discovered that the fan frame I was going to use as a router template wasn't stiff enough, which would have resulted in misshaped holes.

FlexFan.jpg


The simple fix will be to glue on some 1/8-inch aluminum flat bar to stiffen it.

GludedAlFanFrame.jpg


I need to let the glue dry for 24 hours before I can use it, so there should be another update tomorrow. Stay tuned!
 
I am finding myself logging on just to see if you have any new updates on this build. Maybe I missed it but did you fabricate the mobo tray yourself? I wouldnt know how or where to begin to make my own.
 
I am finding myself logging on just to see if you have any new updates on this build. Maybe I missed it but did you fabricate the mobo tray yourself? I wouldnt know how or where to begin to make my own.

The EATX motherboard tray came from MountainMods.com.

There wasn't an easy way to fasten the fan "template" to the front panel safely, so I decided to fabricate yet another template. I cut some 1/4-inch thick plywood the same size as the front panel and I aligned the fan housing and used it as a guide to drill some holes (through all three layers of plywood).

FanTemplateHoles.jpg


The plywood template was removed and the fan housing was "bolted" to it with some #8 socket cap screws i.e. the bolts were used to cut their own threads into the plywood.

FanBoltedToTemplate.jpg


The plywood with the bolted-on fan were placed onto the workbench and a 1/2-inch pattern/flush router bit was used to cut out the fan holes:

FanHoleRouted.jpg


After all three holes were cut out of the template, the template was attached to the front panel and three more holes were routed out of it.

FanHolesRouted.jpg


The template was removed and the holes were cleaned-up with some 120 grit sandpaper.

FrontDone.jpg
 
The top of the case is made from 1/4-inch plywood edged with 3/4 x 1-1/4-inch oak. The plywood was roughly cut to size on the table saw and then a couple of extra layers of plywood were glued to the edges in order to thicken it in preparation for gluing the 3/4-inch edging.

TopEdgesThickened.jpg


The top was then trimmed to the desired width with the router.

EdgesTrimmedSquare.jpg


The edging was glued, scraped flush with a cabinet scraper and lightly sanded.

WhatGlueLine.jpg


Seam? What seam?

GlueLineCloseup.jpg

:D
 
Back
Top