Project "Blue Rising" A Fathers Art and Work for His Son

CustomModAddict

Limp Gawd
Joined
Sep 2, 2010
Messages
184
I decided to do a complete system mod for my 13 year old son who lives in Georgia. I could have just threw some old system together or bought an alienware or other pre-made system for him. But I wanted something special for him, I wanted something built by my hands and my ideas. Something he could be proud of, "My Dad built this for me".

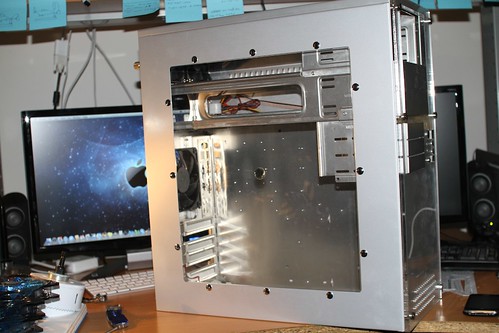
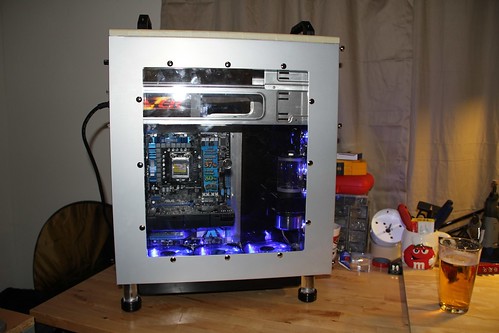
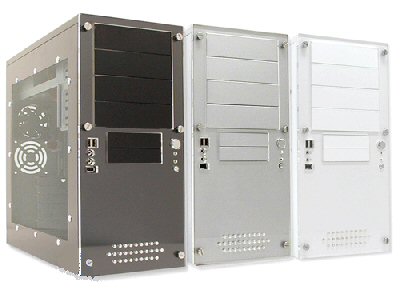
So we are starting with Chyang Fun A320 case (stock photo pictured below) these were popular with certain modders a few years back. I wish I would have bought more of them, this is my last one. I have the silver one.
2029.jpg


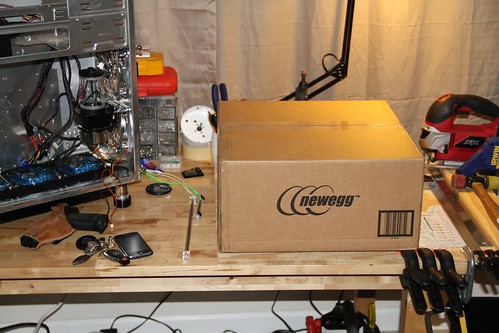
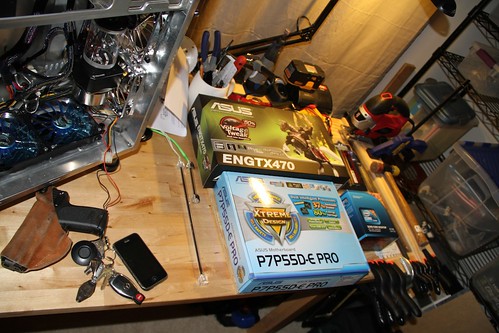
Just placed the final order for all the hardware, as soon as it gets here I can really start getting this project done.

System Specs:

MB ASUS P7P55D-E PRO P55 R

ASUS GTX 470 GPU

CPU INTEL CORE I5 760 2.8

2Gx2 GSKILL PC1600 RAM

ASUS DRW-24B1ST/BLK/B/AS Black SATA 24X DVD Burner

Western Digital Caviar Blue 640GB 7200 RPM SATA 3.0Gb/s 3.5" Internal Hard Drive

Kingwin LAZER Performance Series SLI Ready 850W Modular Power Supply

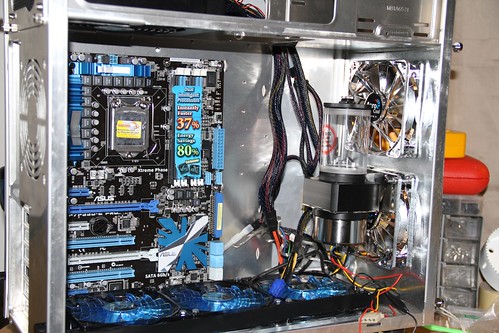
EK GeForce 470 GTX VGA Liquid Cooling Block

EK Supreme HF Universal CPU Liquid Cooling Block - Rev 2 -

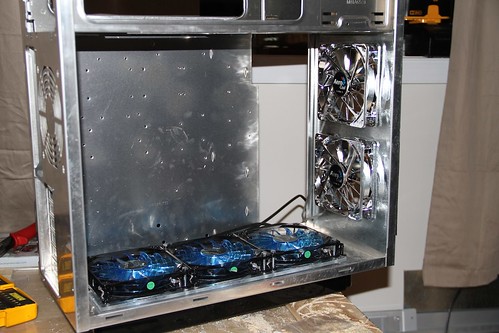
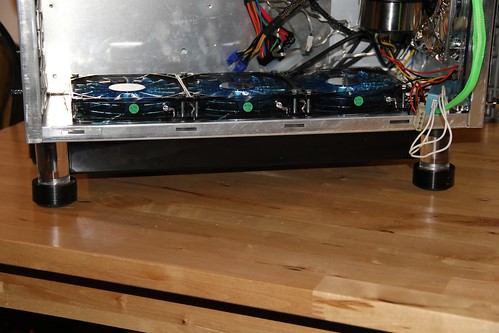
Aerocool Shark Blue Edition 120mm x 25mm High Air Pressure Fan w/ Blue LEDs

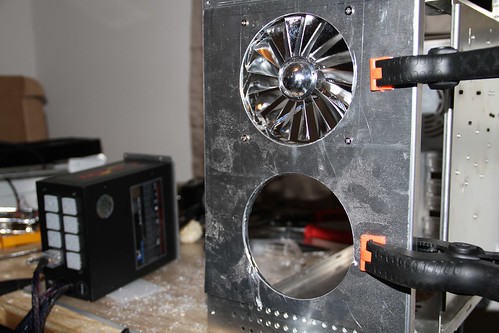
AeroCool 120mm Turbine 1000 Fan - SILVER

Mod/Smart 20 Station LED Board - Base w/ 20x LEDs - Black Base / Blue Switch / Blue LEDs

Blue Illuminated Bulgin Style "Momentary" Vandal Switch - 22mm - Black Housing - Ring Illumination

Red Illuminated Bulgin Style "Momentary" Vandal Switch - 16mm - Black Housing - Dot Illumination

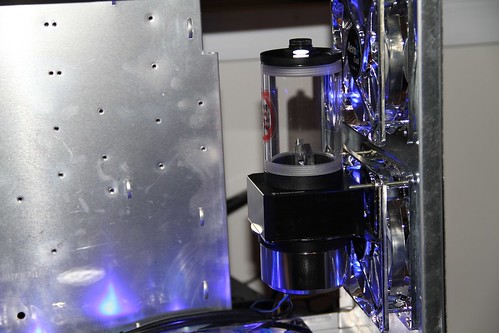
Koolance PMP-450 with Pump Reservoir Base and 150mL Reservoir Tube.
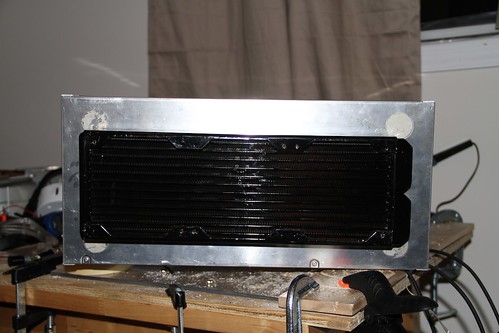
360 Radiator

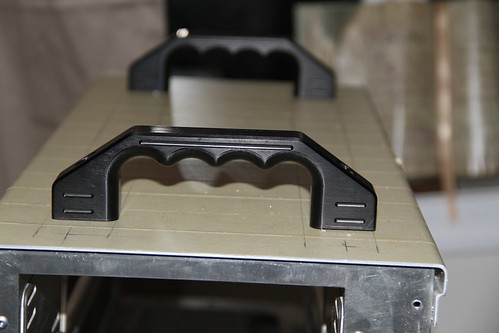
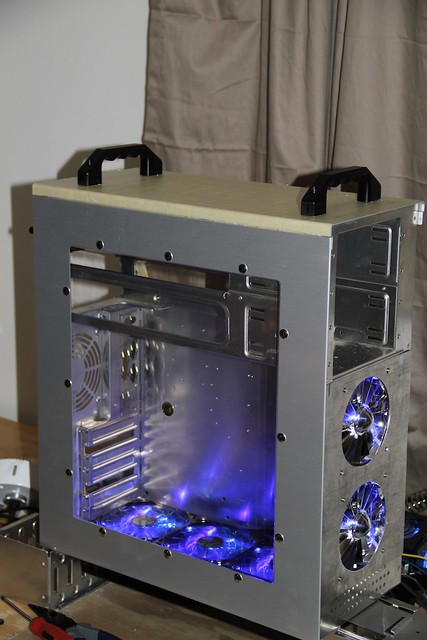
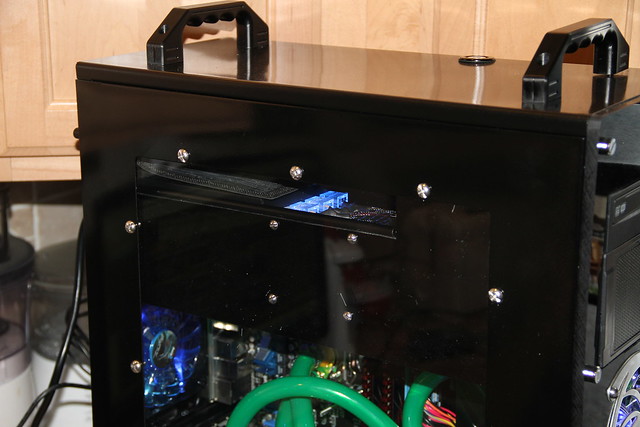
MNPCTech Black Anodized Handles

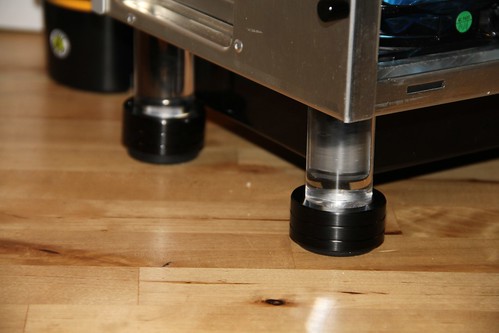
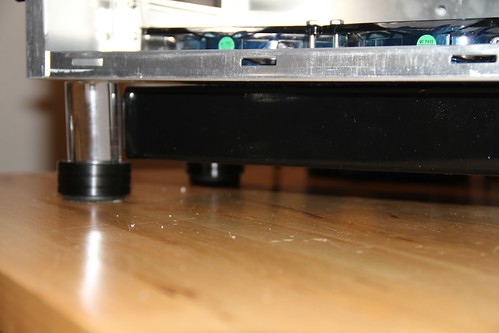
MNPCTech Black Anodized Feet

Design Plans:

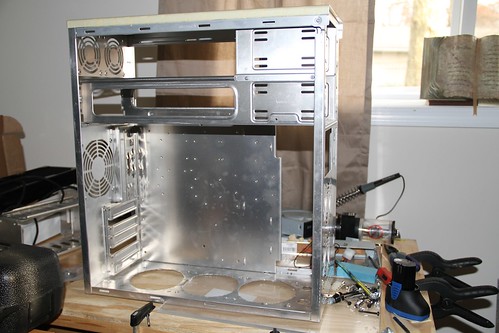
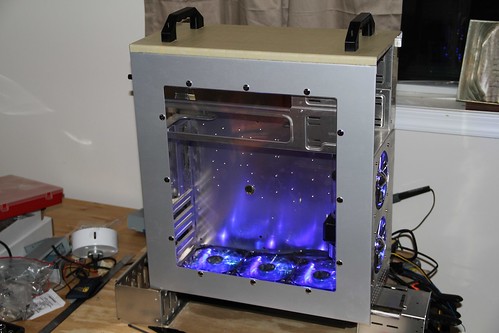
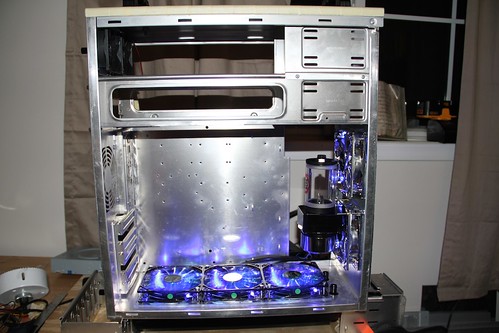
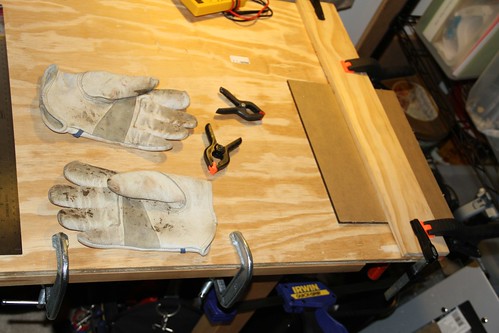
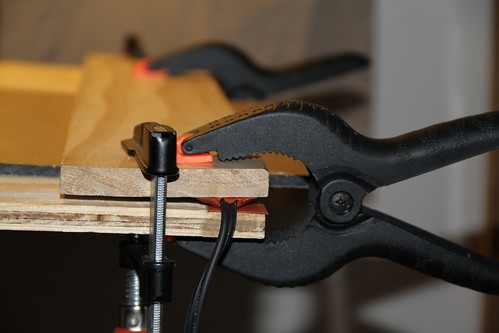
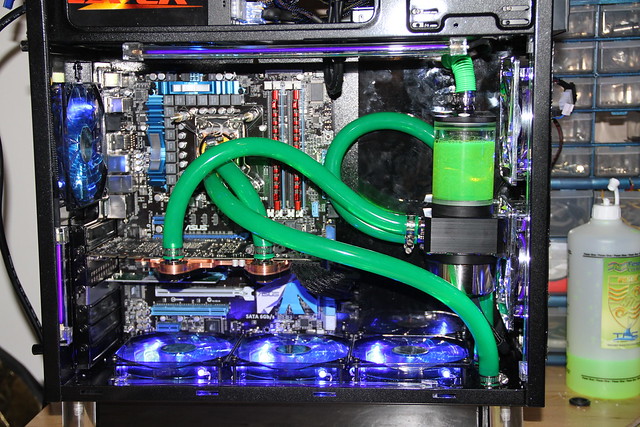
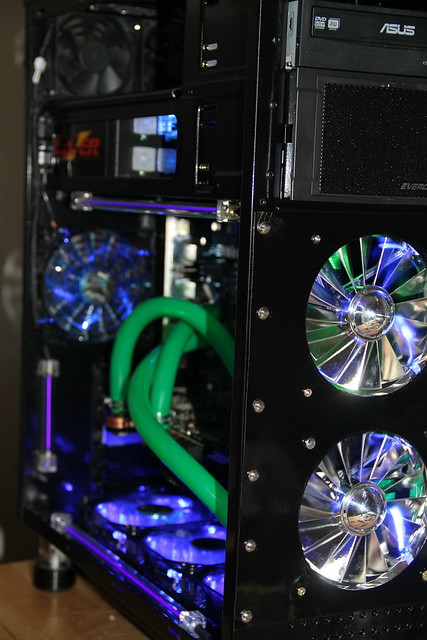
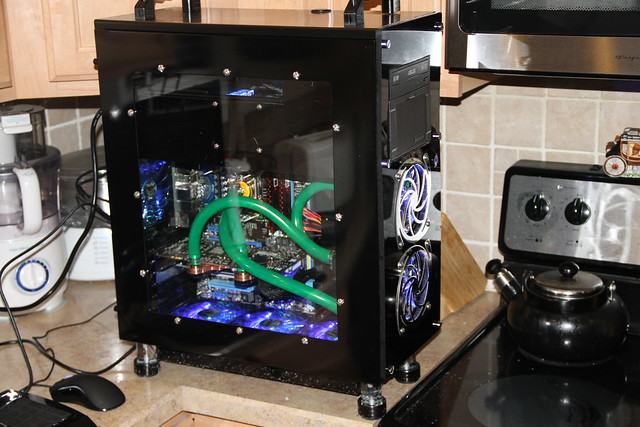
Going to mod and install radiator to bottom of case, Install custom fabricated illuminated case feet, Lazer cut a new acrylic front panel, Custom fabricate interior panels, Custom paint, fabricate interior acrylic parts. Design will be a black with blue illumination.

Well keep on the look out for the next few weeks for updates and plenty of pictures...:cool:
 
Last edited:
Status: Mocking Up Parts.

So today finished up a little work on the build. Got the radiator cut in, the front intake fans cut in, handles installed, and installed Koolance pump/reservoir combo.

5179966367_6f58c27269.jpg


This is what we started with...

5179968601_52fe0b0fc0.jpg


Cut out radiator holes bottom of case

5179969065_916616f7a9.jpg


Cut in one front intake fan

5180570124_8dd2e53e26.jpg


Cut in second front intake fan, and they are Blue LED fans.

5179970711_d23366891b.jpg


5179971661_34d4ba5a26.jpg


5179970901_4294acbf56.jpg


Cut in 360 Radiator

5179969847_a786b48064.jpg


Installed MNPCTech black handles. Got to say these handles are top notch machined parts, they were worth every penny.

5180568806_14d9b98de7.jpg


5180571556_d1346722ff.jpg


5180571770_6a844c7a9b.jpg


Installed Koolance PMP 450 pump/reservoir combo.

5179971863_d244464e94_z.jpg


And here is what we have ended with today...

More to come...
 
Last edited:
Pretty awesome idea and I'm sure he'll love it. I can't wait to build my kid a banging ass rig. :D Kudos to an awesome dad.
 
Bonus points for being an awesome dad. Definitely looking forward to seeing the finished product; this should have some true passion put into it. I'm sure he'll love it.
 
Awesome!, i use to have the same case but in the mid tower form factor that i modded, in fact at one point had 3 of them.
 
Good stuff, great that you are doing that for your son. I remember using them for builds, but none were mine.
 
Well just a little update, picked up some more supplies yesterday at the Acrylic store. Still waiting for the hardware from Newegg should be here tomorrow, then I can get to work on the wiring. Had to pick up a drill, my cordless wasnt cutting it for all this drilling work. So picked up a nice on sale drill at Lowes today $44.00 Hitachi not bad. So first I will start off with a picture of my personal modders man cave :) then a shot of the new tool :cool: and then a few shots of the legs I cut from the acrylic I picked up.


My Modders Man Cave
5185442713_7e067ae81b.jpg


The new drill closer look of the work station
5186044470_52931c2767.jpg


Shots of the acrylic legs that go into the MNPCTech feet and will be illuminated with blue LED's
5185443069_6589240d97.jpg

5186044876_ae28bfd869.jpg

5185443573_f853332d9a.jpg

5185443415_c99d3882a8.jpg


Stay Tuned More To Come :cool:
 
Well the goodies came today as you can see by the pictures. I also fabricated an acrylic panel for inside the case. This panel will act as a chase for hiding all the wiring. Cable management is going to be important in this project. I want it all to be hidden and ran neatly. Well here is a few pictures for you.

Here is the package from Newegg...

5188741849_f1dc819632.jpg


Here is whats inside the Newegg box...

5188741959_b86e06914e.jpg


Motherboard installed so I can measure and mock up, thought the motherboard was goona be bigger, I have more room then I thought.

5189343248_30d4cef304.jpg


My set-up for cutting and fabricating the acrylic, note the gloves they will be important soon

5188742289_cdb4a1fe31.jpg


The acrylic heater strip in place with the sheet clamped down ready for bending

5189343642_9dd3e9a8d1.jpg


And while your waiting for the acrylic to heat up have a nice cocktail or two :) a Steela and Sambuca

5189343772_f2beb5ecd1.jpg
\

The piece of acrylic after bending

5188742643_6676908c16.jpg


Dry fit the acrylic in with 24 pin wiring harness so you can see how cabling will be hidden

5188742861_4465f37cb8.jpg


With paper coating off sheet and in place

5188743135_1b8b38364d.jpg


And final shot of acrylic sheet installed with panel on and fans running

5188743627_9f16c71873.jpg

More to Come were getting close
 
Can you go into a little more detail about how you bend the acrylic?

First you need a strip heater like this there are a few different kind out there, but the one I have is a nice cheap heater cost me $50.00. Make sure you have plenty of clamps around, and some nice flat straight boards or metal.

Basically I laid my strip heater flat on the work surface, placed my sheet over top of the strip heater, and because I was bending a real thick sheet. I brought the rest of the heater strip over top of the sheet. Then I clamped it down nice and tight, let it warm up took about 10 minutes cause it was such a thick sheet. Then just simply bent it down by hand (use gloves cause its hot!!!!) once I got the 90 degree bend in it I removed the sheet and held it in shape for a few minutes to it cooled down.

5189405291_dcf891df52.jpg

5189343642_9dd3e9a8d1.jpg

5189405457_8b359c4710.jpg
 
Thanks! Any chance of burning the acrylic if you heat it too much? Also, do you know if the same method works for plexiglass?
 
Thanks! Any chance of burning the acrylic if you heat it too much? Also, do you know if the same method works for plexiglass?

Not sure about burning the acrylic with the heater, I would think if you left it on for an hour maybe it might, also depends on the thickness of the sheet also. I wouldn't walk away from it thats for sure. Always stay on the cautious side.... Cause that heater does get pretty hot and make sure you unplug it, do not leave it unattended. And Acrylic, Plexiglass, Lexan are pretty much the same thing, there is some chemical difference which gives different strength ratings. But for the purpose of working with it, its still all the same.
 
Sorry about the update delay. Got so busy trying to get the project done before my son went back to Georgia, and the girlfriend moved in right after that. But here are the finished project pictures. I wish I had another week or two to finish it, it would have been perfect...

5362541415_c80d7bba48_z.jpg

Side panel off fluid in everything running.

5363153134_0abf8f3bab_z.jpg

Side panel off more light to show detail, note the black plexiglass piece in back, used for hiding all the wiring.

5363153308_f106e9cca6_z.jpg


5363154996_af8d2987d5_z.jpg

Finished product, note the Danger Den fill port at the very top of the case, made it a ease to fill and get the fluid running.

5363155878_a8283e1d2c_z.jpg

Notice the black plexiglass to cover the PSU. Also note the installed DVD and CD holder, with the OS, and all drivers since my son lives in Georgia. Something goes wrong, all the discs are inside the PC and he can take it to worst case "Geek Squad". No running around for lost CD-Roms of OS and drivers.


Its black chrome powder coated, which I think the guy doing it, ran into a few issues maybe cause the pieces were to thin to bake. Even still, it came out awesome, powder coated, will definitely hold up better then automotive paint job. Watch your tolerances and screw holes when doing powder coat. It was such a pleasure to complete this project, especially since it was for my son, both as a christmas present and for all the hard work he did around the house this summer. He loved it!

On to the next build. Starting in a week or two. Next build is a complete scratch build, I am building the case, frame and as much as I can by myself. Going to be completely different then most of the other stuff out there. Look out for a rough Sketch up rendition soon, and just in case any sponsors looking for a build, need some goodies for the next build.

Thanks all.
 
Back
Top