Project: Ammo Lan (ELECTRONICS COMPLETED!! Updated 8-6-04!!), *¡*TONS OF PICS*!*

Joined
Aug 3, 2004
Messages
40
==================
alrighie to start off Zapwizard has provided much inspiration for this project. this project is NOT an attempt to "out-do" Zapwizard in anyway. i am building this PC to take to LAN parties around the US. laptops are expensive to upgrade so this keeps the fast PC possible to the cheap person (me). :D. alright if there are any problems with the pics PLEASE email me IMMEDIATELY. i will fix them asap. here it goes....
==========================================================
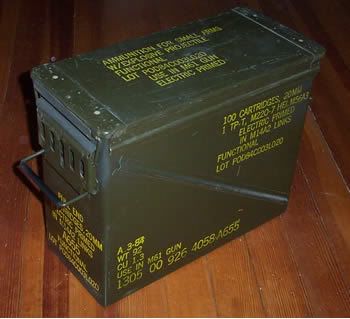
first off this project was supposed to go in to a ammo can looking similar to this:
ammo_can_1.jpg


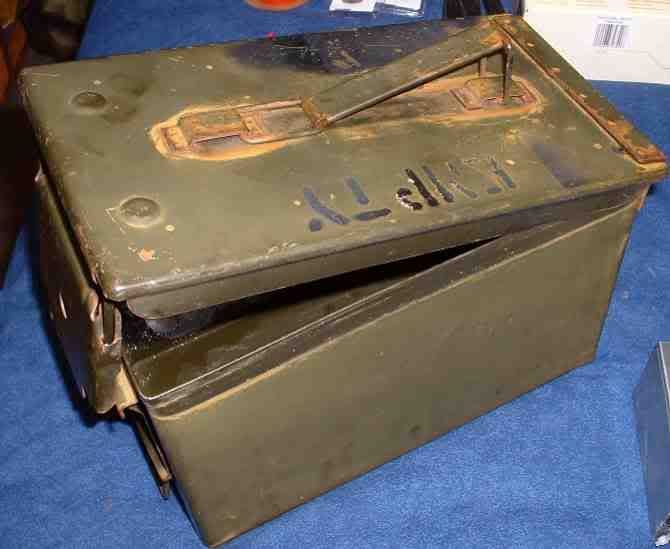
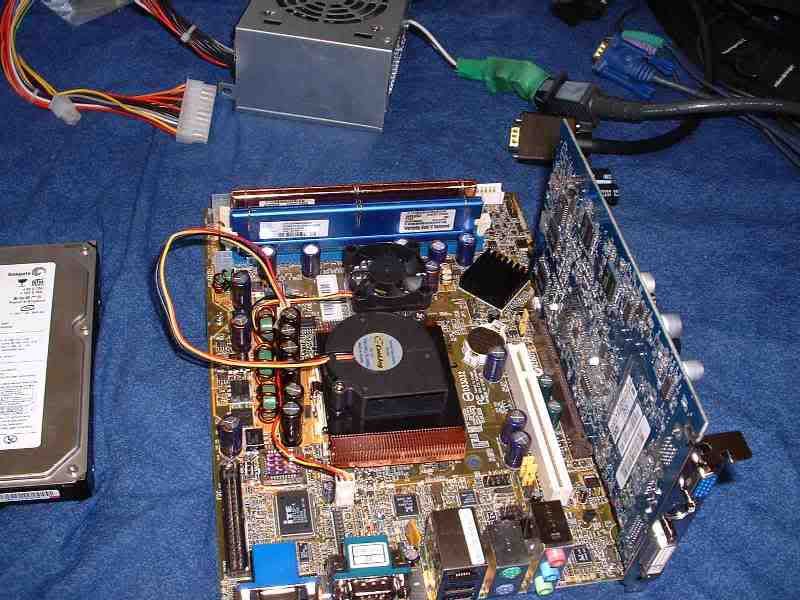
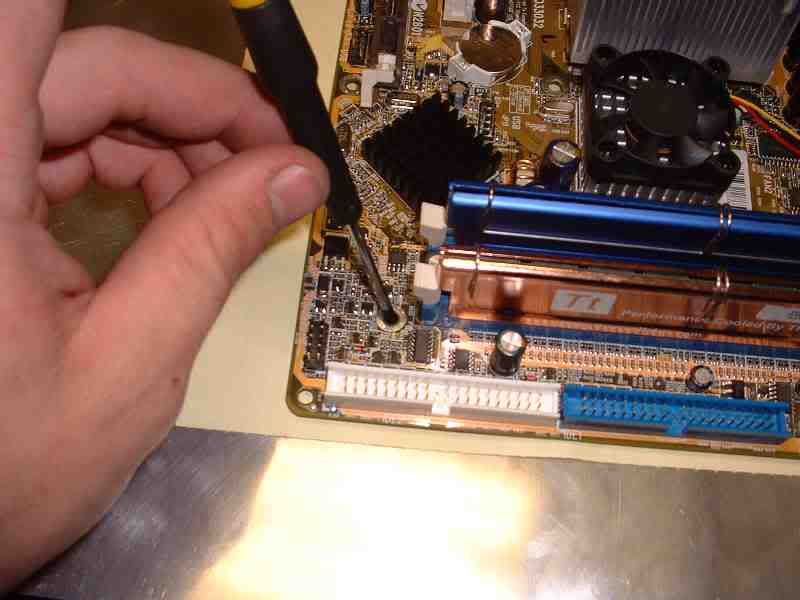
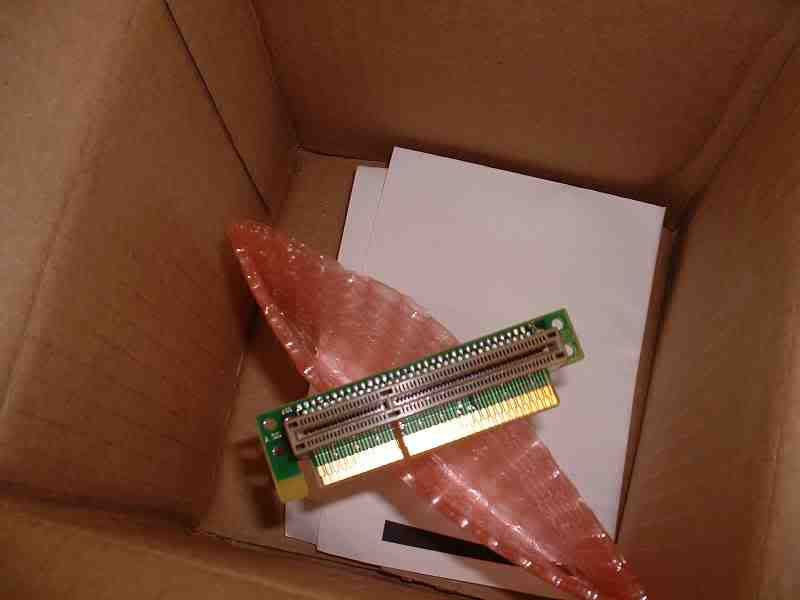
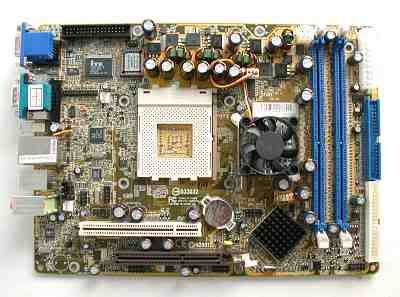
then i realized that i wanted it to play some REAL games like HL2. in order to do this i needed an AGP videocard. so i started looking at motherboards on shuttles site and found this one:
fn41motherboard.jpg


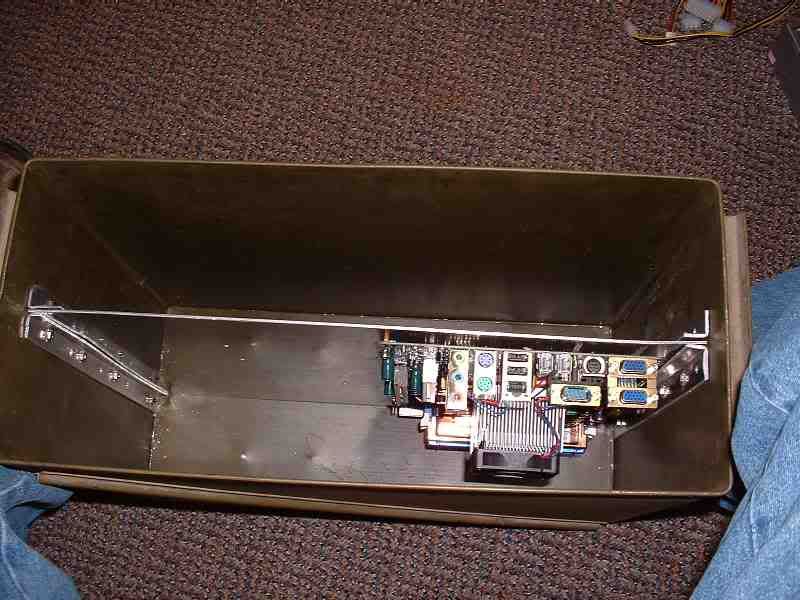
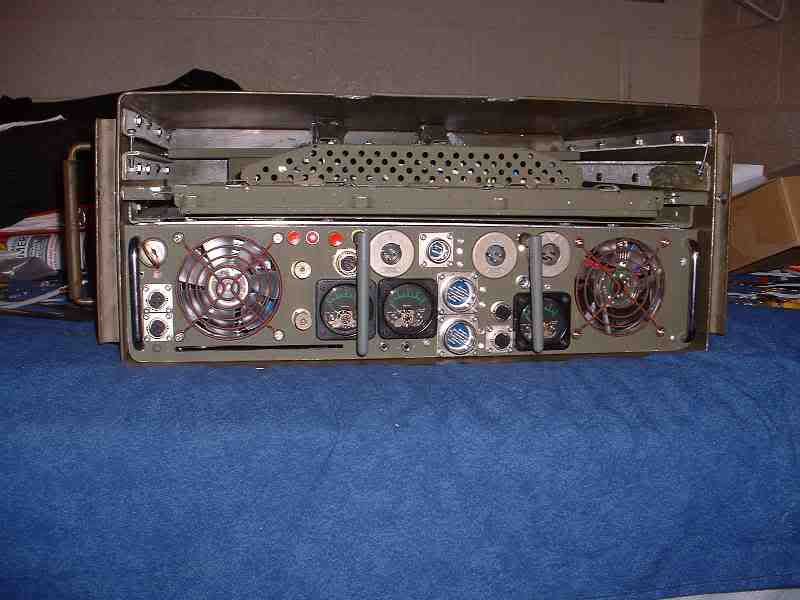
then i started to look for ammo cans that would fit and i came across this one:
ammo_can_2.jpg

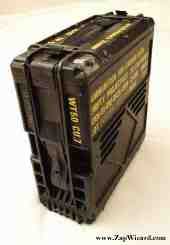
(picture courtesy of zapwizard)

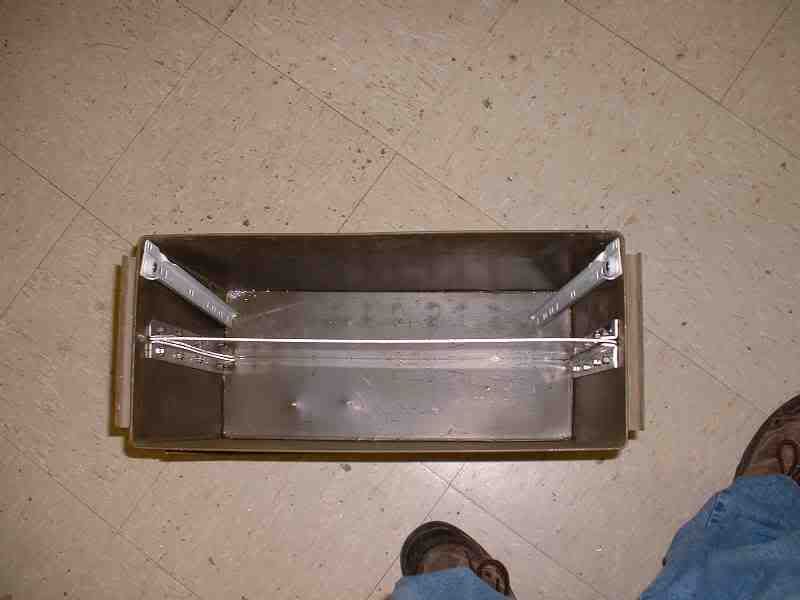
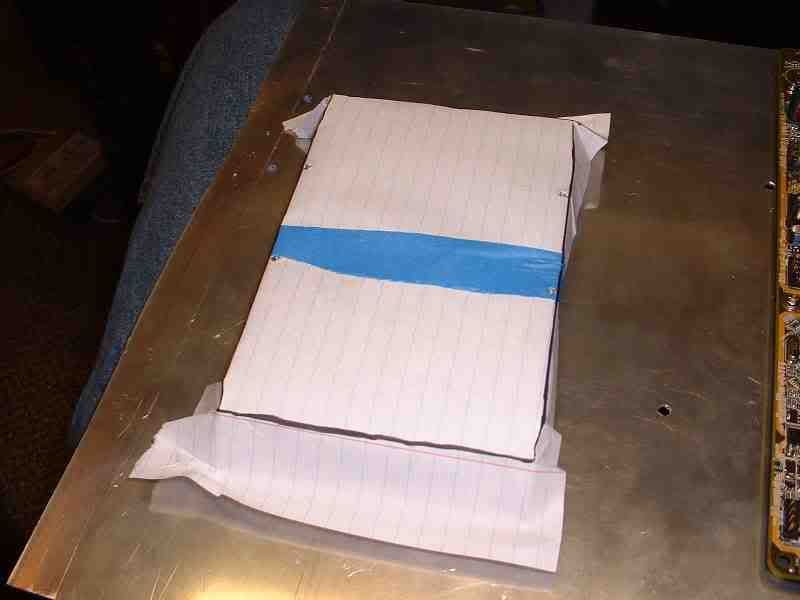
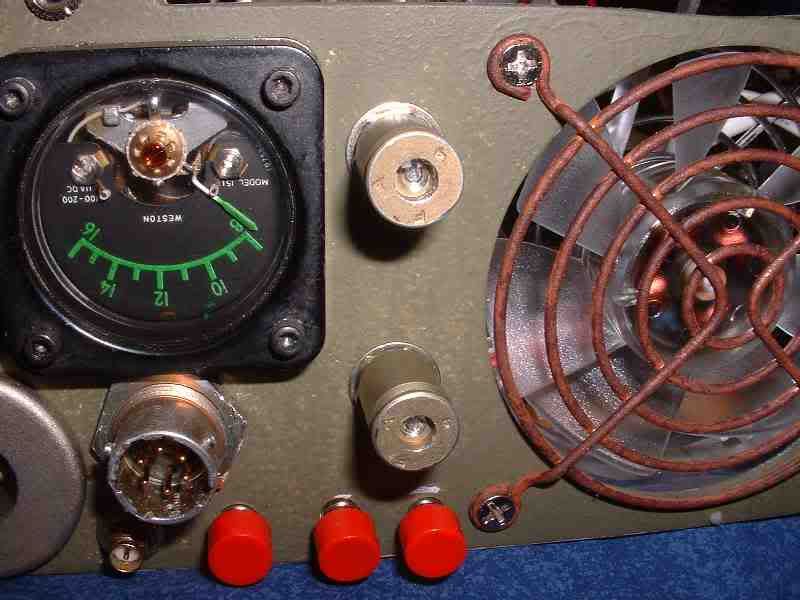
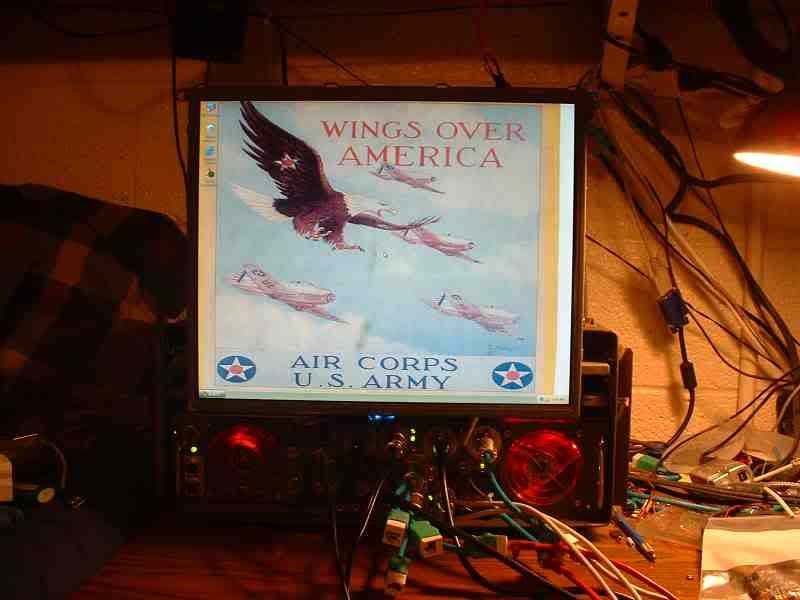
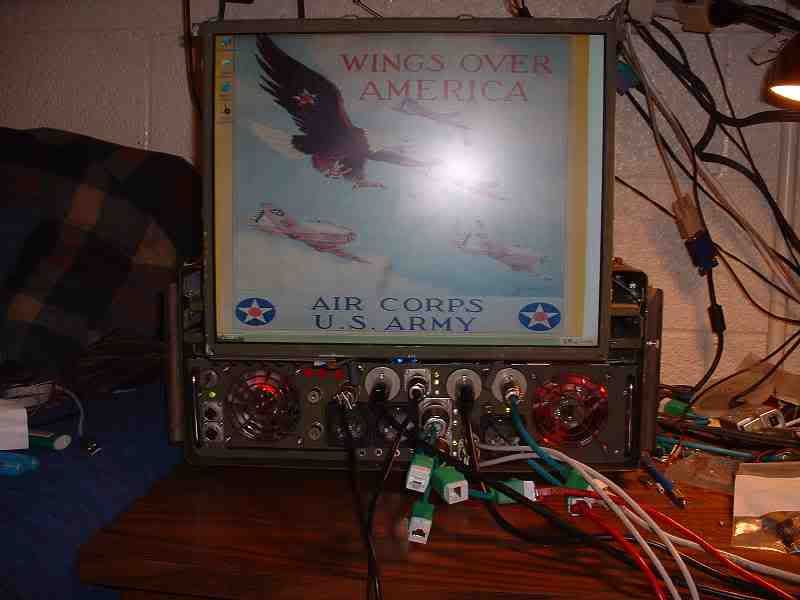
well then i got the crazy idea to put my monitor IN the ammo box. i didn't want to just cut a giant hole in the side i wanted it slide out so when it was in it wouldn't look like a PC. so i started measureing and i was convinced it would work. well the deminsions that i received were botched and the monitor wouldn't fit. I WANTED THE MONITOR TO FIT. sooooo.....i ran down to my local military surplys store and browsed around and came upon a can similar to this one:
ammo_can_3.jpg

(NOTE: i say "similar to this" because i forgot to take pictures before i started modding.)

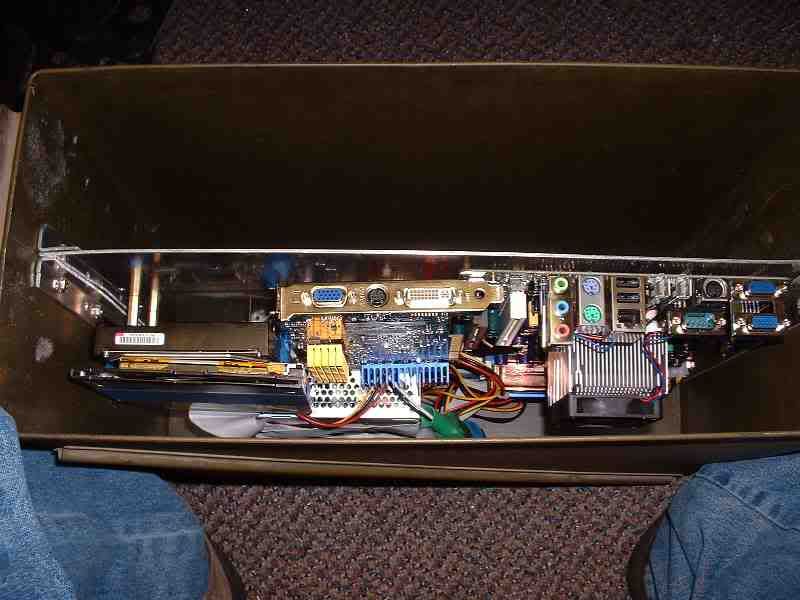
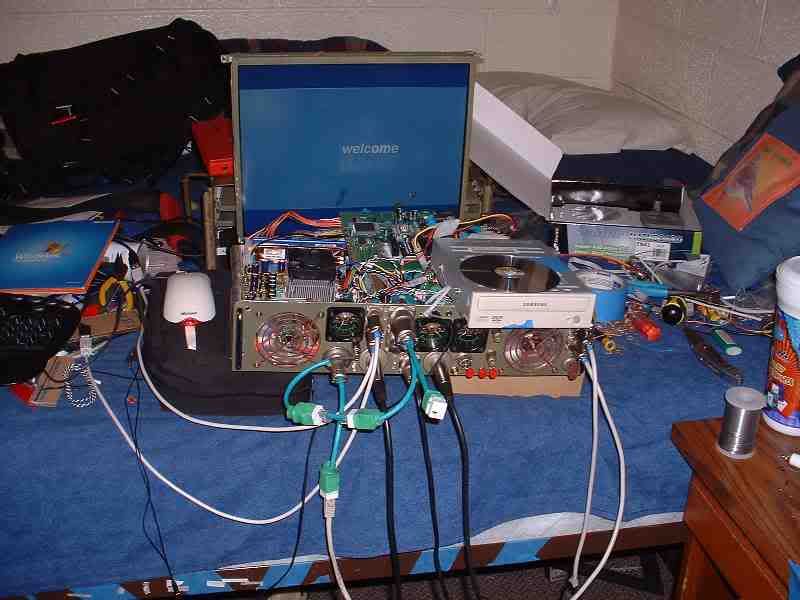
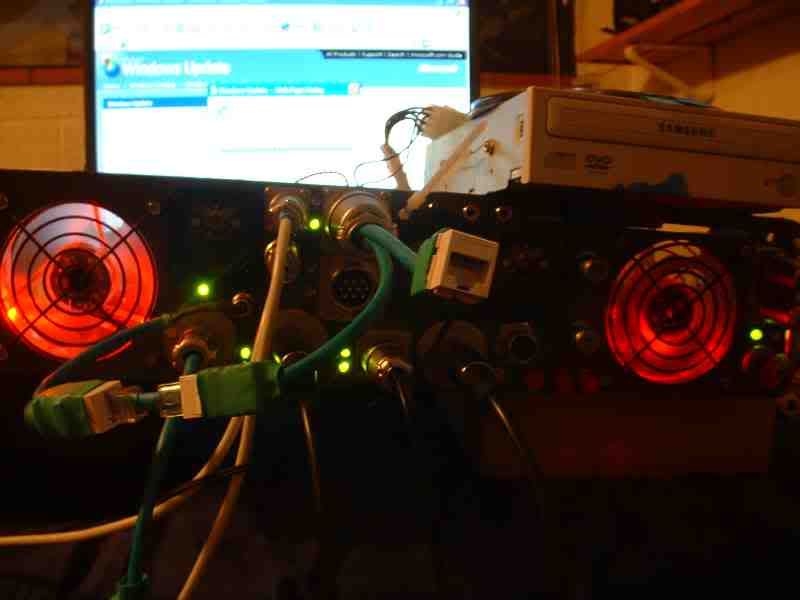
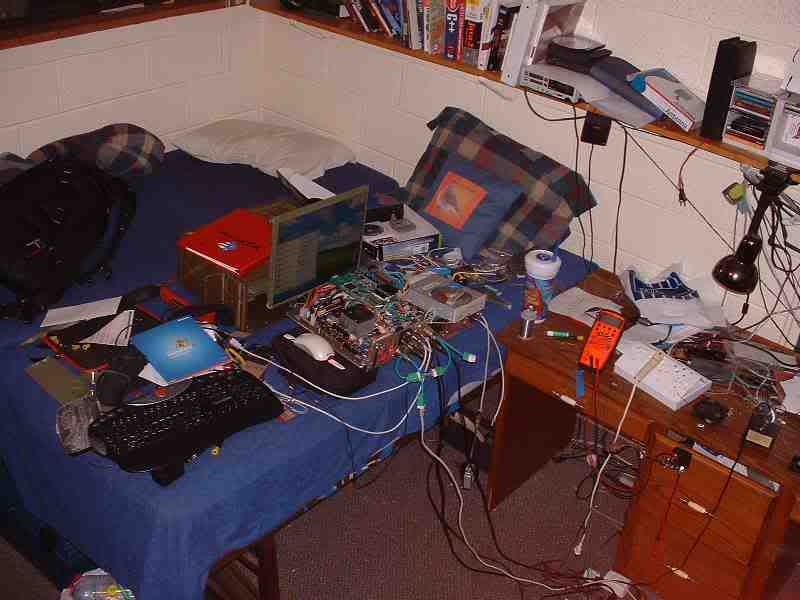
THIS IS A PERFECT CASE!!! the monitor fits perfectly with enough room for a mounting deal or something.
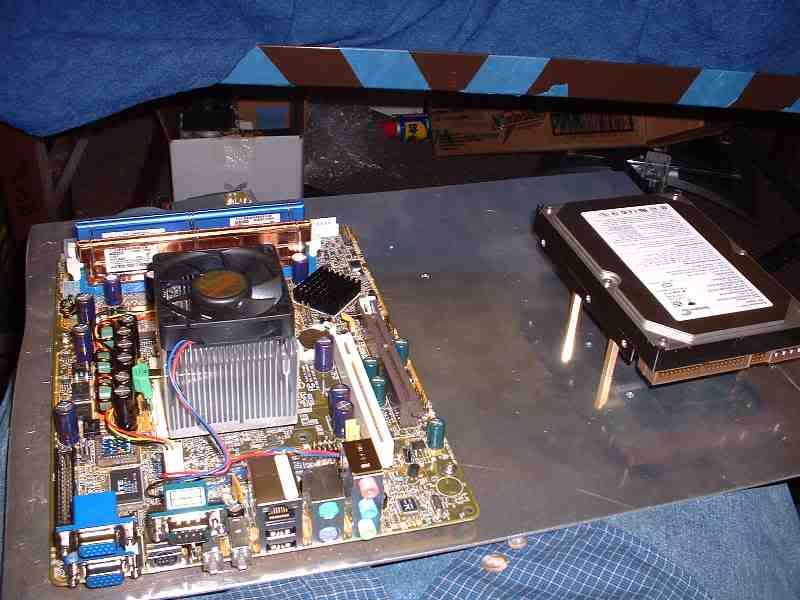
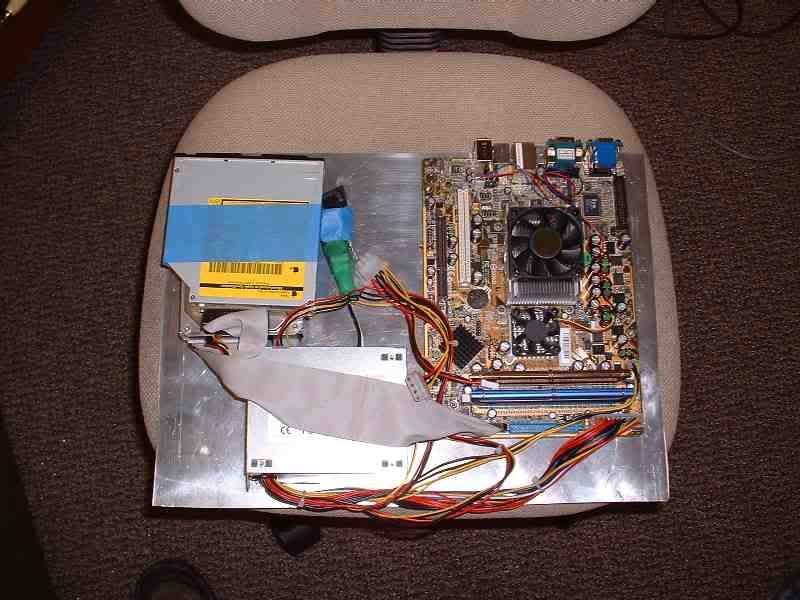
THE PARTS:
-1GB(512MBx2) PC2700 DDR memory
-Gigabyte Radeon 9600 XT
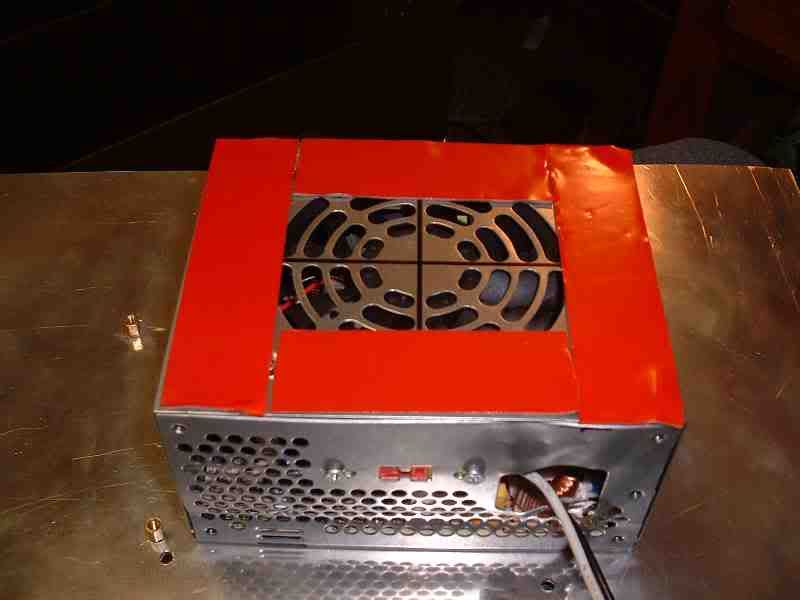
-ALLIED 200W mATX PS(its not he same one pictured here)
-Seagate Barracuda 200GB ATA133 HDD
-Shuttle FN41 Motherboard
-AMD Athlon XP 2500+ barton core
-Panasonic slotloading laptop DVDROM\CDRW drive(fried the apple =C)
 
The work begins:
i was going t use a 1U CPU cooler:
mobo_w_1Ucooler.jpg


however it was really hot and i had a stock cooler that would fit so i used it.
well i started work a couple of days ago so here are the pics of what i have done:
the_can.jpg

components tray installed (it slides out for easy access)

the_play_place.jpg

here is the workshop

the_play_place2.jpg

the other end of it

the_victim.jpg

the victim (this was a machine used to make ICs)

the_objective.jpg

there is burried treasure in there!!

another_objective.jpg

look...MORE TREASURE!!

the_prizes.jpg

booty :p

more_prizes.jpg

more booty :p
 
NOW FOR SOME CHAOS!
making_mobo_template.jpg

im making a template to mount the motherboard to the components tray.

mobo_installed.jpg

here is the mobo installed.

making_HDD_template.jpg

i find templates really handy :thumb:

HDD_installed.jpg

i mounted it with those spacers so there would be room for airflow.

3-4_done.jpg

im making a home in the components tray so the PS can grab its own cold air.

PS_mounting_material.jpg

the all purpose mounting tape :naughty:

PS_fan.jpg

installed PS with cool air source

all_components_mounted.jpg

masking tape to temporarly hold the DVDROM

AGP_card_placement.jpg

well here is where the AGP card is supposed to go however there was a mixup in the description for the AGP angle bracket on a nameless online store. they are going to fix the issue asap. in the meantime i am stuck with onboard video(eeew :grr: )

the_mistake.jpg

stupid people who screw things up for us modders.


well right now i am finished installing winXP and i am doing a few tests on the PC and cooling setup.

installation.jpg

this is going to look really cool.

fans.jpg

here are the fans that look super pimp. i am going to make them turn blue when the HDD is active.

my GF is intown tomorrow and i can't work on stuff till tuesday so i will post more then!! :thumb:
 
Speak Easy said:
Nice work so far! :D

:idea: Put some neoprene or insulation under the MB and videocard to prevent short-outs.

yeah, i thought of that but i didn't because i need to maxamize airflow over that motherboard on both sides. it doesn't shortout and the videocard isn't going to be exactly like that. it will be mounted properly i am awaiting a package to correct a product mixup.
 
alright i have another idea.... i have this Dl-614+ sitting here and it needs a new home. there is plenty of room under the PS i think that i might just try this. the only problem is going to be able to fit everything on the front panel. in addition i am going to need A LOT of connectors. man this is going to be nuts. :D
 
Morphine said:
he runs his own website from what I am undertanding through his posts.

yess'm its running on DSL so i will have to sheck it out later. photojerk.com is working at the moment.

anyhow ending the debate over hosting issues i would like to return to the project log. (sorry i would just like to keep things relatively related to the topic.)

i am going to put the wireless router in a little space that i have under the motherboard
here is the router all stripped down for the world:
D-link_614.JPG

it even has dongles for the antenni quite handy as they are unusually long
here is where i want to put it:
Wireless_router_placement.JPG

it is just under the CPU fan by like 1/3 of a cm so no worries there.
here is another angle:
wireless_router_placement2.JPG

well i will not be able to work on this thing till tuesday maybe even wednesday because i have lots of HW to do and tests and junk. man school and modding do not mix well :grr:
 
ok i was a little board and felt like procrastinating here is a mockup that i did to see what it would look like with the monitor attached. now keep in mind that the monitor is supposed to be about 1"(2.5cm) down:
Mock_setup.JPG


mock_setup_angle.JPG

also take note that i have not done the instruments and connections panel. in addition the monitor mount is not installed/finished yet; so DO NOT WORRY I AM NO WHERE CLOSE TO DONE :thumb:
 
Morphine said:
Oh, you might wanna rethink that router. t looks very close to that fan, and you don't want to risk hindering the airflow for the cpu cooler...

yeah i have had it sitting there by the fan and the temperature has not risen at all it looks like it will be fine. the CPU is running at 107F which is colder than my large chieftec case with a THERMALTAKE cooler WTF?

oh and i was having problems with the apple drive, well i just solved them it turns out that the OS just needed to be updated and it works like a charm. he he he slotloading :p
 
Simonsnet said:
hmm, i'm sure you've already thought about this, but I don't like the idea of that tft without any mounting...
trust me when this thing is done that TFT will be more safe then it ever has in its HUGE plastic coffin. besides that back of it has this nice metal enclosure to protect the electronics. basically i have a smaller LCD protected by metal. i would prefer that over plastic any day.

here is another update. a small one at that but a update none the less.

i was rooting around in my parts bin and i found some heatsinks. i thought man my videocard could sure use these so i slapped them on with some thermal tape and bam there you go. i also removed the large angle bracket for conventional cases and added some offsets for mounting to the components tray. however i cannot mount the videocard just yet because the NAMELESS company has not fixed my order yet!!!! WTF?? :eyebrow: im going to call them tomorrow and straighten things out. anyway here are the pics of what i did.
radeonbottom.JPG


Radeontop.JPG
 
I am so tempted to just BLURT out the name of the store where i bought my AGP riser card bracket from. they have not picked up their phone in the last two days and i have called IN THE MIDDLE OF THE DAY!! WHERE WOULD THEY BE?? :wallbash:. i would like to preserve the warranty of my product however if they do not call me tomorrow i will desolder that AGP connector and put it in the right place. MAN THIS IS PISSING ME OFF!! :miffed:

in other news:
i worked in the shop for a couple more hours today and made some wonderful progress. the rails for the monitor tray are mounted and i am |---| this close to mounting that beast. i just have to tweak it a little bit and it should be ready to go.
monitor_berings.JPG

here are some small berings that the tray will use to slide in and out. they work really good and the only cost me $1 w007 :thumb:

monitorhinges_down.JPG

here is what the monitor will look like when it is folded in its case from the bottom side.

monitorhinges_up.JPG

here is what the monitor will look like when it is open from the bottom.

virgin_frontpanel.JPG

i cut out the front panel and painted it it fits perfectly. i still need to find the rest of the front panel connectors and i should be good to start soldering stuff together.

stay tuned things are looking good!! :naughty:
 
Yellowsnow17 said:
...Those things cost bank if you buy em retail. Keep up the good work!

thanks, i went to my local electronics shop and gathered up all of the connectors that i would need. the total was ~ $60.00 :jawdrop:. needless to say i was glad that i waited till later that day when i found out that the electronics shop where im working was getting rid of that piece of equipment. its too bad i didn't know about it soomer because it had been attacked by part seeking engineers earlier. if i had been there sooner i might have retrieved more parts. eh. you get it where you can... well i plan to get a lot done tomorrow so expect an update then. :thumb:
 
Ok here is what I did today:
I mounted the monitor and while I was doing this I found some stuff out.

I realized that the hinges bow out when they are moving so I had to cut some small groves in the case to accommodate the hinges. :dremel:
monitor_open.JPG


I made some catches to secure the monitor while it was collapsed.
monitor_catch.JPG


I also inserted and mounted a thin sheet of aluminum to protect the monitor from scratches from the bolts on the components tray.
screen_protector.JPG


Here is the monitor standing in all its glory. Look good?
front_w-open_Monitor.JPG

monitorout.JPG


I found these meters at the shop. What do you guys think? Look cool enough?
meters.JPG


I realized that I needed some space for all of the buttons and junk on the front panel. So to get more room I moved the motherboard back about 1.5cm.
updatedtray.JPG

updatedtray2.JPG


When I did this I then realized that I needed to re-think the position of the d-link router. So I moved it here.
d-linkposition.JPG


To help with cooling I found this lying around the shop. Man this thing is big compared with my other blower.
blowers.JPG


Now I had to make a monitor cable that would be internal. I knew that a big fat conventional cable would not do so I made my own :hip:. It has two connectors on each end of 16 wire ribbon cable.
makingcable.JPG

monitorcable.JPG

monitorcableworking.JPG

This cable is perfect because it will allow me to push the monitor in and not have the cable get in the way.

Here is the monitor all proud of itself
monitorworking.JPG


Then I started working on the cabling for computer components. I wanted to have as much room between the motherboard header and the front panel so I pulled out my clippers and started removing un-needed plastic.
plastictrash.JPG

After math :p

Here are the cables that will plug in to the motherboard:
internalcablesstripped.JPG


I guess I got a little too carried away because I started stripping and slimming down the dongles too. Eh oh well they will look good with some heat shrink tubing on them.
externalcables.JPG


Well that is all for now more to come tomorrow. I plan on painting the monitor casing and front panel with olive drab paint. In addition I want to have more connectors to work with so the scavenger hunt continues!!!!
 
Acid Burn said:
looks cool :) The meters with green text/numbers are very nice :D is the monitor going to be motorized? so it will slide out of the box and posission itself all alone? (that would be great! :D)
are you going to make some kind of cover for the lower section of the box?
1. not yet maybe later...

2. yes and here is its beginnings...

alrightie people i have forgone another day of work to bering you yet again another update for the Ammo Beast.

today the fedex man brought me a new one of these. i think its kind of ironic how similar, if not exact, this drive resembles the one i fried both externally and internally. i guess i better be careful.
dvdromdrive.JPG


then i went to the shop and started scrounging for parts and stuff. here is what i managed to dig up:
a keylock switch:
keylock.JPG


some audio stuff:
audio.JPG


potential monitor power cables:
monitorpower.JPG


network plugs:
networkplugs.JPG


pots:
pots.JPG


relays:
relays.JPG


some ribbon cable for misc stuff:
ribboncable.JPG


some schweet switches:
switches.JPG


and my power jacks and WAN connectors:
xlrjacks.JPG


NOW ON TO THE WORK!!

alright my goal today was to mount the front panel for all the goodies. well needless to say i did that and a bit more.

first off i want this ammo case to be rugged and durable to whatever i can throw at it. i contemplated attaching the mounting brackets for the front panel with JBWeld or an epoxy of somekind, i quickly changed my mind on this one. I WANT BOLTS!! so thats what i did.

i made 5 of these, threaded them and drilled the approperate holes and thats where things got fun...
frontpanelbracket.JPG


first off i must say i suck when it comes to my drilling skills. so third time was the charm for this side:
$hit.JPG


then i looked where it went in side of the box and cursed really loud... it hit the front of the panel. im lucky it didn't hit that screw...
ohF.JPG


well time to get out the JBWEld after all:
patchammobox.JPG


patchfrontpanel.JPG


patchfrontpanel2.JPG


well all in all i didn't do that bad. 5 mounting sites and i jscked up one of them. here is what the bottom of the case looks like (BTW like the stickers?)
mountingscrewholes.JPG


and here is the panel mounted with its battle wound:
FrontPanel.JPG


frontpanelw-monitor.JPG


now i figured i had the time and all the parts so i might as well start planning for the next day and here is what i did. i got all of the connectors 3 gages two wireless antenna connectors and a space for a slotloading dvddrive in there. this is going to be a squeeze:
frontpanelw-toys.JPG

(planning)

frontpanelmarked.JPG

(marked up ready to drill)

well thats about as far as i got.

i did however have an incident with my knife read about it here:
http://forums.bit-tech.net/showthread.php?p=684918&posted=1#post684918
 
:rock: after a short but much needed sleep break i went back to work.

i wanted to prep the case for touch up paint as i just went to The Home Depot and had some paint mixed.
paint.JPG

close? ( had to take a friend to help me make sure it matched because i am slightly color blind)

well i took the leap of faith and started cutting the front panel. i started with the DVDROM slot as it was the easiest.
dvdslot.JPG


oops gonna have to change my sheets now. dang.
dust.JPG


these bits ROCK, they do not bust at all however they are a little more expensive but WELL WORTH IT! :thumb:
hevyduty.JPG


i got tired of blowing brown and black boogers so i got myself a cheap mask
me.JPG

:dremel: (resemblance?)

well seeing as i need to cut out a bunch of circles i decided to wait till monday so i could use the drill press and cut out bits, after all i do want this to look nice.

now that i can't start cutting out the other stuff i started sanding down the JBWeld that i had set last night. i changed bits in the dremel to a ginder and went to work. man it cut like butter.
fix1.JPG


fix2.JPG


fix3.JPG


fix4.JPG


on a side note. i made these last night. you will see what they are for later...
shortestNWcableever.JPG

SHORTEST NETWORK CABLE EVER!!! :hip:

more in a few..
 
awesome project... dude... cant wait to see it 100% complete :D

hope you dont mind i split your thread so you wouldent have a bunch of off-topic stuff @ the beginning ;)
 
FLECOM said:
awesome project... dude... cant wait to see it 100% complete :D

hope you dont mind i split your thread so you wouldent have a bunch of off-topic stuff @ the beginning ;)

not a problem at all youre the moderator! :D
 
Xenocide said:
Looking nice.

Can't say im too fond of the stickers but, meh still v nice.

Shame about the having to cut bits out of the case, but the monitor is genius!

1. thanks
2. they were just an idea is there something that i should do? maybe paint something on the side? i need ideas here. i would like to have some sort of label or sticker that matches the theme on the fan grills. any ideas?
3. yeah i filled the one hole with JBweld sanded it and painted it. now those holes look like they were there all along.

ok people on to the update!!

well late last night i caught a bus to my local Home Depot and picked up some much needed primer and some other parts.
i got a can of this which bonds to ANYTHING!! even galvanized steel which is freaking slick.
primer.JPG


then i sanded the parts down, cleaned them with a high strength shower cleaner and painted on the primer:
primercoat.JPG


then the next day i painted them with the green looking military paint.
finalcoat.JPG


well after that i have lots of drilling and solder work to do. seeing as it was late i forewent the drilling and stuck (no phun intended) to the soldering iron.

i went to work on the NW dongles. i figured that i might as well get to work on them because i have seven of them to wire up.
NWdongles.JPG


well i managed to crack off four of them so i think that i am doing pretty good.
nwdonglessofar.JPG


i am doing them this way because i want to be able to go to LAN parties and have people plug in to me.
nwdongle.JPG


well then i decided to take a break from that and i moved to the power cables.
powermale.JPG


i couldn't wire them up to their devices because i do not have the holes in the front panel yet. when i get those cut out i will solder the other ends to them but ONLY after i have painted the front panel.
powerfemale.JPG


i plan to cut out the front panel on monday and have it eiter painted or ready to paint. until then MOD ON!! :rock:
 
backseatmiddlehump said:
Love the stow away monitor. how sturdy is it in the up and out position (just curious)?

its sturdy enough to stand up on its own and not fall over. i am working on a locking mechanism so i can lock it and not worry about it falling over at all.

sorry =C no updates for today. i woke up at 7p because i worked the night shift last night. i managed to sleep through class and everything. :grr:

ill be working on this tomorrow.
 
alright i persisted a little more with the store where i got the wrong angle bracket and they are going to fix the matter. the replacement part will be here in two days. i would have to say that it wasn't easy getting in touch with them but once i did they were very responsible. they even changed around their website to ensure that mixups like this do not happen again. props to them for stepping up and fixing this :clap: :clap: :clap:

Blue Infinity said:
You finally gonna reveal who the mystery store was then?

Or are we gonna be kept in the dark...

well im afraid of the appearance of slander. if they track it back to me it could incur large fines that would be almost impossible for me to pay; so in the intrest of my own financial stability i would opt to not reveal their name...sorry
 
Ok a small update for now.

I have cut all of the holes in the front panel that I need and am ready to start mounting stuff. There is only one problem I remembered to take my digital camera with me however I forgot the memory card for it so no pictures for now. :wallbash: I will insert them here when I get home from work.
HERE ARE THE PICTURES!!

The only holes that I had to actually cut out were the ones for the fans. The other holes I used punches and a bearing press. That made short work of the aluminum panel. :thumb:
I then sanded the panel and sprayed on a couple coats of primer. :dremel:
FrontPanelCutout.JPG


Alright here are some other things that I have finished:

I made the power connector for the NW switch.
NWswitchpower.JPG


and I made the 1st half of the cable to route all of the LEDS on the switch to the front panel.
NWswitchLEDcables.JPG


I wanted to be able to unplug this without having to fumble around with junk.
NWswitchLEDcableend.JPG


I want to have some of the parts in this project remain as modular as possible, meaning I want to be able to upgrade this thing easily without having to break out the soldering iron. This is why I plan to leave the motherboard alone as well as the HDD and videocard. The NWswitch is obviously permanently a part of this project and well I don't mind. I was going to sell it off anyway.
 
ok here is what i have been working on in the past 5 to 6 hours.

i drilled out all of the mounting holes for the panel and luckly i only ran in to one snag the USP ports were punched a little too close to one another. a little trip to the barder de dremel and that was fixed. :dremel:
testfit.JPG


i then removed all of the parts and painted the panel in the approperate army green.
almostfinishedfront.JPG

im a little color blind and those fan grills look red (my roomie says they are brown so im not worrying too much) :confused:

now that i have made some decent headway on that i proceeded to ponder my security circuit. im going to have it not allow the PC to be turned on without the key. when the PC is on if the key is removed the keyboard, mouse, and buttons will be disabled. here is the only picture i will ever take of the curcuit so peek while im feeling good enough to post this pic.
securityboard.JPG

:cooldude:
 
alrightie here is some more stuff that i have done:

i have painted the montor casing to match the inside of the case. well i just re-assembled the monitor and here it is:
monitorpaintedback.JPG


monitorpaintedfront.JPG
 
Blue Infinity said:
The camo on the monitor does look great...did you just mask off the tft when you painted it?

*Edited because of spelling*

nope took that thing apart and painted what people could see. there was no way i was going to risk painting an LCD besides it just looks better. :naughty: :thumb:

Sheldog23 said:
My only complaint is that the Front panel looks a little unorganized. A minor complaint, since it was probably a feat in itself just to get everything to fit right.

yeah it was pretty tough because there are components less than an inch away from the backside of that panel. i had to put the meters where they were because they stick too far inwards so yeah it was a circus feat to get everything to fit however i still have about 9 LEDS i have to integrate in to this thing. :sigh:

ZapWizard said:
Lots of work there, and a good job.

thanks for a while i was hesitant about this whole project and in a way i still a. However i stil press on hoping it will all be worth it in the end. now that i have finished most of the work for the front panel i feel more confidant. :D

_ferry_ said:
very nice but wont normal wire grills a better choice? i think they are more in the same style.

really? i wanted to do a biohazrd theme but now i think that is wearing down. would that look better to have normal fan grills? what does everyone think? :confused:
 
alright people down to business i now hade a deadline that is much closer than was previously expected. i need to have this done and running by friday at 5p MST(US). there is a large lanparty in my area and i could gain some awesone exposure there. plus i haven't played games in a while and i want to frag stuff. anyhow this rdeadline isn't much of a threat but it is going to require lots of work. so here is what i have done in the past 24hrs.

i cut down the handles that i had and threaded their remains. i also scrounged up some wire fan covers. and i reinforced some of the connectors with hotglue. i also worked some more on the secutiry circuit and have a scematic drawn.

i came up with the crazy idea to mount the front panel to the components tray so with one good yank you could pull the whole computer. this would make my life sooooo much easier so i am going to be working on that tomorrow. i decided to ditch the second nic mostly because i figured i would never use it anyway. in addition i wanted to mount the NWswitch right where it was so it was going. then i had this six pin connector in the front that i could now use as a svid out. so all in all i took one step backwards a four forewards. i mounted the NWswitch and remounted the large blower and small blowers which will help to circulate the air a bit more.

enough chatter...more pictures....

here are two angles of the mostly completed components tray:
componentsrtayalmostdone2.JPG


componentstrayalmostdone.JPG


here is the large blowerfan mounted in its corner forever:
largeblowerfan.JPG


and here are some pics i know you guys have been waiting for...
THE FRONT PANEL NEARLY COMPLETED!!!! :hip:
with flash...
frontpanelrealyclosewflash.JPG

with out flash...
frontpanelreallyclosewoflash.JPG

oooo glowey :naughty:

i will definately be painting those fan covers im not sure sure about painting the connectors and the meters look pretty good as they are. so i think that is pretty close to how its going to look. :thumb:

comments?
 
ok i woke up this morning to find this thing waiting for me...

box.JPG


now im not sure why people don't believe me when i say UPS sucks but i just have a sinking suspicion that those same people don't get packages like this.

well it wasn't the end of the world. this is what was inside and needless to say im glad it wasn't a HDD.
replacement.JPG

man that looks like its pointing in the right direction.

and here is the beautiful radeon mounted in all of its glory
componenttraywvidcard.JPG


componenttraywvidcard2.JPG


NO MORE ONBOARD VIDEO w007

alright im going to the shop to finish up some minor details....thanks for all the support guys it really does help. :thumb:
 
alright to start off i have completed about 99.9% of the work for this project. the only thing that i have to do now is figure out why some stuff doesn't work.

ok some pics to start off:

here is the computer with the front panel mounted to it:
computerpackage.JPG


computerpackage2.JPG

two different angles to spice things up.

ok here is a picture of the security circuit installed. it will take a while for anyone to figure out where it is to begin with:
security.JPG


then there is the view of the front panel in the rightside up position:
frontpanelrightsideup.JPG


now here are pictures of the keylock in action. now i was suprised that this was one of the things that i got working and probably one of the most rewarding:
here it is with the panel enabled:
keylockon.JPG


and with the panel dieabled:
keylockoff.JPG

it is red for stop and green for go :D

here is a picture of the front panel with the router powered on and the antenni plugged in:
wifi.JPG


and here is the picture that you all have been waiting for. the finished look:
wholethingalmostdone.JPG


now this project has some problems that i need to sort out before i can call this done.
1. for some stupid reason my dvd/cdrw stopped working. now the only thing im worried here is not being able to get it to work. i NEED THIS DRIVE TO WORK. i do not have the $$$ to buy another one and i know several things which are not helping me calm down about this. a) it used to work just fine. b) the cable works. c) the motherboard works. d) the drive still ejects and spins up.

2. the ps2 is not working. i was messing around with this because it was working just fine however when the 5v was cut using the security circuit it still worked. i checked it with my multi meter there was no 5v to the KB yet it was just fine. so i switched the 5v with the data line and nothing works. i checked all of my connections and i am stumped for right now.

3. the USB apears to not be working. my bios is set to support USB keyboards(the one thing i did before i started screwing with the PS2). i will double check the pins tomorrow.

other than those three stupid problems everything else works as expected. i am feeling most bummed about the dvd/cdrom drive. I DO NOT HAVE THE MONEY TO BUY ANOTHER ONE so if this dies then I AM SCREWED :waah: :waah: :waah: :waah: :waah: :waah:

for now i am going to try to get some sleep and dream of a working ammo can pc :grr:.

oh before i foregt if there are any pictures that you guys want of specifc things let me know and i will snap and post them. :thumb:
 
godspeed said:
wont the antennas ubtruct the view of the screen any way very nice
as for the cd rom it could be a driver problem

1. the antenni are not a problem they rotate and pivot out in many directions so i am not worried.

2. i was not specific enough with the dvdrom the BIOS will not detect it. it is the strangest thing. i now realize that i might have plugged in the IDE backwards but other than that it died on its own.

ZapWizard said:
This is coming along very well.

Your mounting skills are perfect.

wow thanks zap i would not call my skills in any area perfect because this thing has so many issues. it seems that your mod didn't have any problems now i would call that perfect.

i still don't know what pin to disconnect with the PS2 does anybody have an idea?

there are usually 4 pins that are active on a PS2 port. they are as follows:
1: data (tried this nothing works now)
2: n/c
3: GND
4: VCC(5v) (tried this everything worked rgardless)
5: CLK
6: n/c

any ideas? PLEEEEEASE?

Halgy3000 said:
Dude, I HATE when stuff just desides not to work, like my floppy, or my DVD-ROM, or my brother. But that front looks awsome, man. If I may suggest somthing as well, if you are having everything else built in (and mabey you are having this, I skipped the middle page) you might as well have built in sound. Just rip the guts out of some speakers and mount. Have military type dials for the sound controls. That would own even harder than it already does.


well i thought of that but at LAN parties having your own speakers can annoy the people next to you and if everyone had speakers than that would suck. besides i have some problems that i really need to sort out first before i go and try to add any "features". it is a good suggestion though. see those volume knobs in the front those are for the headphone audio jacks so i already have volume control. i guess it wouldn't be that hard to integrate speakers....ill keep that in mind, thanks.

¿þŘΩĐĮĢΫ? said:
pics not working for me, thought i'de let you know

ok that is not coool though my pictures host apparently goes down so i start uploading all of my pics to photobucket(which is very nice btw) and it comes back up WTF? well none to say the least if it goes down again i already have all of my pics uploaded to another host so it is just a find and replace away from deleting photojerk.com forever. man so not cool.
 
¿þŘΩĐĮĢΫ? said:
well Zaps was the "original" ammo case that i know of but his was 2 cases where as yours is just one, which i think is better (can be argued) but one thing that i was kind of dissapointed with ammo cases was that they did not even have anything to do with ammution, lik i think you should get a bullet (take gunpowder out) then like have it as a knob of some sort or have it as power button, if you know what i mean

hmmmm i find that intresting that you say that because i wanted to do the same thing however i didn't know how. well now my friend i do. i have some volume knobs that are looking quite naked. sooooo i think that i will dress them up with a few of these:
bullets.jpg

:naughty: likey?

now i have to decide what to do with them. di i cut them in half and mount the butt end of it over the post? (thats what i was thinking to do) thanks for the encouragement/idea to help me continue with my origonal plans. :clap:

i plugged my dvd/cdrw in to another computer and the BIOS said that it was a non-atapti device WTF WTF WTF WTF?? i am going to contat the company and make them replace it because I DID NOT PLUG IT IN BACKWARDS!! i know i didn't i check the pinout everytime and the way i have the cables zip tied to the rest of the computer it is almost impossibel to flip that cable. i am PISSED :miffed:. panasonic is going to be getting a call on monday....
 
ok i called panasonic which was a feat in itself to get a human on the other end... anyhow they said that they will not replace the drive but rather repair ir. :hehe: now thats a joke i need this drive back ASAP and they want FOUR MONTHS!!! NO WAY!!! so i called newegg and they said sure we will replace it and have your drive back to you in 4 days
WOOOOOOOOOOOOOO HOOOOOOOOOOOOOO GO NEWEGG!! :clap: :clap: :clap: :clap:. props to these guys for doing what the manufacturer couldn't.

other than that i will be working on the security circuit later tonight.

8-3-04
ok several things happend today many good and few bad....

the good:

my mobo is fine. i got my motherboard to use my USB keyboard during and after the POST and i ditched the idea of using PS2 at all. this simplified my day a whole lot. i also picked up some mini molex connectors (the type that everyone uses to connect the front panel lights and crap to the mobo) so those will clean up the security circuit a whole bunch. i shipped off the combo drive to be replaced and everything was going smooth until....

THE BAD NEWS...

i dissasembled the security circuit because i was going to make it all better and stuff... well i forgot i didn't put any load on a small 5v powersupply that was piggybacking on the back of my main one for my computer. so i have my headphones on and i hear this nasty feedback start to come through the lines and then i think man i didn't f&(*^ up the wiring on the sound that bad so i took off my headphones to look at things then i heard it. the mini powersupply was screaming for all it was worth and i went AHHHHH AHHHHH AHHHHH and then my main PSU went click bye bye. well the small PSU wasn't that hot and i think its ok however my main PSU is RED HOT. i can't get the computer to come back on so i think its fried...anyone know what that high pitched squeal was? i think it was a cap but im not sure... im going to wait and test both PSUs again tomorrow...after the main one stops glowing. :miffed:
8-4-04
ok many things happened today that were again good and bad...

the good...
NEWEGG got my RMA and they are processing it. the smaller PSU is just fine and the security circuit went through a overhaul to make it easier to remove the front panel. i also replaced the PS2 with 2 more USB adaptors so there will be 4 USB dongles on the front of the PC. :thumb:

the bad...
the main PSU is definately dead. i am going to Pcclub tomorrow to get another one...remember kids it is necessary to ALWAYS KEEP A LOAD OF SOMEKIND ON THE PSU. no load = no PSU. :idea:

well all in all i took 4 steps foreward and one backward today. lets just pray that i can find a similar miniAXT psu tomorrow. :sigh:
 
alrightie this has been long in coming but i have had alot going on. anyway here is another update for the Ammo Lan PC

i knew that i would have to re-do the security circuit because 1 it didn't work and 2 it was hard as H311 to debug so i started over.
here are some pics of the only things that daylight will ever see: :rolleyes:
securityside.jpg


Securitytop.jpg


here are some pics of what i did with those bullets eariler:
i chopped them down so they would fit approperately. sad yes but it had to be done: :waah: :dremel:
cutdown.jpg


now here is a pic of them mounted. right now they are mounted using hot glue and exterior mounting tape. it is impossible to just pull these things off however i would like a more durable solution in the future... :thumb:
missingPSU.jpg


and last but not least here is the spot where the PSU was after i removed it. DANG MY CARELESSNESS. :duh: just thinking that this was preventable just urks me to death. and in addition i was installing windows when it blew so i know that i might have to restart that when i get this running again. :sigh:
Shellknobs.jpg


i shall post pics tomorrow of this thing in action when i get the new PSU... :hip:
 
okay people after four all nighters (one of which ran for about 70hrs), 3lbs of M'Ms (peanuts of course) ~30 sodas, and a three weeks of near constant work. THE ELECTRONICS ARE FINALLY FINISHED!! i am so relieved to have that out of the way.

i figured out the meters and installed the circuitry for them today.
here is the shunt that allows this voltmeter to display the amps used by the fan.
metershunt.jpg


and here are all of them installed.
metershuntinstalled.jpg


metershuntsinstalled.jpg

and here are the meters showing the amperage being used by the fans. note that the numbers on the meters mean nothing. when the needle goes to the right then that means that there a connection problem to the fan mening that the fan is unplugged. when the needle goes to the right then that means that there is an obstruction in the fan slowing it down or stopping it. i wanted a mardware method to monitor the fans as i am too poor to afford a cool VFD :D
metersinaction.jpg


in addition the security circuit works flawlessly. the only thing that i am waiting on is the CDRW/DVDROM drive...i am using a normal desktop version for installing stuff. i plan in installing more lighting inside so things will look better from the front. however things are pretty good as they are.
theawakening.jpg


frontpanelindark.jpg

(notice those short NW cables were put to use connecting my ammo lan to the switch within it)

here are some pics of the destruction to my room for the making of this mod. one hald of my bed is ground zero for the making and testing of this mod as my desk is already filled with crap.
thedisaster1.jpg


thedisaster2.jpg


well thats all for now so please feel free to add any comments or questionsthat you might have?
 
oki dokie here are the pics that many people, including me, have been waiting for. THE FINISHED CASE!!!! Of course there are still lots of aesthetic things that need to be done like painting the connectors and keyboard etc.... stuff like that. Anyhow here is the PC in its new home running great!!

I am still missing a slot loading dvdrom/cdrw but that is easily missed behind the slit in the front panel :D

Here is the case front with out flash
frontofcasewnoflash.jpg

An unexpected result was the blue light on the video card heat sink that just bleeds through that crack. It completes the mysterious military project theme! :D

With flash
frontofcasewflash.jpg


And here is the monitor all folded up. (NOTE: the antennas can't stay attached because of space limitations. :thumb:)
monitorfolded.jpg


things i plan on doing some time in the near future:
-Paint the connectors and such to match the theme (either army green or black)
-make feet for this thing so it isn't so tipsy.
-RECEIVE A NEW DVDROM/CDRW!!
 
two suggestions...

1) why the external AC adapter for the router? tis probably 5/12v... easily powered from your psu?

2) ditch the female ethernet connectors, it just looks stupid imo... put like a pair of 25" ethernet cables coming from them, that would look cool... or maybe have a pair of 15" ethernet cables with female connectors on the end of them? and put sleeving around them for a more industrial look...

besides those two little gripes you have an awesome project...

you really should have integrated some sort of LCD/VFD it would have fit well i would think... they really arnt that expensive especially when you get into the text/graphical LCD's
 
FLECOM said:
two suggestions...

1) why the external AC adapter for the router? tis probably 5/12v... easily powered from your psu?

2) ditch the female ethernet connectors, it just looks stupid imo... put like a pair of 25" ethernet cables coming from them, that would look cool... or maybe have a pair of 15" ethernet cables with female connectors on the end of them? and put sleeving around them for a more industrial look...

besides those two little gripes you have an awesome project...

you really should have integrated some sort of LCD/VFD it would have fit well i would think... they really arnt that expensive especially when you get into the text/graphical LCD's


1. i used the external router idea because i wanted the router and computer to be completely independant of one another. i wanted the option of turning off the computer and having the router still on for my other users attached to it. in addition i didn't want to stress my PSU. that router draws alot of current and my PSU is only 200W. i just wanted to play it on the safe side. ;)

2. i was really limited on funds and buying a NW cable and chopping it wasn't my idea of fun. anyway when you go to quake con you would have to make a adaptor for it anyway because they give you a cable to use just to make sure that someones faulty cable making skills do not bring down the whole convention center. so i figured that thsi would be the best setup. people can plug in to me with whatever cable lengths they need. for example if i needed to plug the wan in to a NW switch nearby and it has a 15 foor cable perminantly soldered to it that would be a waste. i might get some new showerheads or something put the connector. or maybe some fiber sheath to mask the cable. im not sure yet but i will figure something out.

3. i am not rich enough to afford a VFD. if i had the money i would totally do it. for riht now i think that the meters are doing a bang up job :p


alrightie i just brought my ammo lan PC to my work and everyone loves it. i one of my co workers fought in many south african wars and is familiar with 20mm ammo. so i asked him hey you familiar with 20mm ammo. Yes i am he said. take a look at this...that looks nice (then he sees the ammo can) LOOK AT THAT!! :D

good times, good times.....
 
Hmmm, neat idea but I just don't like it
The case is fairly huge and doesn't look like is comfortable to carry
Also, the front panel is waaaaay too cluttered for me
But hey, to each his own
 
So with that big shop.............when are you going to learn how to use those tools properly? :D


details man details! clean that stuff up
 
Qtip42 said:
So with that big shop.............when are you going to learn how to use those tools properly? :D


details man details! clean that stuff up

shwa? what looks messy, besides my room of course? please tell me because i am too close to the project and i can not spot these things.

i want comments or things that you guys see. if i didn't want them then i wouldn't have bothered posting this mess in a forum :D
 
Back
Top