post pics of ur p180/p182/190s

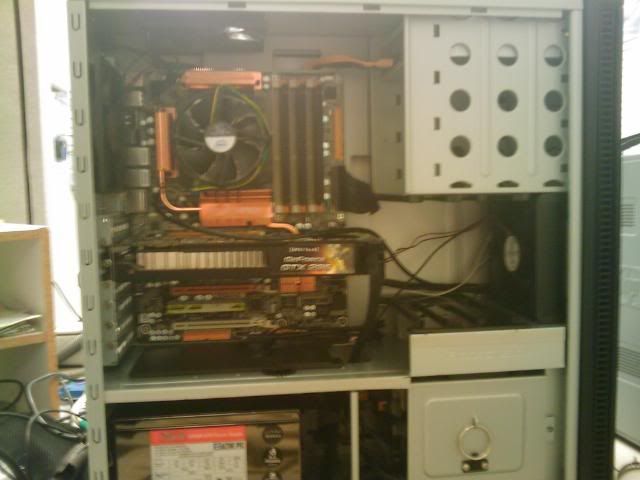
thought that this might be helpful. I kept running into the issue of putting on the back side pannel and having the side bulge out because the cable slipped form the notched area. So I took an old saw blade and ground off all the teethe and slid it in the cannel:
img5234pe4.jpg
 
drmartin48106, nice riser idea. Looks very clean too.

I've seen someone do the pencil trick, and use a pencil to hold up their graphics card... while the pencil iis ghetto and kinda cool, those risers are nice and professional looking.
 
Hi All,

I'm just finishing off a P182 build with an i7 and GTX-285.

I have a new Enermax Rev85+ 850 coming next Tuesday (they only just got released in Europe), and I was wondering about installing it in the P182.

Here's the review:
http://enthusiast.hardocp.com/article.html?art=MTU4OCwxLCxoZW50aHVzaWFzdA==

I guess it's relatively large (W x H x D): 150mm x 85mm x 180mm so I have two questions;

- To the people who has longer PSUs what's the best way to install it?

Plus I see a number of you have removed the PSU cage from your P182, even with shorter PSUs, what are the plus's and minus's of doing so?

Thanks in advance for your help!

Personally I do not know why one would pull off the tray save for issues with a PSU fan. I have the a PSU the same size as the one you are getting and have no issues. Mine is not modular so I even had to contend with all the extra cables (I tie wrapped then and slid then under the PSU - under the tray). I have 35mm between the PSU and the fan (mounted on the PSU side of the divider). I did have to mount the fan directly the the divider or mount it prior to putting in the psu there is no way to slide it in using the fan bracket Antec provides.
img5231tw7.jpg
 
drmartin48106, nice riser idea. Looks very clean too.

I've seen someone do the pencil trick, and use a pencil to hold up their graphics card... while the pencil iis ghetto and kinda cool, those risers are nice and professional looking.

Thanks,
it was not too hard and ran about $10 (including the 1/8 aluminum plate) I still have to mount it to the plat but I'm adding some additional fans so I want to get the holes drilled for this at the same time. Note much room between my sound card (lowest) and my bottom video card. In fact I had on about 2-3mm of clearance so I ground off all of the pins on the back of my sound care to gain another 2-3mm. Now I have 5mm.

before:
img5785sw4.jpg


example of pins to be ground off:

img5768bt7.jpg
 
Just finished my P182 mod,

P182 SE body, P182 side panels + front
Stainless steel base
Perspex window - 2mm black offset to hide layers
Cable management :)

dc4c8b4d440783a2eb2867189cc5f6d9.jpg

How did you get that lighting effect? LED light strips top and bottom? I'm looking to get the same style window and lighting for my Antec Solo.
 
My psu cover was actually an extremely tight fit, and frankly I just got sick of pulling it off and on each time I fiddled with installying something a little different. Not sure it really serves any purpose? Tell me if I'm wrong guys.
 
I'm not using the PSU cover either.
Only thing holding my PSU in are 2 screws from the back of the case.

No problems here yet, had it that way for a year.
 
I just built this for a customer - Intel Core i7, Biostar motherboard, 3x 2gb RAM, Nvidia Geforce GT295 video card, 2x 640gb HDD in RAID0, 1kw modular PSU, P180 case

IMAG0110.jpg


IMAG0111.jpg


*sniff* I guess this is how a surrogate mother feels like.
 
Just got done with some new mods, and excited to show them off! Please tell me what you think.
Cut the Fan Grills out, cut out the behind the motherboard for additional cables, added another GTX 260, and Painted the inside of the case. The black interior paint job is actually spray on Bed Liner for Pickups. Put alot of time in to this project, but I think it was worth it.

Before:
01beforeek9.jpg


After:
sidesr9.jpg

backcr3.jpg
 
Thanks for the complements guys!
Heres an updated pic, cleaned it up even more!
whatuseeou8.jpg

The Foam is actually to seal of the power supply chamber, forcing excess cool air upwards into the Two GTX 260's. Came up with that concept accidentally . Actually lowers my GPU temps a significant amount.
 
I had issues cooling the lower GPU as well. It ran about 20deg hotter. I opted fro the more expensive solution... aftermarket coolers. Will post pic later.

D
 
Is that... Clear tape around the edges of your TRUE?
Interesting idea, did it help at all?
 
Interesting, my upper card is always about 7 degrees (C) higher than the lower one. I might have to pull out the Antec VCool(Blue cooler above the Top Card), and see what happens. I really like that Vcool, its great on the North bride heat sink and much quieter than the stock Nforce Fan.
 
Is that... Clear tape around the edges of your TRUE?
Interesting idea, did it help at all?

Yes - on the top and bottom where the air leaks from the gap between the fan and heatsink.

I tested using Orthos blend test for 20mins before and after and it did reduce temps 3-4C.
 
Yes - on the top and bottom where the air leaks from the gap between the fan and heatsink.

I tested using Orthos blend test for 20mins before and after and it did reduce temps 3-4C.
Wow Stellar, that's a great find. I always wondered if that worked. I'm gonna have to do that to mine Tonight!!
 
Very Nice, maleficarus. I'm currently modding the same case for a server. I like the layout, I'm relocating the hd cage about 1.5" back and adding a 120mm fan in front. I'll post some pics when I'm done.
 
Very Nice, maleficarus. I'm currently modding the same case for a server. I like the layout, I'm relocating the hd cage about 1.5" back and adding a 120mm fan in front. I'll post some pics when I'm done.

Thank you. By the way the NSK4480B is a sweet case to work with! I'm just using the rear 12omm fan set to low speed and no problems for gaming. This case is one of the best cases I have bought. I live in Canada and here is Canuck-land the case set me back $110 CAD.
 
Hey guys only made a couple of posts in the forum, but it's been a great resource for making decisions for my current build. Only thing that really bugs me about the build is the stupid flat cable I need to connect my X-fi Platinum to the front panel.

Here it is, feel free to let me know what you think, good or bad. Specs are in the sig.

(pics removed)


Here is a source for a round ide cable with all 40 pins open.

http://www.computercablesource.com/round-ide-cable-24-inch-1-drive-ultra-ata-133-black-347.html
 
can anyone tell me what hardware (that you can see anyway) is being used on this comp??


blom built it, but he hasn't been on here since last October, so I'm going to assume my PM to him will go unanswered. Thanks for any help!
 
Im sure it does what its designed to do, so in that sense its worth it. Memory is built to withstand the heat though...and you can get cheaper memory thats plenty fast enough to exceed FSB speeds, so in an OC sense, its somewhat pointless and more aesthetic IMHO.
 
Can someone who has the following components please post an interior shot of the case? Trying to see if future problems may arise.

P6T Deluxe and OCZ Vendetta 2.
 
Finally got around to drilling some holes and relocating the 4pin and 24pin power supply cables through the back of the P180B instead of snaking around the front. Also modded the SATA power for the lower HD bay to simplify and clean up HD installs.

P180Bside.jpg

P180BHDD.jpg
 
Nvidia says that the new GeForce GTS 250 is 9 inches (228.6 mm). Can anyone verify that this length is short enough to still be able to use the center HDD cage? I believe the 6 pin power connector is also on the side which will make it easier.
 
Back
Top