New SFF gamers case: presentation and advices

So did anyone receive a case without a window? I wanted one without a window but mine came with one. Just wondering.
 
Just received the case today and here are my thoughts:(As i remember them)

1. The built in stand offs: because my motherboard: Asus Maximus iii GENE doesn't use the lower right corner and now the stand off is just pushing up against the motherboard. Might warp my board? There are some pins underneath the motherboard so it's kinda bent upwards, and i taped it off with electrical tape.

2. Instructions: They were okay but I would like a more in depth instruction.

3. HD Activity LED: Issue Solved.

4. Case Feet: Case Feet should be included because this is gonna be on my table and i don't wanna scratch it up. I'm currently using it on top of a book.

5. Screws: There were so many of them, don't know which one to use where. Plus none of the screws worked on my Optical Drive, had to find and use my own. What are the black thumb screws for?

6. Sharp Edges: My hands were cut trying to take apart everything and fitting things in

7. Front Panel Audio/USB: The usb drives are no longer usable, they were crushed while trying to put on the top of the case. My audio doesn't work either. I emailed Matt about getting a replacement.

8. Modular PSUs is a Must!

9. Case gets scratched up easily. Mine got a few from me trying to unscrew things.

10. Dust Filters: They were all bent.

11. Front Bezel: The screws to the front bezel are close to impossible to remove and put back on.

12. The Reset/Power Button: I had to file down the case so that the Switches would fit into the holes.

I enjoy the challenge. Building this was fun and took around 3-4 hours. Will need to do Cable Management soon.
 
Last edited:
3. For the LEDs you need to use the included grommets. First the LED goes in to the grommet and then it is fed in to the holes in the front of the chassis.

11. I agree, although they aren't too bad with a set of hobby screwdrivers. Std. drivers will be an issue.
 
My DVD drive will not come through the opening on the front panel when I hit the eject button.

HDD LED doesn't seem to work, did in my last case, so LED seems to be bad.. very minor imo

H50 was very difficult to fit, had to turn it sideways to install it because of the power plug being right above the 120mm fan, and it interfered any other way.

Cable management is very difficult, especially for fans. Part of this is motherboard dependent, but still.

I don't like the front panel much. I would prefer to have a full cutout to flush mount the drive... I may do this myself though.

If I would have not hooked something up right or left a fan unplugged or something I might have broken things in frustration. This is a decent looking little case but it is really difficult to get everything in and out of.

Also, I mentioned this before but I'll ask again.. I ordered a case with no window but received one with a window, and I didn't especially want a window... now I can see my terrible cable management! Were any cases made without windows, or was there just a decision made last minute to only make one style?
 
hey, my box arrived at my mailing address in the states yesterday, obviously, haven't opened it yet as it will be a while before im in the country again, but just wanted to say great work on the customer service.

no launch goes perfectly, no matter what, especially not a first product launch from a new company, what really matters is how the issues that come up are dealt with, and so far, your support has been fantastic. keep it up man.
 
My DVD drive will not come through the opening on the front panel when I hit the eject button.

HDD LED doesn't seem to work, did in my last case, so LED seems to be bad.. very minor imo

I don't like the front panel much. I would prefer to have a full cutout to flush mount the drive... I may do this myself though.

Also, I mentioned this before but I'll ask again.. I ordered a case with no window but received one with a window, and I didn't especially want a window... now I can see my terrible cable management! Were any cases made without windows, or was there just a decision made last minute to only make one style?

Hi Bosom,

Could you explain how the DVD drive hits the front of the case? It seems like we need to rectify the opening and I need to know exactly how as fast as possible.
For the HDD LED, just send me an email @ [email protected] and I'll have a new one sent.
For the front panel, same thing, send me an email and you'll have a laser cut one with a 5.25" opening.
No, we couldn't get any "blackheart" made in time without a window. We had no choice on this option.
Let me know if there is anything else I can do to help.
 
mattinv - on the instruction manual:

1.) directs you to remove the outer shell from the chassis. Arrows to where the screws are would be helpful.

2.) shows the outer shell still installed. Please fix this. Again, arrows for screws to remove to take out motherboard tray would be helpful.

3.) has notation saying remove hard drive tray, but arrows point to the 2.5" drive mounts under the optical tray. the HDD tray (2x 3.5" + 2x 2.5") is not even pictured. Please fix this. Also, when the HDD tray is added back into the picture, please add arrows for the screws that need to be removed.

3b.) this naming convention doesn't make any damned sense, and is unnecessary. just make it #1, #2, #3, #4, etc. no A/B stuff, please. Also, this picture is inconsistent with the rest of the pictures, so far. This one shows the exhaust 120mm fan already removed, when you're being asked to remove it. You could do a before and after picture, with arrows for the screws to remove, but don't make it another step.

4.) This one's fine

5.) This one may not even be necessary

6.) also may not be necessary

7.) again, arrows go to screws, please.

8.) definitely not necessary. some people use onboard.

9.) point to the screws

10.) why are we seeing the HDD tray in a picture that's supposed to be referencing the PSU. If you want to show the HDD tray, fine, but do it in a separate step. And as always, if we're inserting the PSU and screwing it in, show us the screws.

11.) Too much going on here. Each subset should have it's own step. Fans are fine being one step. The power button itself is a 2 step process, same for Reset. The HDD and Power LEDs are more like 4 steps. Show us detail. I'm not the only one that originally thought the Power and HDD LEDs didn't fit into the case. There was no pictures of the collars that hold them in. Show us how to mount eh FP Audio/USB PCB, and where it screws into.

12.) The optical drive issue needs to be worked out. First off, there's a piece of metal (when shipped) that prevents optical drive installation. Where's the process for that? What happens if the front bezel for the optical drive tray it too large for the opening (like mine... users should be advised of this potential issue)? Why is the front panel shown removed in this picture?

13.) i think people understand how to orient and mount the drives in the cage. however, what should be shown is how to mount the cage in the chassis...and the screw locations (with arrows).

14.) I had a good laugh at this one. "Connect your SATA hard drives using the angled SATA cable included." Connect multiple drives with one included cable? I'll get right on that. Also, why are you including a cable at all with the chassis? Cables come with motherboards. The SATA cable, and the last line, are unnecessary.

15.) no issues

16.) no issues


As a general rule, orient the pictures to show the best angle for the reader. Don't have it zoomed in too far, that can be disorienting. Also, the purpose of orienting the drawings properly will help with the arrows showing the screw locations. Don't put more into the drawing for each step than is covered in the step that you're addressing.

now I want mah moneyz.
 
Hi Bosom,

Could you explain how the DVD drive hits the front of the case? It seems like we need to rectify the opening and I need to know exactly how as fast as possible.
For the HDD LED, just send me an email @ [email protected] and I'll have a new one sent.
For the front panel, same thing, send me an email and you'll have a laser cut one with a 5.25" opening.
No, we couldn't get any "blackheart" made in time without a window. We had no choice on this option.
Let me know if there is anything else I can do to help.

My drive is hitting on the bottom
Youtube video of it sticking, available in HQ

Closed drive pic
4228094385_d4c3a97c80_o.jpg


Open Drive, stuck
4228860580_00b35aa0ea_o.jpg


Also, my sound through the front doesn't work at all now. it very briefly worked badly then quit.

Also, you can see the issues with the external finish.. it's the most difficult finish to keep clean that I've had on a computer case. Once it gets dirty, it's almost like it sticks in the finish, it doesn't wipe off dry, I have yet to try any type of cleaner on it.
 
Last edited:
My drive is hitting on the bottom
Youtube video of it sticking, available in HQ

Closed drive pic
http://farm3.static.flickr.com/2623/4228094385_d4c3a97c80_o.jpg[/IG]


Open Drive, stuck
[IMG]http://farm3.static.flickr.com/2781/4228860580_00b35aa0ea_o.jpg[/IG]

Also, my sound through the front doesn't work at all now. it very briefly worked [b]badly[/b] then quit.

Also, you can see the issues with the external finish.. it's the most difficult finish to keep clean that I've had on a computer case. Once it gets dirty, it's almost like it sticks in the finish, it doesn't wipe off dry, I have yet to try any type of cleaner on it.[/QUOTE]

Yeah I get a ton of line noise through my front audio ports as well.
 
mattinv & Bosom - the issue I am having with the optical drive and the front panel is exactly the same.
 
I'd honestly look at the LianLi $10 DVD bezel design, instead of having a hole, it has a flap. when you open the drive the flap folds down you stick a CD in, then close it, and the flap springs back up.

Simple / Looks good / has worked with every drive I've tried lately. Samsung, Sony, LG etc.
 
I'd honestly look at the LianLi $10 DVD bezel design, instead of having a hole, it has a flap. when you open the drive the flap folds down you stick a CD in, then close it, and the flap springs back up.

Simple / Looks good / has worked with every drive I've tried lately. Samsung, Sony, LG etc.

this is the design that I have suggested, as well. do you have a link, Blazestorm?
 
sabregen, how is that H50 working out in this case? I am thinking about getting one and just wonder how your temps are looking?
 
temps are fine. 40-55c on the Q6600 @ stock volts (G0) at 3.2. Getting it on your board, inside the case, and mounted is... interesting. I had to secure the mounting hardware and the block to the CPU, with the radiator dangling in the PCI slot area, then attach my SATA cables (if you see pics, my video card covers SATA ports on this board (waiting for P45 Jr. RMA return), then install video card, slide motherboard tray into place, then attach H50 radiator to the 120/140mm location. Like I've previously said, there's a definite order of operations requirement with this case.
 
temps are fine. 40-55c on the Q6600 @ stock volts (G0) at 3.2. Getting it on your board, inside the case, and mounted is... interesting. I had to secure the mounting hardware and the block to the CPU, with the radiator dangling in the PCI slot area, then attach my SATA cables (if you see pics, my video card covers SATA ports on this board (waiting for P45 Jr. RMA return), then install video card, slide motherboard tray into place, then attach H50 radiator to the 120/140mm location. Like I've previously said, there's a definite order of operations requirement with this case.

Nice Lean-Gear by the way! :p
 
temps are fine. 40-55c on the Q6600 @ stock volts (G0) at 3.2. Getting it on your board, inside the case, and mounted is... interesting. I had to secure the mounting hardware and the block to the CPU, with the radiator dangling in the PCI slot area, then attach my SATA cables (if you see pics, my video card covers SATA ports on this board (waiting for P45 Jr. RMA return), then install video card, slide motherboard tray into place, then attach H50 radiator to the 120/140mm location. Like I've previously said, there's a definite order of operations requirement with this case.
Thanks for the quick reply. I think I will go ahead and wait to see how my current cooler temps look in this case first. Right now they are a little warmer than yours but I am running the i7 920 overclocked to 3.4 in an Antec Mini P180. If they go any higher I think I will pick up an H50 and see if it helps.
 
Got the case before X-Mas. All set up and ready to go, minor caveat being the corroded psu extension cable (can't button her up just yet...).

Overall like I have discussed with Mattinv..great job for a first effort. Minor hiccups are to be expected, but with the temps I am getting..wow (wiling to take a few issues). I have all the issues mentioned above.

With my BE 720 OC'd to 3.8 (4th core unlocked) I am avg 25-28 C idle with my load temps (1+ hour of World in Conflict session) avg 32-38 C. (Corsair h50 mounted in 140mm side bracket pulling air into the case through the radiator | Rear 120 mm fan pushing air out )

GPU hangs out around 50 C idle with 57-60 C load (GPU area fan pushing air in)

Cabling is a fun prospect (especially for us neat and tidy types..) and is accomplished right now with a modular psu (a must) and creative use of empty spaces and mass amounts of electrical tape (will be fixed in the future with heat shrink / cable ties / cable tie downs)

Longer GPUs might run into a issue with the PSU cables...mine works right now..but Xfire/SLI might be an issue (then again a long GPU will hide those unsightly cables..). Cables exiting the PSU run right into the GPU area..and push on the backside of the card.

I had a fun time trying to get the pwr/rst buttons to stay in place..ended up using a combo electrical tape/epoxy solution that keeps them in place and not so inset as to be difficult to push.

The case top is very difficult to get on..makes me feel rather silly for how long it takes.

Overall I agree with others that this case requires a certain procedure for installation, and it all depends on what the builder is bringing to the table, IE tall ram has its issues, long GPU cards, etc..

Much quieter than my previous case, even with all fans maxed out. I am happy Mattinv rocks with the customer service, all issues I have brought to his attention have been quickly resolved.

Top shot:
http://i68.photobucket.com/albums/i39/JAUIIAN19/IMG_0321.jpg

Left Side:
http://i68.photobucket.com/albums/i39/JAUIIAN19/IMG_0322.jpg

Right Side:
http://i68.photobucket.com/albums/i39/JAUIIAN19/IMG_0323.jpg

Front:
http://i68.photobucket.com/albums/i39/JAUIIAN19/IMG_0324.jpg

CPU area:
http://i68.photobucket.com/albums/i39/JAUIIAN19/IMG_0325.jpg
 
Last edited:
Wow, I didn't expect any less. But yes, with the socket 1156, and huge heatsinks, we would have to modify the MB tray so that the entire back of the case comes out. Not necessarily a bad thing. Just a modification. Let me know what you think of that.
I'm curious to see how your heatsink would fit with a 1366 board. 10mm on the right, closer to the side fan and everything would be a perfect (tight) fit.

For the fan over the GPU, what do you think about a bracket that would accept both 120mm and 92mm fans? That could allow for extra clearance and make it work in this specific build.... maybe.

I actually thought about using a 92mm fan, but I still don't think that would provide the proper clearance. I just installed a Noctua C12P, which is not a tower style heatsink. It has a downward facing fan, but is supposed to provide good cooling. The top of the cpu fan barely clears the bottom of the GPU fan, but I am pleased with the outcome. I see there was some mention of a different hard drive cage. How is it going to be different? The way that I have my heatsink now, the heatpipes of it are encroaching on the second 3.5 hard drive slot. This is something I can live with, but I want to add an additional 2tb hard drive later on down the road. Thanks for your great follow up. The more I work with the case the more I appreciate some of the clever engineering that went into it. I'll post some more pics once I get it back up and running.
 
I just got my case today and here are my reactions/comments:

1) is there any particular reason why the case came with the buttons and USB ports all dissembled?

2) My front panel also doesn't fit quiet correctly to the case, but that's okay seeing as I'm planning on buying the standard 5.25" panel when it comes out.

3) My cases side panel doesn't hug the case that well in the front, I'll see if I can bend it so it will fit better.

4) Ow my hand hurts, lots of sharp edges!

I'll post more comments when i start building the case tomorrow!
 
Got the case before X-Mas. All set up and ready to go, minor caveat being the corroded psu extension cable (can't button her up just yet...).

<snip>

that H50 tubing looks pretty kinked. that makes me a sad panda.
 
I had a fun time trying to get the pwr/rst buttons to stay in place..ended up using a combo electrical tape/epoxy solution that keeps them in place and not so inset as to be difficult to push.
For mine, I used a glue gun than was laying around and it worked like a charm. We are going to look into having them factory mounted to avoid this problem. But I can't promise anything.
 
I just got my case today and here are my reactions/comments:

1) is there any particular reason why the case came with the buttons and USB ports all dissembled?

2) My front panel also doesn't fit quiet correctly to the case, but that's okay seeing as I'm planning on buying the standard 5.25" panel when it comes out.

3) My cases side panel doesn't hug the case that well in the front, I'll see if I can bend it so it will fit better.

4) Ow my hand hurts, lots of sharp edges!

I'll post more comments when i start building the case tomorrow!

1) Yes, it was going to cost A LOT to have all these parts mounted. But as stated, we are going to look into mounting just the switches and the USB ports.
2) Do not bend anything. First I don't want you to hurt yourself, second I will send you a new front bezel. Apparently, the plant had a forming problem but it is solved.
4) Could you guys help me identify all the sharp edges so that I can correct it on the next run?
 
Matt, as far as the sharp edges, I think much of it is that the corners of the 90 degree cuts in the aluminum are so clean, that it actually forms somewhat of a knife edge. On many metal pieces of my case, one side of the metal seems somewhat "sharper" than the other side. Not a burr, lip, or sliver, per se, but just an extremely clean cut in the aluminum, almost forming a knife edge. If you drag you hand or finger along it, I can see where it can break skin. I suspect it may be the back side of the machine cut that has the issues, whereas the front side of the cut has the smallest amount of compression from the cutting media that it dulls that edge just the smallest amount, removing the "sharpness" at the corner(just speculating). OR I'm just full of beans :)
 
Last edited:
I have been looking at a lot of the various pictures on here and I wonder if someone can tell me if my Kingston hyperX with tall heat sinks will fit under the HDD bay. I have to leave it in as I have a 3.5" drive for storage along with one 2.5" SSD for my OS. I have about two weeks until I redeploy and would like to have everything ready to go once I get home. Thanks for the help.
 
Hey Matt,
I was just wondering if there was an ETA for this. Also, does "front bezel cover" mean the entire front face plate of the case, or just the cover for the optical drive?

Thanks

Hi everybody,

I just want to keep you updated on our progress. We are going to send every single one of you who have received a DA BOX the following:
- 1 new front bezel cover.
- 1 new HDD cage.
- 1 new power cord.
Please, keep in mind that it will take some time to have them made. But I will make sure that everybody is satisfied. I guess we'll have to call this a beta test!:p With free upgrades.
 
Hey Matt,
I was just wondering if there was an ETA for this. Also, does "front bezel cover" mean the entire front face plate of the case, or just the cover for the optical drive?

Thanks

The entire front bezel will be replaced. We have no choice since the bends were not made properly, resulting in visual defect on the top of the case, and it not closing properly.
 
From what I could tell (I didn't put the rig together) on my X58 motherboard, no.
I need to re confirm, but the dominator should fit under the HDD cage.
The cage was designed for this set up (see image below).
corsair_dominator_gt_pc3_16000_triple_channel_kit_profilelarge.jpg

Also, we tested these ones:
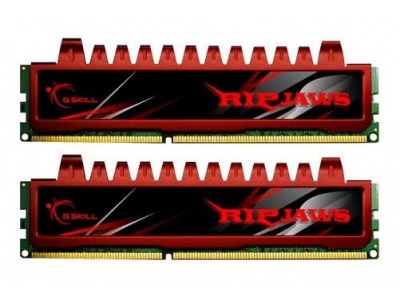
gskill-ripjaw-red_10942.jpg


DA_BOX_pres16.jpg


Anybody with a set of Corsair Dominator that could send us some pictures? Or should I get a set myself for the demo?
 
Last edited:
I need to re confirm, but the dominator should fit under the HDD cage.
The cage was designed for this set up (see image below).
corsair_dominator_gt_pc3_16000_triple_channel_kit_profilelarge.jpg

Also, we tested these ones:
gskill-ripjaw-red_10942.jpg


DA_BOX_pres16.jpg


Anybody with a set of Corsair Dominator that could send us some pictures? Or should I get a set myself for the demo?

You can measure... I don't know how tall the Gskills are but the Dominator GTs are 52mm or a little over 2 inches. I eyeballed, and I am pretty sure there is no way the HD cages give 2 inches clearance.

Edit: here is my Beta Testing contribution for this thread:
img0592e.jpg


http://mosaic.cnfolio.com/uploads/M528Coursework2009B104/iPodShuffleDimensions.jpg


A motherboard will be approximately the thickness of the Corsair manual, but the memory slots on the motherboard will be raised slightly as well.

PS. Matt, with the busy holiday week, I'm just getting around to packaging Da Box to ship back to you :)
 
Last edited:
Thanks for the visual MJZ. The HyyperX ram I have is 2.4" high which has no chance of clearing that. I think I will order that OCZ i7/x58 specific ram as it should easily fit.
 
I'm showing the distance from the top of the motherboard stand-offs to the bottom of the HDD cage as being right at 2 inches (or 1/16 less). Hope I'm wrong but it looks like with a motherboard, the Dominator isn't going to have clearance. Don't have my board or memory yet, but it appears it would be the same issue with either a P55 or X58 board.
 
You can measure... I don't know how tall the Gskills are but the Dominator GTs are 52mm or a little over 2 inches. I eyeballed, and I am pretty sure there is no way the HD cages give 2 inches clearance.

Edit: here is my Beta Testing contribution for this thread:
img0592e.jpg


http://mosaic.cnfolio.com/uploads/M528Coursework2009B104/iPodShuffleDimensions.jpg


A motherboard will be approximately the thickness of the Corsair manual, but the memory slots on the motherboard will be raised slightly as well.

PS. Matt, with the busy holiday week, I'm just getting around to packaging Da Box to ship back to you :)

Yes, you might be right. Clearance is 1.95". So if it's 2.05", it is 2mm too tall roughly...:(
 
Back
Top