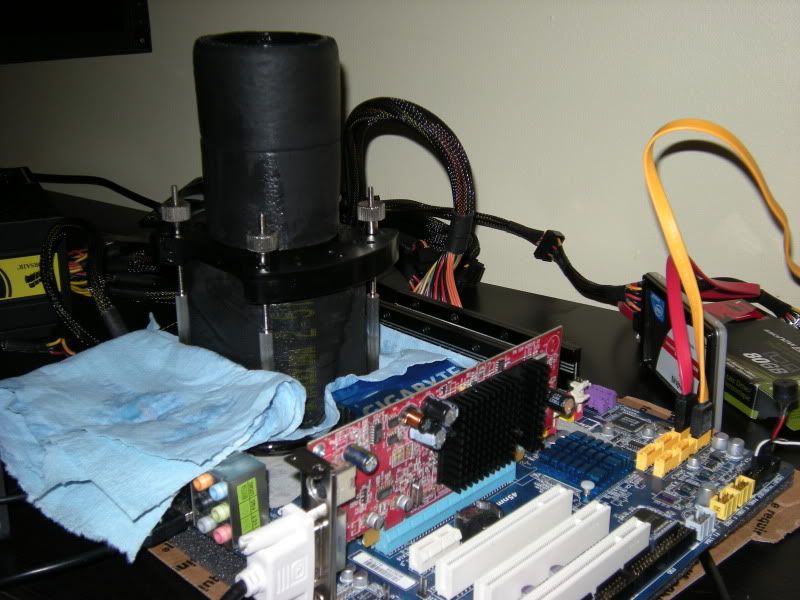
Hardware Used:
Koolance CPU-LN2 Rev1 (with DICE+Acetone)
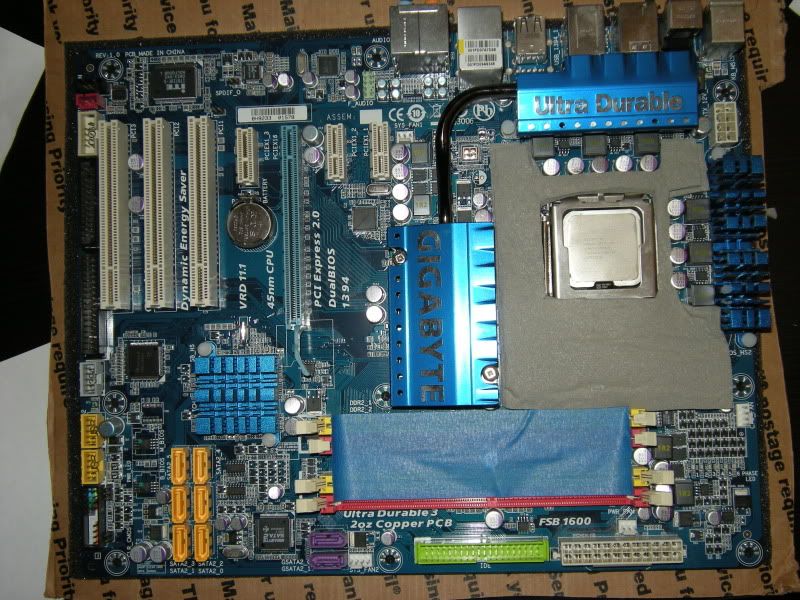
Gigabyte EP45-UD3R
E6300+Q6600 processors
2x1GB sticks of Micron D9 (Cellshock)
<insert random video card>
Installing my stripped XP OS on air before taking it cold:
I started off taking the motherboard (GA-EP45-UD3R Rev1) and made a rough template around the processor marking off where the capacitors are/etc.

I then used that template to cut out two copies of some Frost King (pipe insulation) and stuck one ontop of the other to get a decent/thick seal. Then placed it around the CPU socket noting anywhere that the capacitors/etc needed to be cut out any more.
Some remnants of the Frost King after cutting out the CPU socket, etc.

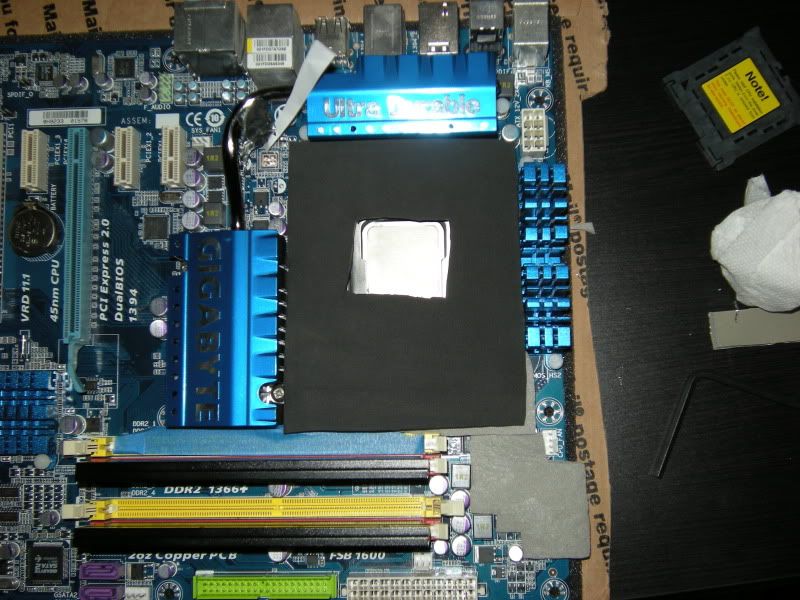
I then did a similar thing as to the Frost King but I used some Neoprene (bought from McMaster) and cut out the template but ignoring the capacitor cut outs as those need to be covered.
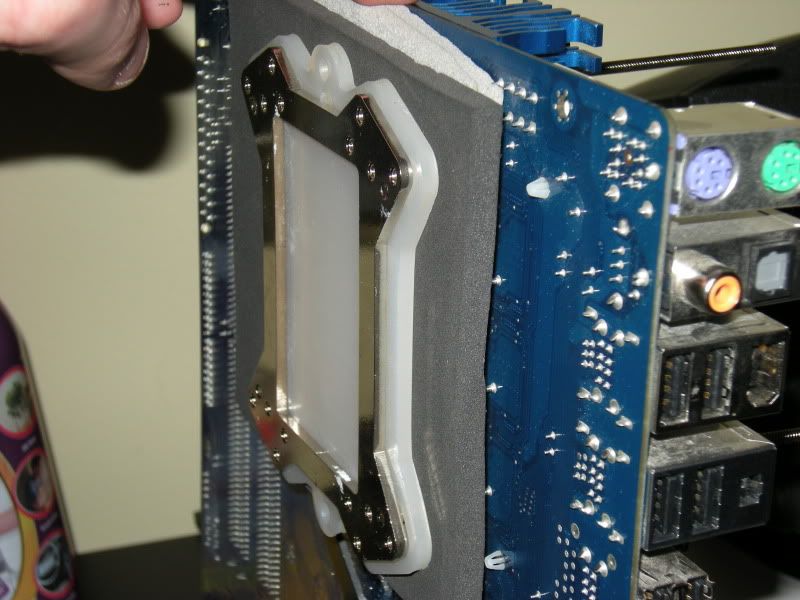
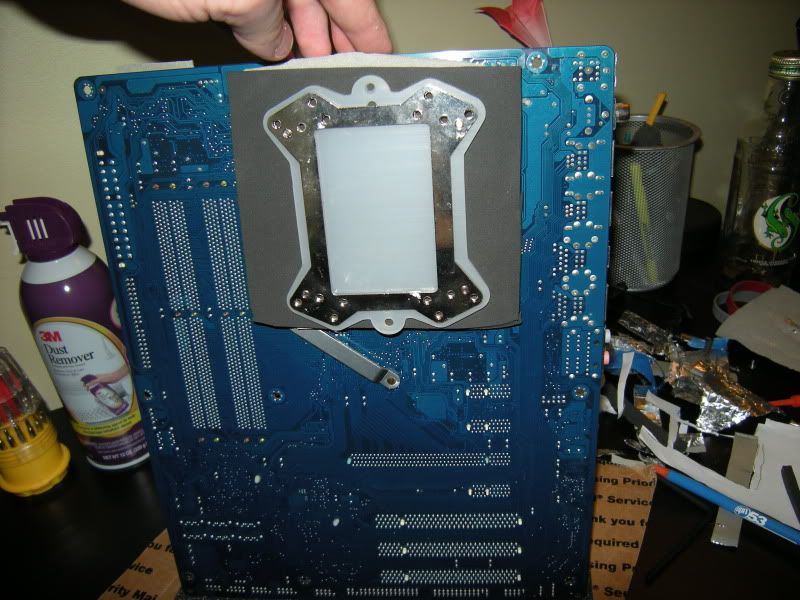
After that was done I re-did it for the back side of the CPU socket. You can also see the rear-mounting plate for the CPU pot
Another shot of the back:
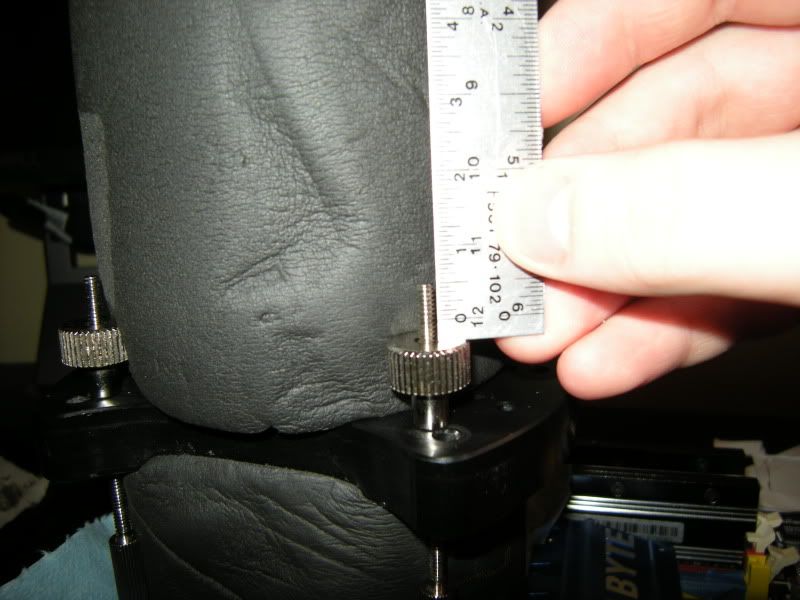
Bottom of the CPU-pot before mounting it:
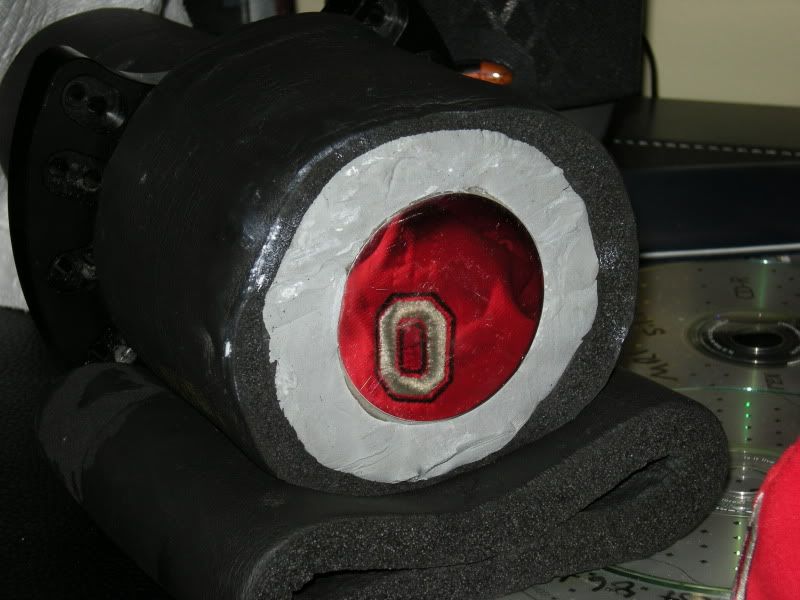
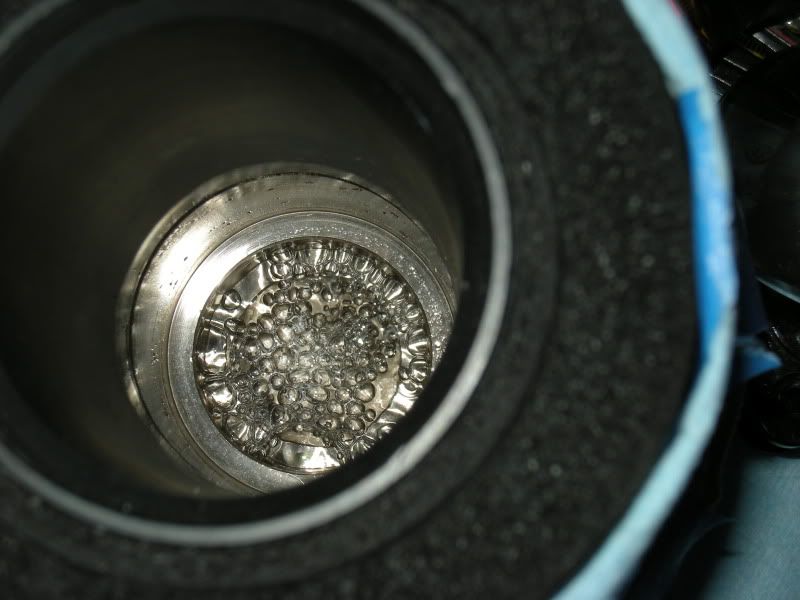
Inside of the pot:

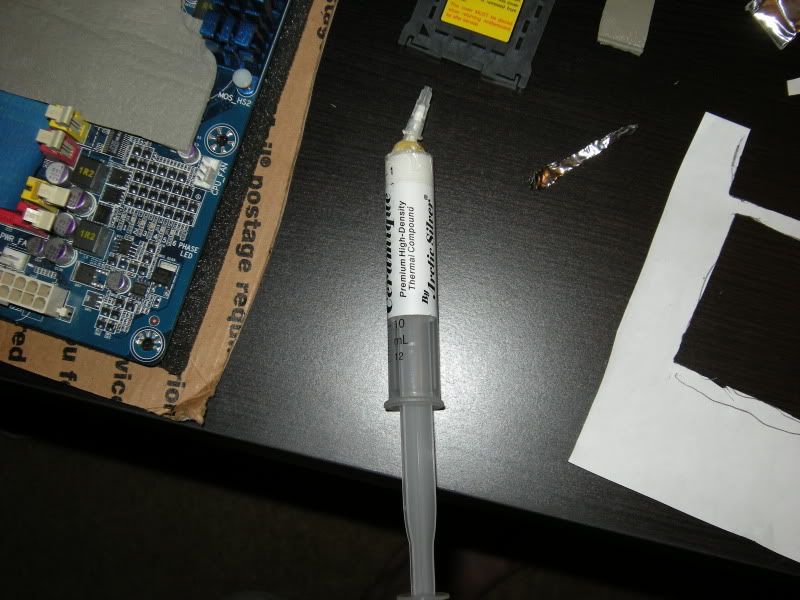
To mount I used some Arctic Silver Ceramique. Which unfortunately my buddy dropped my brand new tube the day before and snapped the tip off of it Here's my feable attempt and gorilla-gluing it to itself. It still worked... kind of, but then I ended up putting the cap on too far and it ripped the top off later.
Before mounting the pot I cut out some Shop Towel with a CPU socket hole and put that down then put the pot ontop of it.
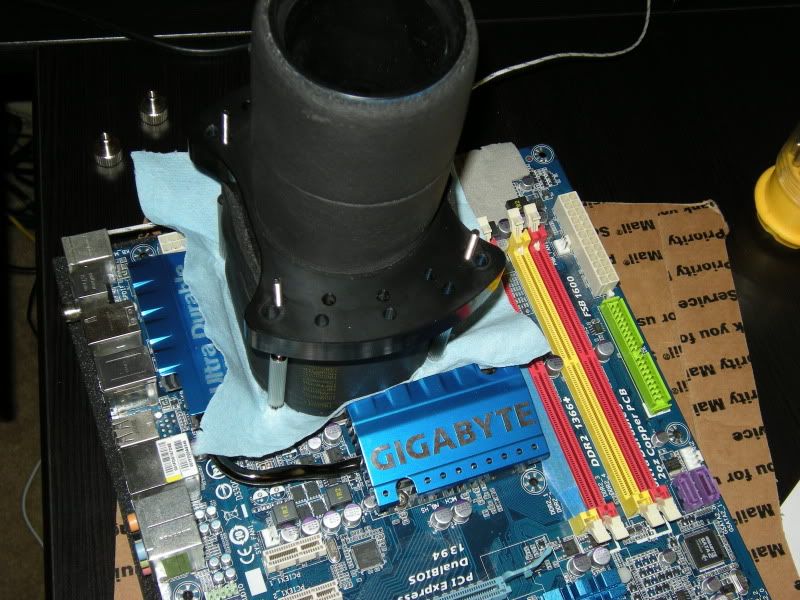
The pot didn't come with any retention springs so I had to guesstimate with how hard to have it down onto the CPU. I kept it as long as it had a difficult time tightening. I then measured how far down on the screws it was on the thumbscrews and took note of it.
After that I put some Acetone into the bottom of the pot (about a shot-glass worth) and scooped in a bit of dry ice to bring the temps down on the CPU.
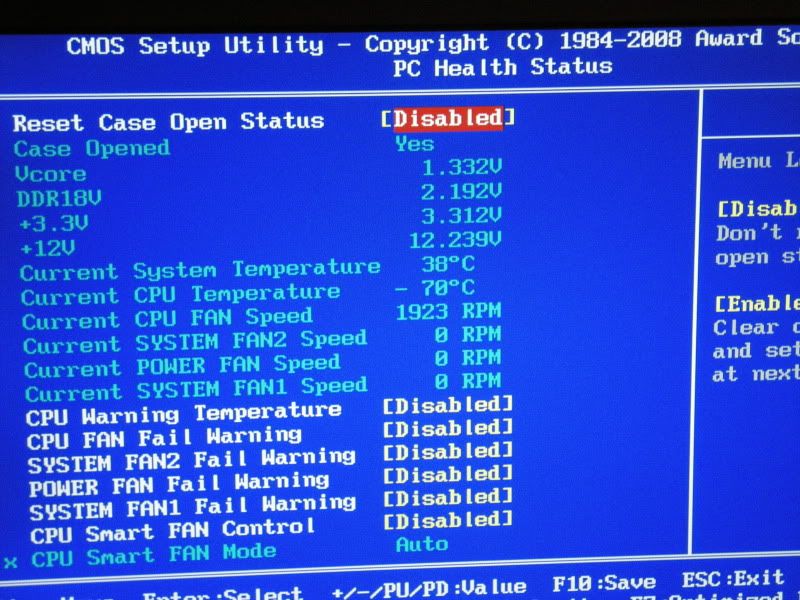
Unfortunately my thermometer hadn't come in yet so I had to go by guesses/time and BIOS read-outs.
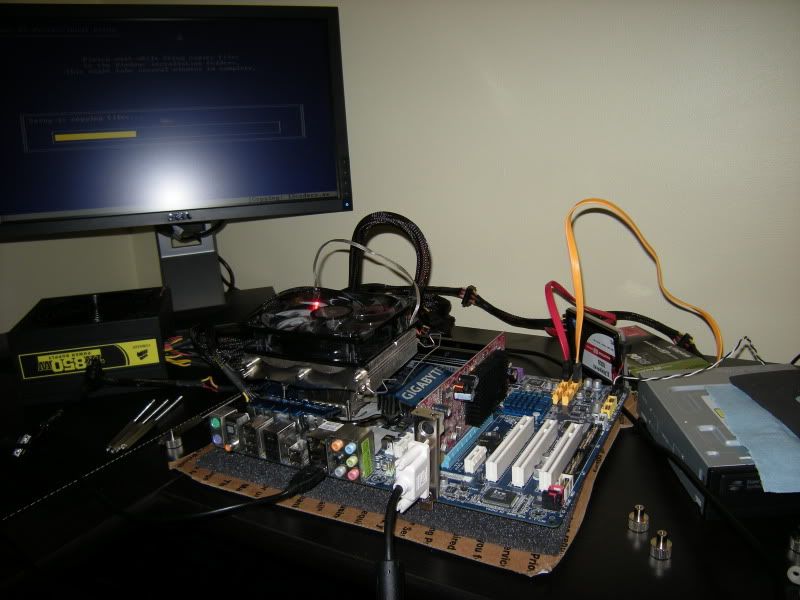
While benching:
And here it is after the clean-up (I had wrapped more shop towel around the pot to absorb any condensation/moisture - which was good because it started to rain and got even more humid in my office).
From my guessing it kept it pretty cool at the right times. Overall it was a fun experience and I'll see when I can get it going again. I can't wait to test my hand at LN2 cooling but that will be sometime way down the line.
Found a decent amount of condensation on the pot but no moisture got anywhere other than on the paper towels that covered the outside of the pot. So good news there!
Final results from Day1 (E6300):
CPU-Z 3.856ghz for 12.7pts
Superpi 1M 14.687 for 15.5pts
Wprime32M 22.93sec for 9.5pts
Wprime1024M 12m 8.671 for 2.2pts
Pifast 26.17 for 1.8pts
Total points: 41.7
Day 2 (Q6600):
CPU-Z 4968.63 for 24.2pts
SuperPi 1M 10.625 for 23.5pts
WPrime32 9.031 for 21.3pts
WPrime1024 4m 49.360 for 21.2pts
PiFast 20.33 for 19.7pts
SuperPi 32M 11m 38.953 for 14.6
Total pointage: 124.5 points.
I need help with 32M me thinks - time to read some tweaking guides.
Koolance CPU-LN2 Rev1 (with DICE+Acetone)
Gigabyte EP45-UD3R
E6300+Q6600 processors
2x1GB sticks of Micron D9 (Cellshock)
<insert random video card>
Installing my stripped XP OS on air before taking it cold:
I started off taking the motherboard (GA-EP45-UD3R Rev1) and made a rough template around the processor marking off where the capacitors are/etc.
I then used that template to cut out two copies of some Frost King (pipe insulation) and stuck one ontop of the other to get a decent/thick seal. Then placed it around the CPU socket noting anywhere that the capacitors/etc needed to be cut out any more.
Some remnants of the Frost King after cutting out the CPU socket, etc.
I then did a similar thing as to the Frost King but I used some Neoprene (bought from McMaster) and cut out the template but ignoring the capacitor cut outs as those need to be covered.
After that was done I re-did it for the back side of the CPU socket. You can also see the rear-mounting plate for the CPU pot
Another shot of the back:
Bottom of the CPU-pot before mounting it:
Inside of the pot:
To mount I used some Arctic Silver Ceramique. Which unfortunately my buddy dropped my brand new tube the day before and snapped the tip off of it
Here's my feable attempt and gorilla-gluing it to itself. It still worked... kind of, but then I ended up putting the cap on too far and it ripped the top off later.
Before mounting the pot I cut out some Shop Towel with a CPU socket hole and put that down then put the pot ontop of it.
The pot didn't come with any retention springs so I had to guesstimate with how hard to have it down onto the CPU. I kept it as long as it had a difficult time tightening. I then measured how far down on the screws it was on the thumbscrews and took note of it.
After that I put some Acetone into the bottom of the pot (about a shot-glass worth) and scooped in a bit of dry ice to bring the temps down on the CPU.
Unfortunately my thermometer hadn't come in yet so I had to go by guesses/time and BIOS read-outs.
While benching:
And here it is after the clean-up (I had wrapped more shop towel around the pot to absorb any condensation/moisture - which was good because it started to rain and got even more humid in my office).
From my guessing it kept it pretty cool at the right times. Overall it was a fun experience and I'll see when I can get it going again. I can't wait to test my hand at LN2 cooling but that will be sometime way down the line.
Found a decent amount of condensation on the pot but no moisture got anywhere other than on the paper towels that covered the outside of the pot. So good news there!
Final results from Day1 (E6300):
CPU-Z 3.856ghz for 12.7pts
Superpi 1M 14.687 for 15.5pts
Wprime32M 22.93sec for 9.5pts
Wprime1024M 12m 8.671 for 2.2pts
Pifast 26.17 for 1.8pts
Total points: 41.7
Day 2 (Q6600):
CPU-Z 4968.63 for 24.2pts
SuperPi 1M 10.625 for 23.5pts
WPrime32 9.031 for 21.3pts
WPrime1024 4m 49.360 for 21.2pts
PiFast 20.33 for 19.7pts
SuperPi 32M 11m 38.953 for 14.6
Total pointage: 124.5 points.
I need help with 32M me thinks - time to read some tweaking guides.
Last edited: