Looking for aftermarket cooling options for PNY 1070ti

jimthebob

Gawd
Joined
Mar 23, 2013
Messages
889
So I recently picked up a PNY 1070ti from a fellow member here because the price was right and it provided a nice bump over my previous card. After running some benches on it, performance is as to be expected but I'd like to drop the temps on it a bit. Under benchmark/load, it'll settle in around 80c which I know isn't horrible per se, but I'd like to improve on that if I could (especially to drop the noise a bit). I already removed the stock HSF, cleaned it up, and replaced the TIM with some Noctua paste so stock performance is about as good as it's going to get.

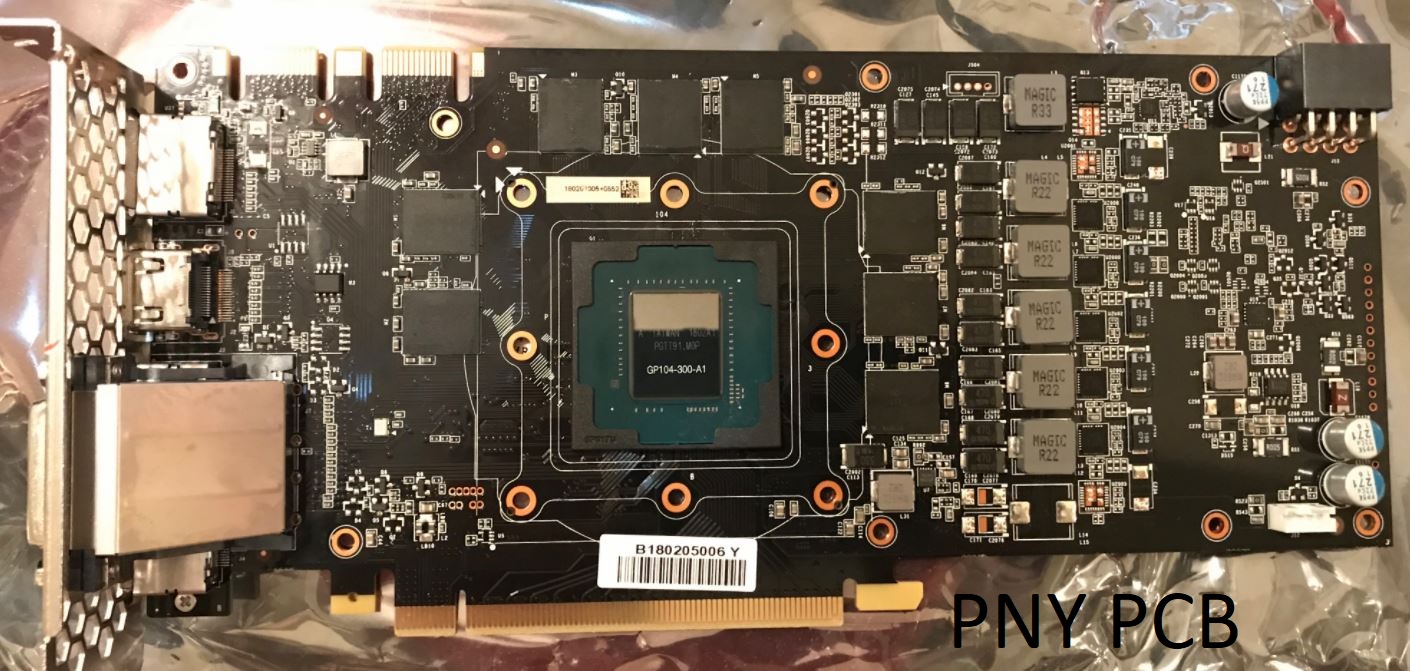
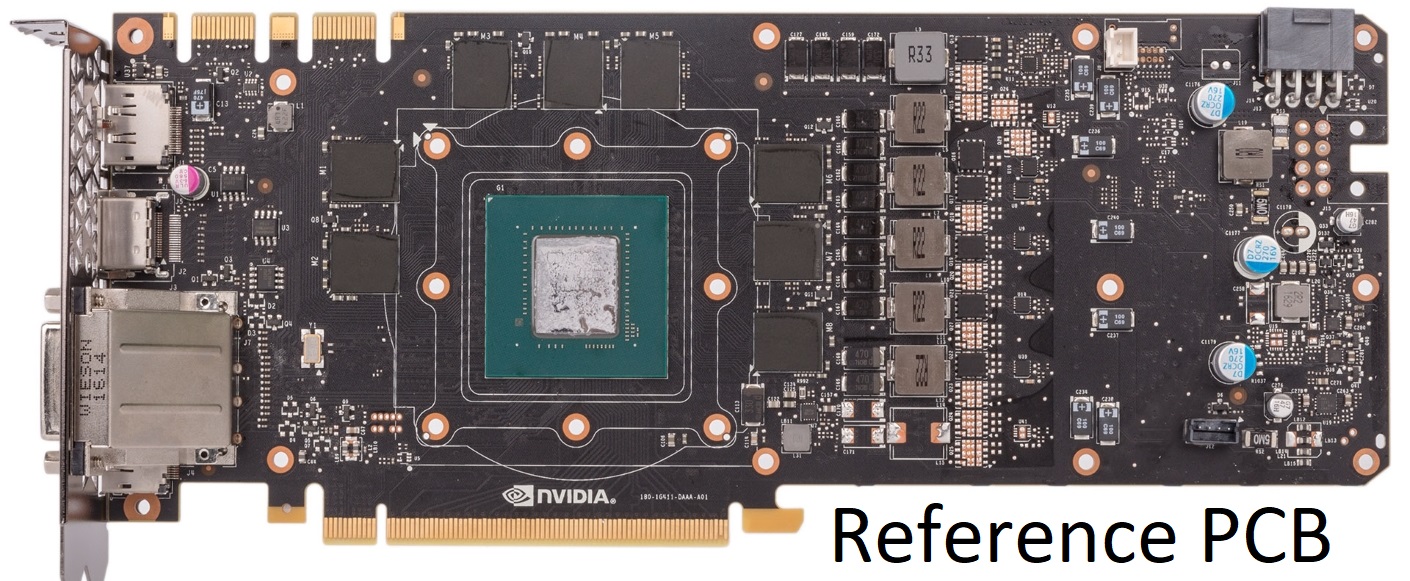
I've done some light googling and found that the reference PCB layout is different than the PNY layout, but what I don't know is are the differences relevant? Front what I can tell by the pics below, it looks like the mounting around the GPU is the same but the mounting points around the board are different to accommodate the HSF PNY utilizes. There are other differences, too, check out the pics and compare.

I was looking at the Raijintek Morpheus II as an aftermarket option (linked below). It lists the 1080Ti, 1080/1070, 650, 650Ti, 660, 660Ti, 680, 760, 770, 780, 780Ti as compatible cards but for some reason leaves the 1070ti off the list. The Raijintek comes with enough small tertiary heatsinks to allow cooling of VRM's, memory, etc. My question is, do you guys think the Raiijintek would work on my PNY card? Looks like all it needs to mount to the card is to line up with the GPU mounting holes around the core and that's it.

https://www.raijintek.com/en/products_detail.php?ProductID=46
If that doesn't work, anyone have any suggestions for other aftermarket coolers I could look into? TIA guys!
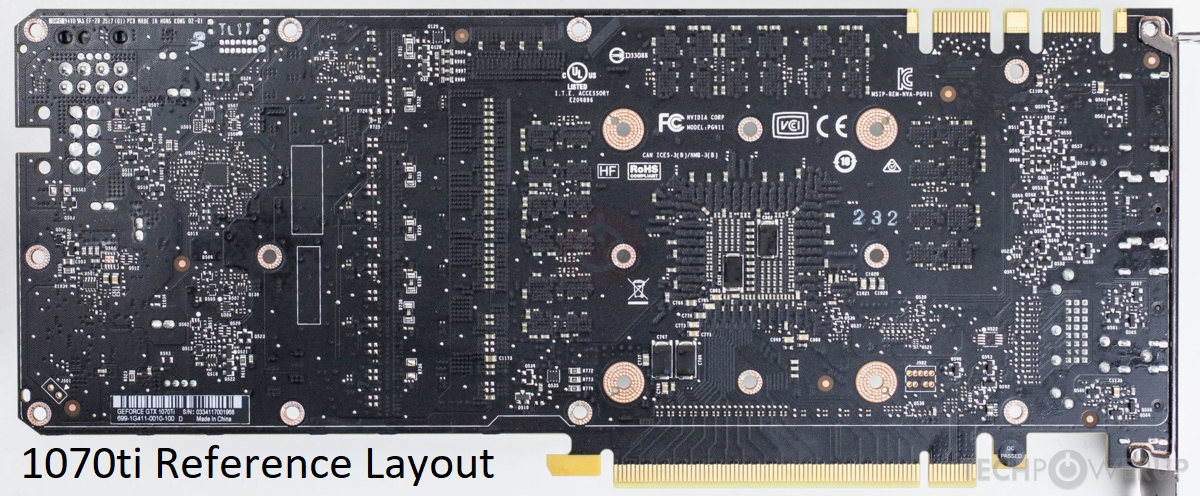
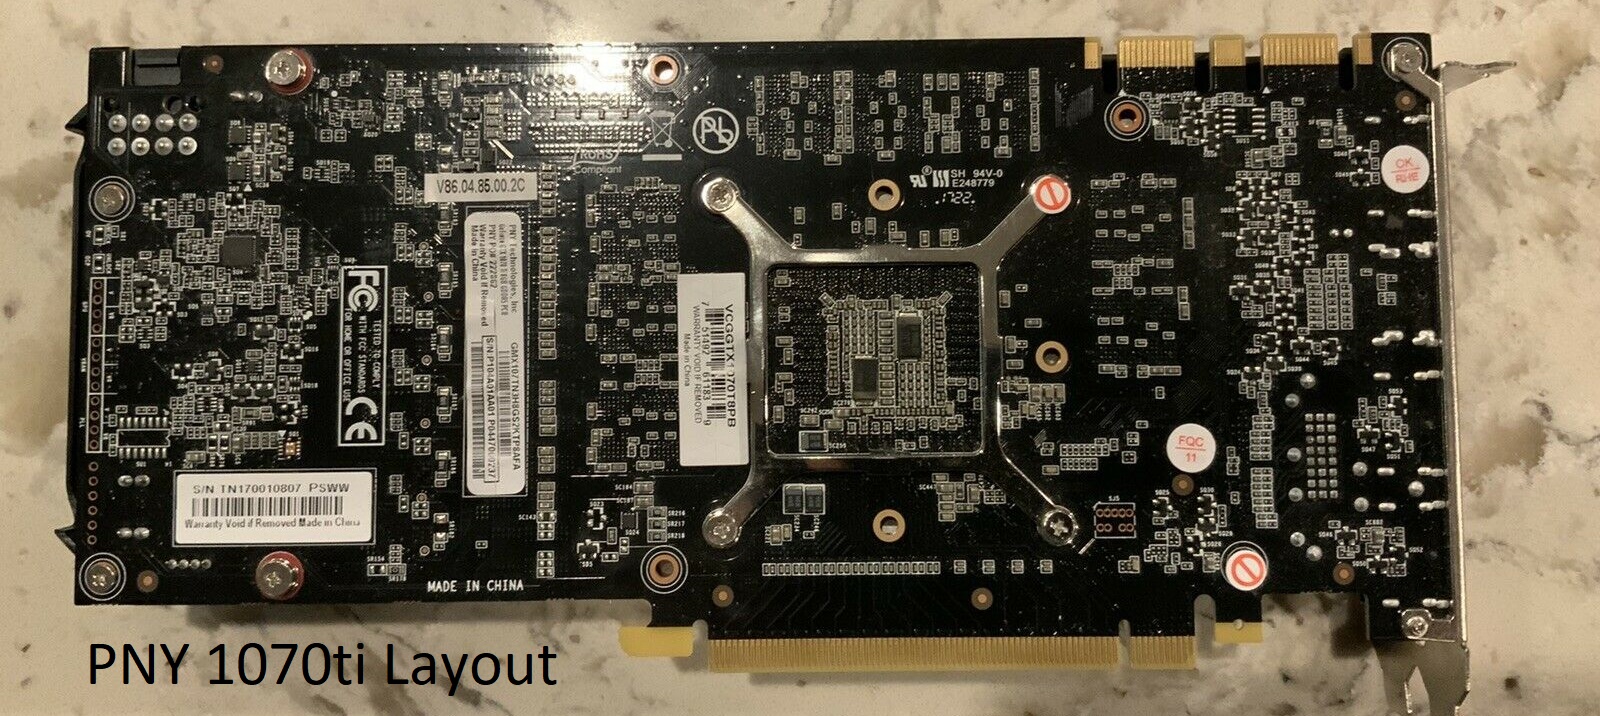
3010-pcb-back.jpg
s-l1600 (1).jpg
s-l1600 (2).jpg
 
You should be looking at the front and not the back of the card when making comparisons for HSF clearance. The placement of certain components (such as VRM banks/capacitors/etc) in relation to the position of things like heatpipe bends and fins on the aftermarket sink are what matter most. All Nvidia GPUs since like the 200 series have the same mounting hole spacing.
 
Did you have the same PNY card I do?

Nope. the accelero 3 v2. should mount to any 1070ti. Just make sure you grab some thermaltape for the heatsinks. Unless you have no plans of removing the small heatsinks. The thermal glue is permanent.
 
Having used an Arctic Cooling aftermarket heatsink (Accelero IV), I have to say, I wouldn't pay anywhere near the asking price for it again. The fans wore out pretty quickly, it interferes with the RAM slots on some motherboards, and it comes with zero mechanism for cooling the VRAM ICs and power FETs.

IMHO, you should either use the stock cooler and run the fans harder or go to some sort of liquid cooling. Maybe the Raijintek one is better, but I'm definitely not in love with the Arctic ones for actual use.
 
I was also hitting ~80c on it in the itx case I had it in.
Perhaps 2-3mm plastic washers to increase mounting pressure? Would be easy to do.
 
I Used to have the 1st version of the Raijintek Morpheus paired up with 2 Coolermaster Vortex fans on a heater R9 290x. Sucker dropped temps almost in half! The mem sinks were good, but the thermal tape to place them with were a little weak. I had to order the VRM sink kit from the egg too. Overall the Morpheus is freaking huge and with the fans it took up 4 slots. Sounded like an old Kirby vacuum cleaner, but man did it run cool! No more throttling or BSOD's after that!

I vote get the cooler and mod the crap out of it to fit! This is [H]!! ;)
 
So I recently picked up a PNY 1070ti from a fellow member here because the price was right and it provided a nice bump over my previous card. After running some benches on it, performance is as to be expected but I'd like to drop the temps on it a bit. Under benchmark/load, it'll settle in around 80c which I know isn't horrible per se, but I'd like to improve on that if I could (especially to drop the noise a bit). I already removed the stock HSF, cleaned it up, and replaced the TIM with some Noctua paste so stock performance is about as good as it's going to get.

I've done some light googling and found that the reference PCB layout is different than the PNY layout, but what I don't know is are the differences relevant? Front what I can tell by the pics below, it looks like the mounting around the GPU is the same but the mounting points around the board are different to accommodate the HSF PNY utilizes. There are other differences, too, check out the pics and compare.

I was looking at the Raijintek Morpheus II as an aftermarket option (linked below). It lists the 1080Ti, 1080/1070, 650, 650Ti, 660, 660Ti, 680, 760, 770, 780, 780Ti as compatible cards but for some reason leaves the 1070ti off the list. The Raijintek comes with enough small tertiary heatsinks to allow cooling of VRM's, memory, etc. My question is, do you guys think the Raiijintek would work on my PNY card? Looks like all it needs to mount to the card is to line up with the GPU mounting holes around the core and that's it.

https://www.raijintek.com/en/products_detail.php?ProductID=46
If that doesn't work, anyone have any suggestions for other aftermarket coolers I could look into? TIA guys!
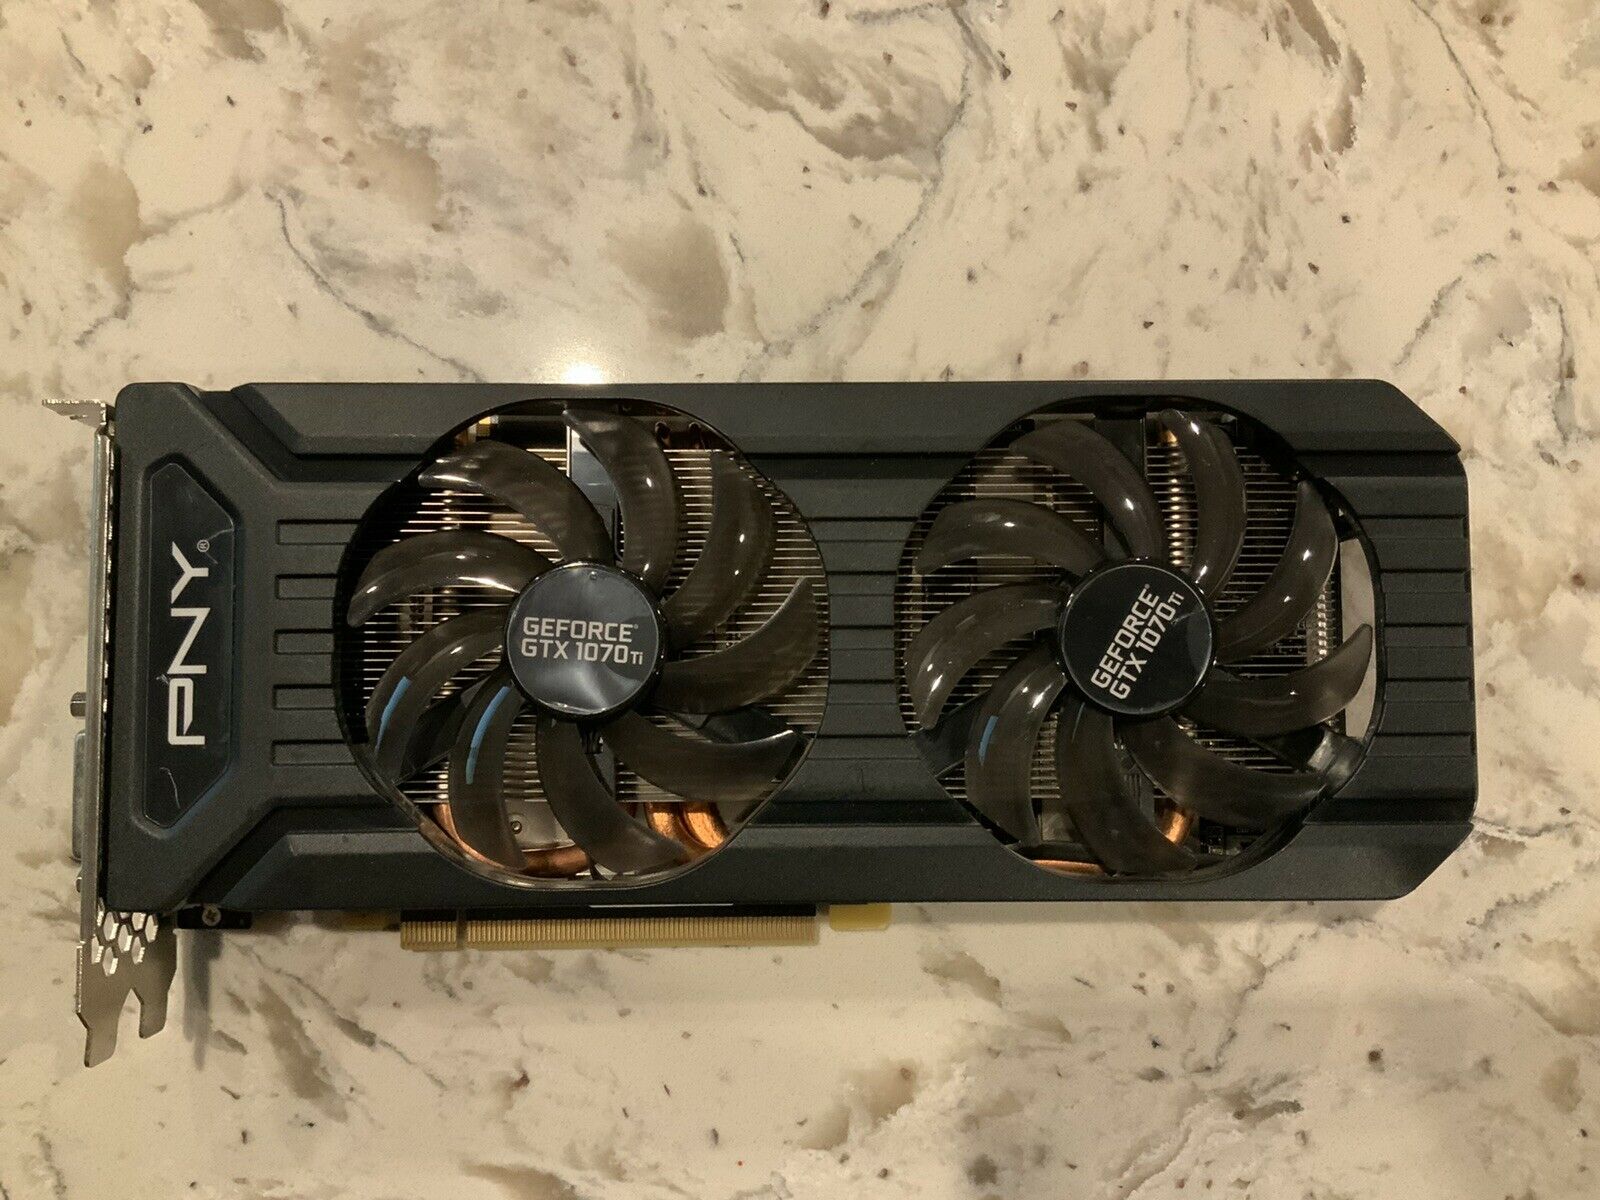
View attachment 220069View attachment 220066View attachment 220067
put liquid metal on it. Dropped my 2060 thirteen degrees in a repeatable stress test----and the ambient temps in yhe room were much warmer than the day I tested temps with the stock cooler. I used Thetmalright Silver King.

You should also be able to gain some degrees and noise efficiency by removing the shroud and fans and strapping on some 90mm or 120mm case fans.
 
Last edited:
You should be looking at the front and not the back of the card when making comparisons for HSF clearance. The placement of certain components (such as VRM banks/capacitors/etc) in relation to the position of things like heatpipe bends and fins on the aftermarket sink are what matter most. All Nvidia GPUs since like the 200 series have the same mounting hole spacing.

I knew this, about looking at the front of the card vs the back, but for some reason didn't post the pics of both. Let me fix that derp moment below. Looks to me like there are small differences but the right around the GPU die looks pretty darn, if not, the same. The big differences come when you start getting past the VRM's, MOSFET's, & RAM and start getting to the side of the board with the 8 pin power. I'm betting that the PNY board just wasn't very popular therefore didn't get verified through manufacturers. Found a thread over on linustechtips where someone suggested the Kraken G12 as an option, which aesthetically I like, but then I'd have to get my hands on an X series NZXT AIO. I wonder if a 120mm AIO would be enough (I'm only being semi-serious, I'm sure it'd be plenty) 🤔

PNY-GeForce-GTX-1070-Ti-8GB-GDDR5-(VCGGTX1070T8PB)-pcb.jpg
Reference.jpg


I was also hitting ~80c on it in the itx case I had it in.
Perhaps 2-3mm plastic washers to increase mounting pressure? Would be easy to do.

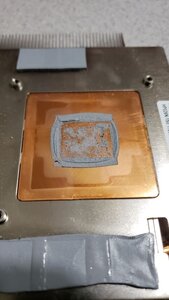
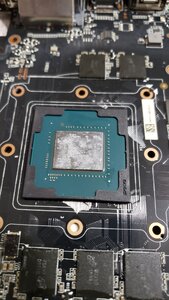
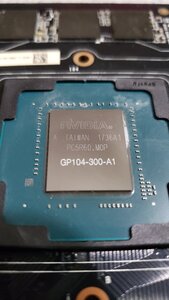
I don't feel like it's a mounting pressure issue after having taken it apart. The stock TIM was dried out and didn't appear to have the best contact/spread (almost looks like a thermal pad in a sense to me) so I'm guessing that didn't help things. I'm only reaching the 80's when running synthetic stress tests so in actual gaming I'll probably be fine but I haven't sat down and gamed a heavy game on it yet so verify. BTW here's a couple pics of stock TIM when I got into it.

20200131_170545.jpg20200131_170547.jpg

I Used to have the 1st version of the Raijintek Morpheus paired up with 2 Coolermaster Vortex fans on a heater R9 290x. Sucker dropped temps almost in half! The mem sinks were good, but the thermal tape to place them with were a little weak. I had to order the VRM sink kit from the egg too. Overall the Morpheus is freaking huge and with the fans it took up 4 slots. Sounded like an old Kirby vacuum cleaner, but man did it run cool! No more throttling or BSOD's after that!

I vote get the cooler and mod the crap out of it to fit! This is [H]!! ;)

That's one reason I am looking for alternatives to the Raijintek unit: it's HUGE when all is said and done and while I have my GPU vertically mounted ATM, I don't think I have 4 slots between my GPU and case window and even if I did, at that point, I'd be worried it would be choking off airflow. That, and as beastly as it is, it's not exactly the runway model of coolers :LOL:

put liquid metal on it. Dropped my 2060 thirteen degrees in a repeatable stress test----and the ambient temps in yhe room were much warmer than the day I tested temps with the stock cooler. I used Thetmalright Silver King.

You should also be able to gain some degrees and noise efficiency by removing the shroud and fans and strapping on some 90mm or 120mm case fans.

Ehh I get liquid metal has it's place and I'm not trying to knock it but I don't think it's the solution I'm looking for. A bit risky if you don't get the surrounding area sealed up right and I've heard about long term reactions with certain metals but I haven't done enough research into it be an authority on the subject.

I didn't think about removing the shroud and strapping a couple fans on there to improve airflow but I'm not sure that's the answer, either. I want to have some form of aesthetics left once all is said and done and removing the shroud and strapping two fans straight to it reminds me of the Raijintek unit :LOL:
 
i was gonna mention the g12 but i t seemed like you were set on a heat sink. the g12 is on sale for $20 on nzxt and if you pick up a cheap asetek based aio to go with it its hard to beat.
 
Ehh I get liquid metal has it's place and I'm not trying to knock it but I don't think it's the solution I'm looking for. A bit risky if you don't get the surrounding area sealed up right and I've heard about long term reactions with certain metals but I haven't done enough research into it be an authority on the subject.

I didn't think about removing the shroud and strapping a couple fans on there to improve airflow but I'm not sure that's the answer, either. I want to have some form of aesthetics left once all is said and done and removing the shroud and strapping two fans straight to it reminds me of the Raijintek unit :LOL:
The rule with liquid metal is don't put it on aluminum. Most heatsonks nowadays have a copper base plate, which is absolutely fine. I have seen reputable youtubers verify this after a whole year. Also, the thermal performance doesn't degrade after that year, either.

I don't think liquid metal is any more risky than watercooling. You only apply yhe teeniest amount which will still spread over the surface. Its kinda like gold leaf. You think its too little, but it spreads very thin. There are some youtubers using more than needed.

rather than dripping it straight onto the GPU, I very lightly dabbed the applicator q-tip and rubbed it on that way. Seemed easier to control the amount.

With a proper minimal application, there is no flowing of the material that I have ever seen. I have never seen heatsonk removal after proper minimal application, where the user was lucky they had sealed things or whatever.
 
Welp if anyone is still interested, I managed to source a used 120mm AIO that will work with an NZXT Kraken G12 GPU bracket. From everything I could reference, this should work with zero issues for me (knock on wood). I have ordered the NZXT bracket, the 120mm AIO, a random assortment of small heat-sinks for RAM & MOSFET's, and a fan header adapter so I can control fans from the GPU fan header to keep silent operation when needed. All parts should hopefully be in this week so if there's interest, I'll be sure to post some pics and info from my endeavor.
 
Welp if anyone is still interested, I managed to source a used 120mm AIO that will work with an NZXT Kraken G12 GPU bracket. From everything I could reference, this should work with zero issues for me (knock on wood). I have ordered the NZXT bracket, the 120mm AIO, a random assortment of small heat-sinks for RAM & MOSFET's, and a fan header adapter so I can control fans from the GPU fan header to keep silent operation when needed. All parts should hopefully be in this week so if there's interest, I'll be sure to post some pics and info from my endeavor.
should work good and keep it nice and cool. my rx580/g12/h50 combo rarely broke 53c
 
should work good and keep it nice and cool. my rx580/g12/h50 combo rarely broke 53c

I'm hoping so, even with the low flow air I plan on passing over the rad. I hit 80°c now on synthetics so even a 10°c drop would be nice. Time will tell.
 
I'm hoping so, even with the low flow air I plan on passing over the rad. I hit 80°c now on synthetics so even a 10°c drop would be nice. Time will tell.
is it going in your 011(sig)? if so i would recommend to have the aio in the back sucking in. assuming you have top exhaust, that will give you better temps.
 
Well gents, the results are in. I received my last part tonite and set to work!

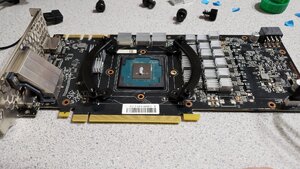
After removing the stock cooler, I began by cleaning things up and installing the various component heat-sinks I ordered. See pics below for where I installed them.

20200212_165709.jpg
20200212_171812.jpg

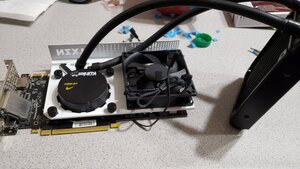
I then installed the bracket and AIO, the wrong way around at first, then installed the contraption in the computer.

20200212_172245.jpg
20200212_183950.jpg

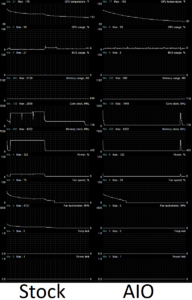
I will say, I have some tweaking to do with rad setup, card orientation, fan selection on the GPU, etc. But, as rough around the edges as it is, I am very pleased. After soaking the loop, I went from 80°C/176°F loaded and soaked with the stock cooler to 70°C/156°F with the AIO. A 10°C drop is alright by me! Boost clocks also increased a bit from 1823 to 1848 which, while not day and night different, is an improvement nonetheless over stock and gives me more headroom for OCing. I'll also note that now I want a bigger AIO as this one gets quite toasty under load! I've also included an Afterburner screenshot comparing stock to AIO temp drops after the stress test is concluded (both screenshots were taken at the same relative time on the graph). Hope y'all enjoyed my endeavor! If I progress any further, I'll be sure to post updates as I go.

Stock vs AIO.png
 
Well gents, the results are in. I received my last part tonite and set to work!

After removing the stock cooler, I began by cleaning things up and installing the various component heat-sinks I ordered. See pics below for where I installed them.

View attachment 222944
View attachment 222945

I then installed the bracket and AIO, the wrong way around at first, then installed the contraption in the computer.

View attachment 222946
View attachment 222947

I will say, I have some tweaking to do with rad setup, card orientation, fan selection on the GPU, etc. But, as rough around the edges as it is, I am very pleased. After soaking the loop, I went from 80°C/176°F loaded and soaked with the stock cooler to 70°C/156°F with the AIO. A 10°C drop is alright by me! Boost clocks also increased a bit from 1823 to 1848 which, while not day and night different, is an improvement nonetheless over stock and gives me more headroom for OCing. I'll also note that now I want a bigger AIO as this one gets quite toasty under load! I've also included an Afterburner screenshot comparing stock to AIO temp drops after the stress test is concluded (both screenshots were taken at the same relative time on the graph). Hope y'all enjoyed my endeavor! If I progress any further, I'll be sure to post updates as I go.

View attachment 222955
not too shabby. did you set a custom fan curve at all? i would set a base of 25% until ~50c then ramp it to 100% at 80c. if you left it on auto its still trying to balance noise and heat as if its was still a heat sink. play with it until you get a balance of heat to noise you like. i would also move it up to the back as an intake. 1, because the rad is lower than the pump the way it is and the air in the aio will settle there. and 2, fresh air equals lower temps.
 
not too shabby. did you set a custom fan curve at all? i would set a base of 25% until ~50c then ramp it to 100% at 80c. if you left it on auto its still trying to balance noise and heat as if its was still a heat sink. play with it until you get a balance of heat to noise you like. i would also move it up to the back as an intake. 1, because the rad is lower than the pump the way it is and the air in the aio will settle there. and 2, fresh air equals lower temps.

Good thoughts, I appreciate them. I do have a custom fan curve set up in Afterburner, however; the fan that came with the NZXT G12 is a DC fan not PWM controlled fan so proper fan speed control ATM isn't working. I plan on ordering a Noctua PWM fan to rectify this. I also plan on doing some case re-arranging in the near future (this weekend) where I place my CPU rad as an intake on the side of the case and working to make my GPU intake (which yes, is fresh air intake now and will remain so) setup to allow my RGB Corsair ML fans to shine in all their glory on top of the rad instead of being hidden under the GPU rad. I also want to switch back to a horizontal GPU setup instead of vertical to help hide some of the new GPU yuck setup. I don't like the vertical mount with the G12.

Edit: Unfortunately, I don't think I'm going to be able to put the rad above the GPU block like I'd like to to keep air where I want it. Case layout just doesn't justify it. I'll check out the possibilities once I get the whole system on the workbench this weekend but I don't expect it to work out. :cool:
 
Last edited:
i wasnt talking about the 80mm fan though, i meant the 120 on the rad. the 80mm should be full power all the time, its a low rpm fan. would you be able to mount the 120 rad at the top of the side intake and then two 120 fans below it? those are 120 on the side arent they? you could also move the cpu rad to the side with the MLs and put the 120 rad up top as exhaust. just giving ideas.
 
i wasnt talking about the 80mm fan though, i meant the 120 on the rad. the 80mm should be full power all the time, its a low rpm fan. would you be able to mount the 120 rad at the top of the side intake and then two 120 fans below it? those are 120 on the side arent they? you could also move the cpu rad to the side with the MLs and put the 120 rad up top as exhaust. just giving ideas.

I appreciate the suggestions but the tube length of the 120mm AIO prevent it from going up top, the only other placement option I have is maybe on the bottom of the side. Right now my current plan for this weekend is to move the CPU rad to side intake and then turn the video card back to horizontal mounting to give the bottom of the case some more breathing room and that should hopefully allow me to turn the 120 rad 90° to make a bit cleaner overall look.

On a side note, I ran a synthetic stress test (furmark) to load up the GPU last night and when I did, all that hot air I was dumping into the case warmed the CPU up a decent bit, as well; definitely more than the stock GPU cooler did. This is why I want to move the CPU rad to side intake, I want to keep that fresh air flowing over the CPU rad as much as I can.
 
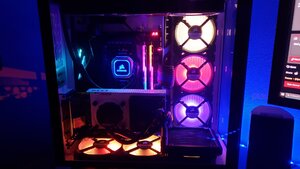
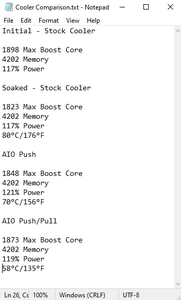
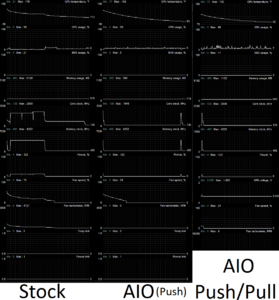
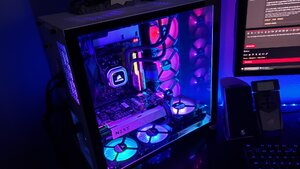
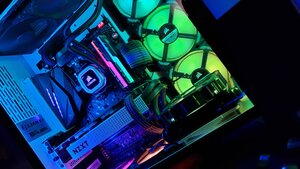
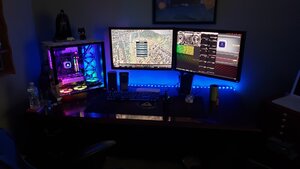
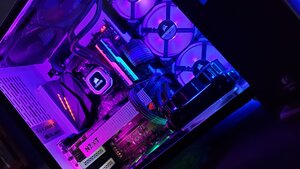
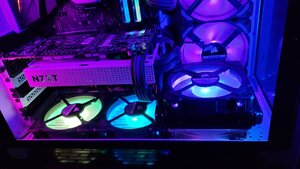
Sooo I did some more tinkering with the whole PC setup including the video card and it's AIO. Long story short, I pretty much rebuilt the PC minus removing the motherboard, CPU, and RAM. I moved my 360 CPU rad from the top of the case in a push config to the side of the case in large part to help keep temps down since the GPU would heat up the CPU when under load. I also swapped to a push/pull config of the CPU rad with Corsair ML fans on both sides. I then switched the GPU back to a horizontal orientation in an effort to hide cables and create a cleaner look. I also swapped the GPU AIO to a push/pull config which helped temps a LOT more than I thought it would. Though not matching, I used a 120mm Noctua fan I had as a push and a Corsair LL as a pull. It's working out quite well. Some additional cable management and adding a couple addressable RGB strips I had that I...forgot I had rounded things out. Some more testing of the GPU in the same way I have done each step of the way in the same room under the same conditions yielded some impressive results that I'm happy with. See the attachments below for more info. I've included some rough numbers I kept track of in Notepad during testing each stage of this endeavor. All Furmark runs were run until temps stabilized in a fully soaked loop. Hope you gents enjoy!

Cooler Comparisons.pngStock vs AIO.png
20200216_155930.jpg
20200216_155937.jpg
20200216_160035.jpg
20200216_160116.jpg
20200216_160212.jpg
 
Back
Top