KT-400 HTPC Case?

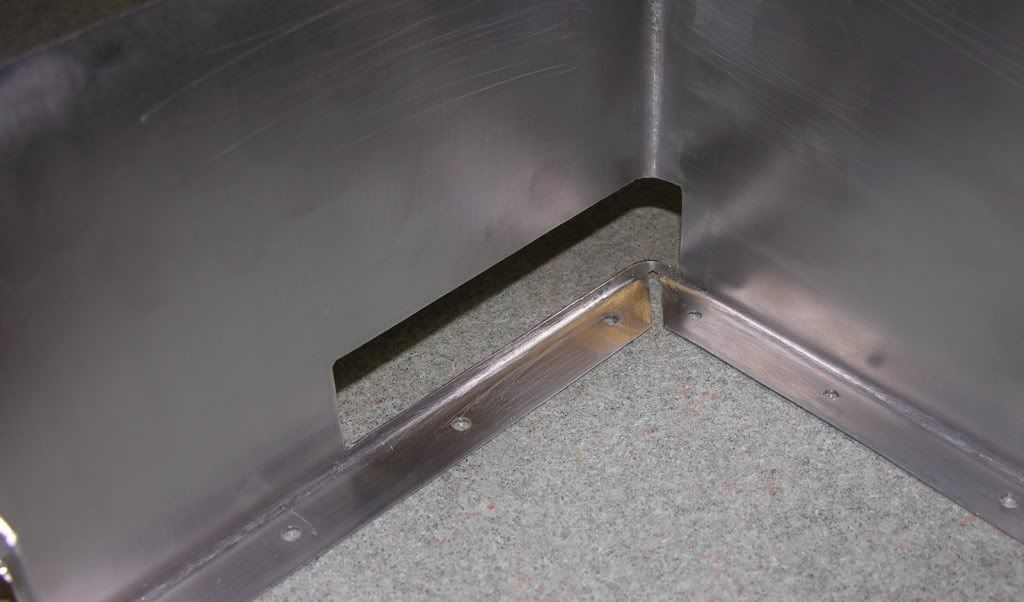
yea steel isn't to bad. For some reason I thought you would be buying aluminum. What are you using to make the bends?

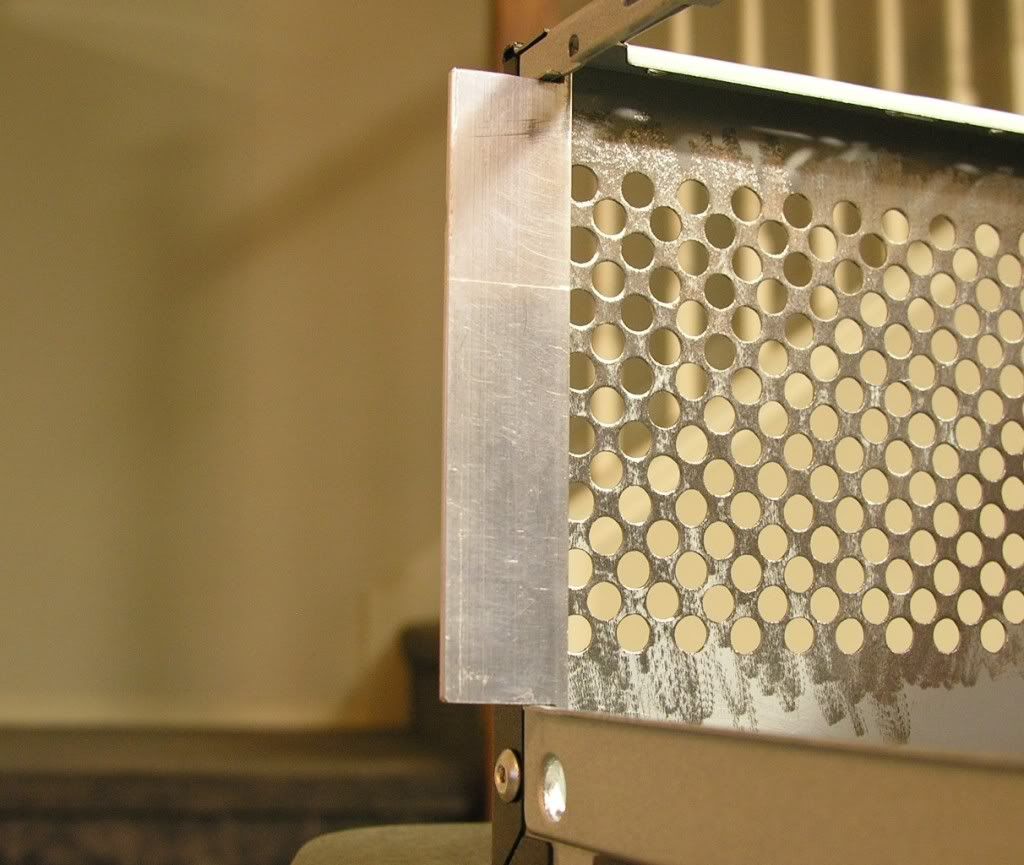
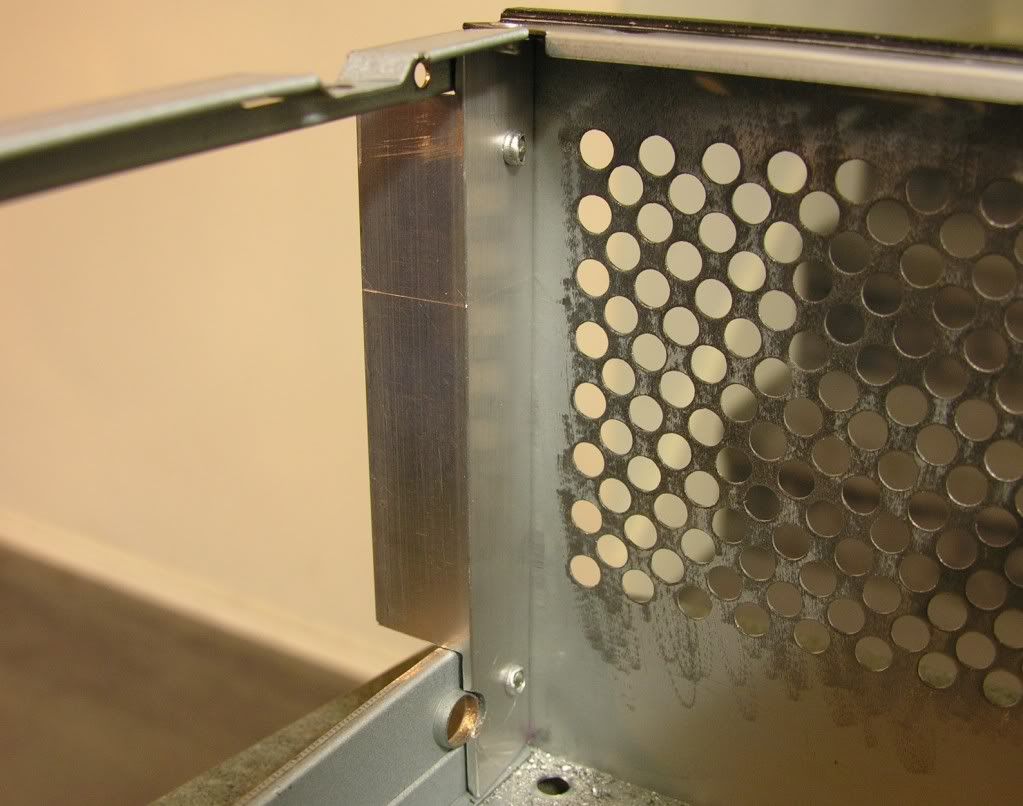
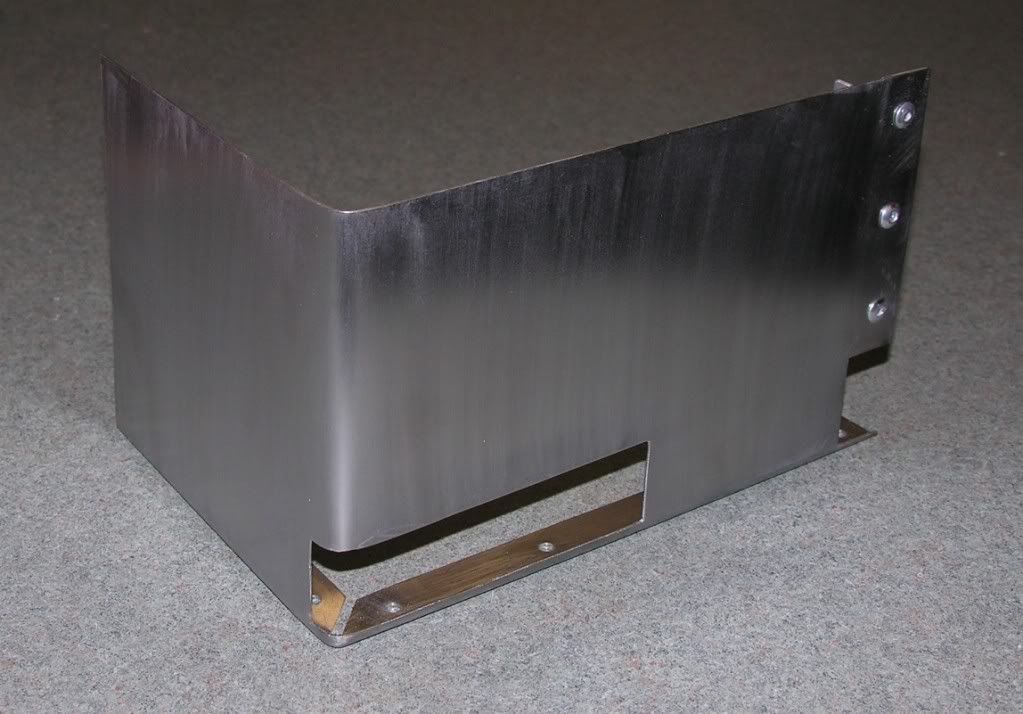
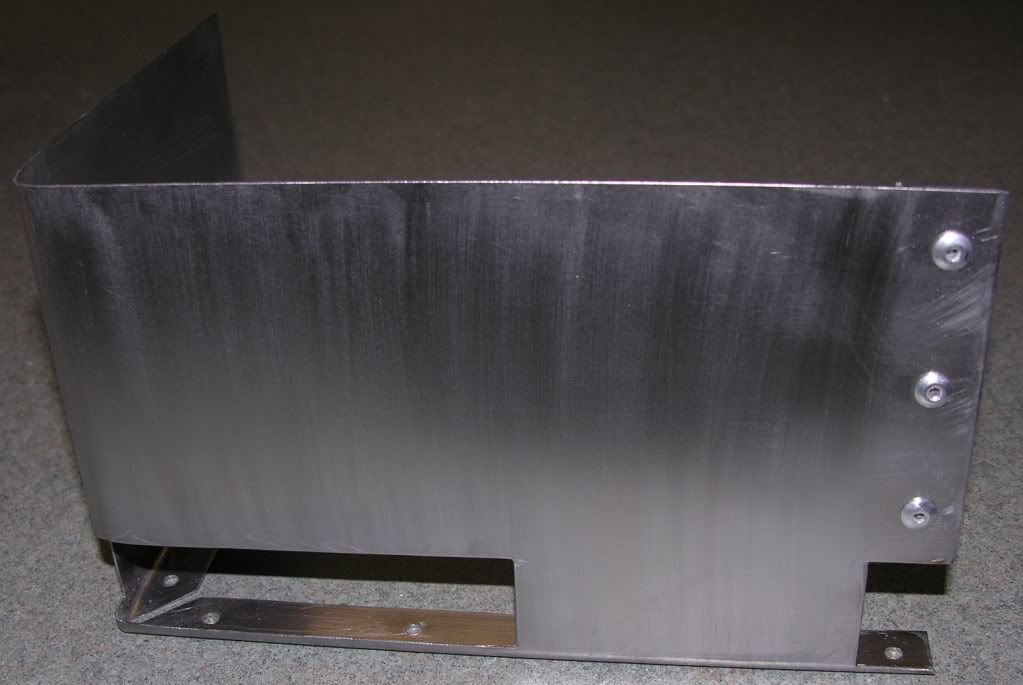
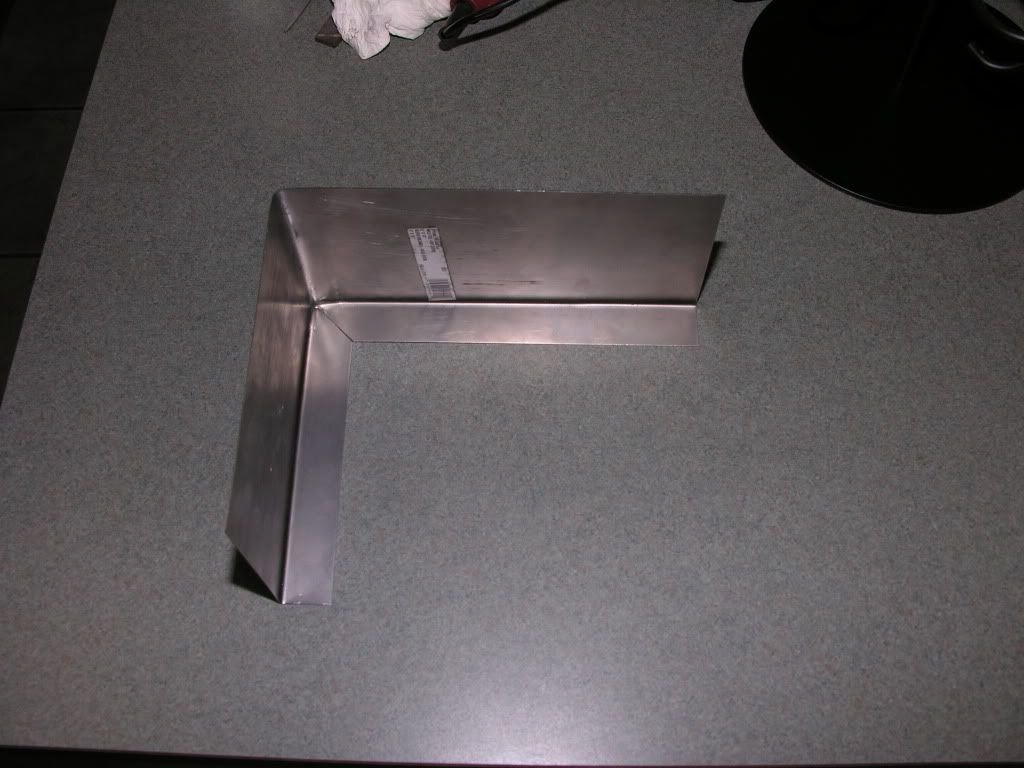
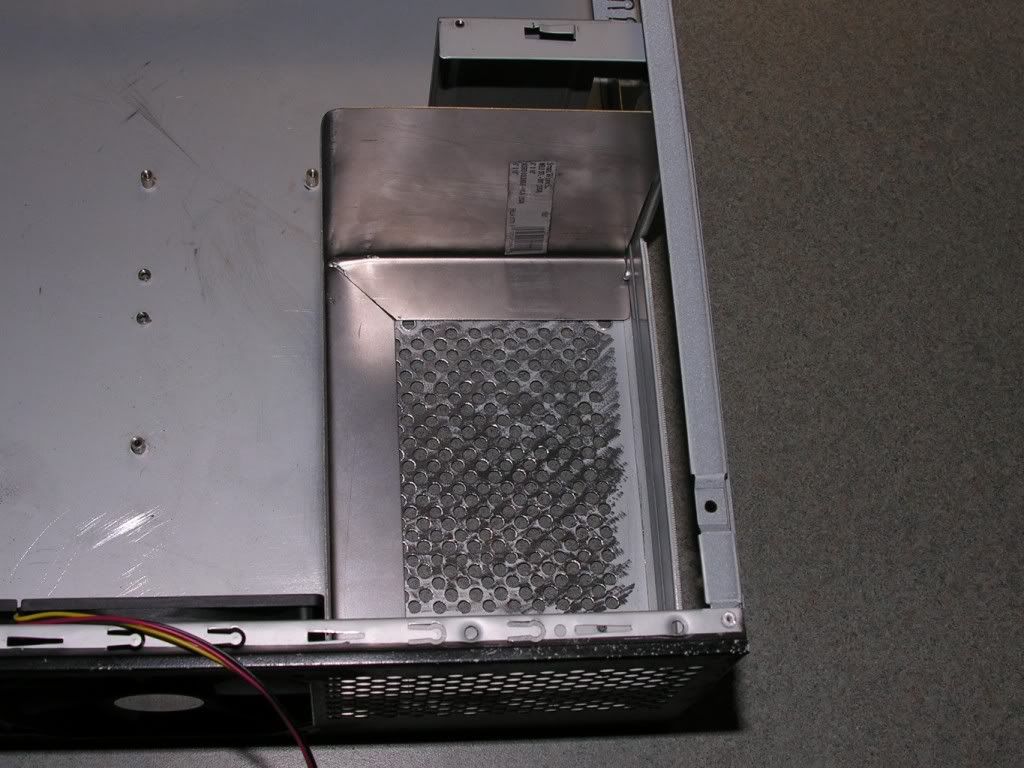
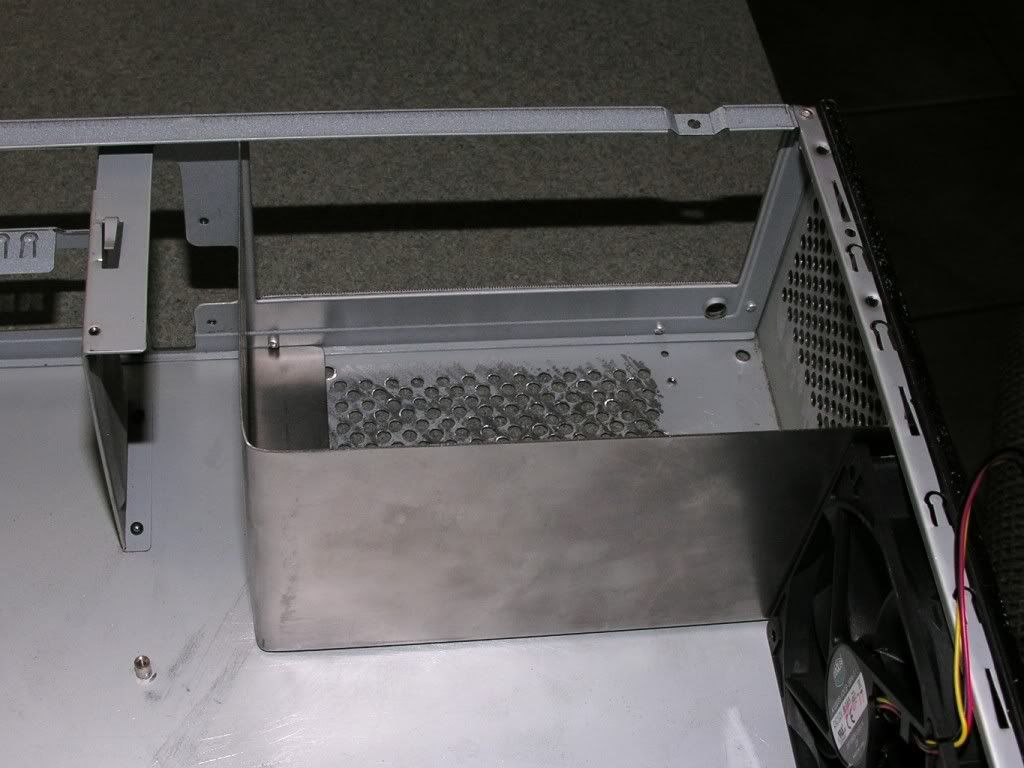
Yeah, aluminum was super expensive. Lowes must be smoking some funny stuff. After seeing the steel, it was a no brainer.. hehe. Using "C" clamps x 2 and some steel right angle iron..

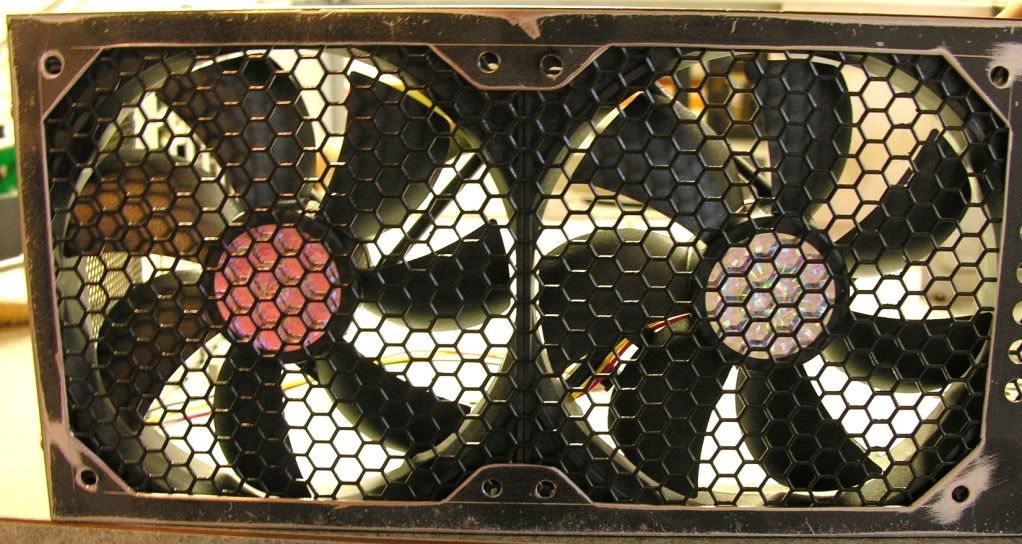
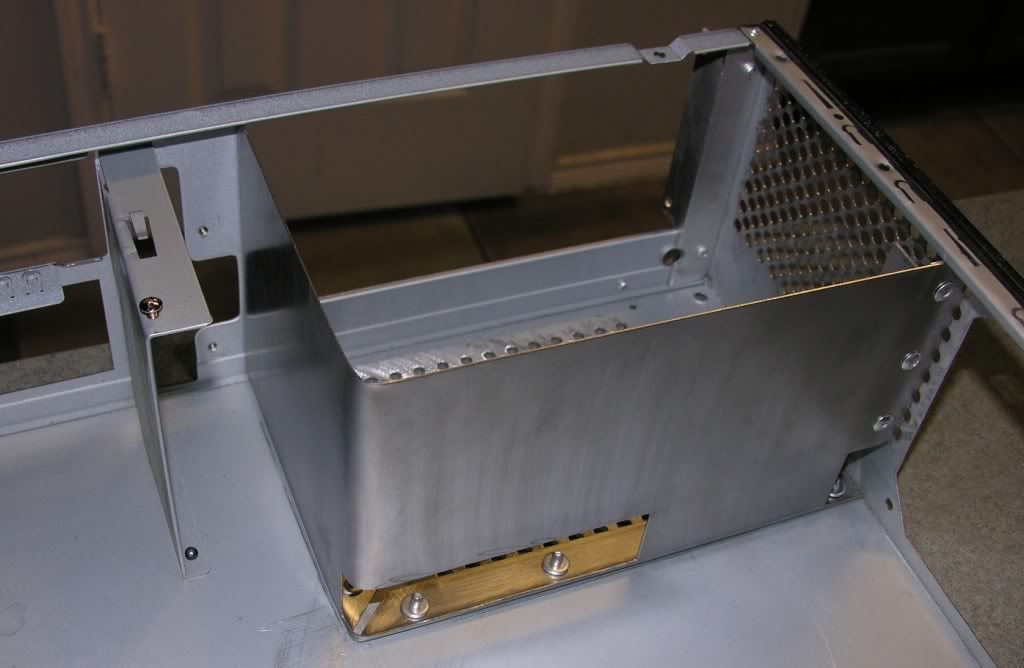
Nice bend! After reading through this thread i picked up this case (45 bucks). Hoping that I van move my htpc out of my temp case.

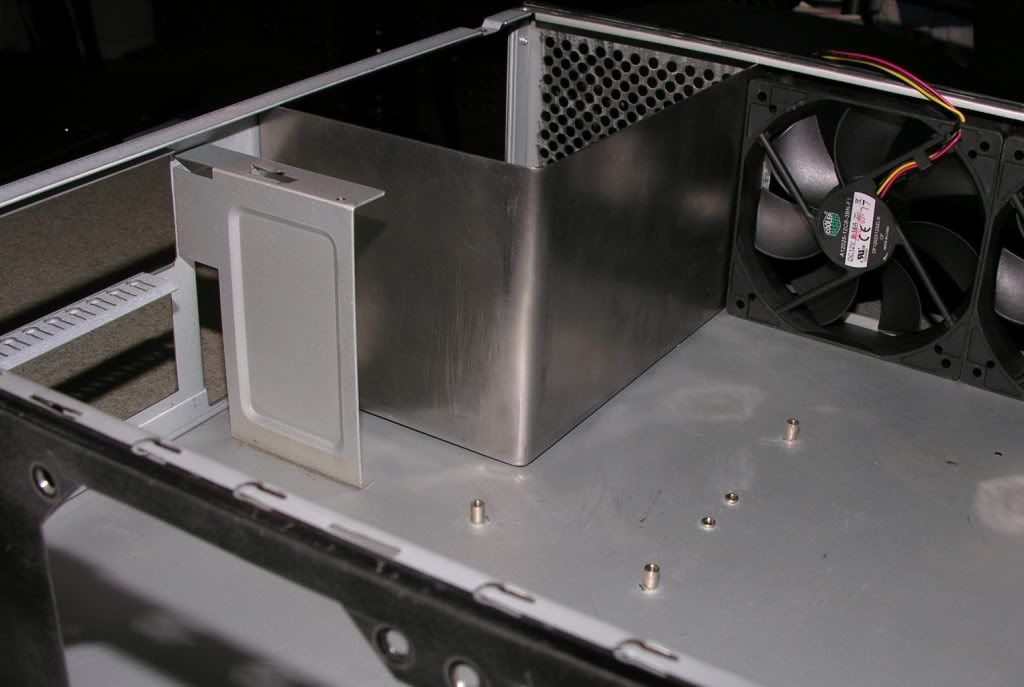
That's awesome.. I think the front bezel is worth $45 alone.. lol. Things are really starting to come together now on my build. I've got another angle bent.. gettin' closer.. LOL! (pictures soon to follow of course)..
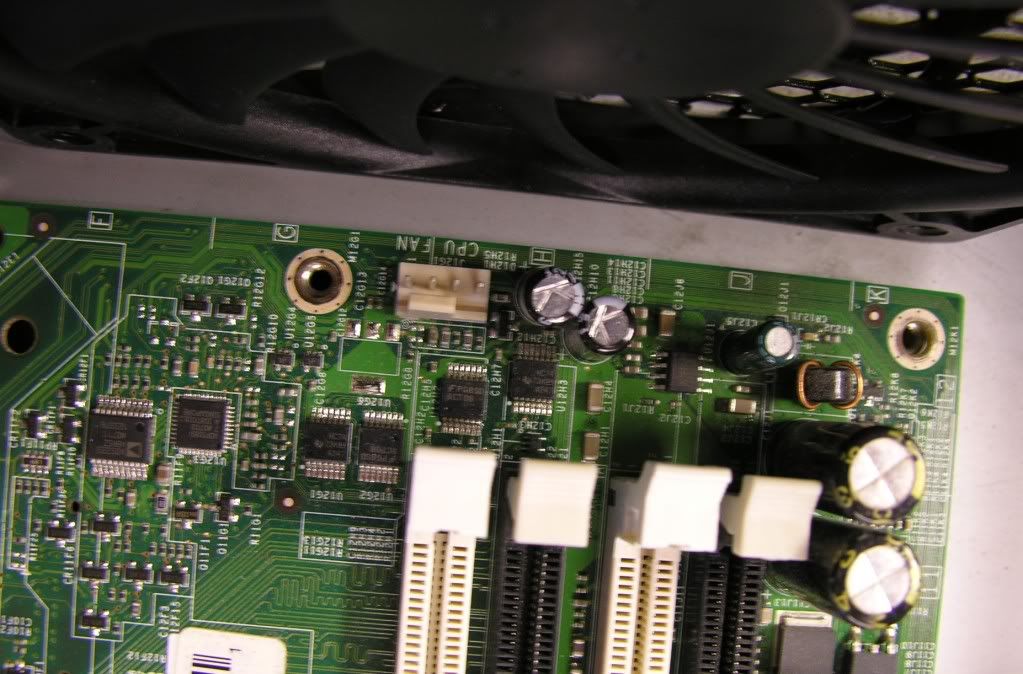
 
Here was my second bend before I started in with the dremel..


DSCN0632.jpg


..And here is roughly the look of where the PSU will sit. It is pretty much closed off to the rest of the system. I will drill several holes on the bottom lip and permenantly secure it to the case with some rivets. I'm also going to rivet a piece of right angle for some mounting brackets for the backside mounting points on the power supply.


DSCN0633.jpg


DSCN0634.jpg


DSCN0635.jpg


DSCN0636.jpg
 
Awesome! Glad to see this coming along so quickly, Officer! Cool, you went with closing the PSU off. That'll be a very unique and effective feature to the case!

Caught glimpse of another mod build you did. The one where you took a beige case and added some really sweet looking dual turbine front panel. You're a real pro.
 
I have an idea for the blank plate area above the I/O panel on the rear. I think it would be a great place to run the knobs of a 4 channel fan controller. As long as it is short enough not to interfere with the CPU cooler it would be a really cool placement.
 
Awesome! Glad to see this coming along so quickly, Officer! Cool, you went with closing the PSU off. That'll be a very unique and effective feature to the case!

Caught glimpse of another mod build you did. The one where you took a beige case and added some really sweet looking dual turbine front panel. You're a real pro.

Yeah.. I remember that build well. It was the first time I had really worked with a plastic epoxy. Tons and tons of sanding.. LOL. Not sure about being a "pro" but I have enjoyed "modding" for almost 10 years now. Back then, it wasn't a very acceptable solution if you had to "hack up your case". : )

As for the PSU area, I've still got several things that I have to do so hard mount that power supply up. I'm also going to dremel the little plastic piece that the power supply sits on. I plan on "thinning" a lot of the plastic off of that thing, in hopes of reducing some of its' mass and potentially some of the turbulance associated with the redesign of the intake / exhaust area(s).

I have an idea for the blank plate area above the I/O panel on the rear. I think it would be a great place to run the knobs of a 4 channel fan controller. As long as it is short enough not to interfere with the CPU cooler it would be a really cool placement.

LMAO! cmadki4... I've already thought of that but thought, who in the world would like to see a 3 1/2" or 5 1/4" bay fan controller mounted in that space? ..Well, I can say without a doubt cmadki4, I like the way you think! I was looking at this model: http://www.newegg.com/Product/Produ...5&cm_re=FAN_CONTROLLER-_-11-998-065-_-Product

I've been measuring and re-measuring. My next cuts will be "notching" the PSU shroud to allow the motherboard to comfortably sit inside the case and allowing those pesky 90 degree angle SATA ports found on many motherboards to permit the SATA connections without being an extremely tight fit (or no fit at all, in many cases). I've already "thinned out" that plastic piece that the power supply sits on.. Not bad, if I do say so myself. (as always, pictures soon to follow)..
 
Great minds think alike :) It would be unusual, but since when are case modders interested in being normal?! Haha. Form and function. I'd say it's a good use of the space. And the controller you have as a possible candidate seems like a good one.

I did something similar on my Antec 300 (now collecting dust). Granted it's on the front rather than the rear, I have the controller knobs mounted in a similar way. A really cool look:
100_6588.jpg
 
Last edited:
Barely any heatsinks on that controller. I imagine it's going to get real hot if you turn those fans down, dumping the excess heat.
 
Barely any heatsinks on that controller. I imagine it's going to get real hot if you turn those fans down, dumping the excess heat.

Additional heat, yes, but an insignificant amount. The air flow in his case is going to be substantial. The amount of heat a fan controller puts off is minimal. Mine was warm to the touch at it's warmest with all 4 channels set to 50-60%. And I had 2 of the 4 channels supplying 2 120mm fans per channel. No problems.
 
Wasn't talking about issues with in-case heat, but more just poor quality design of that particular controller.
 
Wasn't talking about issues with in-case heat, but more just poor quality design of that particular controller.

Sorry, you said "dumping heat" so I assumed you were referring to dumping heat into the case. But with 85 solid reviews on the egg and one here with first hand experience of it being fine. I think if he went with that one he'd be just fine. Low DC currents flowing through it. Doesn't need to be all that robust.
 
Yeah.. I remember that build well. It was the first time I had really worked with a plastic epoxy. Tons and tons of sanding.. LOL. Not sure about being a "pro" but I have enjoyed "modding" for almost 10 years now. Back then, it wasn't a very acceptable solution if you had to "hack up your case". : )

As for the PSU area, I've still got several things that I have to do so hard mount that power supply up. I'm also going to dremel the little plastic piece that the power supply sits on. I plan on "thinning" a lot of the plastic off of that thing, in hopes of reducing some of its' mass and potentially some of the turbulance associated with the redesign of the intake / exhaust area(s).


LMAO! cmadki4... I've already thought of that but thought, who in the world would like to see a 3 1/2" or 5 1/4" bay fan controller mounted in that space? ..Well, I can say without a doubt cmadki4, I like the way you think! I was looking at this model: http://www.newegg.com/Product/Produ...5&cm_re=FAN_CONTROLLER-_-11-998-065-_-Product

I've been measuring and re-measuring. My next cuts will be "notching" the PSU shroud to allow the motherboard to comfortably sit inside the case and allowing those pesky 90 degree angle SATA ports found on many motherboards to permit the SATA connections without being an extremely tight fit (or no fit at all, in many cases). I've already "thinned out" that plastic piece that the power supply sits on.. Not bad, if I do say so myself. (as always, pictures soon to follow)..

Where have you decided to mount the HD cage, In the back near the screened in 80 mm port?
 
Where have you decided to mount the HD cage, In the back near the screened in 80 mm port?

Funny thing. I am NOT going to include the hard drive cage back in the case. If you look at the CDROM bezel, you'll notice on the bottom side, there are (4) tabs sticking out of it. Well, to me, it looks like a hard drive would mount up to that thing. I went to my box of old tech and found an old Maxtor HDD. It bolted right up... perfect fit! Since I only plan on having one HDD in this case, I am just going to use THAT mount for my hard drive needs. I 'might' re-do the mount because in its current configuration, the HDD is positioned upside down. I know it will be fine but I'm not a huge fan of mounting HDD's sideways or upside. Just a preference thing : )
 
Small update.. Fabricated one side of the psu mounts. This mount alone would hold the power supply in place but I'm going to see if I can fab me up some for the other side as well. All I did was use right angle aluminum.. measured it.. cut it.. drilled out the factory rivets.. drilled holes thru the aluminum.. popped in new rivets. Filed down the small piece of aluminum that was covering the little hole for the front bezel mount with a round file. Viola.


DSCN0654.jpg


DSCN0653.jpg
 
Just another update.. been busy doing a little of this.. a little of that. Not really amounting to much as far as progress updates. However, I did get my honeycomb mesh in.. cut out my pattern and temporarily placed it between the case and fans. It's going to look very nice IMO, when it's all done.


DSCN0656.jpg
 
For those who wanted to know the clearance between the motherboard and the Scythe 120mm x 12mm fans. I measured about 5/8" distance between the fan and motherboard.


DSCN0658.jpg
 
You definitely weren't kidding about the clearance. I guess it is impossible to squeeze a 1" fan into a 5/8" space. How's your temps an db's with those fans? From what I read on the Scythe and Yate Loons, they're just too loud compared to the Noctua's. Unfortunately they don't make a 120x12mm.
 
You definitely weren't kidding about the clearance. I guess it is impossible to squeeze a 1" fan into a 5/8" space. How's your temps an db's with those fans? From what I read on the Scythe and Yate Loons, they're just too loud compared to the Noctua's. Unfortunately they don't make a 120x12mm.

Well, I don't have any on hand, but someone might be able to squeeze a 120mm x 20mm fan into that space. As for my temps and dB's, I can't quite comment on that yet. Nothing is hooked up yet and the motherboard is that pic is just a "TEST" board. It's an old 775 socket board. Are the Yate Loons just as loud?
 
Well, I don't have any on hand, but someone might be able to squeeze a 120mm x 20mm fan into that space. As for my temps and dB's, I can't quite comment on that yet. Nothing is hooked up yet and the motherboard is that pic is just a "TEST" board. It's an old 775 socket board. Are the Yate Loons just as loud?

Don't get Yates... Thats my experience. While they were not loud but they were annoying (different kind of noise) , and they both wore out rather quickly compared to other good fans I have used. Try it with what you have, you can 7 volt them easy enough or 5v them even if they will run at that speed. They will probably be fine. You probably don't even need fans on that side... Thats why I love my P180 mini, all the drives stay cool with a single large fan on top pulling in and pushing out all the air. I'd try it both ways.
 
Don't get Yates... Thats my experience. While they were not loud but they were annoying (different kind of noise) , and they both wore out rather quickly compared to other good fans I have used. Try it with what you have, you can 7 volt them easy enough or 5v them even if they will run at that speed. They will probably be fine. You probably don't even need fans on that side... Thats why I love my P180 mini, all the drives stay cool with a single large fan on top pulling in and pushing out all the air. I'd try it both ways.

The fans I mentioned were not rated under 20 db. I can only comment on the specs. Justintoxicated does have a good point. If the drive cage is removed and standard 120's used on the opposite side, I would say it would be more than enough cooling. Fresh air is still being pulled over the CPU.
 
The fans I mentioned were not rated under 20 db. I can only comment on the specs. Justintoxicated does have a good point. If the drive cage is removed and standard 120's used on the opposite side, I would say it would be more than enough cooling. Fresh air is still being pulled over the CPU.

Adequate cooling.. yes, I too agree. But, if I have a long video card in that case, like my GTX 260, the air flow will be greatly disrupted by that card. It will basically cut the air supply through the case, in half. The video card is going to be sitting really close to my PSU shroud. At any rate, the "intake" fans will provide a very nice supply of fresh air to any video card that I put in there. As for the exhaust fans, I'm not worried about the Scythe fans. I intend to get a fan controller which will bring down the dB level of those fans and still keep the heat from building up around the CPU. ;)

Speaking of the PSU shroud, OMG. OMG. OMG. Talk about being a tight fit. I will snap a few pictures of it. ..tons of drilling, notching, filing, dremeling, measuring, riveting, etc.. But I am just about done with it.. It looks kinda pimp! ..haha! (as always, pictures soon to follow).
 
Just bought the case. Wanted to shave ~$50 off my build and figured this would be a good way to do it. I'm hoping for the best.
 
Just bought the case. Wanted to shave ~$50 off my build and figured this would be a good way to do it. I'm hoping for the best.

I don't think you'll regret it, TimG. It's a solid case with plenty of potential. Just expect a effort to get a nice fit and finish. And don't plan on the manual helping you, because it's mostly in Korean. :D

Officer, am I correct that the PSU actually sits partially out the front of the case? Or is this a mod you are adding to get some extra clearance? I haven't dismantled mine yet, so I'm not entirely sure how it's all put together. And that PSU is really tucked in there.
 
Just bought the case. Wanted to shave ~$50 off my build and figured this would be a good way to do it. I'm hoping for the best.

Very cool TimG. I was EXACTLY in your shoes not even two weeks ago. I bought the case knowing that I was going to mod it and wanted to shave as much money off of my initial investment as possible. -High Five Bro!

Officer, am I correct that the PSU actually sits partially out the front of the case? Or is this a mod you are adding to get some extra clearance? I haven't dismantled mine yet, so I'm not entirely sure how it's all put together. And that PSU is really tucked in there.

cmadki4, you are completely correct. The actual power supply sits at the front of the case. A portion of the power supply sits in a notched out area just behind the front "factory" aluminum face plate / bezel.

Here are the final pics of the my PSU shroud. It's been notched in the middle to accommodate an ATX motherboard. My "test" socket 775 motherboard rests just about 1/4" inside the shroud. I also noticed that when I do decide to install my 1156 Gigabyte motherboard in it, the position of those darn SATA ports actually face at a right angle (out) and NOT facing straight upwards. So, the notch should allow me to plug / unplug any SATA ports / SATA cables with relative ease. I've also notched a space for the power cord that plugs into the power supply. Directly above the notch, I have one side of the power supply mounts riveted in place. Pretty solid construction if I do say so myself :D

I'm going to see if I can take all of this stuff down to the powder coater today. He said he is running a little behind so it may take a week and a half before I get my parts back. I'll keep my fingers crossed that it is sooner than later..


DSCN0659.jpg


DSCN0660.jpg


DSCN0661.jpg


DSCN0662.jpg
 
Some real nice work there bud. I am pretty pumped. My case should be in today. I can't wait to start messing with it.

Seeme that you have a full atx mobo in there, a big/hot 260, and a i7. I wonder if I will have less cooling/fitting requirements with my Regor/ati 5450 passive and a mATX mobo.
 
Yeah im hoping for an easier time with my mATX i3 build. If I have to borrow my dads dremel so be it.
Posted via Mobile Device
 
Thanks! ..I know with all of the bare metal, scratches / sanding patches, it's not much to look at now.. But rest assured, it will look like a totally "factory" type finish after I get it back from P.C.'ing. I got the PSU shroud riveted in place and now I am off to the powder coater. I'm getting excited now! When it comes back, I will be sure to post the updated pictures. As soon as they re-release the full ATX 1155 sandy bridge boards, I'm taking my 1156 board out and hooking everything up!


DSCN0667.jpg


DSCN0668.jpg


DSCN0669.jpg
 
Yeah im hoping for an easier time with my mATX i3 build. If I have to borrow my dads dremel so be it.
Posted via Mobile Device

Yeah, really in stock form, this case isn't bad at all. It DOES make a really good lower power HTPC case. But for me, I KNOW my case is going to be pretty wild as far as HTPC's go..
 
Thanks! ..I know with all of the bare metal, scratches / sanding patches, it's not much to look at now.. But rest assured, it will look like a totally "factory" type finish after I get it back from P.C.'ing. I got the PSU shroud riveted in place and now I am off to the powder coater. I'm getting excited now! When it comes back, I will be sure to post the updated pictures. As soon as they re-release the full ATX 1155 sandy bridge boards, I'm taking my 1156 board out and hooking everything up!

We're all excited to see it come back from powder as well! Is the color a surprise? ;) That looks a lot more stable of a mount for the PSU than stock. Stock is pretty floppy. Can't wait to see it when it's all said and done!
 
Wait, so I just realized that since the PSU is in the front, where does the power cable plug into? Looking at the picture on the first page I couldn't tell.
 
Wait, so I just realized that since the PSU is in the front, where does the power cable plug into? Looking at the picture on the first page I couldn't tell.

Look at some of the other pictures. You might be able to see it. The power plug is routed out of the PSU on the side from a 90* plug and to the back to an outlet.

Edit: See the power cable on the left hand side of this picture?
IMG_0546.jpg
 
Gotcha, thanks. I was hoping it didn't awkwardly stick out the side or something.
 
Found something remarkably similar, inside that is. You can do a search for the model and it will lead you to one of the big retailers N****g. Black Aluminum / Thick Steel HTPC-HT1100 ATX Media Center / HTPC Case. I wasn't sure I could post the MFG. name here so I left it out. Shouldn't be hard to search.
 
Found something remarkably similar, inside that is. You can do a search for the model and it will lead you to one of the big retailers N****g. Black Aluminum / Thick Steel HTPC-HT1100 ATX Media Center / HTPC Case. I wasn't sure I could post the MFG. name here so I left it out. Shouldn't be hard to search.

Site away, brother. It's cool. Is what you're referring to?:
http://www.newegg.com/Product/Product.aspx?Item=N82E16811162050

It does look kind of like the KT400/KT600. But it's probably been deactivated for awhile from Newegg, because I haven't seen it on there in the past couple of months.
 
Just got back from the powder coater and I've got some good news. Harley Davidson motorcycles dropped off a ton of stuff at the powder coater and wanted it all done in flat black. So, he said if I wanted my stuff coated with the Harley stuff, he could get it back to me in just a few days.. WOOHOO! ..So, the case will be FLAT BLACK! On the way back in, I dropped by my local Home Depot and went screw shopping.. Seriously, not "screw this shopping" but actually shopping for screws.. haha. I found some Black Alloy allen wrench head screws (also known as Socket Cap Screws). M5 - .8 x 16mm and M5 - .8 x 30mm. The 16mm ones will be for the Sycthe fans and the longer 30mm ones will be for the standard 120mm fans! It should look really nice with those screws holding the fans in place.
 
officermartinez,

Since you started this thread, my question goes to you. I have decided to purchase the KT-600 due to front USB port location and my entertainment center. I will probably do a mod as well. Since both the 400 and 600 are internally identical, can I place my info here or should I start a new heading?

Oh absolutely.. I encourage it. There are NO other threads on these cases and I think it would be nice for someone who is building a system using the HT-400 or 600 to have a thread completely dedicated to these cases. Congrats on your decision to purchase this case. I look forward to seeing your mod!

As for the color, I think you are right.. it should look pretty good : ) ..my case has been pimped!
 
Back
Top