Das Bling - Adventures in Sleeving

the.ronin

Limp Gawd
Joined
Mar 25, 2008
Messages
508
Finally got my Murdermod sleeving ... big ups to Nils for putting up with all my emails. So I'm a total noob at this sleeving stuff but all the photos you guys are posting with the slick Murdermod sleeving got me pumped to try it out. So this will be my own little noobian sleeve thread documenting my progress and whether I burn my fingers off with this heat gun I've never actually used.

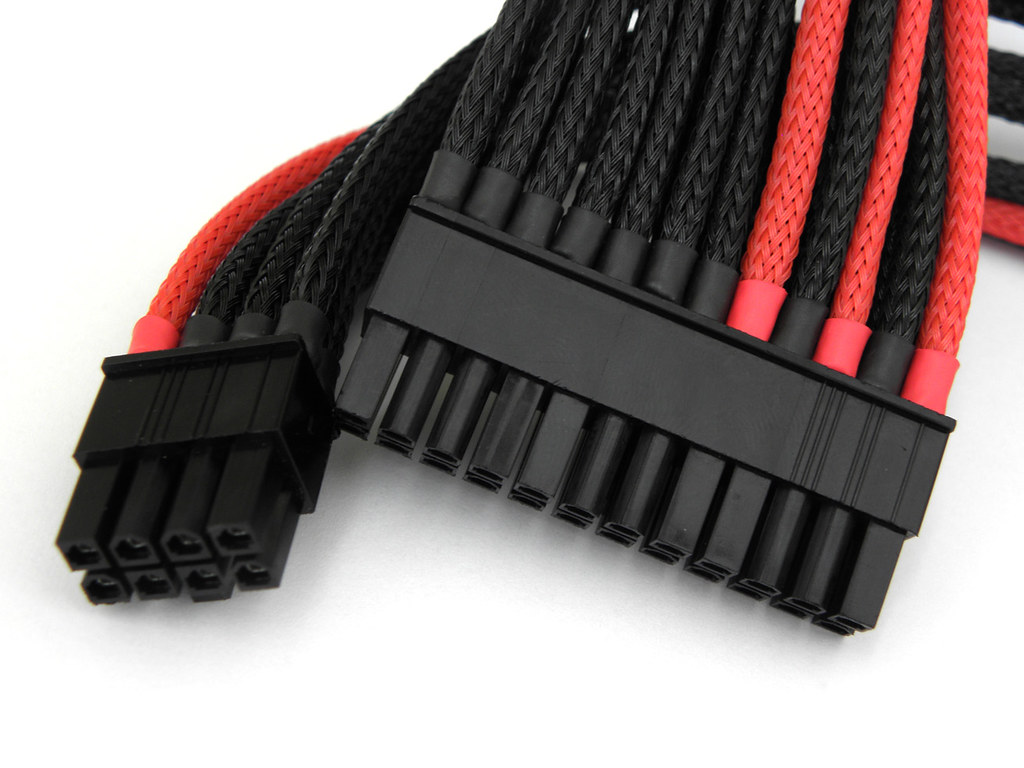
Behold, das bling ...

sleeving1.jpg


And you gotta respect the guy who knows what a "ronin" is ...

sleeving2.jpg


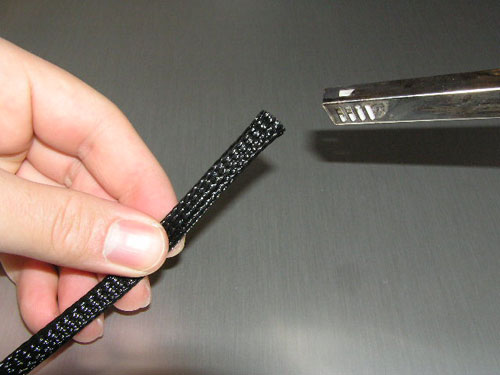
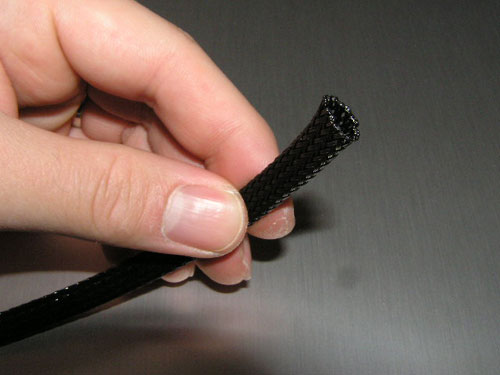
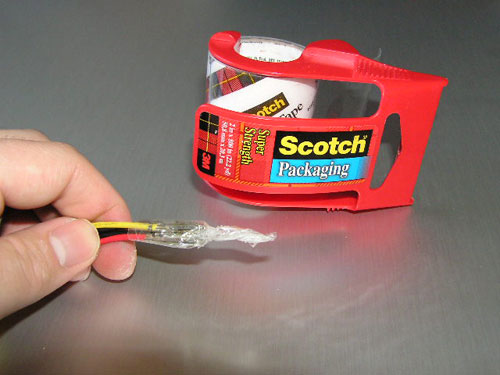
The main tools ... yes, I know, that's one phallic lookin heat gun but it was cheap and I think it will work ...

sleeving3.jpg


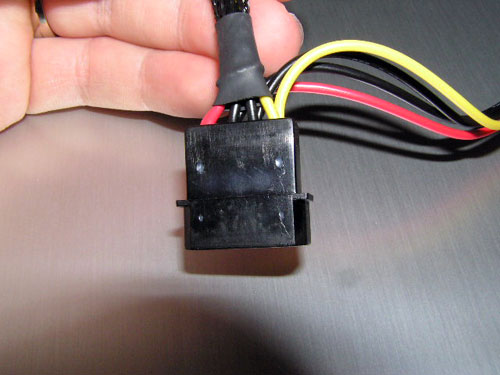
And here is the setup I'll be sleeving (details in my sig below) ...

sleeving5.jpg


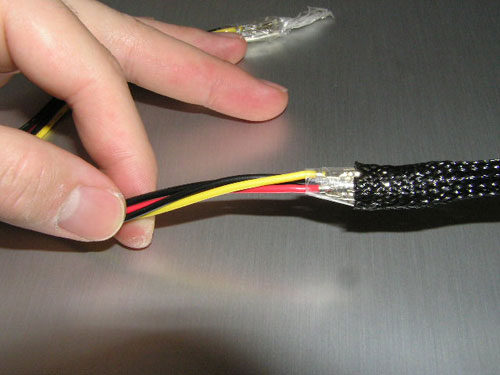
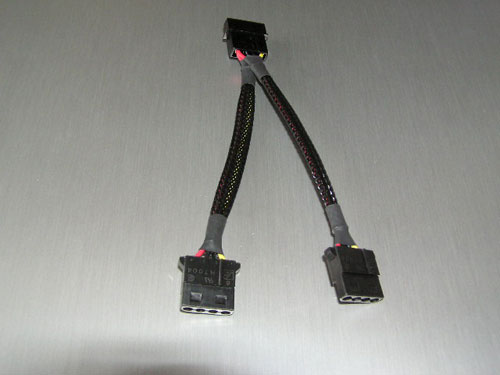
Yes ... you'll notice on some of the wires (not the ATX power cable) I'd taken a stab at some sleeving using some off the shelf crapness. It's quite ugly, I know.

sleeving6.jpg


Yup, it's a Scout ...

sleeving8.jpg


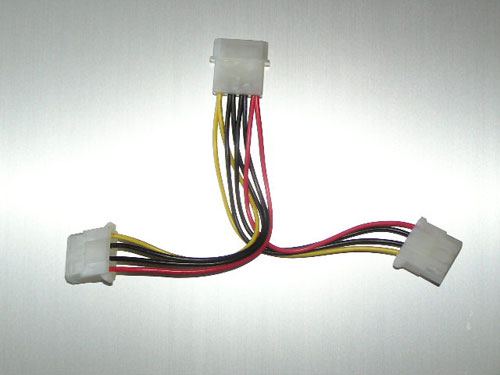
So I thought I'd start off easy with some SATA cables.

sleeving4.jpg


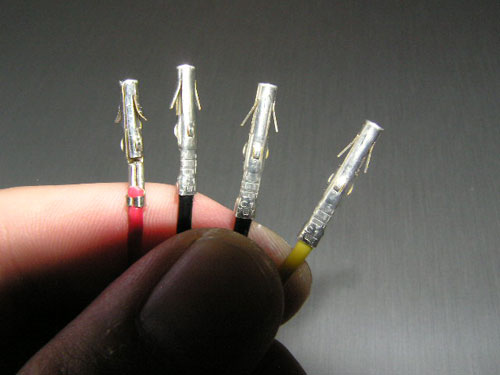
I had done all my SATA cables already with the cheapy sleeving so I'm somewhat familiar with how to do it. I'm hoping this will give me some familiarity with how the Murdermod stuff works without getting bogged down with removing and keeping track of pins. I'm thinking of reversing the HDs so that the SATA cables can be shown off in all their sleeving glory.
 
Good luck on your sleeving mod! I know when I first started sleeving my rigs I was a little hesitant that I'd fry something important. But I didn't and my love for clean, professional looking sleeving jobs was born.

Couple of pointers:

1. You don't really need a heat-gun. A regular, run-of-the-mill hairdryer works just as well.
2. I would encourage you to singe the ends of your braided sleeving with an Aim-A-Flame to prevent runs in the mesh.
3. If you want a neater sleeving job, remove the connectors from your cables first. Then tape the ends of the cables together, slide your mesh over, add your heatshrink, and reconnect the connector. The tape method will prevent runs in your mesh sleeving.
4. You can widen the diameter of heatshrink by inserting the tip of a pair of scissors into the opening and gently spreading the handles apart. This makes it easier securing your sleeving without having to go to the next higher diameter heatshrink.

I usually get my sleeving materials from FrozenCPU. The guys there are pretty nice, and ship fast. They are slightly more expensive than other places but their selection and service is top notch.

One question for you though: I didn't see any heatshrink in your photos. Will you be using any to secure your sleeving or will you be relying on Zipties?

In any case, here is a very brief How-To I wrote of sleeving a molex connector that is posted elsewhere on the 'net:

...you can see in the photo that the tag ends of the sleeving are coming apart. To prevent this, simply use an Aim-A-Flame to melt the tag ends of the sleeving.

Sleeving_Tag_End_Melt.png


Sleeving_Tag_End_Melt_Done.png


Doing so offers two advantages. The first, and most obvious, is that it prevents the tag ends of the sleeving from unraveling. If left unchecked, it is impossible to properly sleeve anything. When measuring out sleeving, I always add an extra 3/8” to account for the loss when melting tag ends. The second advantage is that the melted tag ends form a sort of locking device for the heatshrink to lock onto (more on this in a minute).

One of the biggest pains when using braided sleeving is getting the sleeving over wiring without catching the sleeving on the sharp corners of the connectors and/or contact pins. Like panty house, sleeving is prone to runs, and if not treated, will ruin a sleeving job. This is especially true when sleeving 4-pin molex connectors which utilize two locking tabs which keep the contact pin inside its receptacle (see below).

Sleeving_Bundle_Pins.png


To prevent runs in sleeving, simply use a piece of packing tape and wrap the ends of the wiring in it. I prefer to use Scotch tape since it does not leave residue on the wiring, and it releases easily. It is also quite smooth and sleeving slides readily over it.

Sleeving_Bundle_Tape.png


Sleeving_Sliding_Over.png


The other comment I wanted to make is that in the event that an enthusiast does not own a heat gun or cannot afford one, a hairdryer works just as well when using heatshrink. I discourage the use of zip-ties to secure heatshrink as zip-ties tend to crush wiring if you aren’t careful, and black electrical tape is notorious for leaving nasty, sticky residue when removed. Not only that, but in my opinion, zip-ties and electrical tape just plain look tacky and unprofessional when doing a sleeving job.

As I mentioned earlier, an advantage to melting the tag ends of sleeving is that the heatshrink has something to lock onto when heat is applied. When you melt the tag ends on sleeving, a hard plastic rim is formed. When the heatshrink is heated and constricts over the wire bundle and the sleeving, the heatshrink constricts tightly over the plastic rim which prevents the sleeving or the heatshrink from ever coming apart (see below). Thus, the need for electrical tape or zip-ties is not needed.

Sleeving_Heatshrink_Rim.png


I’ve since written a guide on sleeving wire bundles awhile back (I’ve since had it removed from the site it was hosted on). Here are my before and after photos of modding a molex wiring adapter with aftermarket molex connectors:

Sleeving_Bundle_Bare.png


Take note that the white molex connectors have been replaced with black ones:

Sleeving_Bundle_Done.png
 
garetjax, thanks for the excellent advice! Some of it I had come across in my first sleeving attempts using the crappy off the shelf sleeving but others I never thought of ...

1. You don't really need a heat-gun. A regular, run-of-the-mill hairdryer works just as well.

Indeed. I was thinking this heat gun was going to shoot off billows of super hot air. Not so much. However, it does the job very well (better than my bic lighter at least) and is easy to handle.

2. I would encourage you to singe the ends of your braided sleeving with an Aim-A-Flame to prevent runs in the mesh.

Yes! This was one of the first things I learned from my first sleeving. Even with this higher quality sleeving, I forgot to singe the edges on one of the SATA sleevings and it frayed like mad.

3. If you want a neater sleeving job, remove the connectors from your cables first. Then tape the ends of the cables together, slide your mesh over, add your heatshrink, and reconnect the connector. The tape method will prevent runs in your mesh sleeving.

Good call ... I had done this with the cable wiring and USB cables and it works like a charm. However, I do plan to sleeve the individual ATX power, SATA power, and PCIE wires and maybe the CPU power cable as well.

4. You can widen the diameter of heatshrink by inserting the tip of a pair of scissors into the opening and gently spreading the handles apart. This makes it easier securing your sleeving without having to go to the next higher diameter heatshrink.

Never thought about scissors – I use needle nose plyers and that works as well.

One question for you though: I didn't see any heatshrink in your photos. Will you be using any to secure your sleeving or will you be relying on Zipties?

Zip ties???? Cmon man gimme some credit lols :D The package does include a boatload of heatshrink I just didn’t include it in the photos. Definitely will be using some heatshrink.

Hey here’s an idea ... I’m noticing some bunching up of sleeving towards the end where it meets the heatshrink. I suspect this is because the sleeving becomes un-taught after heatshrinking the ends. I’m wondering if a small electrical tape wrap at the ends to be covered by heatshrink will keep the sleeving nice and taught? I might try that on a couple of the SATA cables I’ve already done.

Thanks again for your comments and great guidelines!
 
I’m noticing some bunching up of sleeving towards the end where it meets the heatshrink. I suspect this is because the sleeving becomes un-taught after heatshrinking the ends.
From experience, I can tell you that the reason your meshed sleeving is bunching up at the ends is because the sleeving is cut too long. Try cutting perhaps 3/8" less than you think you need and you shouldn't have this problem anymore.

I’m wondering if a small electrical tape wrap at the ends to be covered by heatshrink will keep the sleeving nice and taught? I might try that on a couple of the SATA cables I’ve already done.
I would definitely not recommend this. Electrical tape, as it gets hot (and it will inside your enclosure) will leave a nasty, sticky mess when you remove it from your wiring later on. It's also a serious pain to clean up. Try using the method I suggested above to tighten up your meshed sleeving before resorting to electrical tape.

Thanks again for your comments and great guidelines!
You are certainly more than welcome. Let us know how your sleeving mod goes! =)
 
Good luck! Can't wait to see how it turns out :)

As for the sleeve becoming less taught after heatshrinking: make sure that you hold the sleeve in place until the heatshrink completely cools. Otherwise the sleeve may pull the heatshrink back, which both makes the sleeve less taught, and makes the heatshrink longer, which is horrible if you're a perfectionist. ;)
 
Thanks for the heads up, garetjax ... I was thinking of undoing the heatshrinks on the SATA cables and trying some electrical tape but you’ve convinced me otherwise. I also began to think that maybe you do want a little slack on the sleeving so that the cable itself can bend.

crys1s (awesome game by the way – playing it in 5850 glory right now), can you elaborate on holding the sleeve in place? I generally keep my fingers away from the heatshrink while blasting at it with my heat gun. Or do you mean keeping it taught a few inches lower while the heatshrink cools before letting go?

I’ll post photos later of the SATA cables I had finished last night.

I’ll be turning it up a notch on the noob sleeving scale and take on a PCI-E cable. I’ve been practicing with the pin remover and have got this twisting strategy down. I plan on sleeving each wire separately doing them one at a time so as not to lose track of which goes where. Haven’t decided on what to do with the ferrite core – whether I remove it entirely or what. I’m leaning towards keeping it and just re-heatshrinking it in the end.
 
I really want to sleeve the cables in my case. I had already bought my power supply sleeved and I have all black sata cables. I would like to the leads from my case. How difficult do you think it would be?
 
im about to buy some but i was wondering:
what's the optimum length of heat shrink you use per cable?
how far before the crimp do you end the sleeve?

im trying to calculate how much sleeving i need before making the order cause i'm not buying the kit. im buying different colors so its better for me if i just order them seperately.
 
I really want to sleeve the cables in my case. I had already bought my power supply sleeved and I have all black sata cables. I would like to the leads from my case. How difficult do you think it would be?

Anyone else please chime in as I’m a total noob. But in my opinion, this stuff is purely for show. But it’s damn good show. With that said, my HX750W ATX and CPU cables are already sleeved ... but its not MDPC-X sleeving. All its other cables are “ForceFlex” which I understand to be very good both in terms of strength and airflow ... but it’s not MDPC-X sleeving. As you can see, my SATA cables are also already black ... but ... well you get the point.

As for how hard sleeving a PSU would be – I can’t say because I’m just about to try it myself. I’m thinking that so long as you go slow and do everything methodically, the worse that can go wrong is everything blows up.

what's the optimum length of heat shrink you use per cable? how far before the crimp do you end the sleeve?

I haven’t actually taken the time to measure everything out with a ruler. For the SATA cables, I had tried a decent amount of extra sleeving and found that these MDPC-X sleeving do not need as much extra sleeving. I have a couple of cm space covered by the heatshrink – which I did measure to find about 1/2 inch being sufficient for that application. You will see what I mean when I post photos of the finished SATA cables tonight.

im trying to calculate how much sleeving i need before making the order cause i'm not buying the kit. im buying different colors so its better for me if i just order them seperately.

I would just make some rough calculations on the length you need and for what application. Communicate this with Mr. Nils and I’m sure he will work with you to make sure you get the appropriate amounts of MDPC-X goodness.
 
crys1s (awesome game by the way – playing it in 5850 glory right now), can you elaborate on holding the sleeve in place? I generally keep my fingers away from the heatshrink while blasting at it with my heat gun. Or do you mean keeping it taught a few inches lower while the heatshrink cools before letting go?

"Keeping it taught a few inches lower while the heatshrink cools before letting go" sums it up nicely. :D

This is some sleeving I did, and you can see how the red sleeving third from the right shows the black wire underneath it:

4335087654_0f6eaaf1b1_b.jpg


Yuck... that's why it's worth having sore fingers holding the sleeve taught. :D
 
Holy crap my fingers hurt like hell. I don't know how I'm going to even deal with that ATX power cable ... that is going to be brutal. Anyway, I finished one the PCI-E cable ...

sleeving11.jpg


Not quite as clean as I would have hoped but damnit my fingers feel like they are about to fall off.

garet, taping up the ends was definitely a great tip. I also found that try as I might, after cutting the sleeving, they would fray a bit. Once I melted the tips with my lighter, the fray would just freeze in that position unless I patted it down with my finger tips before it completely dried.

As for the ferrite core, it was just too small to thread all the sleeved wires through it so I decided to just leave it off as others have done. Do you guys just let the individual wires droop down or do you organize it somehow maybe with some strategically placed large heatshrinks?

Next up will be the SATA power cable. That's gonna be a little more tricky cos I want to respace the SATA plugs to match the spacing of my HDs in the case.
 
wow nice @_@...

i was looking to buy some 1/8'' techflex clean cut sleeving, do u think 1/8'' heatshrink will fit if i'm going to individually sleeve each wire like u have?
 
wow nice @_@...

i was looking to buy some 1/8'' techflex clean cut sleeving, do u think 1/8'' heatshrink will fit if i'm going to individually sleeve each wire like u have?

Thanks! I’m not sure what the size heatshrink Nils provides for the individual wires, he just labels it as “3 meters of 4:1 SMALL-Heatshrink”. Perhaps one of the more experienced sleevers here can suggest the appropriate size.

I did just realize, I use TWO PCI-E cables for my single 5850 so I’ll need to sleeve another one of these things ... ack. The SATA power cable will have to wait.

Crys1s or anyone else that has sleeved a SATA power cable and repositioned the plugs, do you have any advice on how to go about doing this? Did you patch up the old slots on the wires? Does the plug just cut into the wire creating new slots?

On a positive note, I’ve regained some tactile sensation in my fingers.
 
From what i've read and personal experience, the plug does cut into the wire which creates a new "slot" i guess or however you want to call it. For the exposed wires, ive seen ppl use heatshrink or eletrical tape to patch them up. This one guy didnt need all the extra wire so he cut the rest of it up and melted the insulation over the wire and called it a day lol.

from what im reading here, after you put the sleeving on, you're supposed to pull on it to tighten it and then put the heatshrink on to finish?
 
From what i've read and personal experience, the plug does cut into the wire which creates a new "slot" i guess or however you want to call it. For the exposed wires, ive seen ppl use heatshrink or eletrical tape to patch them up.

That is what I had suspected. Thanks for the feedback.

This one guy didnt need all the extra wire so he cut the rest of it up and melted the insulation over the wire and called it a day lol.

Lols now that’s sleeving core!! :D

from what im reading here, after you put the sleeving on, you're supposed to pull on it to tighten it and then put the heatshrink on to finish?

In theory :D ... I’m sure the more experience you have at this, this is actually what happens. For me, it started out that way but then you realize these damn connectors don’t always like going back into their little hole home as easily as you would expect so I ended up tugging and pulling at the sleeved wire so much, any effort I had put into making sure they were heatshrinked taught and at the right location flew right out the window as they began to loosen from the pressure. Whatever though ... I just pushed them right back into place. I think this will make sense when you try it.

For reference, it took me 2 hours to sleeve that PCI-E cable. I would have preferred more time as I wanted to redo some of the sleeving and correct the issues I ran into like what I described above. You really really need to take your time on this. If anything to let flesh grow back on your fingertips.
 
garet, taping up the ends was definitely a great tip.
First off, excellent job! You've done a very nice job on those cables!

I also found that try as I might, after cutting the sleeving, they would fray a bit. Once I melted the tips with my lighter, the fray would just freeze in that position unless I patted it down with my finger tips before it completely dried.
Yes, you'll have to kind of "smoosh" the mesh together, using the hot plastic you melted to glue everything to one another.

One tip you may want to try is when you melt the ends together, use a flat piece of metal and push the melted end straight down with a little bit of force. This will make the end completely level and melt the mesh together so it doesn't fray.

Next up will be the SATA power cable. That's gonna be a little more tricky cos I want to respace the SATA plugs to match the spacing of my HDs in the case.
Do share photos when you're done! =)
 
Thanks garet ... I just realized though that my 5850 needs two PCI-E cables so I've got go through the joy one more time lols. :D

I'm a bit worried about the SATA power cable though. It's got like 5 connectors to the cable I'm hoping I don't screw them up trying to take them off. I'm also concerned about repositioning the connectors to match the spacing of the HDs in my case.
 
Very nice stuff, this has got me considering taking a crack at sleeving.
 
Thanks for continuing to provide feedback and tips, everyone. I finished the other PCI-E ... this time I did it in just over an hour which I attribute to getting the hang of removing these bastard little terminals out of the plug. Although you wouldn't be able to tell from the photos, I'm also more satisfied with the overall work in terms of the sleeving length, heatshrinking, and replacing the terminals ...

sleeving12.jpg


The big take-away for me this time was in removing the satanic terminals. Rather than pulling them with all the might I could muster while pushing and twisting in with the pin remover (yes, that is actually as complicated as it sounds), I found they came out much much easier by simply wiggling them around while pulling with a fraction of the force. I did this while pushing in with the pin remover. Some pins can be more of a bitch than others but hey that's just the way it is.

[edit] Oh I forgot to add that if one of those little bastard pins doesn't want to go back to its hole home and slips right back out or doesnt fit all the way in, don't force it and just turn it 90 degrees and try again. I found that some don't necessarily go back in an obvious manner. It does help to pull out the tiny flaps on the sides which catch and keep the pin secured to the plug hole. The little blade on my Swiss Army knife works real well for this. [/edit]

Ok time to let the fingers heal again. Next up will definitely be the SATA power cables or I may just throw caution to the wind and go straight for that level boss ATX power cable.
 
Uh oh ... I think I might have screwed something up. Finished sleeving the PSU - only did the ATX cable since the CPU cable was hidden anyway. Now when I flip the PSU on, the computer turns on without my hitting the case's on switch. The fans connected to headers (CPU and GPU) start on at full blast. I press the on switch and the fans scale back but the computer doesn't post. I get an "FF" code on my EVGA motherboard which is a generic "boot" indication.

When sleeving the ATX, I made sure to diagram the pinout and number each wire. After removing each wire, I sleeved it and tagged it with the number. I didn't replace the sleeved wire because I wanted to run a heatshrink to the base of the ATX. After sleeving all the wires and running the hearshrink, I replaced them one at a time into their slots.

I've tried everything else such as a different GPU, removing peripherals, heck I even replaced the motherboard haha. So I suspect it must have something to do with the PSU sleeving but I could've sworn everything was replaced exactly.

Any ideas????
 
False alarm!!! Whew ... spotted my mistake by looking at some images on the internet. Damn this shits not for the faint of heart. :D
 
Ok so here it is ... I knew that sleeving would blow up the wires, for lack of a better term, but in a small case like the Scout, it really makes it look like wire overload haha ...

sleeved1.jpg


(Yeah, I know I've got some wiring up there to clean up - with the ATX snafu, I had enough drama for tonight so I'll deal with that later.)

sleeved2.jpg


sleeved3.jpg


sleeved4.jpg


So everything seems to be working fine but wow what a fire drill that ATX sleeving was. I thought my diagrams and tags were spot on - goes to show you can't be too careful. One thing I didn't do that a lot of people suggest was to take photos of your cable before sleeving it. Very good advice.

Anyway this was fun. :D
 
Looks like a 'squiddy*' orgy fest!

Awesome job on the sleeving and way beyond my patience level. :D


*ie, 'sentinel' from The Matrix
 
Back
Top