Navigation
Install the app
How to install the app on iOS
Follow along with the video below to see how to install our site as a web app on your home screen.
Note: This feature may not be available in some browsers.
More options
You are using an out of date browser. It may not display this or other websites correctly.
You should upgrade or use an alternative browser.
You should upgrade or use an alternative browser.
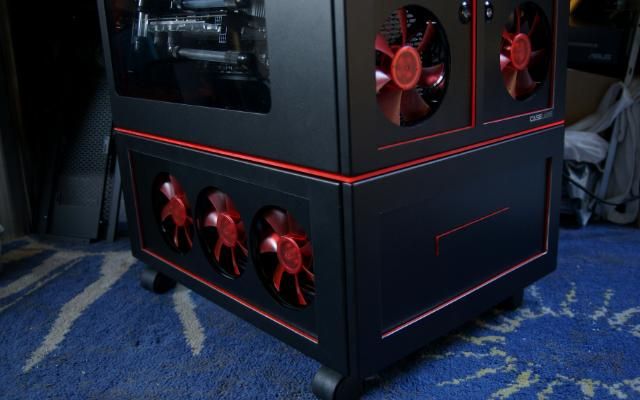
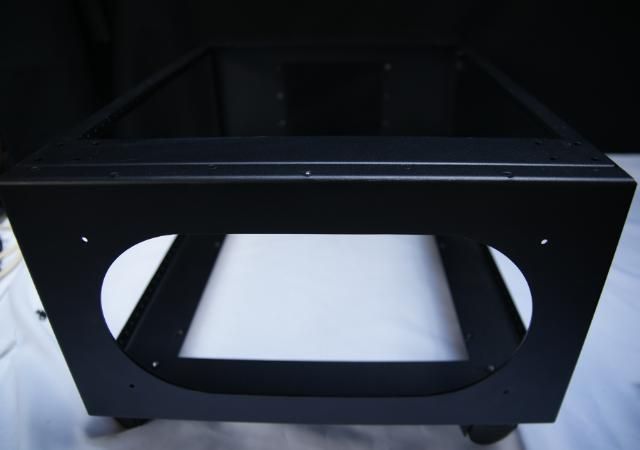
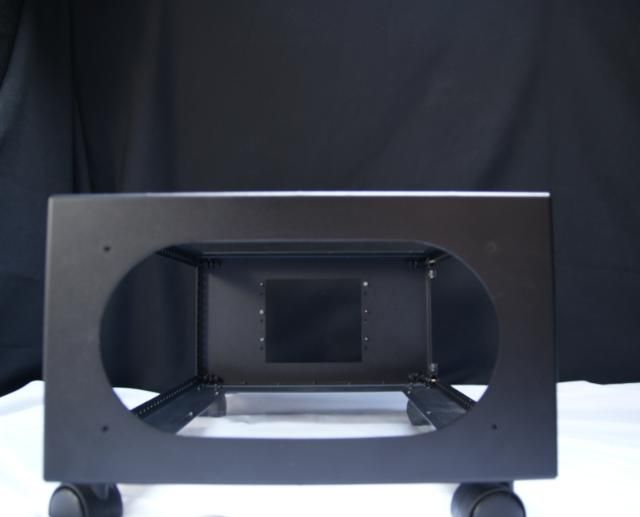
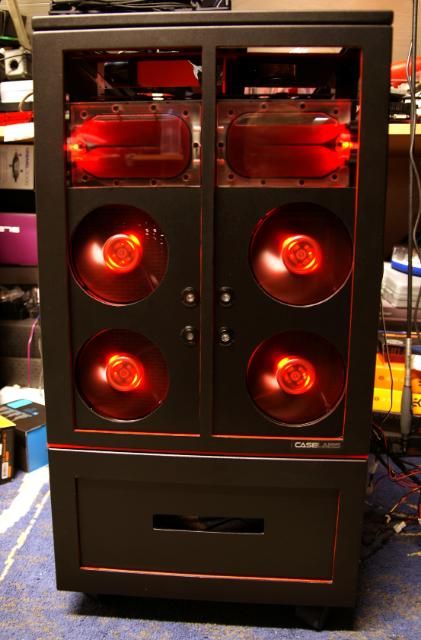
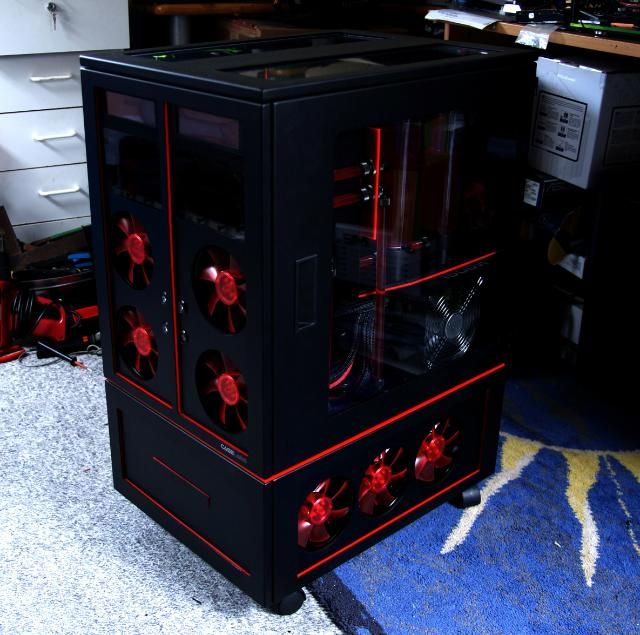
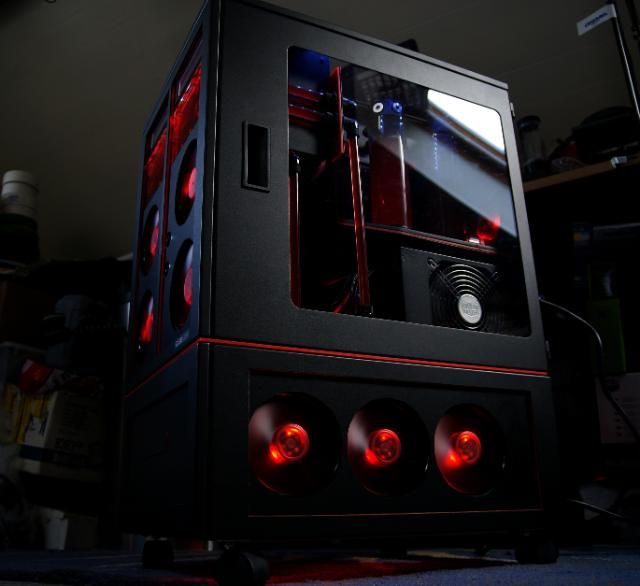
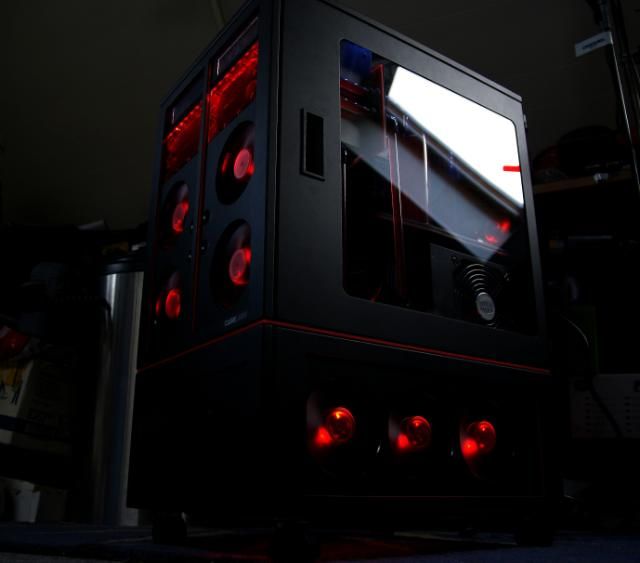
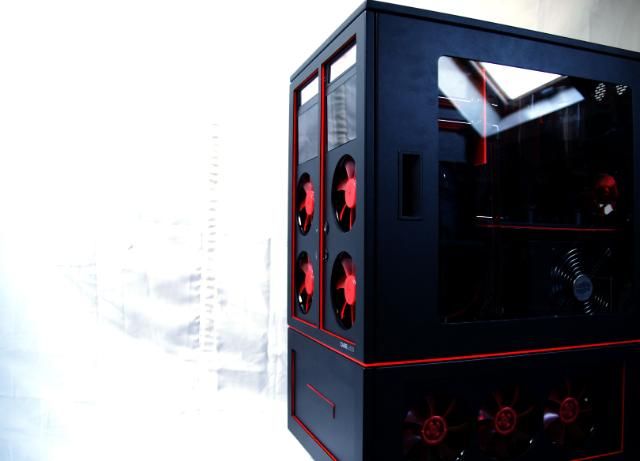
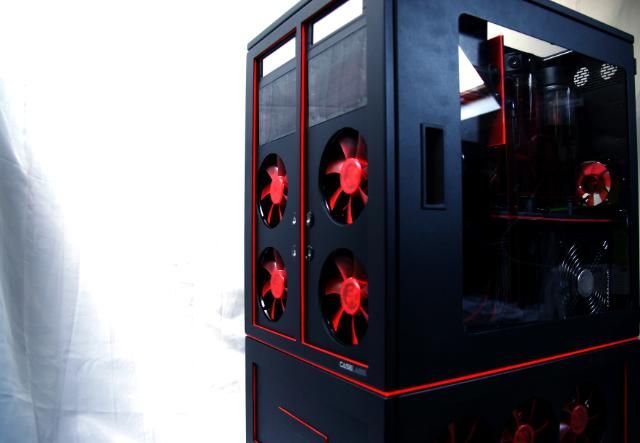
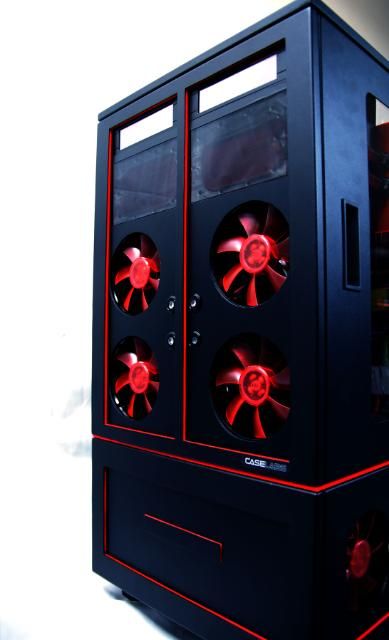
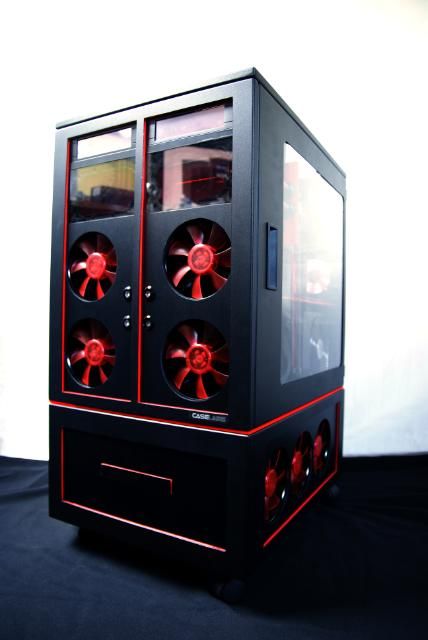
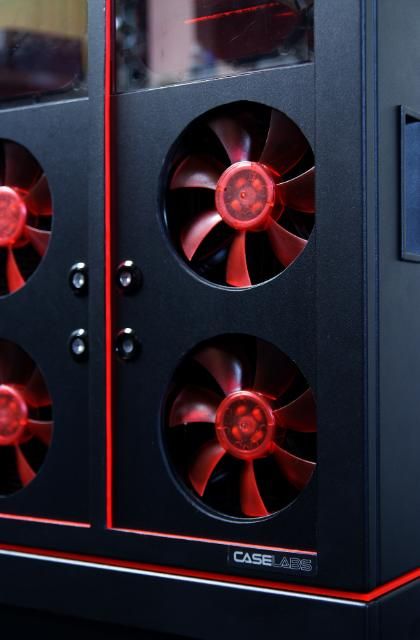
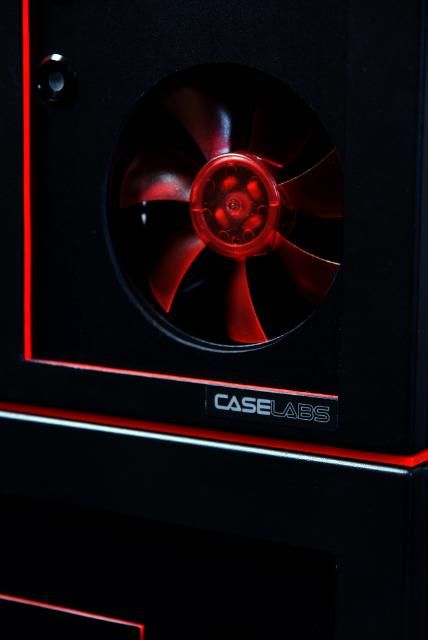
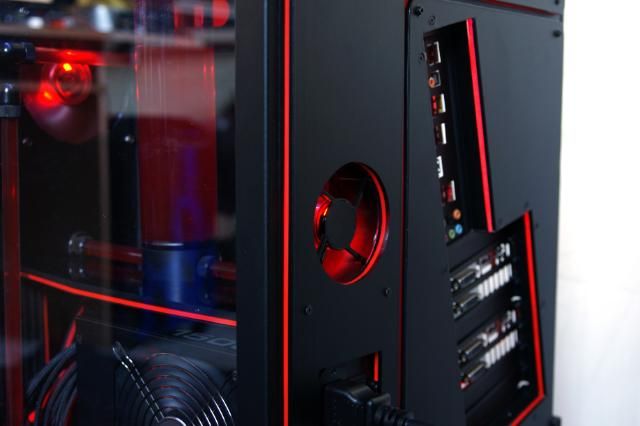
CaseLabs MAGNUM M8K
- Thread starter kier
- Start date
Chrisroman
Gawd
- Joined
- May 29, 2011
- Messages
- 692
Absolutely gorgeous
omegatotal
Gawd
- Joined
- Mar 15, 2002
- Messages
- 672
looks great!, I would consider fine grit sanding the edges of the acrylic to give it a good look ")
fl3shwound
n00b
- Joined
- Jul 25, 2012
- Messages
- 1
This is done unbelievably well!! Wish I had skills like that...
Thank you...thank you... thank you my modding friends and yes omegatotal, edges will be sanded and polished
Update!!!


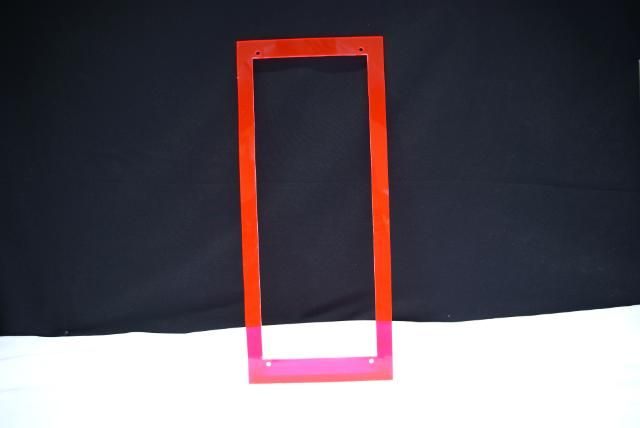
Hmm...vacation is almost over and spent the last few days modding the M8. After some brainstorming about the red line across the case, I have made this update. Started again with a lot of red acrylic
For the sides (pedestal) I first sawn the transparant acrylic and endorsed the fanholes
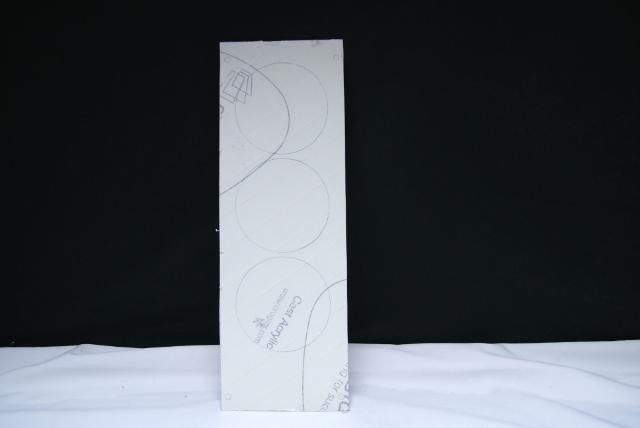
Drilled holes for the fretsaw
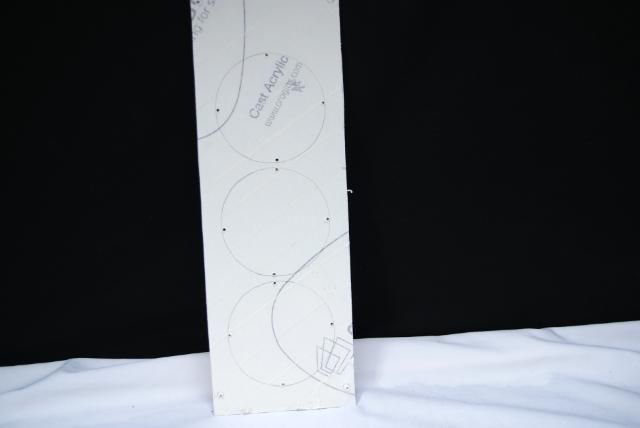
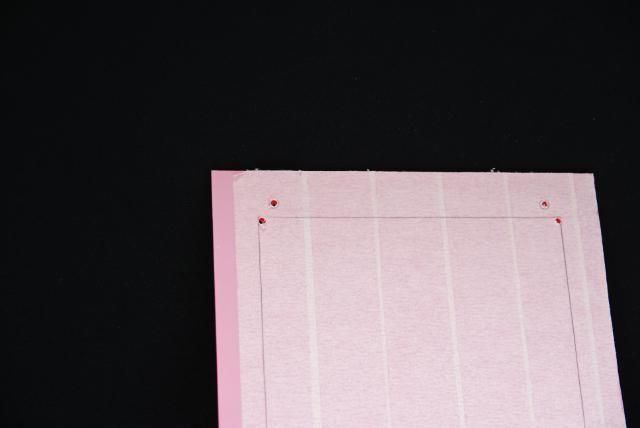
Also marked the red acrylic
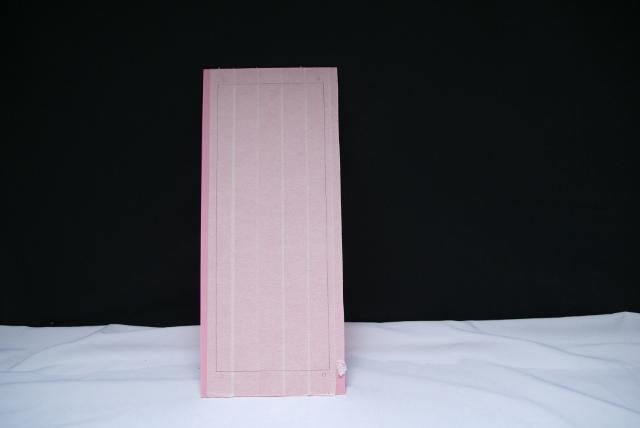
And drilled holes
Again some sawing. The red result
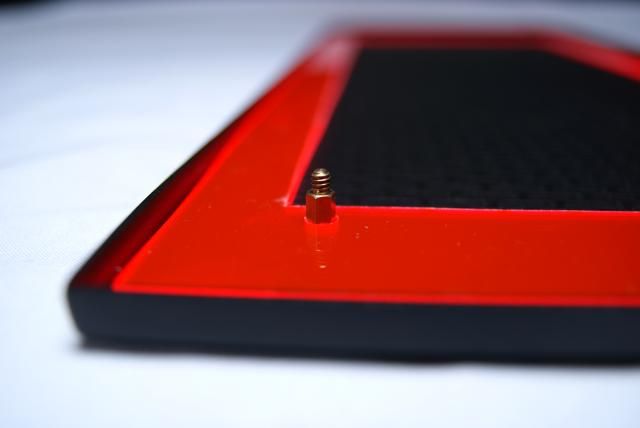
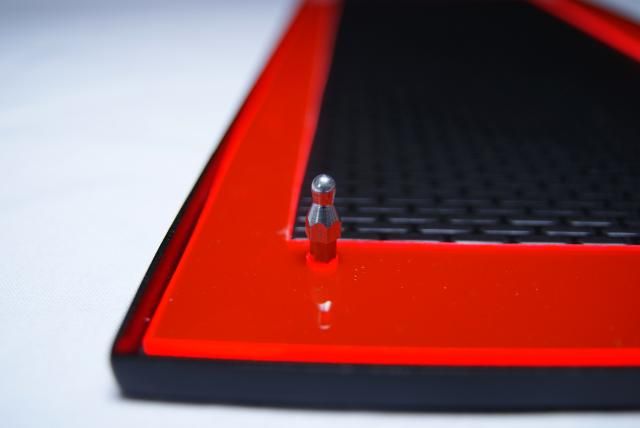
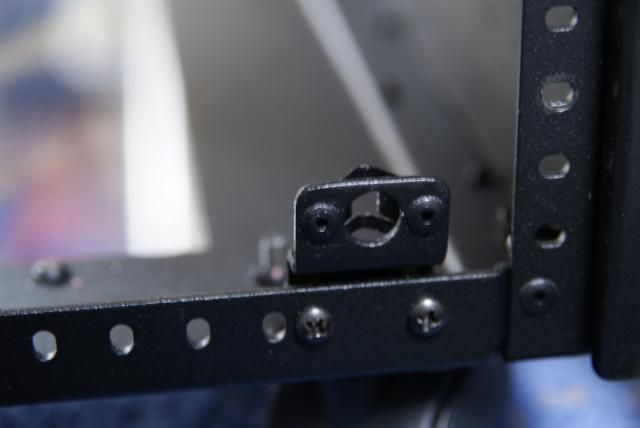
On the corners I also drilled holes for the standoff's
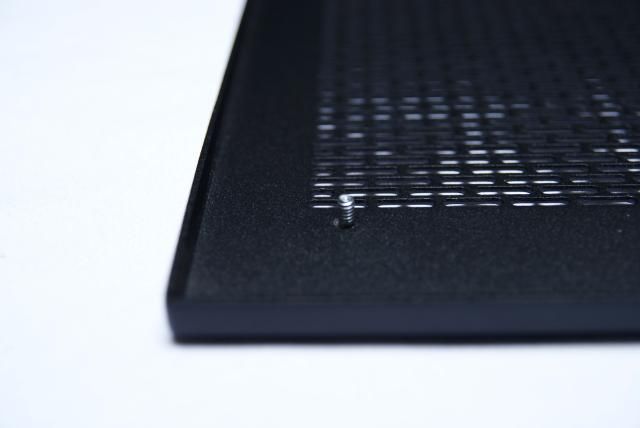
Placed some standoff's on existing thread
And placed the orginal back
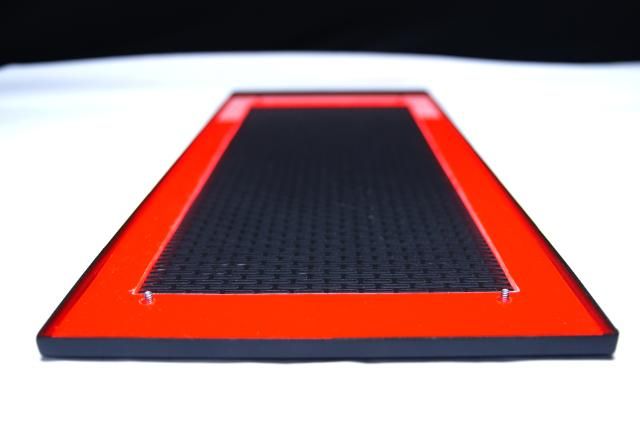
Transparent acrylic also sawn
Placed on the red acrylic.
And made the transparent acrylic black
Marked/ sawn the orginal cover
Because I used the standoff's on the covers, I also needed to adjust to the originals from the frame.
Before:
Standoff's
After:
Placed everything back
Btw. the aluminium edges will be painted black
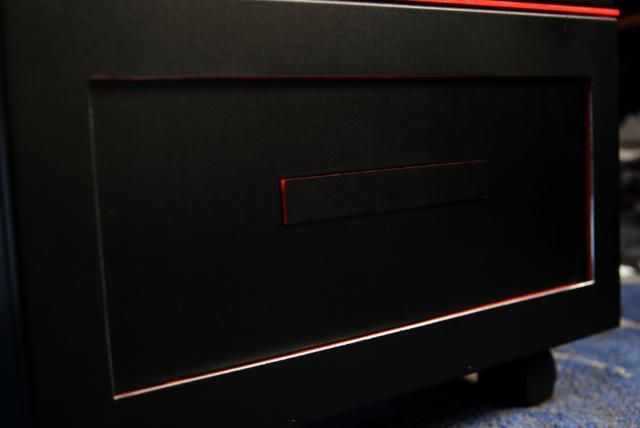
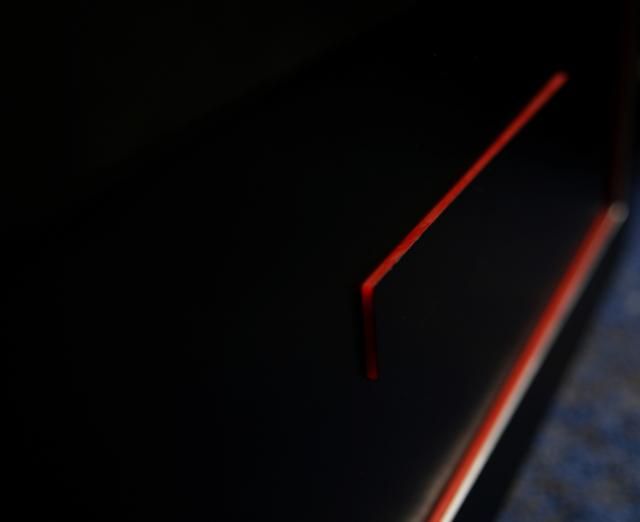
I also want the red line in the front of the pedestal ... with a slot for the Blu-ray.
Orginal cover marked and sawn.
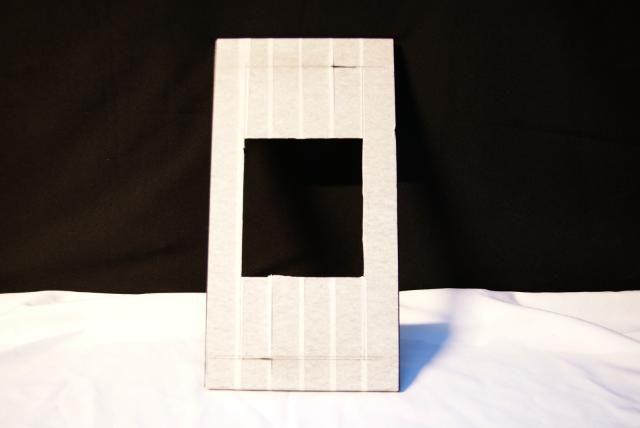
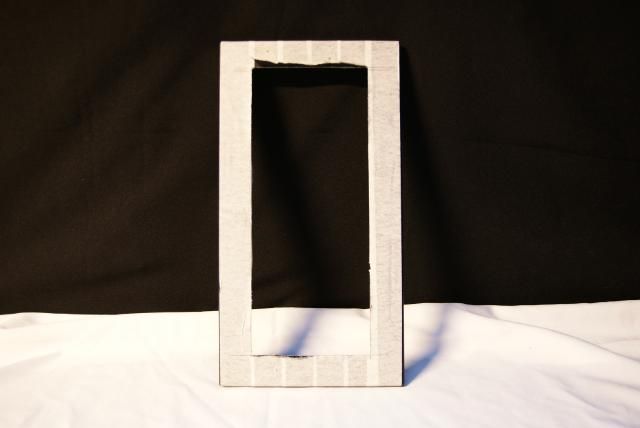
Made this the same way as the side panels
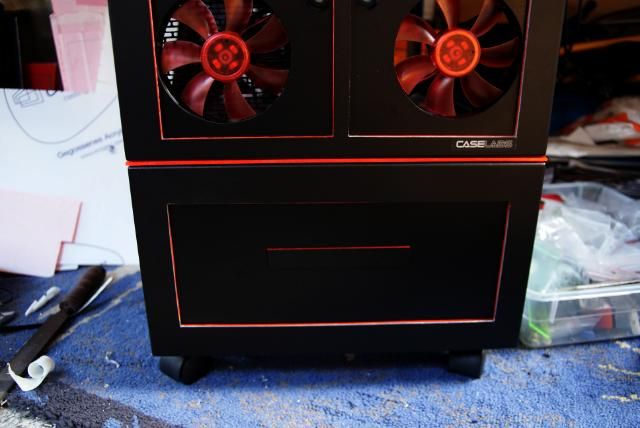
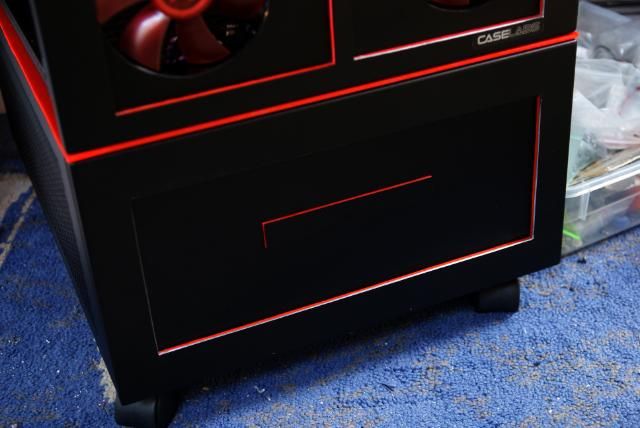
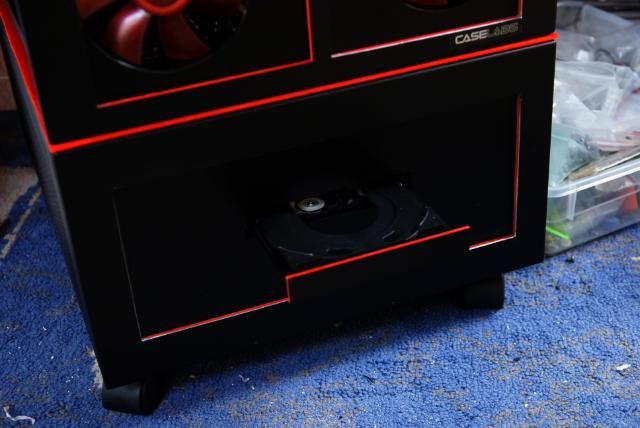
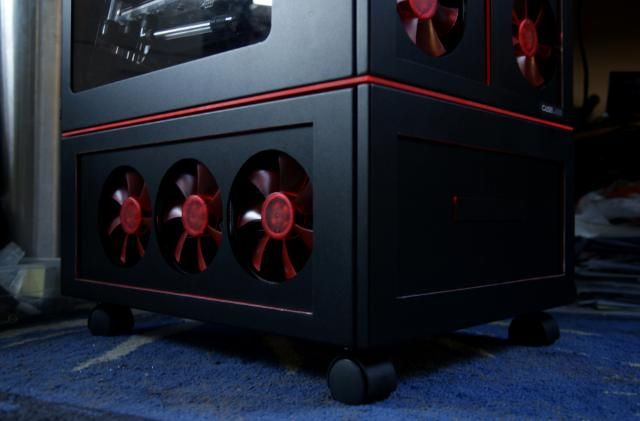
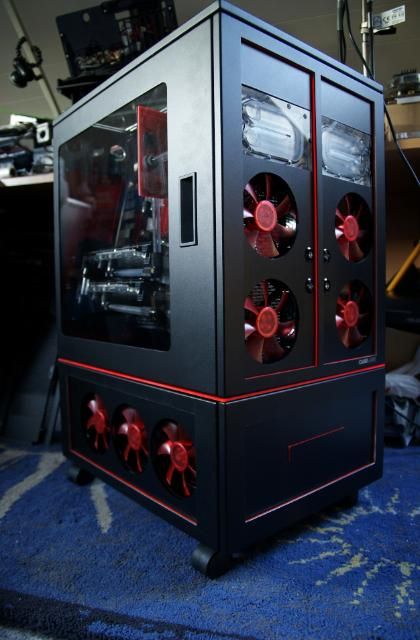
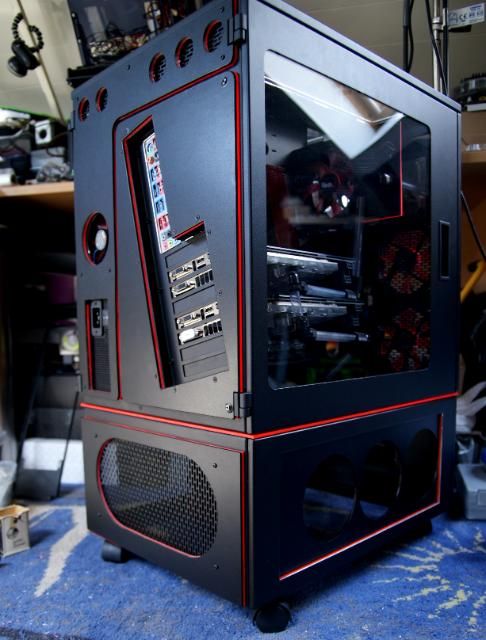
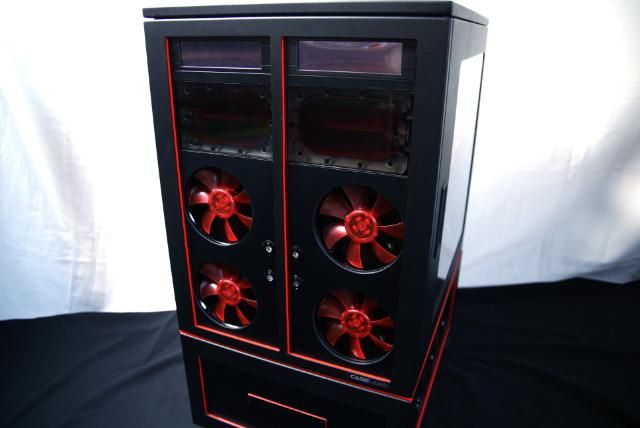
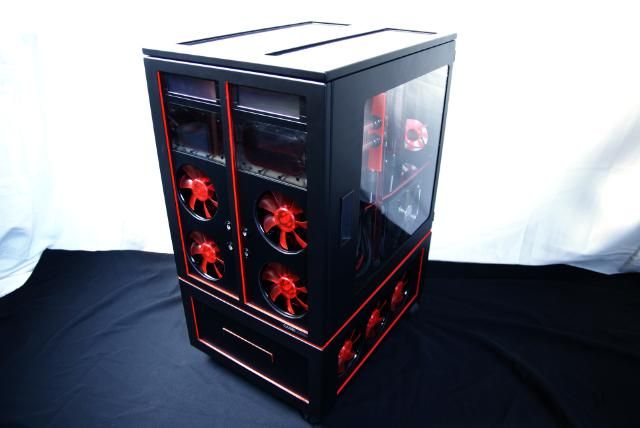
Total shot
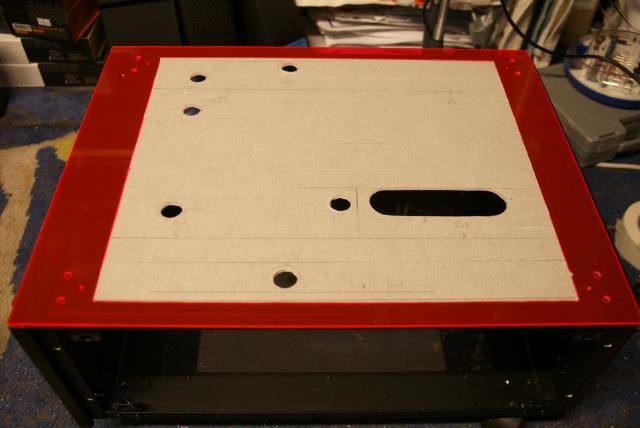
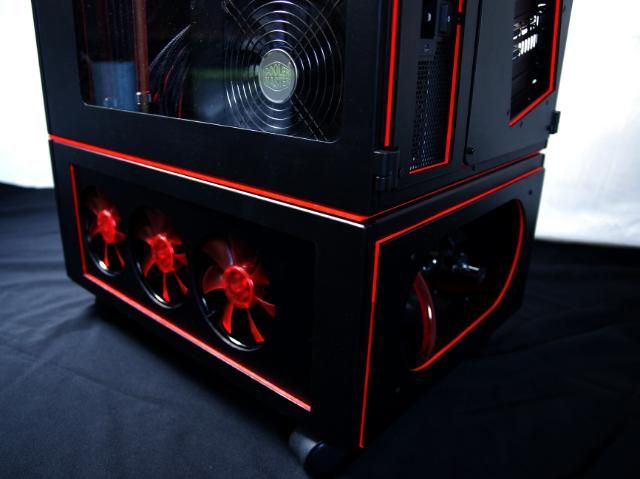
Sawn a transparent acrylic plate for the bottom of the pedestal
Where a red glow underneath the case comes from later on.
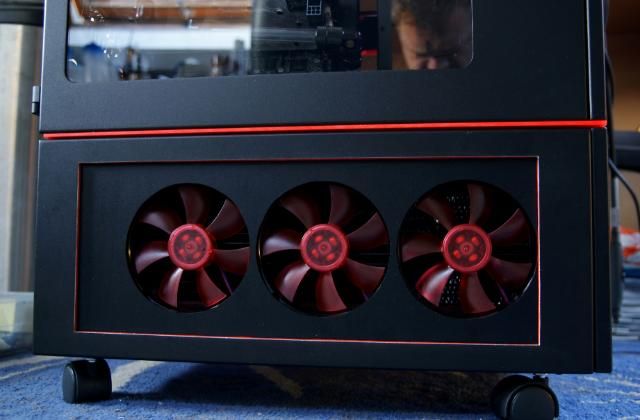
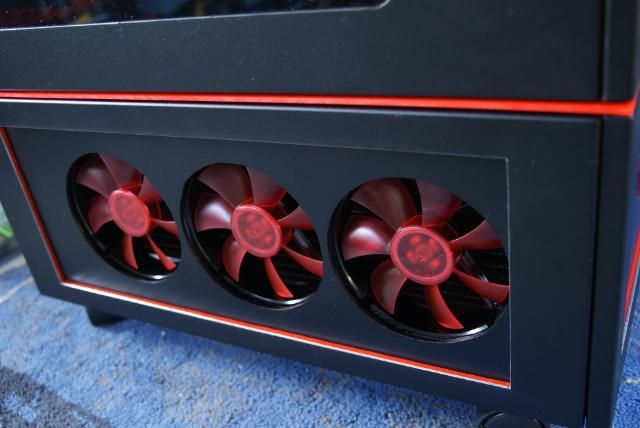
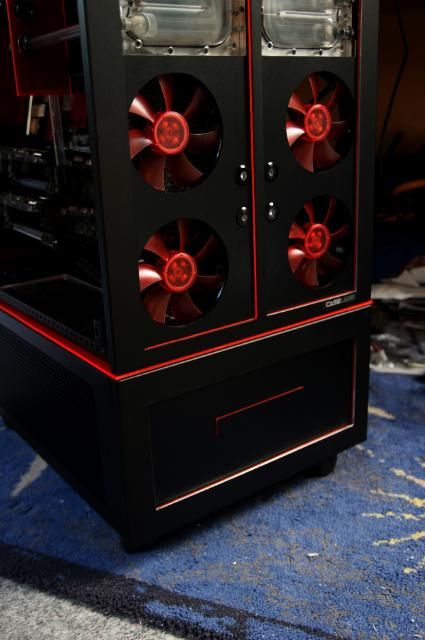
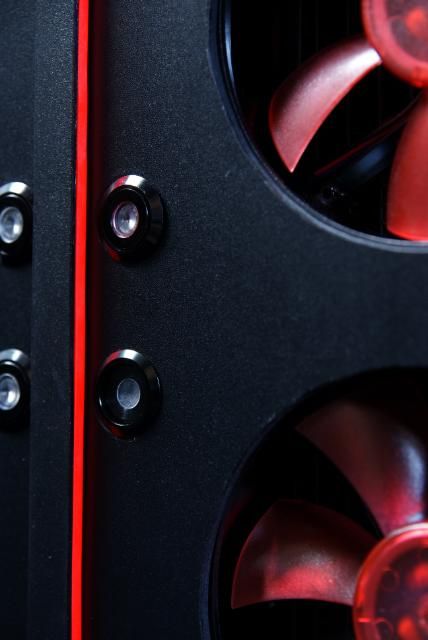
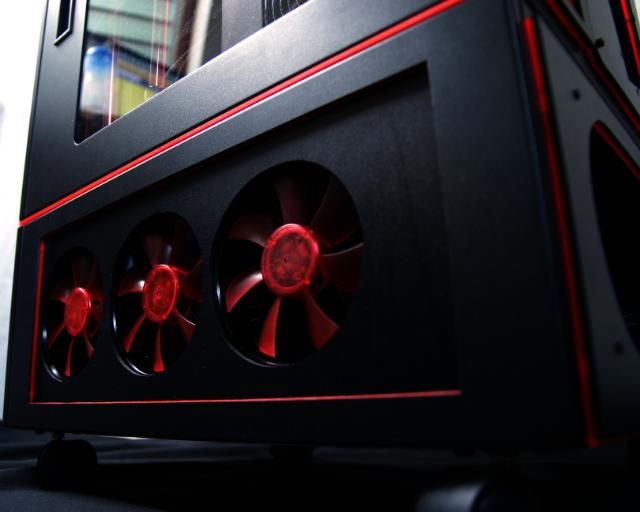
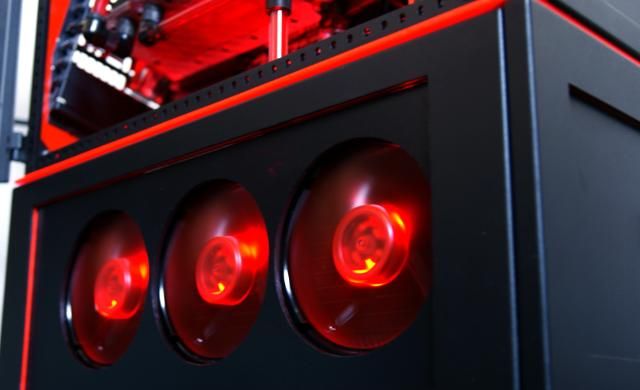
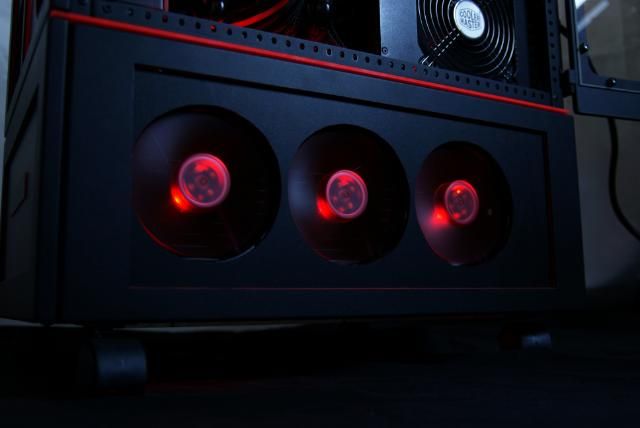
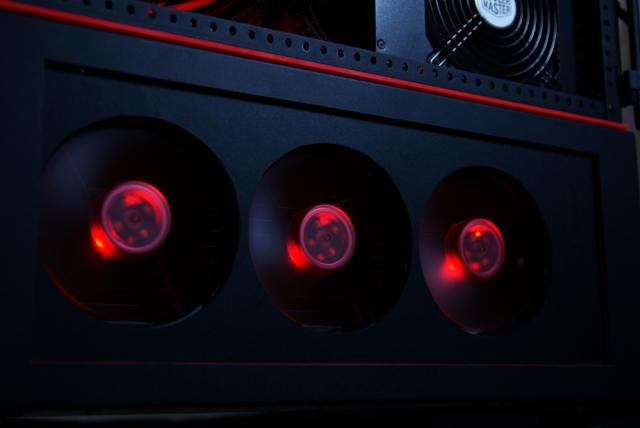
After a good tip from my friends from TFoM I've also changed something in the front. The HDD coolers were to shiny, so I applied some black transparent acrylic.
Better like this...only need some leds
Need to look what kind of leds I'm gonna use.
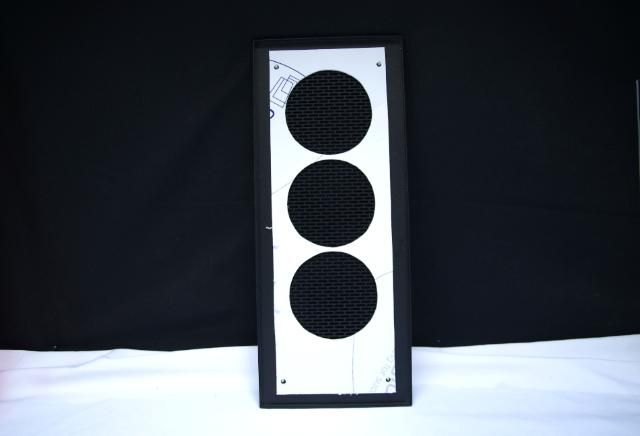
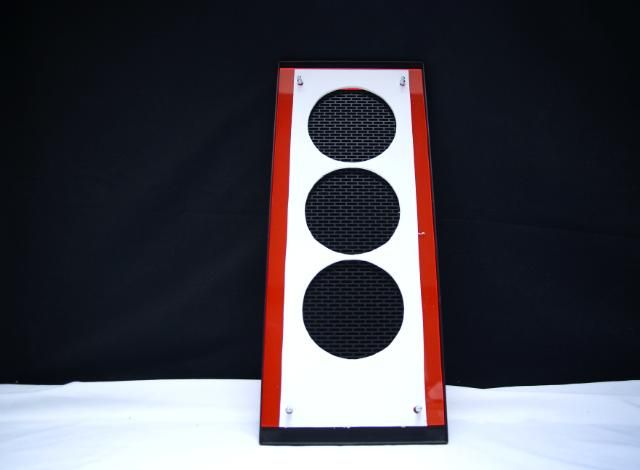
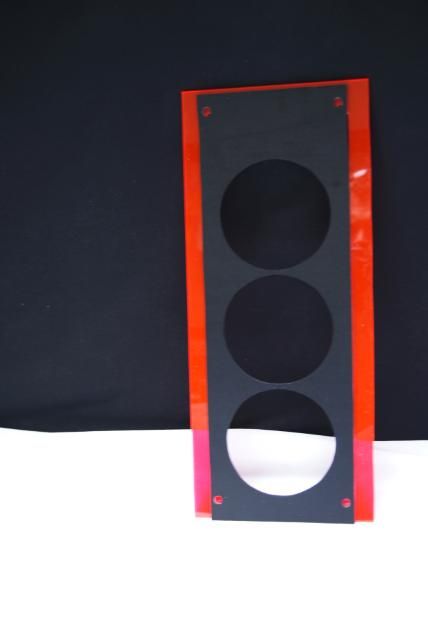
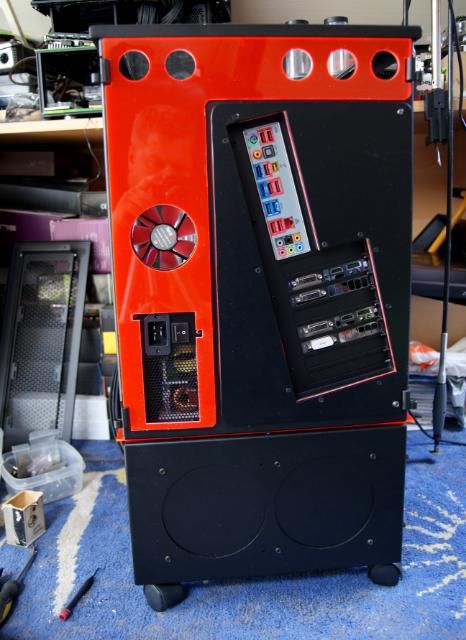
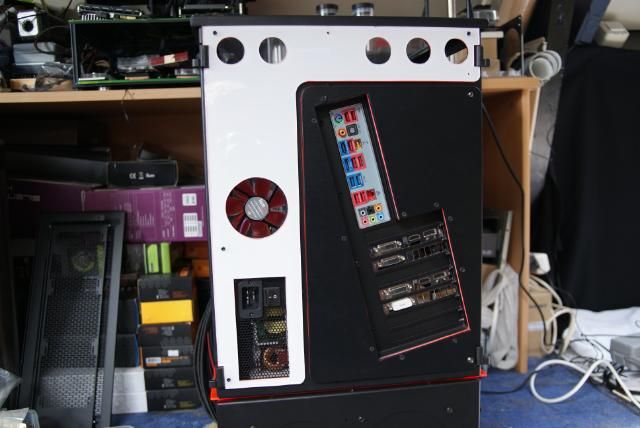
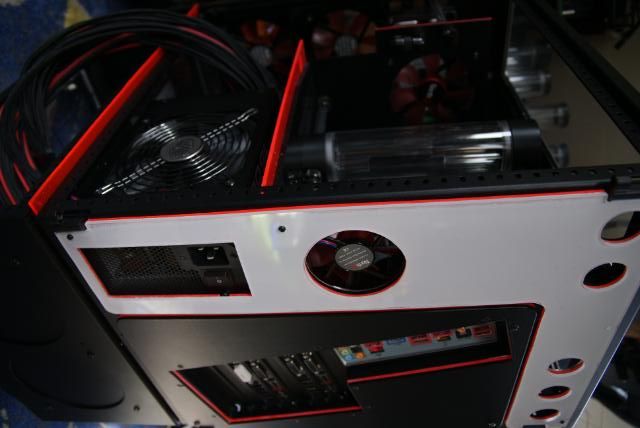
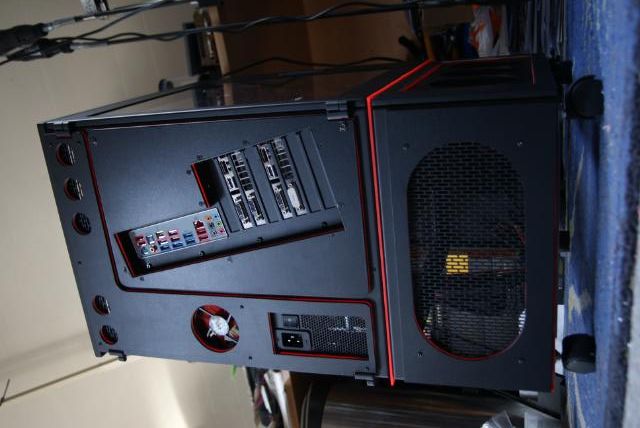
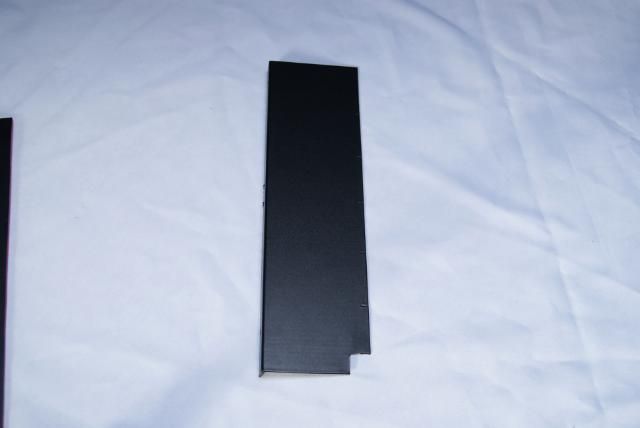
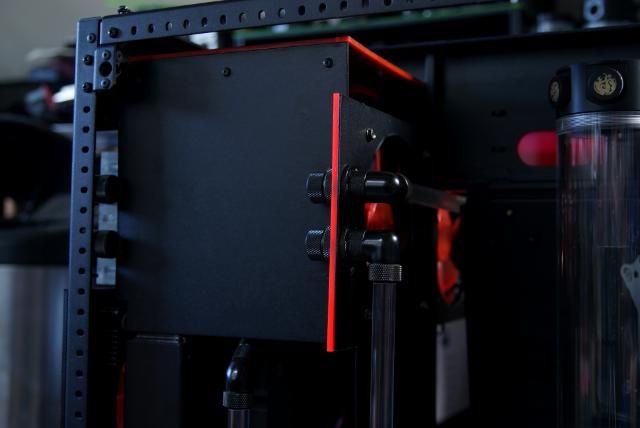
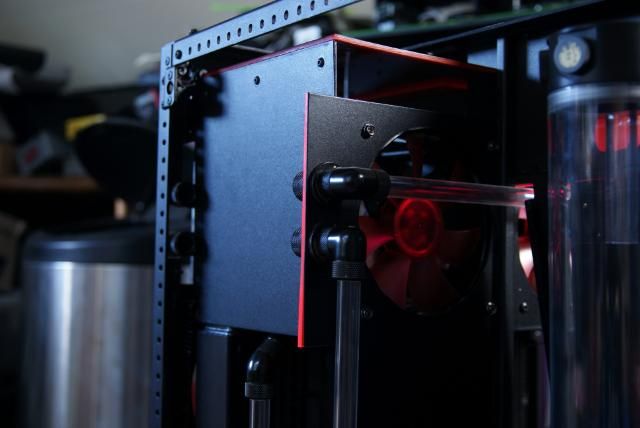
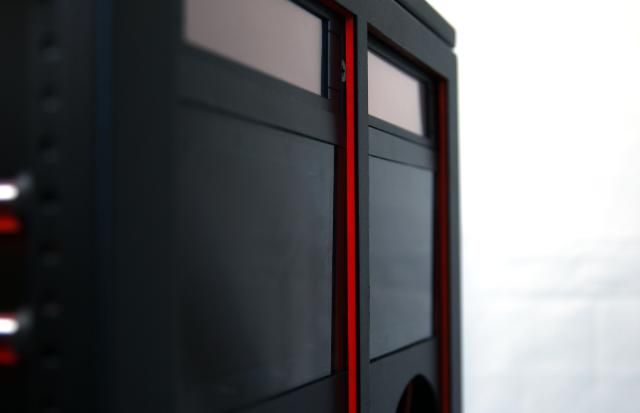
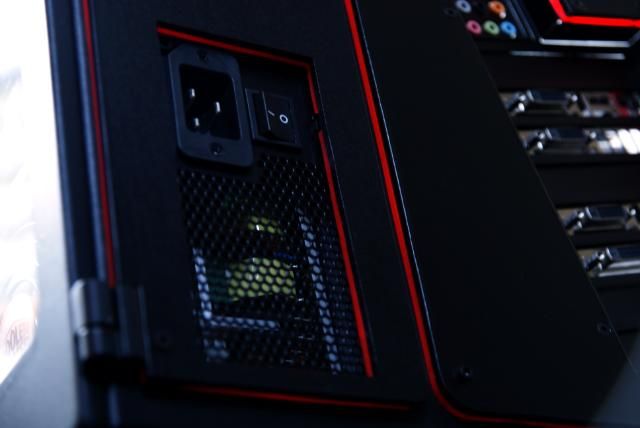
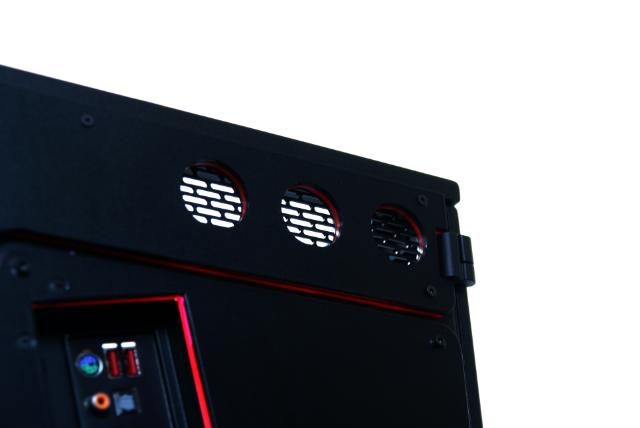
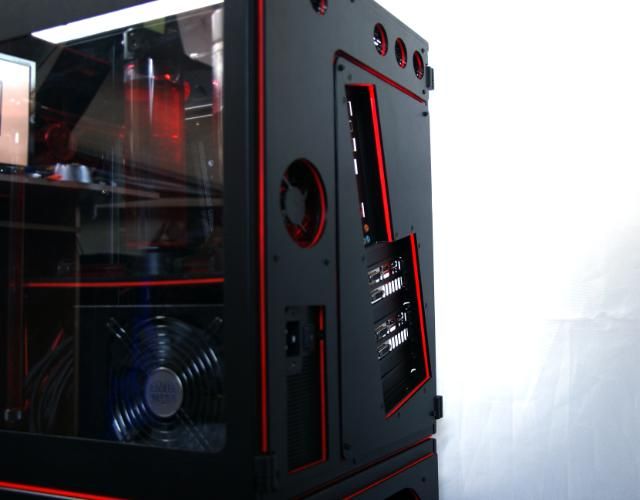
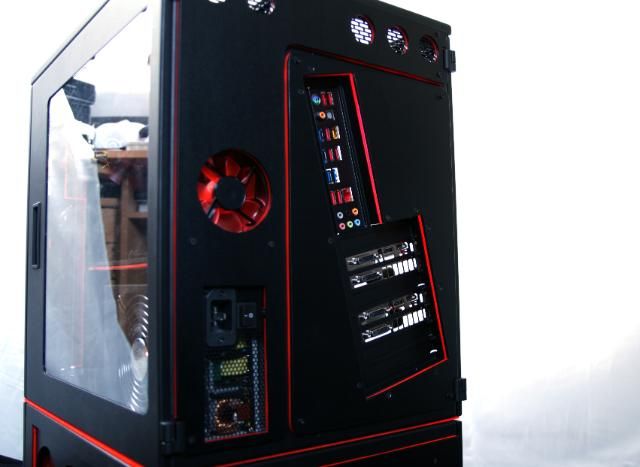
Last but not least the back, lol, yes the back is also important. Target is just to mod as much as possible, but nevertheless that the M8 is still recognizable. So sawn a new piece of red acrylic and marked more holes and squares.
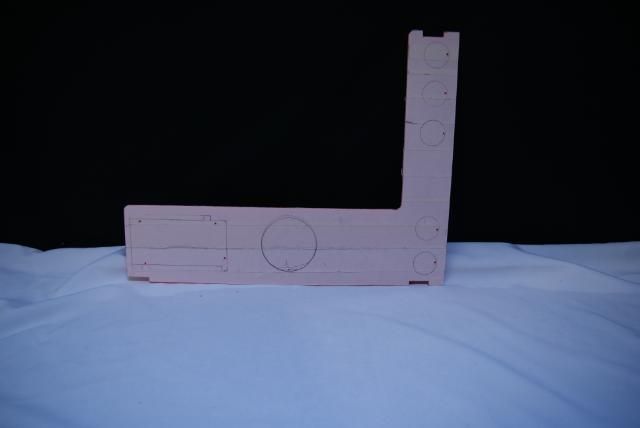
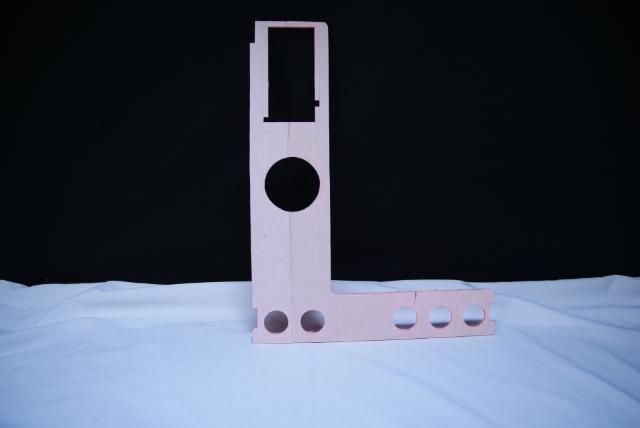
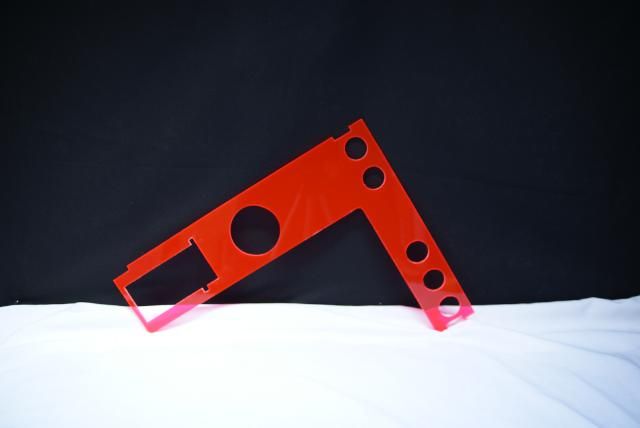
Made the same shape transparent acrylic
And it's black again
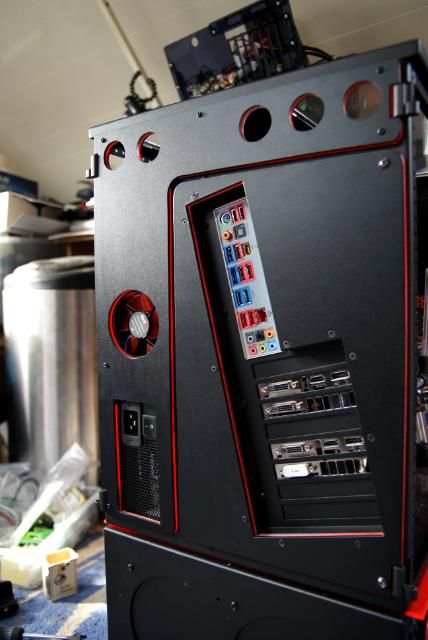
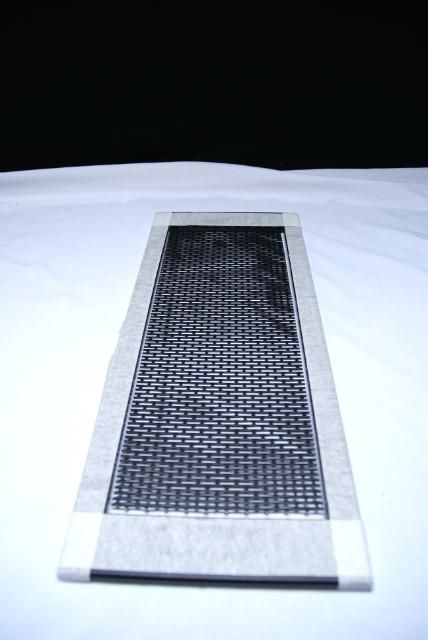
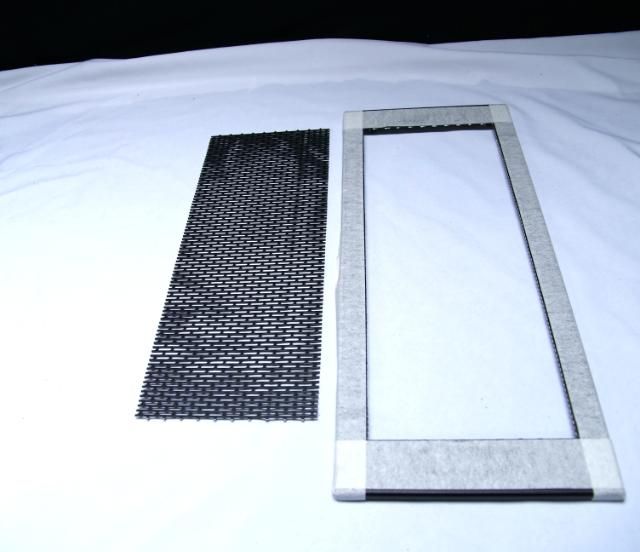
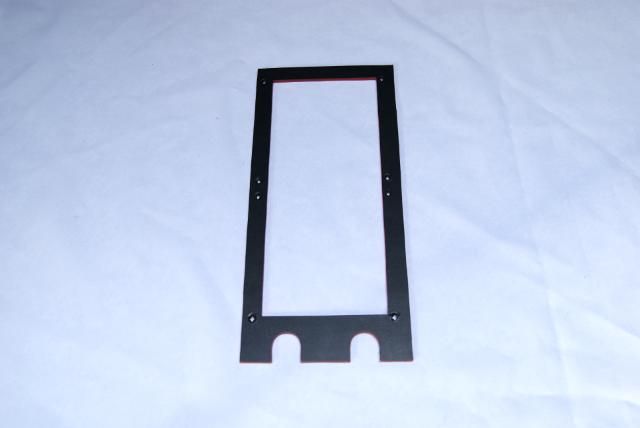
For the 5 air outlets I have used the Caselabs mesh (acrylic edges will be polished)
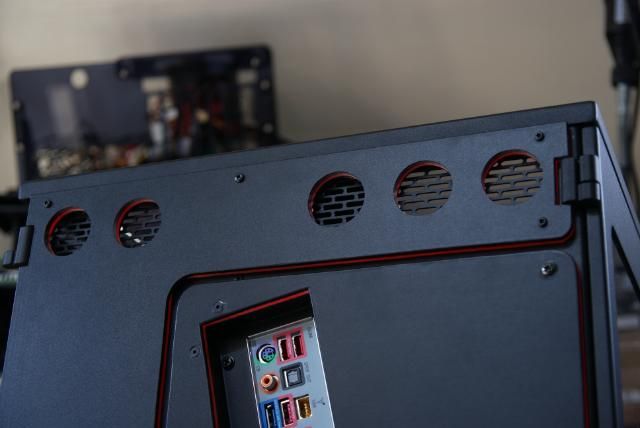
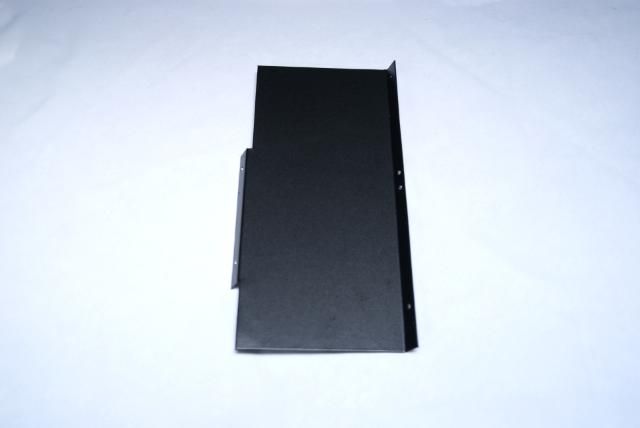
Adjusted the original 140 mm fanholes.
Again with red, black and mesh.
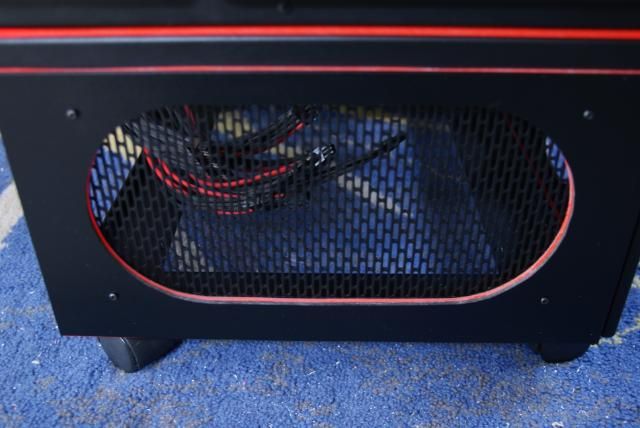
Total shot
Hope you like this update so far, maybe this weekend more updates about the internal
and yes omegatotal, edges will be sanded and polished Update!!!
Hmm...vacation is almost over and spent the last few days modding the M8. After some brainstorming about the red line across the case, I have made this update. Started again with a lot of red acrylic
For the sides (pedestal) I first sawn the transparant acrylic and endorsed the fanholes
Drilled holes for the fretsaw
Also marked the red acrylic
And drilled holes
Again some sawing. The red result
On the corners I also drilled holes for the standoff's
Placed some standoff's on existing thread
And placed the orginal back
Transparent acrylic also sawn
Placed on the red acrylic.
And made the transparent acrylic black
Marked/ sawn the orginal cover
Because I used the standoff's on the covers, I also needed to adjust to the originals from the frame.
Before:
Standoff's
After:
Placed everything back
Btw. the aluminium edges will be painted black
I also want the red line in the front of the pedestal ... with a slot for the Blu-ray.
Orginal cover marked and sawn.
Made this the same way as the side panels
Total shot
Sawn a transparent acrylic plate for the bottom of the pedestal
Where a red glow underneath the case comes from later on.
After a good tip from my friends from TFoM I've also changed something in the front. The HDD coolers were to shiny, so I applied some black transparent acrylic.
Better like this...only need some leds
Need to look what kind of leds I'm gonna use.
Last but not least the back, lol, yes the back is also important. Target is just to mod as much as possible, but nevertheless that the M8 is still recognizable. So sawn a new piece of red acrylic and marked more holes and squares.
Made the same shape transparent acrylic
And it's black again
For the 5 air outlets I have used the Caselabs mesh (acrylic edges will be polished)
Adjusted the original 140 mm fanholes.
Again with red, black and mesh.
Total shot
Hope you like this update so far, maybe this weekend more updates about the internal
DraginDime
[H]ard|Gawd
- Joined
- Jan 12, 2012
- Messages
- 1,464
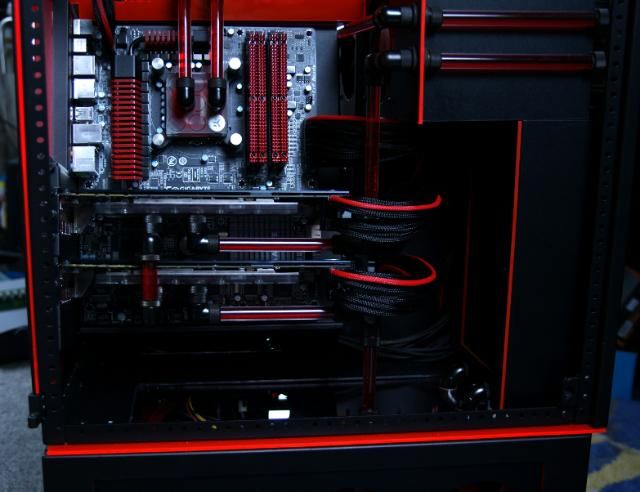
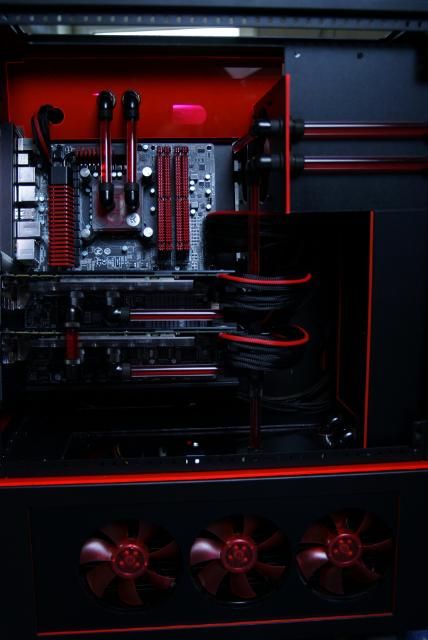
Awesome update. I really like that slanted motherboard tray. Can't wait to see more pics of it through the side window.
Killer build so far. Props to you sir.
Killer build so far. Props to you sir.
Awesome update. I really like that slanted motherboard tray. Can't wait to see more pics of it through the side window.
Killer build so far. Props to you sir.
This, Pretty much sums it up to a T.
Nathanak21
n00b
- Joined
- Aug 3, 2012
- Messages
- 62
Dat plexi. But in all seriousness- that is one beast of a case. I LOVE the front panel.
Thanks you guys
Update!!!
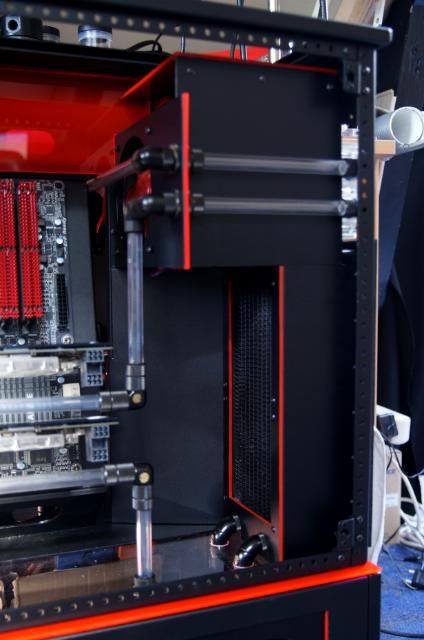
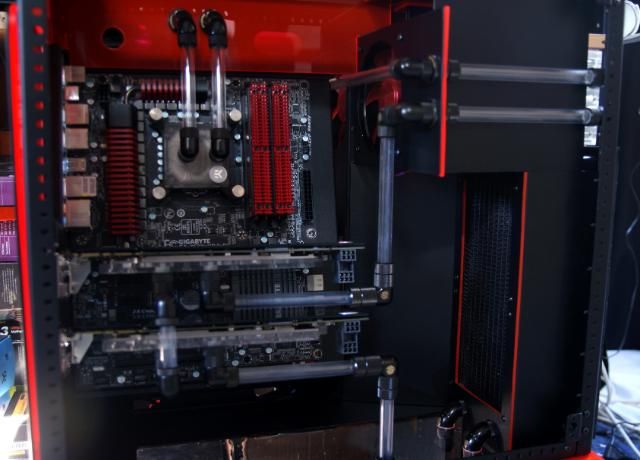
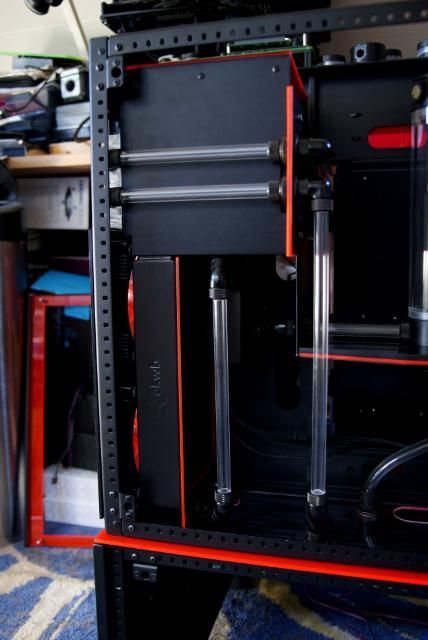
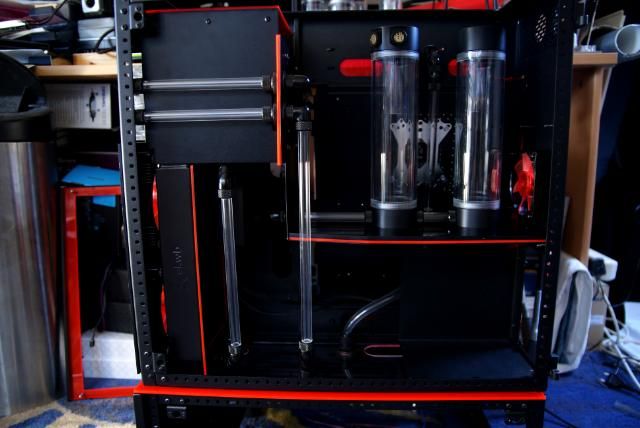
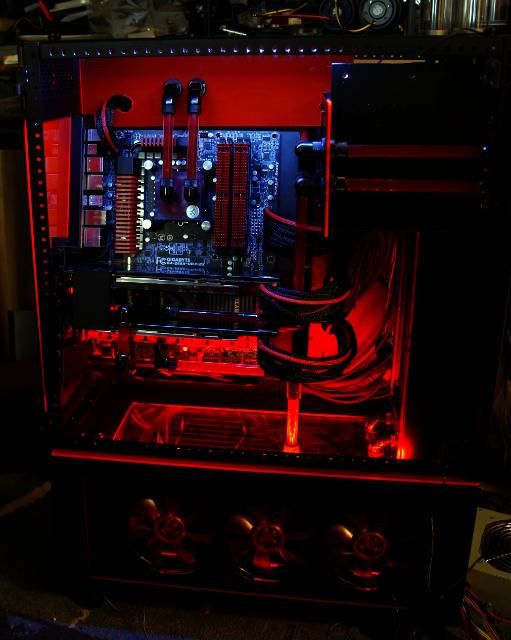
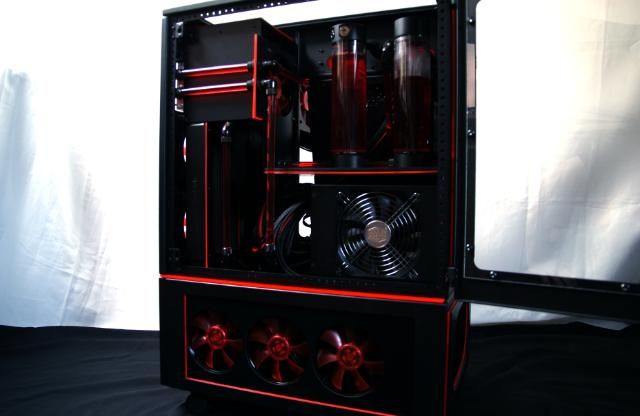
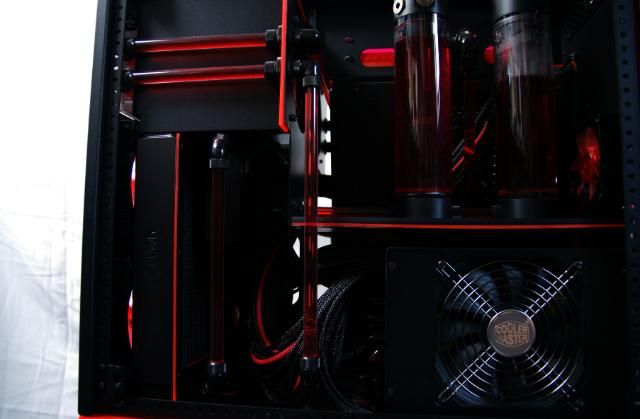
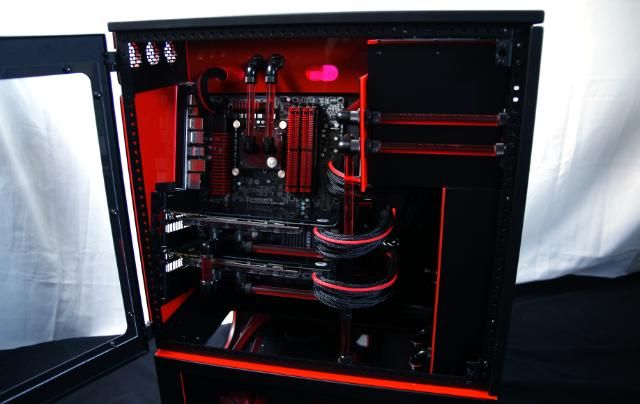
Target is as good as reached this holiday. Connecting all solid acrylic tubing.
Have taken some extra pics t, so a lot of pictures and little words
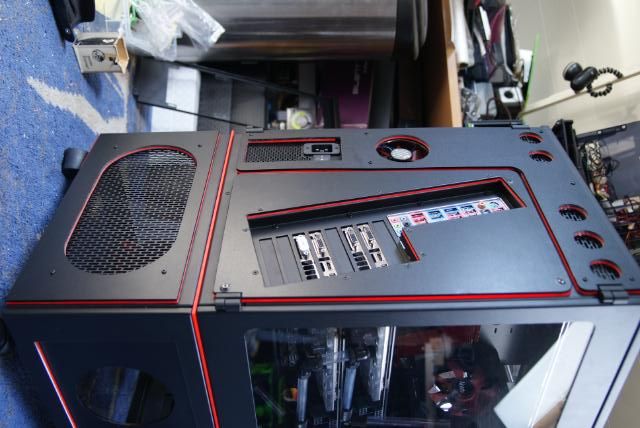
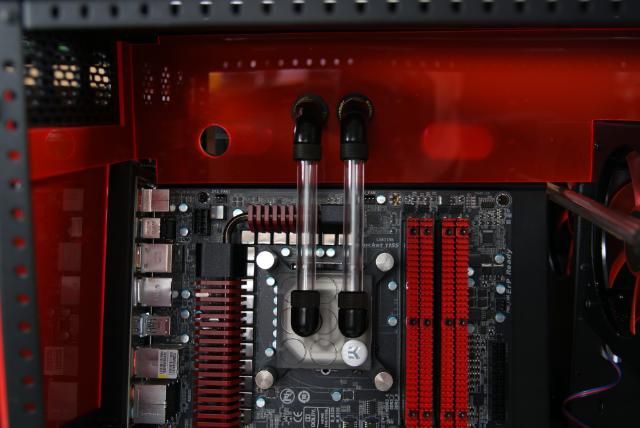
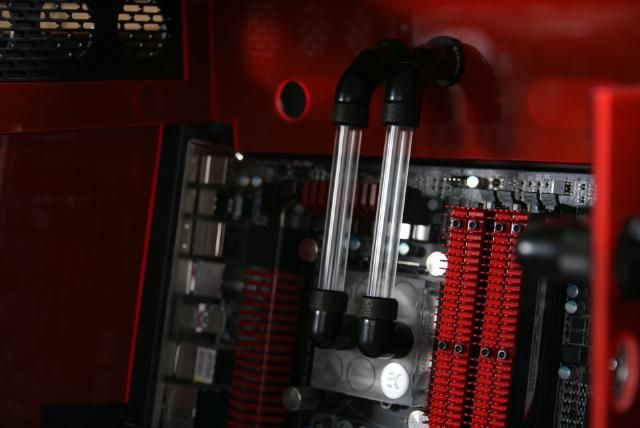
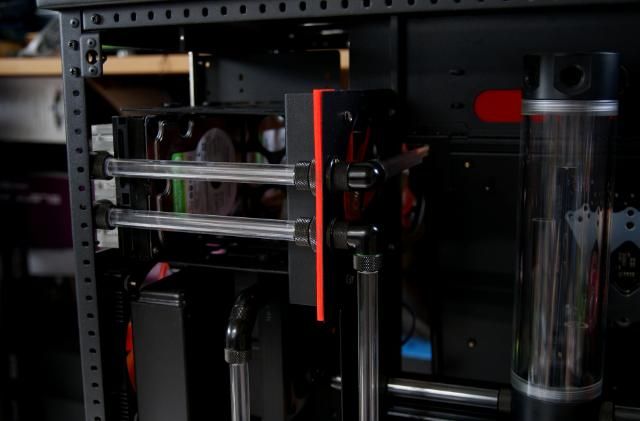
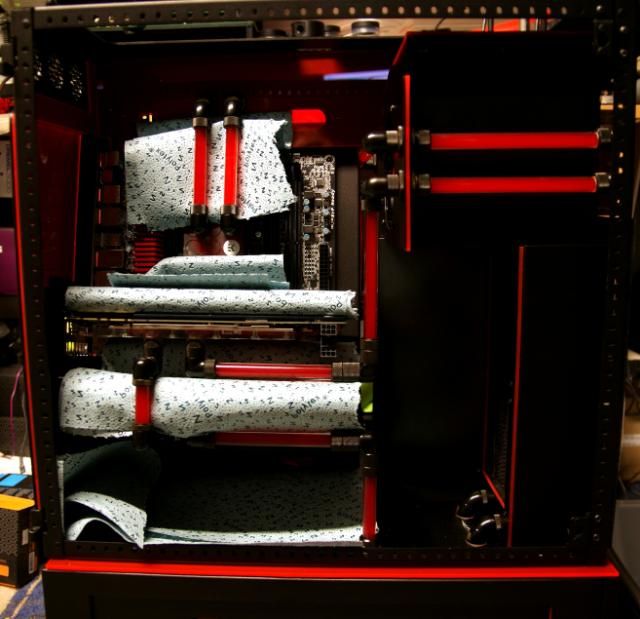
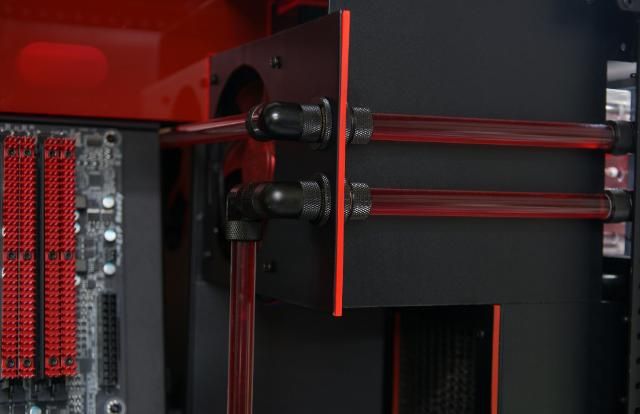
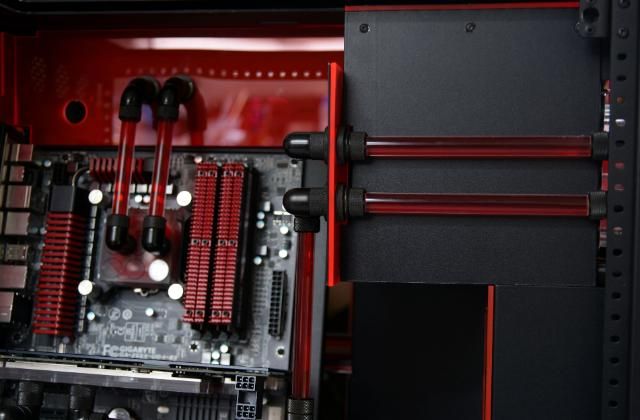
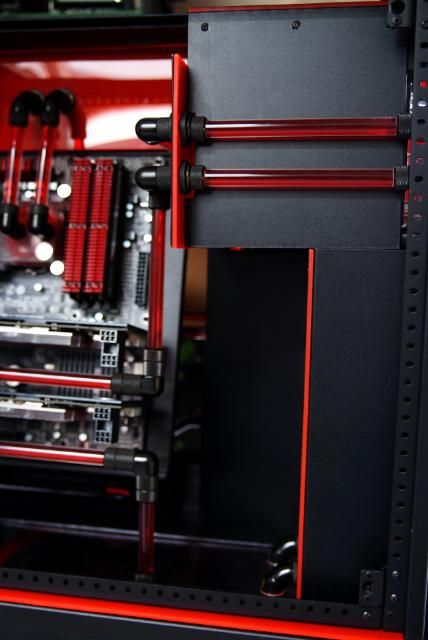
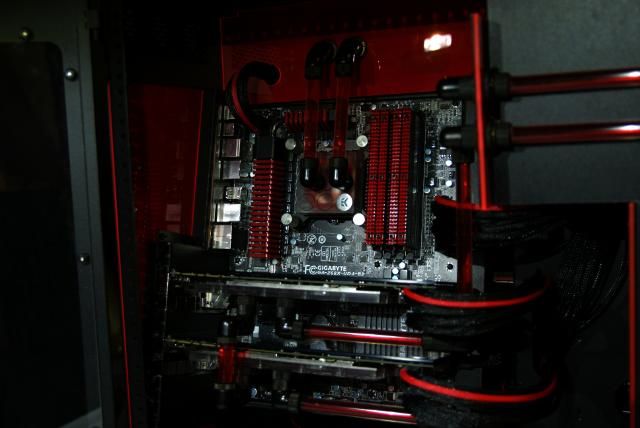
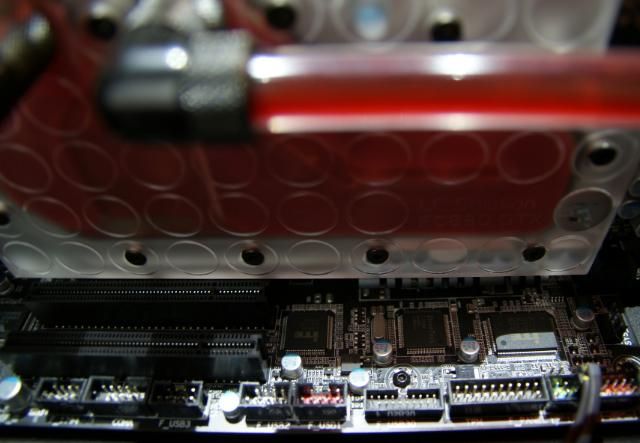
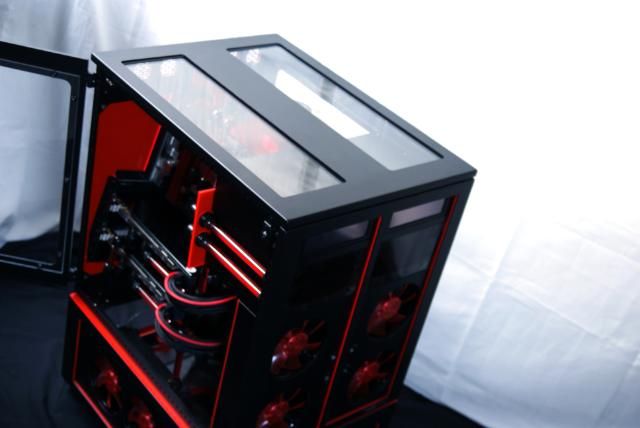
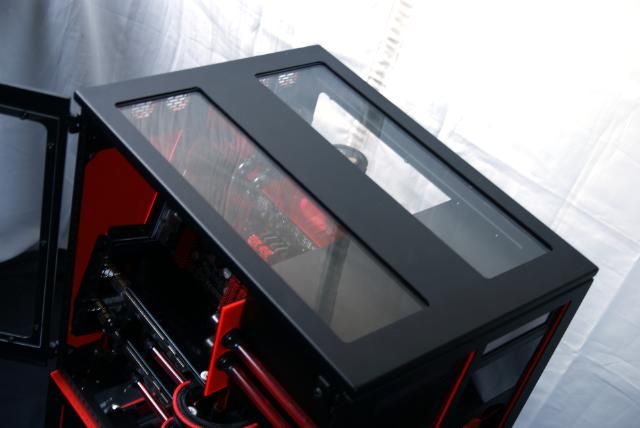
To begin, I made ​​a aluminum plate to support the angled mobo tray containing a slot for cables etc.

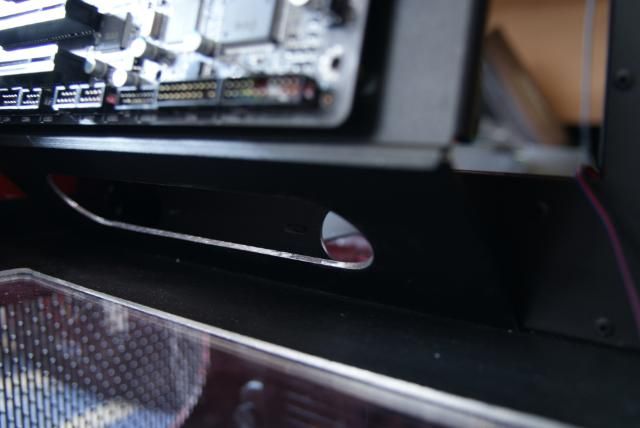
Marked 2 holes above the mobo for the in\ outlet CPU.
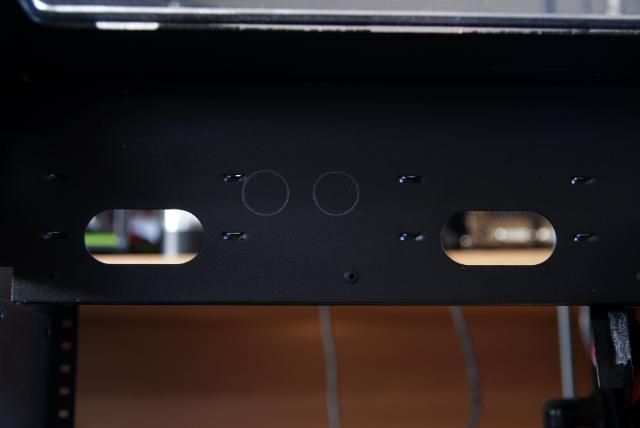
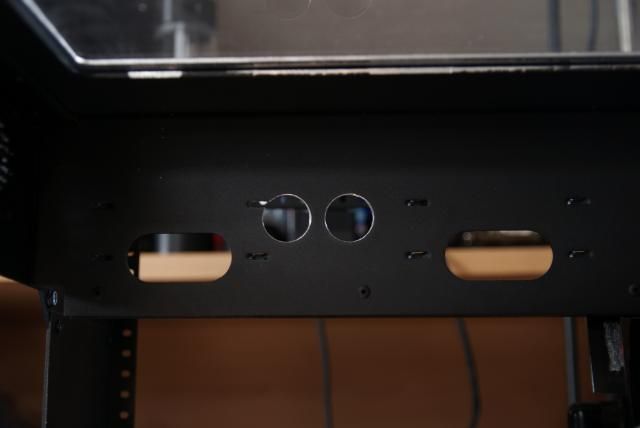
Cut a plate red acrylic with 2 holes in it
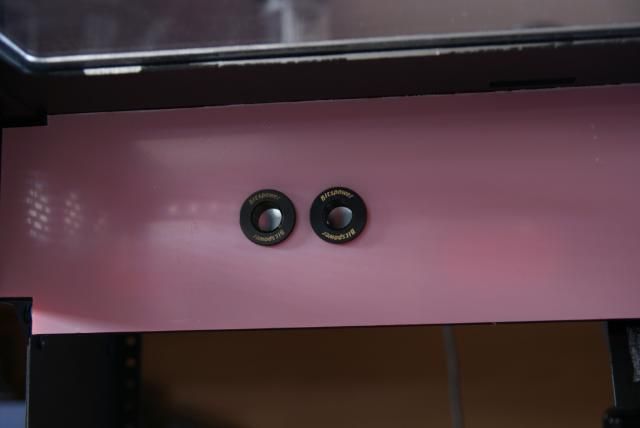
Fitting.
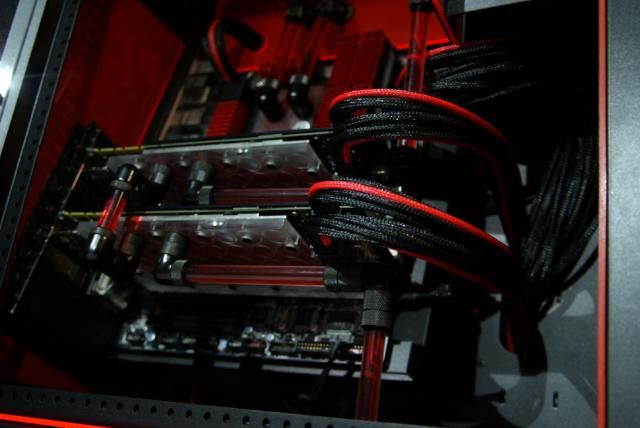
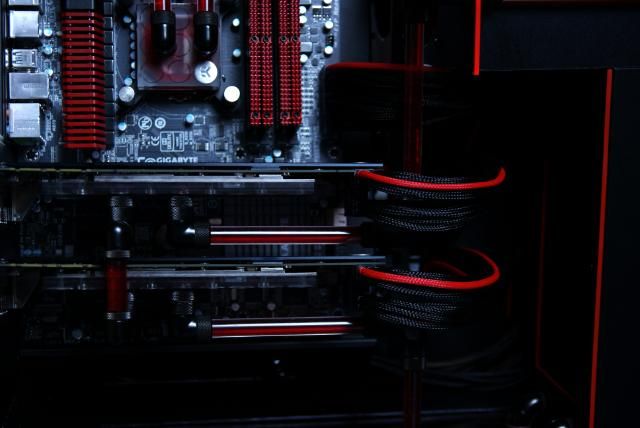
And cut the right sizes acrylic tubes.
Also connected all other tubes.
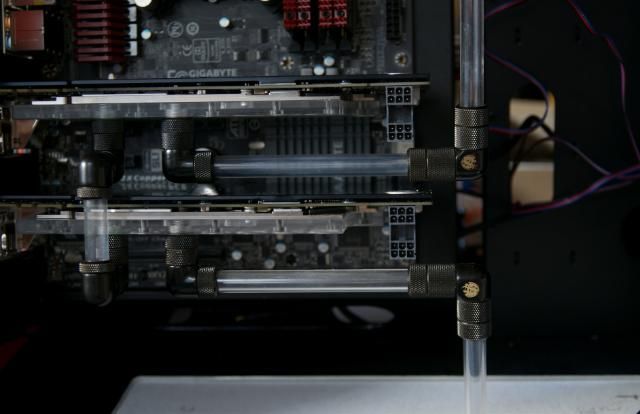
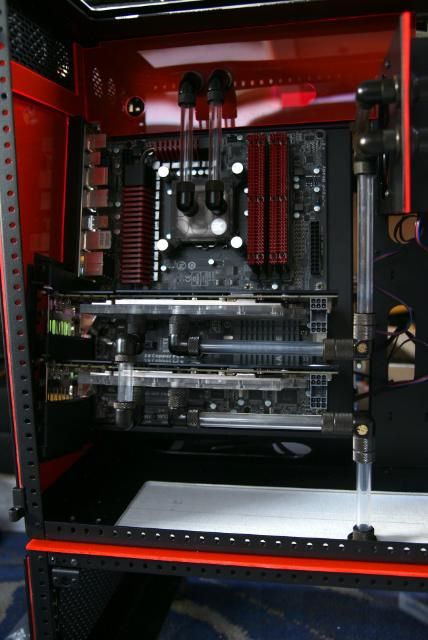
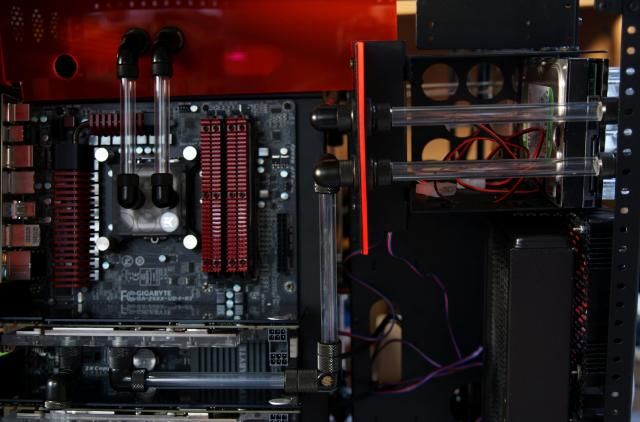
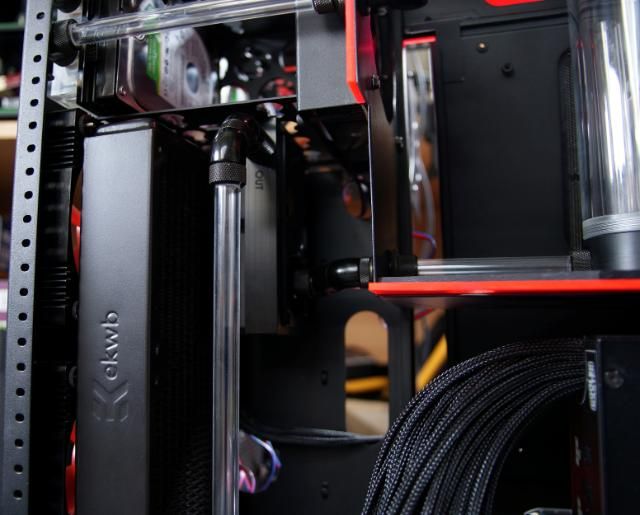
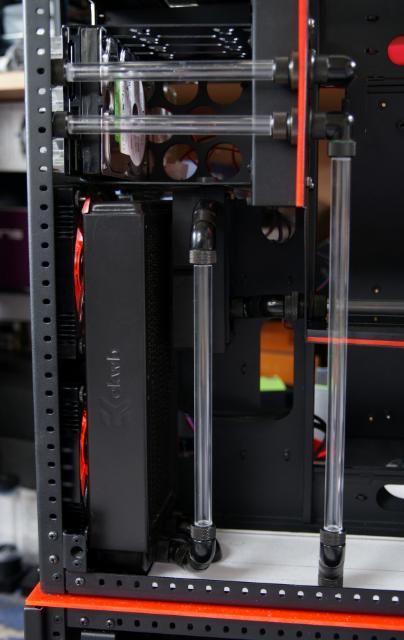
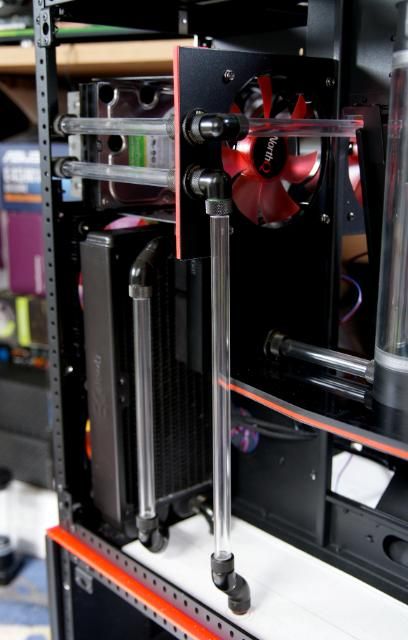
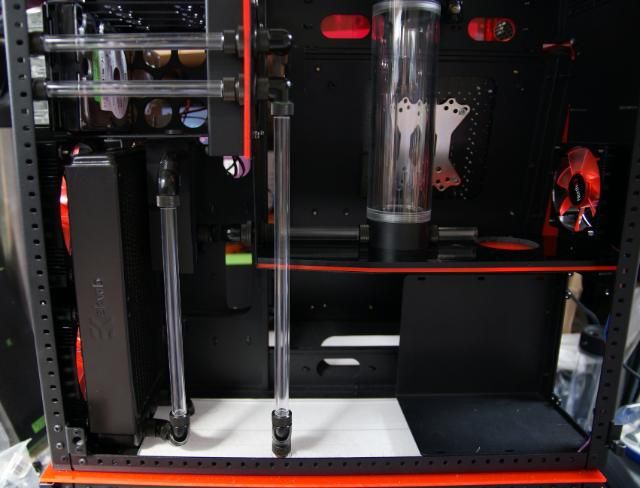
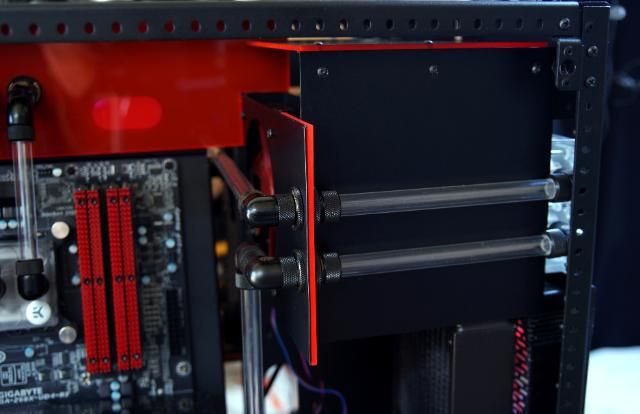
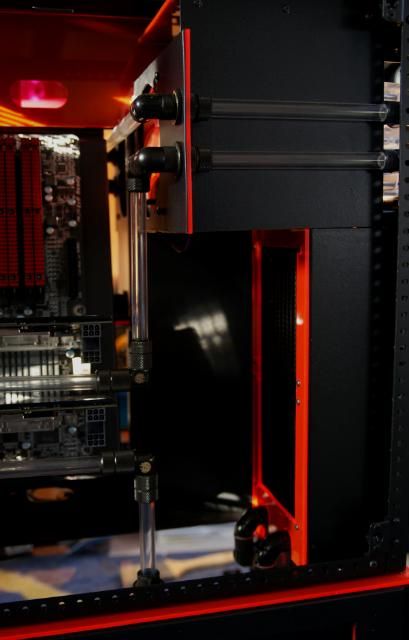
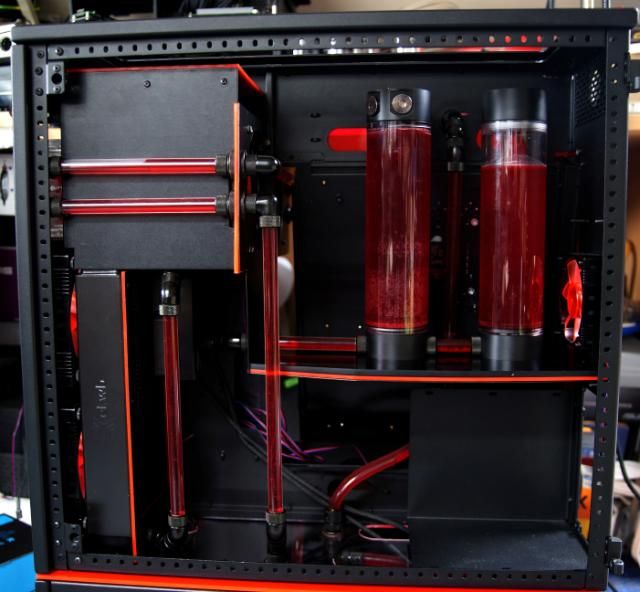
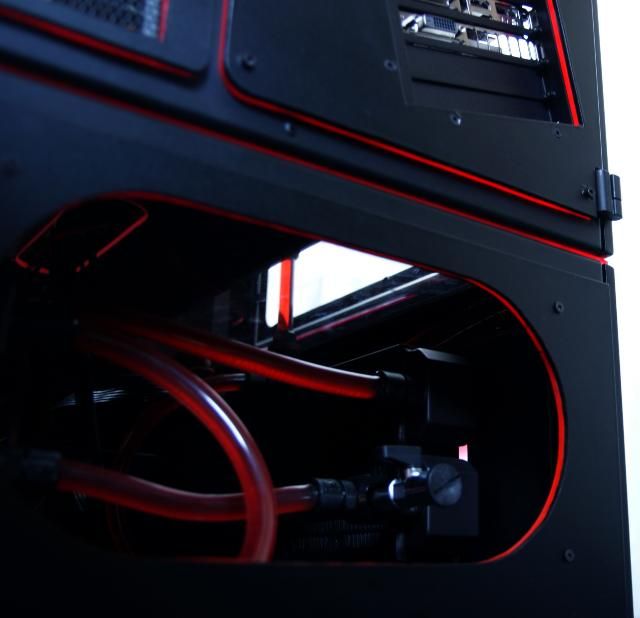
240 rad placed and marked the holes downwards.
Made the link to the other side.
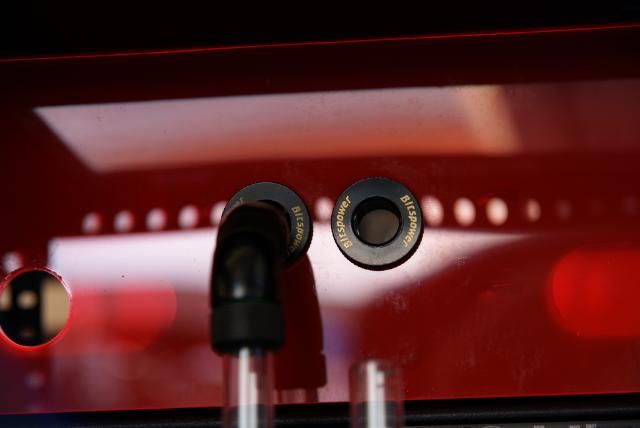
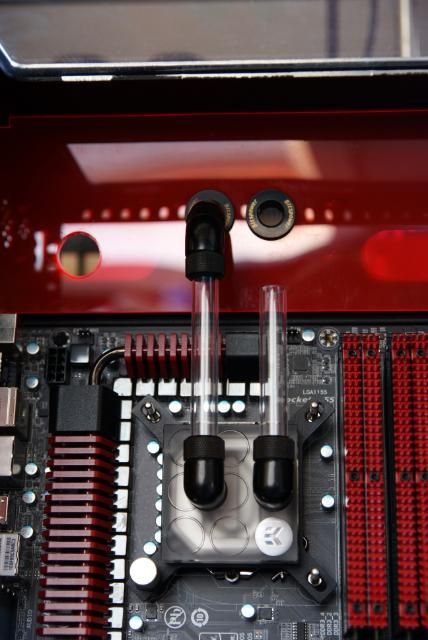
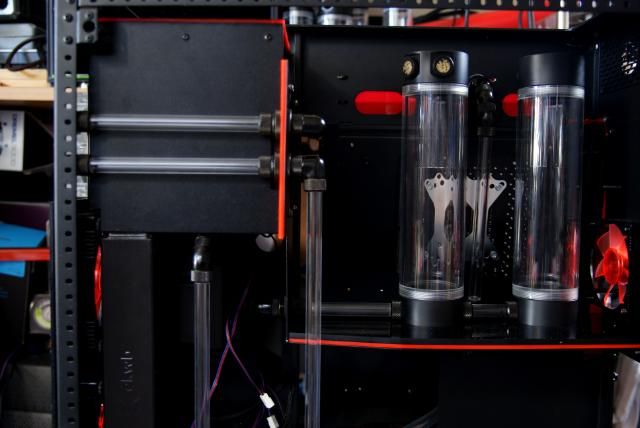
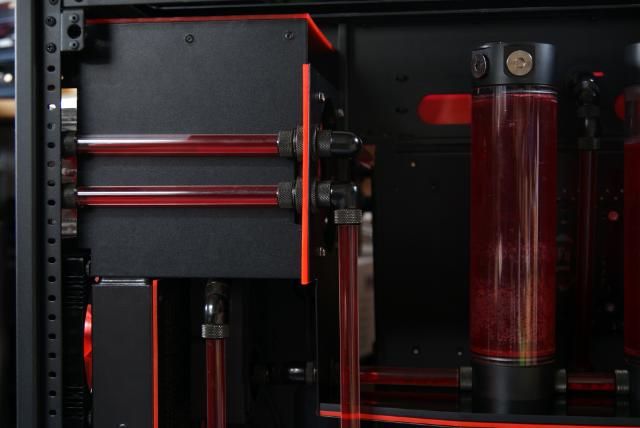
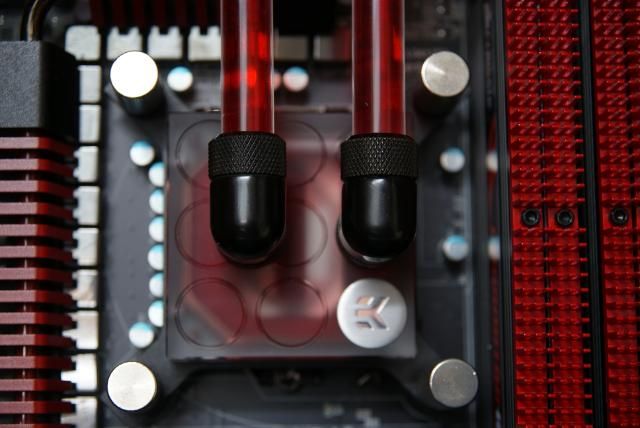
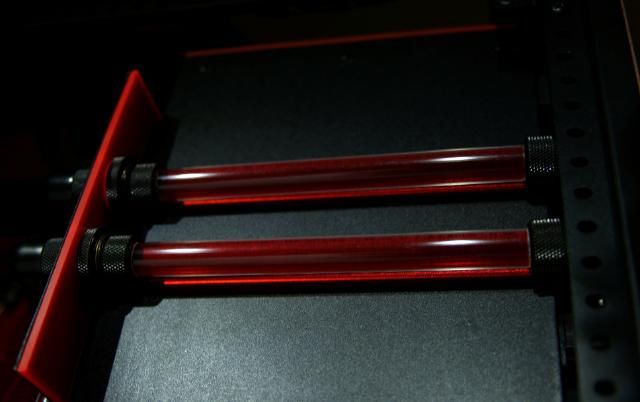
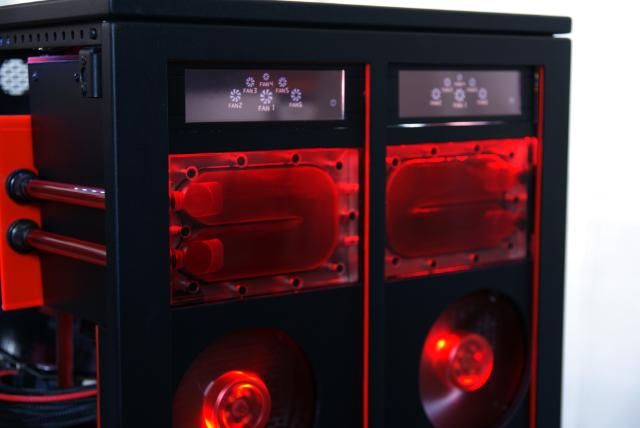
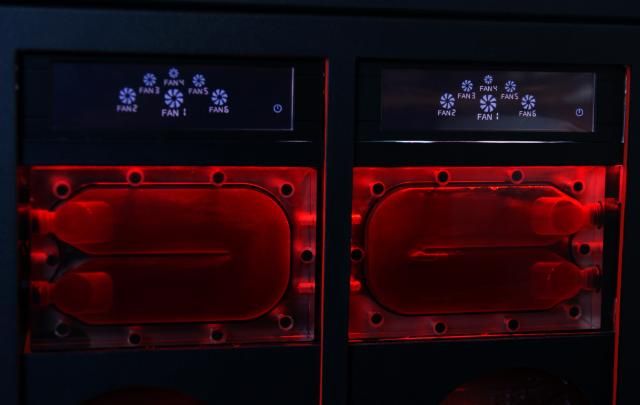
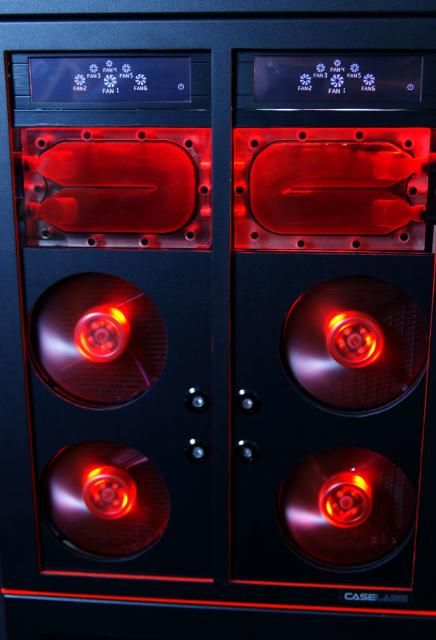
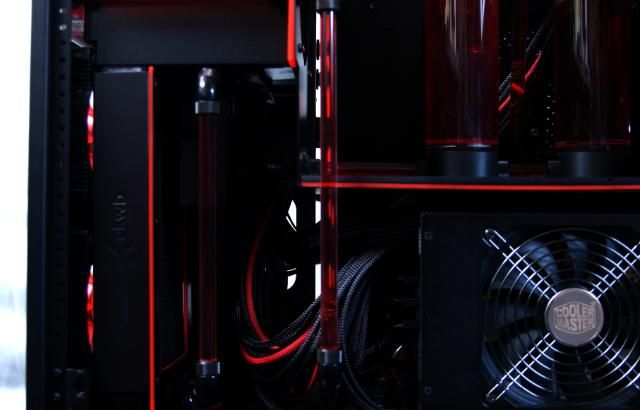
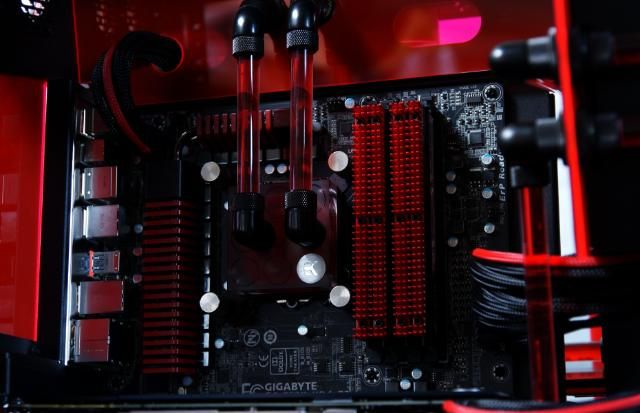
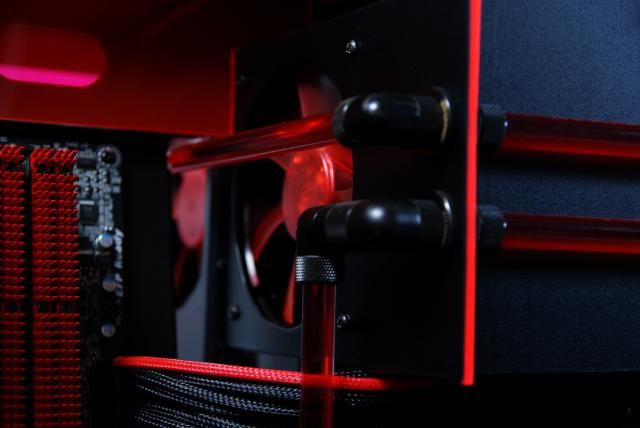
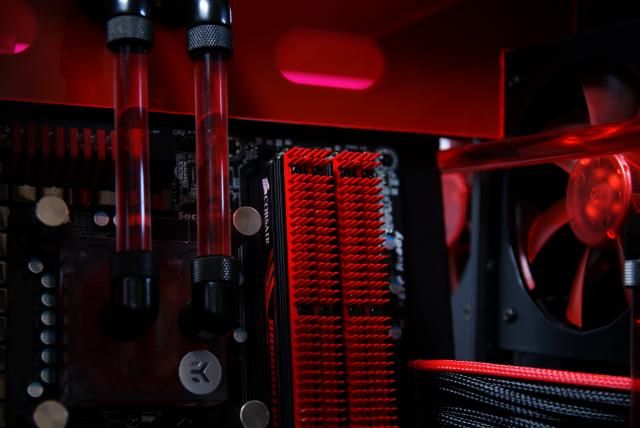
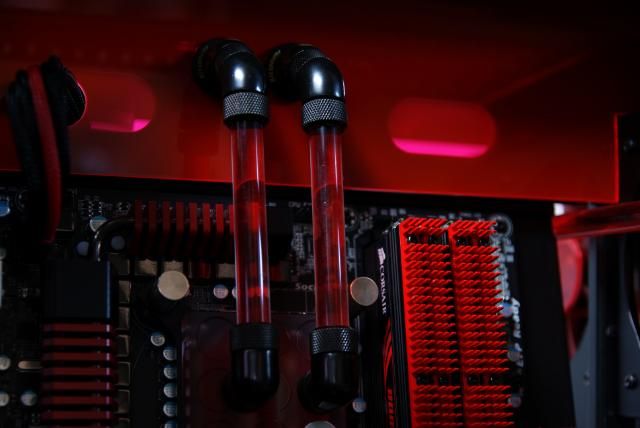
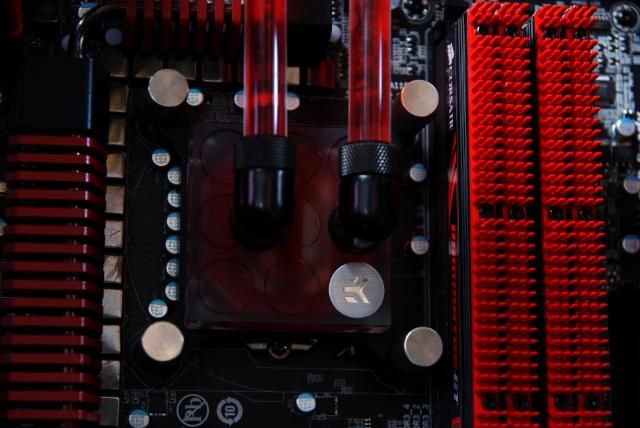
CPU outlet goes into the reservoir.
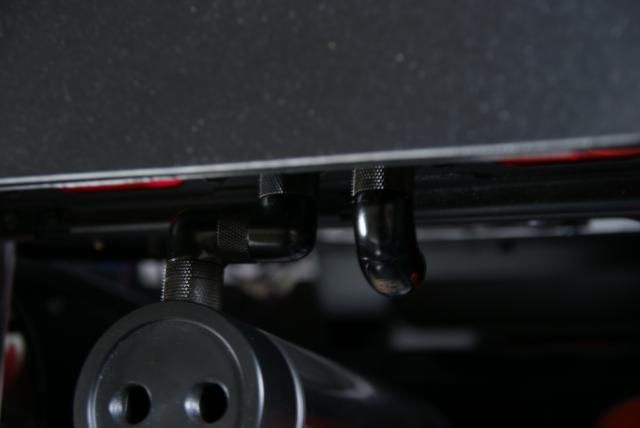
Inlet CPU comes from below the pedestal, in which a solid tube in the center of the 2 reservoirs is running.
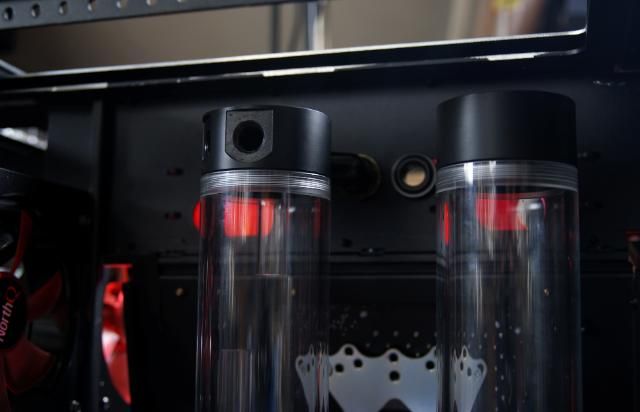
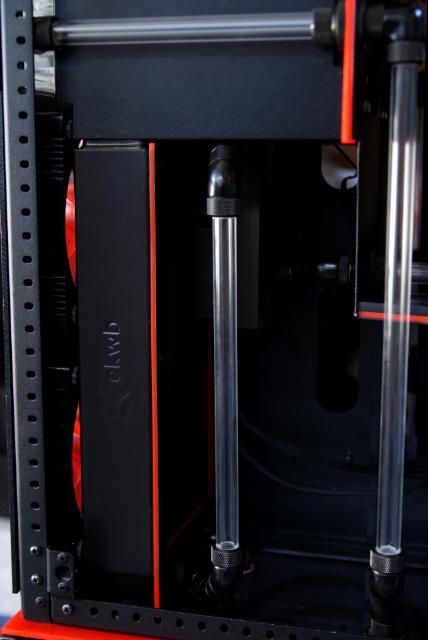
From the left reservoir is a tube running to the pumps (2x MCP355 with EK-DCC Dual top V.2)
Attach the pump to the HDD cage.
Inlet pump
Outlet goes down to.....
The 240 radiator
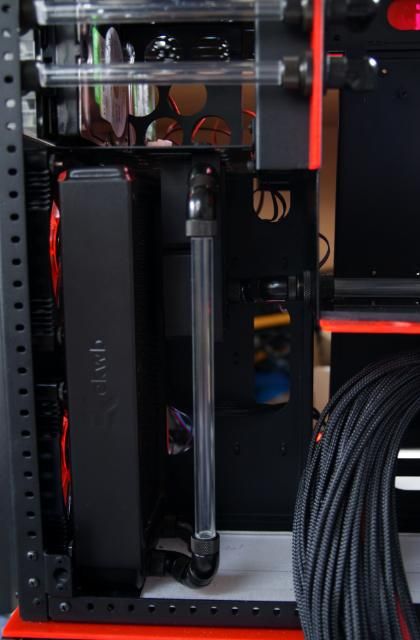
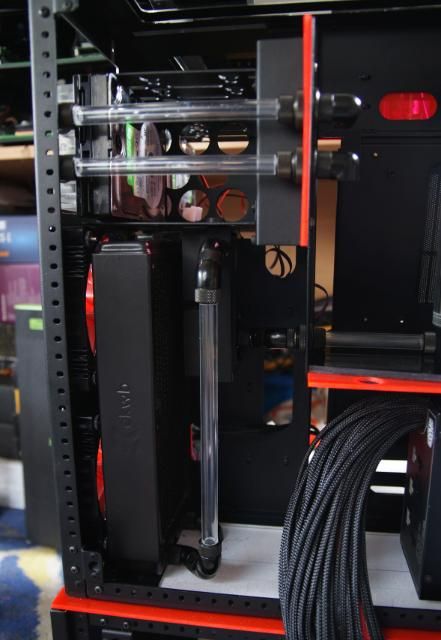
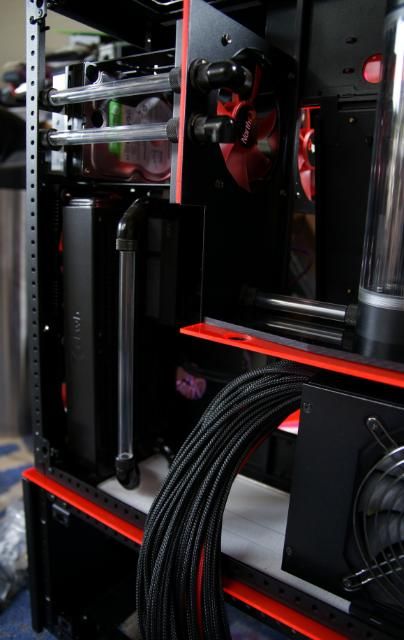
Outlet rad goes down again.
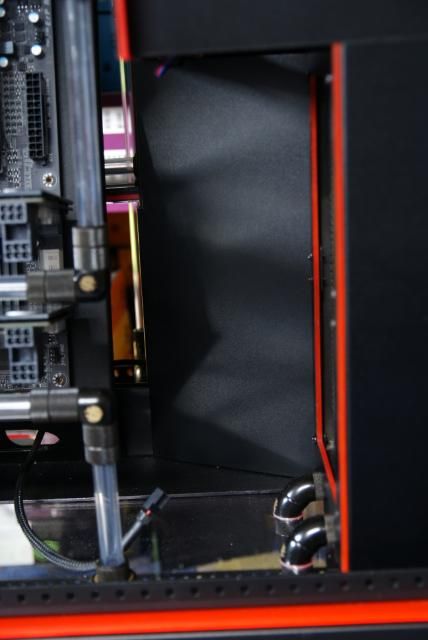
From the HDD there is also going a tube downwards. Using later on a fill port through the acrylic midplate
Adjusted the piece horizontal red acrylic with the hole in it.
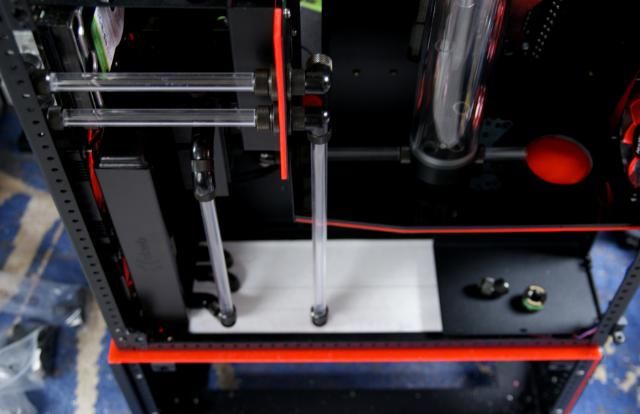
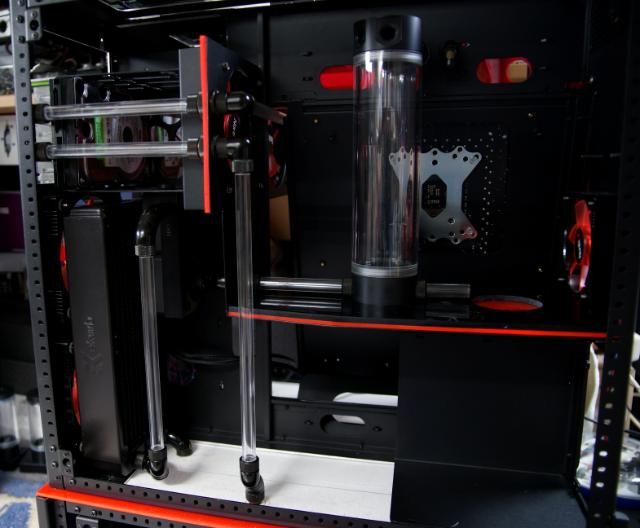
That's it
Update!!!
Target is as good as reached this holiday. Connecting all solid acrylic tubing.
Have taken some extra pics t, so a lot of pictures and little words
To begin, I made ​​a aluminum plate to support the angled mobo tray containing a slot for cables etc.
Marked 2 holes above the mobo for the in\ outlet CPU.
Cut a plate red acrylic with 2 holes in it
Fitting.
And cut the right sizes acrylic tubes.
Also connected all other tubes.
240 rad placed and marked the holes downwards.
Made the link to the other side.
CPU outlet goes into the reservoir.
Inlet CPU comes from below the pedestal, in which a solid tube in the center of the 2 reservoirs is running.
From the left reservoir is a tube running to the pumps (2x MCP355 with EK-DCC Dual top V.2)
Attach the pump to the HDD cage.
Inlet pump
Outlet goes down to.....
The 240 radiator
Outlet rad goes down again.
From the HDD there is also going a tube downwards. Using later on a fill port through the acrylic midplate
Adjusted the piece horizontal red acrylic with the hole in it.
That's it
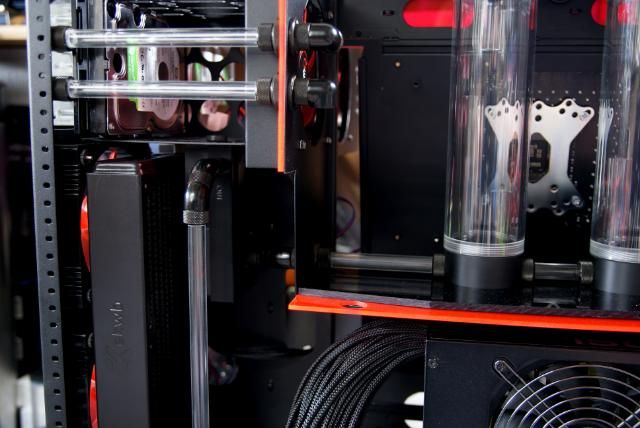
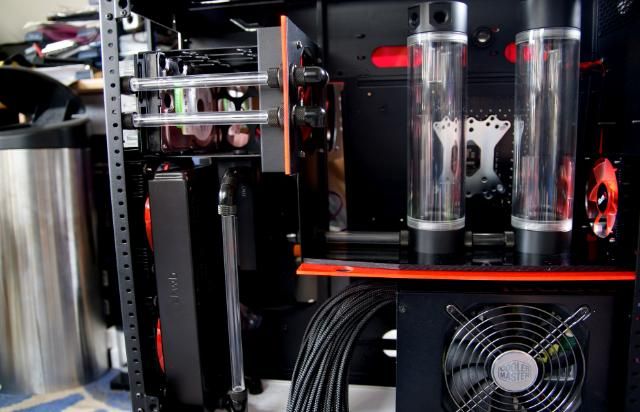
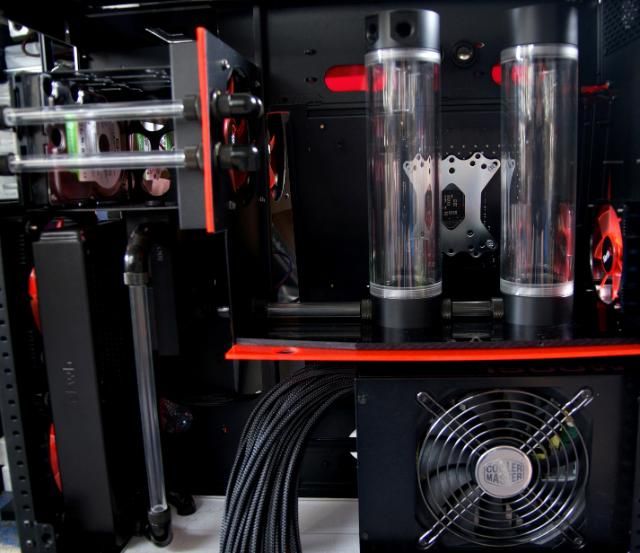
Update!!!
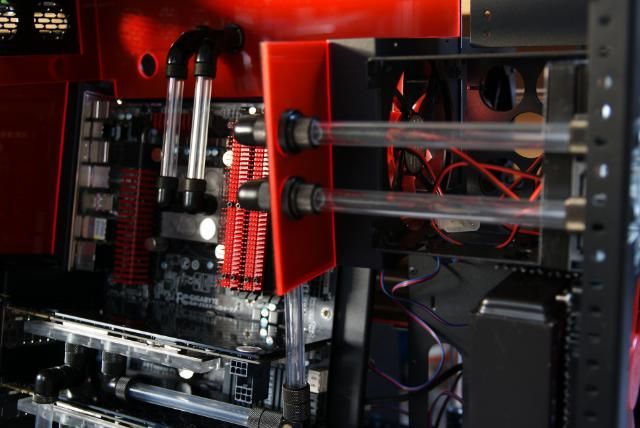
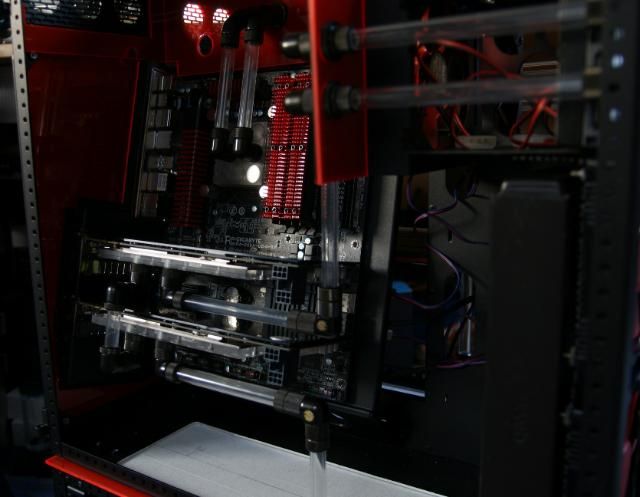
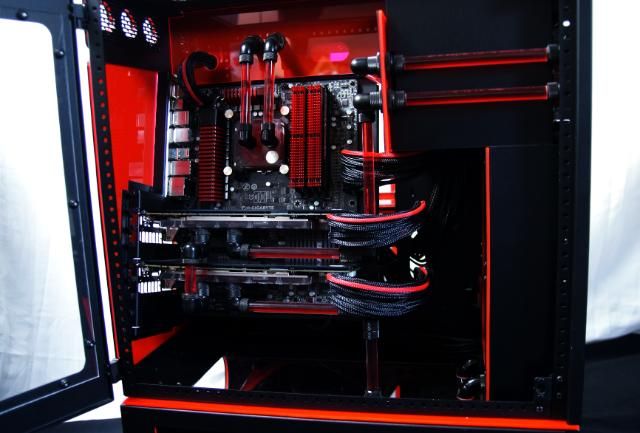
Where were we .... the acrylic tubes where almost finished, now it's time to make some covers.
First the CPU first connection, this is becoming exactly in the center of the two reservoirs
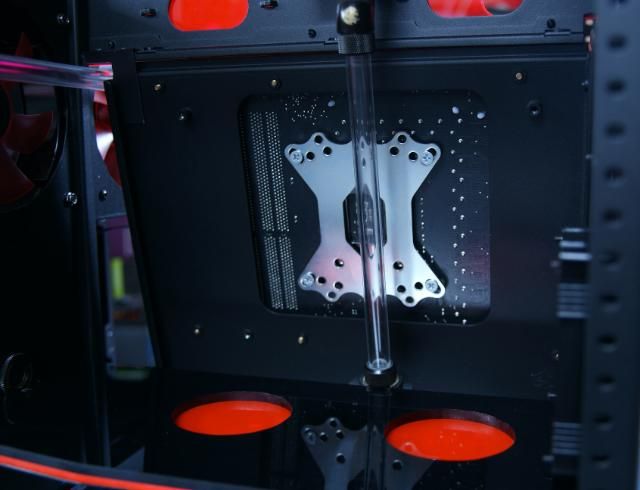
The midplate, Here I have created the holes for the tubes and fill-ports.
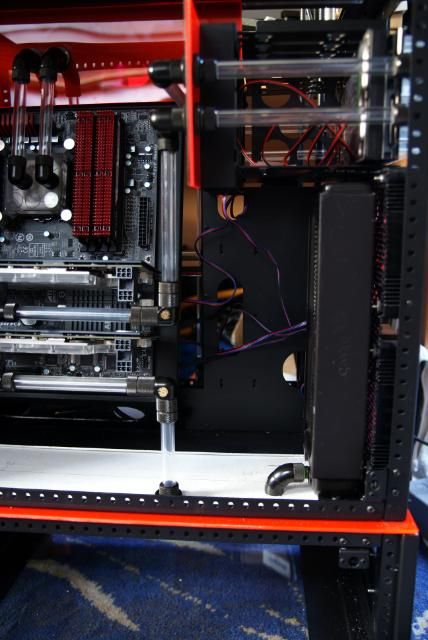
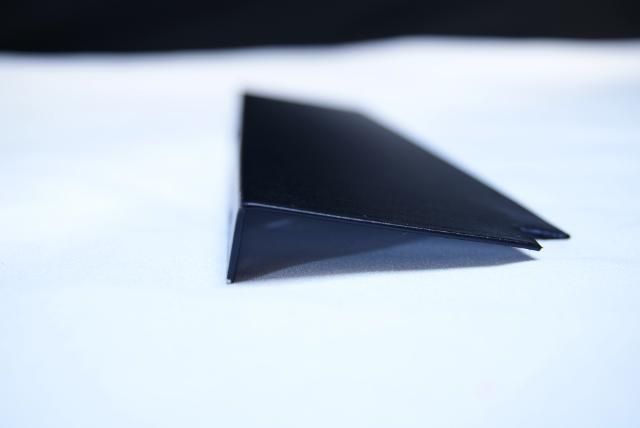
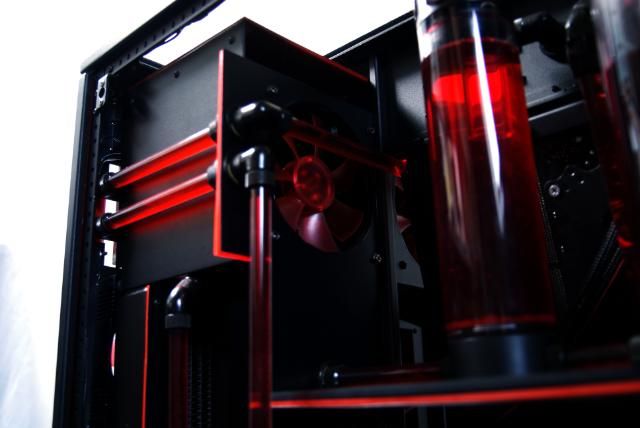
For the left 240 rad I have bent an aluminum cover and made it black.
Cut a piece of red acrylic cut to the dimensions of the radiator. And past this black vinyl

Besides the radiator there is a nice space for all wiring but I don't want to see the wires. Therefore a cover. Cut, bent and made it black.
To hide the HDDs and a nice black background for the tubes, I cut a piece of aluminum and again made it black, also made a nice red acrylic roof​​.
The earlier made red acrylic placed on the radiator.
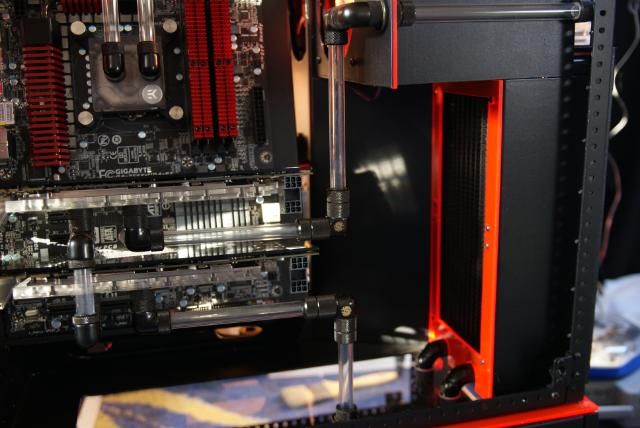
The cover for the wiring.
One side complete.
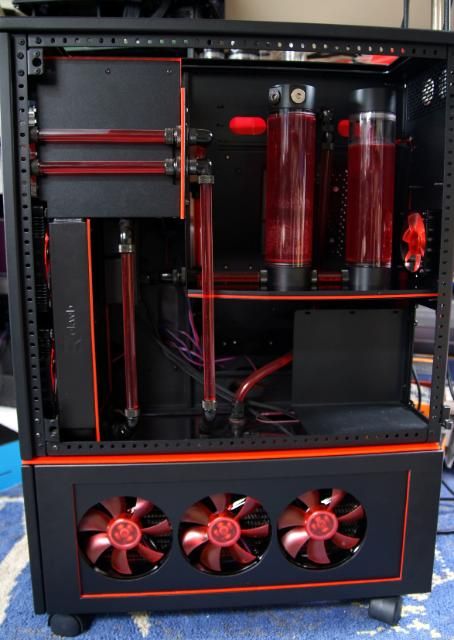
Gonna make both sides almost the same​​. So cut another piece of aluminum for the HDD cover.
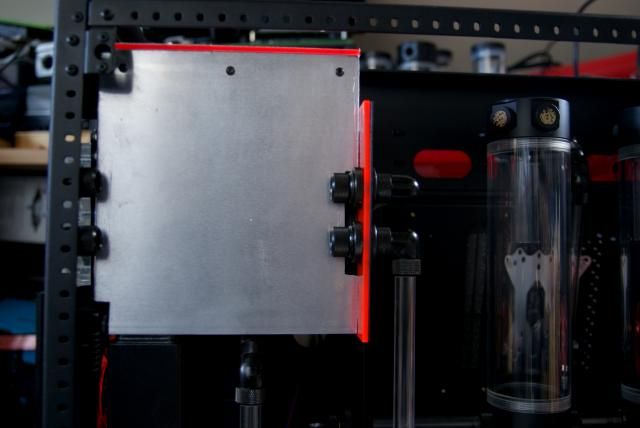
Made it black
Again, a piece of red acrylic for the other radiator
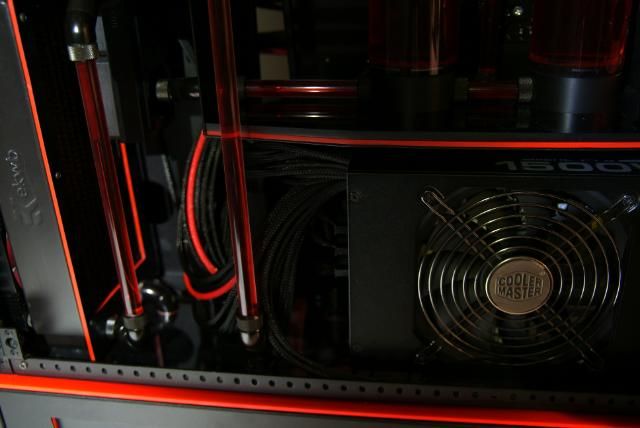
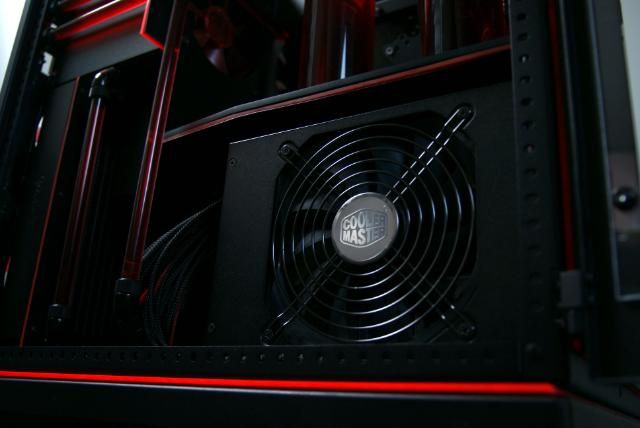
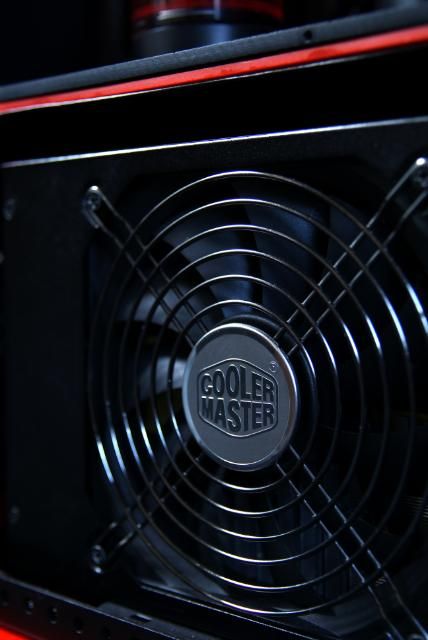
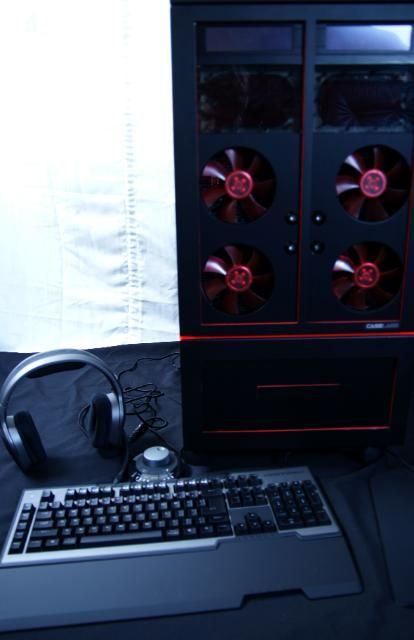
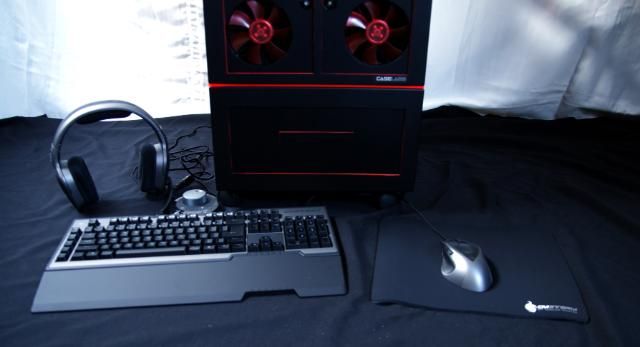
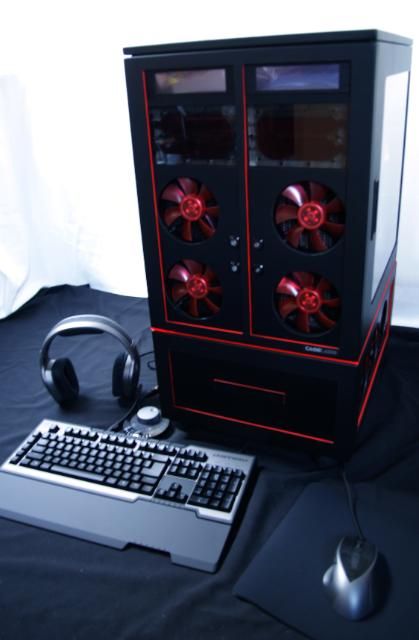
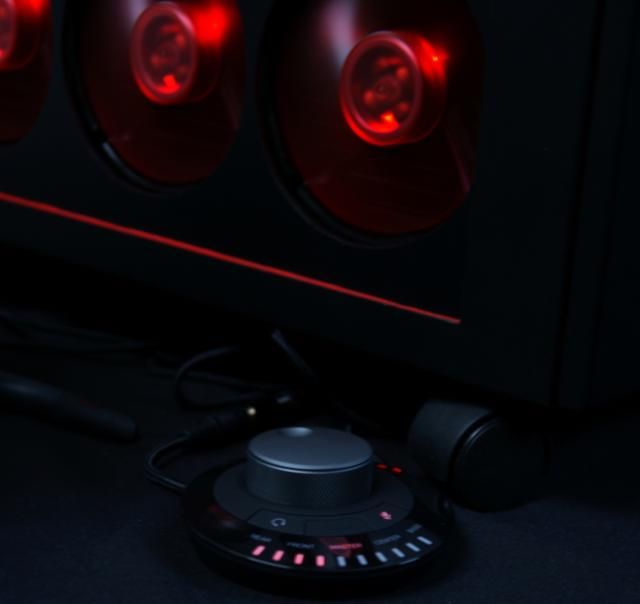
Then suddenly a package from.......Coolermaster
With a box full of game gear in the colors of the Case Labs build.. Thank you Cooler Master Marco, Ruud and everyone who made ​​this possible.
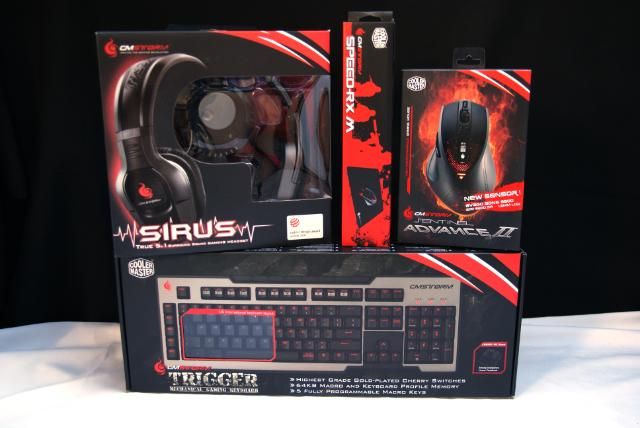
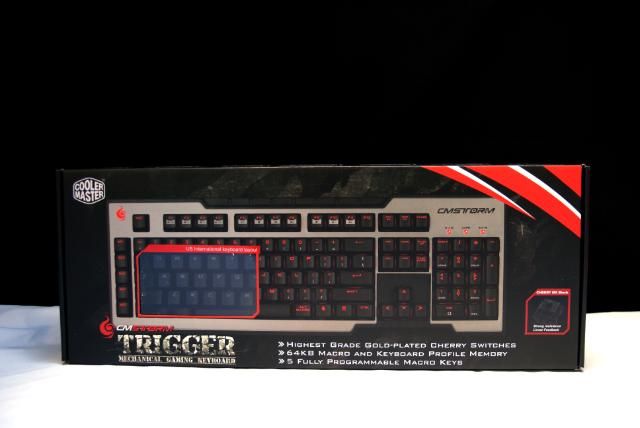
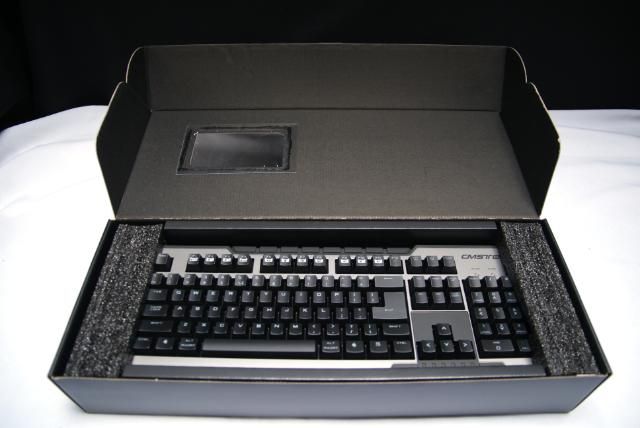
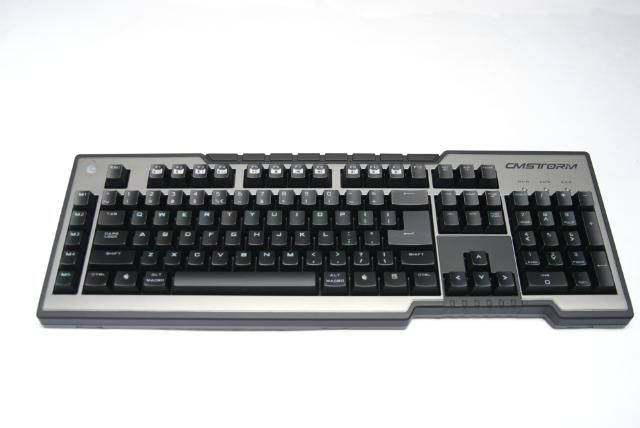
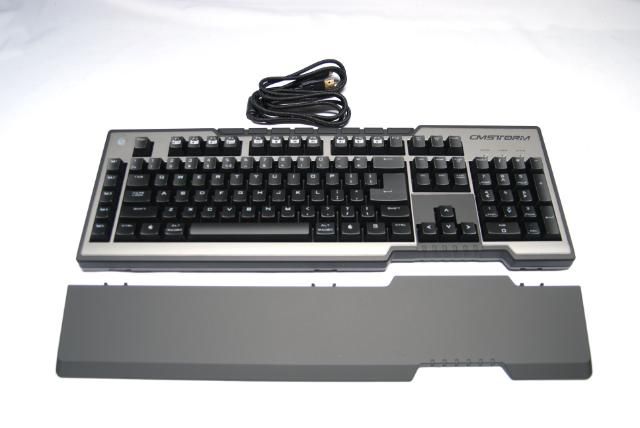
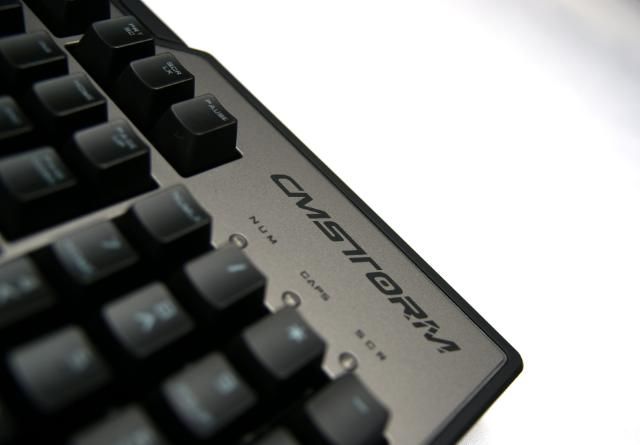
The CM Storm Trigger Keyboard:
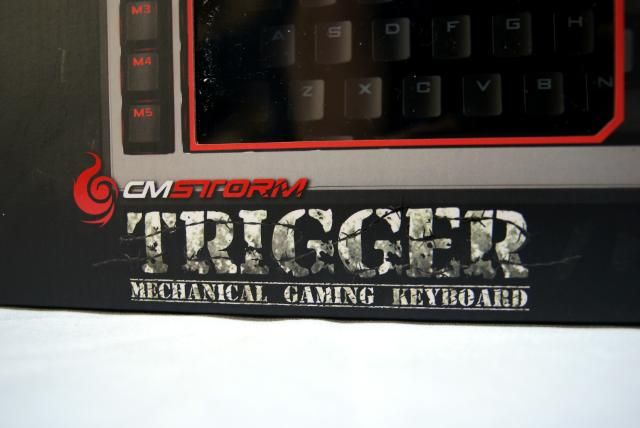
•High durability gold-plated Cherry switches rated for over 50 million key strokes
•Multi-media control keys for convenient sound control
•5 macro keys with profile management
•18K gold plated ultra low latency USB plugs
•Anti-ghosting 6 key rollover
•64KB on-board memory for profile storage
•Storm tactics key for deactivation of Windows key
•1000Hz driverless polling / 1ms response time
•Two port enhanced USB 2.0 hub
•Detachable wrist rest
•Braided cable for durability
•Non-slip rubber coating


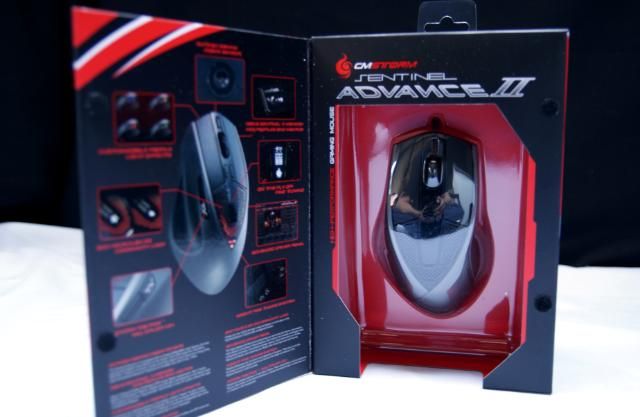
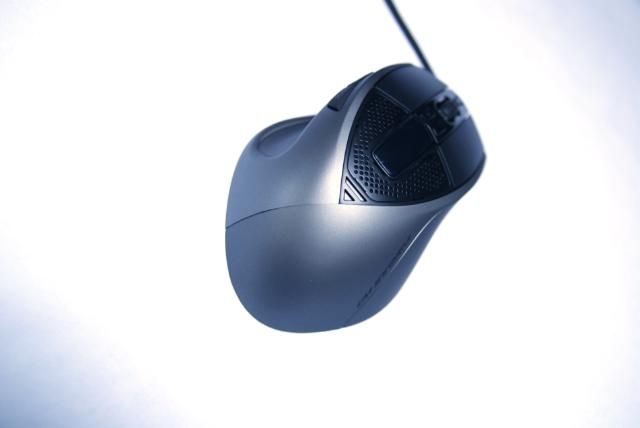
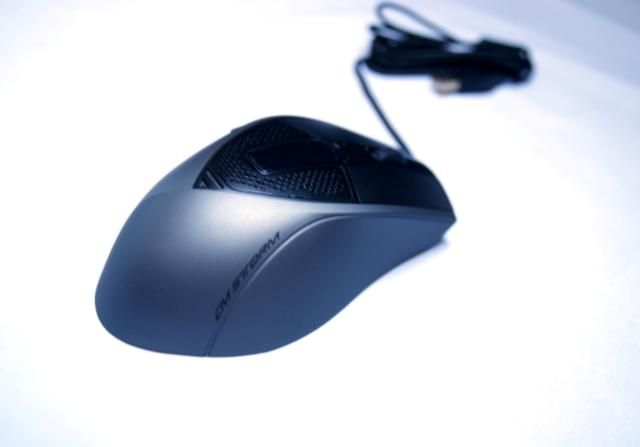
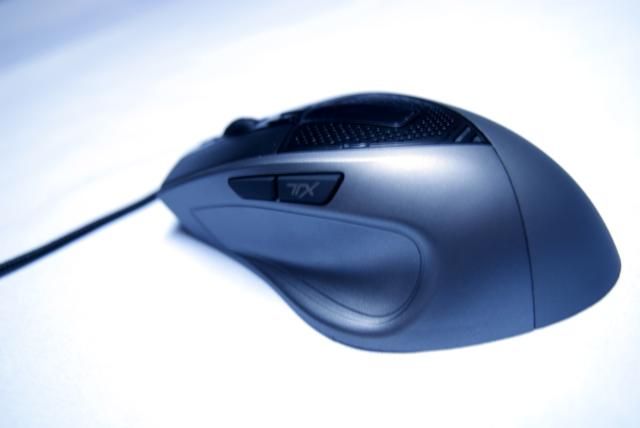
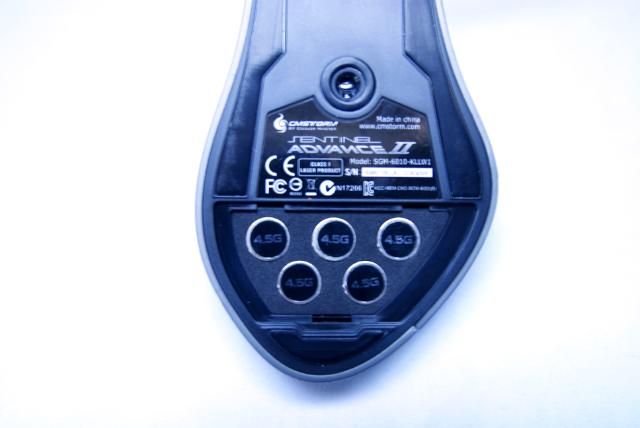
The CM Storm Sentinel Advance II:
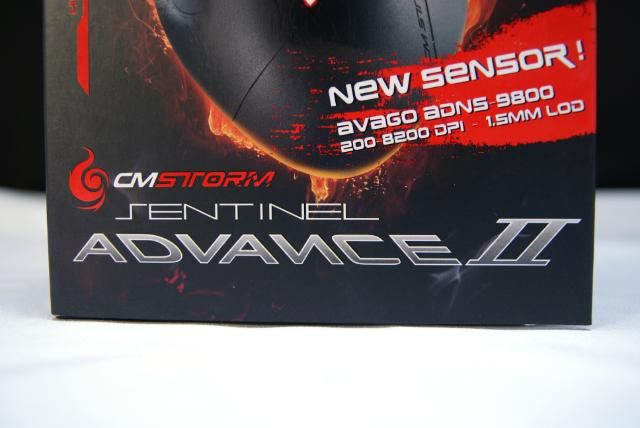
•200 - 8200 DPI tracking resolution
•128 KB Sentinel-X TM Memory for profiles and macros
•On the fly DPI adjustments (+/- 200 DPI)
•As little as 1.5 mm lift-off distance
•Up to 150 IPS – 3.8 m/s
•125 Hz – 1000 Hz USB rate fine-tuning
•5 profiles with 4 DPI setting each
•8 programmable buttons
•9 virtual buttons via button combinations
•Right-hand Ergonomic Design
•Customizable OLED logo
•Customizable multi color LED light system
•5 x 4.5g weight fine-tuning system


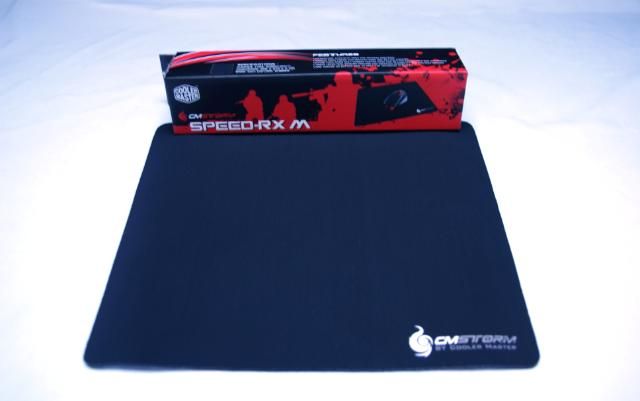
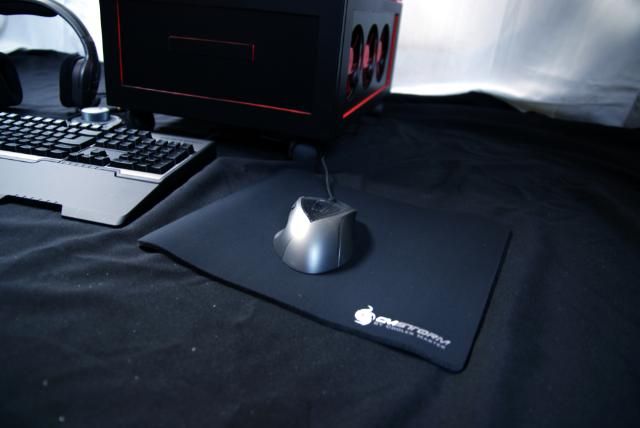
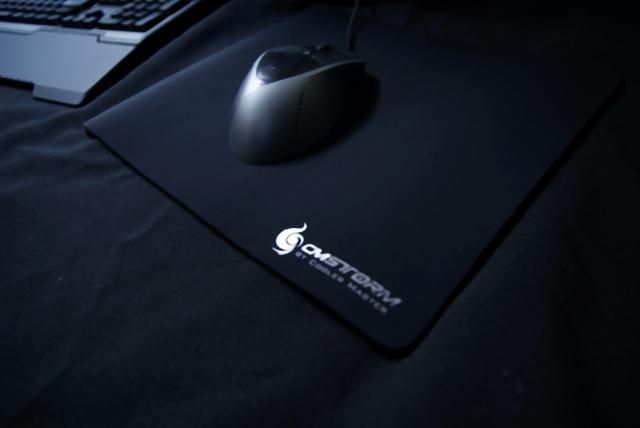
The CM Storm Speed-RX:
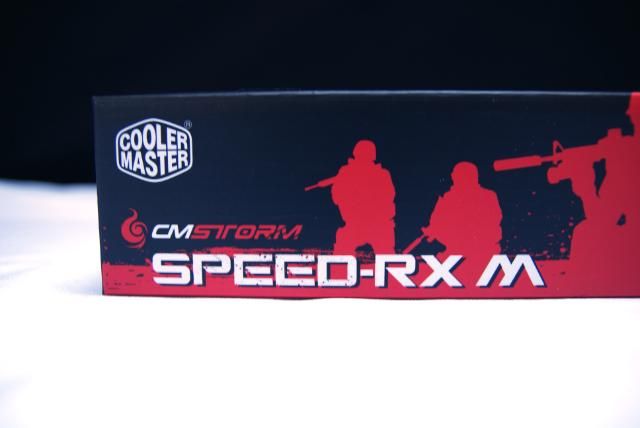
•Microscopic Synthetic Mesh for optimum precision
•Smooth nano fibers for reduced drag and better comfort
•Extra thick (5mm) soft rubber center piece for better ergonomics and endurance
•Triple Layer heat bonding process for improved durability and prevent peeling
•Grip coating on bottom side to keep the mousepad in place
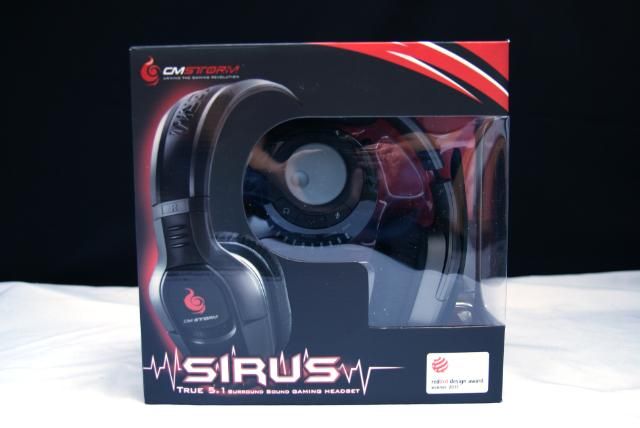
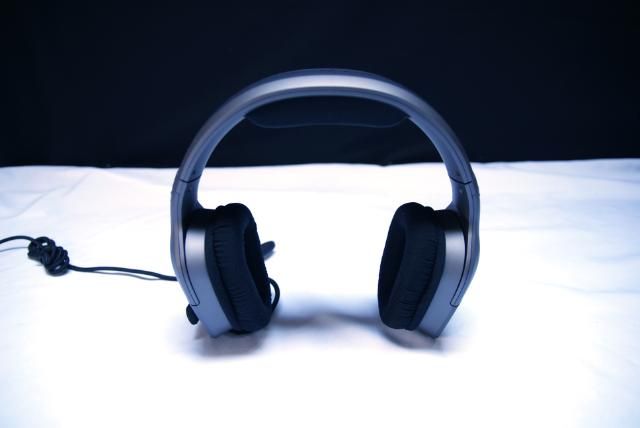
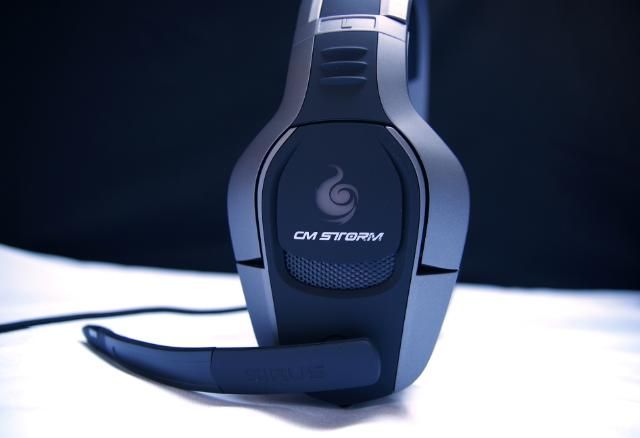
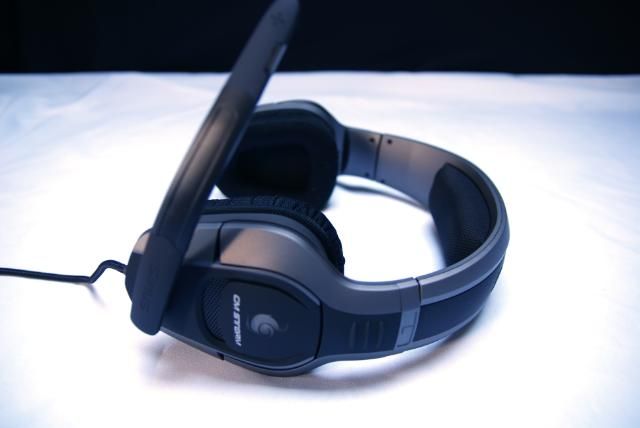
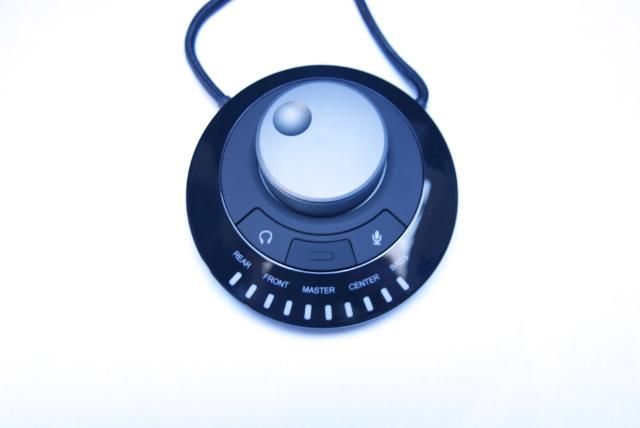
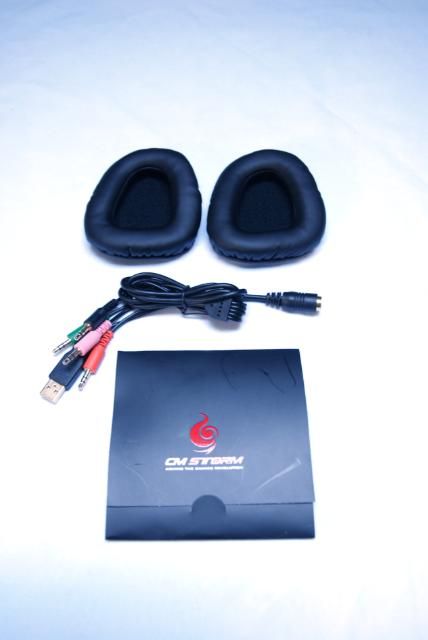
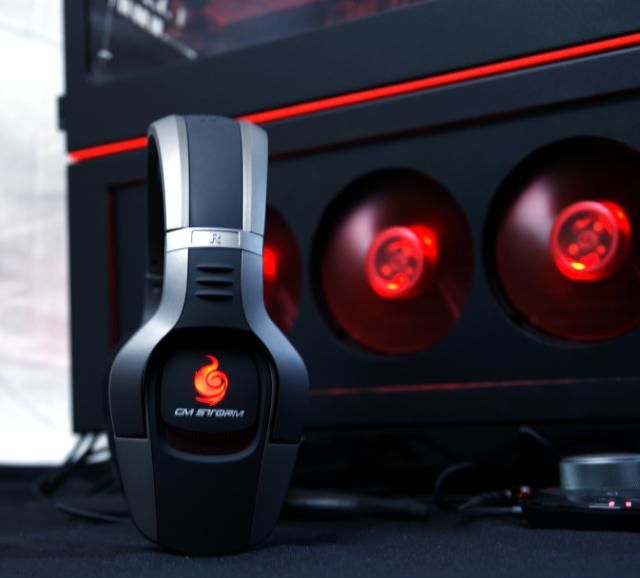
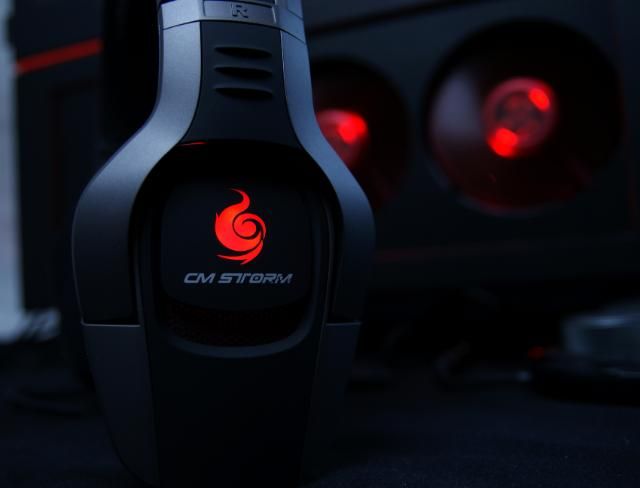
And last but not least, the CM Storm Sirus 5.1 gaming headset:

•True 5.1 Surround Sound (4 high quality speakers on each side)
•On-The-Fly Rear, Center, & Front speaker control for maximum sound customization (in USB mode only)
•Interchangeable ear-cups, micro weave for breathable audio and leatherette for improved noise insulation
•Dual gold-plated USB Connectors for improved signal quality
•Extra long durable and flexible microphone arm with LED mute indicator

So the ultimate gaming kit. Thanks again and complete review follows when everything is plugged in.
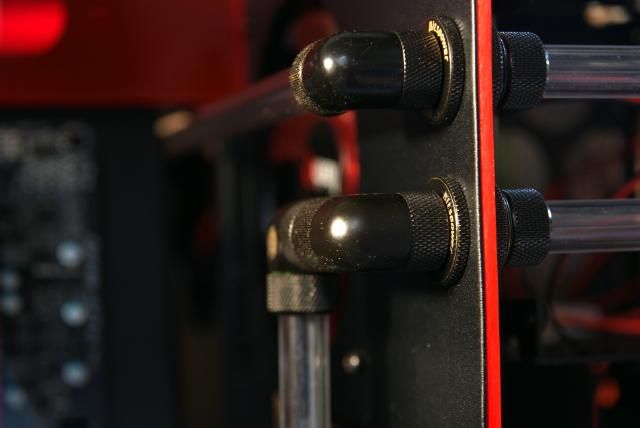
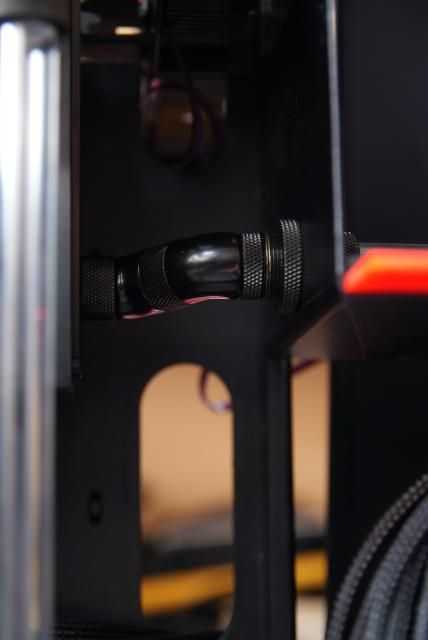
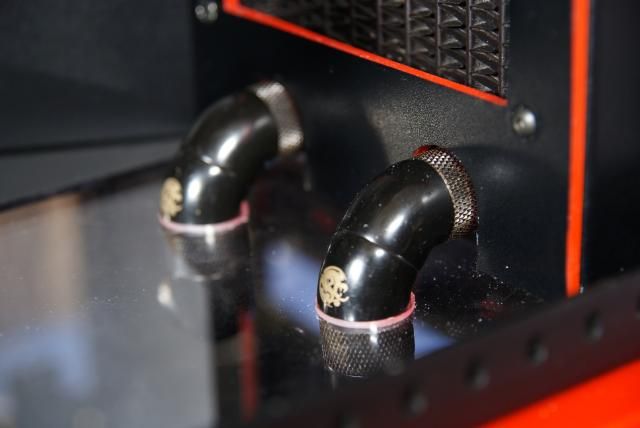
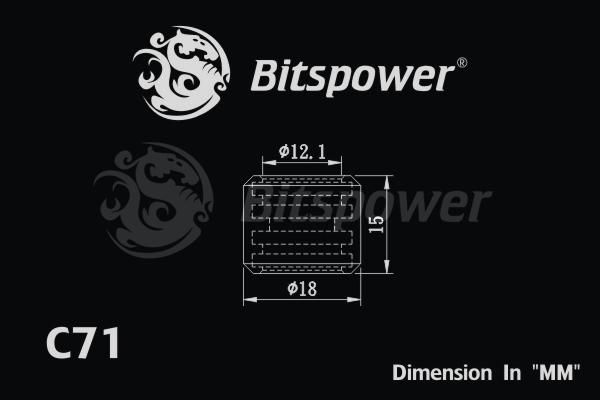
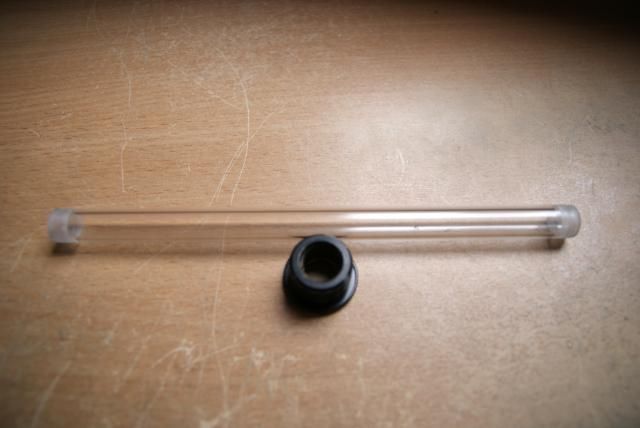
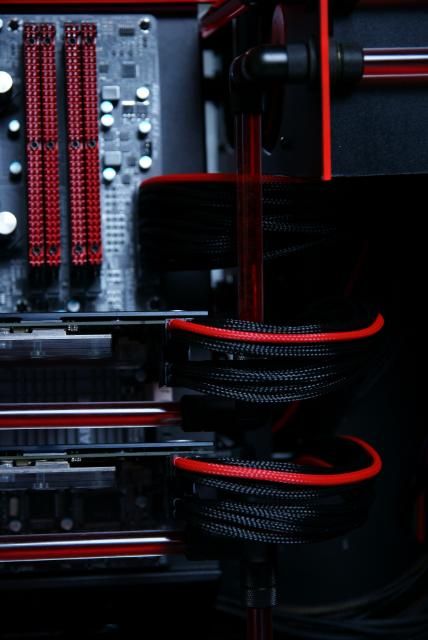
I got a lot of questions about the acrylic tubes, how I make them fit.
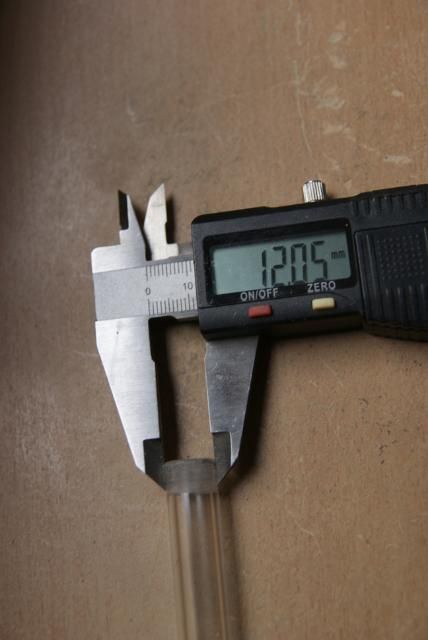
The acrylic tube is unfortunately with a tolerance, and unfortunately I rarely got the 12mm.
The tube that I most of the time get is generally 12.23 mm. Unfortunately, this does not fit into a multi link
Specs of the multilink C47 has no internal dimensions, therefore the C71
Step by step how I do this
Tube with the tolerance
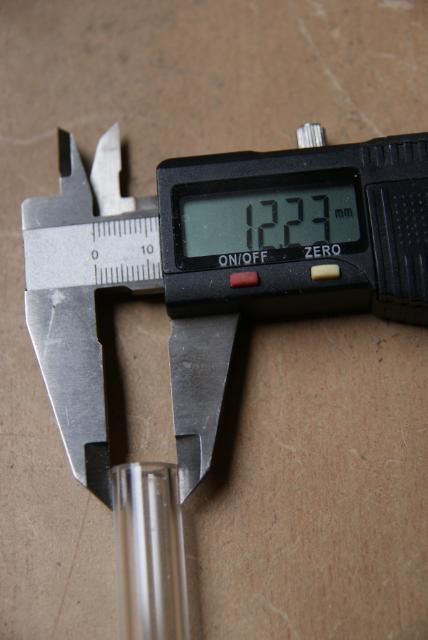
Marked the tube and cut it with a junior saw.
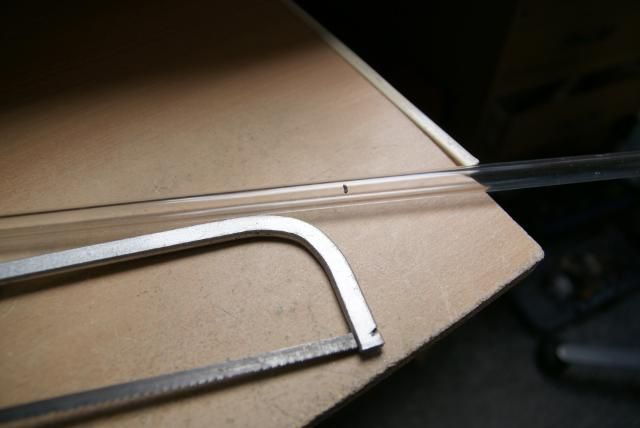
Both ends file straight.
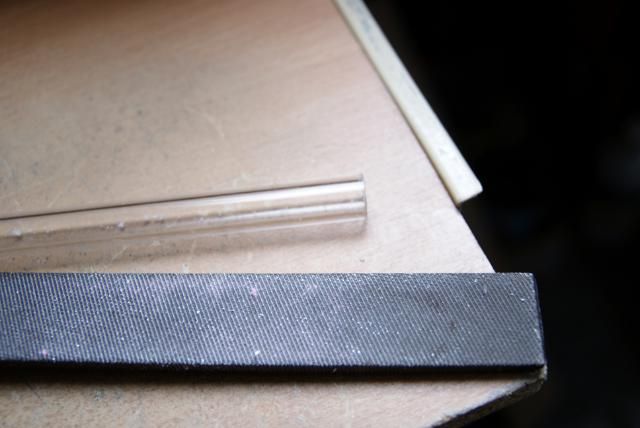
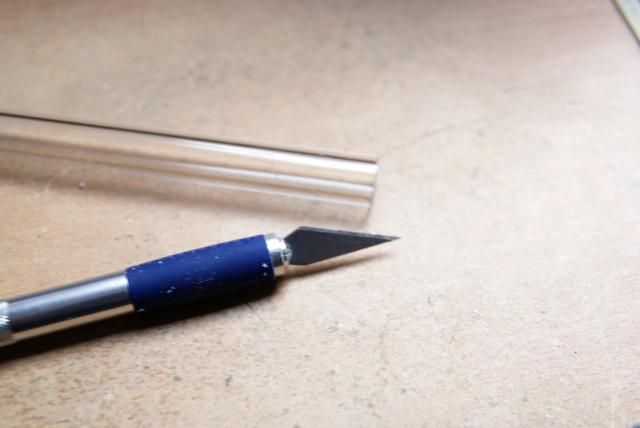
Removed a thin layer internally with a sharp knife
My dremel extention tool, set to 8mm

And this a few times around the tube. After some filing and measuring the right size
Now you have a sharp edge on the side which is not very good for your o-rings in the multilink.
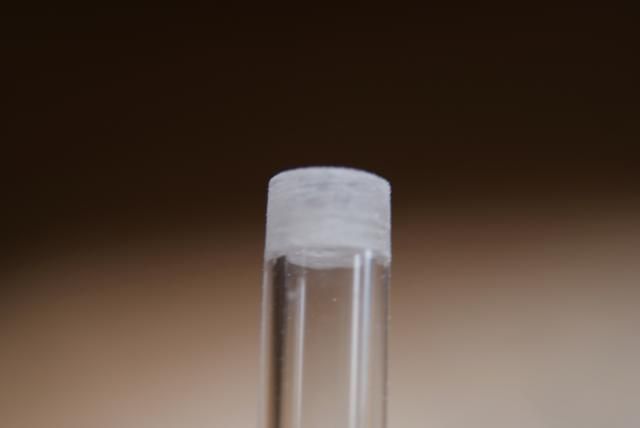
The original BP links also have a slanted edge, so made this also. File a slanted edge with a small file.
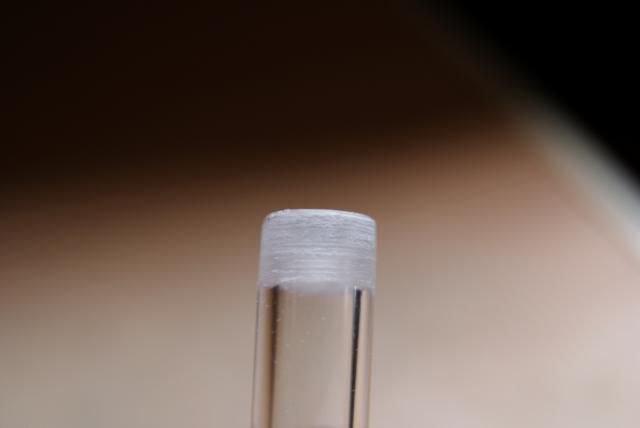
And ready is your custom made crystal link.
To end this update a small teaser

Where were we .... the acrylic tubes where almost finished, now it's time to make some covers.
First the CPU first connection, this is becoming exactly in the center of the two reservoirs
The midplate, Here I have created the holes for the tubes and fill-ports.
For the left 240 rad I have bent an aluminum cover and made it black.
Cut a piece of red acrylic cut to the dimensions of the radiator. And past this black vinyl
Besides the radiator there is a nice space for all wiring but I don't want to see the wires. Therefore a cover. Cut, bent and made it black.
To hide the HDDs and a nice black background for the tubes, I cut a piece of aluminum and again made it black, also made a nice red acrylic roof​​.
The earlier made red acrylic placed on the radiator.
The cover for the wiring.
One side complete.
Gonna make both sides almost the same​​. So cut another piece of aluminum for the HDD cover.
Made it black
Again, a piece of red acrylic for the other radiator
Then suddenly a package from.......Coolermaster
With a box full of game gear in the colors of the Case Labs build.. Thank you Cooler Master Marco, Ruud and everyone who made ​​this possible.
The CM Storm Trigger Keyboard:
•High durability gold-plated Cherry switches rated for over 50 million key strokes
•Multi-media control keys for convenient sound control
•5 macro keys with profile management
•18K gold plated ultra low latency USB plugs
•Anti-ghosting 6 key rollover
•64KB on-board memory for profile storage
•Storm tactics key for deactivation of Windows key
•1000Hz driverless polling / 1ms response time
•Two port enhanced USB 2.0 hub
•Detachable wrist rest
•Braided cable for durability
•Non-slip rubber coating
The CM Storm Sentinel Advance II:
•200 - 8200 DPI tracking resolution
•128 KB Sentinel-X TM Memory for profiles and macros
•On the fly DPI adjustments (+/- 200 DPI)
•As little as 1.5 mm lift-off distance
•Up to 150 IPS – 3.8 m/s
•125 Hz – 1000 Hz USB rate fine-tuning
•5 profiles with 4 DPI setting each
•8 programmable buttons
•9 virtual buttons via button combinations
•Right-hand Ergonomic Design
•Customizable OLED logo
•Customizable multi color LED light system
•5 x 4.5g weight fine-tuning system
The CM Storm Speed-RX:
•Microscopic Synthetic Mesh for optimum precision
•Smooth nano fibers for reduced drag and better comfort
•Extra thick (5mm) soft rubber center piece for better ergonomics and endurance
•Triple Layer heat bonding process for improved durability and prevent peeling
•Grip coating on bottom side to keep the mousepad in place
And last but not least, the CM Storm Sirus 5.1 gaming headset:
•True 5.1 Surround Sound (4 high quality speakers on each side)
•On-The-Fly Rear, Center, & Front speaker control for maximum sound customization (in USB mode only)
•Interchangeable ear-cups, micro weave for breathable audio and leatherette for improved noise insulation
•Dual gold-plated USB Connectors for improved signal quality
•Extra long durable and flexible microphone arm with LED mute indicator
So the ultimate gaming kit. Thanks again and complete review follows when everything is plugged in.
I got a lot of questions about the acrylic tubes, how I make them fit.
The acrylic tube is unfortunately with a tolerance, and unfortunately I rarely got the 12mm.
The tube that I most of the time get is generally 12.23 mm. Unfortunately, this does not fit into a multi link
Specs of the multilink C47 has no internal dimensions, therefore the C71
Step by step how I do this
Tube with the tolerance
Marked the tube and cut it with a junior saw.
Both ends file straight.
Removed a thin layer internally with a sharp knife
My dremel extention tool, set to 8mm
And this a few times around the tube. After some filing and measuring the right size
Now you have a sharp edge on the side which is not very good for your o-rings in the multilink.
The original BP links also have a slanted edge, so made this also. File a slanted edge with a small file.
And ready is your custom made crystal link.
To end this update a small teaser
hammerforged
[H]ard|Gawd
- Joined
- Jan 23, 2012
- Messages
- 1,092
Solid build. Love the crystal link. Really like that you stuck with all 90 degree angles, just adds to the overal very clean look of the build.
Another Update!!!
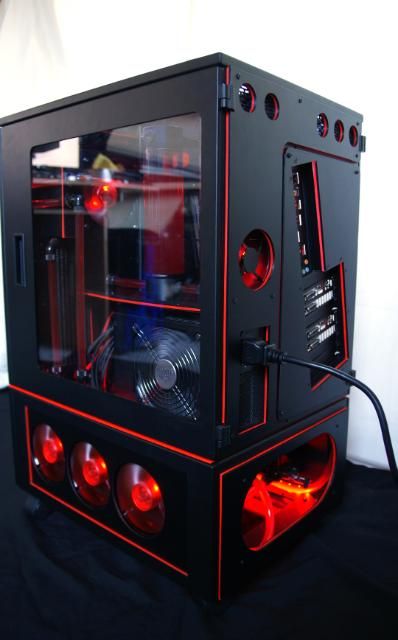
Ok, can't resist posting the pics of a filled M8
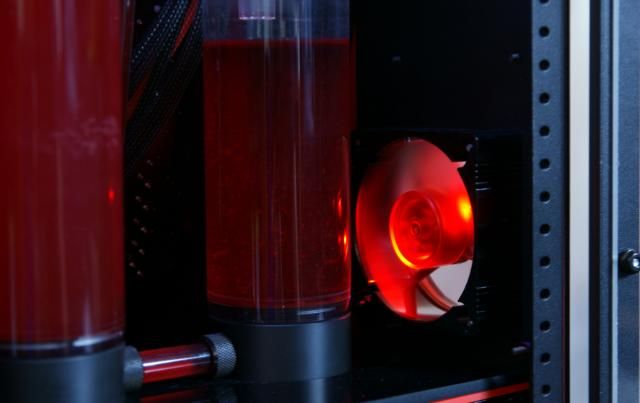
After adding 2.5 liter EK-Ekoolant blood red
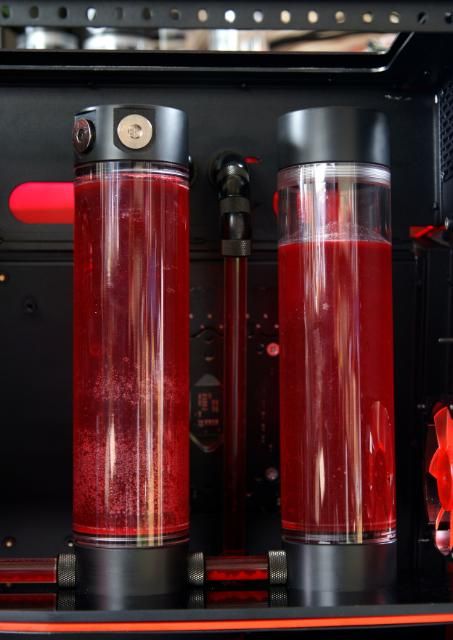
Still some air in the front

Picture with some leds, but don't know if i keep these
Other side a bit more careful so just in case everything is covered
And again a build without leaks, maybe because this time I used EKWB rotery's
After some hours :thumb:
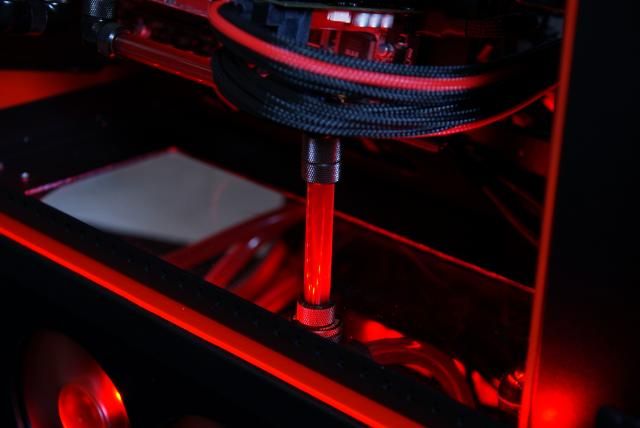
The beautiful EK-FC680 GTX - Acetal + Nickel CSQ
And the EK-Supremacy - Nickel
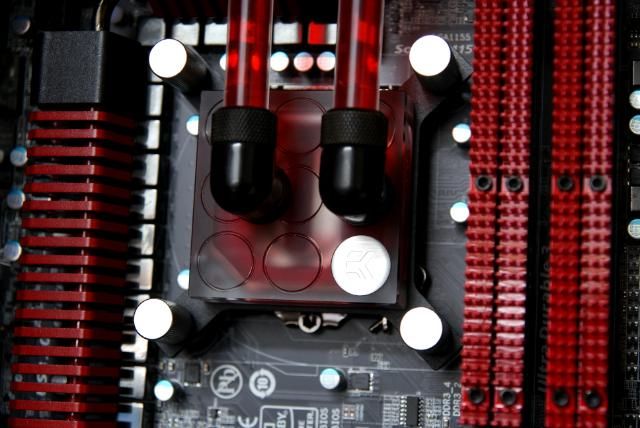
All tubes filled
Ok, can't resist posting the pics of a filled M8
After adding 2.5 liter EK-Ekoolant blood red
Still some air in the front
Picture with some leds, but don't know if i keep these
Other side a bit more careful so just in case everything is covered
And again a build without leaks, maybe because this time I used EKWB rotery's
After some hours :thumb:
The beautiful EK-FC680 GTX - Acetal + Nickel CSQ
And the EK-Supremacy - Nickel
All tubes filled
dealmaster
Limp Gawd
- Joined
- Jul 12, 2007
- Messages
- 467
This is seriously awesome man. Your attention to detail is second to none. Very inspiring work.
hammerforged
[H]ard|Gawd
- Joined
- Jan 23, 2012
- Messages
- 1,092
Ha just saw your build on my FB feed. Xoxide shared it.
ochadd
[H]ard|Gawd
- Joined
- May 9, 2008
- Messages
- 1,317
Beautiful build.
mundivalur
n00b
- Joined
- Aug 6, 2012
- Messages
- 53
OMG you you you !!
Great build
Great build
fullvietFX
[H]ard|Gawd
- Joined
- Sep 1, 2004
- Messages
- 2,015
WOW WHAT THE *BLEEP* MOTHER*BLEEP*!
robert125381
Limp Gawd
- Joined
- Jul 22, 2012
- Messages
- 143
hands down the most pictures i have ever seen on a build thread!
Thanks everybody
Update!!!

It took a while, but here is on of the latest updates of the CaseLabs M8 build
Because of some problems related to shipping and other stuff it took a little longer before i received the second Lamptron touch controller.
Thanks to Highflow I received it so that I could continue
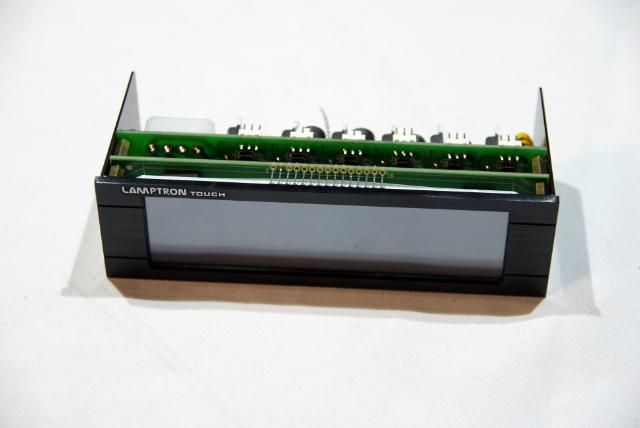
The 2e Lamptron touch controller
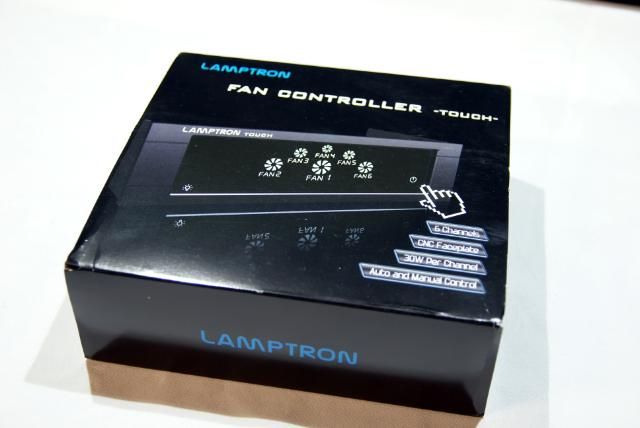
Not long after this I got the controller from Lamptron thanks Lamptron !!!
Installed and tested. Works perfectly!!!
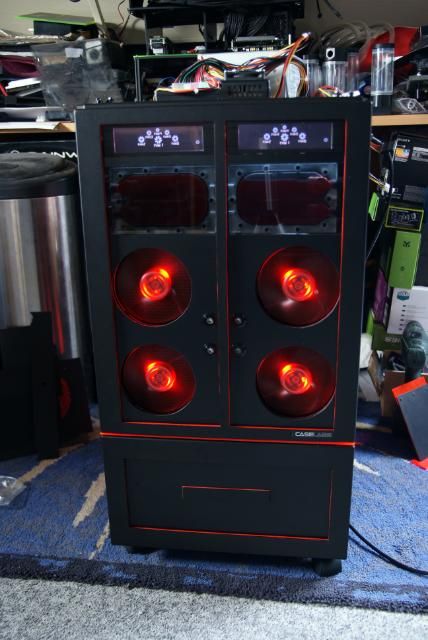
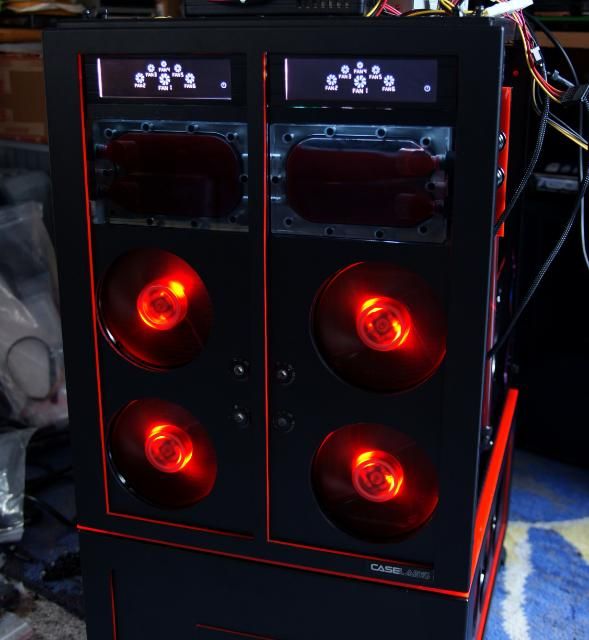
Looking good i think
Time to connect the cables

Before the power goes on some detail shots
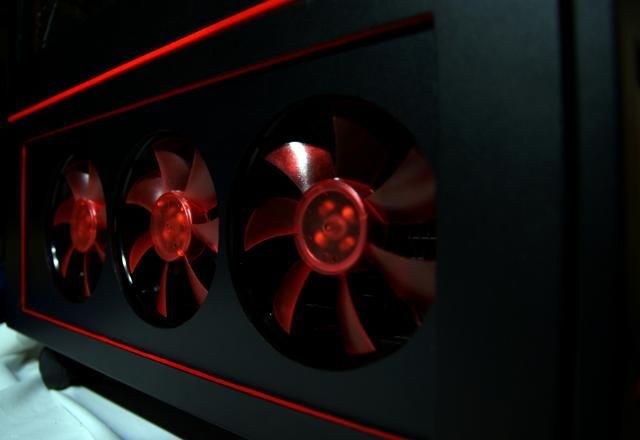

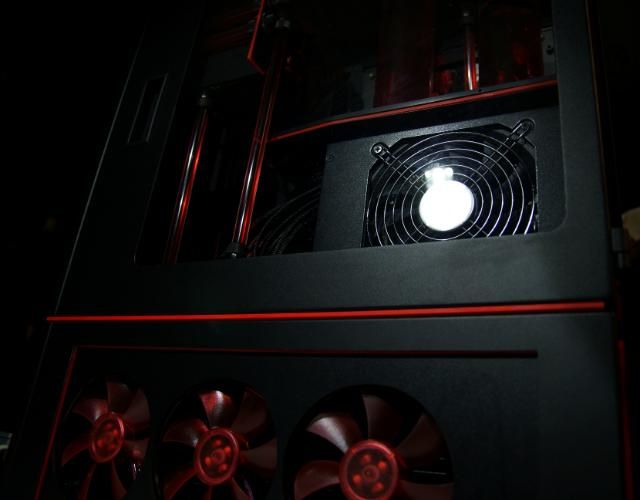
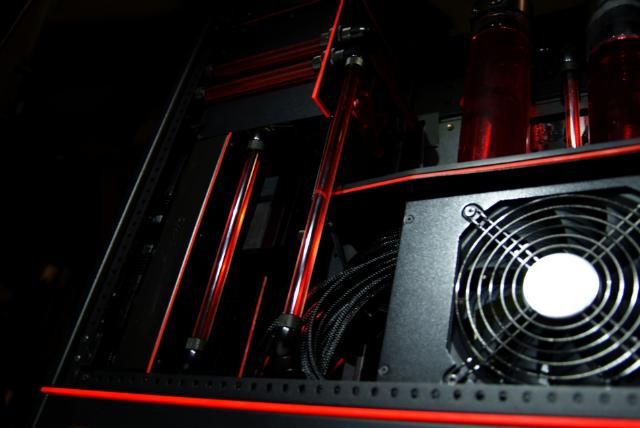
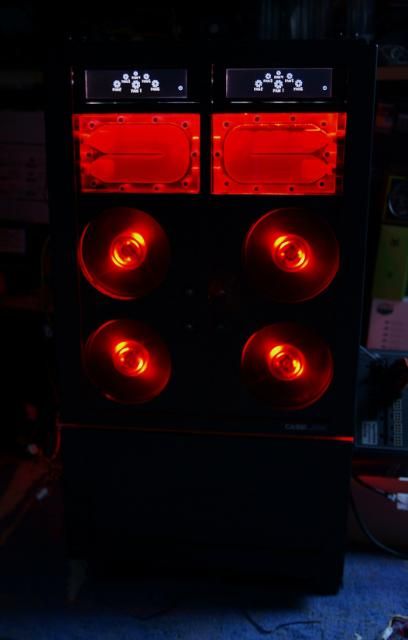
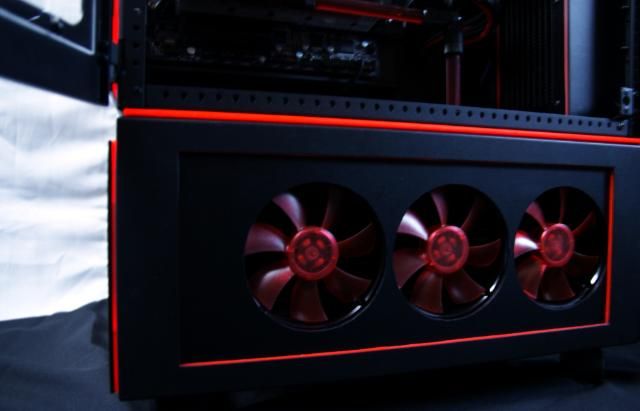
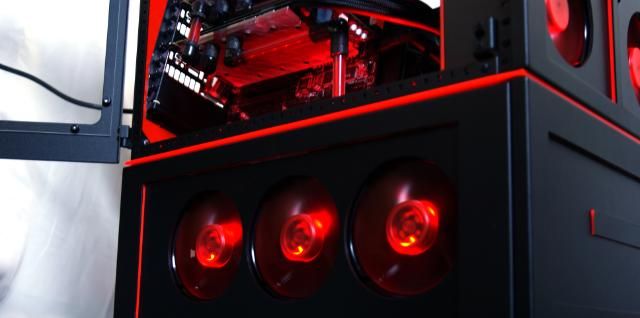
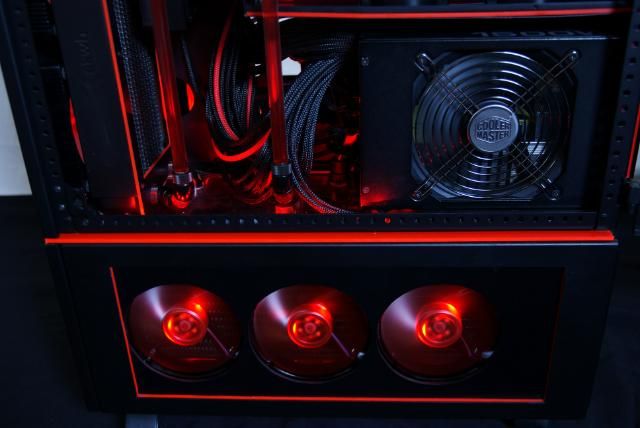
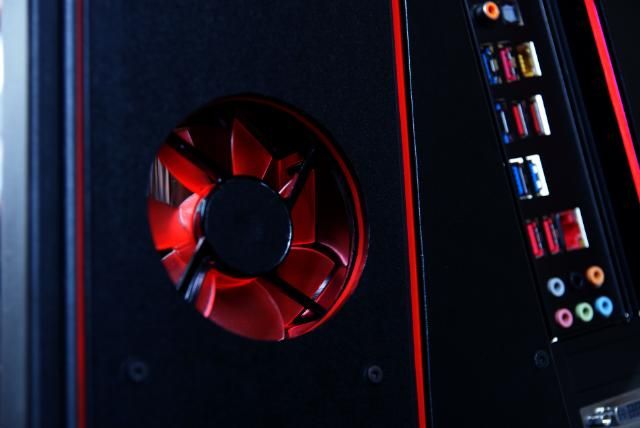
I also have applied some SMD LED strips, which are made available by a good friend of mine from lumenledverlichting. Clenn Thanks!!!

Above a white LED strip and underneath 2 red LED strips, and this on both sides
And on top of the HDD coolers also a LED strip instead of a single LEDs
Something wrong with this picture above
Not anymore now!!
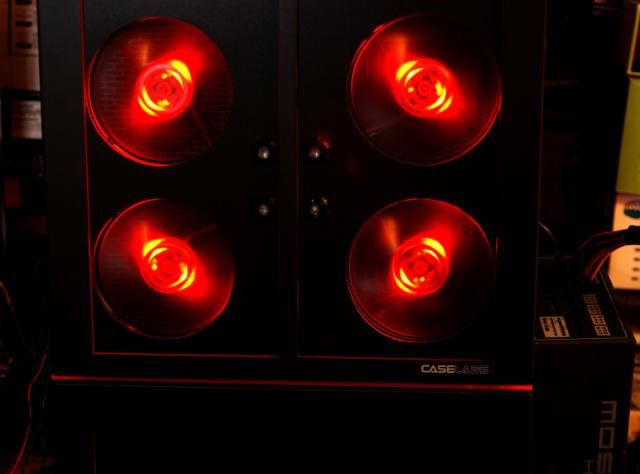
Looks good with the lights and fans
Up and running!!!
Soon the final photoshoot
Update!!!
It took a while, but here is on of the latest updates of the CaseLabs M8 build
Because of some problems related to shipping and other stuff it took a little longer before i received the second Lamptron touch controller.
Thanks to Highflow I received it so that I could continue
The 2e Lamptron touch controller
Not long after this I got the controller from Lamptron
thanks Lamptron !!!
Installed and tested. Works perfectly!!!
Looking good i think
Time to connect the cables
Before the power goes on some detail shots
I also have applied some SMD LED strips, which are made available by a good friend of mine from lumenledverlichting. Clenn Thanks!!!
Above a white LED strip and underneath 2 red LED strips, and this on both sides
And on top of the HDD coolers also a LED strip instead of a single LEDs
Something wrong with this picture above
Not anymore now!!
Looks good with the lights and fans
Up and running!!!
Soon the final photoshoot
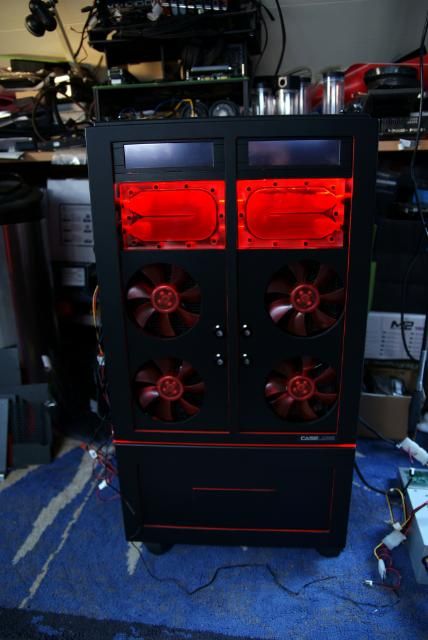
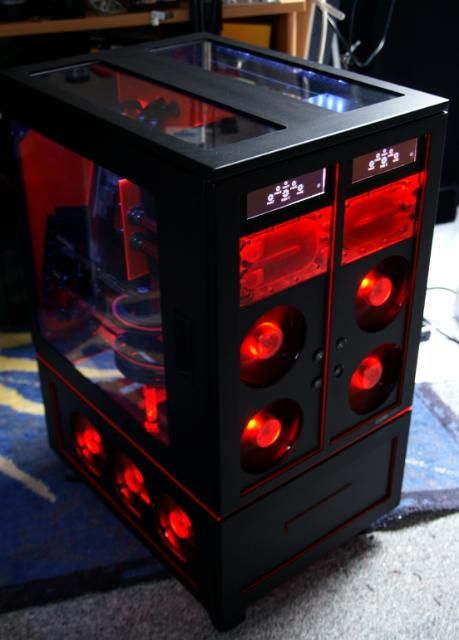
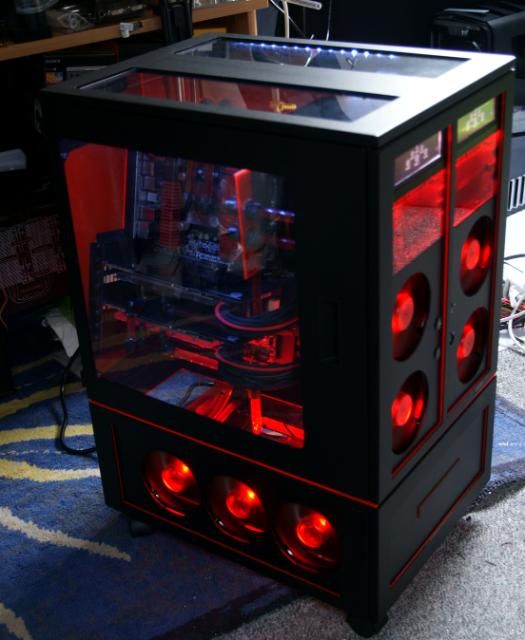
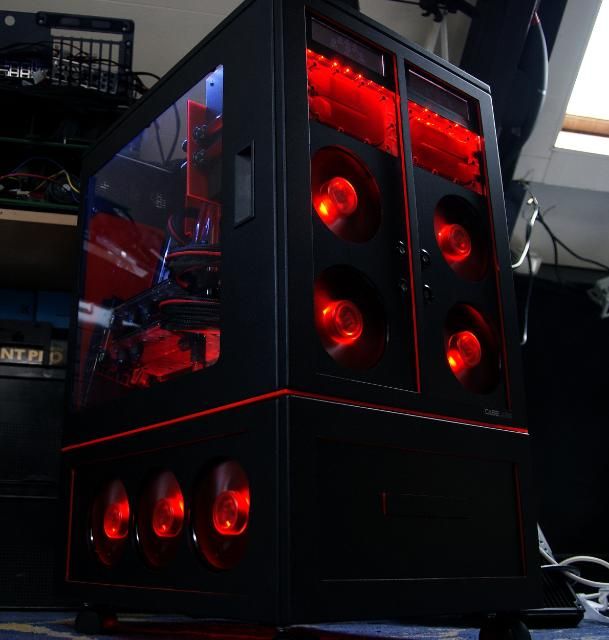
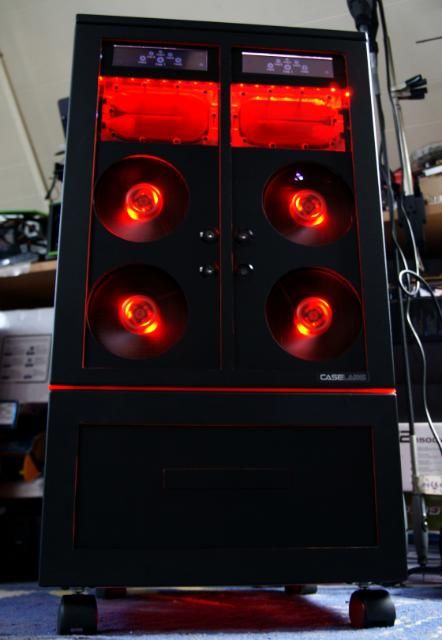
Final Update!!!
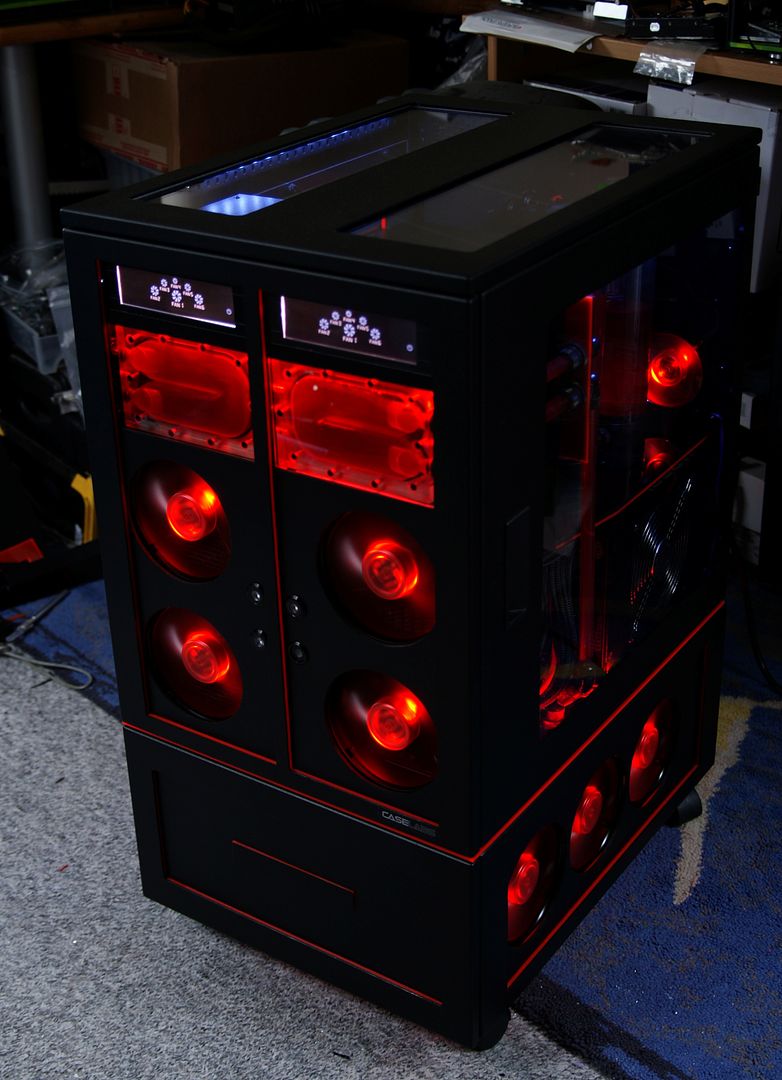
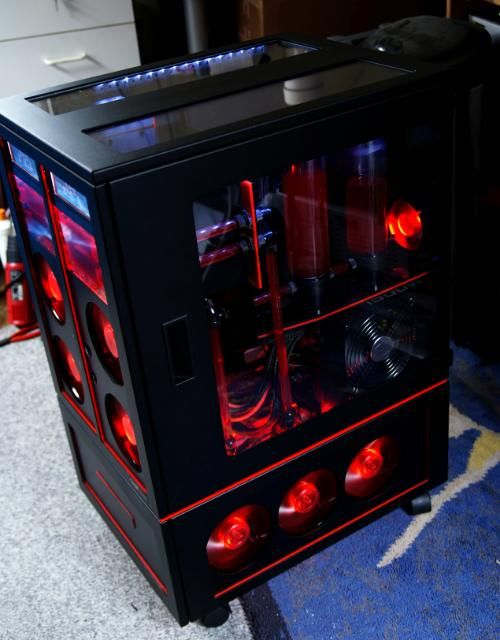
After a long wait.... the final pics. This build was quite a challenge given the size and space to be filled.
Now .... no more text only pics. Hope you like it!!!
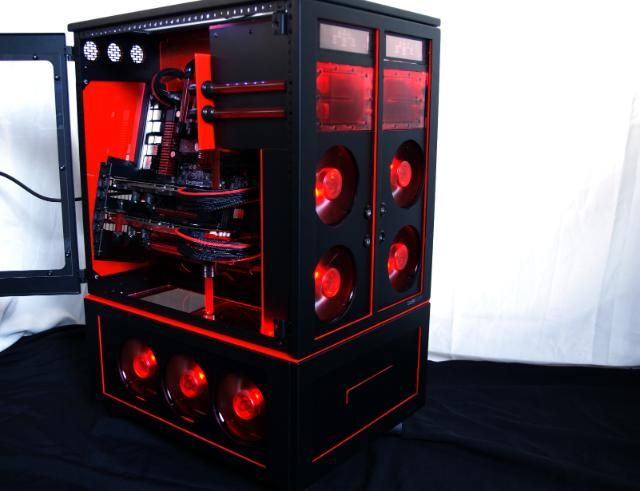
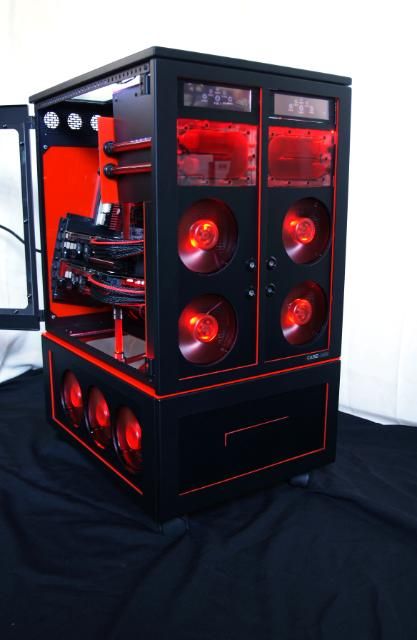
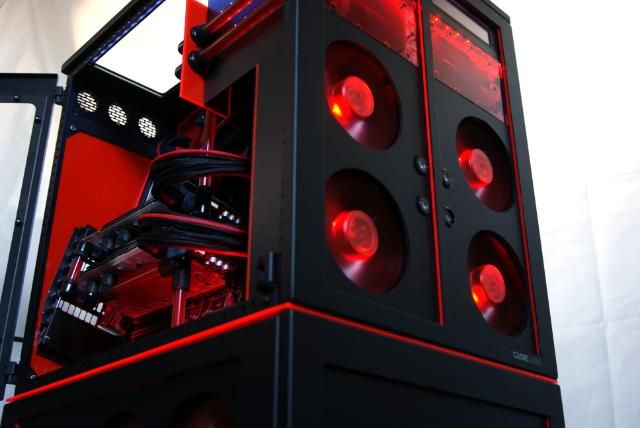
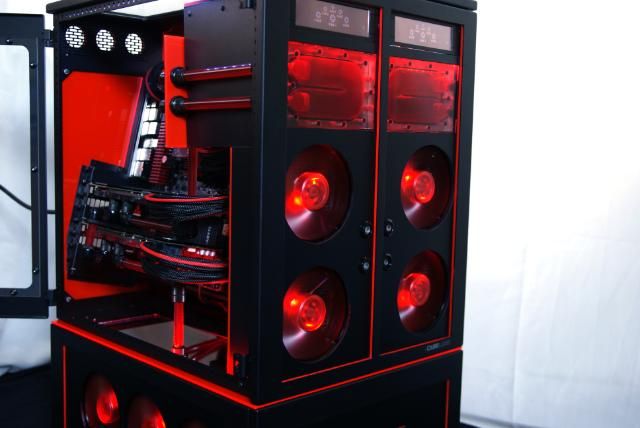
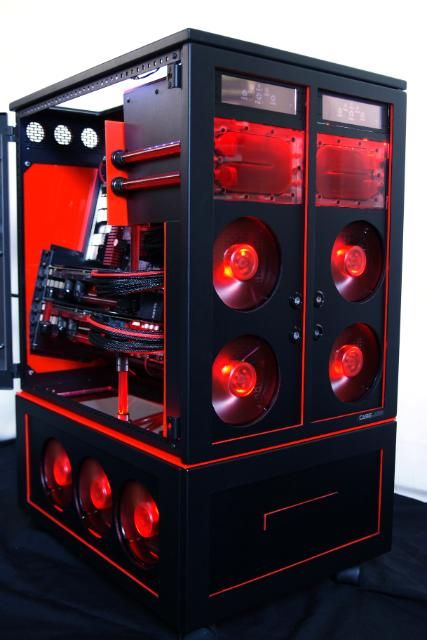

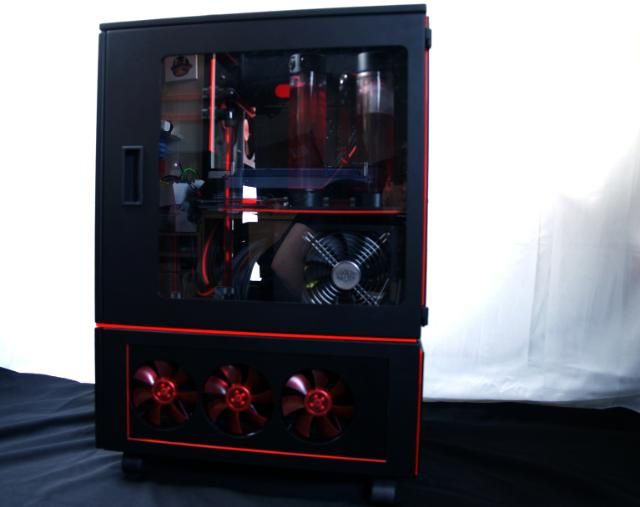
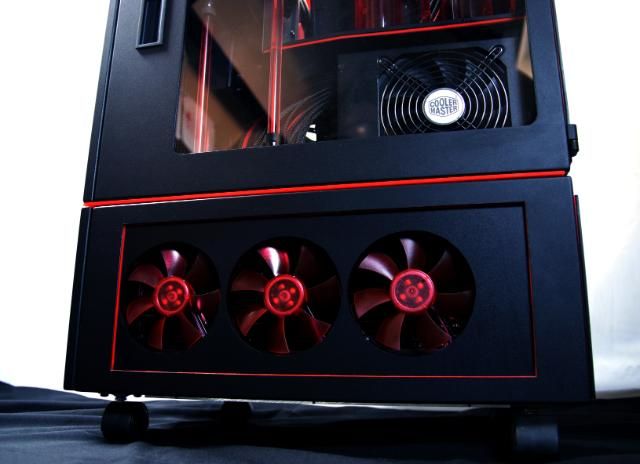
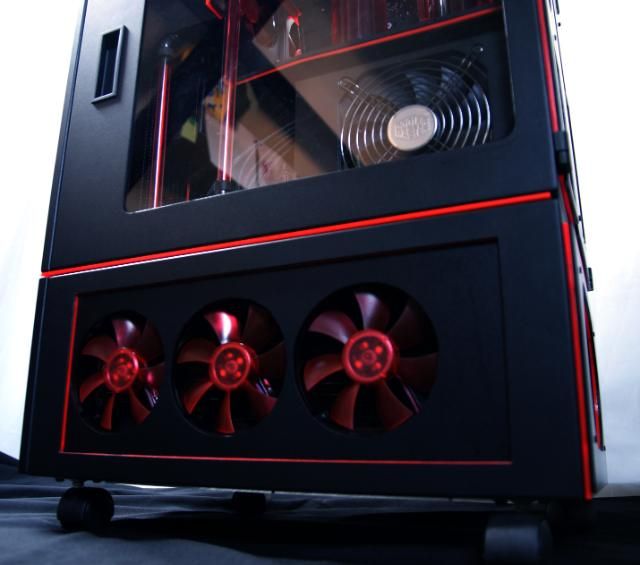
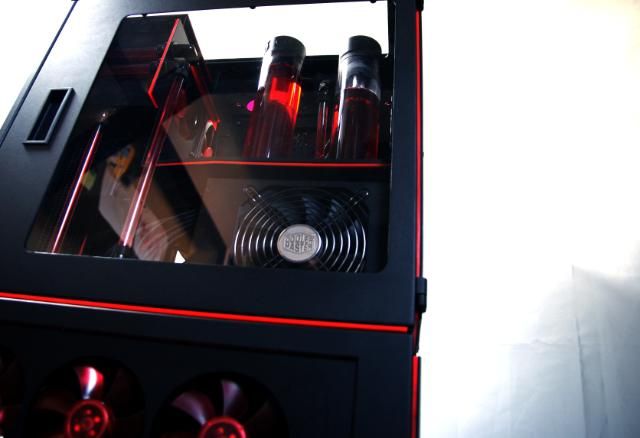
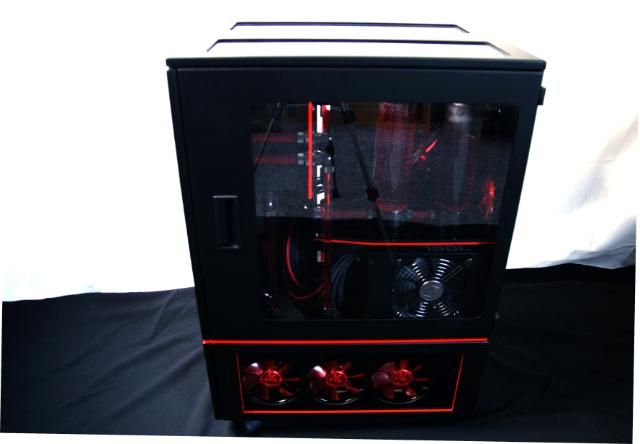
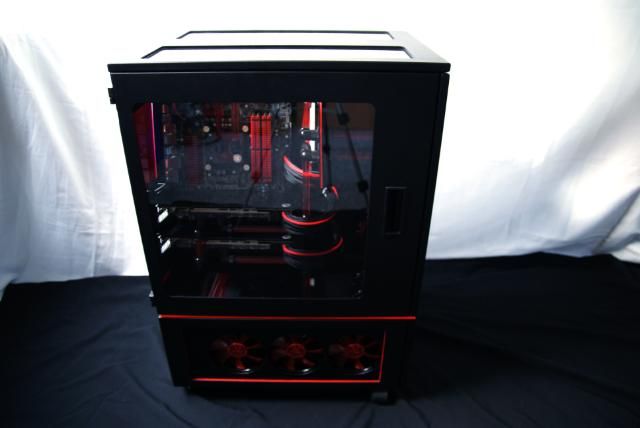
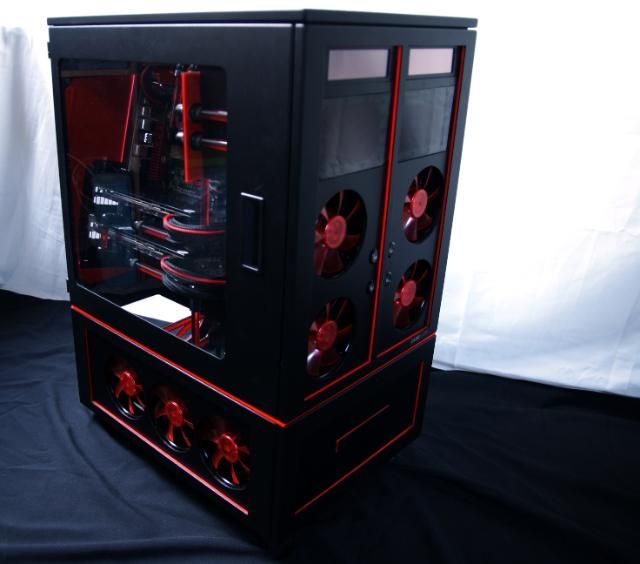
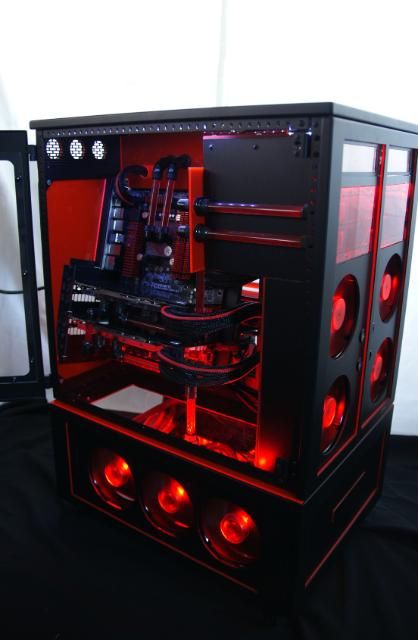


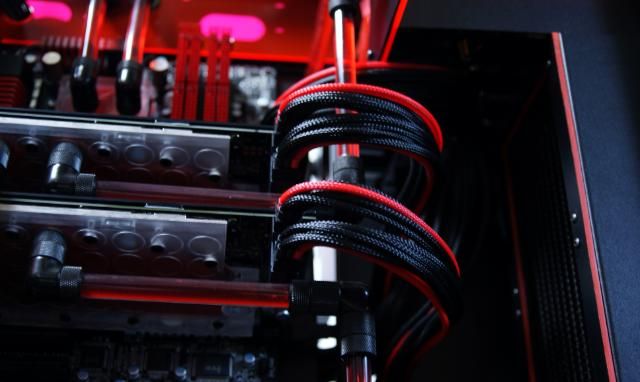
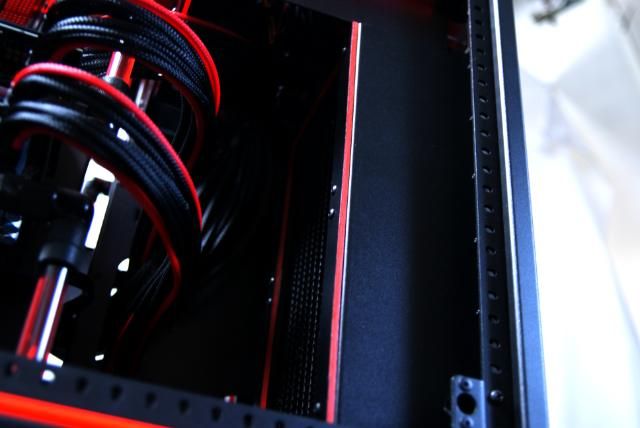

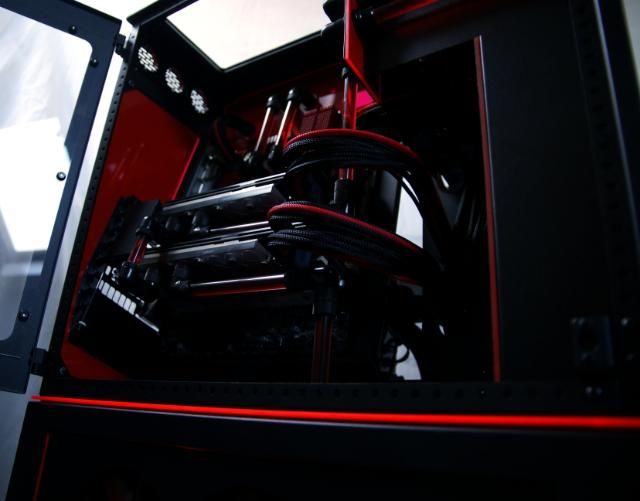
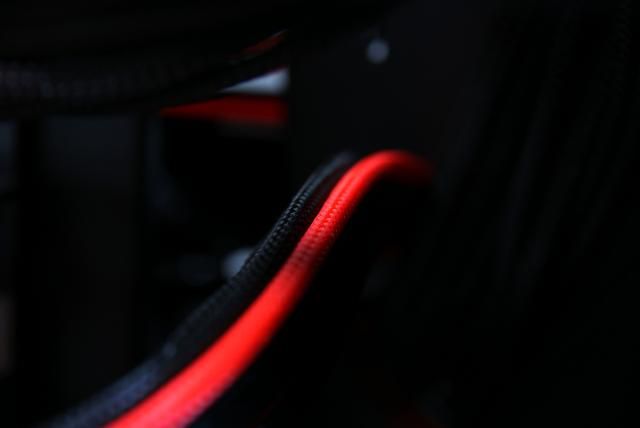

That's it!!! A lot of pics I know, but easy to read
My thanks goes to the following persons who have made this build possible:
Jim from Caselabs for providing the beautiful Caselabs Magnum M8
Maurizio Lamptron for the Fancontrollers and switches
Freddy from Highflow for various products...best shop in town
Marco and Ruud from Coolermaster for the PSU and gamegear
And Gregor from EKWB for supplying the water cooling products and always having the confidence in my builds
Clenn from lumenledverlichting for the SMD ledstrips
Without these people, the build couldnt finish like it is now.....thanks y'all
And of course the people of the various forums for the support and comments
After a long wait.... the final pics. This build was quite a challenge given the size and space to be filled.
Now .... no more text only pics. Hope you like it!!!
That's it!!! A lot of pics I know, but easy to read
My thanks goes to the following persons who have made this build possible:
Jim from Caselabs for providing the beautiful Caselabs Magnum M8
Maurizio Lamptron for the Fancontrollers and switches
Freddy from Highflow for various products...best shop in town
Marco and Ruud from Coolermaster for the PSU and gamegear
And Gregor from EKWB for supplying the water cooling products and always having the confidence in my builds
Clenn from lumenledverlichting for the SMD ledstrips
Without these people, the build couldnt finish like it is now.....thanks y'all
And of course the people of the various forums for the support and comments
wra18th
[H]F Junkie
- Joined
- Nov 11, 2009
- Messages
- 8,492
Excuse me while I pick up my jaw from the floor.
Excuse me while I pick up my jaw from the floor.
LOL Yup.... Extreme Mod
So dar this is on top of my list
second is frank
That is totally BAMF.
Thankslove that last selection of pictures dude!
with the CM products?
Ok thats what you call high quality mod.... for me tha best part is the slanted mobo tray! really EPIC! This need to be in the cover magazine!
For me personal the mobo tray was the most fun thing to do
Excuse me while I pick up my jaw from the floor.
thanksLOL Yup.... Extreme Mod
So dar this is on top of my list
second is frank
so...im first? finally first place, thanks WOW.. I love the layers of red acrylic!
Thank you
WorldExclusive
[H]F Junkie
- Joined
- Apr 26, 2009
- Messages
- 11,548
And this is why I love PC Gaming...
This is the stuff of Legends!
This is the stuff of Legends!
dieseldog49
[H]ard|Gawd
- Joined
- Jul 30, 2011
- Messages
- 1,132
Damn......... just Dayumn