Apple G5 modded with a twist

toddfx

Weaksauce
Joined
Mar 9, 2011
Messages
124
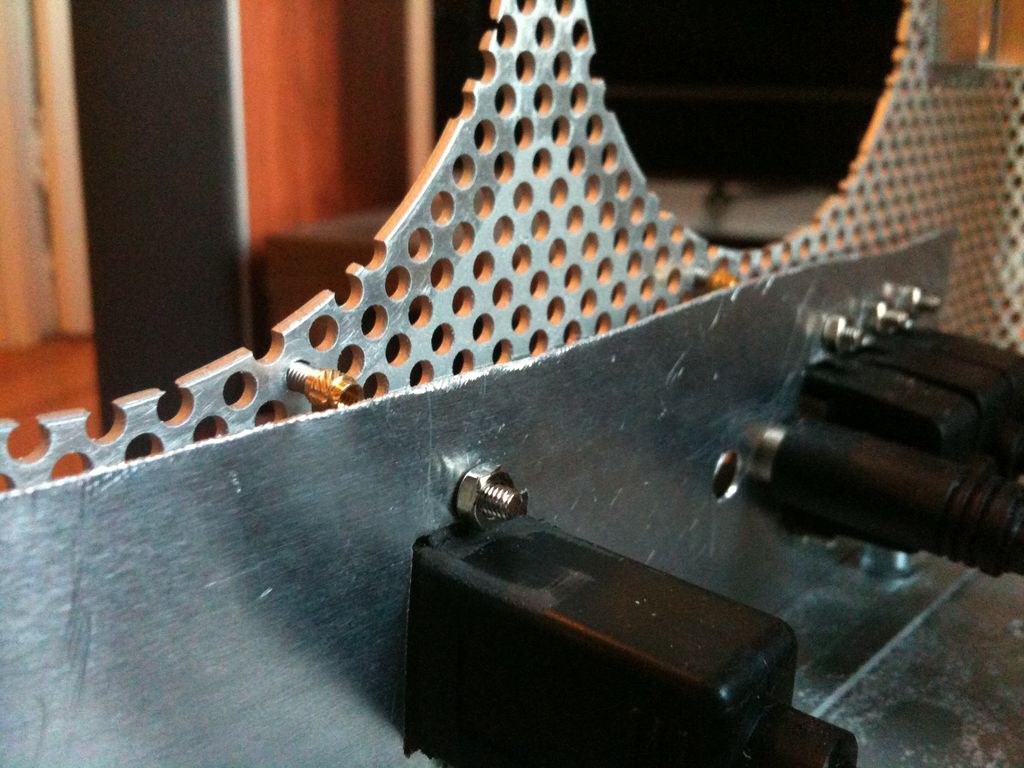
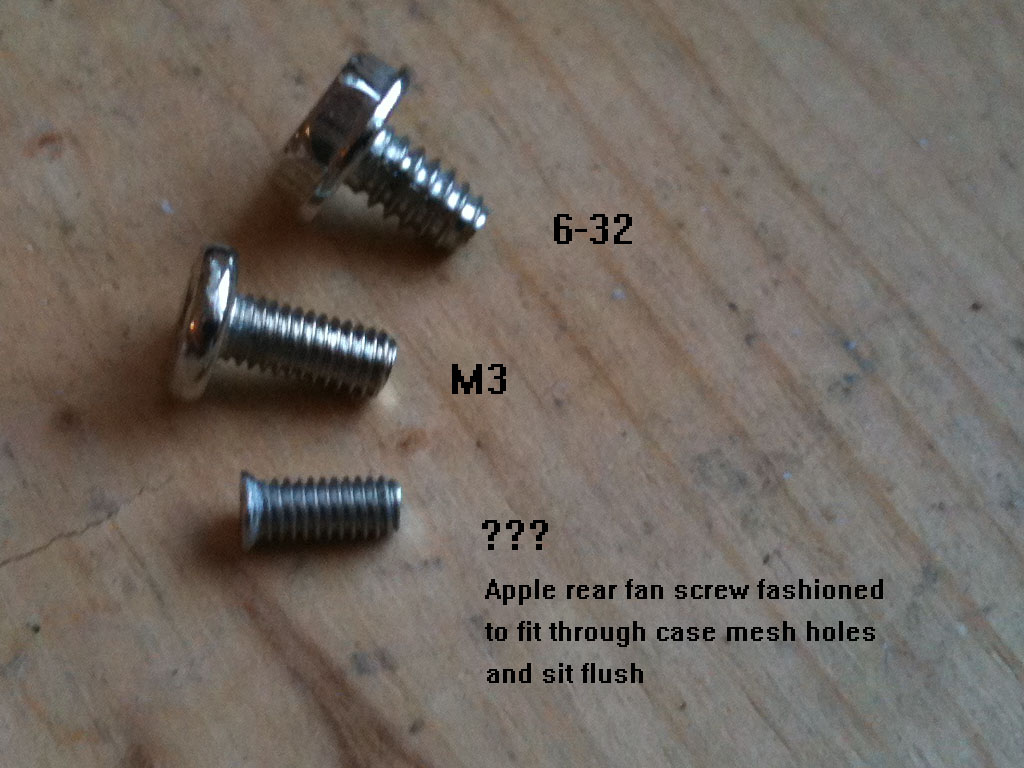
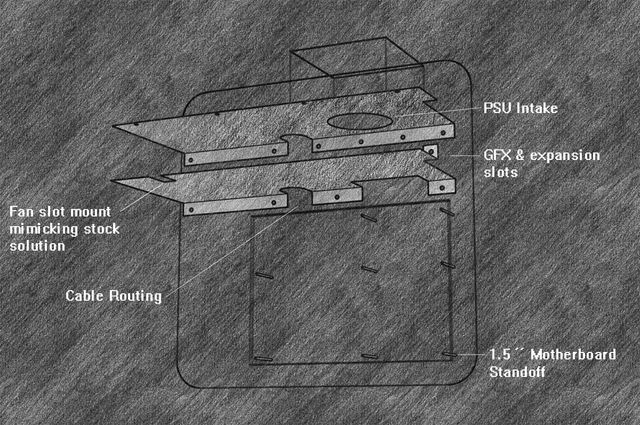
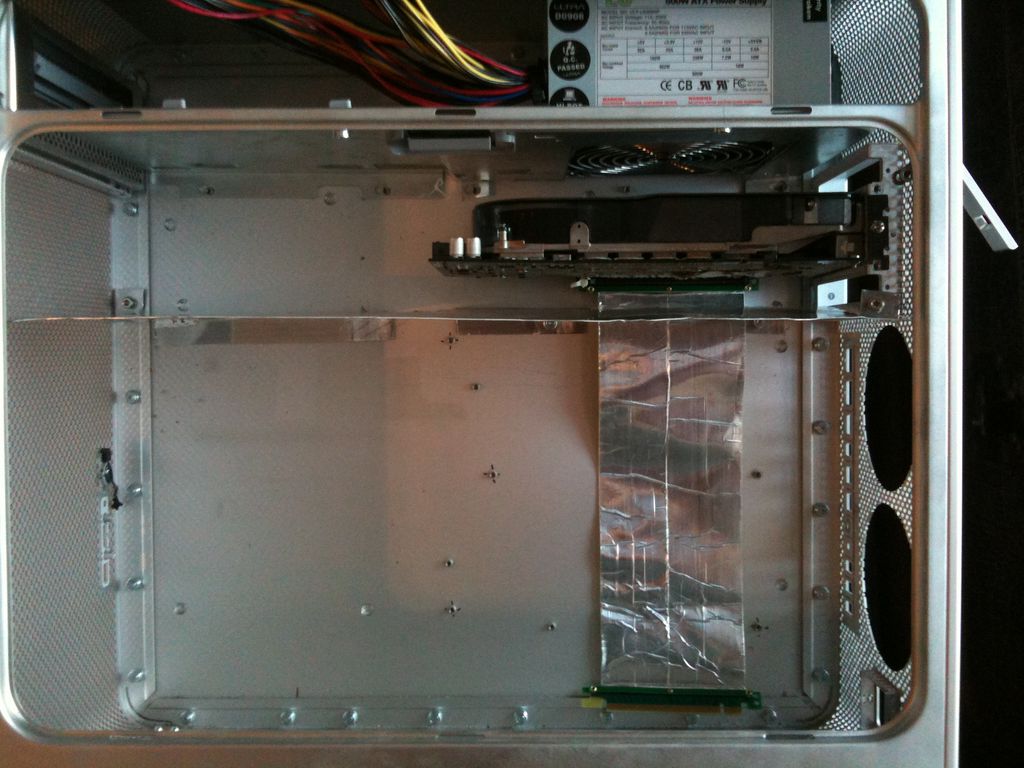
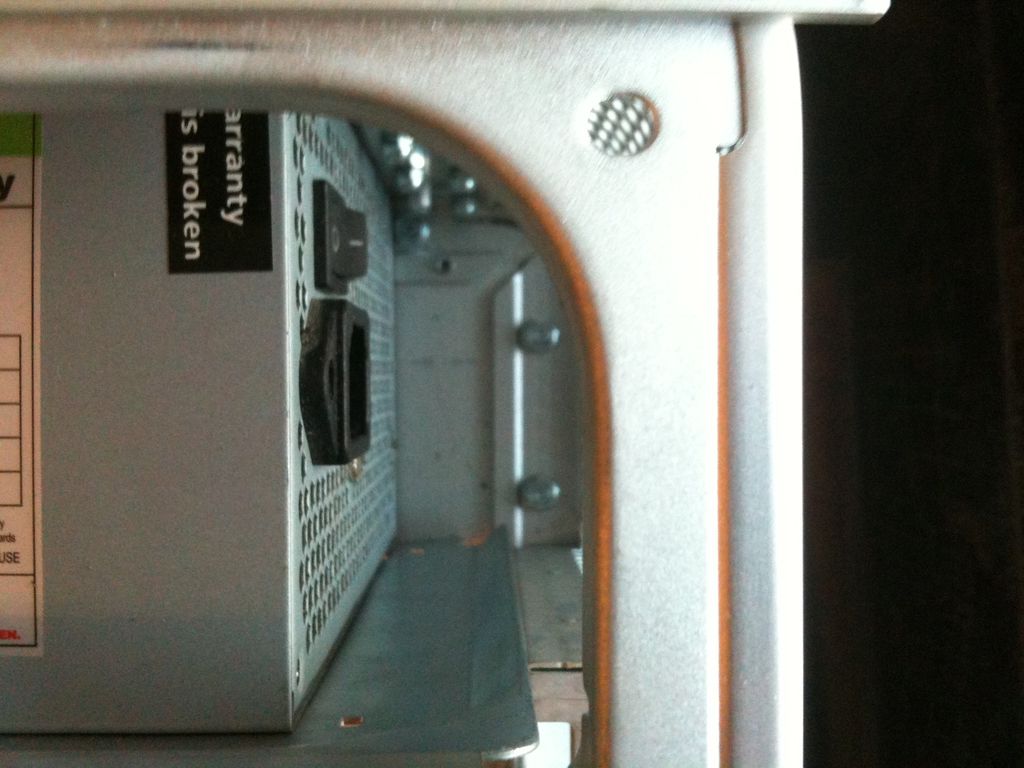
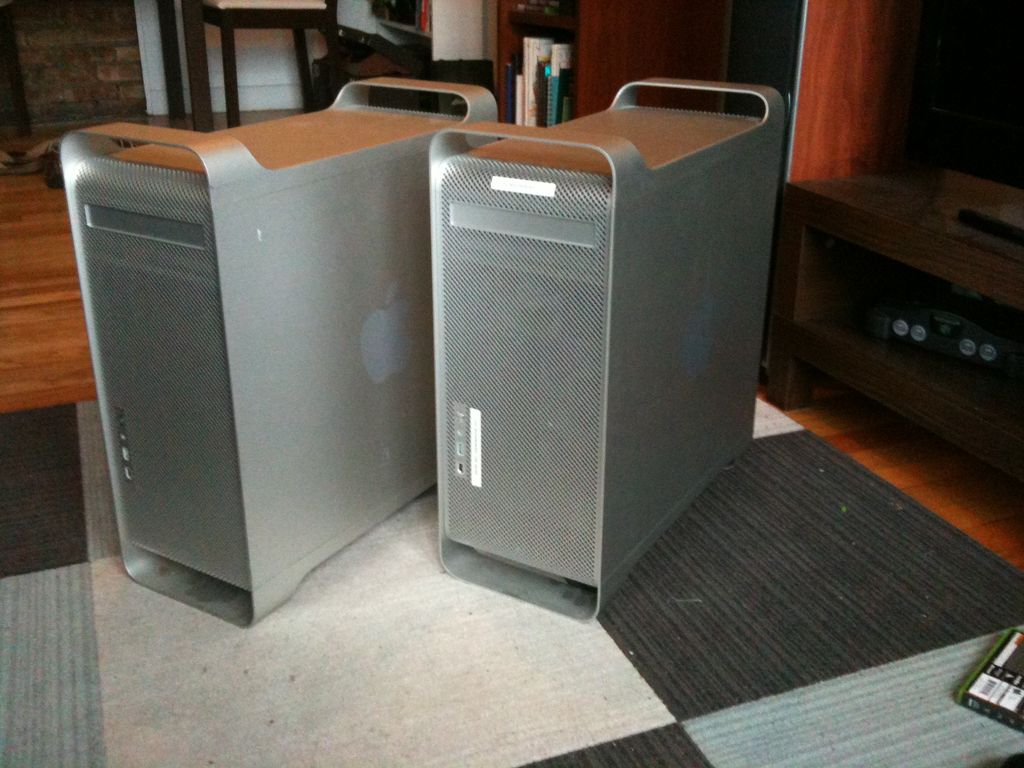
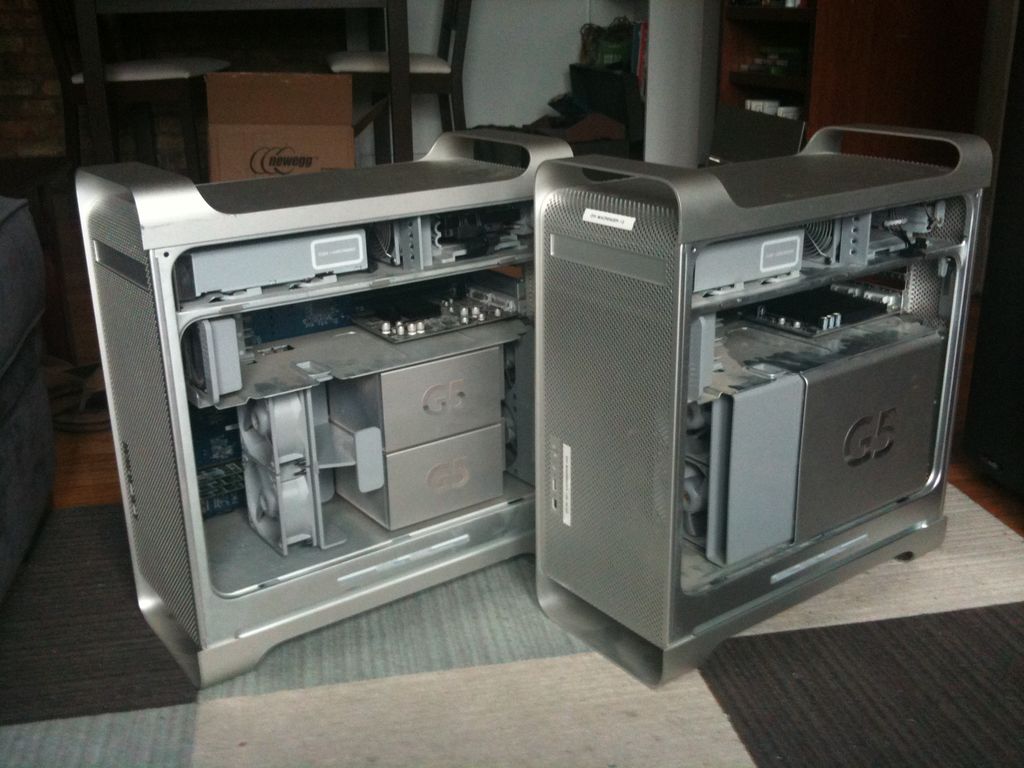
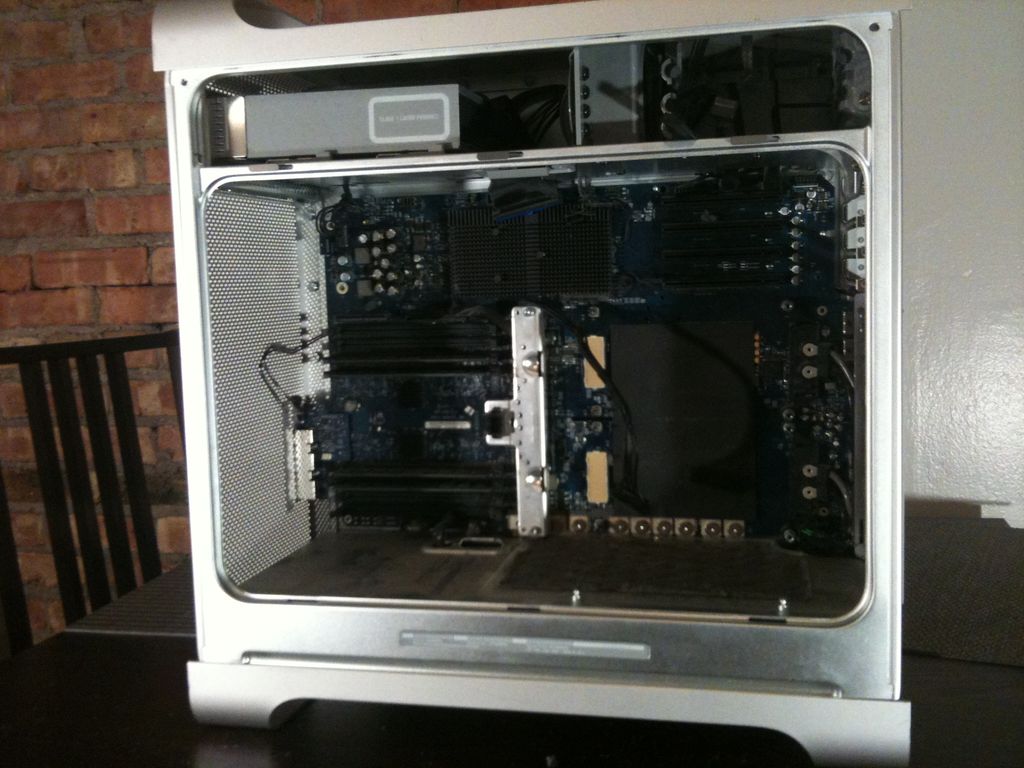
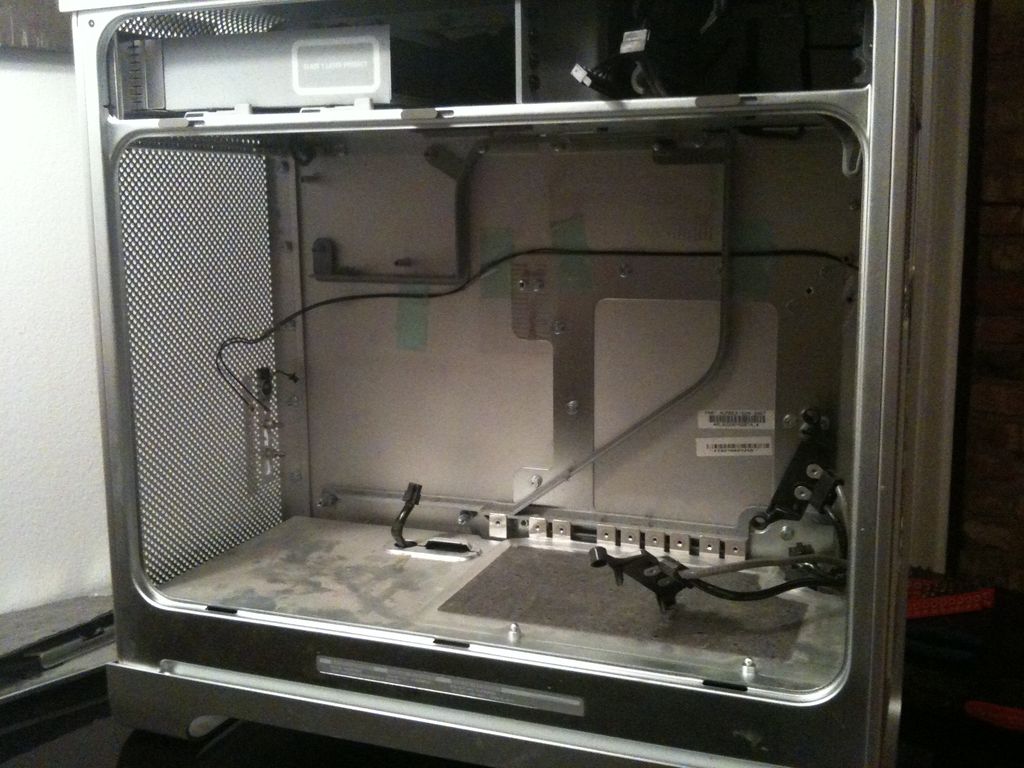
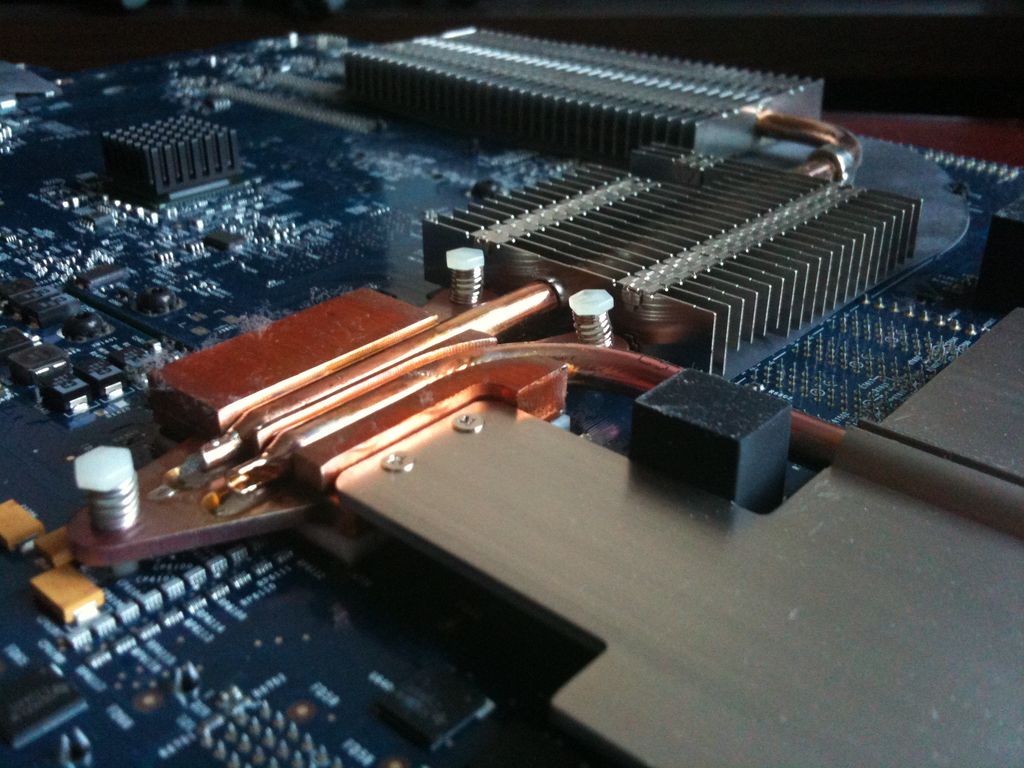
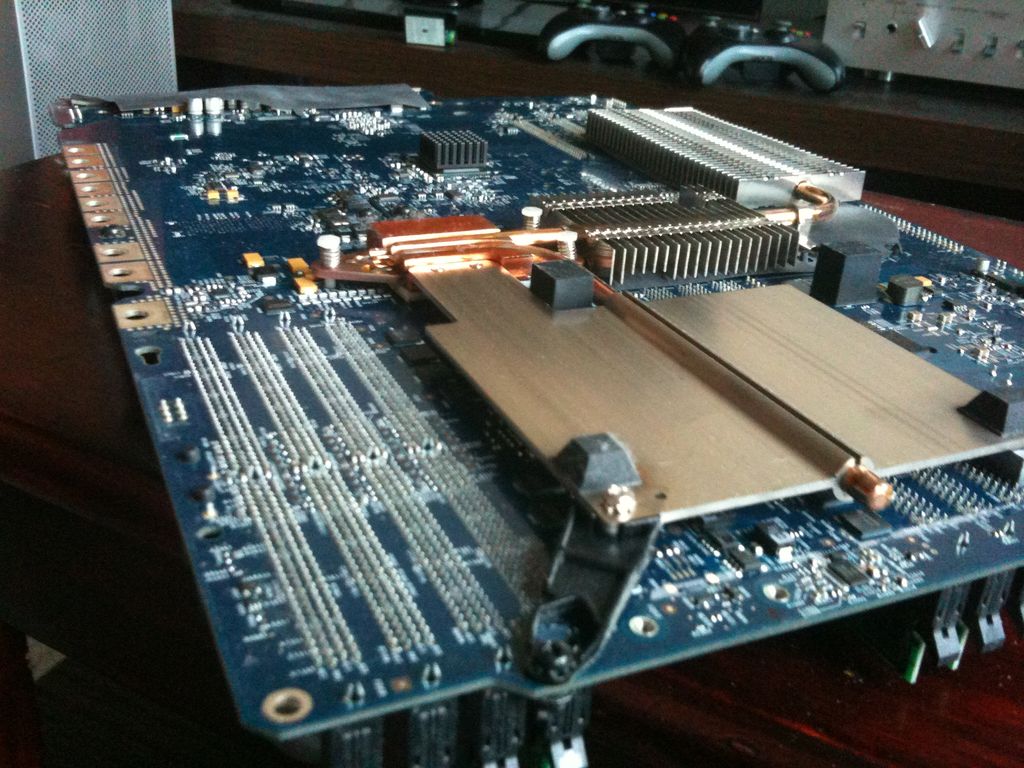
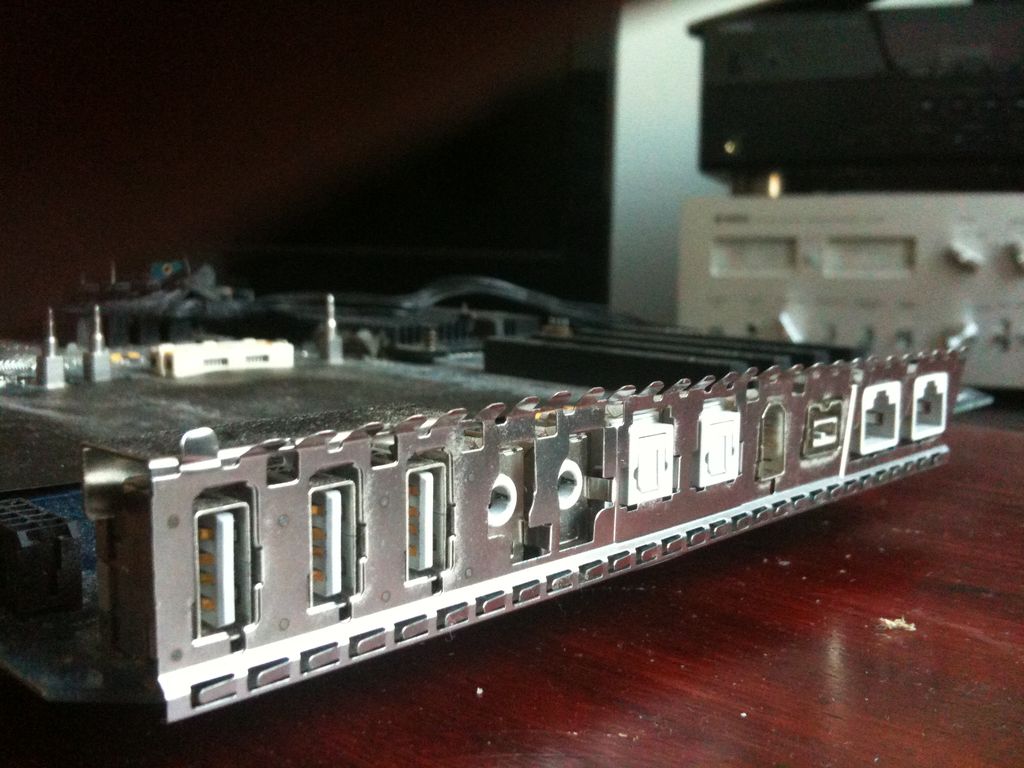
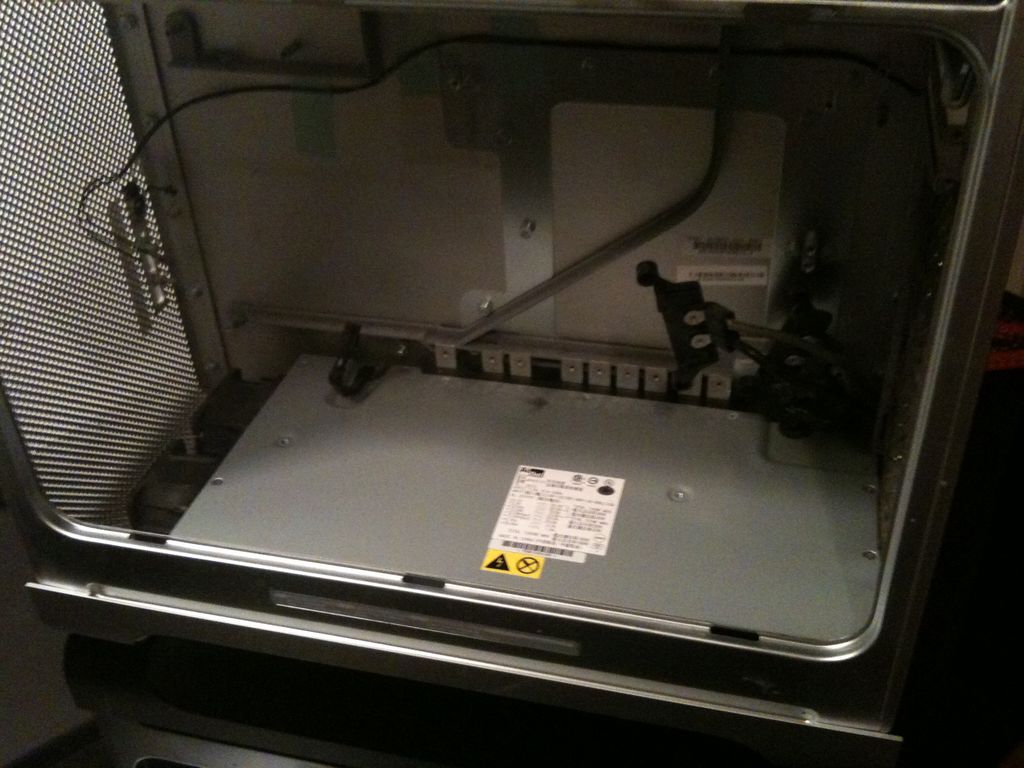
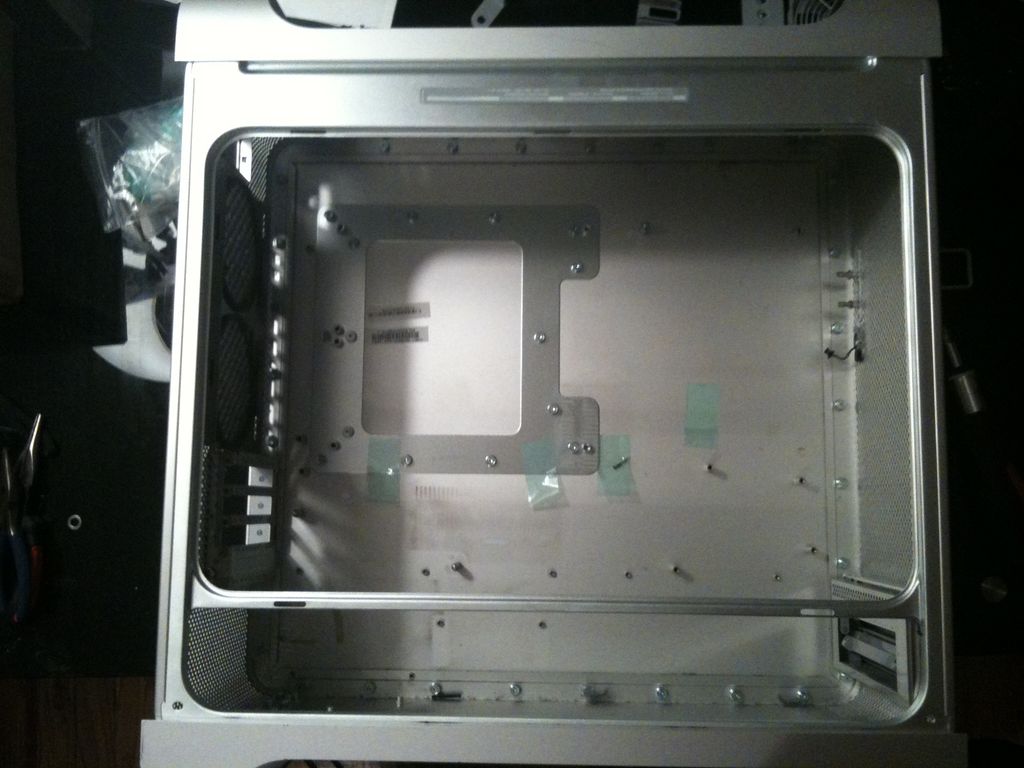
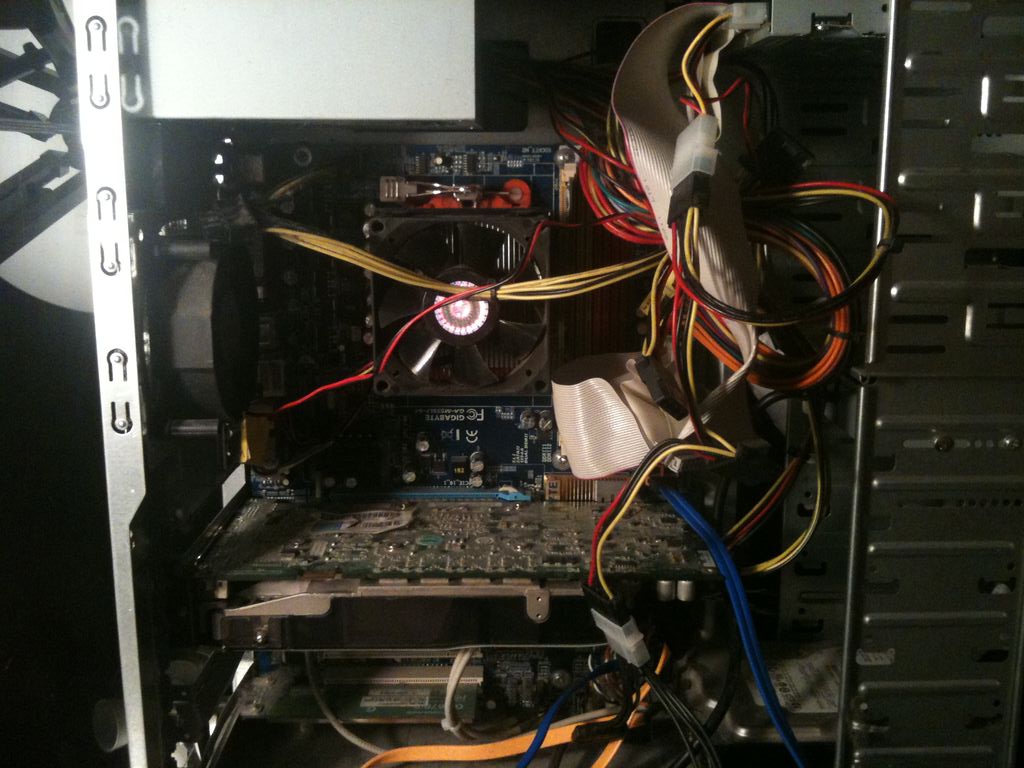
Through my research on G5 case modding, I found that 95% of the cases get their back I/O panel and expansion slots all shredded up to match standard ATX motherboards. I want to keep the exterior of the beautiful G5’s case exactly how it is. My solution? Move the motherboard away from the I/O ports and instead route extension cables where they need to go.

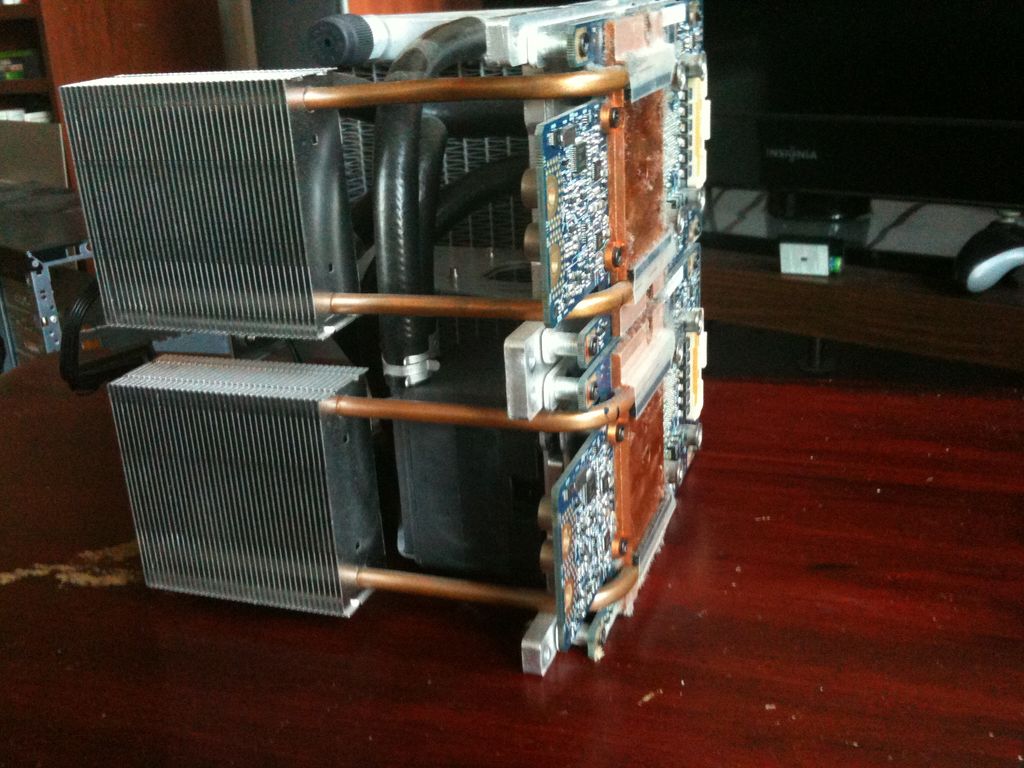
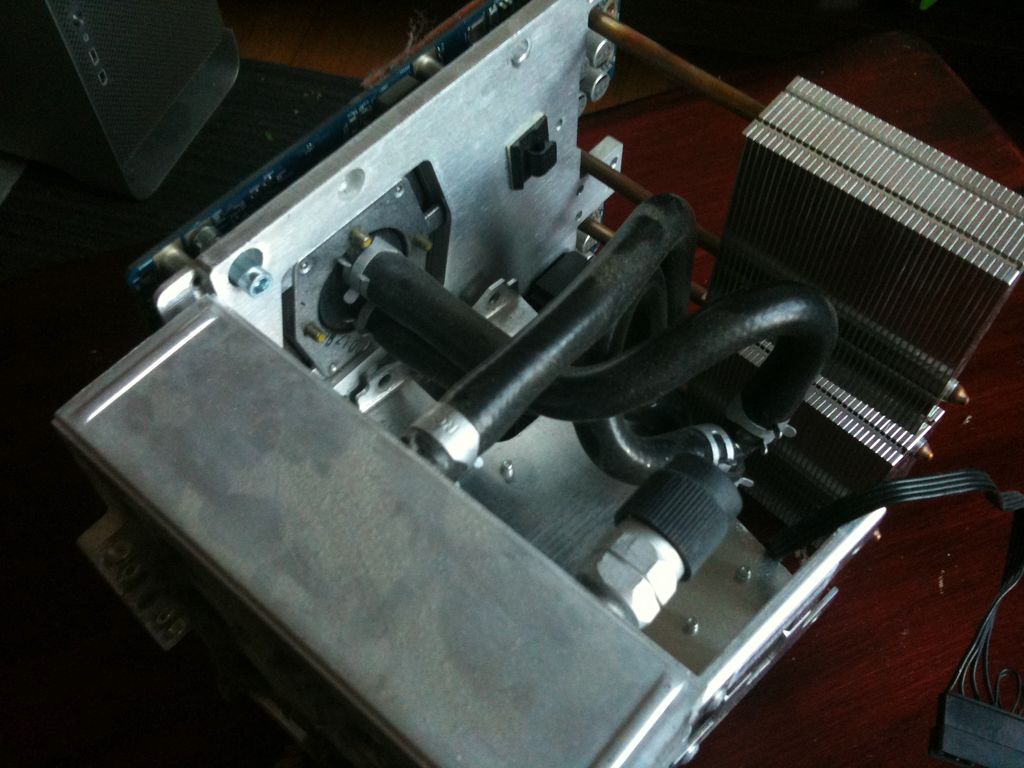
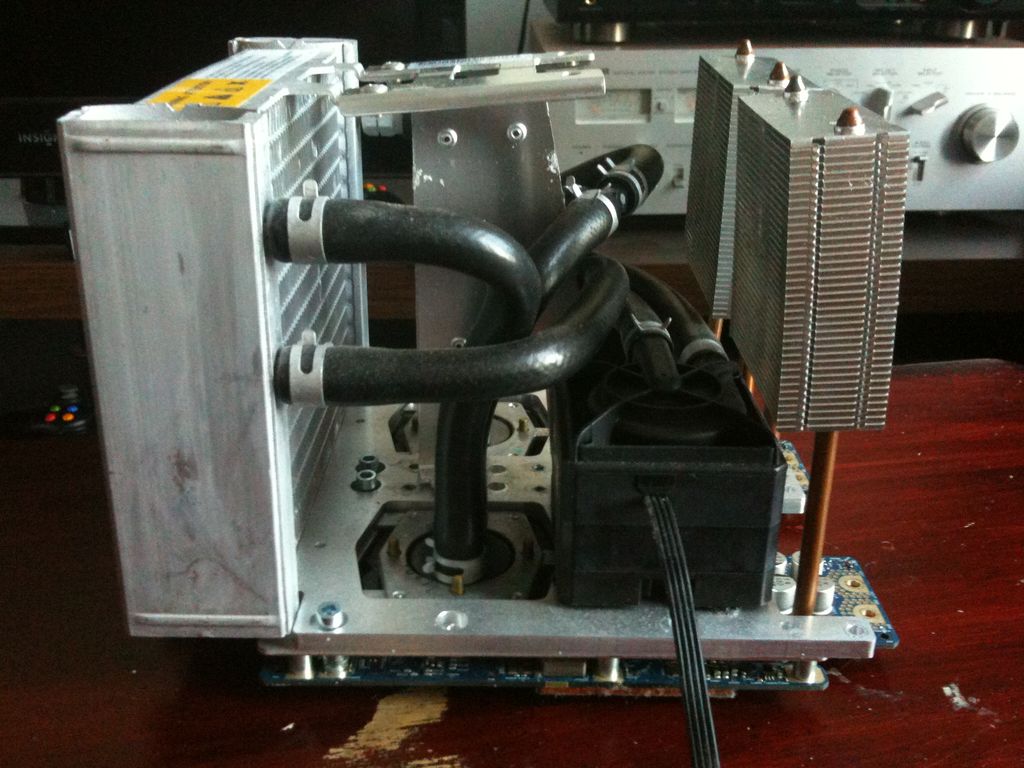
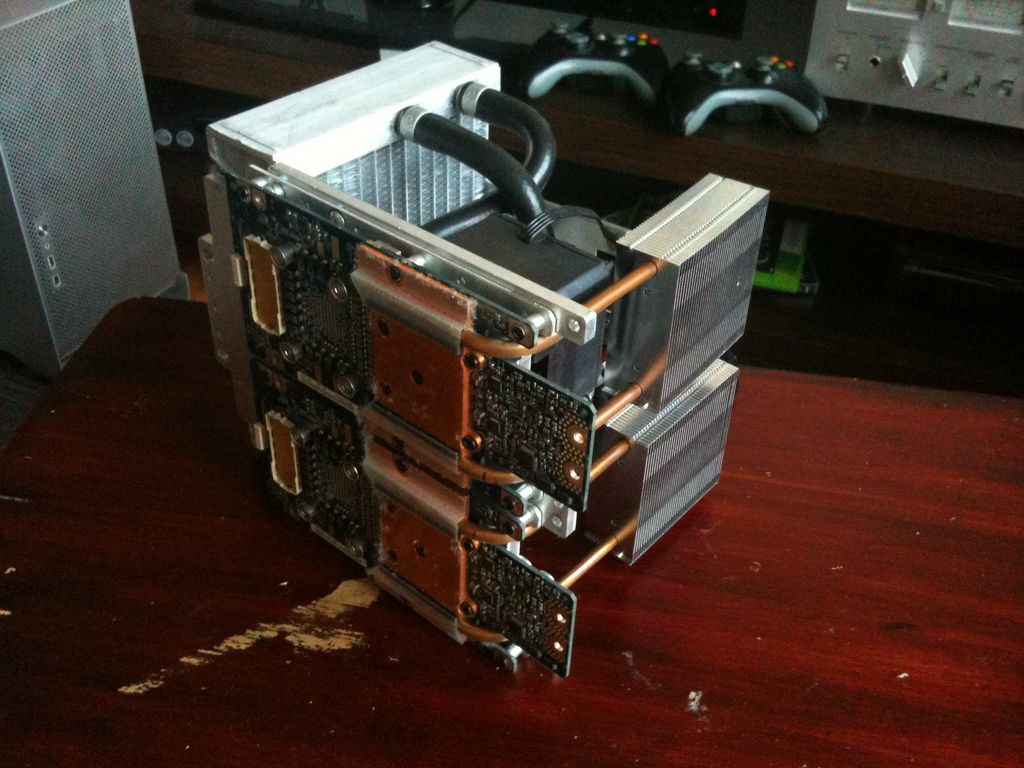
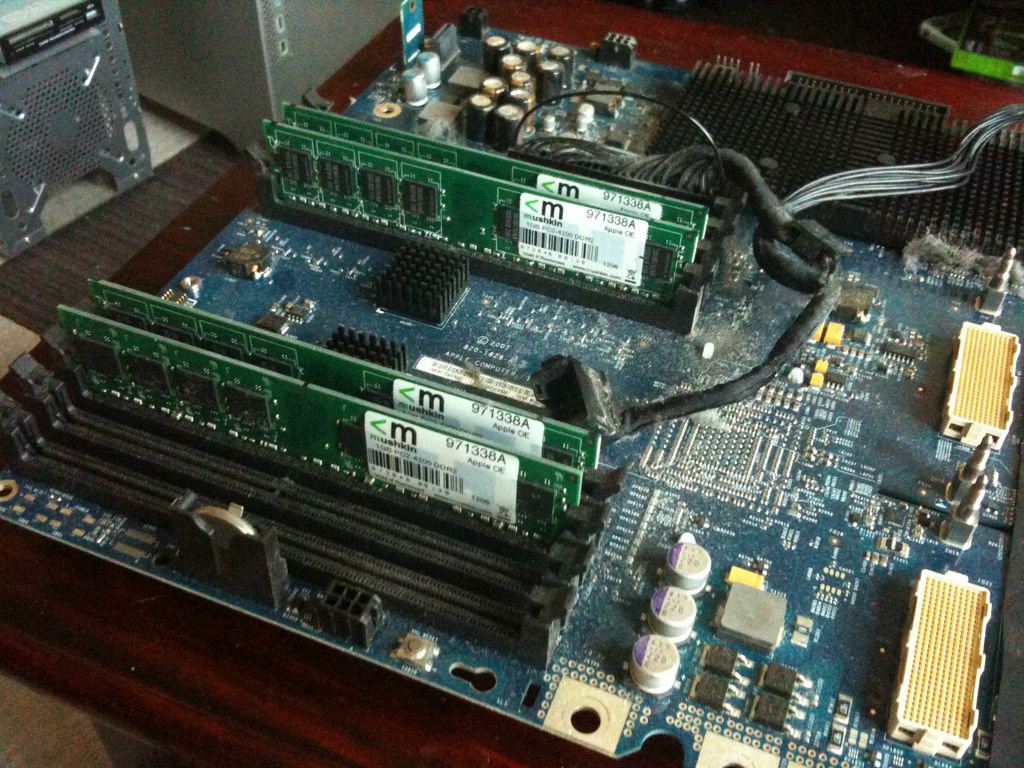
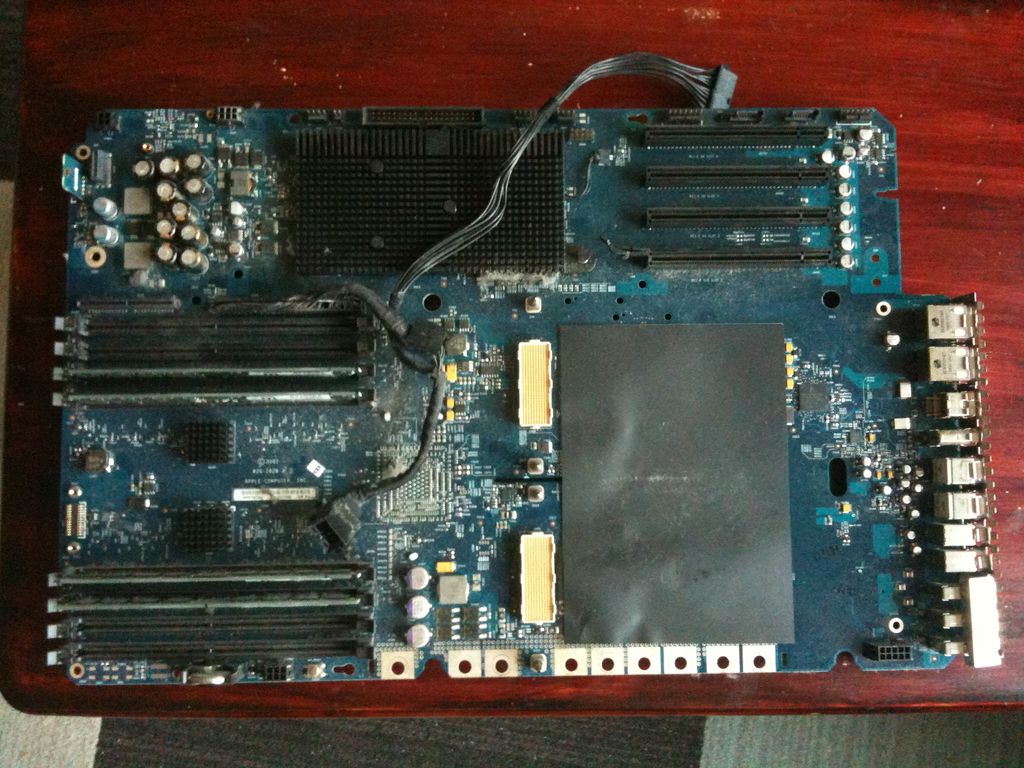
Not only that, but I’ll be rotating the motherboard 90 degrees CCW. If I'm not hooking the I/O ports right up to the back of the case, then I am taking the liberty of moving things around even more. I believe this puts the CPU in a better position for cooling, plus I feel it uses the space more efficiently. Using another little trick, it also allows me to easily utilize the G5s expansion slots with no case slicing necessary.

IMG_1303.JPG


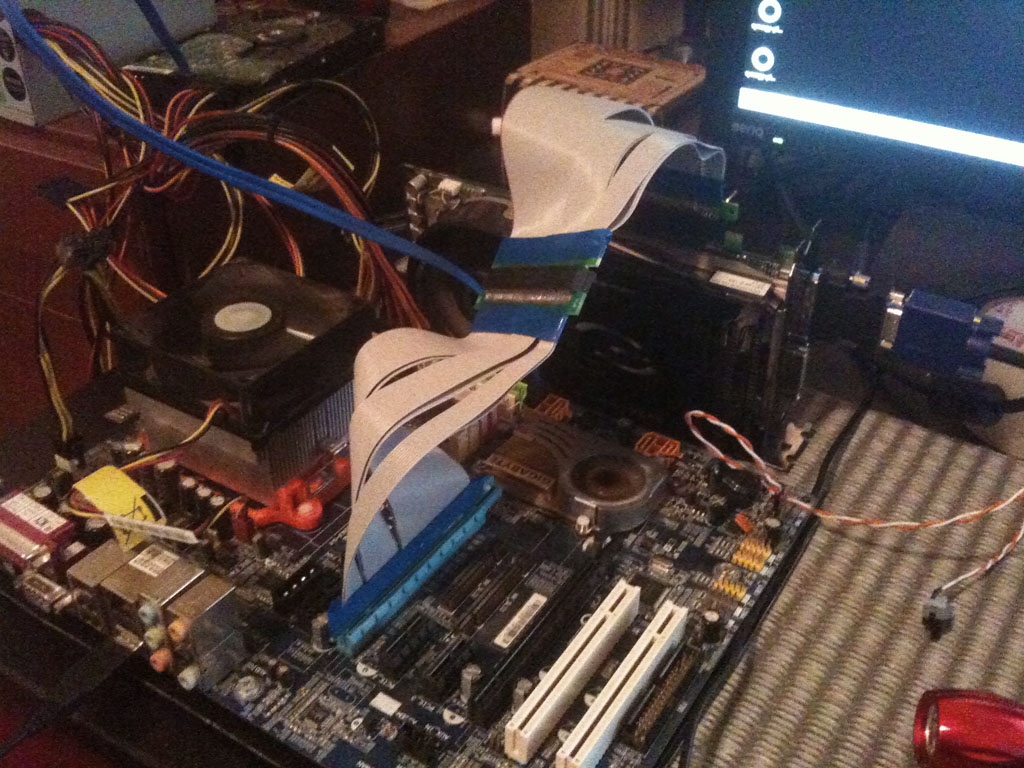
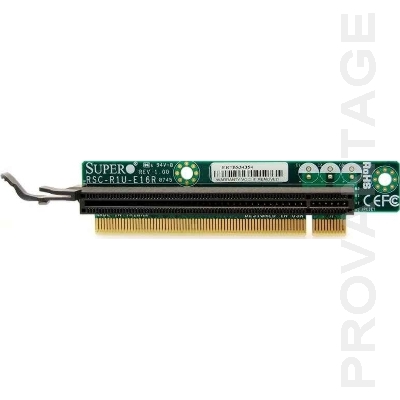
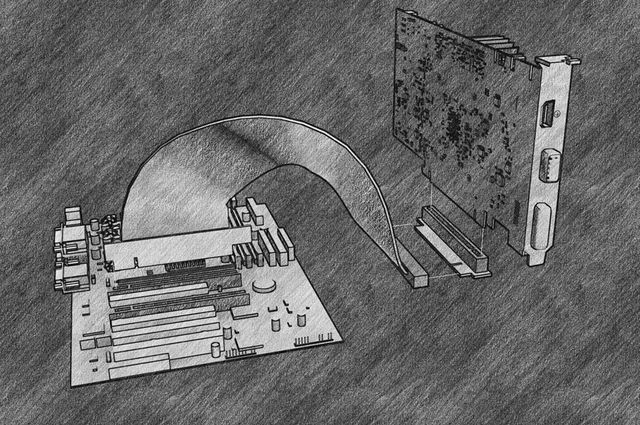
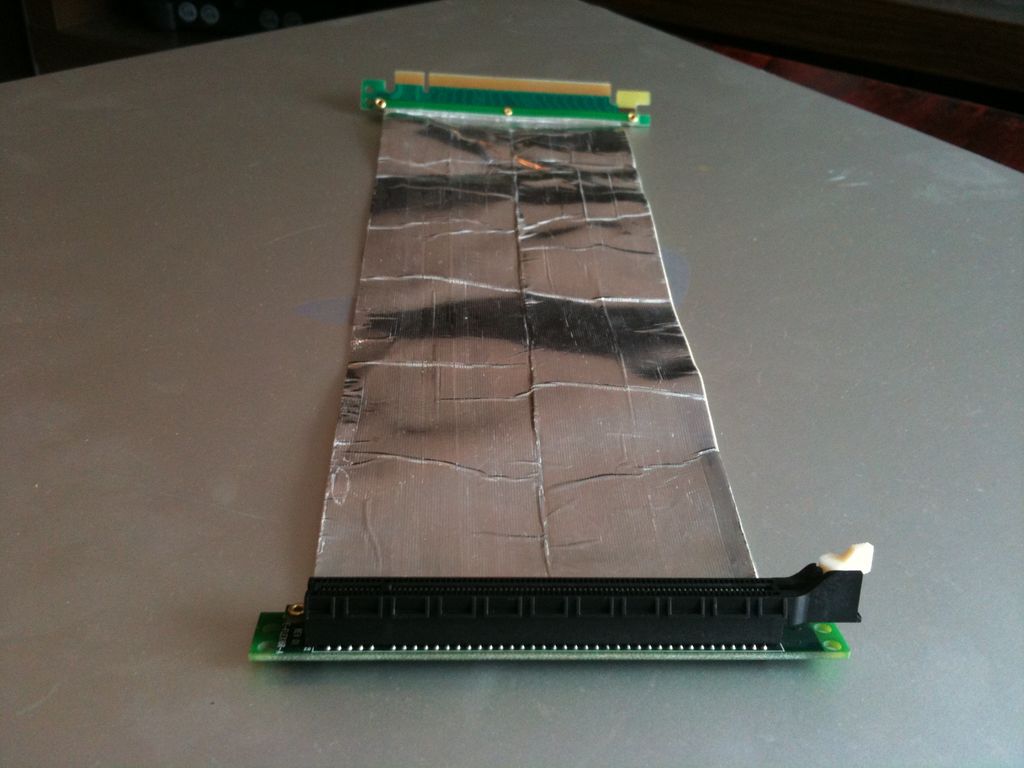
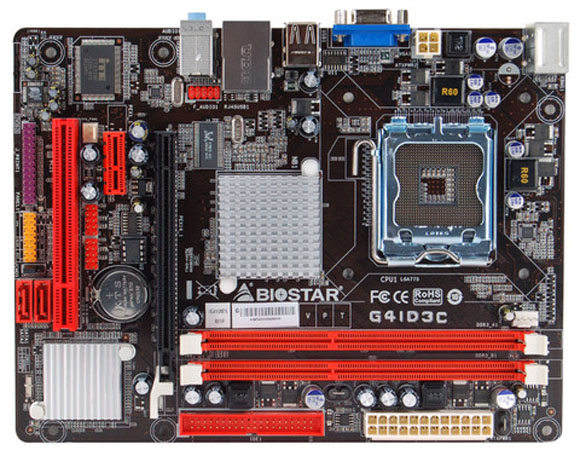
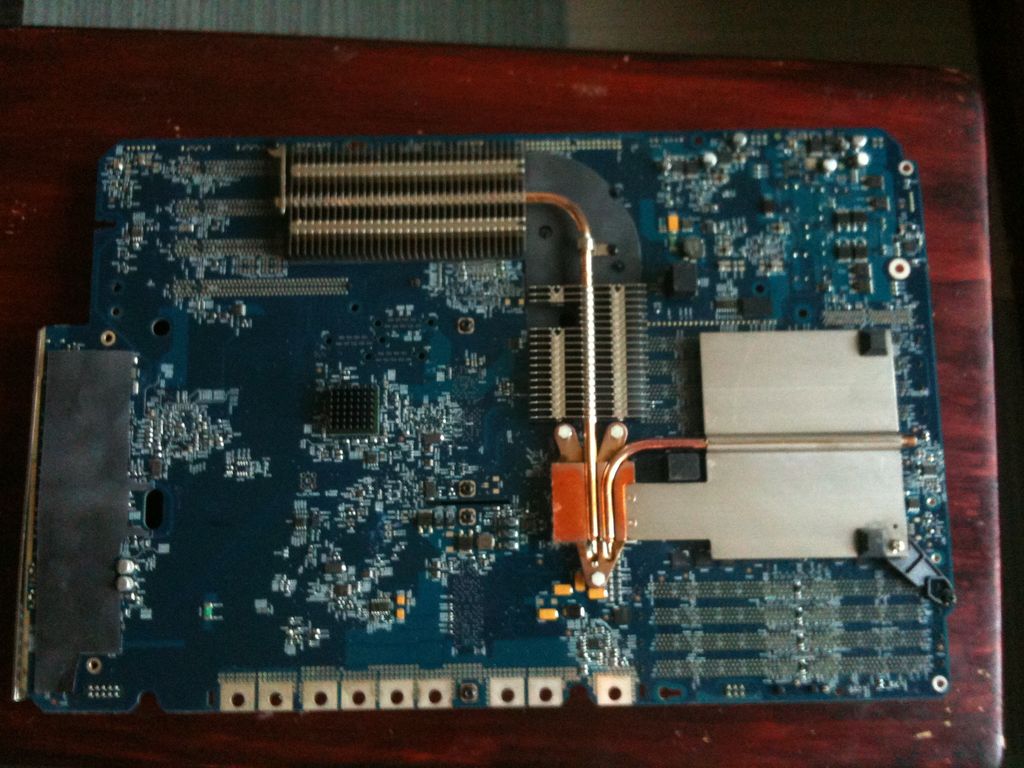
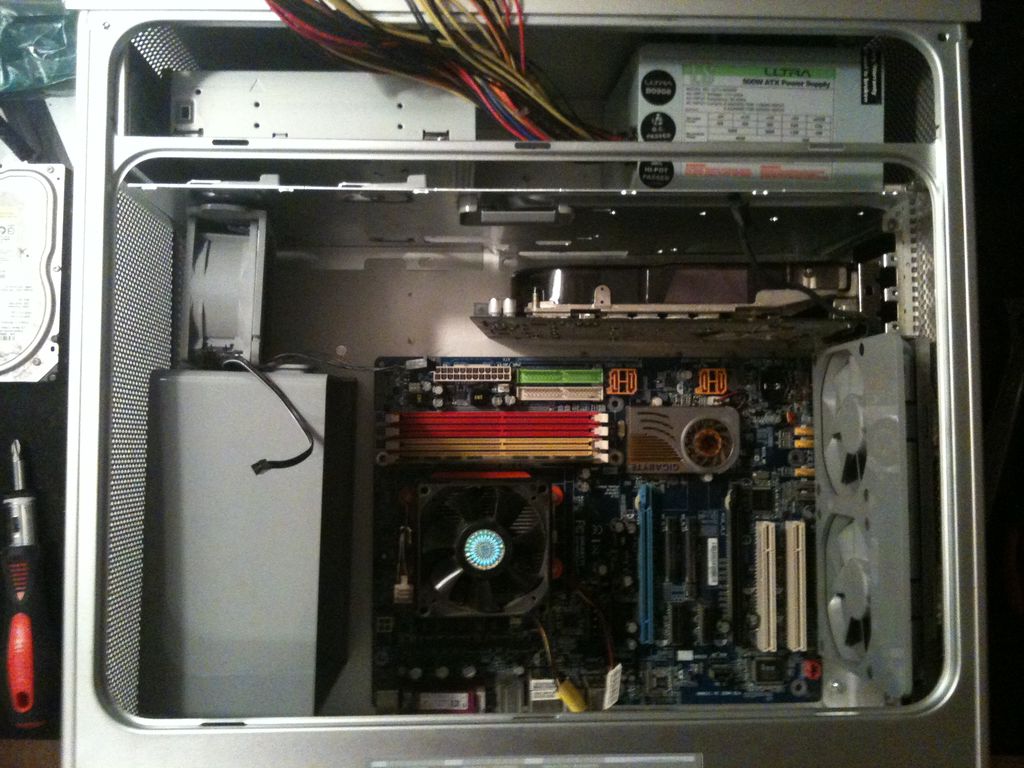
To attach the GPU to the motherboard, I’m going to use a flexible PCIe extender:

pcie-extender.jpg


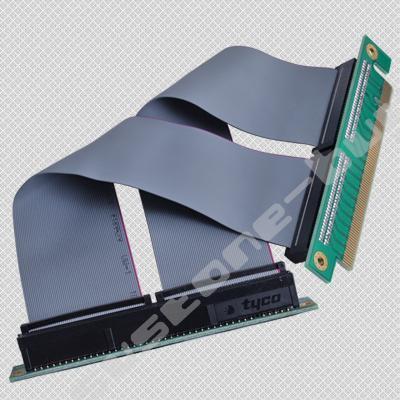
I just ordered 3 of them, but it will be sort of trial and error when they arrive. They are 7'' so hopefully that is enough. I might need to modify it or use multiple in succession, but we will just have to wait and see. I also would love to round the cable, like what people commonly do with IDE cables these days.

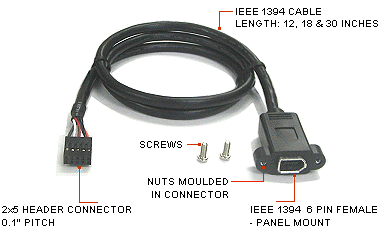
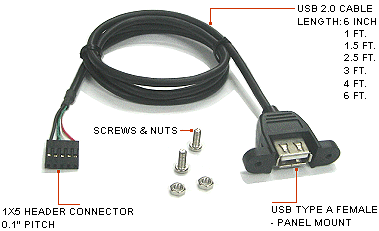
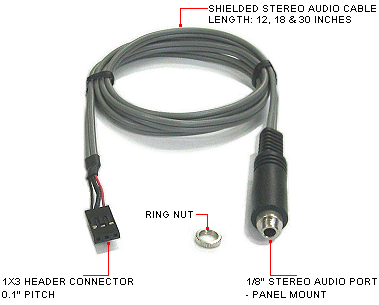
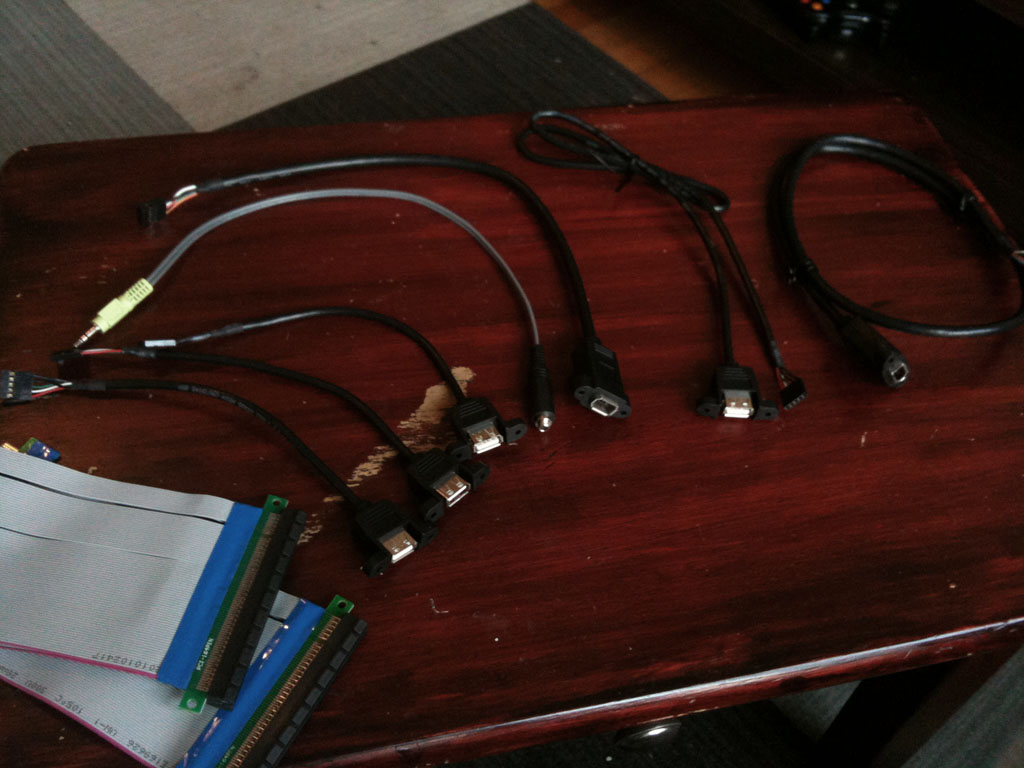
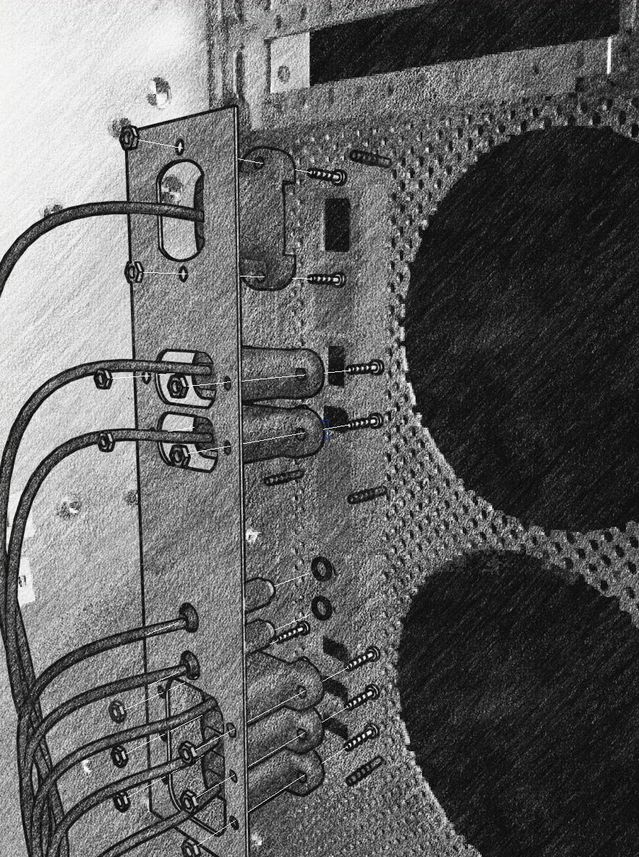
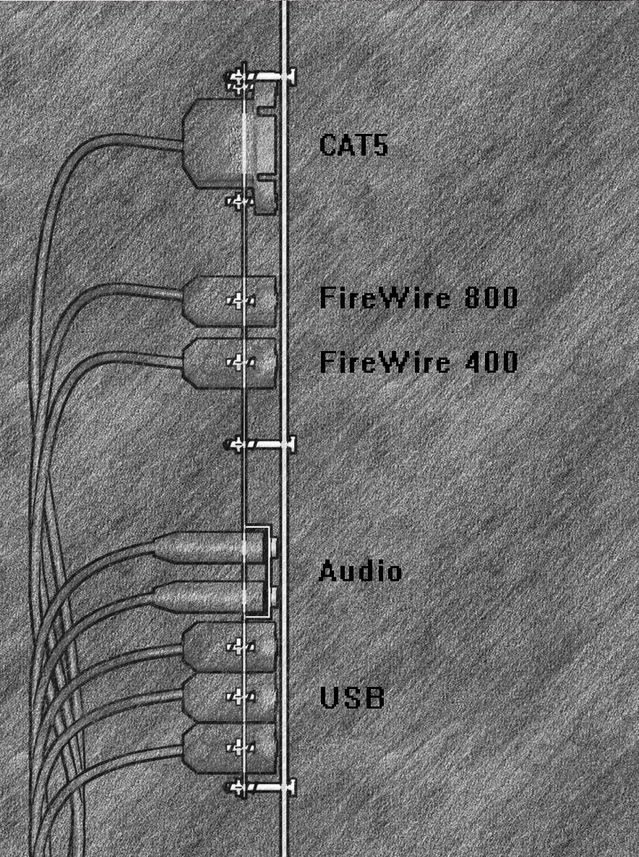
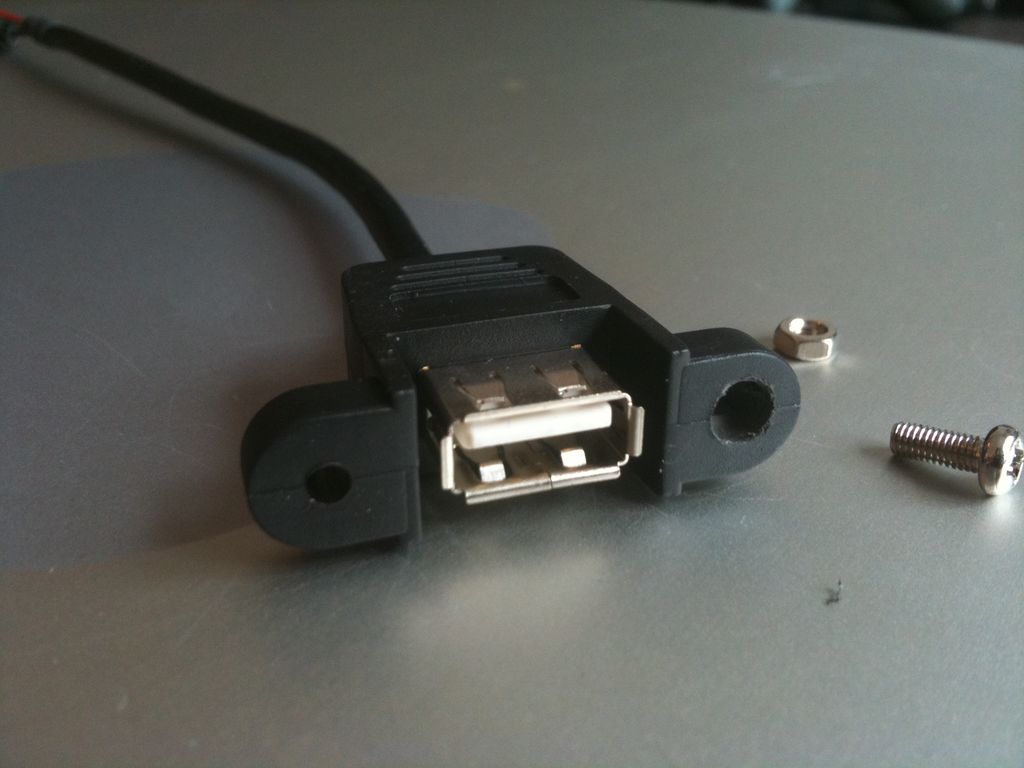
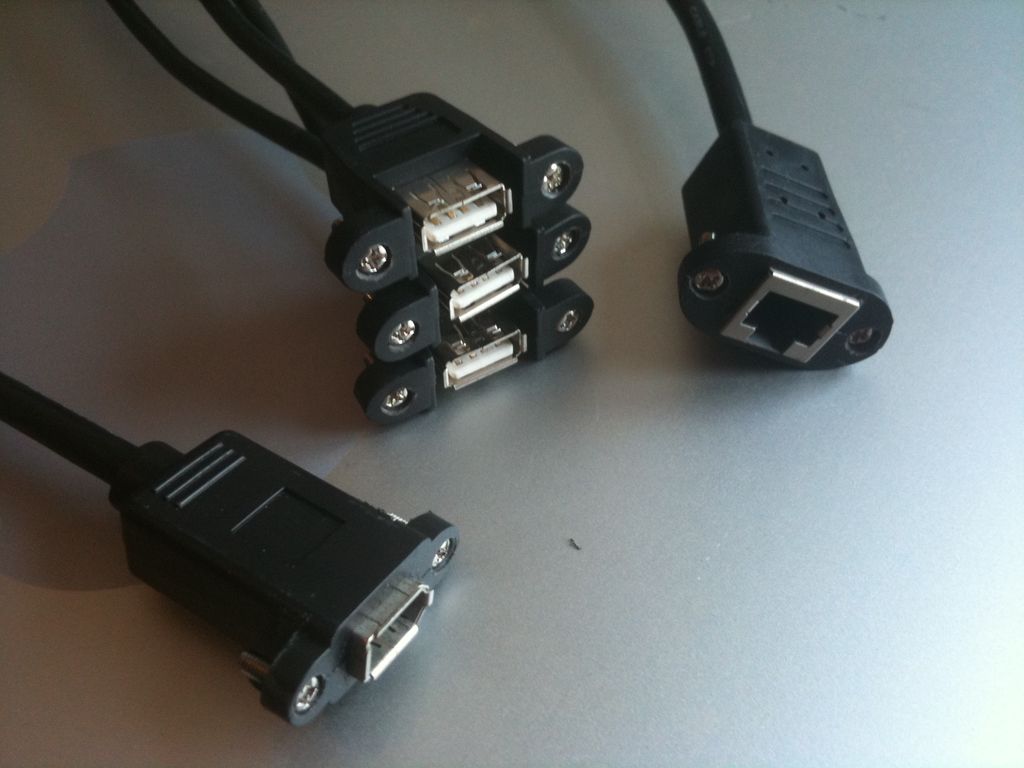
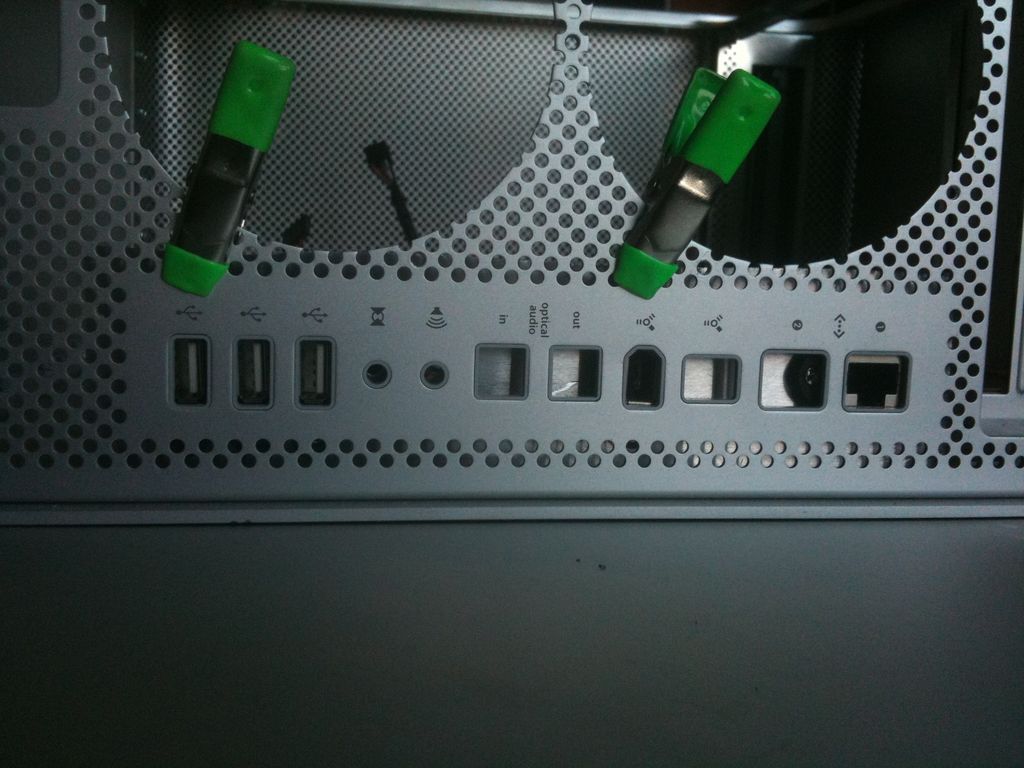
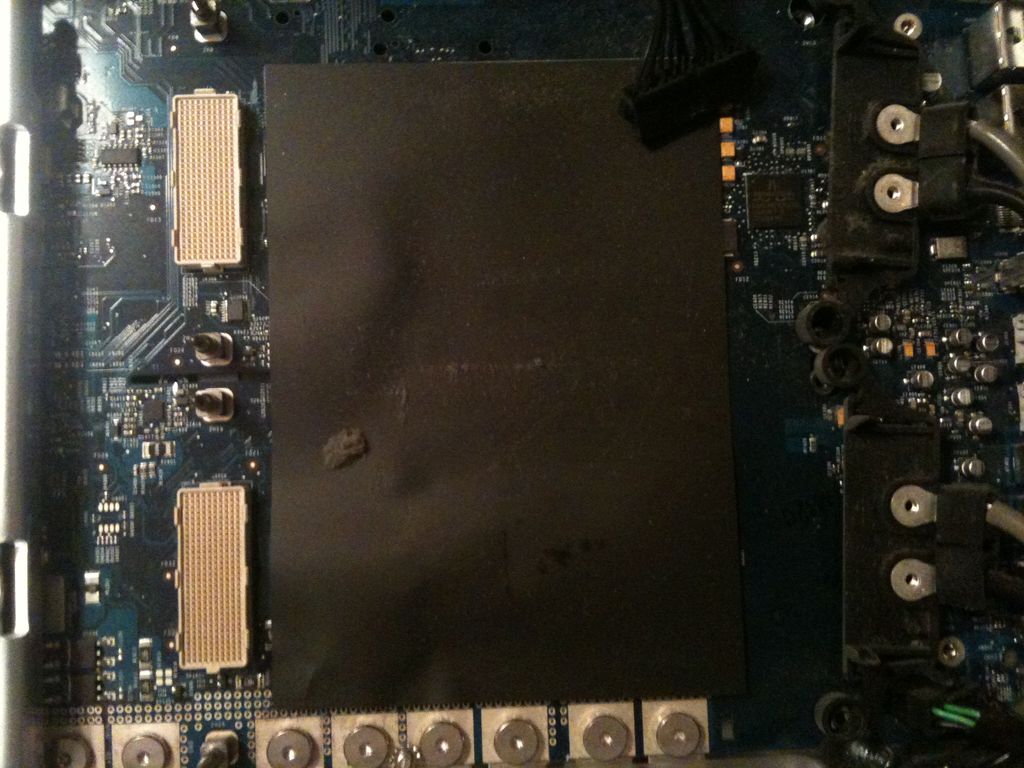
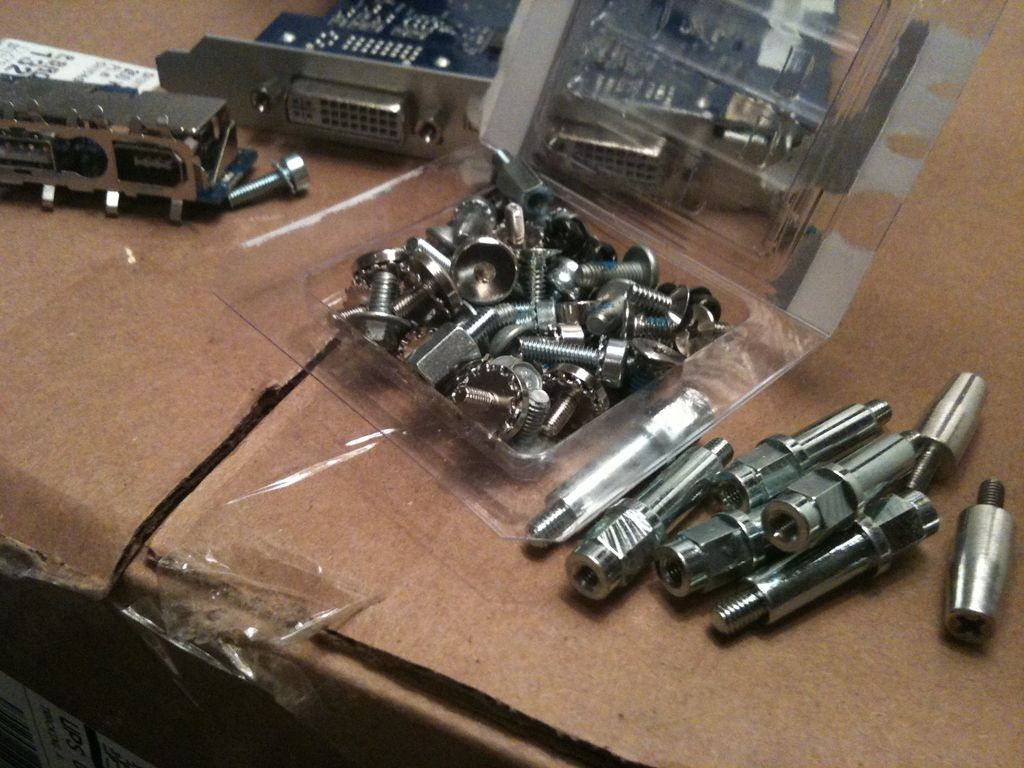
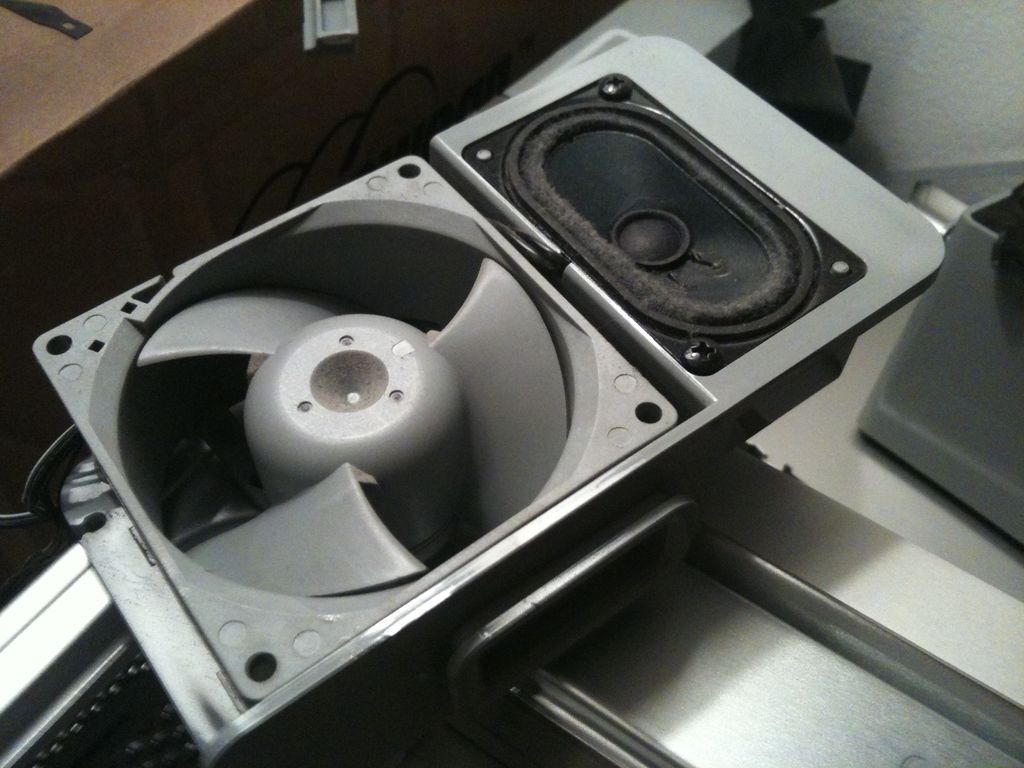
For audio, Firewire and USB I'll be routing ports directly to the motherboard's headers. This particular computer will have a PCI wireless card so I probably won't worry about ethernet for now.
 
Last edited:
I’m going to back-track a bit here. I’d love to give a bit of back-story to this modding adventure, and wanted to share my experience thus far.


I came by two dead G5s last week and already dove in head first. When I received these as a gift from IT, I was told one had a fried motherboard...err, logic board..and the other just had something wrong with the SATA connectors. I set the SATA one aside thinking I could try to get it running in the future, but knew the one with the fried motherboard had a different fate.

IMG_1181.JPG


I knew nothing about the specs or hardware of either of these machines, and I’ve never worked inside an Apple computer before. The experience of getting to comb through the G5 and really get my hands dirty is the sole reason I took the machines. For years I sort of considered these towers to be the holy grail of computer case architecture. Although I have no interest in PowerPC technology and despise the Mac OS, the layout of these G5s and of course the newest Mac Pros is obviously desirable.

IMG_1201.JPG


The one on the left is without a double dual CPU, but I figured since the right one only has one CPU cover I just assumed it was a single CPU...

IMG_1210.JPG


...wrong! I was amazed to see a propriety Apple water cooling system cooling two CPUs. I had heard that they implemented this under the hood, but I never thought one of my freebie machines would of contained it.

IMG_1212.JPG


Time to start stripping this beast down. I just unscrewed everything I could see on the CPU cooler, which ended up including 4 different screw types. Good thing I came prepared. The CPUs appear to be mounted on individual cards beneath the heat-sink(s), and I’m intrigued by what appears to be the power cables.

IMG_1232.JPG

IMG_1233.JPG


After about 40 minutes of fussing and shedding about 25 screws, she finally let go of her cooling block. The CPU sleds (is that the right nomenclature? sounds right to me...) came off as part of the same heap.

IMG_1315.JPG


This thing is a BEAST.

IMG_1322.JPG

IMG_1326.JPG

IMG_1333.JPG

IMG_1328.JPG


They connect to the logic board using these oddly arranged CPU pin grids. The power connections are equally unique. The four silver leads on the right side of the case are for the CPUs, and the logic board gets its power from 8 leads protruding directly from the power supply along the bottom. Never seen anything like it!

IMG_1234.JPG

IMG_1246.JPG


After another 15 screws, the motherboard is finally released.

IMG_1254.JPG


This thing is crazy huge, and has a lot of unique features.

IMG_1339.JPG

IMG_1337.JPG

IMG_1355.JPG


I love these heat sinks on the bottom of the board...

IMG_1365.JPG

IMG_1370.JPG


Here is the I/O panel...more on that later...
IMG_1343.JPG


With the power supply cover removed, the very long and flat 1000W power supply is revealed.

IMG_1255.JPG

IMG_1259.JPG


This thing had to be squeezed out fairly strategically. It fought back but I prevailed. It’s gotta be about 15 lbs.

IMG_1261.JPG

IMG_1262.JPG


This junk up here was a real pain to get out. I ended up having to remove the heat-shield which I was not planning on doing. Although I then realized it would have to come off eventually anyway, because I plan to mount the ATX PSU where the hard drive slots currently are.

IMG_1267.JPG


After about 2 hours and at least 50 screws, she is finally bare. Still some cleanup to do inside though. I went on to unscrew as many standoffs as I could, but was forced to resort to a few taps of a hammer to dislodge some which were glued/melded on.

IMG_1275.JPG

IMG_1273.JPG


Lots of parts laying around.
IMG_1279.JPG

IMG_1286.JPG


A speaker on a fan. Only Apple...

IMG_1281.JPG

IMG_1383.JPG


LOTS of fans actually. I normally don't see G5 modders utilize these, but my initial plan is to use all of them. I understand the wiring may be a bit wonky, but should be fairly straight forward I would think... We'll see!

Ok so that was definitely a blast, but now it’s time for some new hardware. I got these cases for free, and I am not planning on spending any money on specific hardware. I have several older machines laying around collecting dust (very literally), so I’m just going to use one of their guts.

Here is the donor...
It's a Gigabyte GA-M57SLI-S4 with an AMD Athlon 64 X2 6400+...
IMG_1194.JPG


She's an oldie I know, but I just finished building a new Sandy Bridge 700D rig and have no desire to purchase new hardware for this mod. I got the G5 case for free, so I'm just recycling this old AMD system I had laying around. It'll be making sure to leave everything generic enough so that any standard ATX board could be swapped in one day.

IMG_1373.JPG


Here is it tested in the case:

IMG_1303.JPG


If you missed me say it earlier, I am planning on using a flexible PCIe extension ribbon to connect the GFX card to the motherboard.

Here is another test fitting of the stock coolers. I plan to use them all as long as I can rewire them to work with ATX.

IMG_1299.JPG


Since I took those photos, I've reconsidered putting the PSU in that upper right corner. I am going to do some test fitting in the lower left corner. I might need to remove it from the casing but I am hoping to avoid that.

And one last shot of what has been keeping me going so far...

IMG_1397.JPG


That’s my progress so far. My next step is going to be testing that PCI Express extender. I should make sure that is going to work for me before I go on, considering the entire configuration depends on it.

Planning cable routes and ordering other necessary extensions and ports will also be a critical part of the next step. For USB, firewire, and audio ports I will be yanking the front panel connectors out of 2 spare cases I have laying around. It should be fun fabricating brackets to hold everything in place.

I will also be either fabricating a custom motherboard backplate, or trying to utilize one from one of my donor cases.

I’ll also be re-using the second stock Apple heat-shield to separate the GFX and CPU cooling zones.

The hard drive(s) will probably be mounted flat against the bottom of the case.

I’m considering painting the case black. It’s still very much up in the air :)
 
Last edited:
Tonight I fabricated my custom motherboard tray. I ran out and grabbed a 6-32 thread tap and got all the standoffs mounted securely. It was my first time creating a custom tray, and it turned out darn nice if I may say so myself! Once I get it sanded down and re-painted it should look great. Not that it will even be visible though, the edges are mostly obstructed from view once the motherboard is mounted.

IMG_1409.jpg


I had bought a windowed panel for my 700D a while back, so the old solid panel is now scrap metal. I used a bit of that for this because it is very thick and sturdy. I was expecting to have some trouble cutting it, but my jigsaw with 36 TPI blade tore right through it.

I left a lot of the shorter Apple standoffs on the case, so I'll be utilizing those to mount this tray to the back of the case.


I also have some parts in the mail.

I already mentioned the PCIe extender which I got from a guy custom making them ebay, but I also got these from frontx.com:

1394.gif

usb.gif

ethernet.gif

audio.gif


I'll be fabricating mounting brackets for both the rear and front panel, but am going to wait until the parts come in.
 
Last edited:
I'm looking at this GELID Solutions AM2 cooling block. It's very simple, minimal, and utilitarian which is ultimately what I am aiming for on this build.

gelid2.jpg
 
This could turn out quite nice! Im in for the run bro!
 
I hope you choose to get the optical i/o and fw800 working as well!

Great ideas so far! :)
 
Thanks guys! It's definitely my most ambitious mod since I replaced the case of my X-Box back in 2004. I'm going to try to keep a high level of craftsmanship and design cleanliness.

Anyway, I got all my cables in the mail.

3x 6'' USB
1x 6'' FireWire 400
1x 6'' Ethernet (not pictured here)

And for the front panel:
1x 18''' USB
1x 18'' FireWire 400
1x 18'' 1/8th inch audio

For some reason I forgot to order two 6'' audio cables for the rear panel, so hopefully those will be arriving next week.

Also, I decided to include FW800 but will not be adapting the optical I/O ports.

IMG_1437.jpg


I also got the PCI Express x16 extenders. I ordered a third as well, which I may attempt to "round."

IMG_1446.jpg


They look pretty ugly in this state. If I don't round them, I'll at least sleeve them up real nice or make some kind of troft or cover for them.

I did a test daisy chaining two of them together, and it functioned flawlessly! I am glad to see that. Looks like we're in business!

IMG_1452.jpg


However when I went to test the configuration in the case, I realized I am going to need a 90 degree adapter for where it meets the graphics card. There isn't clearance between the GFX card and the back of the case for these to bend properly.

Something like this should do the trick:
pcie-90.JPG


Anyway, back to the I/O panel. I started to mock up what I have in mind for all those I/O extensions. I created this in 3D Studio Max:

backplate_01.JPG


backplate_03.JPG


backplate_04.jpg


I'll be fabricating a bracket that will secure all the plugs. Although I added a slight gap in the profile view above, the faces of the I/O plugs will hopefully sit completely flush against the case. I'll need to bore out the mounting holes about an 1/8'' in so the screw heads will set down inside the plastic casing, allowing the ports to flush right up against the case.

The bracket will be secured to the case using 6 tiny screws that will hopefully take advantage of the natural holes in the case and will not be too visible on the outside. The stock G5 rear fan assembly was held in place using a similar method, so perhaps I can take some cues from that.

Next steps:
-Order right-angle PCI express adaper
-Order 2 more panel-mount audio plugs (silly me for forgetting the first time)
-Find a panel-mount FireWire 800 adapter.

-While I wait for those parts to arrive in the mail, I should be able to begin construction on rear I/O bracket.
-I'll also start mounting fans and creating necessary brackets.
-Fitting the PSU is also on the agenda...

Lots to do.
 
Last edited:
I wouldn't think optical I/O would be too difficult if you did want it. Your board might have support for optical output (maybe input too).
 
So today I went ahead and created the rear panel bracket.

No FW800 yet but it can easily be added once the adapter arrives in the mail. I'll need to have it in hand in order to drill proper holes for it. Also missing one of the audio cables still.

First step was the bore out the mount holes to allow each screw to sit flush inside:

IMG_1461.JPG


And here is the stack completed:

IMG_1466.JPG


Here is the panel in progress. I intend to shave down the edges and get it squared up:

IMG_1479.JPG


Testing it in the case. Fits in there pretty snug!

IMG_1490.JPG


Alignment of the ports is pretty decent. The audio is the only one that is not quite aligned and is also set too far back. As for the ports that will not be utilized (second ethernet and optical I/O), I'll shield them off from the inside.

I'm also considering pulling out the plastic rim that lines each of the ports. I had to sand it down a bit already, but even still it is keeping the Firewire and ethernet ports from sitting flush with the case. The original apple ports were made to poke THROUGH those openings, so I am worried that mine will be too far in-set. Removing the plastic rim may help that.

IMG_1481.JPG


I wouldn't think optical I/O would be too difficult if you did want it. Your board might have support for optical output (maybe input too).

I've just never used optical, to be honest. How drastic is the quality difference over standard 1/8'' audio jack? The Klipsch 2.1 system at my desk doesn't support it, but all the motherboards I own do support optical out it looks like.

As for mounting this bracket to the case, I am hoping to utilize the hidden screws that were once used to attach the rear 80mm fan fixture to the case. However the supplied screws are not long enough, and I am unsure what size or threading they are. Also, only specific holes in the case will accept the screws, and my bracket is coming up just short of them. I will either fabricate an extension bracket or just redo the thing.

Those gold bits are the nuts that were originally embedded into the fan casing to catch the tiny screws. Speaking of the fan casing, I'll need to create something new. This new bracket obstructs the placement of the original fan housing.

IMG_1506.JPG


Does anybody have a guess as to what size those tiny screws might be? Is there any standard size that is smaller than M3?

IMG_1510_mod.jpg


I'm going to Home Depot tomorrow to look for a new metal cutting bit for my dremel. Today I used a diamond tipped cutting wheel on the aluminium, but I need something with more precision and control.

Does anybody have any cutting bit recommendations?
 
Last edited:
all i can say is wow nice work man, good luck with teh screws i have no idea
 
Nice work man, will definitely keep my eyes on once this is done.
 
Nice! Interesting way about modding a G5, and detailed. Will keep an eye it.
Good work
 
Trim the metal down to the stock size.

There is no comparison in sound quality over optical vs 3.5. Optical is the best way for 5.1 cant go any higher, But the quality is superior.
 
Wow, this is awesome. I love your approach to this mod. Keep up the great work, looking forward to see future updates.
 
Thanks for the comments guys! Much appreciated. I am fairly new at modding, but am doing my best.

Not a lot to report. I ordered my missing audio cables, and I'm still looking for a right angle PCIe adapter. All the ones I have found face the wrong direction. I need the male end to be facing downward, towards the motherboard (as seen in the diagram below), but every one I can find is configured in a way that would make the male end face upwards. If anybody has any idea where to find an adapter like this, I'm all ears!

pci-e_02.JPG


And here is the design for new heat zone separators. Using the stock ones would require a great deal of modification anyway, and they are made of steel thicker than what I believe I would be able to cut through. So i've decided to just fabricate my own:

heat_shields.jpg


They'll use all the original mounting hardware, and will even allow the stock intake fan fixture to slide securely into the slot just as the original did. The PSU draws air up from the same space as the GFX card, but I do not believe there will be any issue with them competing for air. There will be an intake fan in the middle heat zone that should supply enough fresh air to cool both.

In the diagram above, you can also see my non-standard motherboard standoff height. I intend to raise the motherboard 1.5'' from the back of the case to allow cables to be routed and stored back there for a cleaner look. The only possibly issue I see with this is that the height of my CPU cooler will be slightly limited, but I usually do not go for the bigger coolers anyway. Accessing the cables once the motherboard is place on might also be a chore, but hopefully I can avoid that with some clever cable planning.
 
Last edited:
You could flip the flexible extender end?

I wish it were that easy! I can rotate the flexible cable any direction, but the pins on the rigid right-angle adapter need to be facing towards my motherboard, not away from it.
 
Can you pull the ribbon cable past the GPU and fold it over to change the direction? That wont work... I don't think.

Desoulder resoulder?
 
Why not use the apple watercooling stuff, just make a new bracket for the block ?
 
Can you pull the ribbon cable past the GPU and fold it over to change the direction? That wont work... I don't think.

I did consider that and yeah I should have slack for it. Just not 100% sure I would have the clearance between the bottom of the card and the back of the case.

I have an inquiry out to adexelec.com who manufacture/sell a lot of neat things including this awesome all-in-one right angle plus flexible extension. It can even be configured the correct way I need it. They don't list the price though and they are a bulk manufacturer, so I'm not even sure if they will sell me a single unit.

We shall see.
 
Last edited:
Why not use the apple watercooling stuff, just make a new bracket for the block ?

An interesting idea indeed. It would certainly be neat. I'll play around with the positioning of it in there, and will also need to test it for functionality... :cool:
 
I just ordered a batch of some DIY parts from performance-pcs.com.

This mod is all about learning and doing things i've never done before, so I'm going to crimp my own Molex cables for the Apple fans. I found a forum post full of information and diagrams on how to convert all the Apple fans to 4 pin Molex.

Also grabbed some fan meshes for the rear fans. Still need to design a mounting bracket for them too.

fan_stuff.JPG


I've never bought heat-shrink before. Hopefully the sizes I chose will work.
 
Nice!


I always loved the G5 cases (though I think the Quicksilver G4s may have been my favorite even if they weighed 2 tons).
 
As much as I hate OSX since public beta release in 1999, I LOVE their hardware design. Perfect.
 
Thanks guys!

Sorry for the slight delay here. I had a guest at my house for the last week, so I had to pack up all my modding stuff.

Slight change of plans: I'm now using the stock upper mounting plate to hold the PSU and DVD drive. I had attempted to fabricate my own, but the aluminium I used was too thin (you can compare the thickness of the two plates visible in this photo). I bit the bullet and just hacked up the stock one, which is very thick but ended up turning out nicely.
IMG_1568.JPG


You can see a big difference between that lower separate and the upper one. I'm going to re-do the lower one with some thicker aluminium.

In other news, I got a new PCIe extender in the mail! This one has a right angel adapter and is much longer.
IMG_1563.JPG


It does seem long, yet I'm still having a hard time making it reach the motherboard PCIe. It's going to be tight, but it should work though. I was going to order a 12'' but stupidly ended up opting for a 10''. Those extra 2 inches would of made a big difference. Sorry I forgot to take a picture of it on the motherboard, but will upload one this week.
IMG_1583.JPG


I'm very happy with how nicely the PSU fits up top with the stock panel. It almost seems to be made for it - these holes even line up perfectly with the PSUs mounting holes - I'll just need to make a couple of L brackets to hold it in place.
IMG_1578.JPG


If you are familiar with the G5 case, you'll know that the power plug is at the bottom of the case, yet it is very obvious here that my PSU is at the top. I am going to run an extension down to the stock power inlet. I found this perfect extension cord with 2 right angles:
powercord


I also need to order some extra long M3 standoffs. They will use 6 of the stock Apple standoff mounts, and will set the motherboard out about 2 inches. This will allow ample room for wiring beneath. I found these 50mm ones on amazon but am waiting to hear if they are M3 or not.

I got everything in the mail for my fan cable crimping, so that will be my next big step I think after I finished the heat shields.

Hopefully another update will come soon this week! Thanks for watching guys, this is my first work-log.
 
As an Amazon Associate, HardForum may earn from qualifying purchases.
I knew the G5 Powermacs were liquid cooled but I had never actually seen the cooling parts themselves.

Now that I have... holy shit. I never expected that.
 
i wouldn't try to round the PCI-E extender, just make an aluminium shroud to to hide it, or tuck most of it behind the motherboard... i could just see rounding it messing with the signals and introducing cross-talk.
 
This past week I have had little time to work on the project and was starting to get that feeling of loss of interest. However some great news today has rejuvenated my excitement.

What better way to rejuvenate a project than throw some money at it!?

I spoke to a local company who does anodizing, and we worked out a deal to have the case hard-coated for $100. The great natural gun-metal gray color of a hardcoat anodize is exactly what I had in mind, but was worried it would be too expensive. $100 is very doable.

I've decided to go ahead and purchase some new components specially for this build. Since I am going for aesthetics on this build, I decided I had better give more delicate consideration to the motherboard. I'm looking for a black board with red & grey accents. I'm also looking for something cheap like this JetWay. I have a Q9550 laying around, so I'll be needing a LGA775 board. I'm also now aiming for a MicroATX board instead of a full ATX.

I'll be painting the G5 fan housings matte black and the blades red. This paired with the gun-metal grey of the case should hopefully have a rat-rod inspired look to it.

I've ALSO decided to move forward with water cooling! I'll be using the G5's radiator and have determined that it uses 3/8'' ID tubing. I could not get the G5 pump working (I think I shorted it out actually...), so I'm looking for a cheap pump. By cheap I mean ~ $50. Any suggestions? I'm also looking for a LGA775 cooling block.

I have not yet decided what is to come of the graphics card, but very well may just continue to use my 8800 GTS.

Anyway, I'm excited about getting the case sent off to the anodizer hopefully next week!
 
Last edited:
It is coming along nice, I can't suggest a pump for you sorry but the 8800 should still be fine to play games on lower resolutions my friend still uses his 8800 640 and q6600 to game.
 
So I got a few components in the mail. In choosing parts, I was mostly concerned with aesthetics and cost, so performance took a hit on this one in favor of the correct look :)

I'll admit I'm a little worried about the color of this motherboard though. I've noticed that there are pure black motherboards and then there are brownish-black motherboards. In this picture the board looks brownish black, but in many other photos of this board it does appear a deeper black. I imagine it just has to do with the lighting. I just hope that the brown color is minimized when I have it in hand. I could not find many other black 775 boards with red connectors. There is a pretty awesome ZOTAC one I almost purchased, but the connectors were red-orange which is not exactly what I want.

I guess we'll just see how this thing looks in hand.

Went with this Biostar G41D3C for $39
G41D3C.jpg


And 4 gigs of some black G.SKILL memory for $30
black_ram.JPG


And also got this PCI Firewire card with an internal 1394 header because the motherboard doesn't have any. I'll remove the metal expansion slot plate and just leave it stuck in the PCI slot.
1394-card.JPG
 
Last edited:
I've gone back and forth about if I will do air or loquid cooling, but finally decided to move forward with the liquid. I'm trying to keep the budget very much in check, but that is difficult when dealing with water cooling parts. The better looking stuff is of course going to be a little bit (a lot) more.

This is not set in stone, but I am looking for this Zalman ZM-WB5 for the CPU block, which comes in at a pretty decent $39.
zalman-block.jpg


The pump is even harder to go cheap with. I'm bummed I couldn't get the G5 one running, because I know a good pump is the most critical part of a good WC system. I hear the Laing DDC 3.1 that was in the G5 is pretty good, too.

Unfortunately though, my budget is keeping me at the sub $60 level. I'm currently looking at this Thermaltake P500 for $50 which I have read mixed reviews of.
p500-pump.gif


I love the look of both of these pieces, and believe they fit the rat-rod style I have been inspired by. I just hope that their quality is high enough to prove sustainable.

3/8'' ID Tubing will be white, and believe the clamps will either be red or perhaps just bare silver.
tubing-white.jpg


I mentioned it earlier, but I'll be utilizing the G5's radiator which looks pretty cool in all silver and already has it's own accompanying fan fixture. The fan shroud will be painted matte black, and the fan blades will be painted red.

I'm still up in the air about a reservoir. I need to wait until I get the motherboard, radiator, and fans fully installed before I can think about radiator placement. Fabricating my own is a thought that has crossed my mind, but we'll see.
 
Last edited:
i think the water cooling will go a long way to make it look even nicer
 
For the CPU block for $10 more get a rasa. Much better performance. You can buy a DDC from bmaverick for $35 plus a top for $20 which is a lot better than any thermaltake water cooling product
 
forgive me if this was already stated but is this going to be a hackintosh project?
 
Back
Top