M76
[H]F Junkie
- Joined
- Jun 12, 2012
- Messages
- 14,030
The events leading up to the purchase
I was bored with my old case (Sharkoon Rebel 12 Value), I had it for at least five years. But more importantly I was looking for better cooling performance, more modern design, and better options for cable management. So I went for the
SilverStone Raven RV03
So why I choose this case? The main reason is the revolutionary 90 degree motherboard mounting. Of course there are a few other SilverStone cases that offer the same, like the RV01, or RV02, or the FT02. But those cases have two huge drawbacks. For one they are literally huge, both in width and depth. Second they all cost a small fortune, around $400 give or take a few depending on the variant and the retailer. Compared to that the RV03 is half of that, you can pick it up under $200.
I have to admit that originally I was looking at the FT02, for months, but the price kept putting me off from actually going trough with the purchase. In hindsight it was a good thing, because later I realized that the huge case would've been jutting out from beside my desk by a good 5 inches at least. It would've looked stupid. And besides it has no excuse for being so big, since it has less internal drive bays compared to the RV03.
First I apologize for the blurry pictures, I had very bad lighting, since the room is shaded, to try to keep the heat out. It's close to 40C° outside and no air-con.
So before I delve deep into the RV03, I want to say a few words about my old case so you can see what it has to beat.

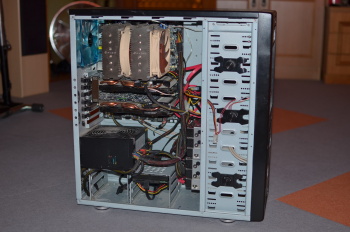
As you can see the case has 6 internal 3.5 bays and and 11 exposed 5.25 bays, so it had plenty of room for expansion. But cable management is a mess, the location of the psu is weird, as it sucks air from the top, and while the front bezels have dust filters, the huge fan on the side has no such thing, and since it blows inside the case, the dust just kept piling up on every component inside. It kind of make the front filters pointless as well. I tried to reverse the fan, but it ruined the cooling.

I had to move the fan outside the case, otherwise the cpu cooler wouldn't fit in. That's why it's standing out like that.
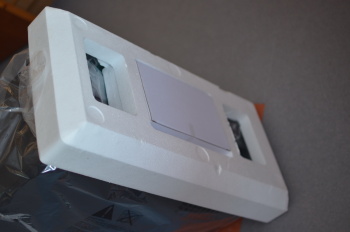
Let's move on to the Raven. It comes in a pretty unremarkable cardboard box, the accessories and manual are in a box fitted to the bottom of the Styrofoam.

After removing the packaging I realized that this case is still pretty big, it's much wider, and a bit longer than my old case. And only about 3 inches shorter.
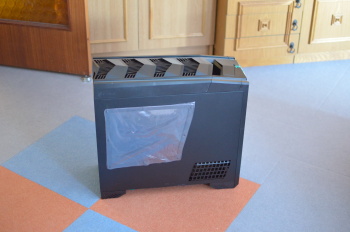
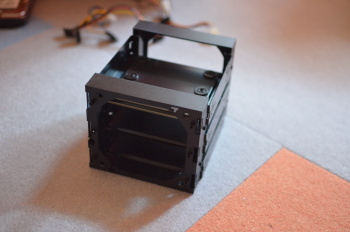
Since the motherboard will be fixed in a rotated position, all the cables will come out on the top, so the case has a removable grill on top for easy access. The handle on the back is very useful for lifting and rotating the case during assembly I only wish they put one on the front as well, because it has no clear points that you can grab there.


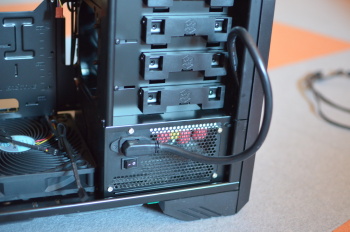
The little metallic box with the two switches near the front is for changing the speed of the two 180mm fans on the bottom. Unfortunately it's quite useless, because the noise is unbearable on the high setting, so under normal circumstances everyone will use it on low. I'd have preferred potentiometers, so you could set the speed to the highest where the noise is still acceptable to you.
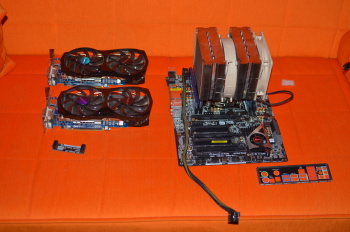
So let's move on to assembly. I laid out every component on the floor that needs to go in:


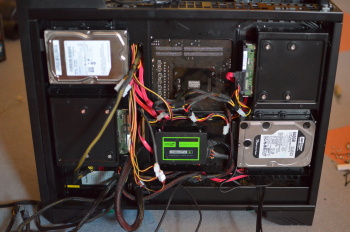
On the bottom right the there are two Lian-Li 2x5.25 to 3x3.5 drive bays, but in the end I didn't use those. I fitted 4 hard disks to the back of the MB tray as recommended by the manual, and the remaining three to the 5.25 bays with the trays supplied for the case.
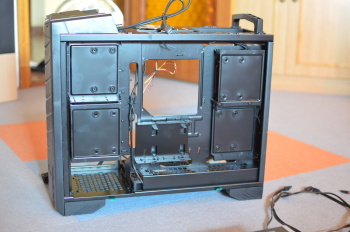
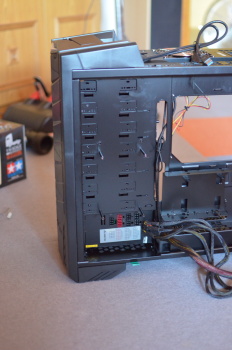
So after removing the top and side covers here is what we got:
The bottom left hole is for the PSU, since it's mounted sideways there is a size limitation, but my psu is not too big so no problems there for me.
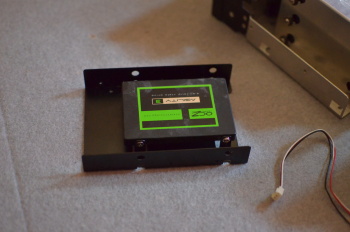
As I mentioned there are four 3.5 trays hidden in the back, two mounted bottom up. And a 2.5 drive tray in the middle, that has room for two 2.5 inch drives. More than enough for the average user. Not for me though. A mild inconvenience that you have to remove the 3.5 trays to access the left side of the 5.25 bays, to be able to remove the 6x3.5 trays installed there. You have to remove the trays anyway to install hard drives in it, since they need to be secured from the bottom. You can probably squeeze in the HDD's to the trays that have their bottom facing out, but I removed all of them to have easier access. An interesting fact that the HDD trays on the back of the MB tray, are identical to the ones in the 5.25 bays. So they're interchangeable.
The manual recommends to install the PSU first, so that's what I started with:
I had to remove the vibration dampener from the PSU because the space is very tight I just couldn't squeeze it in. Not that it would've done much good, since the PSU sits on a metal rail, so the back of it would've contacted the case anyway.
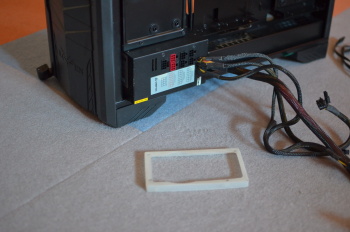
Since the PSU can't have it's connector on the side of the case we need to attach an extension cable:
Now I don't know why they made it so long, that it's jutting out like that, and there is no obvious place to tuck it away at first glance.

The above picture shows the two 180mm fans fitted on the bottom. I don't really understand why they put that dense mesh on them, since I think that's the main cause of the noise on the high speed setting. Of course they're not removable, it's moulded as one piece with the fans themselves.
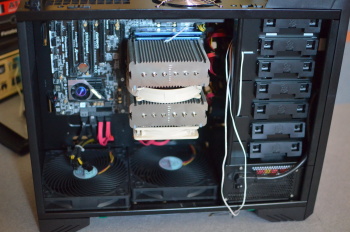
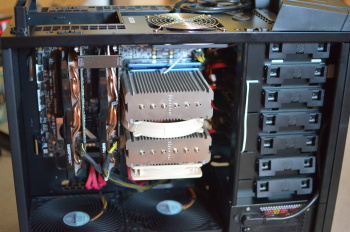
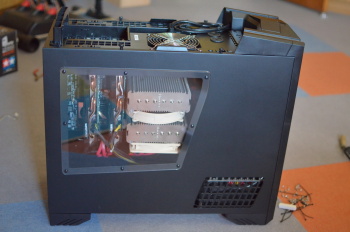
According to the manual the second step is to put in the motherboard:
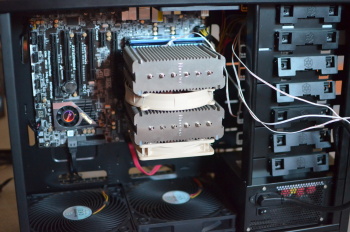
Since I never removed the cpu cooler that meant I had very little access left to the back of the 5.25 bays. Which made the installation of the drives very hard. So here's an advice: Install everything that goes into the 5.25 bays before putting in the Motherboard, or at least the CPU cooler.
I was bored with my old case (Sharkoon Rebel 12 Value), I had it for at least five years. But more importantly I was looking for better cooling performance, more modern design, and better options for cable management. So I went for the
SilverStone Raven RV03
So why I choose this case? The main reason is the revolutionary 90 degree motherboard mounting. Of course there are a few other SilverStone cases that offer the same, like the RV01, or RV02, or the FT02. But those cases have two huge drawbacks. For one they are literally huge, both in width and depth. Second they all cost a small fortune, around $400 give or take a few depending on the variant and the retailer. Compared to that the RV03 is half of that, you can pick it up under $200.
I have to admit that originally I was looking at the FT02, for months, but the price kept putting me off from actually going trough with the purchase. In hindsight it was a good thing, because later I realized that the huge case would've been jutting out from beside my desk by a good 5 inches at least. It would've looked stupid. And besides it has no excuse for being so big, since it has less internal drive bays compared to the RV03.
First I apologize for the blurry pictures, I had very bad lighting, since the room is shaded, to try to keep the heat out. It's close to 40C° outside and no air-con.
So before I delve deep into the RV03, I want to say a few words about my old case so you can see what it has to beat.
As you can see the case has 6 internal 3.5 bays and and 11 exposed 5.25 bays, so it had plenty of room for expansion. But cable management is a mess, the location of the psu is weird, as it sucks air from the top, and while the front bezels have dust filters, the huge fan on the side has no such thing, and since it blows inside the case, the dust just kept piling up on every component inside. It kind of make the front filters pointless as well. I tried to reverse the fan, but it ruined the cooling.
I had to move the fan outside the case, otherwise the cpu cooler wouldn't fit in. That's why it's standing out like that.
Let's move on to the Raven. It comes in a pretty unremarkable cardboard box, the accessories and manual are in a box fitted to the bottom of the Styrofoam.
After removing the packaging I realized that this case is still pretty big, it's much wider, and a bit longer than my old case. And only about 3 inches shorter.
Since the motherboard will be fixed in a rotated position, all the cables will come out on the top, so the case has a removable grill on top for easy access. The handle on the back is very useful for lifting and rotating the case during assembly I only wish they put one on the front as well, because it has no clear points that you can grab there.
The little metallic box with the two switches near the front is for changing the speed of the two 180mm fans on the bottom. Unfortunately it's quite useless, because the noise is unbearable on the high setting, so under normal circumstances everyone will use it on low. I'd have preferred potentiometers, so you could set the speed to the highest where the noise is still acceptable to you.
So let's move on to assembly. I laid out every component on the floor that needs to go in:
On the bottom right the there are two Lian-Li 2x5.25 to 3x3.5 drive bays, but in the end I didn't use those. I fitted 4 hard disks to the back of the MB tray as recommended by the manual, and the remaining three to the 5.25 bays with the trays supplied for the case.
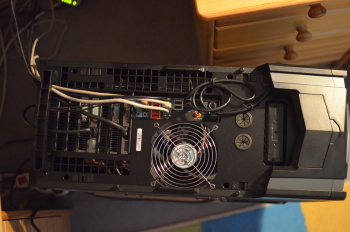
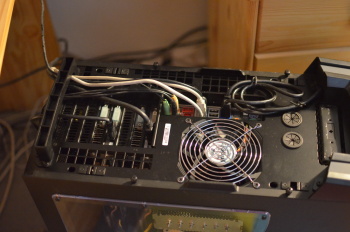
So after removing the top and side covers here is what we got:
The bottom left hole is for the PSU, since it's mounted sideways there is a size limitation, but my psu is not too big so no problems there for me.
As I mentioned there are four 3.5 trays hidden in the back, two mounted bottom up. And a 2.5 drive tray in the middle, that has room for two 2.5 inch drives. More than enough for the average user. Not for me though. A mild inconvenience that you have to remove the 3.5 trays to access the left side of the 5.25 bays, to be able to remove the 6x3.5 trays installed there. You have to remove the trays anyway to install hard drives in it, since they need to be secured from the bottom. You can probably squeeze in the HDD's to the trays that have their bottom facing out, but I removed all of them to have easier access. An interesting fact that the HDD trays on the back of the MB tray, are identical to the ones in the 5.25 bays. So they're interchangeable.
The manual recommends to install the PSU first, so that's what I started with:
I had to remove the vibration dampener from the PSU because the space is very tight I just couldn't squeeze it in. Not that it would've done much good, since the PSU sits on a metal rail, so the back of it would've contacted the case anyway.
Since the PSU can't have it's connector on the side of the case we need to attach an extension cable:
Now I don't know why they made it so long, that it's jutting out like that, and there is no obvious place to tuck it away at first glance.
The above picture shows the two 180mm fans fitted on the bottom. I don't really understand why they put that dense mesh on them, since I think that's the main cause of the noise on the high speed setting. Of course they're not removable, it's moulded as one piece with the fans themselves.
According to the manual the second step is to put in the motherboard:
Since I never removed the cpu cooler that meant I had very little access left to the back of the 5.25 bays. Which made the installation of the drives very hard. So here's an advice: Install everything that goes into the 5.25 bays before putting in the Motherboard, or at least the CPU cooler.