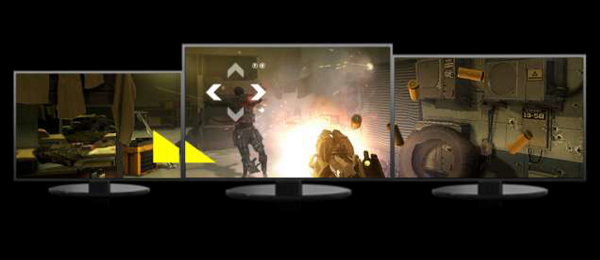
3x 120Hz Eyefinity Portrait Setup

Okay, looks like ASUS is coming with a triple-slot CU (4xDP) card:

http://www.techpowerup.com/159003/ASUS-Radeon-HD-7970-DirectCu-II-Graphics-Card-Pictured.html

That might end up being the right choice if 2fire will be enough for triple 120Hz.

I run two of the Direct CU II 6950's with my triple portrait and they are great. I bought that model so I could have all DP connections (through dvi active adapters) and avoid the screen tear from different connections. The coolers are great and quiet, they aren't Accellero Xtreme good but they are far better than reference.
 
I run two of the Direct CU II 6950's with my triple portrait and they are great. I bought that model so I could have all DP connections (through dvi active adapters) and avoid the screen tear from different connections. The coolers are great and quiet, they aren't Accellero Xtreme good but they are far better than reference.

That's good to hear. I figure I can add one of these monsters and CF to my ref, so the ref idles super-low (quiet), and the biggun' does the light work, and then headphones on for gaming.
 
I just debezzeled 1 u2412 to see the difference, there is about 3-4mm of savings on each side, so not bad, what arm is that I have to ask? If i was brave enough I'd remove the metal casing and create my own casing for the LEDs but meh I don't feel like wasting $300 =p.
 
Last edited:
you can convert the 6990's 5th output (DVI-D) to displayport or minidp using an adapter. Are you saying it would still tear after being converted to displayport? This was never an issue with me because even though I was shooting for more than 4 monitors, I would never have been gaming on more than one or three at any time.

http://www.hardwareheaven.com/reviewimages/amd-radeon-6990/amd-radeon-6990_outputs.jpg

Yes, I believe it would. There seems to be some subtle timing difference between dvi and dp that makes this happen, its also much more apparent in portrait because the persistent tear runs vertically and is almost like an extra translucent bezel when it comes to distraction.

Maybe there are some other solutions to this that I don't know about (I've spent most my time in the green camp) but if there is I haven't seen it.
 
That's my biggest issue with the dcuii cards. I want all dp or all dvi. We need to make this happen.
 
triple is no prob on the 6990, it has 4 mini dp outs. The 6970 has 2 mini dp and two dvi (+one hdmi shared with the dvi). It looks like the 7970 has two minidp and one shared DVI-D/hdmi though. I'd assume a 7990 would be similar to the 6990's outputs?
You can do 5 monitors with a 6990, but its only four with mini dp, (if you want all minidp for games). I'm not sure about using an adapter on the 5th output (DVI-D)... previous poster thought the dvi timing might still be off even through adapter. Would be nice if someone could confirm this out of curiosity.
.
I only game on one monitor at the moment and at the most (gaming) would be three in LLL eyefinity so not a big issue for me. The more outputs the better though. It would be nice if I could use the outputs on a 6970 if I added one for trifire 6990+6970 at some point, but from everything I've heard you can't use the 2nd card's outputs when you do crossfire.
 
DVI tends to run at 59.95Hz and DP runs at 60Hz. Here lies in the problem. If we could match this, it'd be perfect. Some monitors take Directly 60Hz on there DVI ports which is why some users have never had tearing, while the greater majority have issues.
 
Ekk, the 700D has a completely different PCB directly mounted to the back panel covering up the LCD panel mount holes and has a two inch panel ribbon cable. Now this will be interesting to mount properly...

Anyone want to donate their 750D internal Flexcon 1124 ribbon cable? That one is a nice workable 8 inches lol.
 
Little teaser as I just got in the 6GB 7970's from Taiwan to test:

SANY00062.jpg


Man this is a bit overwhelming! I have to turn my head like 50 degrees to the left just to click on the Start button. :)

Viewing angles even on my temp ghetto rig support system are very positive!
 
Vega, please post instructions and pics on how you are disassembling these LCD's. I have 3 on my floor that I will be doing similar to what you have, once I have instruction. :)
 
I'm hating you a bit right now.

now sell me your old arm :>

btw are the clocks on the 6GB 7970 the same as the 3GB model?

5400x1920 = 9.x MP, that is a pretty crazy resolution.
 
I'm hating you a bit right now.

now sell me your old arm :>

btw are the clocks on the 6GB 7970 the same as the 3GB model?

5400x1920 = 9.x MP, that is a pretty crazy resolution.

I might just have it for sale, still testing the setup I'll let you know.
 
I gotta know... is Crossfire enough? Or do you think you're going to jump to 3Fire or 4Fire when the 7990s drop in March?
 
.
.....That does look neat but personally I would set it back a lot further than regular desk distances which would require the monitor array to be on its own further back stand/pillar/table, or conversely the player sitting back further at his own stand/pillar/table separate from his main desk. I don't like any monitor (at normal desk viewing distances) much more than 30" diagonal in front of me for gaming unless it was going to be something like a LLL eyefinity setup with the side panels peripheral by design. I used to have a 37" westinghouse and regardless of the ppi/rez, that size causes eye bending to the perimeter of the display, and even some micro or full head/neck tilting.
.
Man this is a bit overwhelming! I have to turn my head like 50 degrees to the left just to click on the Start button
..... I do have a much longer array of monitors I use at my desk but I only game on one. I use displayfusion to create a functional window7 taskbar on every monitor - start button, ability to add shortcuts to folders or files on the bar, clock+date. The only taskbar functionality that is exclusive to the primary monitor of the array currently is the system tray and the more functional pin-able items (as opposed to taskbar shortcuts). You can move the start button on any monitor's taskbar to the right/left/top/bottom or disable it on a per monitor basis. You can also add the "Show desktop" button or remove it from any monitor's bar, and auto hide or remove the bar on monitors you chose to. Displayfusion also has a feature-rich wallpaper configurator for multiple displays among other things.
.
.
......I prefer to keep the actual scene objects in a game similar in size in relation to my viewpoint (viewing distance to the gaming monitor/gaming monitor array) regardless of what rez+screen size and how many monitors I am using. The exception would be LLL eyefinity or similar type setups where the side/extra panels are peripheral by design for immersion - but the central monitor's viewpoint would still apply.
.
5x1 16:9 aspect compared to 16:9 based PLP
5x1's aspect - resolution aside - looks similar to a PLP 16:9 setup to me somewhat (3x1 PPP is very similar to the perspective of a single 16:9 in landscape + the "side P's" being the monitors on the ends .. so at 5x1 ~ PLP-like). Therefore at the right distance I think I would be ok with it (and enjoy the 120hz and high perceived ppi at what I'd consider an appropriate viewing distance)- other than the fact that I personally don't prefer the more central bars. I'm not sure I could get used to those even as slim as Vega got them. I'll watch the vids again a few times. If anything I would prob do triple 27" monitors since I already have a single one.
.
......The vids look cool but the game would have to be able to move all HUDs , chat windows, pointers, maps/readouts, etc to inside of the centric viewpoint (outside of the periphery) imo, which is a problem with many games in any eyefinity configuration to be fair... WoW can do it dependent on addons, RiFt (similar to WoW but modern gpu crushing graphics ceiling) can do it out of the box, F1 is racing so less dependent on HUD and prob benefits more from having some of the game in peripheral for immersion. From the looks of them, I don't think BF3 or Skyrim have options to move/keep HUDs/notifications/pointers/chat/inventories - etc.. central but I haven't played either personally.

eyefinity config aspects visualized to perspective

"Eyefinity 2.0 to support custom resolutions" PLP and "mixed grid"
http://widescreengamingforum.com/article/amd-radeon-hd-7970-review-eyefinity-20
.
 
Last edited:
Posted a few more video's on Youtube of 5x1 setup:

http://www.youtube.com/user/CallsignVega/videos

Still deciding if it's worth keeping.

Really impresive setup / vids ;)

I notice on the BF3 vid that (as expected) the framerates dropped quite significanly.... are you decided yet on whether that's worth it for the extra immersion you get from having such an expansive deskttop area, i.e. ~60fps with 5 screens compared to ~120fps+ with 3?
 
Little teaser as I just got in the 6GB 7970's from Taiwan to test:

This doesnt sound right, there is literally nothing on the net which mentions that there are any of these actually floating around yet.
 
@elvn What will define where the HUD will be placed in games like BF3 or any other without custom UI options is the CAP that is used with the driver. Also in time, Eyefinity 2.0 is said to support different resolutions but always in the same orientation, no PLP support announced yet. The guy above me... look further yes there is info about incoming 6GB cards =)
 
Why would eyefinity care what orientation a monitor is in ? If it can do a grid of monitors I don't see why it couldn't do narrower widths sideways like softTH does. If it did a 2560 wide center with a 1680 or a 1440x900 or even a 1280x720 on the side in landscape the smaller rez would still be very narrow and nowhere near the dimensions by comparison to the central monitor. I'm also curious if it will always align the grid based on the bottom of the monitor, or if you could hang taller monitor's extra physical height below your main monitor's bottom line.. or the option to center larger monitors on each side of your shorter center monitor, etc... Its great that they are expanding eyefinity functionality so I hope they will expand it with some of these capabilities.
..... Regardless the point still stands on the aspects being almost the same but without central bars on the PLP version, similar to LLL eyefinity in that there is a full sized landscape monitor in the middle. Of course the benefit would be that the resolution is much greater on 5x1, and if you set it back further the perceived ppi would be pretty high too - but at the expense of many more vertical bars , especially the few in the center region. A very high rez and perceived ppi and prob the biggest factor is that they are still combined with 120hz gaming capability. It is very impressive even considering the bars tradeoff.
 
Last edited:
The guy above me... look further yes there is info about incoming 6GB cards =)

Yes I have followed the news closely and saw the leaked docs a while back, but like I said, "there is literally nothing on the net which mentions that there are any of these actually floating around yet."

I talked to a couple of my distributors, and apparently nothing is in the pipeline in the short-term either.

I would like to see some photos etc from Vega of the 6gb cards. I imagine that wont happen, but would be very happy to be proved wrong as Im waiting to grab a couple of these when the do become available.
 
Congrats Vega, your pics and videos convinced me to purchase two of these and will likely be removing the bezels as well. I should have some side by side images and video with an FW900 if anybody is interested. If I don't hate it I'll get a third and do a simile PPP setup.
 
Just cleaning up my work area, should have photo's and disassemble guide here shortly.
 
Can we see pictures of the 6gb 7970's?

I doubt hes gonna release photos as hes obviously under NDA. But Vegas legit, and hes always getting experimental hardware 1-2 years ahead of the curve...didn't you catch his OLED soft panel teaser review?
 
I doubt hes gonna release photos as hes obviously under NDA. But Vegas legit, and hes always getting experimental hardware 1-2 years ahead of the curve...didn't you catch his OLED soft panel teaser review?

Fair enough if he can be vouched for.

But not sure why it was even mentioned if it is something which wasnt going to be elaborated on. Very itchy for these cards to be made available now.
 
Instructions to disassemble the 750D series (23" or 27") Samsung 120Hz screens to minimize bezels/mount VESA:

Tools: Plastic trim removal tool or standard sized flat-head screwdriver with soft tape on the tip, mini-flat head screwdriver, standard size Phillips, mini-sized Phillips, heat gun, thin cloth, clear package tape, black electrical tape, Dremel (this will save you another 1 to 1.5mm bezel). Set up the monitors GUI configuration before dis assembly as it is easier to do it now rather than when the control are in the back.


Remove the electronics base from the panel. Using a soft pry tool, pry up the square black rectangle gloss plastic cover over the mounting screws where the base attaches to the panel. Tug on the vertical gloss plastic strip on the back of the base to expose the ribbon cable. Loosen the four screws holding the black base mounting plate to the panel. Lift up the panel slightly and disengage the ribbon cable by lifting up on the grey plastic friction snap at the end of the connection. Be very careful here as the flex cable is quite fragile and delicate, especially where the connections are made. (There is one on either end of the flex cable, one panel side and one circuit board side).

SANY00082-1.jpg


Once the panel is detached from the base, set the panel down on a flat surface screen facing up. Using a soft pry tool, insert between the two halves of the plastic panel outer casing and slightly twist. A small coin like a dime with tape on it also works great. Once the panel begins to separate, lay a thin flat cloth on the screen to protect it as you use your hand pressure to lift up and under the edges of the trim. Use constant and even pressure as not to break any of the plastic tabs/snaps that hold the two halves together. Work all around the panel until the two halves are cleanly separated.

SANY0003-9.jpg


Lift up and remove the LCD panel from the back housing. Lay the panel face down on a flat surface on a towel or other soft material. Using a razor blade, cut the metallic tape located at the top of the panel along the seam to facilitate the removal of the metal panel retention bracket that surrounds the panel. Using a mini-Philips, remove the screws on the panel PCB cover and remove the cover using an angled pulling motion. Use package tape to secure the PCB to the back of the panel. Using a thin flat-head screw driver, work around the edges of the metal panel retention bracket along the edges to "pop" the the bracket out of place. You will have to work and secure the "popped" sections as you go to prevent them from falling back into place. Once the metal bracket is removed, be careful when you move the panel as there is no longer anything holding the LCD panel against the back-light.

SANY00112.jpg


Using package tape, wrap all LCD panel ribbon cables to the back and tape them to secure them in place. You might have to over-hang portions of the panel over the edge of the table to accomplish this. Do not let the LCD panel separate from the back-light as this may introduce dust and other debris that might become a visual impairment to your screen.

SANY00122.jpg


OPTIONAL: Use a Dremel with cutting wheel along the top black plastic back light retention surround to eliminate a 1-1.5mm amount of bezel when you overlap the screens. Use black electrical tape along the edge once the cut is done to prevent light from escaping the back light. It would behoove you to to slightly lift the LCD panel and have it "float" above the back light in a clean-room type environment to prevent accidentally damaging the glass LCD panel. Also, tape off the gap between the raised LCD panel and the back light to prevent any of the debris during cutting from entering.


At this time you may mount your rotating 100mm VESA mount at an angle as pictured. The holes are not standard VESA holes, if you rotate the VESA plate the 100mm holes just happen to align which makes this mod possible without going to extreme mounting modifications.

SANY00132.jpg


Time to disassemble the electronics base. Remove all screws from the base.

SANY00092.jpg


Wear a static wrist strap or touch a grounded surface before handling PCB's. Try to work on a hard surface floor and not a carpeted floor, especially if it is dry. Disconnect the cables to the two-layered PCB. Remove all screws securing the PCB to the base. (There are multiple depths to the screws). Remove the PCB's. The base should look like this one the PCB's are removed:

SANY00102.jpg


The PCB's:

SANY00063-1.jpg


Remove the two black screws covering the top of the micro-fan. Using a pair of gloves and a heat gun, heat the fan to over ~200C. It is secured using very strong double-stick tape. Once the fan is heated up, slowly pry and work it out of the housing. The fan needs to be attached to the PCB's in order for the monitor to work properly. The monitor is designed to shut off after 10 minutes if the fan is not operating correctly or is not connected as a self preservation design.

Once the fan is removed, it can be re-attached to the socket on the PCB. From underneath, lift up on the edge and pry the tabs off of the "soft-touch" controls from the stand. The soft-touch control panel will lift off vertically from the base.

SANY00072.jpg


Re-attach the soft touch control panel to the PCB. The following is monitor stand dependent. I used zip-ties to hold the PCB's to the back of the stand as viewed below. The PCB's, fan and control panel are all tied together. I used a twist tie to point the output of the micro-fan to blow over the heat sinks on the stacked PCB's. Slide the zip-ties through the holes in the PCB's and secure them to the back of the monitor stand as shown below. Mount the panel using it's VESA mount to the stand. Whether you mount the LCD panel first or the PCB's is up to your stand configuration. Using your hands, articulate the ribbon cable to the back of the LCD panel and snap or "close shut' the ribbon cable friction retainer when the ribbon cable end white line is parallel to the receiving socket. Connect your power and signal cables.

SANY0019.jpg


Adjust the overlap, height rotation and angle of the panels. With TN viewing angles, the furthest left panel should overlap the center and the center should overlap the right. A slight angle (especially of the right panel) is desirable. Bringing up a large desktop background image with many lines for reference is helpful in aligning the panels and overlap properly. You want the bezel gap to be as small as possible, so some tweaking from your viewing position will be needed to get the distance between lit-pixels as small as you can get.

In the end and with some due diligence, you should have something along the lines of...


3xSamsungOwl1.jpg


Or even this if you are feeling really randy:


SANY00062.jpg


Please let me know if you have any questions.
 
Thank you so much!

It looks like you're using 2 bolts to hold the VESA adapter to the back of the LCD chassis. If this is correct, do you feel that it is strong enough?

Also, can you post the part # of the VESA adapter you're using.

Thanks again!
 
Very interesting. I think a little too risky for my taste personally, and since I would likely be using a LLL setup without central bars it wouldn't be as necessary.
.
I wanted to post a more full detail of the eyefinity2.0 features I mentioned above. I don't know if the review is accurate or not in this statement:
Eyefinity 2.0 expands the monitor configuration availability with a new 5 by 1 approach. This effectively allows you to run up to 5 monitors on the horizontal plane, to create an almost panoramic experience. Monitors can be aligned in landscape or portrait mode, or even a mix thanks to the flexible bezel correction mentioned above.

http://mygaming.co.za/news/hardware/30496-amd-eyefinity-2-0-technology-detailed.html


This site has 4 slides that show eyefinity 2.0 promotion features.
http://www.evga.com/forums/tm.aspx?m=1376291&mpage=1


Eventually monitors will be nearly bezel-less I think, like some of the oled CES stuff - though they are all televisions that I've seen so far, and tvs suck for gaming imo (size at a desk and ppi at size, lag inducing features, etc).

http://mybroadband.co.za/news/wp-content/uploads/2012/01/LG-oled-55-inch-TV.jpg

http://www.leadersvision.cz/2011/11/15/lgs-new-3d-tvs-have-almost-no-bezel-fulfills-our-sci-fi-dreams/
 
3x 1080P in landscape is already so ridiculously wide compared to tall I could not imagine doing five landscape wide. Those two end monitors would be completely worthless IMO.
 
yes I agree 5xL is useless. Though that was in the quote, I quoted it more for the interest in possible PLP capability using the bezel management and grid support (and perhaps other interesting grid setups). Not sure if the mixed orientation quote is accurate or not, that may have been an assumption by the reviewer. The monitors can be different sizes but I don't' see resolutions mentioned. I'm not sure what the full capabilities will be but it could be very interesting.

http://mygaming.co.za/news/hardware/30496-amd-eyefinity-2-0-technology-detailed.html
"Monitors can be aligned in landscape or portrait mode, or even a mix thanks to the flexible bezel correction mentioned above. "
Another interesting feature found in Eyefinity 2.0 is flexible bezel correction. This allows monitors of different sizes to be used in an Eyefinity setup but automatically adjusting the display image to take into account where the edge of one monitor is relative to the monitor next to it.

AMD-Eyefinity-Bezel.png


Because I would prefer PLP to 5x1 personally. They are essentially both the same aspect ratio, though a lot less rez obviously and the sides wouldn't be 120hz (unless you had a really strange matchup setup of mixed orientation 120hz monitors and sizes... i.e. central + "ears" .. | | == | | ).
 
Last edited:
Vega, thank you so much for the disassembly shots -- can't wait to get these VESA mounted. Pretty surprising there were two random screw holes that lined up.
 
Your numbers during the 5x1 videos look really promising. I'm more tempted by the ASUS CuII (for 2Fire) sooner rather than waiting for the 7990 (for 3Fire), which might not even fit in the FT02 depending on the length.
 
Vega, I disassembled my first of 3 LCD's.

I stopped though where you cut the metallic tape at the top to remove the metal casing. I'm not sure how much more that gains you, and then all your talk about the LCD separating from the back light, I wasn't sure how you then kept those from re-separating after you mounted the LCD.

Thanks a bunch though for your instructions and pictures.
 
Removing the metal casing surround will net you another 1-2mm. I went for the maximum bezel removal. ;)

You can keep the metal casing on of course if you want but that will give you a few mm bezel width and depth as it will separate the panels just slightly when you overlap them.

If you keep the metal casing I would just use the black electrical tape to cover up the aluminum look unless you like it. Under the metal casing are the LCD ribbon strips that you fasten to the back of the panel. That is what keeps the LCD panel against the back light. It works pretty good. Let me know if you run into any issues.
 
Ahh ok I think I understand now.

I'll be setting them in 3xLandscape, and for a iRacing, so the horizontal bars kinda seem like roll cage bars, which doesn't reduce the immersion that much.

I can see how in portrait configuration like yours it can really add up.
 
Back
Top