3M Headlight Restoration Kit for $14.95 shipped(2 bucks cheaper than amazon)

This is an excellent kit. I used it all the time on customer cars and they were extremely satisfied...came out like new. The only downside is it takes quite a bit of work, but otherwise highly recommended.
 
I'm going to restore one of the headlights on my jetta this weekend, and I'll try and remember to report on the results. I'll be using the method I used when I worked at a watch repair shop to restore the domed plastic glass on old Rolex and Omega watches; using increasingly fine grained sand paper, and finishing with a rag and brasso. You start with around 400 grit sandpaper (more or less, you don't want sand grains so large as to cause scratches themselves, but large enough to take out the big scratches), move to 600, 800, and 1000, each until you've removed the successively smaller scratches from the previous. Then get a smooth rag (we always used a smooth, lintless jewelry polishing rag, but I'm going to use an old cotton t-shirt), apply brasso, and buff. The faster you buff, up to a point, the smoother a more shiny the plastic will become.

Long story short, if you have sandpaper and brasso, you may not have to spend the $$ on this.
 
But I saw on an internet advertisement about 'This one weird trick found by a stay at home mom' that could do it even cheaper!
 
Stuff works great. Although it starts to get hazy again after a year. Next time I'll redo it but maybe get a clear coat painted on it.
 
Also, if you have or can get a CD polishing/repair kit, it works just the same. Both CDs and modern headlights are made of the same transparent acrylic. I had an old CD polishing kit that I was given and it worked perfectly.
 
I'm going to restore one of the headlights on my jetta this weekend, and I'll try and remember to report on the results. I'll be using the method I used when I worked at a watch repair shop to restore the domed plastic glass on old Rolex and Omega watches; using increasingly fine grained sand paper, and finishing with a rag and brasso. You start with around 400 grit sandpaper (more or less, you don't want sand grains so large as to cause scratches themselves, but large enough to take out the big scratches), move to 600, 800, and 1000, each until you've removed the successively smaller scratches from the previous. Then get a smooth rag (we always used a smooth, lintless jewelry polishing rag, but I'm going to use an old cotton t-shirt), apply brasso, and buff. The faster you buff, up to a point, the smoother a more shiny the plastic will become.

Long story short, if you have sandpaper and brasso, you may not have to spend the $$ on this.

Wrong forum. I think you meant to put this in the cpu forum under "lapping cpu cooler". Seriously though, if that works long enough I need to do this before light refuses to even shine through the plastic anymore.
 
I bought a car that had TERRIBLE lights. I spent about 75 on different "headlight restoration kits" - this being one of them. If your lights aren't that bad - then maybe this will work. I decided to try the sandpaper route (as mentioned above - but I went 400 - 800 - 1500 - 2000) and then used one of the polishing compounds that I had purchased and the lights were brand new.

I can't recommend this product.
 
I used one of these 3M kits a few weeks ago and really liked the results. I have a 1993 Ford Ranger with the original headlight lenses. They had become pretty frosted and yellowed over the years (and one of my friends was giving me grief over them). I looked at some of the other kits out there but many are kind of lightweight rubbing compounds. That may work for very surficial defects but my oxidation and scratches were deeper than what I figured those kits would be good for. I took my time (about an hour) with the 3M kit and ended up with lenses that look pretty close to new (some crazing deep in the plastic). After using this kit, my impression is that it is good for many situations. If this can't do the trick, you should probably just buy new lenses for your vehicle (they usually aren't that costly).

Yes, a person could probably do this with several grades of sandpaper and rubbing compound themself. This kit gives you all of that and it attaches to a home drill, which will help reduce some of the work involved.
 
Stuff works great. Although it starts to get hazy again after a year. Next time I'll redo it but maybe get a clear coat painted on it.

I have used several of these kits. They are all pretty much the same. Using them properly is the key. The.problem with them is you have committed yourself to repeating the process every 6mos. to a year to keep them that way. The headlights come from the factory with a UV coating that eventually wears off which is why the polycarbonate lens turns yellow. Once you use an abrasive you have removed any that was there, not that its a huge deal, but in some cases it is more cost effective to just replace them and be done. I still do mine but I simply get a bottle of stuff sold at Advance Auto as motorcycle windshield cleaner which is the same thing, its a fine plastic abrasive in a liquid suspension. Rub on rub off, no need for power drills or sand paper. Grab some painters tape, mask it off, grab a cold beer and enjoy some therapy, take your time, do it by hand.
 
I just use a good quality car cleaner/polish and it does the same job, you just need to use a bit of elbow grease. sandpaper is likely overkill, if i was going that route i would likely start around 600 grit and go up to 2000 grit then compound.

It is the plastic iteself degrading, you are just removing the oxidation.
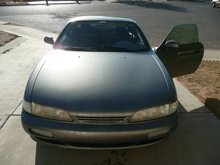
 
the turtlewax kit on amazon is 9-10$ and suppose to be more permanent because it fills the cracks a bit better. anyone try that? my one light is cloudy as heck.
 
I just use a good quality car cleaner/polish and it does the same job, you just need to use a bit of elbow grease. sandpaper is likely overkill, if i was going that route i would likely start around 600 grit and go up to 2000 grit then compound.

It is the plastic iteself degrading, you are just removing the oxidation.
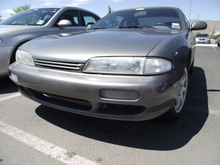
I did the sandpaper route and they looked almost new. It's been two years, and I'm seeing a slight haze come back. Might do it again this weekend. If the $14 kit can reapply the UV protection, then I might give it a try.
 
^ I have that - and tried it. Again - if your headlights aren't that bad, then I would say go the plastic polish route first. Otherwise, sandpaper is the only way to fly.
 
if they are really bad use the sanding method followed by polish, but after that all you need is any of the plastic polishes and a terry cloth and 10 minutes once a year
 
Tried using two different kits on my headlights without much results. I ended up just ordering new headlamp modules.
 
F-that.
Get yourself some Meguiars PlastX, and a paper towel. Takes 30 seconds and works great. I swear by the stuff. Its like 5% of the work, and looks about 80% as good compared to if you sanded it yourself.

Seeing as how my headlights re-fog up every 3-4 months, using PlastX is so much easier.
http://www.meguiarsdirect.com/product_detail.do?q=4596


+1 for meguiars. Not too long ago 3M bought the meguiars brand, but they did not fiddle with it too much.
 
A little laquer (sp?) thinner on a rag with little rubbing will make the plastic lights look brand new! Just keep it off the paint around the light.
 
Back
Top