Radiator and other preparation before building my loop

kamikazi

[H]ard|Gawd
Joined
Jan 19, 2006
Messages
1,601
I have all the parts in hand, EK distro plate for PC-O11 Dynamic, EX Velocity Block, Corsair (HW Labs) radiator, Bitspower fittings, EK ZMT 3/8 ID 5/8 OD tubing, etc. I've been reading up on what needs to be done to prep the radiator and it appears things are all over the place. Some people say hook it up to a hose and flush it with tapwater (which I'm equipped to do), then rinse it out with distilled water. That's actually what I did last time I water cooled about 8 or 9 years ago. Some people talk like touching it with tapwater is the worst thing you could ever do. Some people say use something like Primochill Sys Prep to run in it for a day, then drain it and flush with distilled. Some people say to fill with distilled, shake it up real good and drain it.

I don't have a ton of time to invest (little kids), but I want to do it right (nice oxymoron, I know). What is the most effective way to safely get things ready? I will be running either Koolance Liq 702 clear or EK Cryofuel clear in it. I bought a bottle of each because I was indecisive. I'm heavily leaning towards the Koolance after seeing some horror stories about bad batches of EK Cryofuel and also reading that you can go a long time with Koolance before cleaning. I only have the one 700 ml bottle of Koolance, I'm hoping that's enough for just a CPU loop. I could also be convinced to go with distilled and PT Nuke and maybe some propylene glycol as a DIY. I will most likely leak test in the case for a day or two before running.

Questions:

See above for the question about how to prep the radiator. I'm leaning towards flushing with tap water, then filling with distilled and draining.
Which of my coolant options would you go with? I'm leaning Koolance
I have one of those Bitspower pressure relief plugs that will go in the port that will be the fill port on the distro block. Any issues with that?
I have a Bitspower plug with the temp monitor, ever had issues with one of those leaking?
Do you typically leak test with your preferred coolant and then just leave it be if all is good or do you leak test with distilled, drain, and refill with your coolant of choice?
Anyone build their loop in the case, pull the whole thing out in one piece and leak test outside the case?

I know that a lot of these questions have been asked and answered ad nauseum, but I have some analysis paralysis. The opinions of folks are very strong and often contradict each other. Thanks for your time.
 
Hwlabs does a really good job of cleaning their rads so i would just do a quick flush with distilled. Shake it up really good and drain into a white or clear bowl to verify.
I do my leak testing in the case with papertowel at all of the fittings. I first double check that every fitting is nice and snug. Then run it overnight once ive gotten the majority of the air out. Lastly i top off the fluid and keep a close eye on fluid level for the next couple of days.
As for the koolance fluid i cant say as ive no experience with it. For a cpu only loop it should be enough. I would avoid mixing fluids to avoid any issues.
I run pt nuke and distilled and mix it by the gallon ;)
GL and have fun!
Thanks for the info.
 
Mayhem's Blitz part 1 will clean your rads to utmost shininess. Part 2 will clean the rest of your loop. I've used it on my last several new rads and never needed to clean any of them again.
 
+1 for Mayhem's Blitz Part 1 and 2. It's time consuming (6-12 hours for part 1 plus flushes, 24 hours for part 2 plus flushes), but it will prep your loop to run longer with less maintenance.
 
Thanks for the advice on Blitz. I had briefly looked at that, but didn't consider it as it seems to be mainly for cleaning out old loops. I just watched Mayhem's video on their website about cleaning rads with Blitz 1 or vinegar and baking soda. If I go beyond just a distilled water flush, I may split the difference and just go for the vinegar and baking soda since it's new. I kind of found it funny that the guy in the video pointed out that the blue water coming out of the rads showed how good it works. The purest, newest, most pristine copper you could get would turn any acidic fluid blue.
 
I filled it up with distilled, shook, and drained 3 times. First time left some little black flecks. Second and third times left some tiny, tiny black flecks, less on the third rinse of course. Right now, it's sitting full of a white vinegar/water mix. I had 5% white vinegar, so I mixed it 20 percent vinegar to 80 percent water. I'll let it soak for probably close to 24 hours before I flush it tomorrow.
 
20200308_222720.jpg
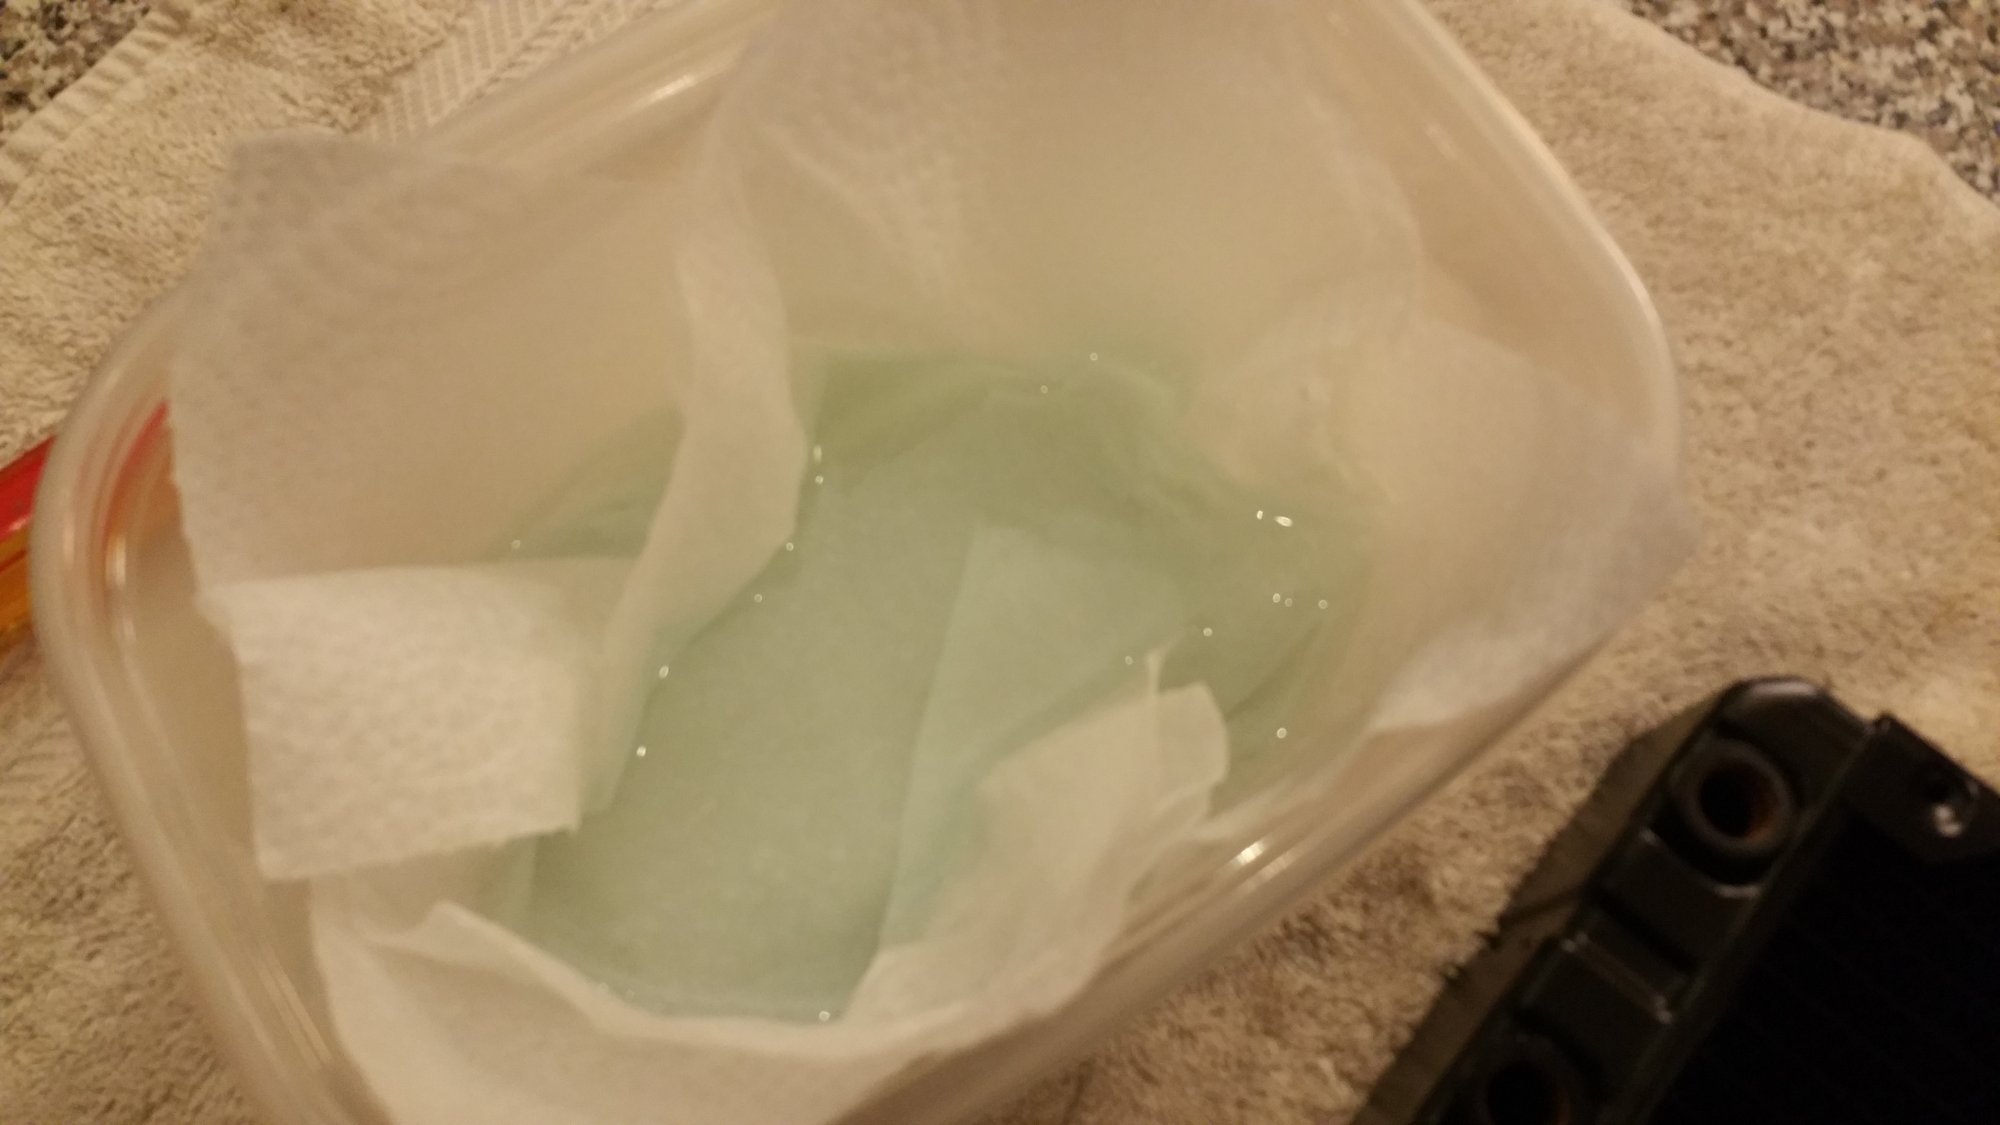
Post 20+ hour vinegar and distilled water soak. Looks a little blue, but not too blue.

I then filled it with distilled and drained it twice, then distilled and baking soda twice, then filled with distilled and drained 3 times.

I have it stored upside down with the fill ports open so that it can fully dry out without a bunch of junk getting in.
 
I suppose you guys should be using them in line filters to be in the safe side?
 
Post 20+ hour vinegar and distilled water soak. Looks a little blue, but not too blue.

I then filled it with distilled and drained it twice, then distilled and baking soda twice, then filled with distilled and drained 3 times.

I have it stored upside down with the fill ports open so that it can fully dry out without a bunch of junk getting in.

20 hours? You left the vinegar in for 20 hours? Vinegar is an acid and it reacts with copper. Don't let it soak for more than a couple hours tops.
 
20 hours? You left the vinegar in for 20 hours? Vinegar is an acid and it reacts with copper. Don't let it soak for more than a couple hours tops.
Just following the advice shown in the video put out by Mayhem's here:
Cleaning a Copper Radiator. Go to just after the 17 minute mark to see advice on vinegar. The first half of the video is showing how to use Blitz 1 which is way more acidic than vinegar. I didn't use straight vinegar, it was 80% water and 20% vinegar that was already just 5% acidic out of the bottle. I'm not worried.

Oh that's good you diluted it a lot. I'd still be wary in the future of letting a mix sit so long though. The blue liquid that comes out is copper oxides, ie its eating your copper. Yer pic doesn't show any flux or particulates but all blue liquid for ex. And as mentioned hwl rads come pre-flushed.
 
Oh that's good you diluted it a lot. I'd still be wary in the future of letting a mix sit so long though. The blue liquid that comes out is copper oxides, ie its eating your copper. Yer pic doesn't show any flux or particulates but all blue liquid for ex. And as mentioned hwl rads come pre-flushed.
Yeah, it seemed just a little copper was etched away, very light blue. If you watch that video I posted, the water they poured out looked like blue coolant. I got a bunch of tiny black particles out when I flushed. It was probably actually clean enough before I hit it with the vinegar. The baking soda mix neutralized any left over vinegar. I just hope I got all that stuff flushed out. Anyway, I'm going to leak test with distilled and primochill sys prep and flush before I put my actual coolant in there. Hopefully, it will all be very clean.
 
Flush with RO or Distilled water and a cap full of white vinegar. Rinse it out after. Its loop ready.

1 or two drops of bleach hold and shake radiator with water in it then rinse well. This kills microbes and cysts that are present.

Flush all tubing hard or soft with clean water.

Absolutely DO NOT let dust get in your blocks pipes pumps or coolant solution. It will make your coolant electrolytic and if a spill occurs your hardware will zap. Pure water and most cooling solutions are non electrically conductive. But dust ruins it.

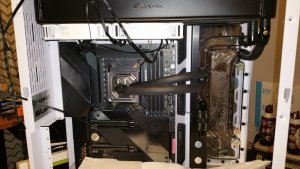
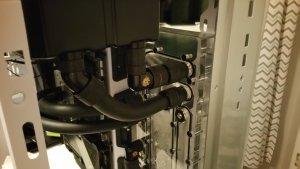
No way I'm dismantling the thing now short of a leak. The 90 degree fitting in this picture was interesting to install to say the least.
20200412_003409.jpg
If you look closely, it's actually a 90 degree fitting connected to an extender into the radiator. Then, there is about a 1.5 inch section of tube between the 90 and the fitting that goes into the distribution plate. The fittings are rotary fittings, so I was able to twist the whole fitting assembly into the distro-plate first, then slide the distro-plate up as I screwed the other end into the radiator via the rotary fitting. The radiator and distro-plate ports are so close together, there was no other way I could figure out to do it without making a giant loop of tubing.

It was also quite a pain to get the reservoir portion full. I had to hold the whole case up at a weird angle while the pump was running to add more fluid. It was tedious to keep the fluid from running out of the fill hole as it's pumping on through. As soon as you turn the pump off, everything drains from the rad and fills the reservoir above the fill port. This thing could definitely use some kind of fill port extension that gets up to the height of the radiator, there's just no where to mount it without cutting a whole in the top, which I guess I could do.

Also, Primochill Sysprep has a little soap and a mild acid in it to clean the loop. :)
 
No way I'm dismantling the thing now short of a leak. The 90 degree fitting in this picture was interesting to install to say the least.
View attachment 237641
If you look closely, it's actually a 90 degree fitting connected to an extender into the radiator. Then, there is about a 1.5 inch section of tube between the 90 and the fitting that goes into the distribution plate. The fittings are rotary fittings, so I was able to twist the whole fitting assembly into the distro-plate first, then slide the distro-plate up as I screwed the other end into the radiator via the rotary fitting. The radiator and distro-plate ports are so close together, there was no other way I could figure out to do it without making a giant loop of tubing.

It was also quite a pain to get the reservoir portion full. I had to hold the whole case up at a weird angle while the pump was running to add more fluid. It was tedious to keep the fluid from running out of the fill hole as it's pumping on through. As soon as you turn the pump off, everything drains from the rad and fills the reservoir above the fill port. This thing could definitely use some kind of fill port extension that gets up to the height of the radiator, there's just no where to mount it without cutting a whole in the top, which I guess I could do.

Also, Primochill Sysprep has a little soap and a mild acid in it to clean the loop. :)

I understand but was your reply meant for me? Im not sure how its connected? Quote the wrong person or am I missing the connection? Serious question, totally not being mean. I want to make sure.

Its possible I just responded too late after you already committed to building your loop. I was just answering the original question but didnt read all the replies. I have a habit of doing that I guess.

Yeah, it was directed at you. I had put an update in the last post and I guess you didn't see it; the picture of the loop and that I was currently leak testing it. No worries. I was just saying that there's no way at this point I'd disconnect the radiator to clean it out again. Pretty funny actually.
 
Yeah, it was directed at you. I had put an update in the last post and I guess you didn't see it; the picture of the loop and that I was currently leak testing it. No worries. I was just saying that there's no way at this point I'd disconnect the radiator to clean it out again. Pretty funny actually.

Oh I totally understand. No worries. Its look very nice and I hope you enjoy the hell out of it hahaha
 
No way I'm dismantling the thing now short of a leak. The 90 degree fitting in this picture was interesting to install to say the least.
View attachment 237641
If you look closely, it's actually a 90 degree fitting connected to an extender into the radiator. Then, there is about a 1.5 inch section of tube between the 90 and the fitting that goes into the distribution plate. The fittings are rotary fittings, so I was able to twist the whole fitting assembly into the distro-plate first, then slide the distro-plate up as I screwed the other end into the radiator via the rotary fitting. The radiator and distro-plate ports are so close together, there was no other way I could figure out to do it without making a giant loop of tubing.

It was also quite a pain to get the reservoir portion full. I had to hold the whole case up at a weird angle while the pump was running to add more fluid. It was tedious to keep the fluid from running out of the fill hole as it's pumping on through. As soon as you turn the pump off, everything drains from the rad and fills the reservoir above the fill port. This thing could definitely use some kind of fill port extension that gets up to the height of the radiator, there's just no where to mount it without cutting a whole in the top, which I guess I could do.

Also, Primochill Sysprep has a little soap and a mild acid in it to clean the loop. :)
Are those distribution blocks more than just a gimmick/fad? I find them fascinating and to some degree pointless? It does help seeing pictures of them piped in...
 
Are those distribution blocks more than just a gimmick/fad? I find them fascinating and to some degree pointless? It does help seeing pictures of them piped in...

My only other custom loop experience was an XSPC kit about 10 years ago that had a res/pump combo that fit into a 5.25 inch bay. The pump went bad and started making noise about 6 months in. I got a replacement under warranty and then just sold the whole kit. I said I wouldn't water cool again, but these super hot chips got me back into it.

I agree with you about being fascinating and pointless. This is obviously targeted at the rigid tube market, that's where they shine. I went with soft tubing, which admittedly is kind of weird here, for the purposes of flexibility (pun intended). I should be able to change the cpu or re-apply thermal paste without disconnecting anything. I can also swap out RAM as needed. If I was using rigid tube, that wouldn't be possible. I priced both options and it actually would have been cheaper to go with rigid tube and fittings using some pre-bent sections. I was very close to buying a traditional pump/res combo to mount on the bottom in one of the fan slots and just be done with it, but I liked the clean look of the distro-plate. I would have liked to have gone with white fittings, but they are harder to find and considerably more expensive.

Upsides:

1. A huge positive to me is the lack of tubing required. I'll bet I only used a total of two feet and I think that it's a cleaner look. Of course, that one connection to the radiator was a bear.

2. Clean looks, flat form factor, and RGB lighting.

3. Ease of adding a second radiator at the bottom of the case in the future. There is no pump/res sitting in the bottom of the case to worry about relocating.

4. Ease of adding a GPU into the loop with minimal tubing runs.

5. With my current setup with no radiator on the bottom, it appears that draining this thing will be super easy. I attached a ball valve to the drain port in the back and I'll screw in a fitting with a piece of tube when the time comes. I'll find out tonight when I drain out the primochill sysprep and refill with real coolant.

Downsides:

1. This distro-plate is set up to cool both a gpu and cpu and there is no simple/clean/easy fix to go with just one or the other. I didn't want to spend money to cool a 1080Ti since I already have it on a Kraken G12 and old H100. I didn't figure it was worth another $200 for an "older" graphics card. Therefore, I had to bypass the graphics section. I did so with two expensive 90 degree fittings and short section of tube. It was a little difficult because I had to pre-connect the two and use the rotary ability of one of them to crank it in. I could have just used standard fittings and put a small loop of tubing between them, but I think it would have looked cheesey. But, now I have 2 90s that I can use if I cool a graphics card in the future.

2. It's fairly expensive at $200 and you get a lesser DDC 3.1 pump. You may need to upgrade to a DDC 3.2 pump in the future to support 2 radiators and a gpu block, but it will probably be fine in reality if you use low restriction rads. EK was now selling this directly with a DDC 3.2 for $229.99, but they kept pushing out the in stock date from the middle of March to the middle of April. Now, I see that it's $280 and showing no stock.

3. This distro-plate takes up 3 fan bays. It would be nice to have that extra air coming in. Now, I'll be reliant on the three slots on the bottom. Two of those will be taken up by the H100 attached to my Kraken G12 and 1080Ti. I'll be pre-heating the intake air. I don't know how much of a difference this will make. The back side of the case has a lot of slots, so the rad up top will be able to pull in fresh air from there as well.

4. Filling the reservoir was somewhat difficult. It was hard to keep the pump fully covered with liquid while adding it. I had to hold the case up at weird angles with one hand while the pump was running to put more fluid into the fill port on the back while keeping anything from coming out. The moment you turn off the pump, the fluid fills the res to capacity above the fill port. Of course, unless you have a fill port that's above the level of the radiator up top, you're going to have this issue with any system.
 
Sorry, but a distribution plate could require more tubing than a traditional setup. Every component has a inlet and outlet that feeds coolant to the water block and back to the distribution plate rather than a daisy chain between each component which could reduce the length of the tubing runs. Now this all depends on your setup and how many components you have. In my case, a distribution plate could probably result in less tubing being required, but not by much.

The complexity of the tubing runs drops significantly as you could get away with a simple 90 degree bend in the tubing if your front mounting the distribution plate. If mounted off to the side, your are looking at two 90 degree bends which are the easiest things to do. In a more traditional setup, you could have all kinds of crazy shapes to make things work.
 
I agree with you about being fascinating and pointless. This is obviously targeted at the rigid tube market, that's where they shine. I went with soft tubing, which admittedly is kind of weird here, for the purposes of flexibility (pun intended). I should be able to change the cpu or re-apply thermal paste without disconnecting anything. I can also swap out RAM as needed. If I was using rigid tube, that wouldn't be possible. I priced both options and it actually would have been cheaper to go with rigid tube and fittings using some pre-bent sections. I was very close to buying a traditional pump/res combo to mount on the bottom in one of the fan slots and just be done with it, but I liked the clean look of the distro-plate. I would have liked to have gone with white fittings, but they are harder to find and considerably more expensive.
I actually like the idea of being able to maintain and work on the pc with minimal trouble so using flexible hose makes sense to me. You could even change out the cpu with very little fuss.
 
Sorry to highjack, but I'm following closely as I also have little monsters and going through what you will do. I'm currently still studying on all the watercool prep work, but plan to go your route down to the o11 case which I bought already.

Where in heck did you find the o11 distro plate?
 
Sorry to highjack, but I'm following closely as I also have little monsters and going through what you will do. I'm currently still studying on all the watercool prep work, but plan to go your route down to the o11 case which I bought already.

Where in heck did you find the o11 distro plate?
Microcenter has them if you have one near you.
 
Last edited:
As an Amazon Associate, HardForum may earn from qualifying purchases.
Back
Top