NCASE M1: a crowdfunded Mini-ITX case (updates in first post)

Thanks for the clarification. I checked both of my Conductonaut packages, included the unopened one, and neither included the needle tip. They only had the thin black conical tip.

That's interesting. Of the three packages I've purchased, the first one did not come with the needle tip, but the last two did. I figured people were having issues with the gigantic plastic one so they came up with the much smaller silver needle.

Even with a slight amount of pressure the black plastic tip can spew LM all over the place. Using another medium to apply the LM to, then transfer to the die would be the best solution with the least amount of risk.

https://www.pccasegear.com/products/35854/thermal-grizzly-conductonaut-thermal-compound-1g/ is where I bought it from. Has a black 'needle' like tip but no metal needle. It'll arrive today so I'll find out then.

EDIT: So it arrived just then. And I do indeed have the metal tip applicator. Sweet. :)
 
Last edited:
planning on building into my m1. whats everyones go to for cpu heatsinks and anyone with RGB ram??
 
I use the Be Quiet! Dark Rock TF. It is amazing. Quiet and cool. Unfortunately it doesn’t fit on a lot of motherboards. It only fits on mine because I have very low profile RAM. I wouldn’t switch it out for anything.
 
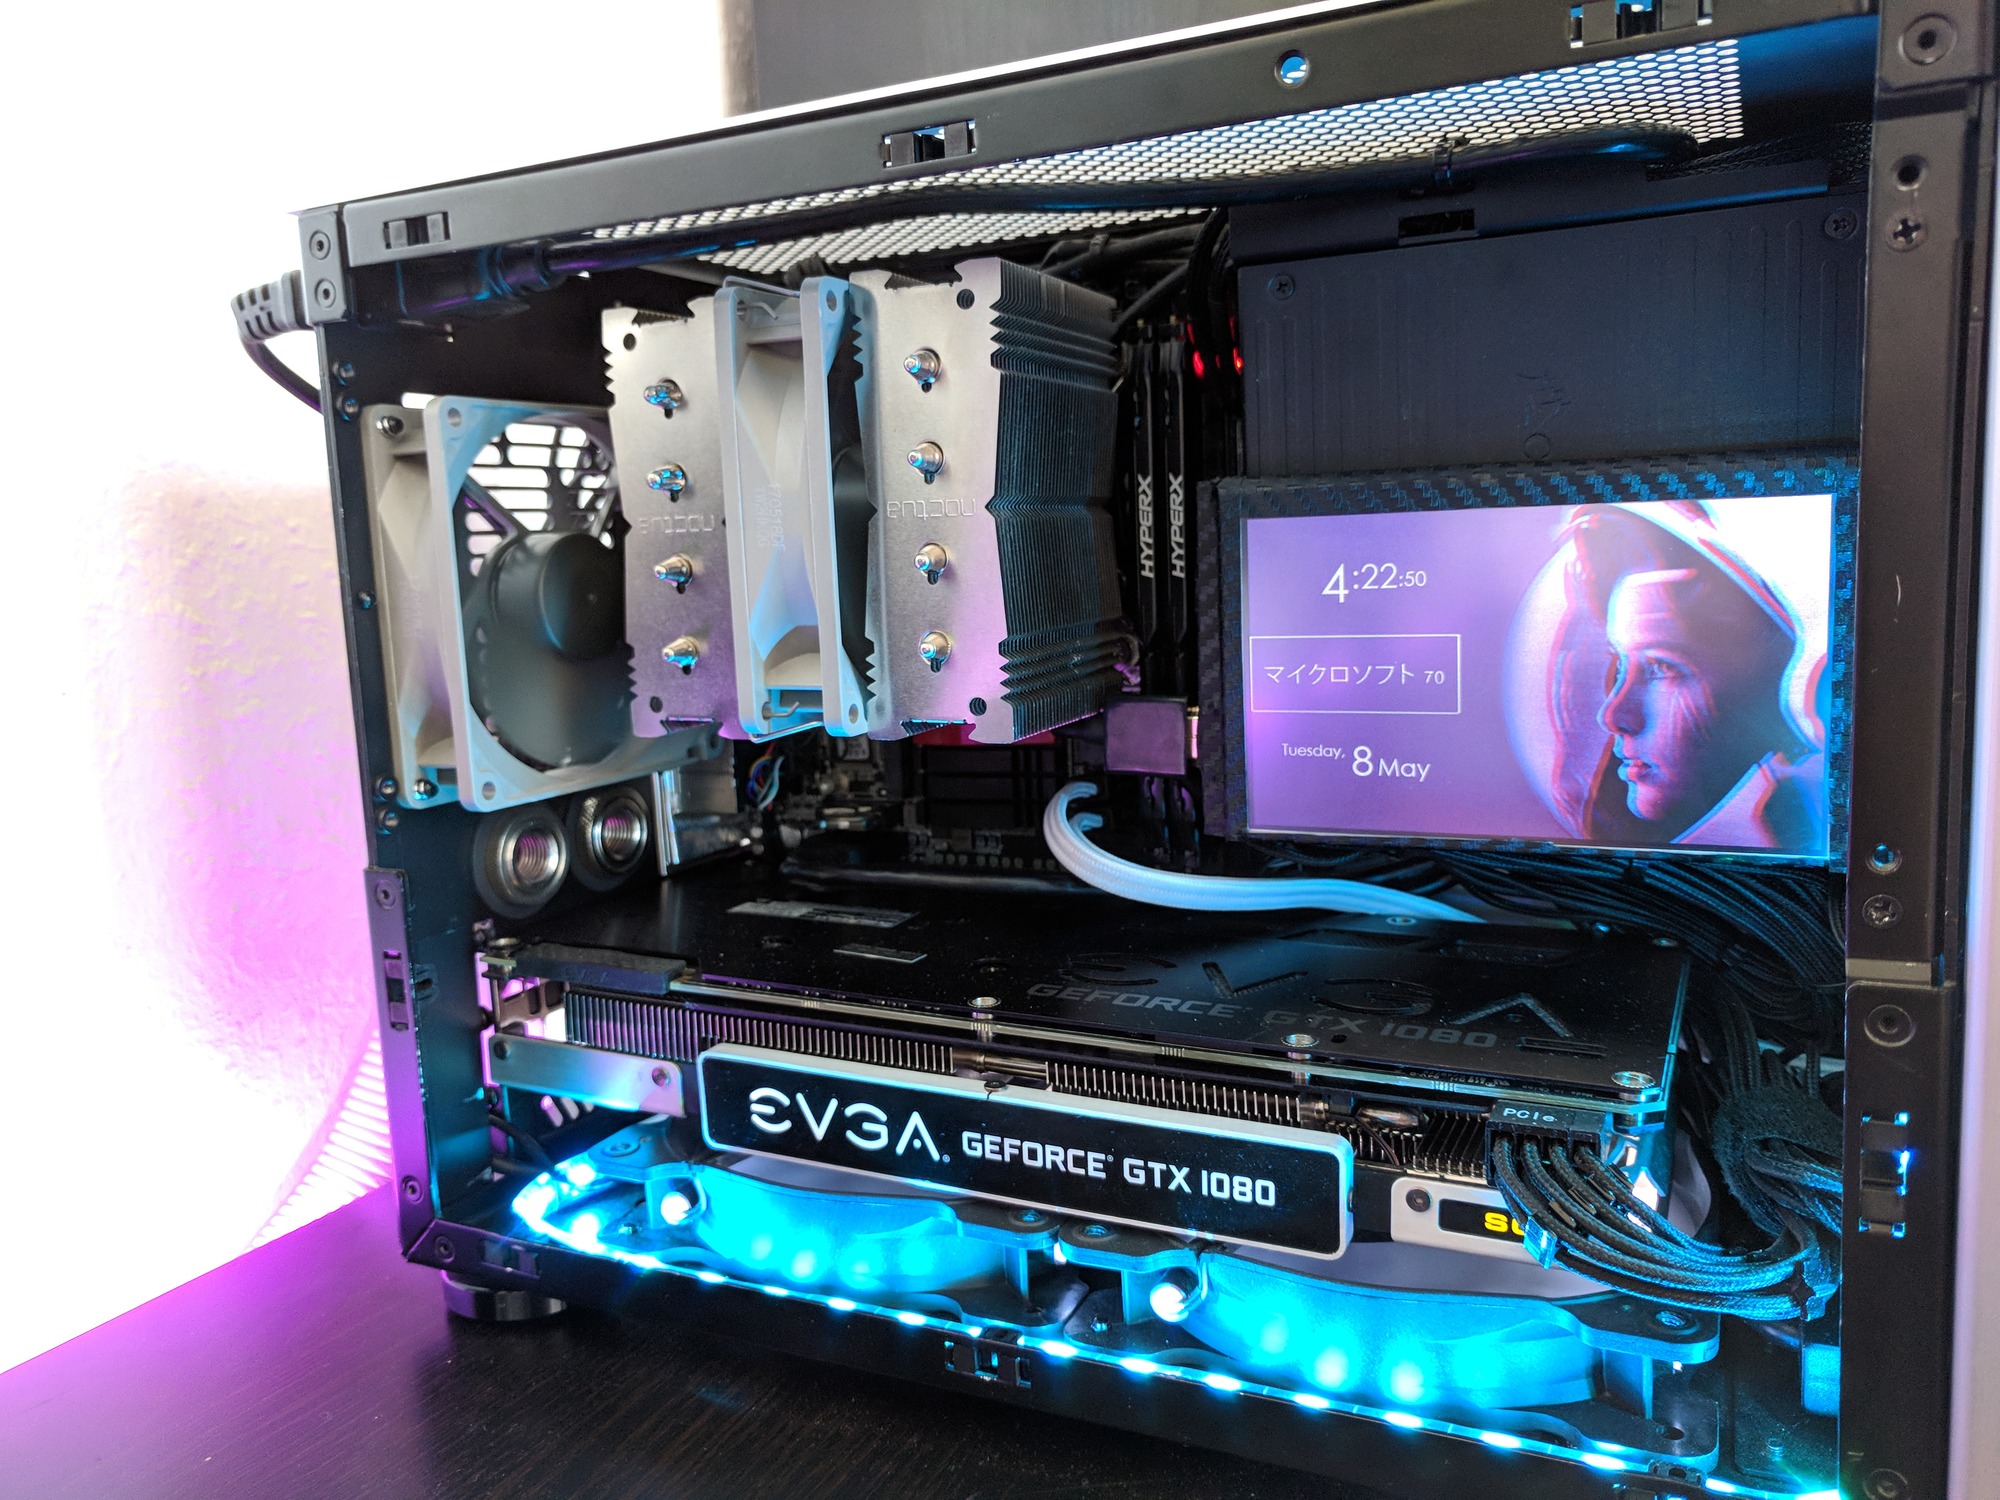
Today I mounted a small display in my NCase :)
It's powered through HDMI and is good enough to show temps/date/time etc.
It's the 5 inch version from GeeekPi (bought on Amazon) and a 0,5 m slim HDMI cable.

Eoa4BpC.jpg
 
So neat! I get worried bending cables like that so I don't try too hard XD.

I agree and try not to bend cables too much near the connectors so that the electrical contact is not stressed. The wide ATX cable is twisted longitudinally, but it's only a few full twists and doesn't feel like it's trying to spring open.

To achieve a clean appearance I shortened the SATA power cable, which is easy to do by carefully opening the connectors, relocating them along the ribbon cable, and then cutting off the excess cable. You can even bring a connector to the opposite side of the ribbon cable if needed, but you must keep the cable wires in their original spot in the connector. I guess that's kind of hard to describe. The cap on the last SATA connector is a bit different shape and covers the cut end of the ribbon cable. It's vital that none of the cut wires make electrical contact with a neighbouring wire. They must be cut flush with the connector. I suppose liquid electrical tape or any other liquid insulator could be applied to the cut ends, but I didn't do this.

I also shortened the PCI-E power cable. This requires a pin extraction tool, new pins, and a crimper. I practiced crimping a lot before modifying the actual cable.
 
Okay. So I was impatient and couldn't wait for the weekend lol.

I kinda stuffed up the liquid metal application, and didnt wait long enough for the glue to cure.. but re-aligned when I latched it down.

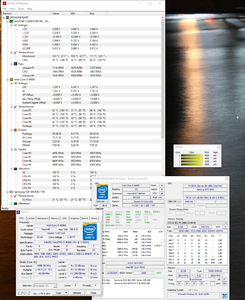
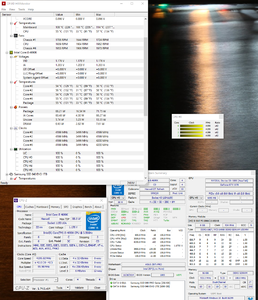
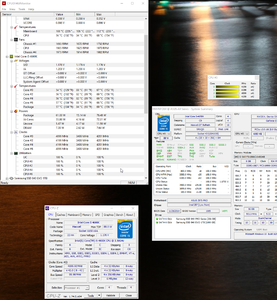
I hope the names of the files stick. lol. Basically at 4.2ghz I dropped 11 on the package total. But then at 4.5ghz I used to hit over 80 degrees. Now I'm under 70, same temp as I was at 4.2ghz.

Whilst it's not as large a drop as I hoped for, it does give me enough headroom to consider trying to push 4.6-4.7ghz :).

I'm sure a better application would've netted me a few more degrees but for now I'm happy.

Note this is with the Copper IHS, conductonaut and kryonaut together. All fans run at 100% for testing purposes to remove PWM variables, but I plan to run 4.5ghz for a while with low rpm fans and see how i go there.

Overall a bit of a nerve-racking project, but seems worth it so far! Hopefully long-term the CPU holds up :).

Thanks for the pointers re-using the needle! I did still manage to squirt everywhere at one point... Uh, the conductonaut that is :p.
 

Attachments

  • post delid 4.5ghz.png
    post delid 4.5ghz.png
    799.1 KB · Views: 0
  • Post delied 4.2ghz.png
    Post delied 4.2ghz.png
    779 KB · Views: 0
  • Pre Delid 4.2ghz.png
    Pre Delid 4.2ghz.png
    852 KB · Views: 0
Okay. So I was impatient and couldn't wait for the weekend lol.

I kinda stuffed up the liquid metal application, and didnt wait long enough for the glue to cure.. but re-aligned when I latched it down.

I hope the names of the files stick. lol. Basically at 4.2ghz I dropped 11 on the package total. But then at 4.5ghz I used to hit over 80 degrees. Now I'm under 70, same temp as I was at 4.2ghz.

Whilst it's not as large a drop as I hoped for, it does give me enough headroom to consider trying to push 4.6-4.7ghz :).

I'm sure a better application would've netted me a few more degrees but for now I'm happy.

Note this is with the Copper IHS, conductonaut and kryonaut together. All fans run at 100% for testing purposes to remove PWM variables, but I plan to run 4.5ghz for a while with low rpm fans and see how i go there.

Overall a bit of a nerve-racking project, but seems worth it so far! Hopefully long-term the CPU holds up :).

Thanks for the pointers re-using the needle! I did still manage to squirt everywhere at one point... Uh, the conductonaut that is :p.

Nicely done, and yes it can be nerve wracking. Glad you got everything up and running.
 
Okay. So I was impatient and couldn't wait for the weekend lol.

I kinda stuffed up the liquid metal application, and didnt wait long enough for the glue to cure.. but re-aligned when I latched it down.

I hope the names of the files stick. lol. Basically at 4.2ghz I dropped 11 on the package total. But then at 4.5ghz I used to hit over 80 degrees. Now I'm under 70, same temp as I was at 4.2ghz.

Whilst it's not as large a drop as I hoped for, it does give me enough headroom to consider trying to push 4.6-4.7ghz :).

I'm sure a better application would've netted me a few more degrees but for now I'm happy.

Note this is with the Copper IHS, conductonaut and kryonaut together. All fans run at 100% for testing purposes to remove PWM variables, but I plan to run 4.5ghz for a while with low rpm fans and see how i go there.

Overall a bit of a nerve-racking project, but seems worth it so far! Hopefully long-term the CPU holds up :).

Thanks for the pointers re-using the needle! I did still manage to squirt everywhere at one point... Uh, the conductonaut that is :p.

You might have better luck floating the IHS. I did tests with and without sealant, and the z height of even a fraction of sealant made a big difference in my testing *with the rockitcool copper IHS.* I specify that, because I was able to get near identical temps when sealing and floating the stock IHS.

Squirting is common, which is why I advocate for people to use another medium, like a bottle cap, to unload into. Then dab the Q tip and transfer that to the chip.

What cooler are you using? Those devils canyon chips should hold up to a pretty high OC. I had my 4790k at 4.8 @ 1.328v. Throw some voltage at that bish and report back.

Not sure I'll bother with a remount at this stage. XD.

Yeah the squirting more occured when I was being careless picking back up excess, and pushed back down on the plunger too quickly just to retract it haha. Oops. I did use the Q-tip method to spread/apply etc.

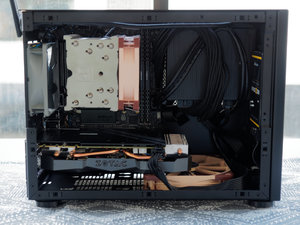
Noctua D9L. I'm concerned about my motherboard temps though, according to HW monitor at 4.2ghz i sit just shy of 100, or around there. At 4.5ghz I jump another 10 odd. My board has the VRM daughterboard but has no direct air cooling due to the D9L airflow design.

Running Unigine Heaven returned temps of around 60-63 degrees at 4.5ghz 1.3v, so with lightish CPU usage but with GPU spitting hot air around. (This was my primary issue previously, GPU would heat up so much my CPU temps would shoot through the roof).

I'll aim for 4.7ghz at say 1.325v and see if I'm stable tonight.

Do you have a intake fan on the right side of the fan bracket? That will usually help with the motherboard temps.
 
Do you have a intake fan on the right side of the fan bracket? That will usually help with the motherboard temps.

Used to, didn't make much difference overall TBH. I remember it really didn't change my mobo temps at all because it was run low RPM and not directed at the board so..

I think considering my board a top-down cooler would be preferable, but I'm probably not going to invest in that at this stage considering I have the tempered glass panel on the way anyway whenever they ship, so side panel intake would very much be a temporary fix and a top-down would probably choke more now with a closed-off side panel

With a window side panel we will need to rethink airflow in the M1. Already, there was a discussion about using the rear fan location as an intake for CPU air coolers. I wish there was a way to use the top panel as an intake.
 
With a window side panel we will need to rethink airflow in the M1. Already, there was a discussion about using the rear fan location as an intake for CPU air coolers. I wish there was a way to use the top panel as an intake.

Rear intake could fix the problem, but unsure. I'm keen to see. Either way my temps are lower now so I don't mind! :p.
 
With a window side panel we will need to rethink airflow in the M1. Already, there was a discussion about using the rear fan location as an intake for CPU air coolers. I wish there was a way to use the top panel as an intake.

I was originally going to put the U9S in vertical orientation so the fans could route the warm air up, however, the power cable extension blocks the spot where the fans would sit. What we need is an internal right angle power plug so that the cable can follow the back of the case and then the motherboard instead of going straight out along the side of the case. There are older pictures of this orientation working, but they are on older case versions where the internal power cable didn't have the strain relief built in. Then you could use the back grill as intake to feed cool air right into the side of the heatsink.

I've looked for that kind of cable but haven't been able to find one premade.

I Have a V1 so might be doable for me lol.

I'm going to see how temps go anyway when the side panel arrives. If it's <5 degrees difference I probably won't bother?
 
Have just ordered my NCase M1 and am deciding the details of my build while I wait for the case about mid-June.

My plan is to put the most powerful 65W TDP processor in it I can, currently looking like the Ryzen 2700 (non-X), but the X470 motherboard prices are making it look expensive (+C$100) compared to the i7-8700(non-K) paired with an H370 motherboard.

To keep the cost down I am planning to use my old GTX 670 GPU until I can replace it with a GTX 1150 Ti or equivalent that can run of the PCI-E slot. I only play Cold Waters so my GPU requirements are not large, my daughter is nagging me about wanting to play one of the Forza games on it though.

Components planned are:
Common:
  • 16GB dual channel DDR4
  • Fractal Design Celsius S24 AIO
  • Samsung 960 or 970 Evo 500GB M.2 PCI-E
  • Corsair Series SF450
  • Gigabyte Windforce GTX670

If AMD:
  • Ryzen 2700
  • ASUS ROG Strix X470-I Gaming (unless an A450 board gets released)

If Intel:
  • i7-8700
  • Gigabyte H370N Wifi

Have heard that VRM temps can be a challenge with B350 and H370 boards, but am not sure if that's only if you're overclocking. Any experience out there?

I like the look of the side window but it makes the AIO a non-starter. Also looking at the dimensions either the Noctua C14S or the be quiet Dark Rock TF look like they would leave insufficient space between the side of the case and the cooler to allow air circulation. It's down to 11mmm for the Dark Rock TF which means the fan is going to have to fight recirculation and back pressure.

The be quiet Shadow Rock LP looks the best non-tower cooler out there to cool the VRM but I haven't seen anyone use it on here? Plenty of people seem to be using the Noctua NH-U9S but I doubt it would do much in terms of VRM cooling and I don't like the look of the thing for a windowed case.

Your cooler of choice will really depend on whether you consider a side-panel window. If you want it, top-down for TALL coolers like the Dark Rock TF and C14S are a no go, they have no room to breathe. Given you're looking at minimal overclocks, if at all, a Cryorig C7 or similar top-down would work, alternatively a Noctua U9S/D9L would be plenty for your needs. Top-down is good as it gives some cooling to VRMs. 8700 non K will run fine on any reasonable after market cooler. The 2700 will be a different beast if you want to overclock, but even then if you keep it mild to 4ghz or so across all cores, you won't see too much heat output.

After trying one, I dislike the idea of a 240mm AIO in the Ncase M1. It just takes up so much room. Though temps were good using it as intake.
 
does it actually help to have 2 x 120mm fans blow on the gpu fans? seems like it would just constrict and hinder the gpu cans
 
Okay. So I was impatient and couldn't wait for the weekend lol.

I kinda stuffed up the liquid metal application, and didnt wait long enough for the glue to cure.. but re-aligned when I latched it down.

I hope the names of the files stick. lol. Basically at 4.2ghz I dropped 11 on the package total. But then at 4.5ghz I used to hit over 80 degrees. Now I'm under 70, same temp as I was at 4.2ghz.

Whilst it's not as large a drop as I hoped for, it does give me enough headroom to consider trying to push 4.6-4.7ghz :).

I'm sure a better application would've netted me a few more degrees but for now I'm happy.

Note this is with the Copper IHS, conductonaut and kryonaut together. All fans run at 100% for testing purposes to remove PWM variables, but I plan to run 4.5ghz for a while with low rpm fans and see how i go there.

Overall a bit of a nerve-racking project, but seems worth it so far! Hopefully long-term the CPU holds up :).

Thanks for the pointers re-using the needle! I did still manage to squirt everywhere at one point... Uh, the conductonaut that is :p.

What are you testing with?
 
What are you testing with?

Prime 95 (older version, i forget which one, but it's not the one that makes your temps stupid crazy).

I ran my fans at lower RPM at 4.4ghz 1.25v and got a similar result to the 4.5ghz but with less noise/voltage.
 
The fact that newer versions of Prime95 uses AVX CPU instructions which generate more heat and draw more power than Non-AVX applications like a regular game for example.

You have in general 3 options for AVX vs Non-AVX:

1. You set in your BIOS/UEFI a AVX offset like 2 or 3, so by default any Non-AVX application like a game will use the full clock multiplier of your CPU. For example you have set 45 with 100 Mhz BLCK, this would give your 4.5 Ghz all core speed and this speed will be used with any Non-AVX application like a game. If you now launch a AVX application like a video rendering software, it will use the AVX offset setting like 2 or 3, this will divine -2 or -3 from your current clock multiplier setting, so you will get 4.3 or 4.2 Ghz all core and the heat and power draw is much lower and you still have a decent processing power for this application.

2. You can still use latest Prime95 version, you can disable AVX CPU instructions simple putting in a text file called "local.txt" to the root folder of Prime95 i.e. “C:\Program Files (x86)\Prime95\” with these two lines:

CPUSupportsAVX=0
CPUSupportsFMA3=0

If you want to test AVX, simple change CPUSupportsAVX=0 to CPUSupportsAVX=1 and save the file.

3. Last but not least (my personal handling and opinion), delid always the CPU, if the CPU is not already out-of-the-box soldered, optimise cooling and sightly raise CPU Vcore to get your Non-AVX setting without using a AVX offset stable with AVX applications, because I already faced that AVX offset bug, that a game uses AVX offset setting, even the game don't use any AVX CPU instructions at all.
 
Whew that is nuts.. I'll have to test my setup with Prime but I'm using an 8700K and my temps are low to the point of shock really. I'm OCd to 4.6Ghz @ 1.2 LLC lvl 5 on a Z370i. I'll have to whip through old prime on it. Disregard my SIG PC. I've also got a killer N1 8700K build that is all air with exhaust out the bottom :)
 
A delided 8700K with 4.6 Ghz all core @ 1.2 volts is ok, that setup should no problem at all to cool with air and pretty fair silent operation. If you don't use AVX software I would not care so much. My own delided "crappy" 8600K @ 5 Ghz all core need 1.344 volts for Non-AVX and 1.392 volts for AVX, I easy hit 170 watts power draw from the CPU when I use render software, but I have a huge external water cool setup on my Ncase M1 build, so even this "crappy" CPU is still at AVX load below 64°C and my fans run only at 450 rpm so I don't care. :)
 
does it actually help to have 2 x 120mm fans blow on the gpu fans? seems like it would just constrict and hinder the gpu cans

There have been conflicting opinions and results about adding fans on the bottom of the Ncase M1. If your intent is to feed air to your graphics card, the effectiveness of bottom fans is affected by the type of graphics card and the design of its cooler:
  • graphics card that exhausts air out the rear of the case (such as an FE-style cooler): a fan under the GPU cooler's fan to feed air into the cooler has been reported to be only slightly beneficial. One user reported that adding a duct below the cooler's fan was quieter and almost as effective.
  • graphics card with cooler that exhausts inside the case (non-FE-style cooler): if the heat output isn't too high, then bottom intake fans can help, but they will also push heated air into the upper half of the case.
  • graphics card with large third-party heatsink (such as Arctic Accelero Xtreme III and IV): bottom fans are needed, but whether they are used as intakes or exhausts depends on the amount of heat produced. High-power cards may be better served by bottom exhaust fans to pull air through the heatsink and out the bottom of the case
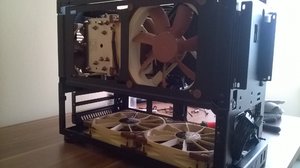
My son's M1 has a Gigabyte 1070 with a 3 fan cooler. Adding two of Noctua's thin 120 mm fans as bottom intakes reduced his GPU temperatures by 10 deg. C. The approximately 10 mm gap between the fans and the graphics card cooler reduces turbulence, and hence noise, between the two opposing sets of fans.

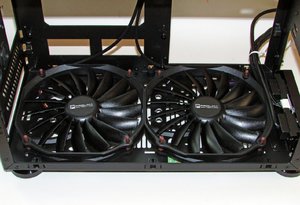
In my own M1, I replaced my Zotac 970's small dual-fan cooler with a large Alpenföhn Peter II heatsink. This is thicker than the Accelero Xtreme so I had to use slim fans. I modded the case to install dual Prolimatech 140 mm fans as exhausts and it's working great.

M1 with dual 140mm Prolimatech fans on Bottom (Large).jpg

I hope this helps.
 
In my M1 I've tested the following:
Side intake bottom intake - hot insides temps warm.
Side exhaust bottom intake - cool GPU hot inside/CPU temps
Side intake bottom exhaust - good GPU temps amazing CPU. Case temps good. Best configuration for me.

I use the large noctua top down cooler and an accelero on GPU.
 
Back
Top