Silverstone SST-FT03-Mini (Mini-Itx)

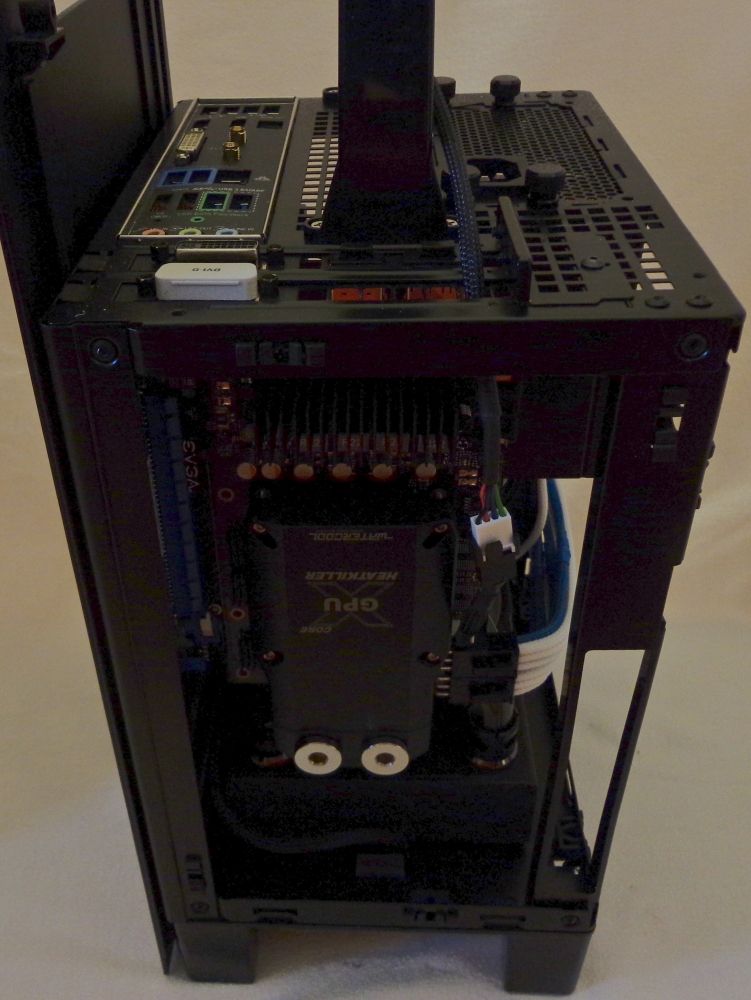
I'll just have to wait and see what goes with the GTX 770 or 760Ti. I'm not willing to do such a mod on the FT03 Mini considering the drawbacks (I'd still like to see exactly how Maingear has their case modded by Silverstone to fit in a Titan). I'm kind of stubborn regarding my choice with the FT03 — it has everything I want. Oh well...

I contacted Maingear about that a while back. I posted their response a few pages ago. They just cut a hole and give you the case without a dust filter. You could probably get just a filter and stick it on the fan itself. You should make sure to separate the filter from the fan blades a little so as to not kill the performance completely...
 
I contacted Maingear about that a while back. I posted their response a few pages ago. They just cut a hole and give you the case without a dust filter. You could probably get just a filter and stick it on the fan itself. You should make sure to separate the filter from the fan blades a little so as to not kill the performance completely...
I saw that post of yours; I remembered their answer being vague in that regard and not clearly stating how the case is modded. Simply cutting a hole and leaving the filter off comes off as somewhat "ghetto mod-ish" from Maingear.
 
I feel like they might do it in a very 'nice' way that looks manufactured. Also, the people buying these things from them don't know any better anyways. I'd be interested to know how many of those systems they've sold. I would be surprised if it's more than 15, but I'm sure it's in the hundreds or thousands...I've noticed that general people aren't too bright or care much to understand things.


Update: Found an unboxing on youtube: http://www.youtube.com/watch?feature=player_detailpage&v=lvKd_CqdyQ8#t=274s
I was right, they have a custom filter!!! Wow I'm kinda surprised I was right


Update: No that was actually just the regular Ft03. But I've built one of those and don't remember a fan filter of that form factor so it still may be custom even for that case.


Update: Another company, "Utopia," also makes the same Titan version of this case: http://www.youtube.com/watch?feature=player_detailpage&v=Rqkh2GXpFNI#t=128s
After watching that, it looked like the Titan fit without any modifications. Than I looked up it's length and it's only 10.5". I think that would actually fit with minimal to no modifications. I have my 10" GTX 680 PCB in there and I roughly measure almost exactly a 1/2" of extra room if not slightly less than that. I would think a little grinding on the fan filter cover clip/tab, and maybe an extra couple tenths of an inch off the floor of the case would do it.

If you actually look here: http://www.youtube.com/watch?feature=player_detailpage&v=Rqkh2GXpFNI#t=398s You can see that the filter/cover isn't quite 100% on (not flush with bottom of case). Some possible evidence of the tight squeeze. Even so, if you're looking to spend $1k on a Titan, it's probably not too much of a stretch to just dish out $2k for the complete Utopia system which has an O/Ced i7, 8gb 1866mhz, 2xRAID SSD's, one of the 'H' liquid coolers, and of course the Titan. Unless you really take the do-it yourself thing at heart. Although these days a good 5th grader could probably build a computer. I built my first computer in 8th grade, the year was 1998.
 
Last edited:
The Titan will not fit in a stock FT03 Mini — I did a bit of research after seeing the video you posted on the Utopia PC; on their Facebook page they have an article from Custom PC Magazine in which it is mentioned the chassis has been modded to accommodate the Titan.
 
The Titan will not fit in a stock FT03 Mini — I did a bit of research after seeing the video you posted on the Utopia PC; on their Facebook page they have an article from Custom PC Magazine in which it is mentioned the chassis has been modded to accommodate the Titan.

Yeah it definitely won't fit stock, but you also don't have to cut a gaping hole out the bottom and leave the fan filter/cover off. The mod could be as easy as cutting the filter/cover tab off and taping or using some sort of magnetic rig to get it to stay in place. At the extreme end, you may need to shave off a bit of the case floor or flex some metal a bit.

This is all speculation to begin with so I'm not sure why I'm even responding. Sorry if this comes off as argumentative; not my intention.

Update: I measured my own case as best I could and I calculate I would need between 1/16" to 3/32" to fit a 10.5" card. I'm pretty sure I can flex the metal top panel at least 1/32" if not a full 1/16", and the fan filter/cover clip tab would definitely have be hacked off 100%. I feel like just taking off 1/16" off the bottom of the case would be needed just to make for a bit of squeezing room, but it'll fit as long as you have a half decent dremel and do a little planning.
 
Last edited:
Yeah it definitely won't fit stock, but you also don't have to cut a gaping hole out the bottom and leave the fan filter/cover off. The mod could be as easy as cutting the filter/cover tab off and taping or using some sort of magnetic rig to get it to stay in place. At the extreme end, you may need to shave off a bit of the case floor or flex some metal a bit.

This is all speculation to begin with so I'm not sure why I'm even responding. Sorry if this comes off as argumentative; not my intention.

Update: I measured my own case as best I could and I calculate I would need between 1/16" to 3/32" to fit a 10.5" card. I'm pretty sure I can flex the metal top panel at least 1/32" if not a full 1/16", and the fan filter/cover clip tab would definitely have be hacked off 100%. I feel like just taking off 1/16" off the bottom of the case would be needed just to make for a bit of squeezing room, but it'll fit as long as you have a half decent dremel and do a little planning.
No problem at all — conversing with someone who has first hand experience with the case is a lot of help. It comes off as informative if anything. Thanks!
 
Hey Guys,

This is my first post. I just wanted to show off my new build and also say thanks! To the guys that have already posted their watercooled builds on here for the inspiration/ideas.

This is my main gaming pc. It is plugged in to my TV so I wanted it to be really quiet but also powerful enough to play games at 1080p maxed out.

Specs are:

Asrock Z77E - ITX Motherboard
I5 3570k @ 4.0ghz
8GB Samsung 1600mhz ram
EVGA GTX670 reference
Silverstone ST450 - SFG (Fan replaced with Noiseblocker Multiframe)
Samsung 256 GB 830 series SSD
2.5 inch Seagate 500gb HDD
Silverstone slim DVD burner (waiting on slimline cable. CP10 doesn't fit)
Alphacool UT60 140mm radiator
2 x 140mm Noiseblocker Blacksilent Pro PWM fans
Swiftech Apogee Drive II
EK Plexi/Nickel GPU Block
Bitspower fittings matte black.


I have the pump running at 1500rpm so I can't hear it at all.
I have put Acoustipak on every panel.
After an hour of Crysis 3 with an ambient temp of 20 degrees C the GPU peaked at 48 degrees and the CPU at 62 degrees.
The fan speed got up to 60% which is barely audible. I have them controlled by Precision X with the GPU BIOS modified to allow 100% fan speed.
The 80mm Multiframe on the PSU is plugged into its original fan cable so it is still controlled by the PSU.

There wasn't any room for a res but the way I have T-Line works really well. I just bled the majority of the air with the computer on its "front" so the pump was not at the top of the loop and topped it up a couple of times using the fill ports on the radiator.

I had to cut out the base plate to suit the new rad as well as cut the ODD drive tray.
I put a couple of new holes in the top plate too. One for the fill port and one for the HD audio and switches cable.

As you can see from the photo's everything juuuuust fits.

Sam
 
Last edited:
As you can see from the photo's everything juuuuust fits.

Sam

Wow, amazing build. Looks great!! I would say you've maxed the case out 100%. Too bad you had to go with the stupid SFX PSU or I'm sure it would be 99% silent. Really nice work with the GPU water block and piping. Did you get your CPU/GPU temps flipped? I find it hard to believe an i5 hit 62deg while playing most games (probably not with an FPS). I have just a basic air cooler on mine clocked at 4.3ghz and it doesn't pass ~53 deg on the most intensive of FPS scenes.
 
Very very nice job with fitting all that hardware/cooling equipment in there. Again Nice Job!!!
May I ask how your loop is setup? -what order-
 
Thanks! The PSU with the multiframe on it is basically silent (I removed the stock fan). I had a few other things running at the same time as when I was gaming (bitdefender, google play music uploader, chrome) which could explain why the CPU peaked so high.

Doing an Intel stress test + Heaven for 30 minutes gives me GPU 51 degrees peak and CPU 78 degrees peak.

I think that the water temp is probably just getting up around the 40 degree mark because the GPU drops to that within seconds of closing Heaven. I don't have a water temp probe to be sure though. I think a delta of 38 degrees between the CPU and the water temp at full load is fairly standard looking at this. http://www.xtremerigs.net/reviews/water-cooling/2012-cpu-water-block-roundup/

Someone with more water cooling experience than me could probably clear that up. It's either that or I botched the paste. Hope not. It would be a mission to redo!
 
Loop order is Pump -> GPU -> Radiator -> T-Line -> Pump.

I wanted it to flow that way to try to coax the bubbles into the unconventional T-Line.
 
Does the pump add much heat to the CPU block on the Swiftech Apogee Drive II? Would the Apogee Drive II need much airflow in a tight space to keep cool to avoid adding to the heat in the loop/CPU?
 
I'm sure the pump does add some heat. Hard to measure though. The two noiseblockers should turn over the full volume of the case in under a second even if they are only pushing half their specified CFM's so I am pretty sure the pump has plenty of airflow. It is also directly in the flow path of the fans. Unfortunately the air it gets is preheated by the rad but it doesn't seem to be a problem.
 
Doing an Intel stress test + Heaven for 30 minutes gives me GPU 51 degrees peak and CPU 78 degrees peak.!

My rig is very similar (AX120 instead of your UT60) but I'm getting CPU 62-68C and GPU 47-49C under extreme load. I found it very difficult to bleed the loop entirely. Is it possible that there are still microbubbles in the water?

Edit: I forgot this morning to say how good your rig looks. Very nice organisation :)
 
Last edited:
I'm in love with your rig Samb, so much so that I think I've just decided to do an FT03 Mini build over the Summer. If I go ahead with it, it'll be basically identical to yours. The only change will be a 500GB 840 SSD instead of the HDD you have.

Couple of questions:

Exactly what did you have to cut to get everything to fit? It's not exactly clear.
Are the Bitspower rotaries necessary? I ask simply because kitting the whole build out with them would be pretty expensive.
What size tubing have you used. Looks like 7/16, but it's hard to tell.
What sort of RPM do the main fans get up to under load? This would mainly be a silent build that I'd be going for.
 
Daedalus, you can also use a Heatkiller GPU Core block instead of a fullcover and have the ports much lower, next to the radiator. This also helps to avoid the ports conflicting with the optical drive tray, and allows almost a direct connection from GPU to rad.

ll-loop-order-2_zps783df7df.jpg
 
Thanks for that WiSK. I'm currently using an XSPC block, and I'd rather not have to change it. Basically the same placement of ports, but there's an extra one on the bottom (as you see it in Samb's last picture)
 
Hi WiSK,

A lot of the ideas in my build came from your Lori Lemaris build log. So thanks! It helped alot.

It is definitely possible there is still some air in there. I have only had it running for 48hrs. I think i'll leave it a max pump speed overnight.

My fans are running at 70% with the GPU at 50 degrees with my current fan profile which is whisper quiet. If I crank them up to 100% (1500rpm) Im getting 44 on the gpu and 69 on the cpu. The whooshing sound of the air gets pretty loud at that speed though still no fan noise just a ton of air being moved. I'm pretty happy to sacrifice a few degrees for the sake of silence though.

Thanks for the compliments Daedalus!

I would take a photo of the cutting I did on the bottom but it would require laying it over. It wasn't that difficult. I just had to enlarge the hole a bit to match the rad. If you have it about 4mm off the mobo tray you have about 2mm of space fron the ODD tray once you have cut the tab off it that is supposed to hold a 3.5inch drive. You will also have to cut off 2 standoffs on the motherboard tray. I bought a dremel. Made it easy as.

As for the GPU block. I already had mine so I wanted to make it work (and I love the CSQ design). I originally ordered an EK bridge plexi single but it had two ports on the back of it that meant i would have had to cut the chassis rail to make it fit which i wasn't keen on doing as they are thin enough already. I ended up talking to EK and they sent me another FC link like the one that comes with the block which is 2mm thinner than the bridge and has no extra ports which fits perfectly. Cost me about 18 bucks from Slovenia. Watch your block length too. I have about 0,5mm between the fan and the GPU block, you could ditch the rubber gasket that comes with the noiseblocker or use another fan which would give you another 1-2mm.

For the fittings I think you will have to play that by ear when you get it together because your GPU block is different. To get from the Pump to the GPU on mine there is actually no hose (I wanted some in there for vibration isolation but couldn't make it work). From pump to block I am using a snake style adapter Male - Female, an extendable SLI fitting, A dual rotary elbow, a 20mm extender and a single rotary elbow. I stared at this for hours and looked at measurements on the bitspower site then hoped like hell I had measured it all properly when I ordered. The SLI and rotary gave me a bit of play. It's tricky because the PSU is right there and the outlet on the pump is at a 15 degree angle.

Can't wait to see yours if you build it! You can always add another HDD later. I just have mine stacked in there. My HDD is just for my music collection. Windows and games live on SSD.

Like Wisk did you could flip the rad around which would make your loop shorter and keep the hoses out of the flow path for the fans. I toyed with the idea but couldn't figure it out. It would be awesome though, you would have a really short loop.

You guessed it. 7/16

Cheers!

Sam
 
Last edited:
Sam, I have to say again that you've done an excellent job! Now reading your explanations it's very interesting how you approached the problems. Great that you could get a custom part from EK. Also your cable routing is very neat and tidy :)

Enjoy it! :D :cool:
 
Thanks a lot for the detailed response Samb. One other question: They way you have yours done, are you using the existing holes for the main 140 fan, or did you have to drill new ones? I only ask because it would be nice to use the filter setup the comes with the case.

Clearances should be ok, I think. I'm not planning on using gaskets with the fan(s) so that should gain me a few more mil. My GPU block also doesn't extend past the PCB of the card, so it should be ok.

The only thing I'm still a little confused on is in your reply there. Why would two motherboard stand-offs have to be cut out?
 
There is a little tray for an SSD next to the motherboard which has two standoffs, and a third thing which was originally for a card reader in the SG05 and somehow stayed in the FT03-mini fabrication process.

Pjalchemist once posted pictures in this thread about it (since he also cut a bigger hole for 140mm rad) but I just searched and he seems to have deleted all his photos.

You can see the SSD tray on this picture from this review. I can't understand Japanese but the pictures are comprehensive.
 
Last edited:
Ah, the little thing underneath the motherboard you mean? So it's not actually motherboard stand-offs that have to be removed, just the edges of that SSD tray, I take it.
 
Sorry that bit about the part from EK was a bit confusing. It is a standard part but they don't usually sell them separately. The FC Link comes with every CSQ block but I needed a second one to make that bend.

What I had one of but needed a second:
fc-link_detail_800_1_1.jpg


What I bought originally:
ek-fc-bridge-single-plexi_800_1.jpg


It is hard to see but the first picture is L-shaped which makes it thinner and doesn't have the extra ports that need the plugs that would conflict with the chassis.

Cheers!

Sam
 
You will definitely have to drill new holes for the rad :)

I'm not using a filter. It wouldn't fit. I tend to hit my pc with a compressor/compressed air once a month anyway.
 
Last edited:
Can't the rad just be screwed in through the bottom 140mm fan mount? I'm guessing, and that the rad - probably the thread end - hits the inside all of the case?
 
I couldn't use the existing holes because the rad has to be shifted slightly towards the mobo tray for the ODD tray to fit. It is only a few mm but it makes all the difference!
 
Ah, got'cha. I may not even use an ODD in mine - I don't have one currently and don't care - It's just that with the FT03 it looks so clean and well integrated I sort of feel like I have to have one. :p
 
Anyone out there able to tell me how to get the power and reset switches out of the housing? I'm able to get the lights, USB and audio ports out for wire replacement prior to sleeving, but I'm unable figure out how to release the power and reset switches... any help would be greatly appreciated!
 
I think they are glued in, I didn't dare try to remove them. If you figure it out though, post back here because those are the last wires I need to sleeve also :)
 
I think they are glued in, I didn't dare try to remove them. If you figure it out though, post back here because those are the last wires I need to sleeve also :)

Now that I've had some feedback, I'm going to leave the switches alone and just splice in black wiring and sleeve from there. Like you, I wouldn't dare try to force them out and it looks like they are either glued in or clipped on in at least four spots.
 
Now that I've had some feedback, I'm going to leave the switches alone and just splice in black wiring and sleeve from there. Like you, I wouldn't dare try to force them out and it looks like they are either glued in or clipped on in at least four spots.

I thought about trying to push some sleeve and shrink up there and then just aim the heatgun and hope it does its work and doesn't melt anything. But then I got a bad feeling about it :)
 
Would anyone be able to confirm if a GTX 770 can be powered by the SFX Silverstone 450w Powersupply? Also, since the card is 10 inches long, will it be able to fit with a Corsair H60 in the FT03-Mini?

Thanks,

Jay
 
Would anyone be able to confirm if a GTX 770 can be powered by the SFX Silverstone 450w Powersupply? Also, since the card is 10 inches long, will it be able to fit with a Corsair H60 in the FT03-Mini?

Thanks,

Jay

I read they are using the same PCB's as the titans, just a slightly different layout. If that is the case than it's 10.5 inches, and you'd need to cut a cutout to fit it probably. Well I guess that only applies to the references designs w/ the titan cooler... which most manufacturers cheaped out on.
 
I read they are using the same PCB's as the titans, just a slightly different layout. If that is the case than it's 10.5 inches, and you'd need to cut a cutout to fit it probably. Well I guess that only applies to the references designs w/ the titan cooler... which most manufacturers cheaped out on.

I'm also reading on the Nvidia's website that the GTX 770 draws out more power than the GTX 680.

GTX 680:
Maximum Graphics Card Power (W) 195 W
Minimum System Power Requirement (W) 550 W
Supplementary Power Connectors Two 6-pin

GTX 770:
Maximum Graphics Card Power (W) 230 W
Minimum Recommended System Power (W) 600 W
Supplementary Power Connectors One 8-pin and one 6-pin

So the Silverstone PSU may not be able to handle it.

The 770 is the same GPU as a 680, just higher clocked w/ their new boost 2.0 that was introduced w/ the titan. 780 is a cut down titan GPU w/ less memory, and higher base clocks.

also I have a titan OC'd to 1124GHz (stock volts) and an i5 2500K at 4.5GHz and the SST-ST45SF-G handles it.
 
The 770 is the same GPU as a 680, just higher clocked w/ their new boost 2.0 that was introduced w/ the titan. 780 is a cut down titan GPU w/ less memory, and higher base clocks.

also I have a titan OC'd to 1124GHz (stock volts) and an i5 2500K at 4.5GHz and the SST-ST45SF-G handles it.

Seriously? That is awesome! Though the only drawback now is the fact that the 770 are 10.5 inches long so I don't believe it would fit in the FT03-Mini.
 
Seriously? That is awesome! Though the only drawback now is the fact that the 770 are 10.5 inches long so I don't believe it would fit in the FT03-Mini.
I'm having the same dilemma as you and sadly no — 10.5" will definitely not fit in the enclosure.
 
Well I may just go with a 680 then. What is the issue I hear about the ST45SF-G with the Hard Drives and all? Can I still fit two 2.5 inch drives along with a optical drive? Including jamming in a 680 and a Corsair H60?
 
Seriously? That is awesome! Though the only drawback now is the fact that the 770 are 10.5 inches long so I don't believe it would fit in the FT03-Mini.

The reference design is 10.5 inches, but nvidia allowed them to design their own boards, and most have done that w/ their cheaper coolers. A look on newegg shows most of the twin cooler 770's listed as 10 inches.
 
Back
Top