This is mainly a build log, since the project is all but done, and I didn't stop to take pictures of the boring old "look I drilled some holes!"
My main gaming rig was still rockin' an H67 mobo with a 2500K and milking a 480GTX overclocked on watercooling.
I was ready for a new set of gaming stuff!
I knew I didn't want to give up the portability of my Gunnar case with sliding Radiators, but a rolling case would offer a bit easier transport.
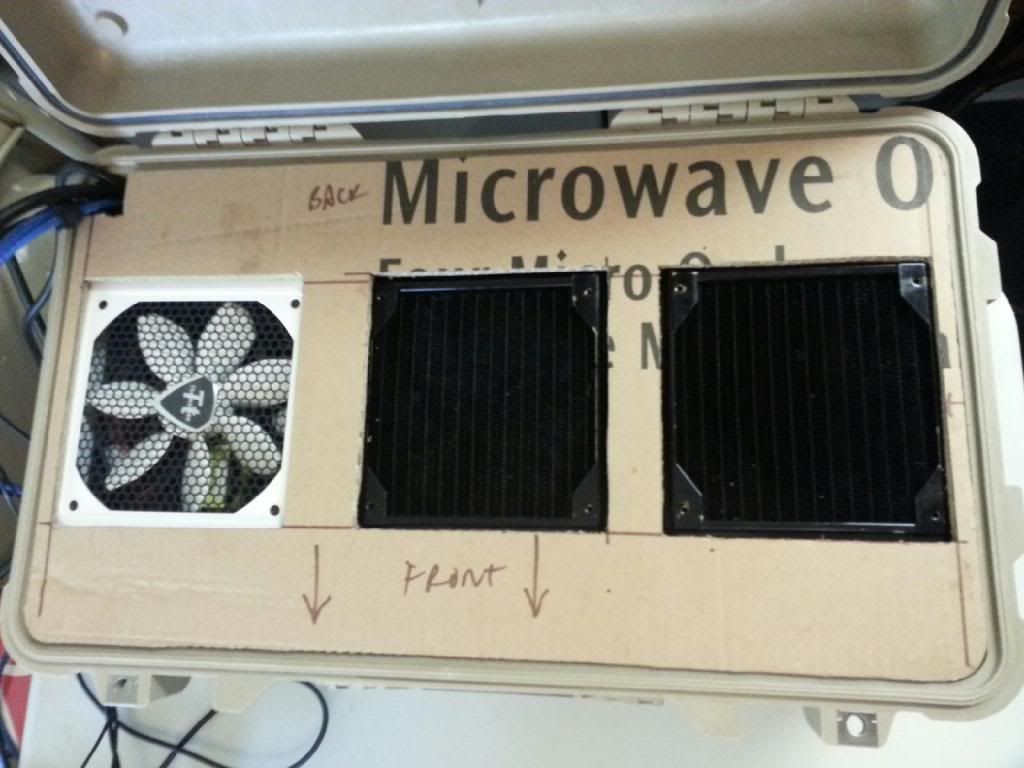
So, after some planning:
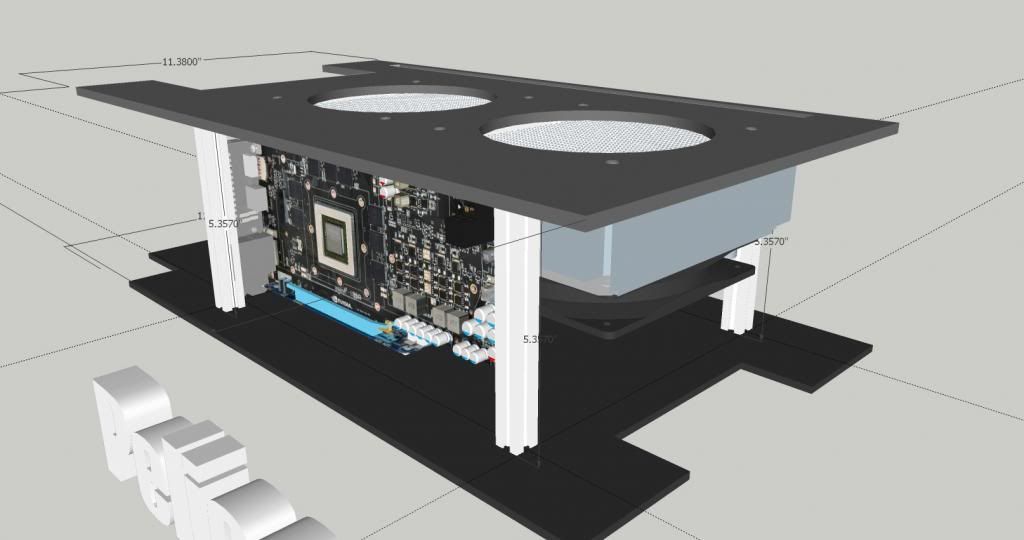
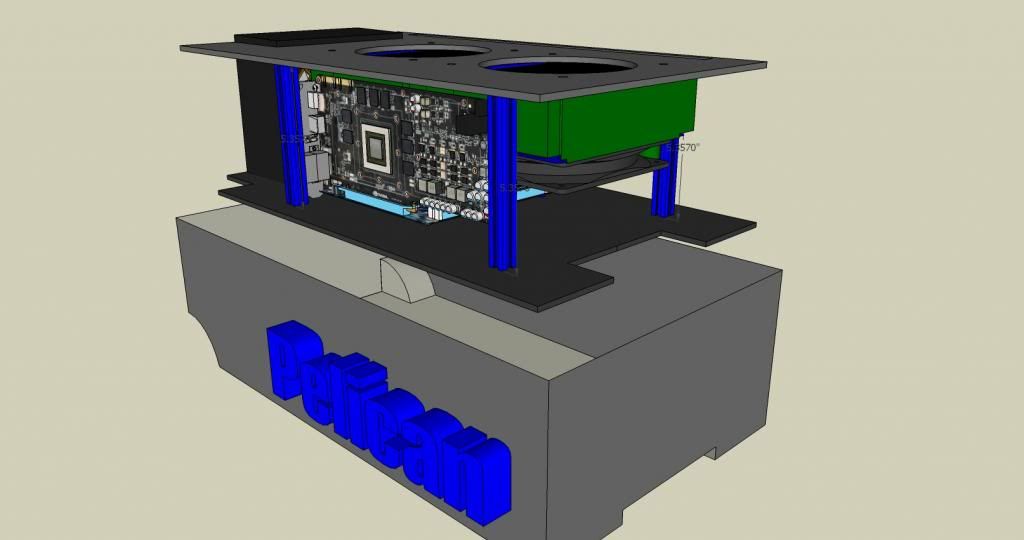
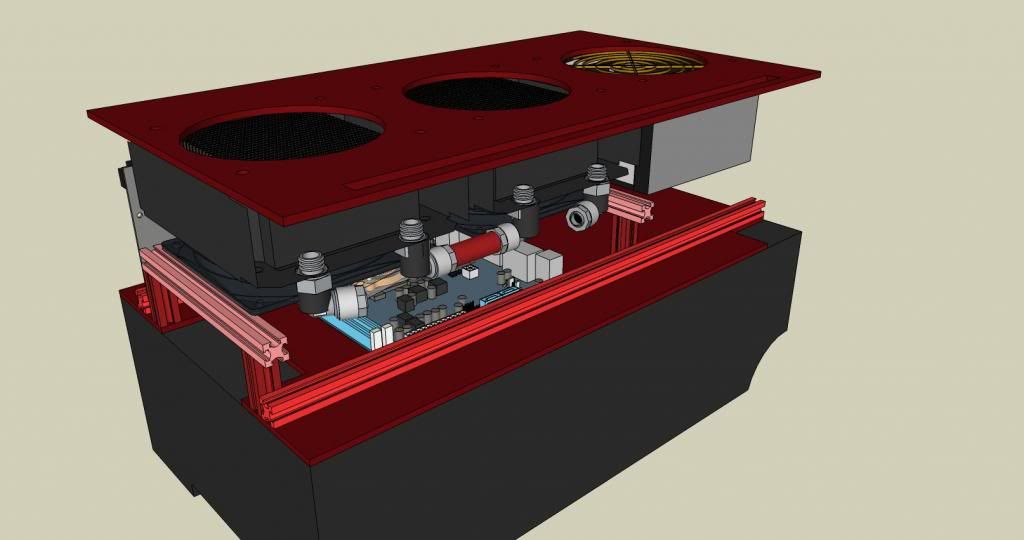
http://img.photobucket.com/albums/v160/Dgephri/pelican pc/Pelican-01.mp4
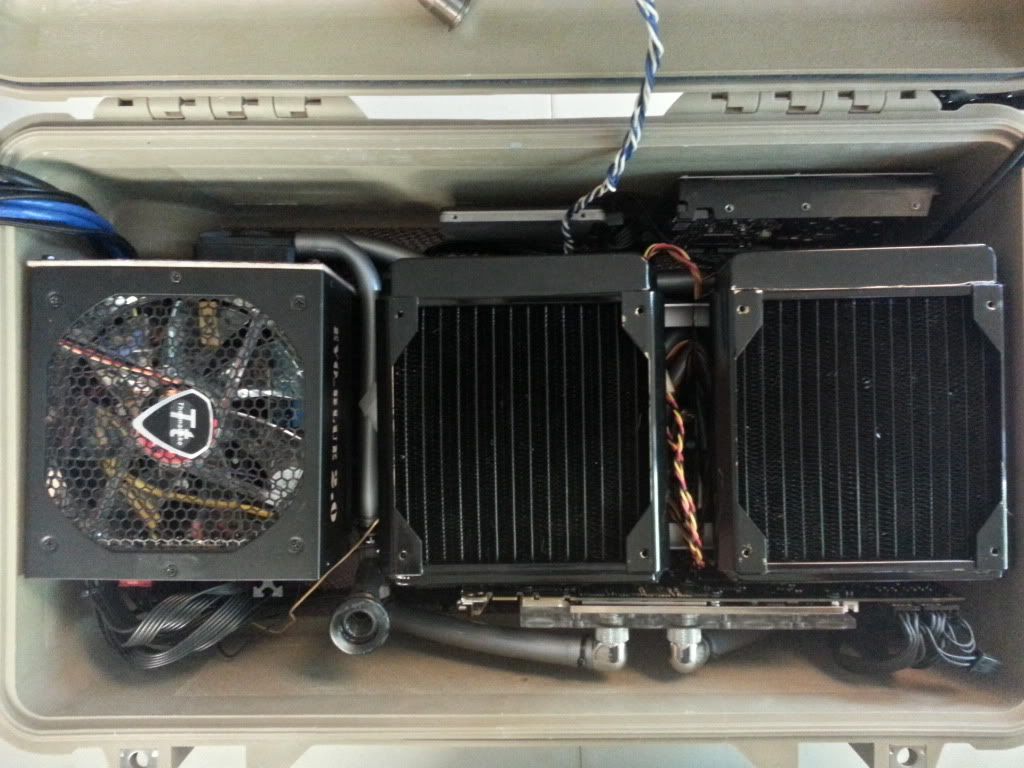
I knew that my CPU and GPU were cooled more than adequately by my dual 140mm Radiators...Keeping them.
I knew my 2500K had never been overclocked due to the limitations on H67 ITX motherboards. If I got a Z77 ITX I could get some more headroom out of that...Keeping that.
I knew my Corsair 2X8Gig RAM would have headroom to go in the Z77 and not hold back on a decent overclock...Keeping that as well.
The remainder? Old, cut, bent, dusty, tired...maybe clean it up and turn that into a backup Gaming rig for my GF.
What new stuff you ask?
Z77 Motherboard: Gigabyte GA-Z77N-WIFI - while limited by voltage options in OC, it still reaches 4GHz and features full audio and dual NICs plus Wifi/BT and other stuff. ITX package with ATX features IMO.
I have several DD blocks laying around that can cool this effectively.
Titan - 6Gb, fast, fast, and some fast. I didn't want to give up interior space to a 13"+ GPU, and multiGPUs tend to have issues with mATX and ITX boards in my experience. At 10.5" the Titan is the same
size as my aging 480GTx and a huge increase in capability. My 3D planning revealed a clearance issue with any GPU block that had Barbs up on the top ready for SLI. I had to find something with barbs only
coming out the Die side of the GPU, nothing over the top. Turns out, EK had a CSQ block for the Titan in the works: http://www.ekwb.com/shop/ek-fc-titan-nickel-original-csq.html
Stuff was ordered, waited, other stuff had to be manufactured, then ordered, blah blah, blah-bitty blah (Giggitty) and so on.
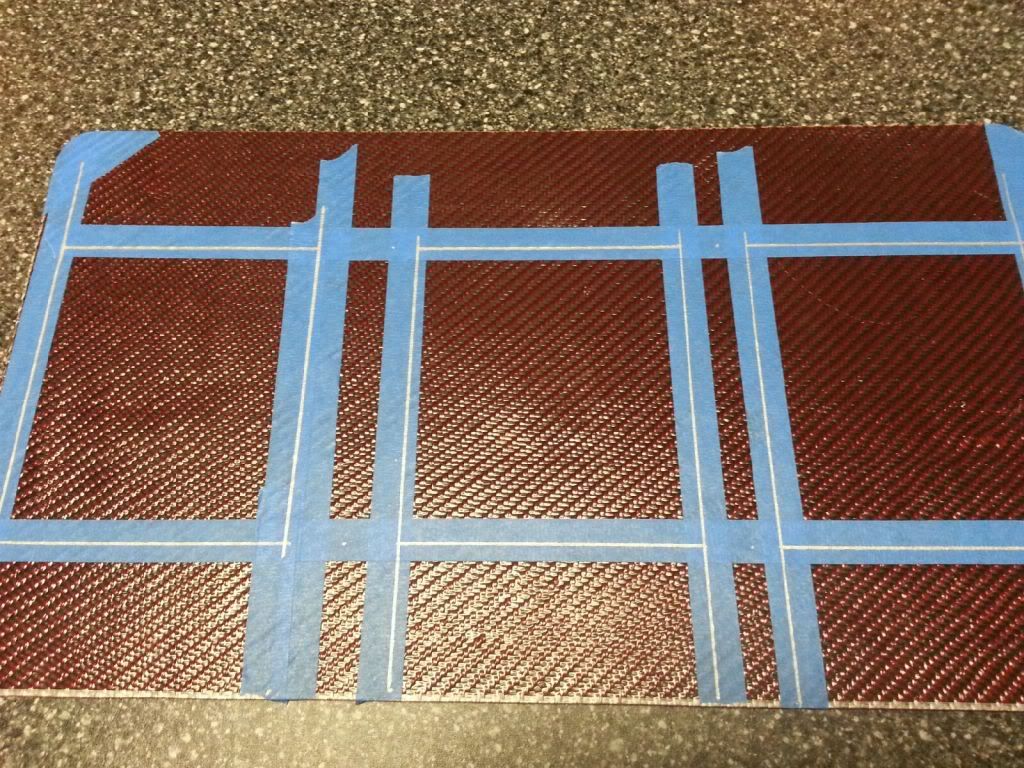
I made Carbon Fiber sheets:
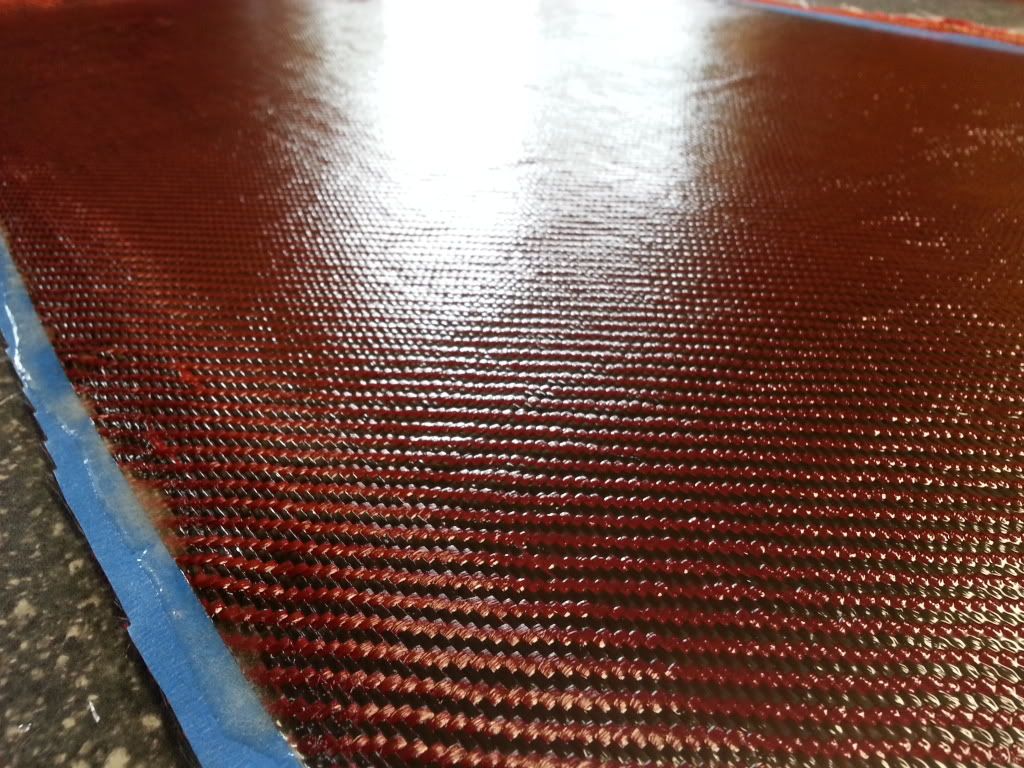
and I cut them into shapes.
So, as of Friday, I fit, I formed, I drilled, I filed, I taped over marks, I used a drill press, a band saw, a scroll saw and my trusty rotary motor with cutting bits. I used 8/32 taps, a countersink bit,
bought a bunch of black socket head bolts, nylon lock nuts, rubber washers, and even some 1/2"X1" L-aluminum.
I then started running power lines, backplane cables, PCIe cords, SATA, and the like. After many hours of mind-numbing layout trials I am ready to show the process of assembly as it occured after deciding
what had failed in design and what needed to work before I could fill up the watercooling.
Here goes:
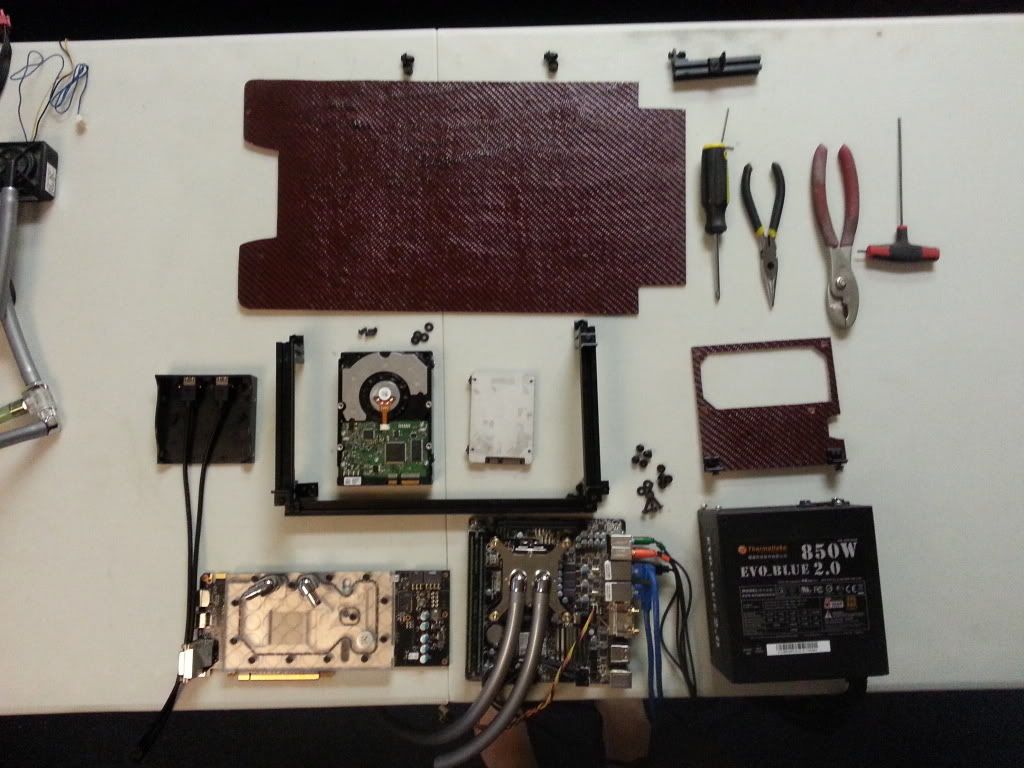
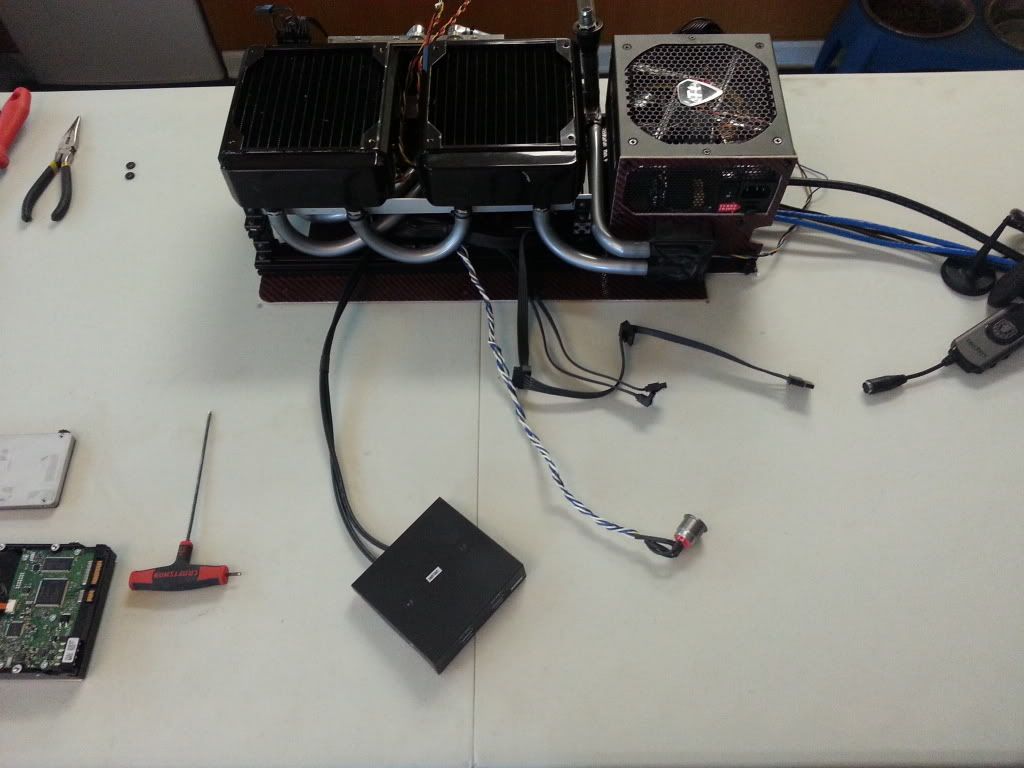
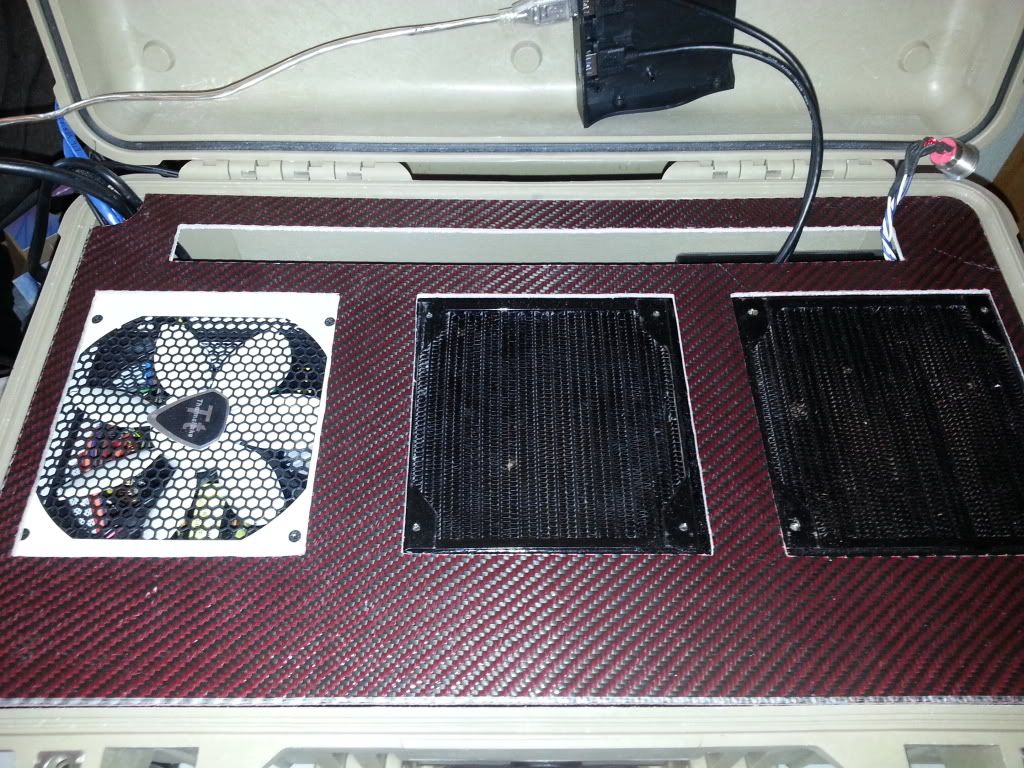
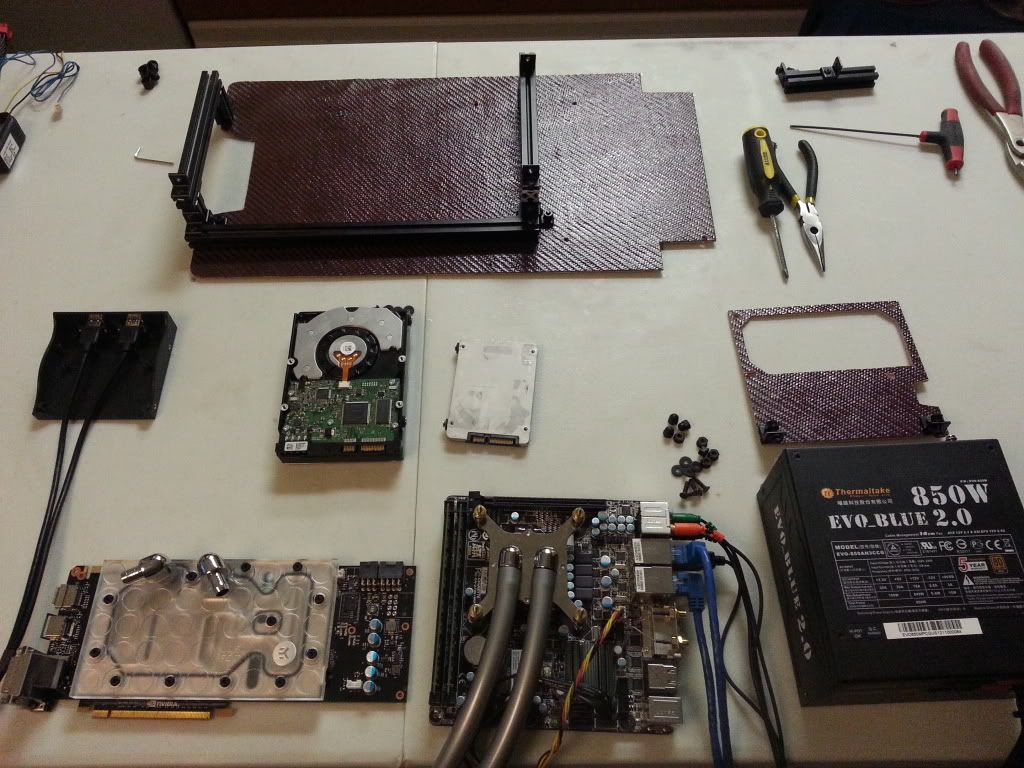
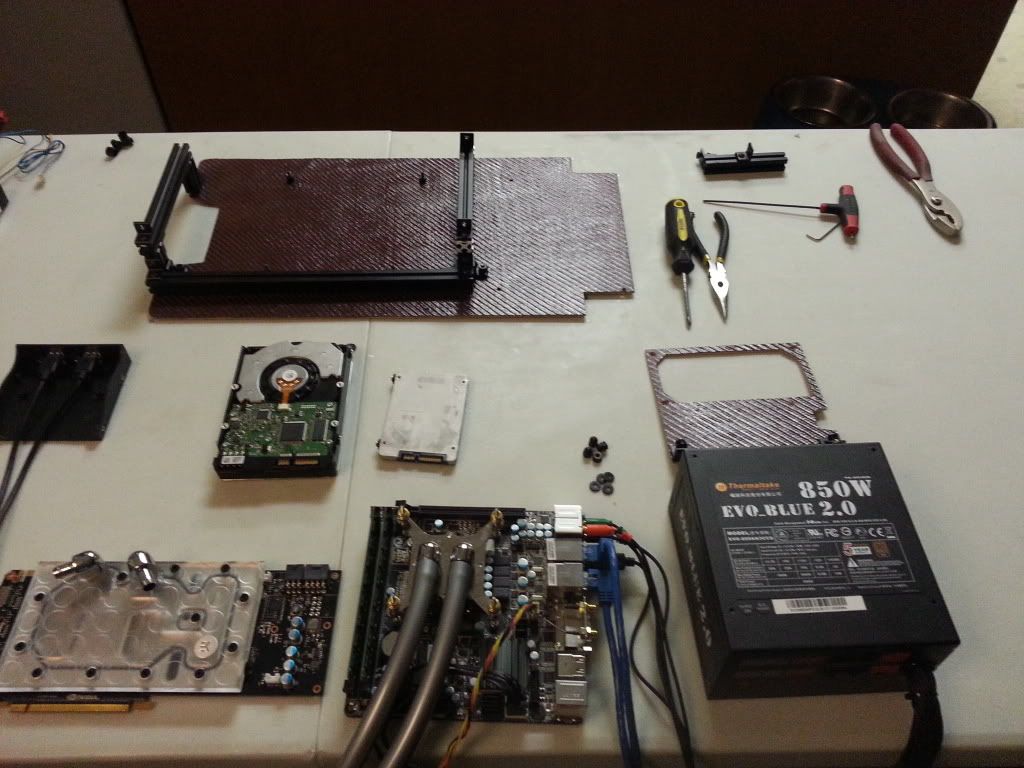
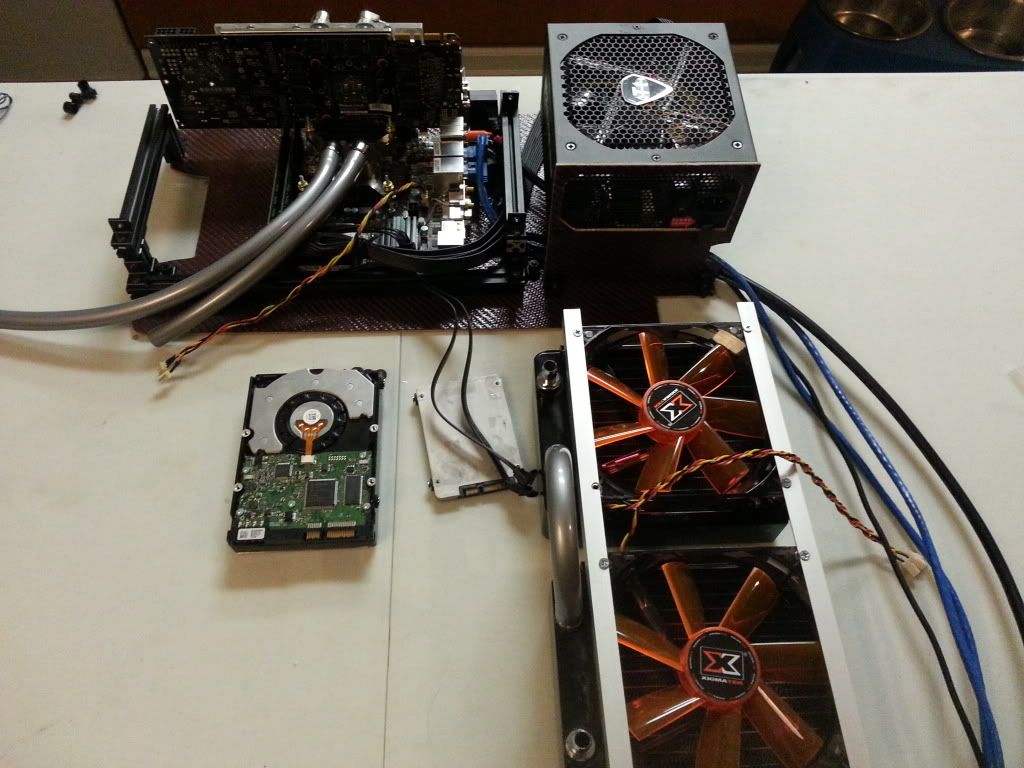
Here is most everything I could fit into view for the first major structur and electronics that needed mounting first.
The aluminum bar (t-Slot by Lubic) is mounted, sitting on rubber washers and tightened with Black Nylong Lock nuts. The Counter suck screws sit flush underneath and I just tighten them with my giant hex
wrench.
followed by the motherboard stand off screws in a similary Countersunk up to nylon lock nut arrangement. Instead of putting screws DOWN through the motherboard, I have bolts sticking up and I put a NUT on
to hold the motherboard in place.
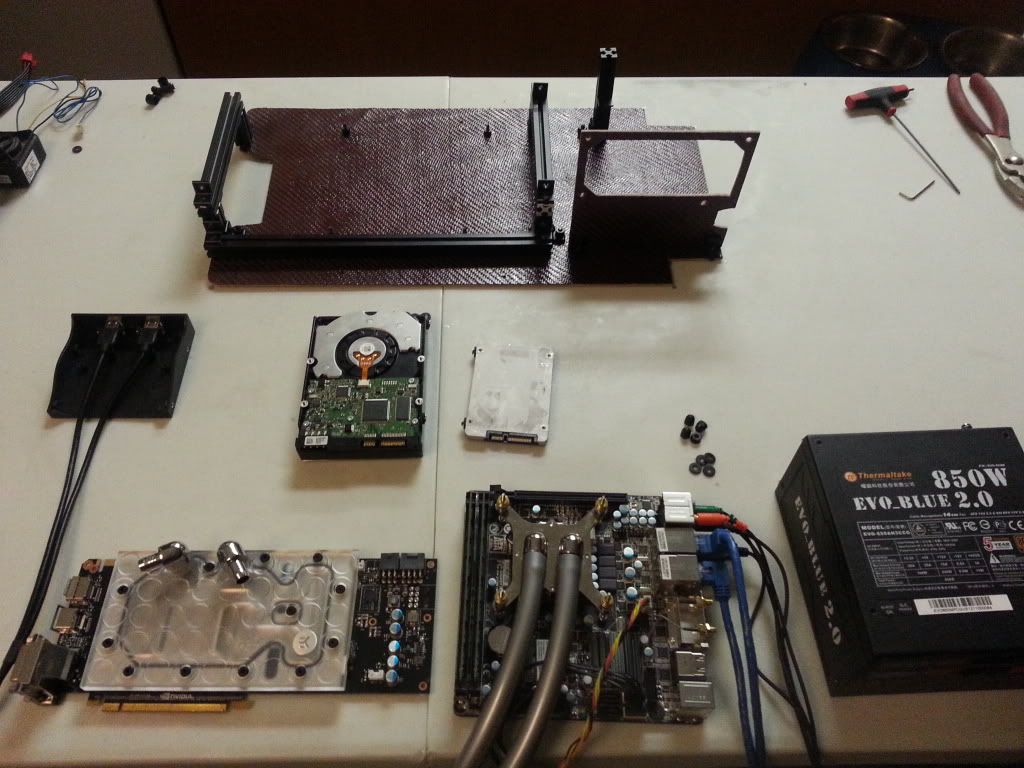
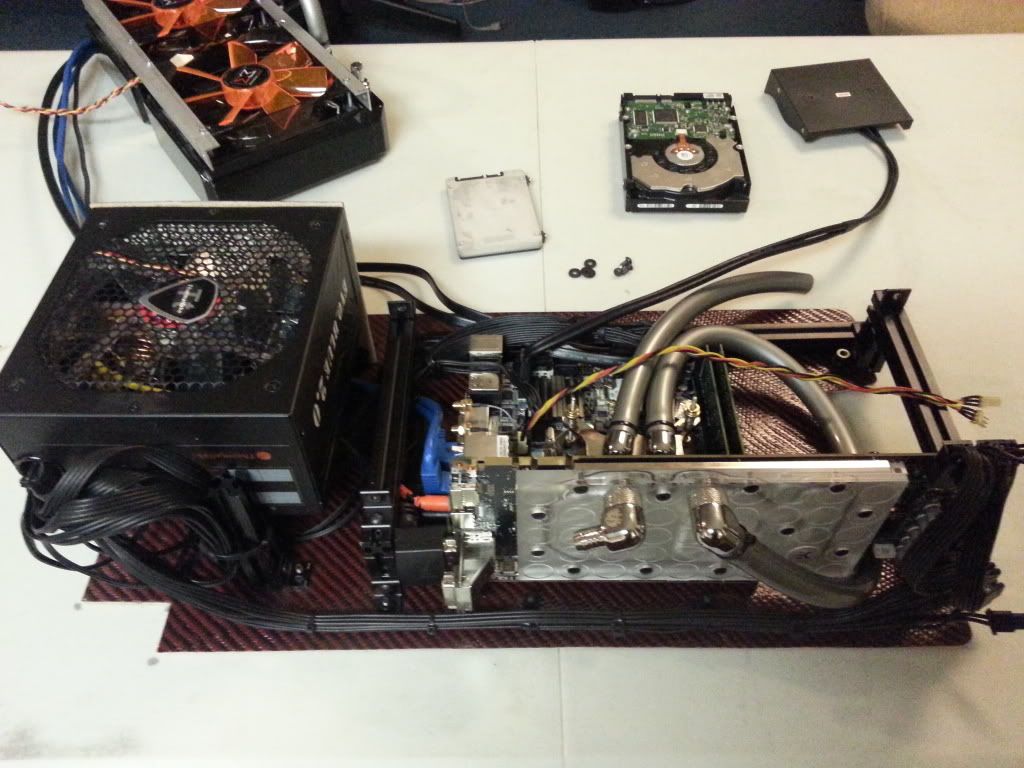
but before I place the mobo, I put the PSU bracket and brace down since so many things need to sit under that. Easier to place the brackets before I have a handful of cords in my way.
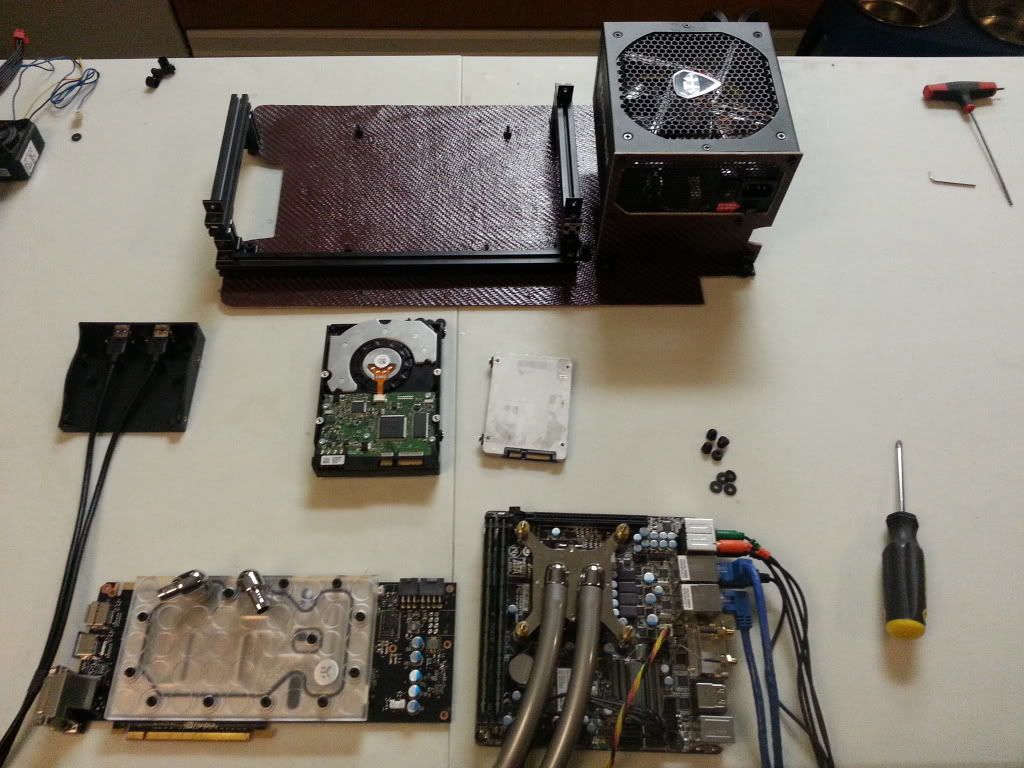
Setting the PSU in place before the mobo is another crucial element of getting everything to go in and avoid tangles...just wait a bit and you will see.
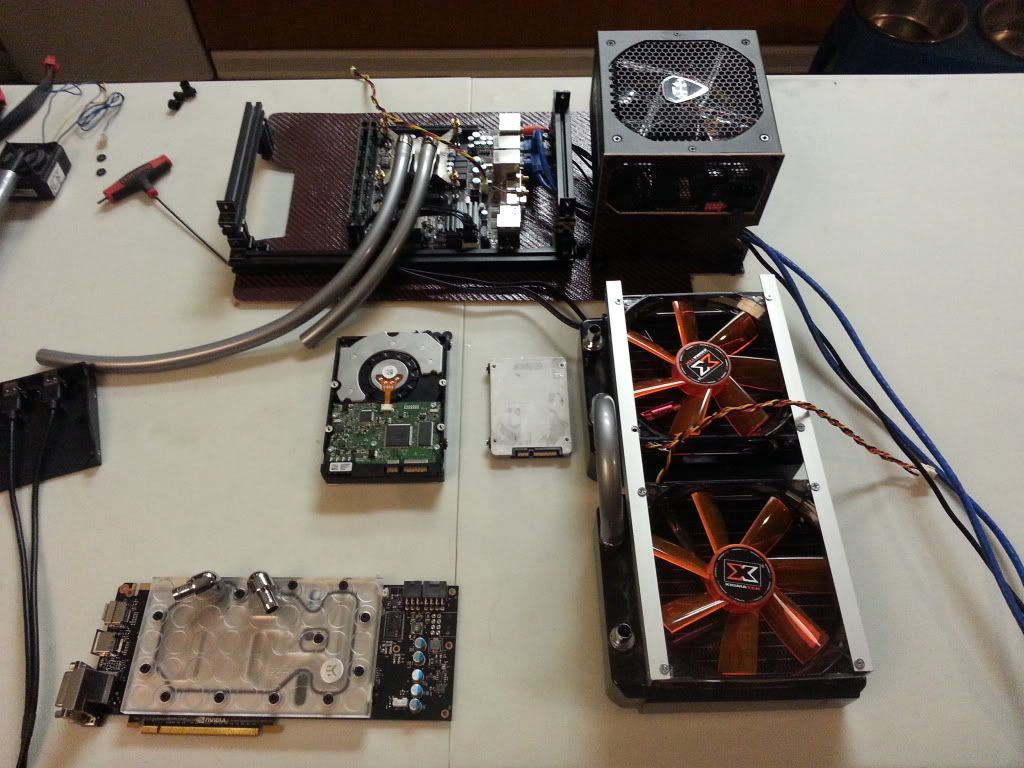
Ahhh...see? The backplane of the motherboard is entirely trapped inside the case! Everything I want to run out has to be plugged in and accounted for before I can even put the watercooling in. Fun right?
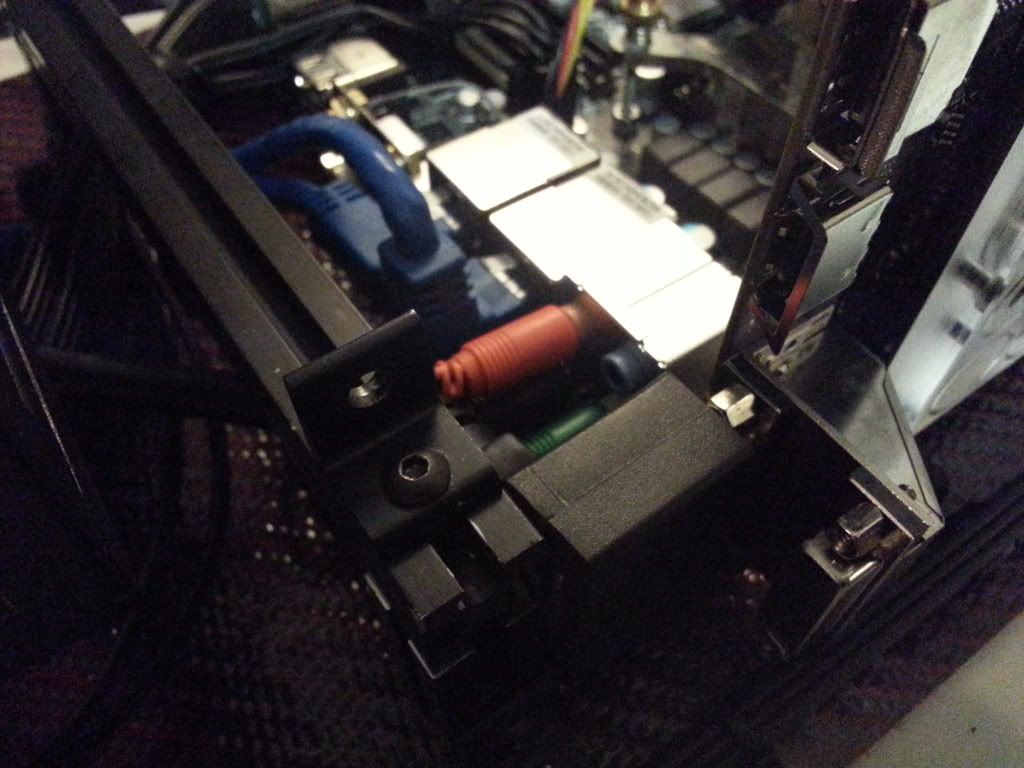
") That bundle includes the audio for my 5.1 headset, two LAN cables, and soon, the DVI. You can also see the watercooling tray "bottom up" after I made room on the table.
That bundle includes the audio for my 5.1 headset, two LAN cables, and soon, the DVI. You can also see the watercooling tray "bottom up" after I made room on the table.
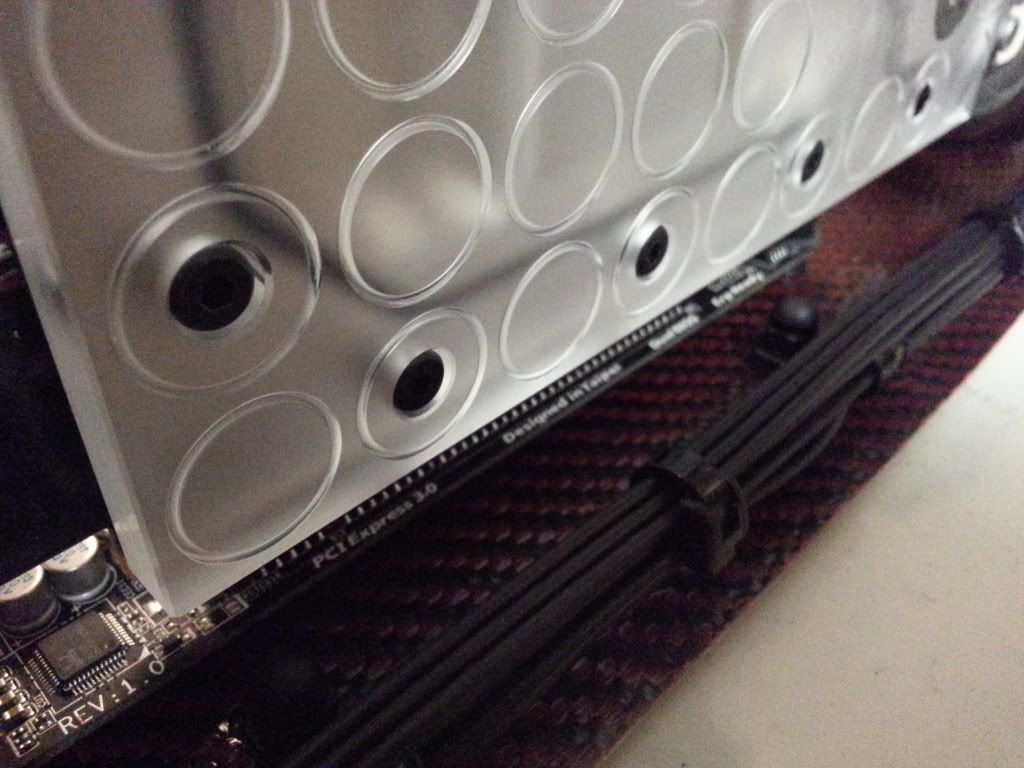
The Titan sporting an EK CSQ in Nickel finish. You might notice I had to tuck a 90degree DVI cable onto it. That cable also snakes under the PSU before I can install the Watercooling tray.
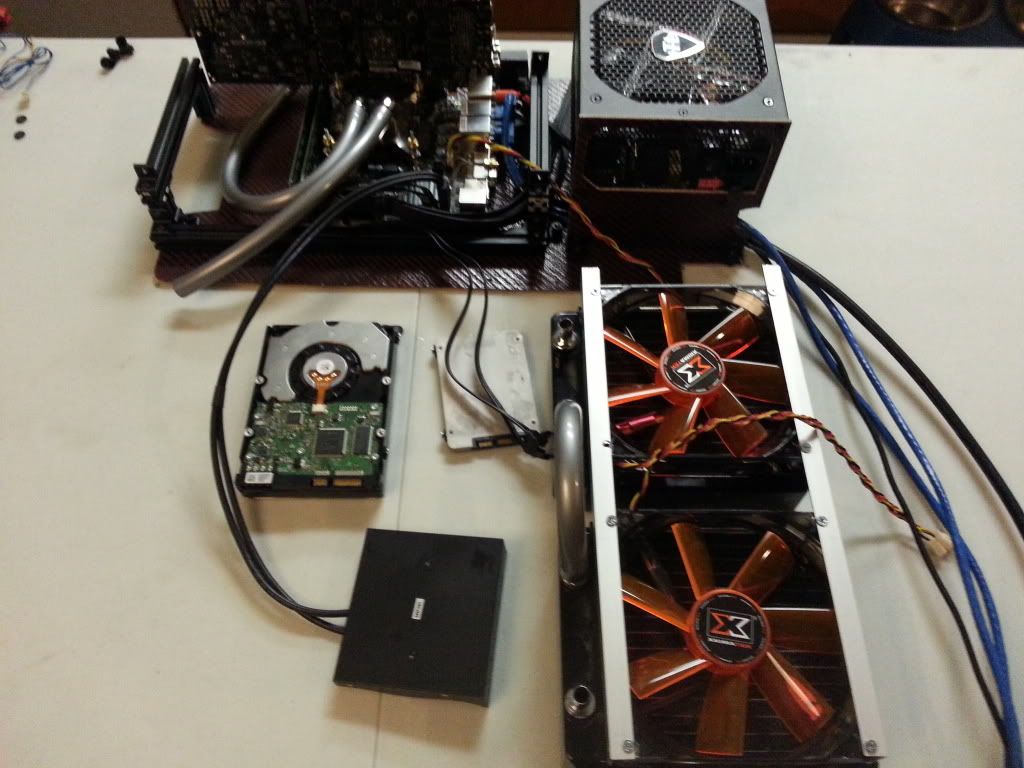
A bit fuzzy, but that cable and black box is a USB 3.0 drive bay device that will come back into some Modding later. I just needed it plugged in so I can connect external devices.
With the Titan installed it's finally time for some GPU love shots:
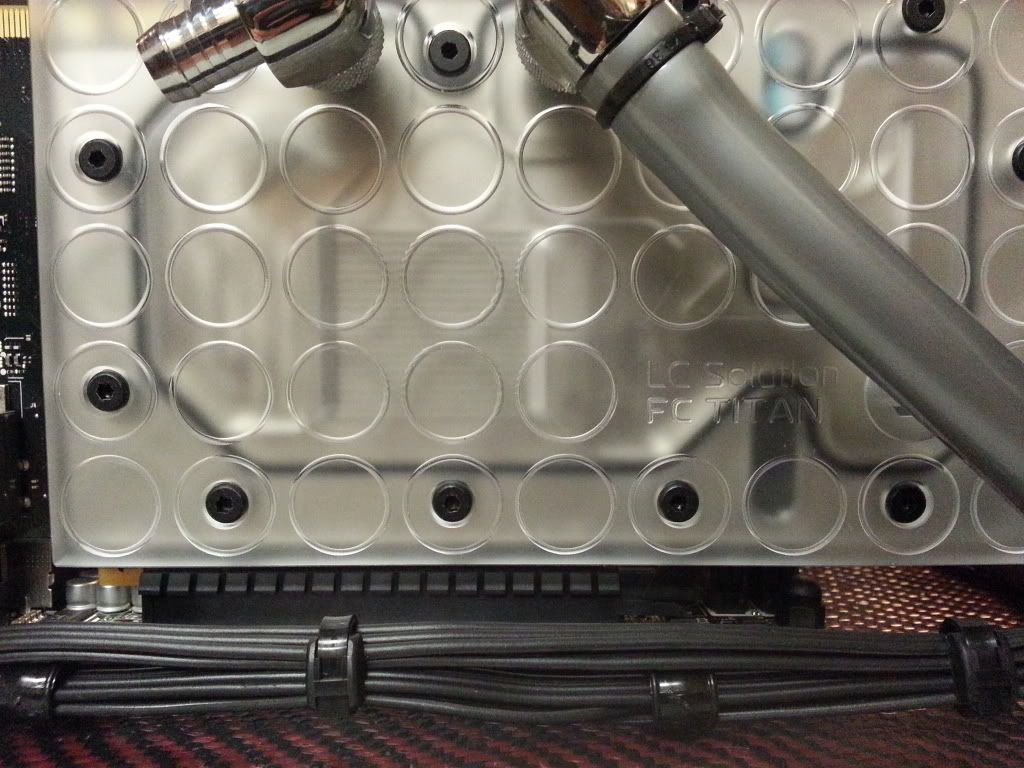
It starts to show how tightly packed it all is...I had to shave the back of the DVI cable, remove the mounting bolts (like it can move now) and then cut the stress boots on all my Audio cables so they could
lay flatter. I also had to hunt up two DIFFERENT 90degree LAN cables since two 90 degrees would have pressed on each other and created a potential problem later on.

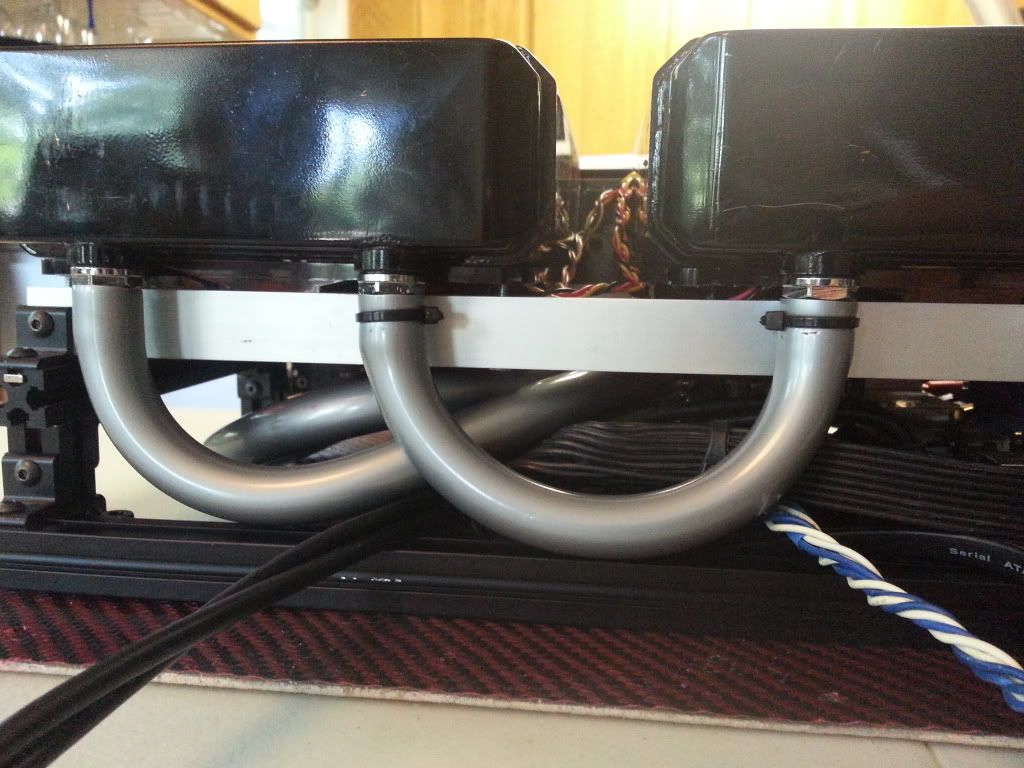
That brings up to late last night. I am nearly ready to set the watercooling tray in place, bolt it down, and finish tubing with zip tie back ups. I don't really have room for Compression fittings since
nearly everything is close fit with just barbs and tubing diameters!
More photos as that occurs in the next two days. I plan to be filling the waterlines and leak testing tonight.
My main gaming rig was still rockin' an H67 mobo with a 2500K and milking a 480GTX overclocked on watercooling.
I was ready for a new set of gaming stuff!
I knew I didn't want to give up the portability of my Gunnar case with sliding Radiators, but a rolling case would offer a bit easier transport.
So, after some planning:
http://img.photobucket.com/albums/v160/Dgephri/pelican pc/Pelican-01.mp4
I knew that my CPU and GPU were cooled more than adequately by my dual 140mm Radiators...Keeping them.
I knew my 2500K had never been overclocked due to the limitations on H67 ITX motherboards. If I got a Z77 ITX I could get some more headroom out of that...Keeping that.
I knew my Corsair 2X8Gig RAM would have headroom to go in the Z77 and not hold back on a decent overclock...Keeping that as well.
The remainder? Old, cut, bent, dusty, tired...maybe clean it up and turn that into a backup Gaming rig for my GF.
What new stuff you ask?
Z77 Motherboard: Gigabyte GA-Z77N-WIFI - while limited by voltage options in OC, it still reaches 4GHz and features full audio and dual NICs plus Wifi/BT and other stuff. ITX package with ATX features IMO.
I have several DD blocks laying around that can cool this effectively.
Titan - 6Gb, fast, fast, and some fast. I didn't want to give up interior space to a 13"+ GPU, and multiGPUs tend to have issues with mATX and ITX boards in my experience. At 10.5" the Titan is the same
size as my aging 480GTx and a huge increase in capability. My 3D planning revealed a clearance issue with any GPU block that had Barbs up on the top ready for SLI. I had to find something with barbs only
coming out the Die side of the GPU, nothing over the top. Turns out, EK had a CSQ block for the Titan in the works: http://www.ekwb.com/shop/ek-fc-titan-nickel-original-csq.html
Stuff was ordered, waited, other stuff had to be manufactured, then ordered, blah blah, blah-bitty blah (Giggitty) and so on.
I made Carbon Fiber sheets:
and I cut them into shapes.
So, as of Friday, I fit, I formed, I drilled, I filed, I taped over marks, I used a drill press, a band saw, a scroll saw and my trusty rotary motor with cutting bits. I used 8/32 taps, a countersink bit,
bought a bunch of black socket head bolts, nylon lock nuts, rubber washers, and even some 1/2"X1" L-aluminum.
I then started running power lines, backplane cables, PCIe cords, SATA, and the like. After many hours of mind-numbing layout trials I am ready to show the process of assembly as it occured after deciding
what had failed in design and what needed to work before I could fill up the watercooling.
Here goes:
Here is most everything I could fit into view for the first major structur and electronics that needed mounting first.
The aluminum bar (t-Slot by Lubic) is mounted, sitting on rubber washers and tightened with Black Nylong Lock nuts. The Counter suck screws sit flush underneath and I just tighten them with my giant hex
wrench.
followed by the motherboard stand off screws in a similary Countersunk up to nylon lock nut arrangement. Instead of putting screws DOWN through the motherboard, I have bolts sticking up and I put a NUT on
to hold the motherboard in place.
but before I place the mobo, I put the PSU bracket and brace down since so many things need to sit under that. Easier to place the brackets before I have a handful of cords in my way.
Setting the PSU in place before the mobo is another crucial element of getting everything to go in and avoid tangles...just wait a bit and you will see.
Ahhh...see? The backplane of the motherboard is entirely trapped inside the case! Everything I want to run out has to be plugged in and accounted for before I can even put the watercooling in. Fun right?
That bundle includes the audio for my 5.1 headset, two LAN cables, and soon, the DVI. You can also see the watercooling tray "bottom up" after I made room on the table.
The Titan sporting an EK CSQ in Nickel finish. You might notice I had to tuck a 90degree DVI cable onto it. That cable also snakes under the PSU before I can install the Watercooling tray.
A bit fuzzy, but that cable and black box is a USB 3.0 drive bay device that will come back into some Modding later. I just needed it plugged in so I can connect external devices.
With the Titan installed it's finally time for some GPU love shots:
It starts to show how tightly packed it all is...I had to shave the back of the DVI cable, remove the mounting bolts (like it can move now) and then cut the stress boots on all my Audio cables so they could
lay flatter. I also had to hunt up two DIFFERENT 90degree LAN cables since two 90 degrees would have pressed on each other and created a potential problem later on.
That brings up to late last night. I am nearly ready to set the watercooling tray in place, bolt it down, and finish tubing with zip tie back ups. I don't really have room for Compression fittings since
nearly everything is close fit with just barbs and tubing diameters!
More photos as that occurs in the next two days. I plan to be filling the waterlines and leak testing tonight.
Last edited: