Hi everyone! I'm new to the HarDd Forum, and wanted to share my latest build with you all!
I just completed this mod yesterday, and got some free time to make a log.
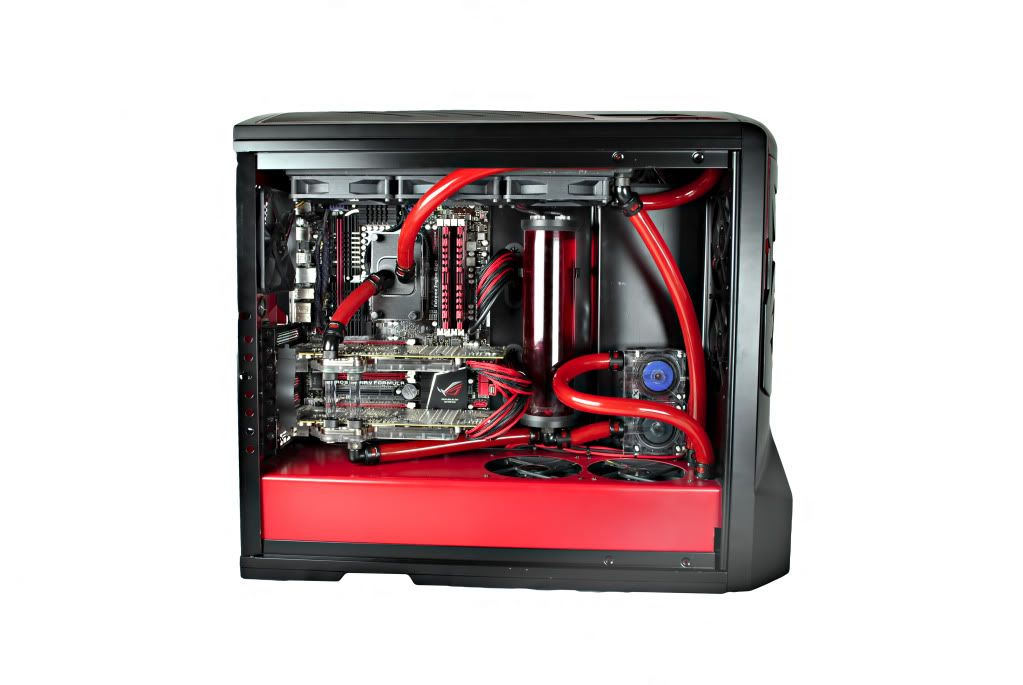
System Specs are
Asus CrosshairFormula V
AMD FX-8120 @4.6Ghz
16GB G.Skill Ripjaw 1600Mhz
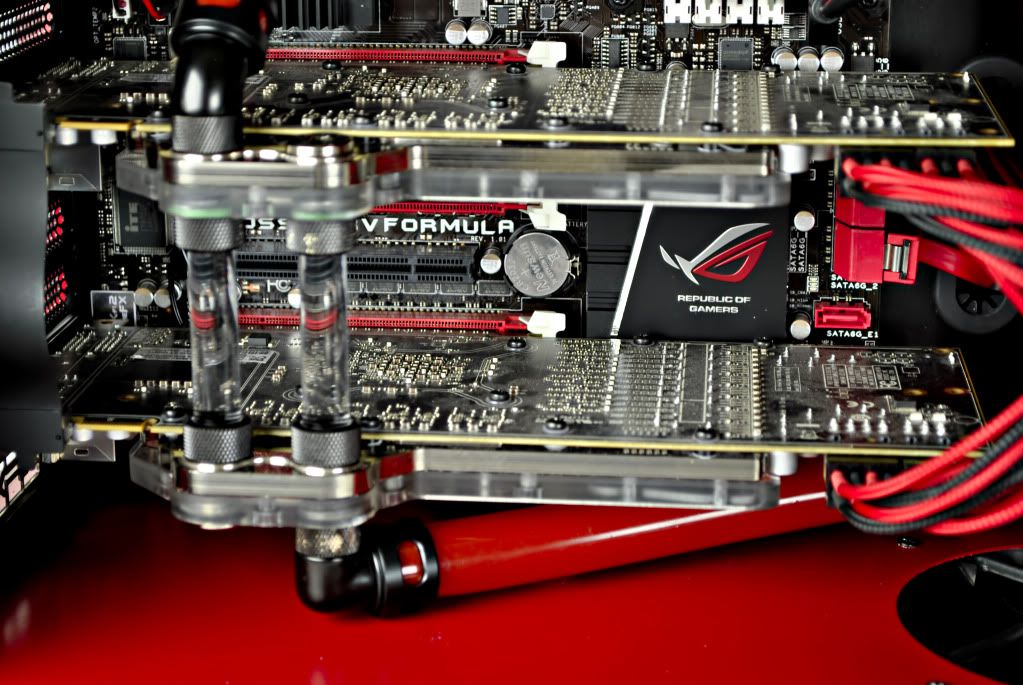
2 - XFX 6970 w/EK 6970v2 water blocks - Bitspower Crytal links
XSPC Raystorm CPU Block
2 - MCP355 Pumps w/ XSPC Dual Pumo Acrylic
Alphacool 240mm Radiator
XSPC RS360 Radiator
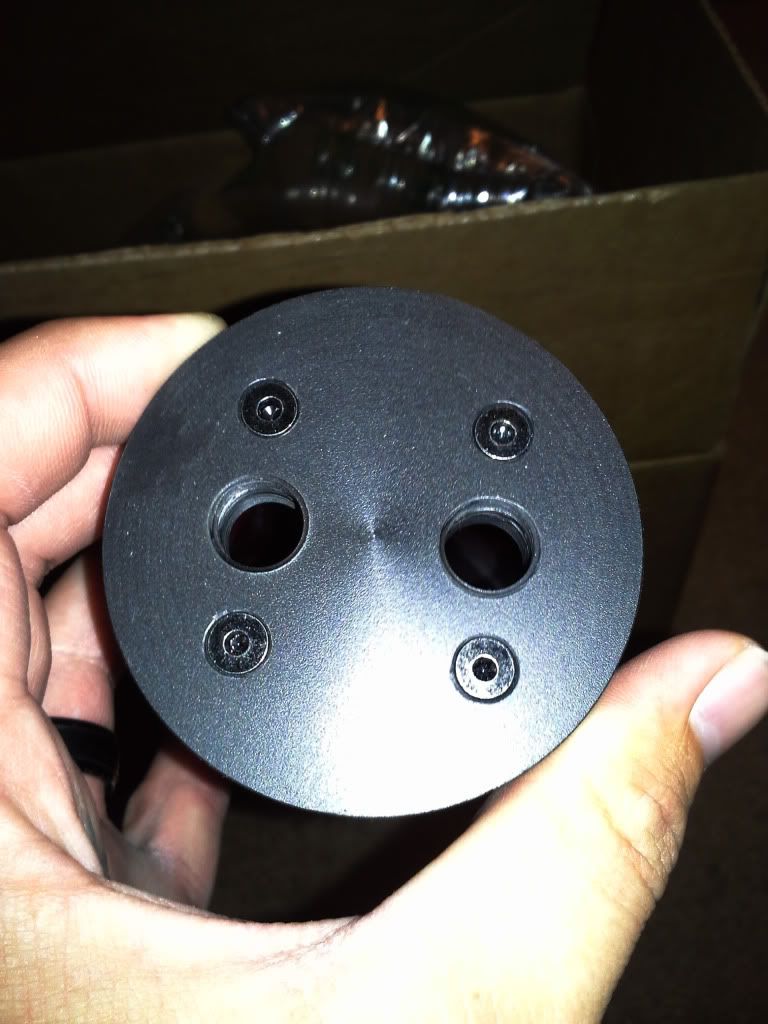
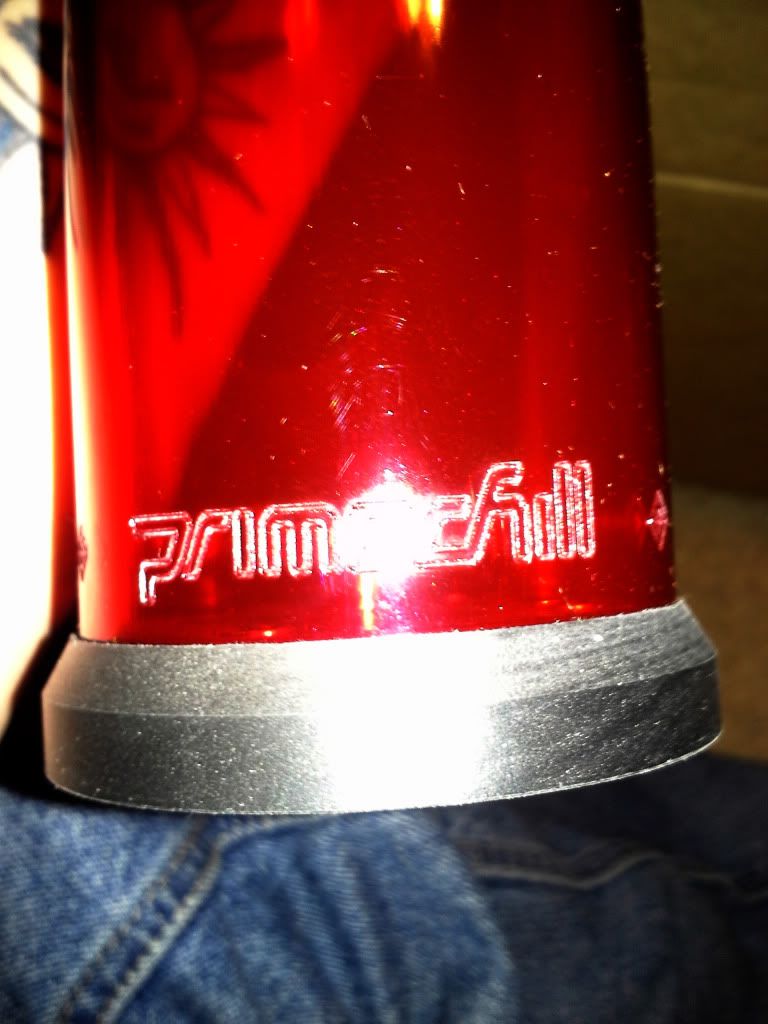
Primochill Compression Tube Reservoir
Primochill Primoflex PRO LRT UV Red Tubing
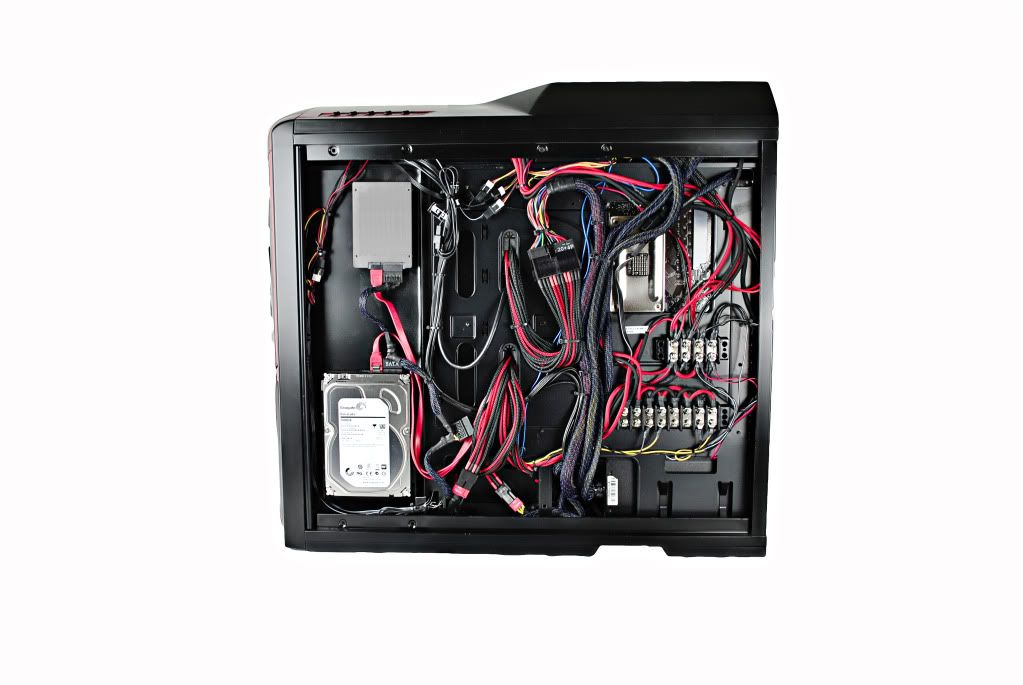
2 - Corsair Force Series 3 60GB SSD in Raid0
1 Seagate Barracude 7200rpm 2TB for storage.
ModSmart 24pin, 6pin PCIe, 8pin PCIe sleeved cable extensions.
A little background for the motivation on this build. I've been into hot rods for a good majority of my life. I used to modify and drag race a few of the cars I have owned through out the years. Mostly Camaro's, but I've built a few decent DSM's as well. 2 years ago, I injured my shoulder at work, and have not been able to do any of the heavy mechanicing that I used to be able to do. I have since had 3 surgeries on my shoulder, and have been told heavy lifting or a lot of repetitive work is going to be off of my list of capabilities now.
Luckily, I have also been building and fixing computers for at least the last 10 years as a smaller, back burner(winter) hobby. So I started modding cases, and building more computers while recovering from my surgeries. It has now become my passion, and I can do it one handed if the need ever arises again
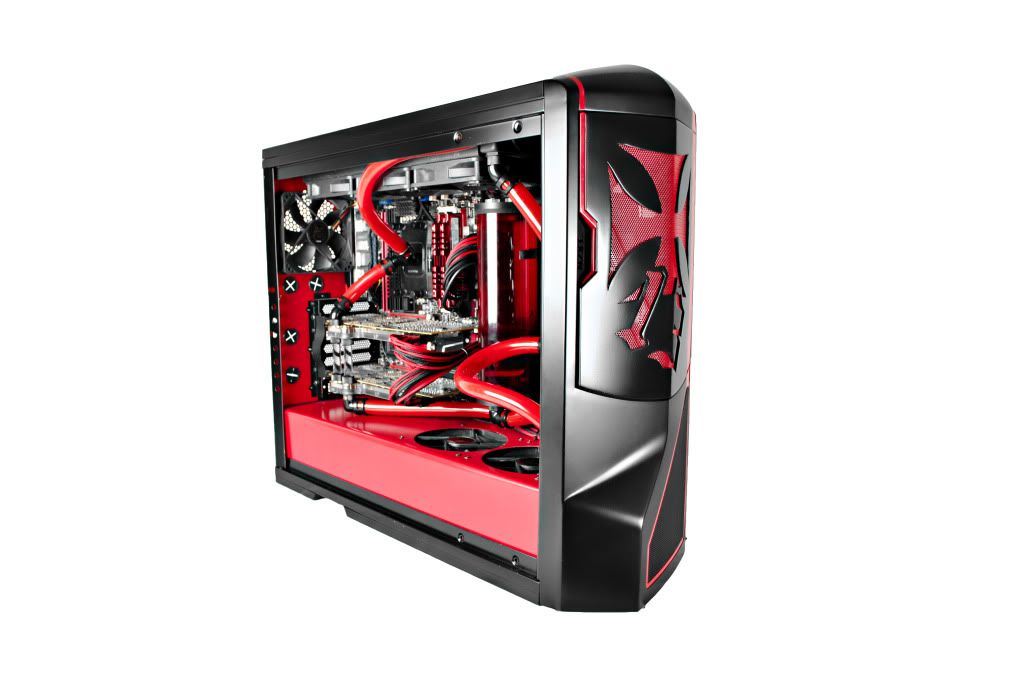
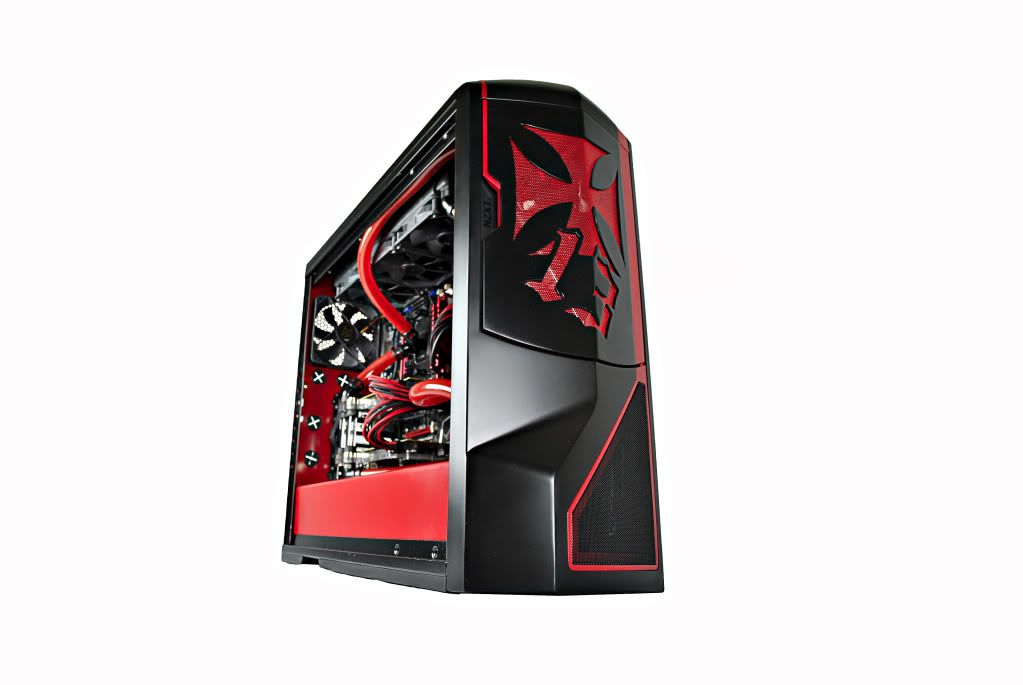
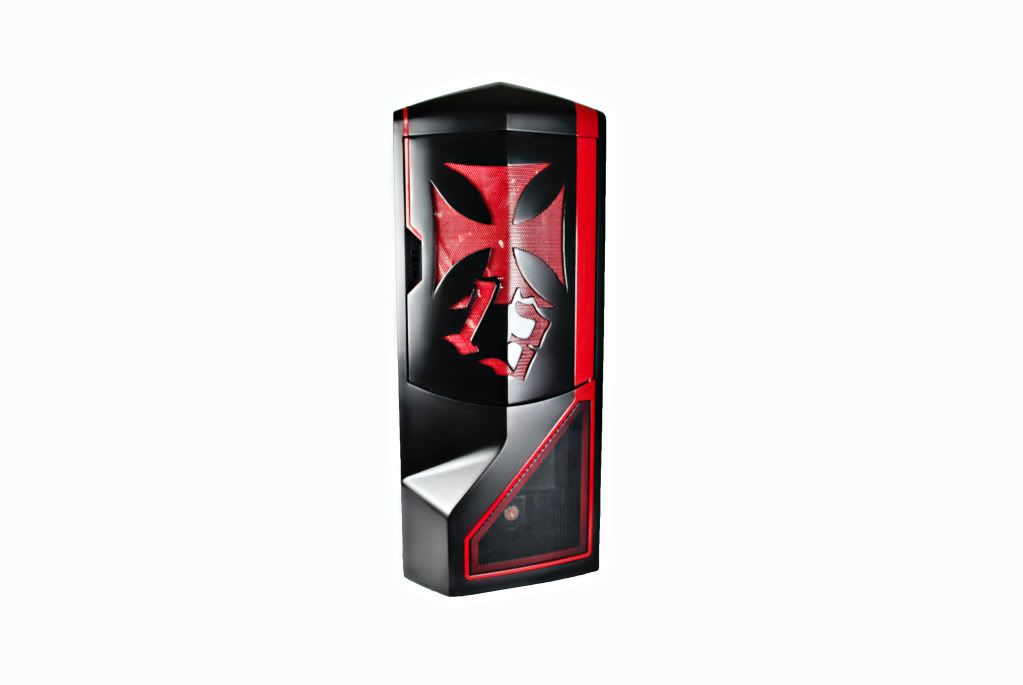
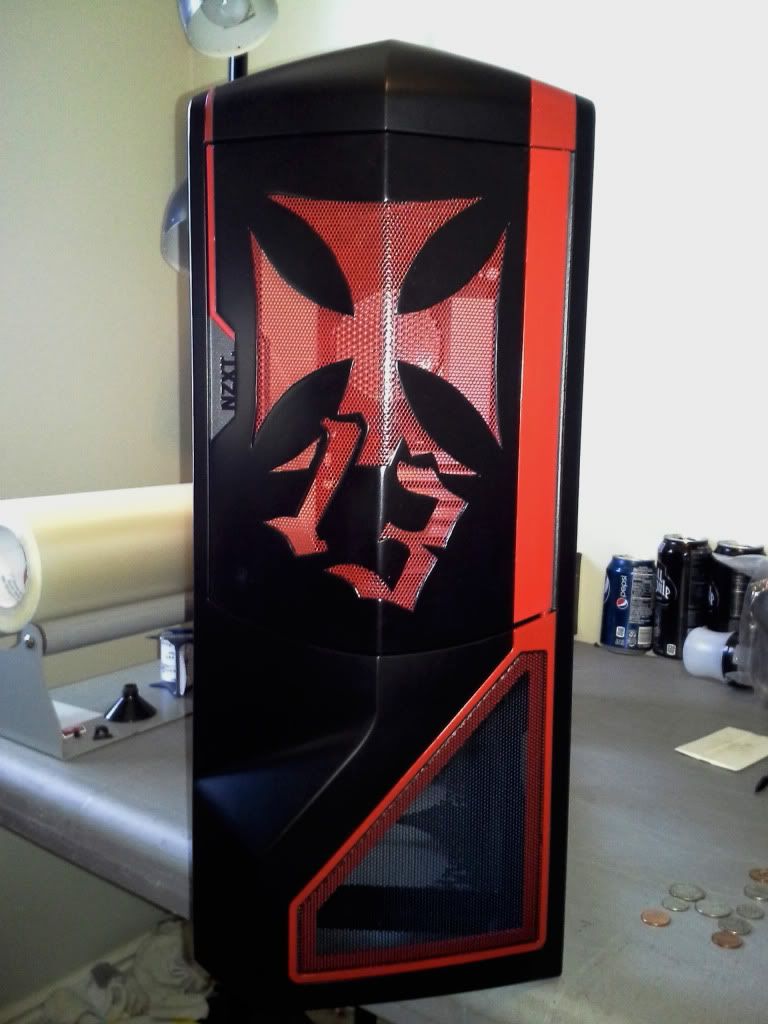
On to the mod. I decided on Lucky 13 for the name, because I like the brand, and it deals around the old school hot rod scene, which is the theme I wanted to go far.
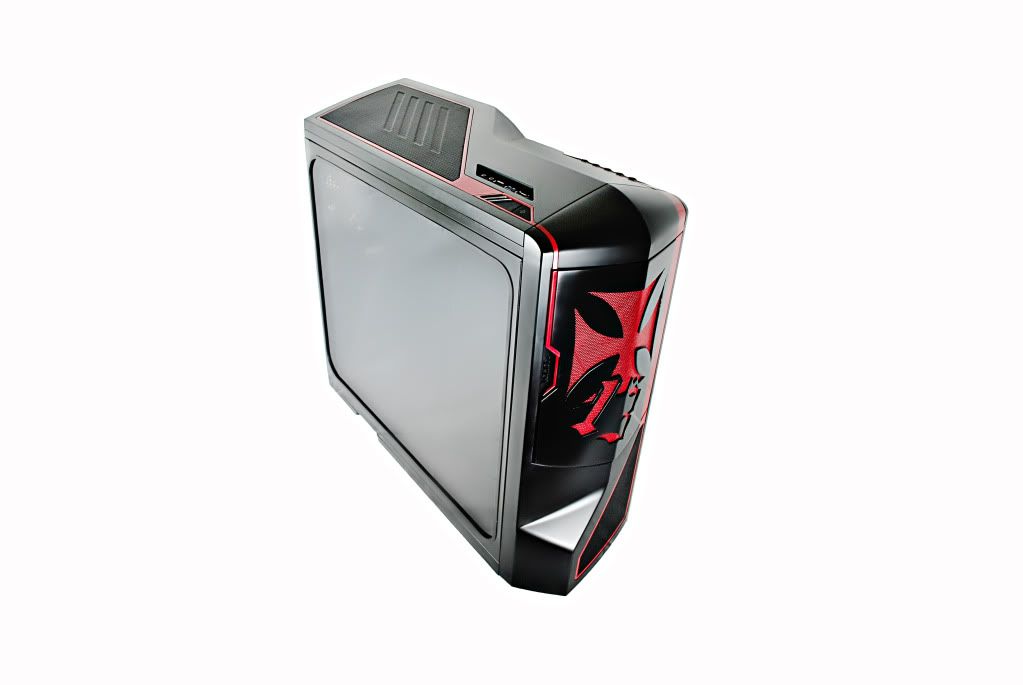
I loved NZXT's Phantom case, ever since I laid eyes on it in a few forums. It's shape, size and cable management possibilities are great, not to mention the moddable aspect of them. I loved my white Phantom, but with all of my watercooling gear, it felt cramped, and I got sick of feeling claustrophobic, looking inside the case. So I obtained a black Phantom, and got started.
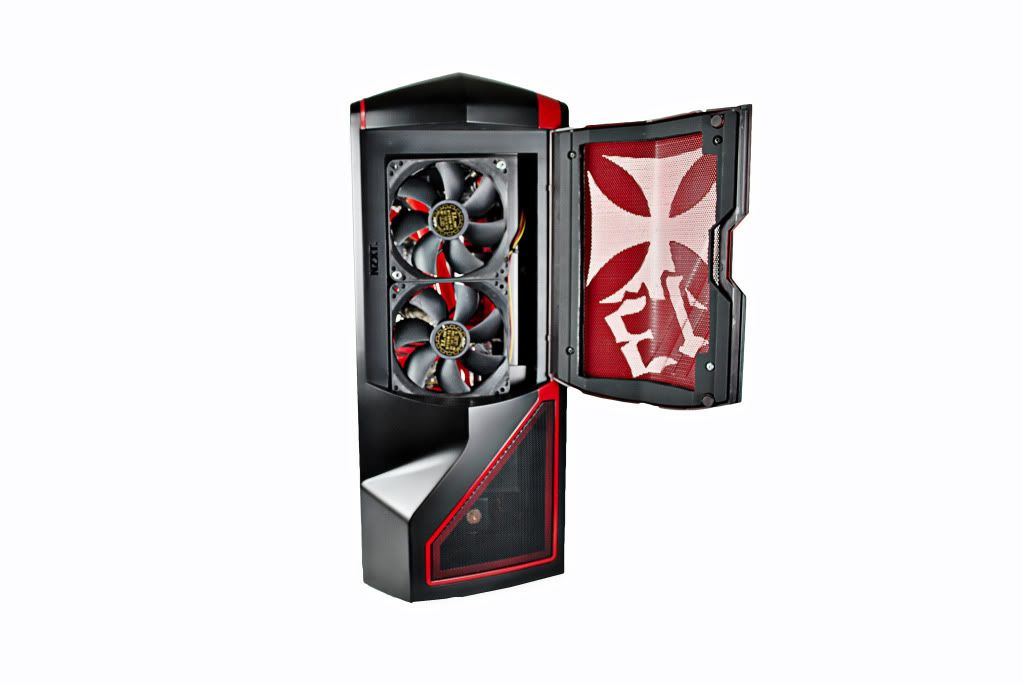
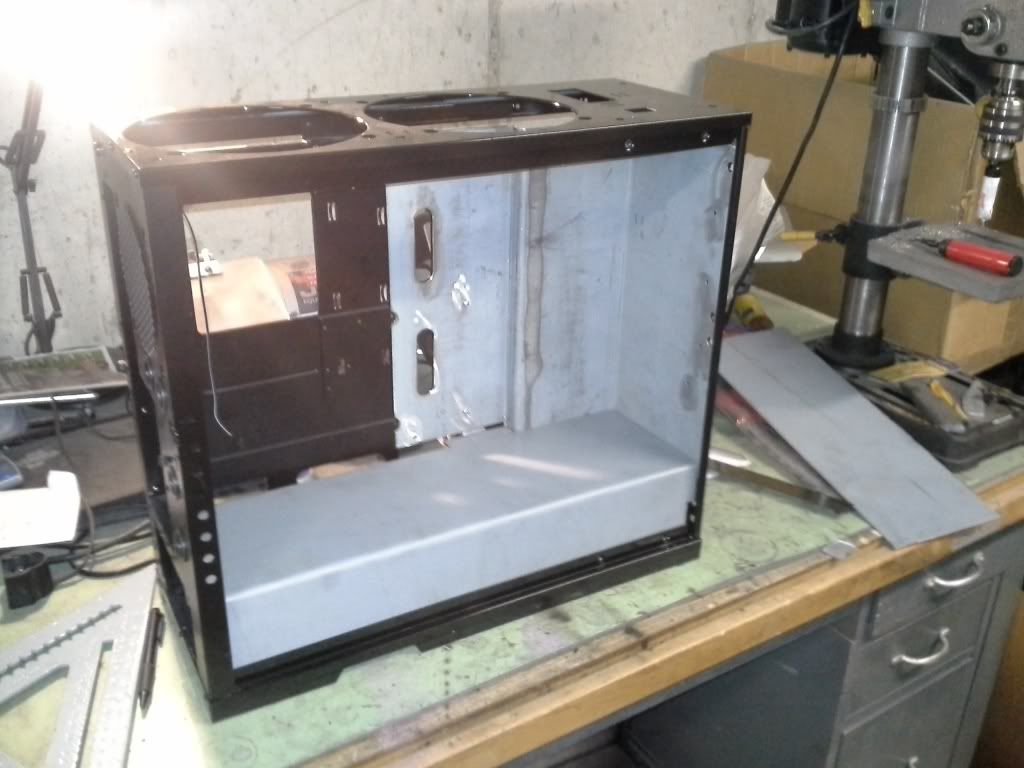
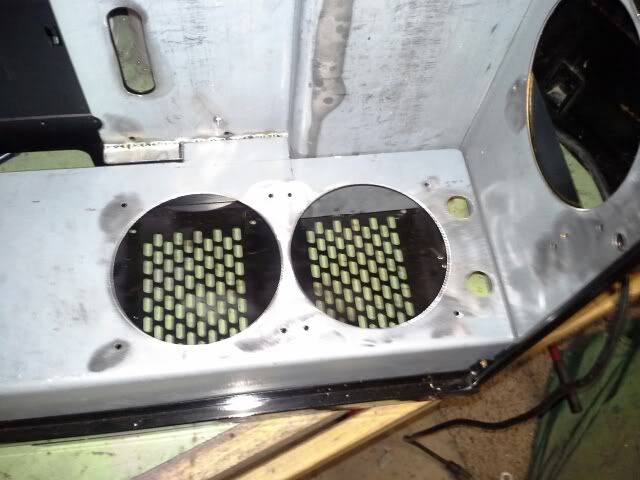
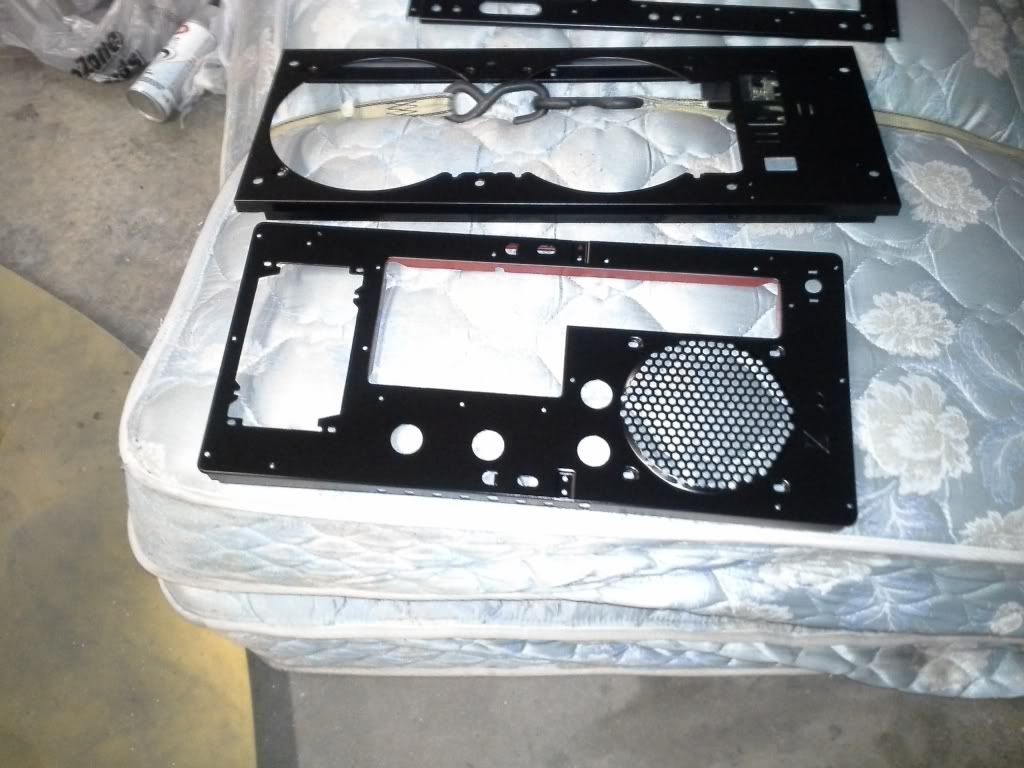
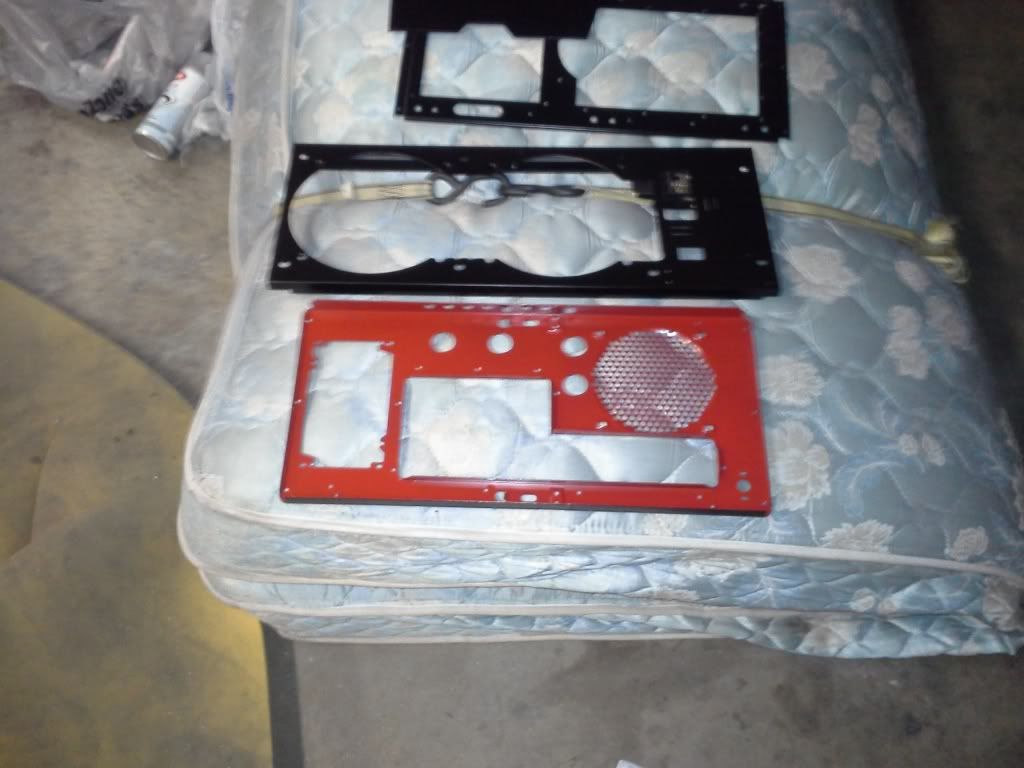
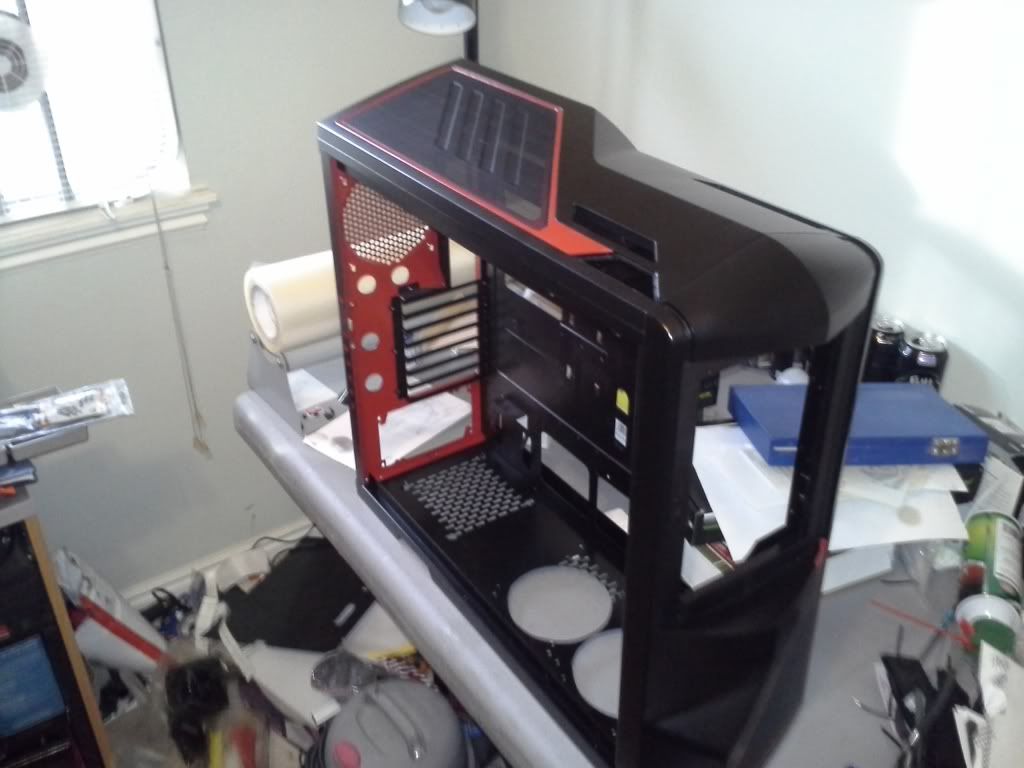
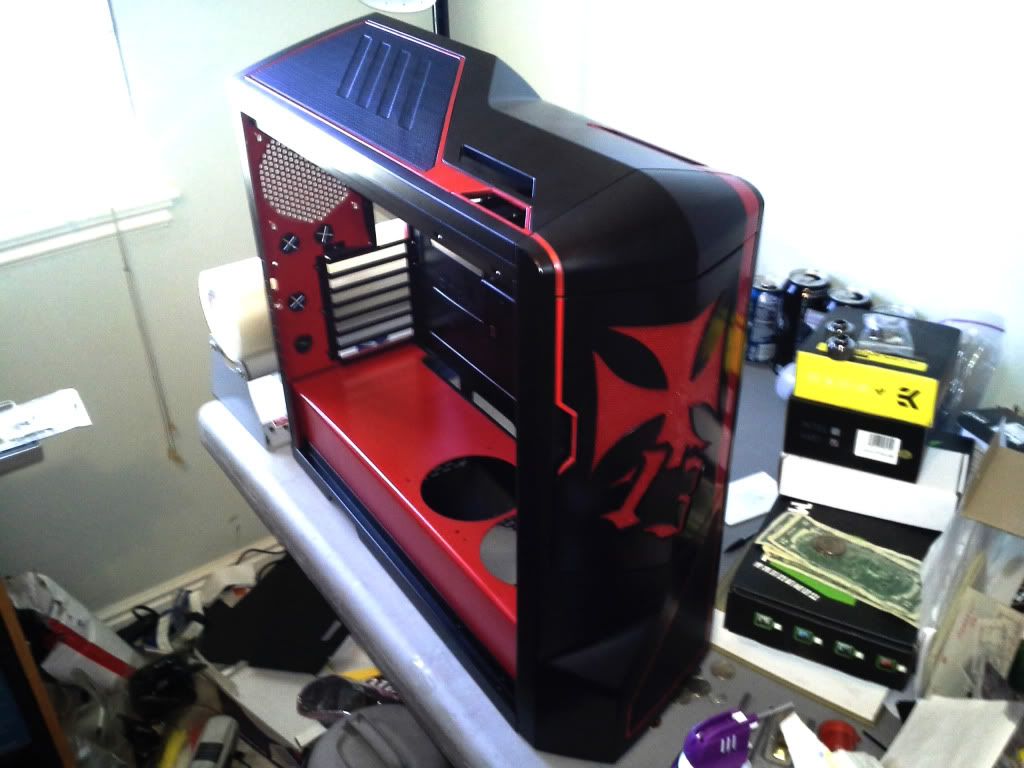
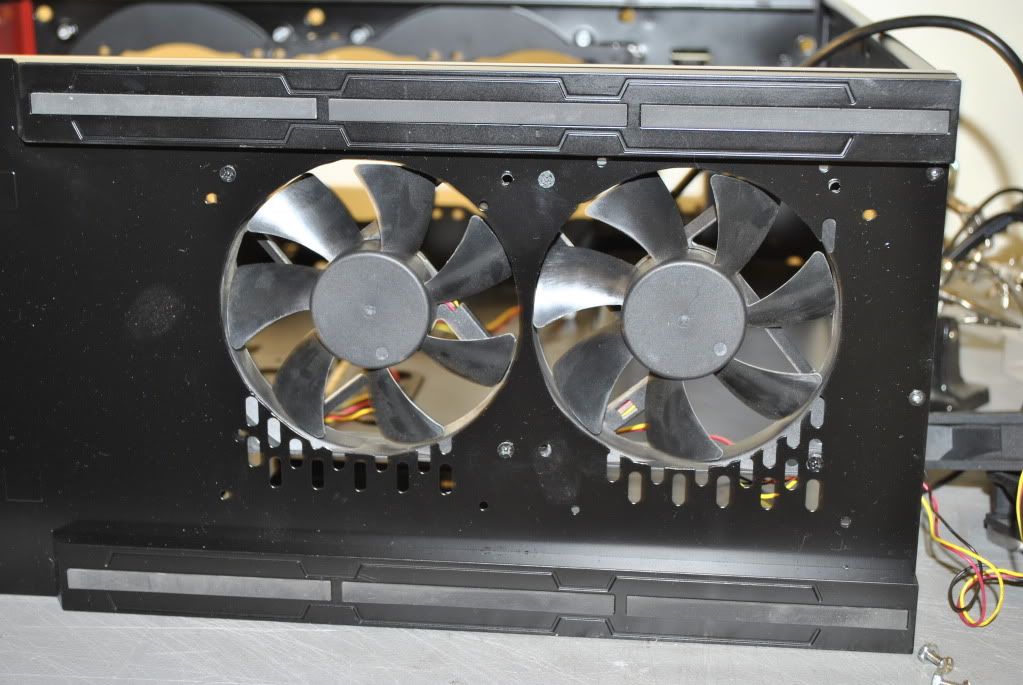
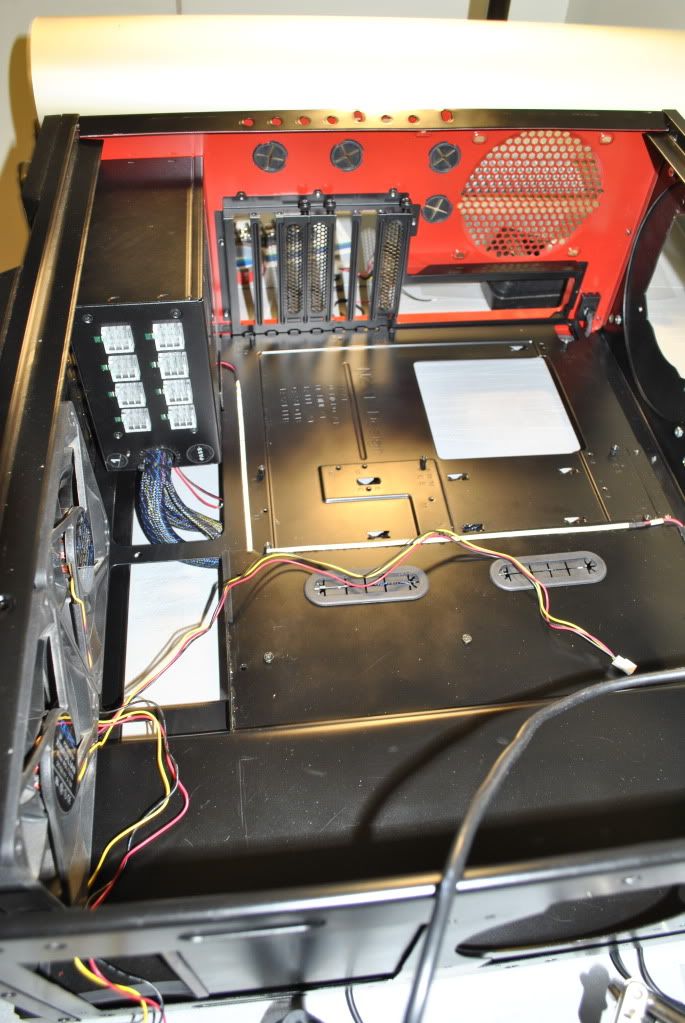
I ditched the 5.25", and all the HDD bays immediately. I fabricated a panel to smooth out the visible part of the MB tray, and gave me room to mount my HDD and SSD's in the back of the case, and wrapped it around to the front of the case also. I decided to add 2 more 120mm fans where the 5.25" bays used to be, since I removed the original fan mount on the front of the case. Next, I made up my PSU, and radiator shroud for the bottom of the case.
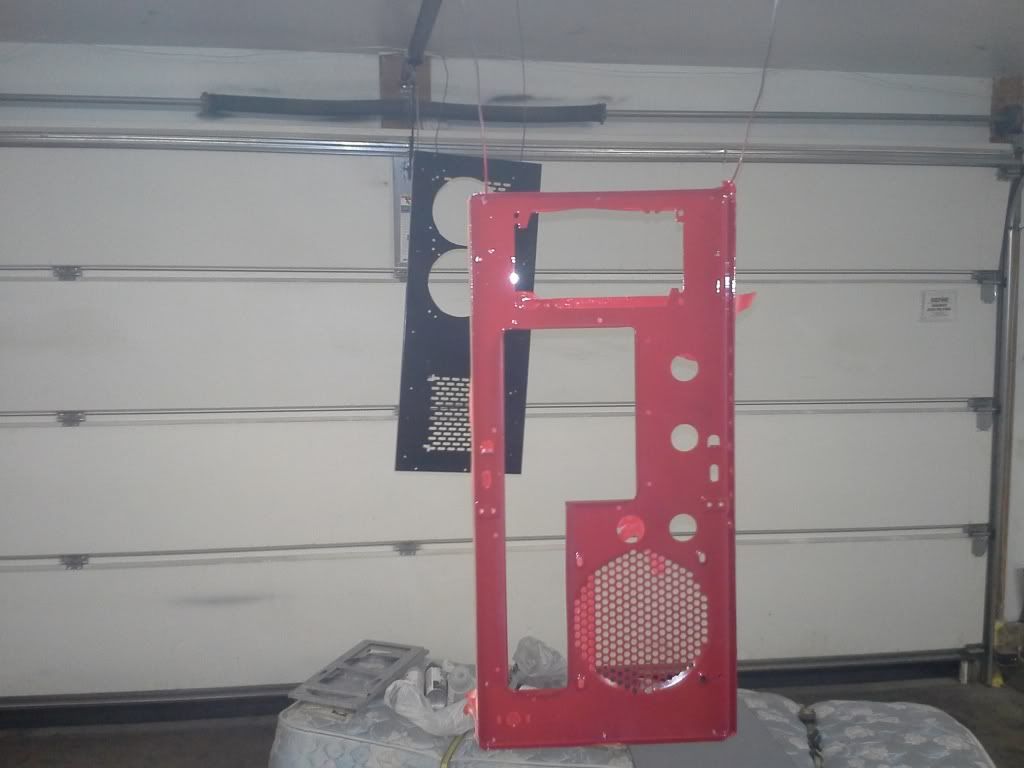
Once I had all of that test fitted, I drilled out all the rivets on the case, sandblasted all the panels(except for the plastic pieces of course) and got to repainting. I painted the exterior, the MB tray, and cover satin black. I then taped off the back side of the rear panel, and painted it, and the PSU/rad shroud, and the exterior plastic trim, satin red, to accent all of the black.
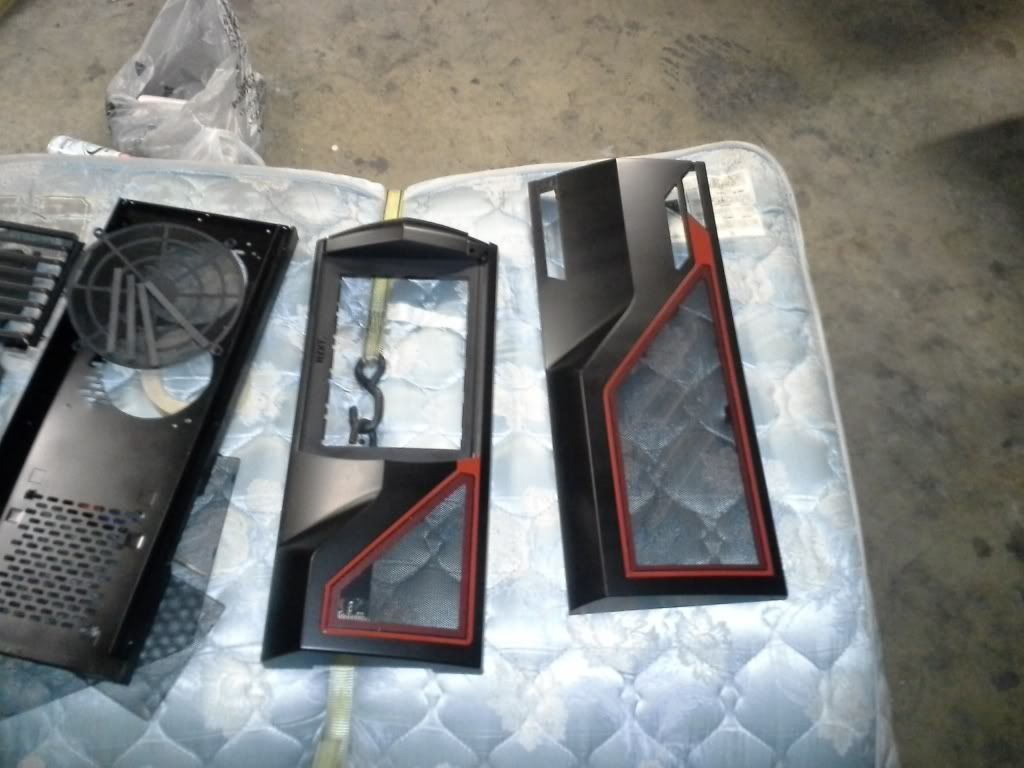
Reassembly of the case after painting.
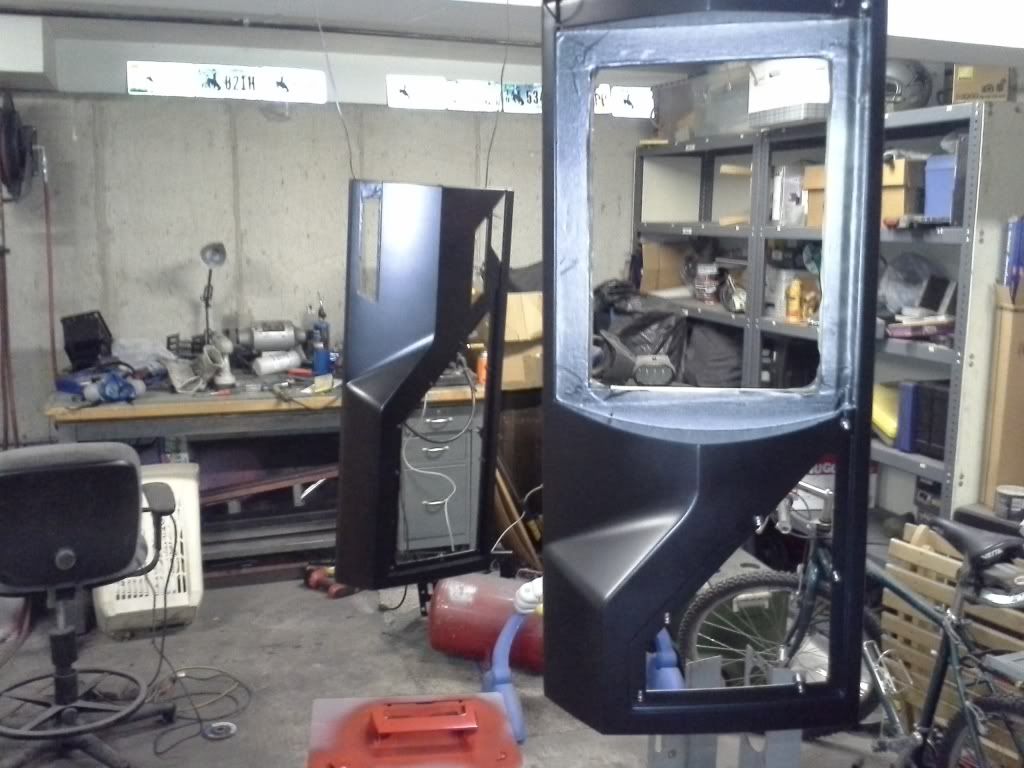
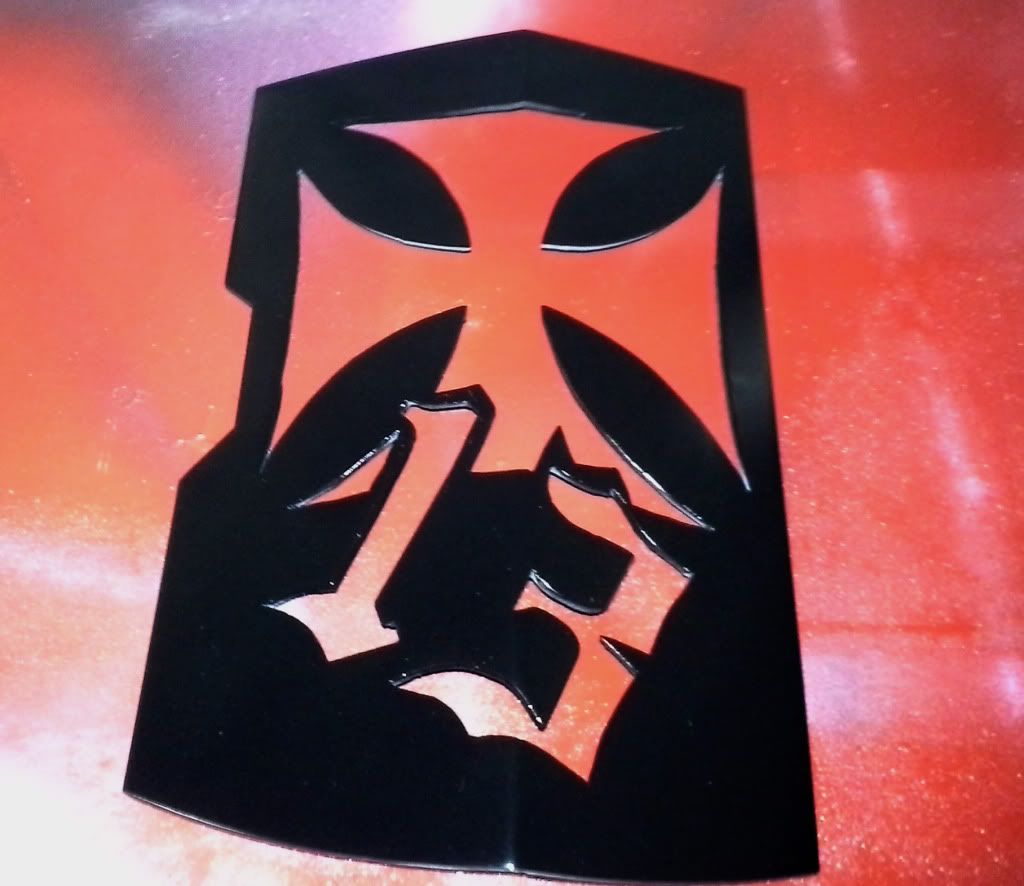
I then decided that the front door of the case needed to be able to flow some air, for the 2 new fans that I was going to install, and took the opportunity to make something special. This is what I came up with.

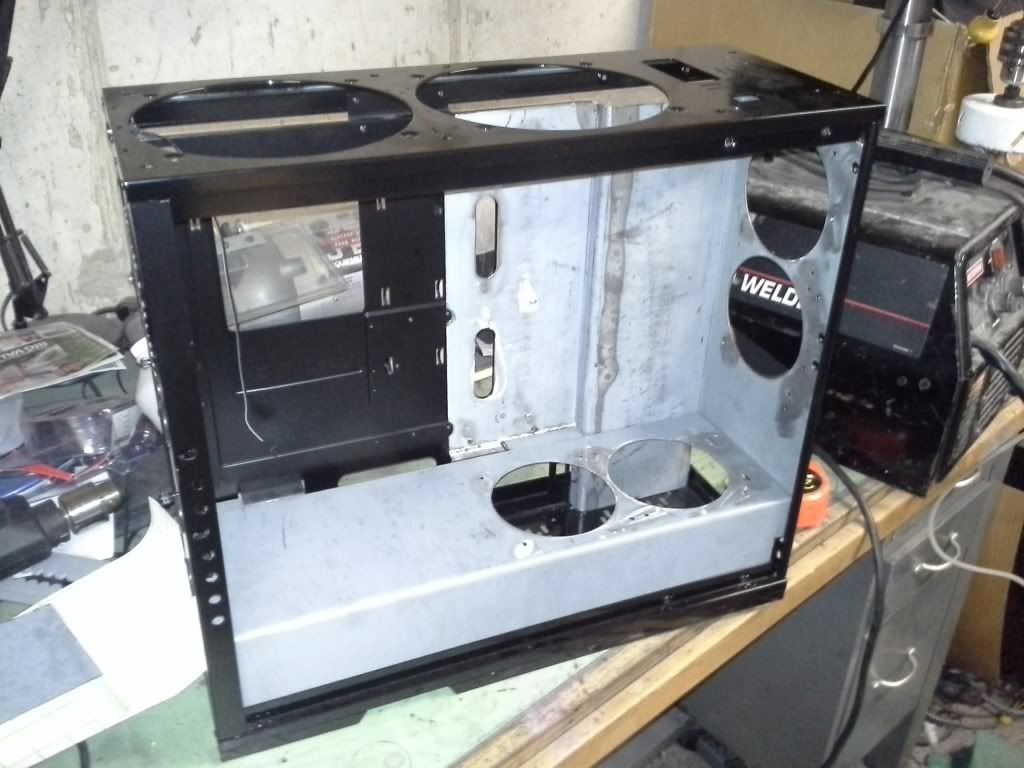
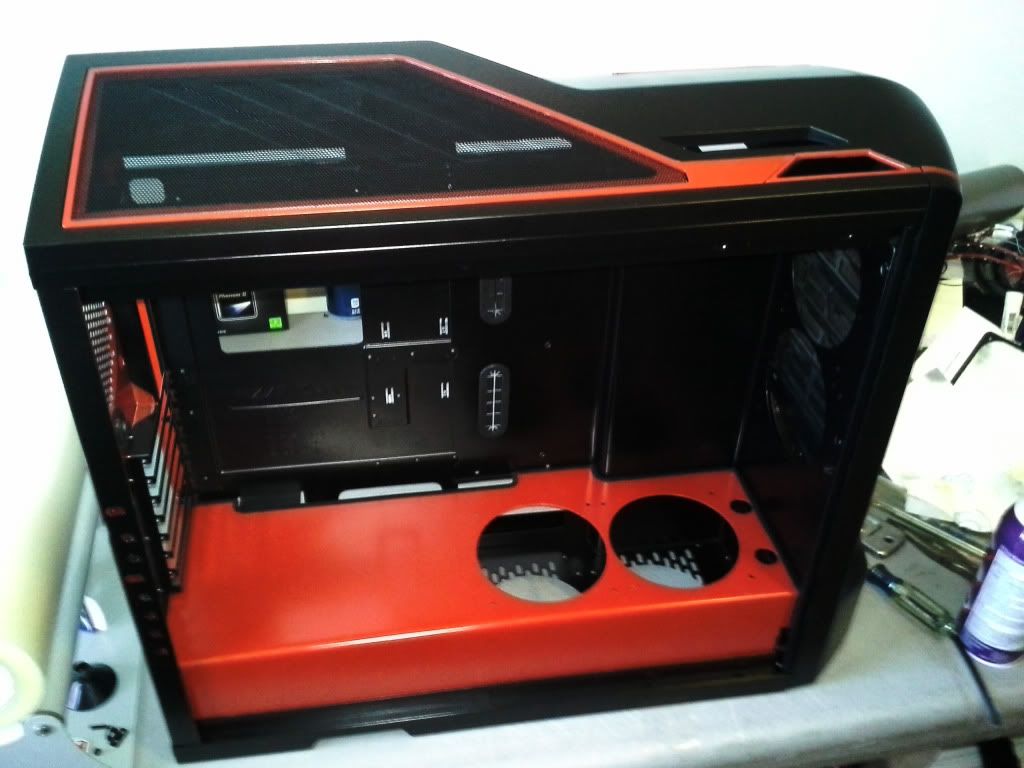
Case and new fab'd parts all put together.
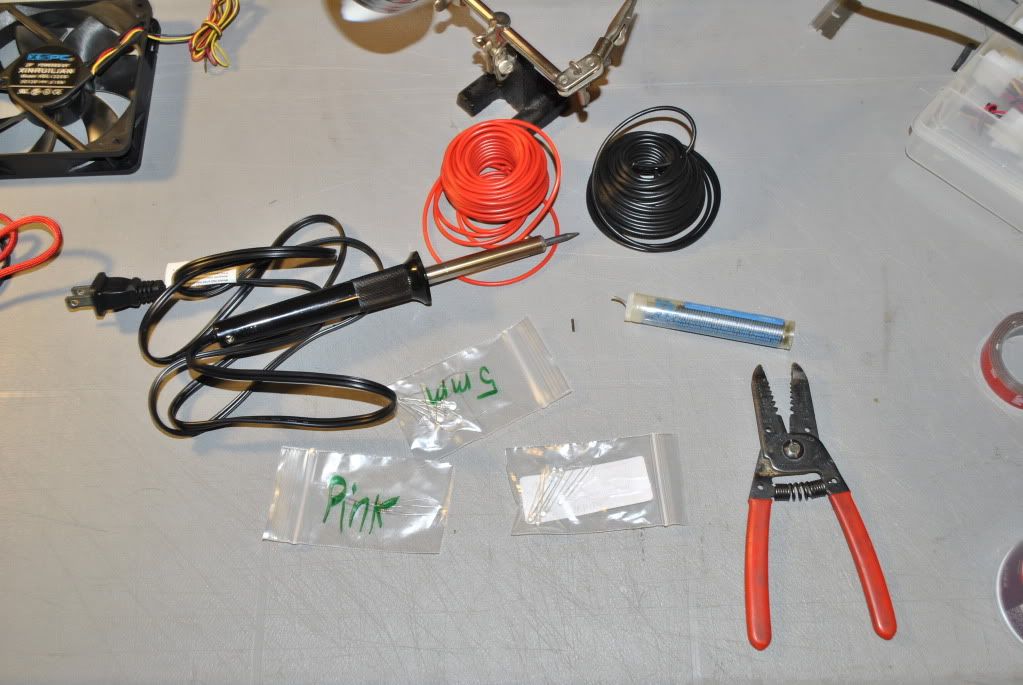
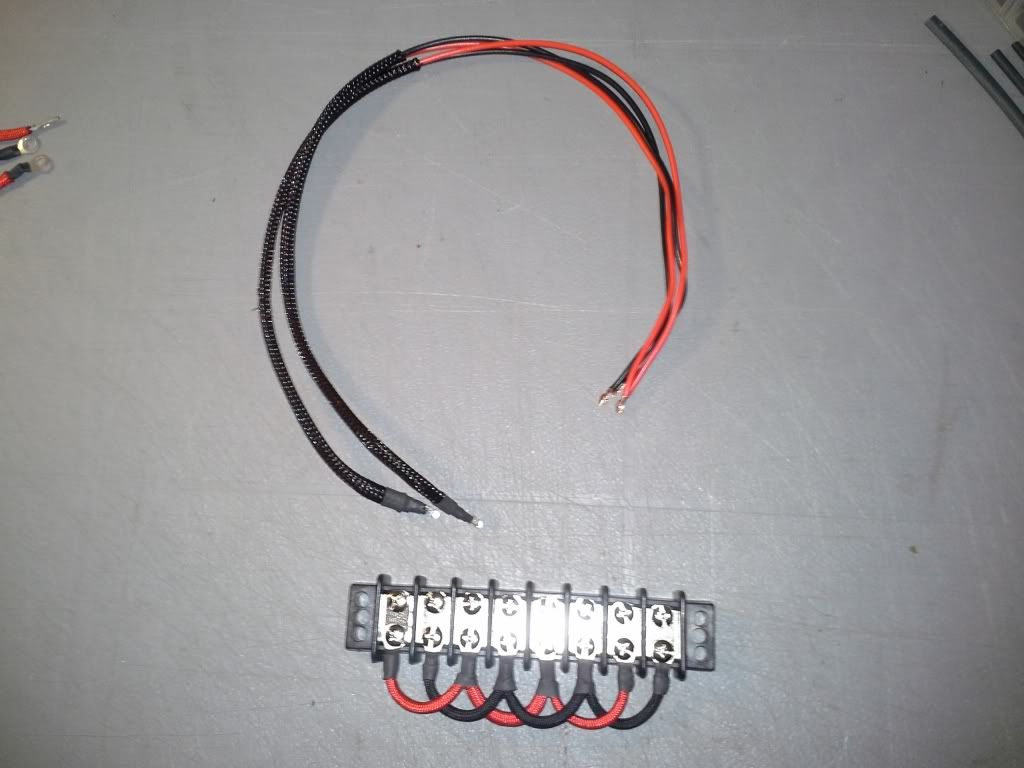
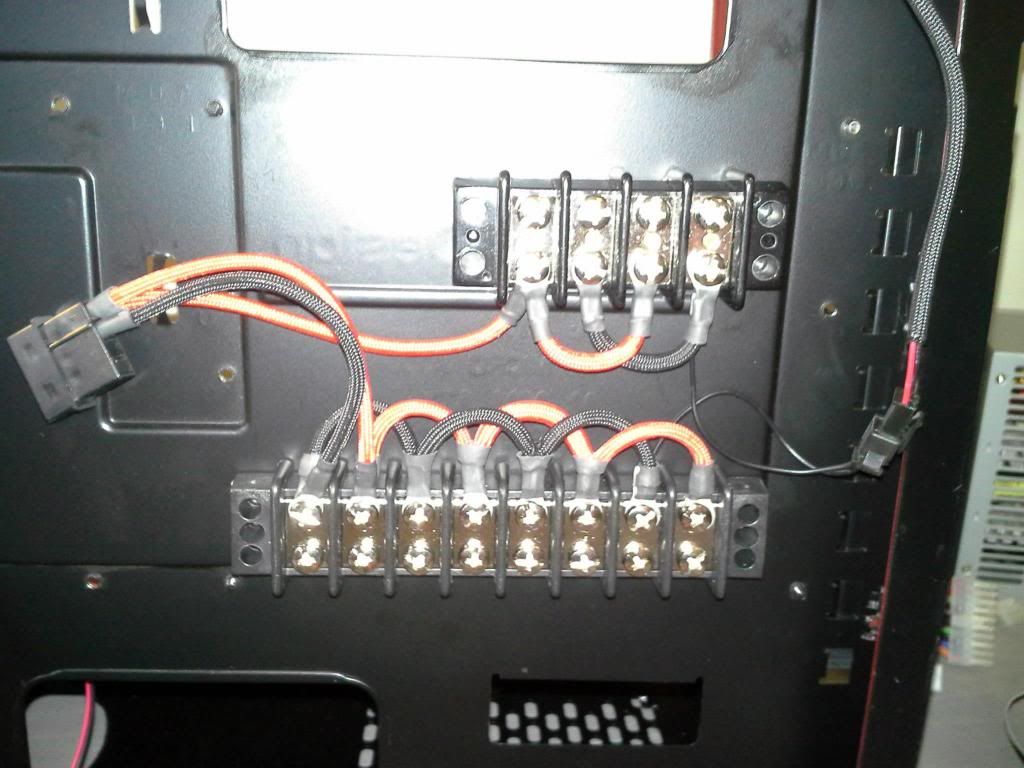
Once all of the big modding jobs were completed, I got started build all of my wiring blocks for my pumps, and LED's. Turned out to be a good time to do it, while I waited for my new reservoir to arrive.
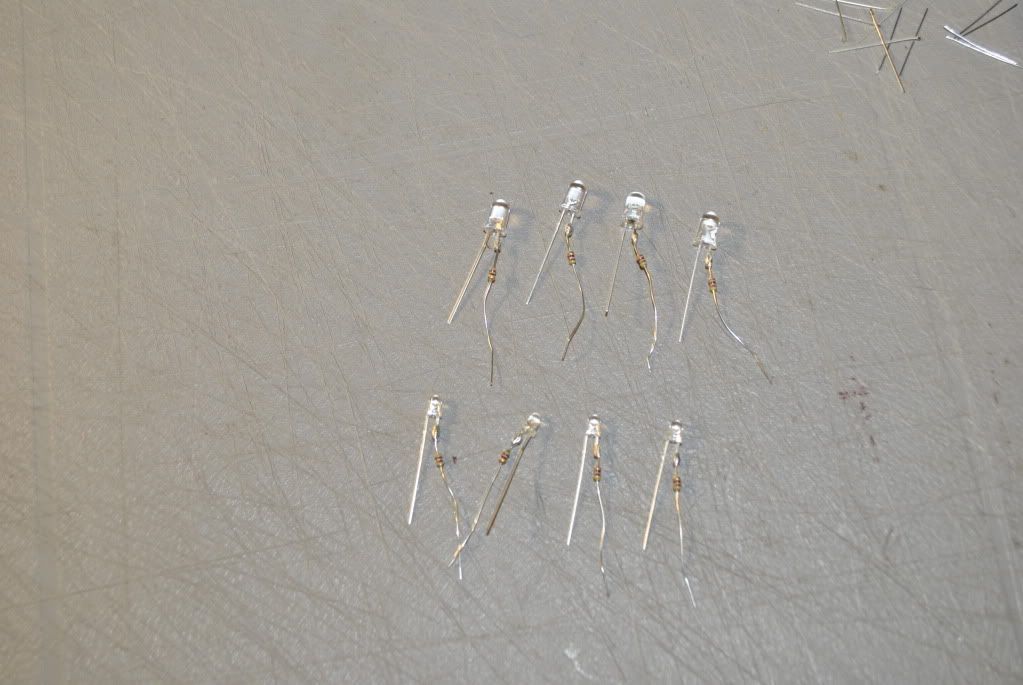
Resistors soldered onto the LED's
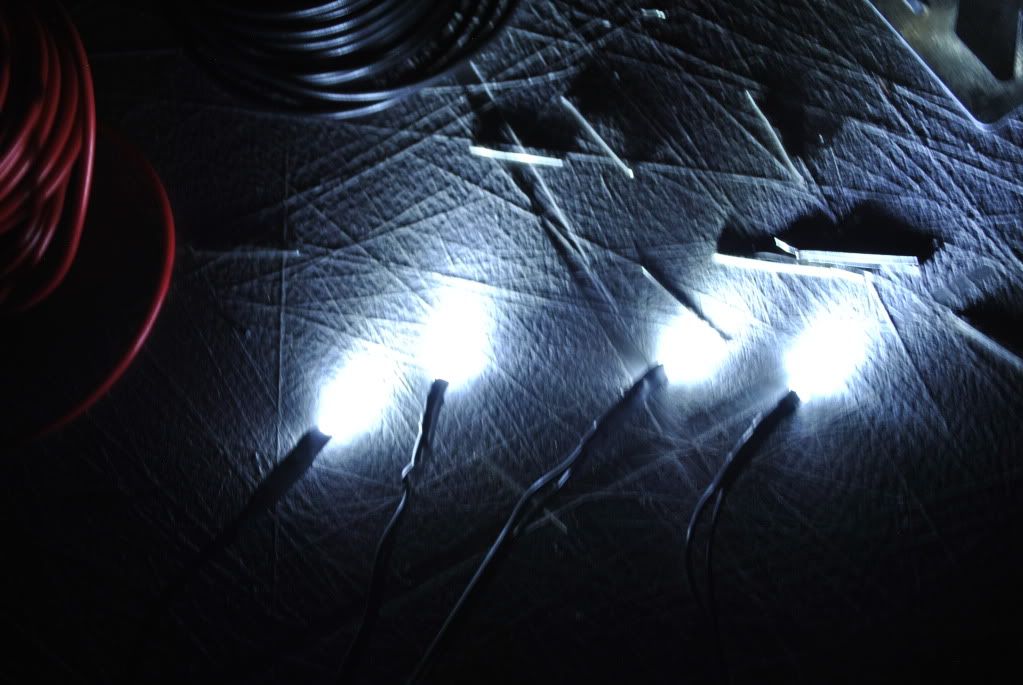
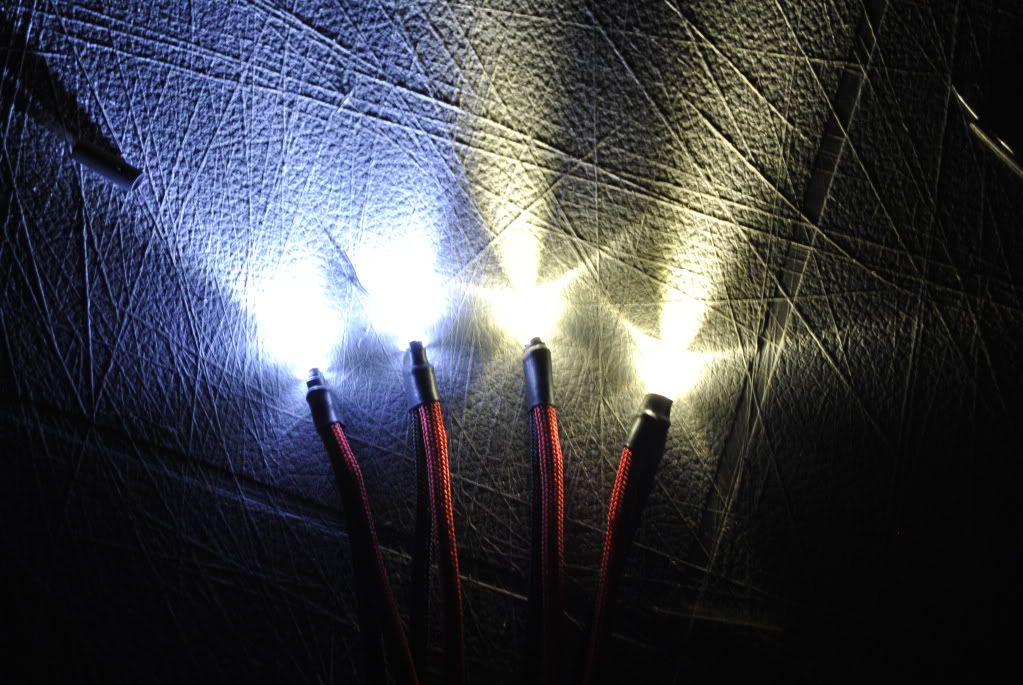
They worked! Success!
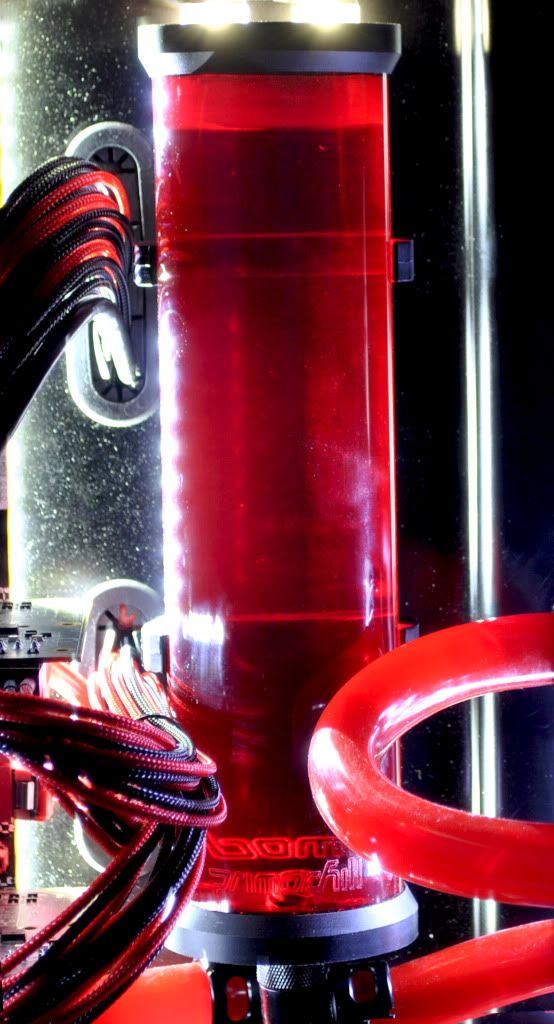
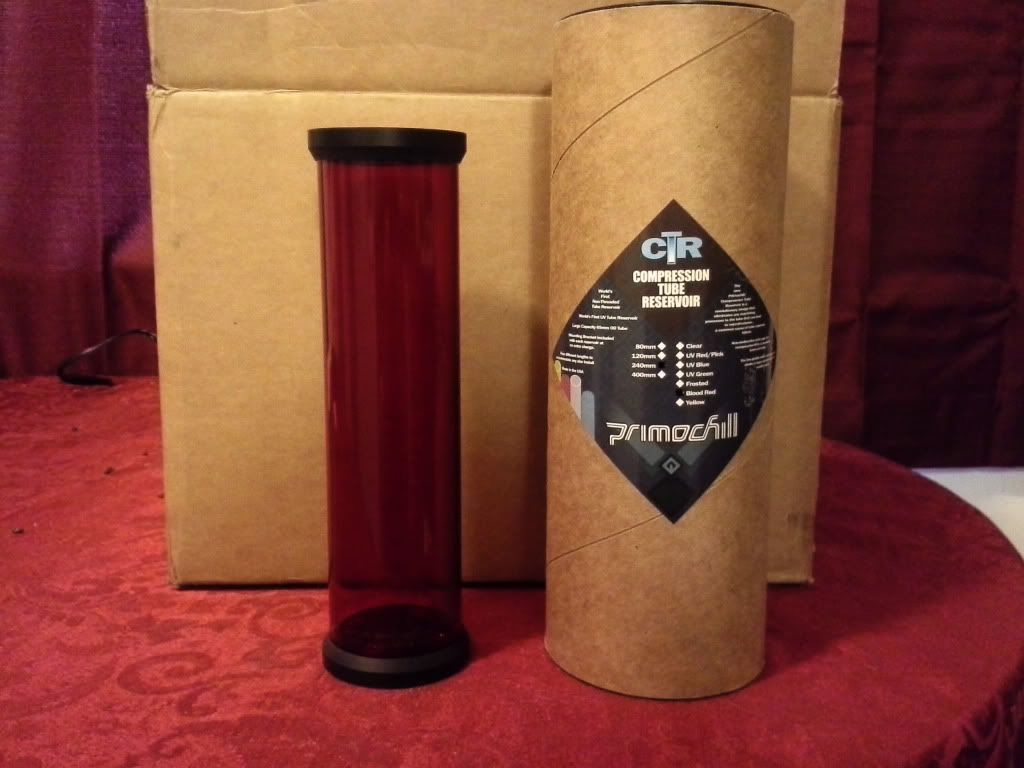
The first Primochill Compression Tube Reservoir to leave there building
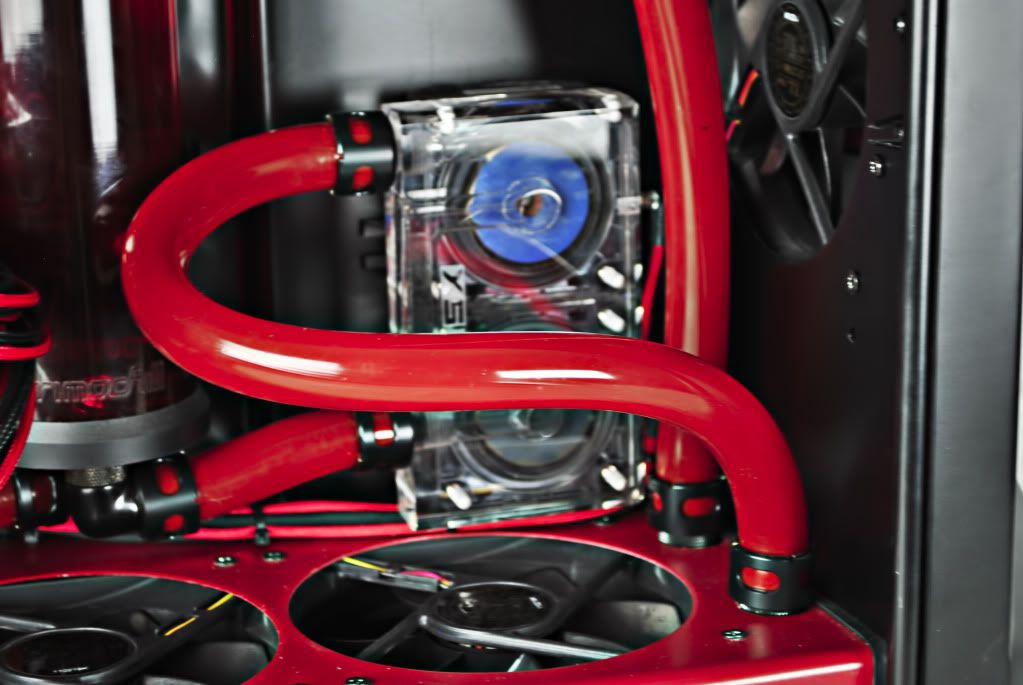
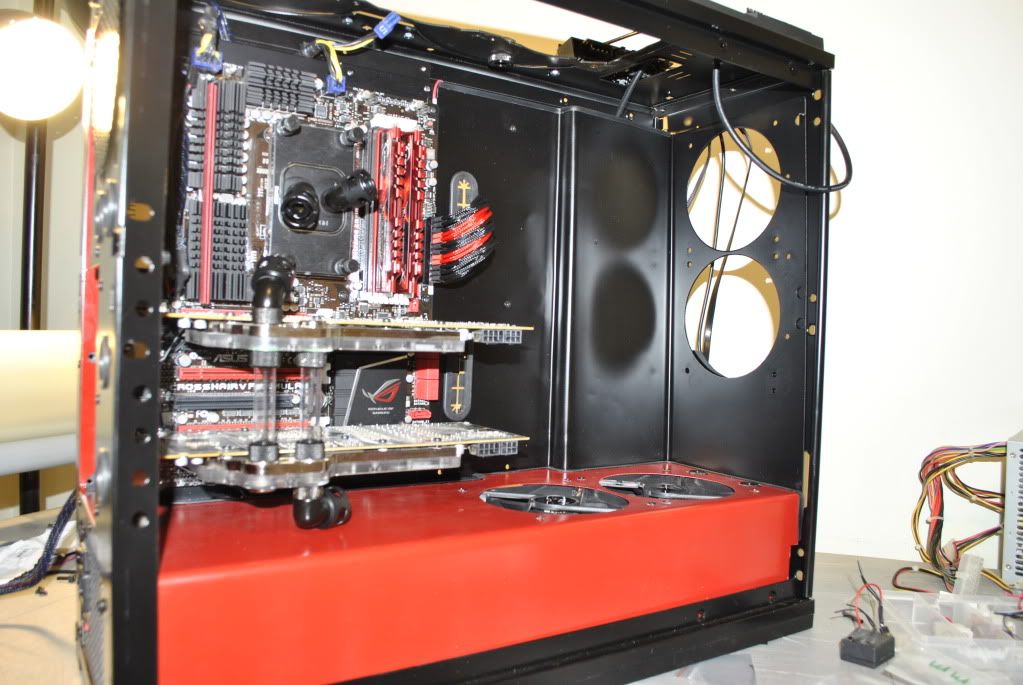
With the arrival of the new res, and tubing, the transfer of hardware could commence!

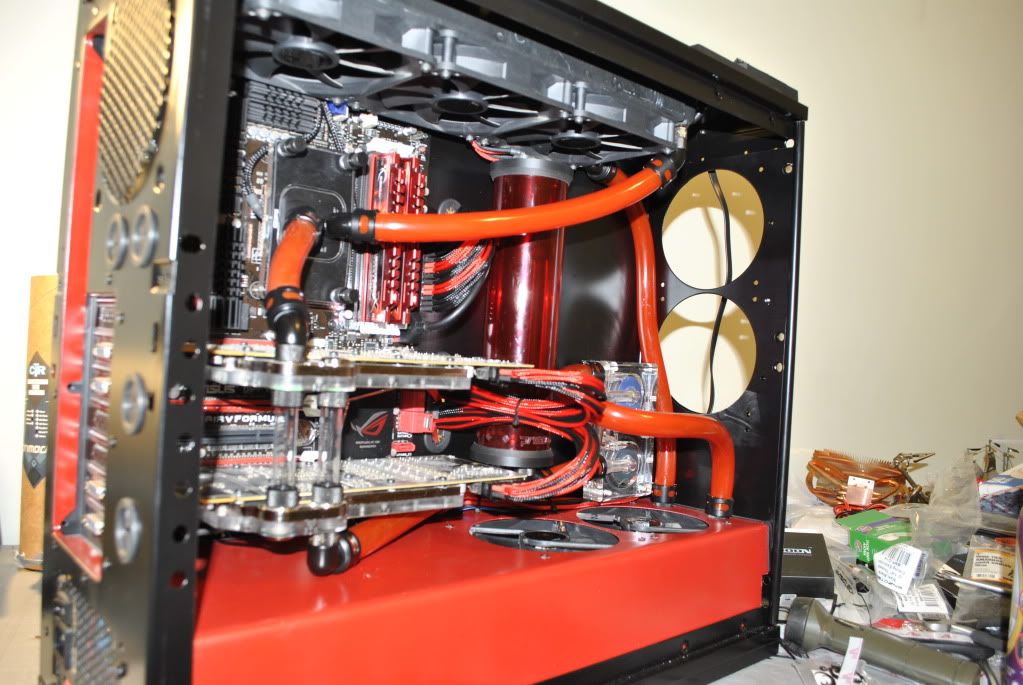
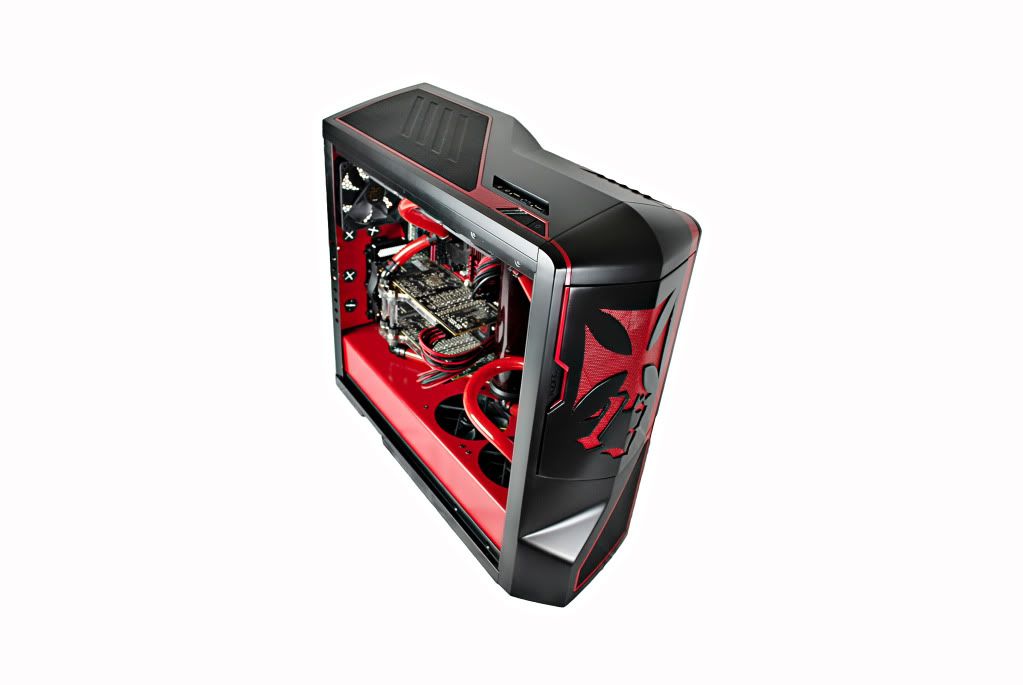
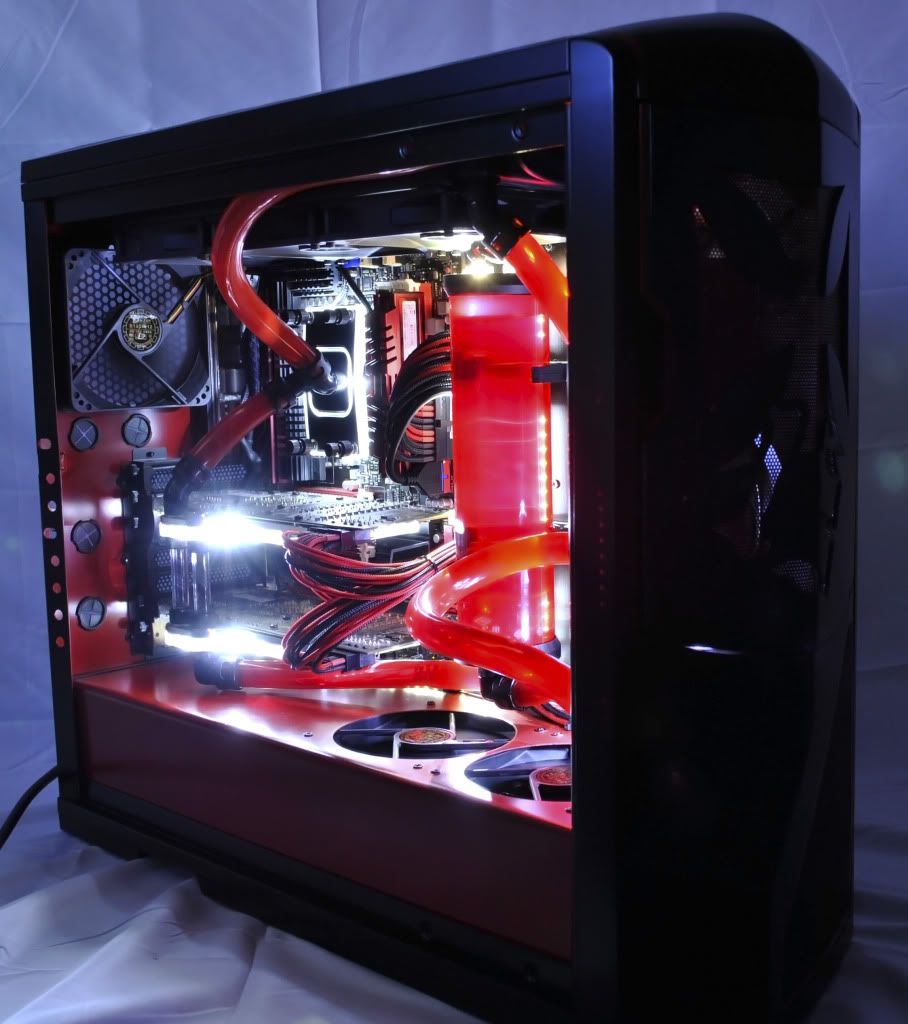
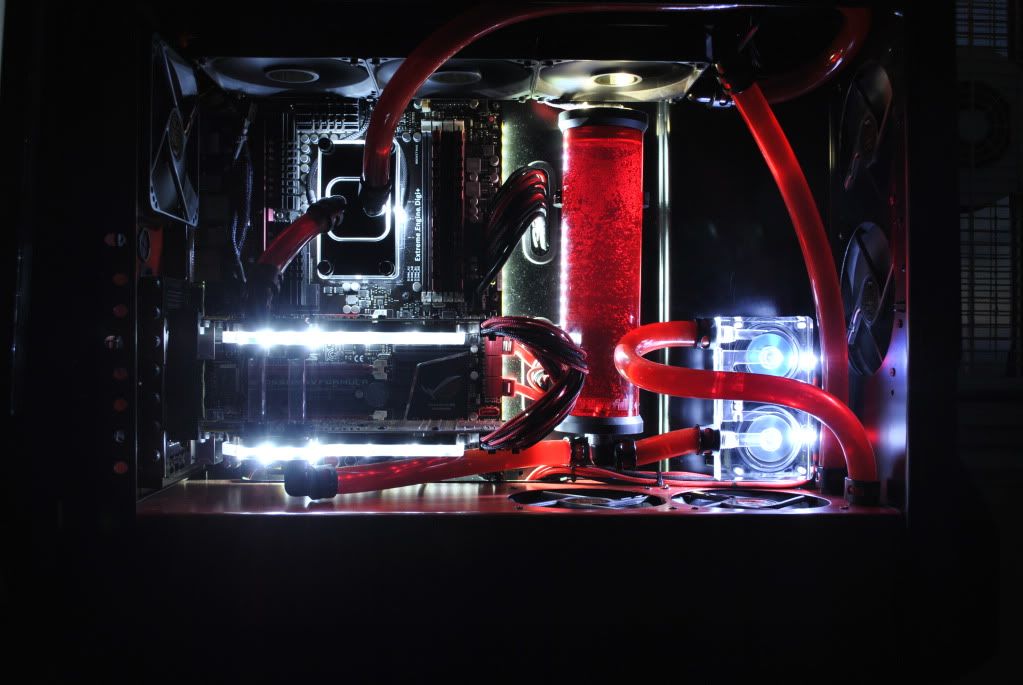
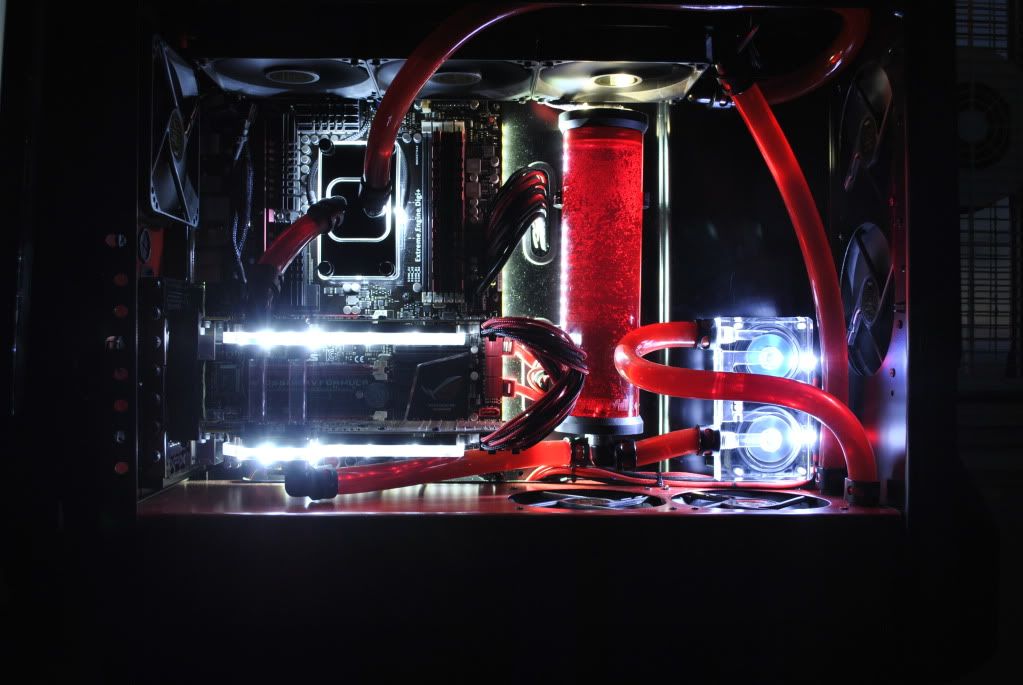
Here is how she sits now, back up and running. I'm still going to doing a better photoshoot of the build later tomorrow, and will update the log with the new pics.
I just completed this mod yesterday, and got some free time to make a log.
System Specs are
Asus CrosshairFormula V
AMD FX-8120 @4.6Ghz
16GB G.Skill Ripjaw 1600Mhz
2 - XFX 6970 w/EK 6970v2 water blocks - Bitspower Crytal links
XSPC Raystorm CPU Block
2 - MCP355 Pumps w/ XSPC Dual Pumo Acrylic
Alphacool 240mm Radiator
XSPC RS360 Radiator
Primochill Compression Tube Reservoir
Primochill Primoflex PRO LRT UV Red Tubing
2 - Corsair Force Series 3 60GB SSD in Raid0
1 Seagate Barracude 7200rpm 2TB for storage.
ModSmart 24pin, 6pin PCIe, 8pin PCIe sleeved cable extensions.
A little background for the motivation on this build. I've been into hot rods for a good majority of my life. I used to modify and drag race a few of the cars I have owned through out the years. Mostly Camaro's, but I've built a few decent DSM's as well. 2 years ago, I injured my shoulder at work, and have not been able to do any of the heavy mechanicing that I used to be able to do. I have since had 3 surgeries on my shoulder, and have been told heavy lifting or a lot of repetitive work is going to be off of my list of capabilities now.
Luckily, I have also been building and fixing computers for at least the last 10 years as a smaller, back burner(winter) hobby. So I started modding cases, and building more computers while recovering from my surgeries. It has now become my passion, and I can do it one handed if the need ever arises again
On to the mod. I decided on Lucky 13 for the name, because I like the brand, and it deals around the old school hot rod scene, which is the theme I wanted to go far.
I loved NZXT's Phantom case, ever since I laid eyes on it in a few forums. It's shape, size and cable management possibilities are great, not to mention the moddable aspect of them. I loved my white Phantom, but with all of my watercooling gear, it felt cramped, and I got sick of feeling claustrophobic, looking inside the case. So I obtained a black Phantom, and got started.
I ditched the 5.25", and all the HDD bays immediately. I fabricated a panel to smooth out the visible part of the MB tray, and gave me room to mount my HDD and SSD's in the back of the case, and wrapped it around to the front of the case also. I decided to add 2 more 120mm fans where the 5.25" bays used to be, since I removed the original fan mount on the front of the case. Next, I made up my PSU, and radiator shroud for the bottom of the case.
Once I had all of that test fitted, I drilled out all the rivets on the case, sandblasted all the panels(except for the plastic pieces of course) and got to repainting. I painted the exterior, the MB tray, and cover satin black. I then taped off the back side of the rear panel, and painted it, and the PSU/rad shroud, and the exterior plastic trim, satin red, to accent all of the black.
Reassembly of the case after painting.
I then decided that the front door of the case needed to be able to flow some air, for the 2 new fans that I was going to install, and took the opportunity to make something special. This is what I came up with.
Case and new fab'd parts all put together.
Once all of the big modding jobs were completed, I got started build all of my wiring blocks for my pumps, and LED's. Turned out to be a good time to do it, while I waited for my new reservoir to arrive.
Resistors soldered onto the LED's
They worked! Success!
The first Primochill Compression Tube Reservoir to leave there building
With the arrival of the new res, and tubing, the transfer of hardware could commence!
Here is how she sits now, back up and running. I'm still going to doing a better photoshoot of the build later tomorrow, and will update the log with the new pics.