Navigation
Install the app
How to install the app on iOS
Follow along with the video below to see how to install our site as a web app on your home screen.
Note: This feature may not be available in some browsers.
More options
You are using an out of date browser. It may not display this or other websites correctly.
You should upgrade or use an alternative browser.
You should upgrade or use an alternative browser.
Project: Large Wooden Tower
- Thread starter Spotswood
- Start date
RexPokinghorn
2[H]4U
- Joined
- Aug 2, 2001
- Messages
- 3,055
Looking great ")
Thanks for the encouragement guys.
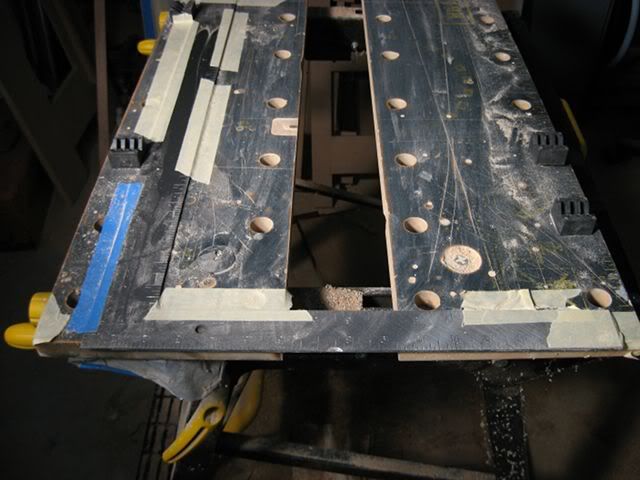
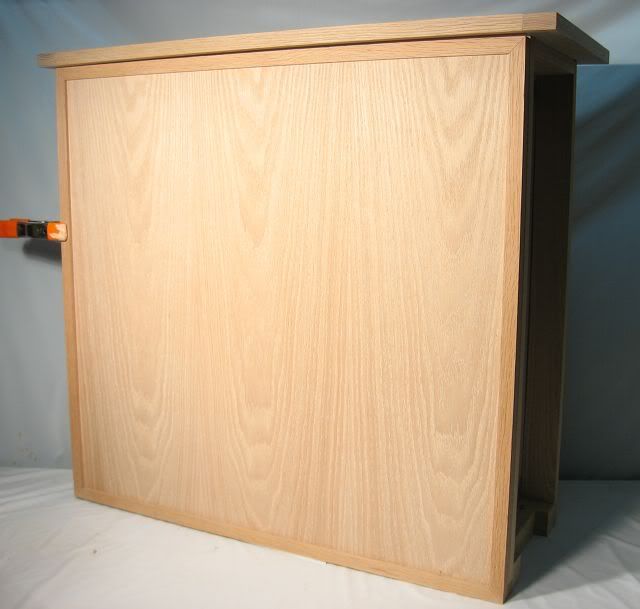
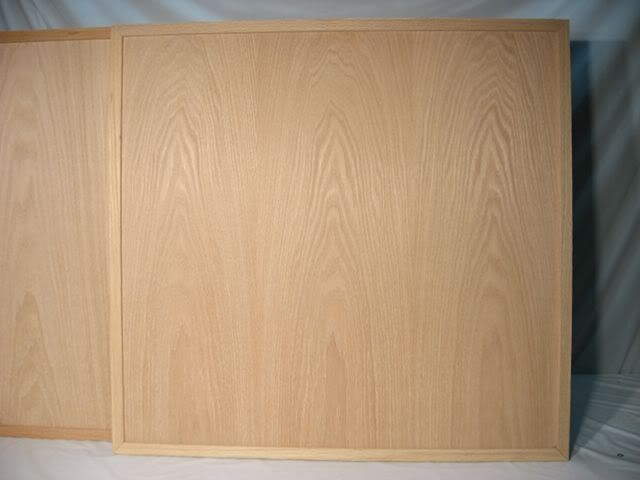
The ends of the top were cut with... Anyone? Anyone? ...a router fitted with a flush/trim bit. The "jig" used to make sure the cut was nice and square was a framing square taped to the workbench.
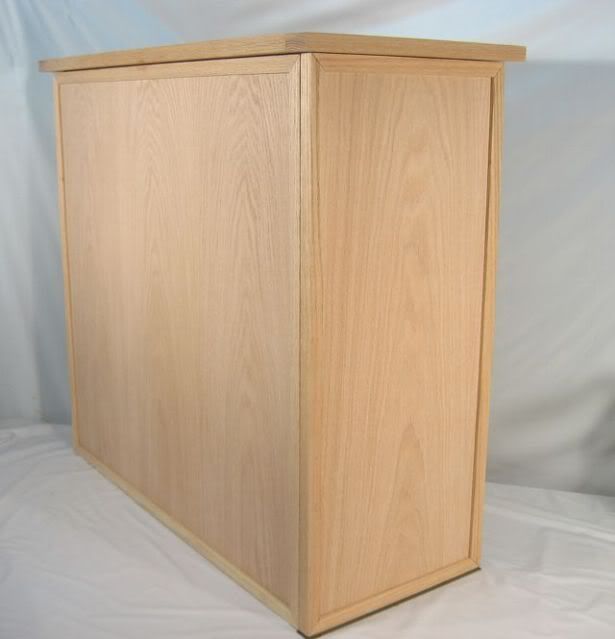
Completed top:
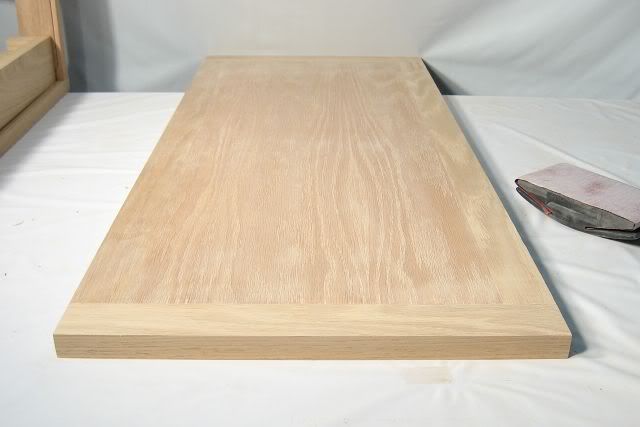
The top took a lot of time to complete. For the next 100 cases, I'll have to come up with either a simpler design or a more efficient fabrication technique.
The ends of the top were cut with... Anyone? Anyone? ...a router fitted with a flush/trim bit. The "jig" used to make sure the cut was nice and square was a framing square taped to the workbench.
Completed top:
The top took a lot of time to complete. For the next 100 cases
, I'll have to come up with either a simpler design or a more efficient fabrication technique.Thanks for the encouragement guys.
The ends of the top were cut with... Anyone? Anyone? ...a router fitted with a flush/trim bit. The "jig" used to make sure the cut was nice and square was a framing square taped to the workbench.
Completed top:
The top took a lot of time to complete. For the next 100 cases
100 more of these?This case is being built as a hobby of mine, but that could change depending on interest. Over at XS a lot of members were drooling over a case design that this one is based on, but this one is being fab'd out of wood, which will probably lessen its overall appeal (although I don't know that for sure). I hope many other water cooling enthusiasts will commission this case (or any variation of it).
lol you dont have to go to XS to see people drooling over this case design (I am, right here) . i have my own plans in set for a case (not wood ) therefore i could not take advantage of the commission of this case...any who still looks great man, very professional woodwork there. Do you have prior experiance in crafting things out of wood?
. i have my own plans in set for a case (not wood ) therefore i could not take advantage of the commission of this case...any who still looks great man, very professional woodwork there. Do you have prior experiance in crafting things out of wood?
Last edited:
I haven't built too many furniture-grade projects, mostly home remodels etc. But then I've built a fair amount of round wooden cases:l... Do you have prior experiance in crafting things out of wood?
Base model will be $499. This particular case has a few extras, such as the EATX MB tray, "table" top and a skirt/extra trim on the bottom, etc.before i get too excited, any estimate on price for one of these?
FrEaKy
[H] Movie and TV Show Review Guy
- Joined
- Jan 31, 2003
- Messages
- 14,113
that would look very nice with a light stain and a good gloss..... mmmmmmm
Kaldskryke
[H]ard|Gawd
- Joined
- Aug 1, 2004
- Messages
- 1,346
Base model will be $499. This particular case has a few extras, such as the EATX MB tray, "table" top and a skirt/extra trim on the bottom, etc.
That's a really amazing price for such great work, especially when you consider how much people will pay for a bland MM case with less cooling potential. I'd be interested except I have neither the space or the need for such an incredibly large case.
Anyway it looks fantastic. I can't wait to see the finished product.
Cerulean
[H]F Junkie
- Joined
- Jul 27, 2006
- Messages
- 9,476
Bump.
Love the case!
Love the case!
I couldn't agree with you more.That's a really amazing price for such great work, especially when you consider how much people will pay for a bland MM case with less cooling potential.
Thank you! I could build you a smaller case, PM me if you're interested.I'd be interested except I have neither the space or the need for such an incredibly large case. Anyway it looks fantastic. I can't wait to see the finished product.
qiaowenqian
Limp Gawd
- Joined
- Jul 10, 2009
- Messages
- 500
looks great!!!!
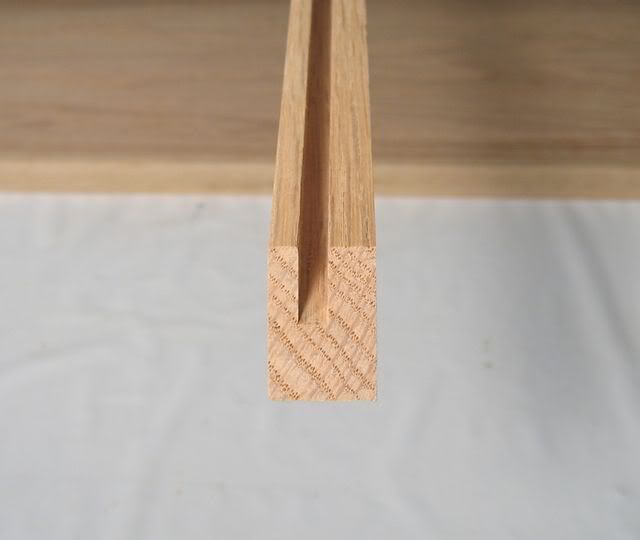
Somehow I managed to break both of my 5.2mm straight router bits, so work on the other side and front panels will have to wait a few days.
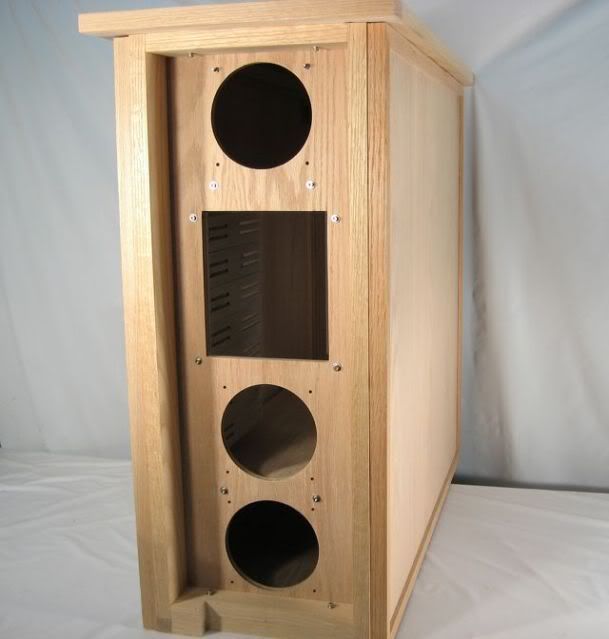
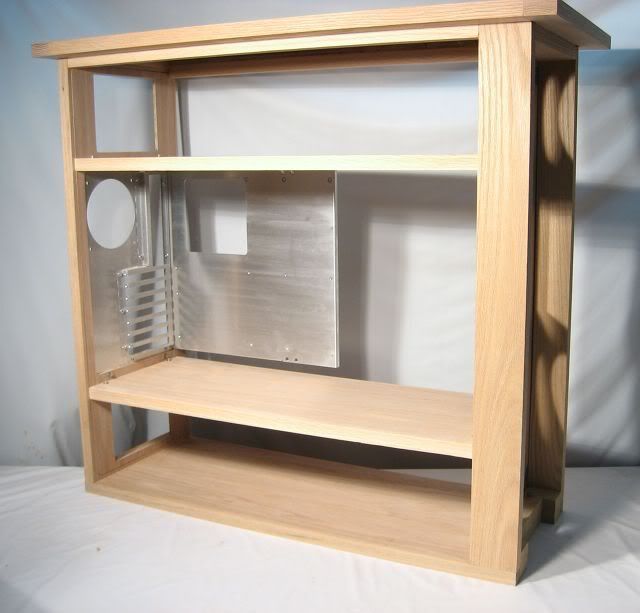
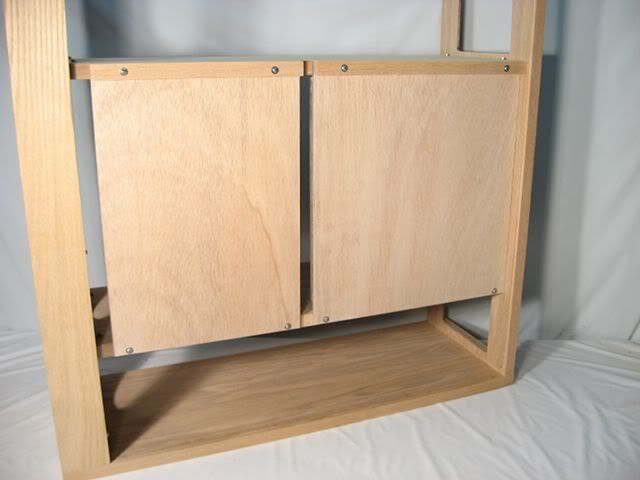
Between the motherboard tray and the side panel is a removable "false" back that will strengthen the case, steady the motherboard tray and conceal all of the wiring. There is about 1-1/4 inches between the "false" back and the side panel.
Between the motherboard tray and the side panel is a removable "false" back that will strengthen the case, steady the motherboard tray and conceal all of the wiring. There is about 1-1/4 inches between the "false" back and the side panel.

rogerwilco
Limp Gawd
- Joined
- Feb 6, 2007
- Messages
- 426
Nice work!!
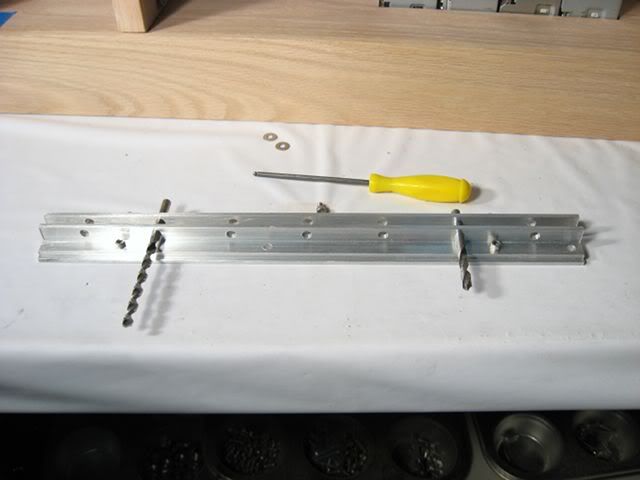
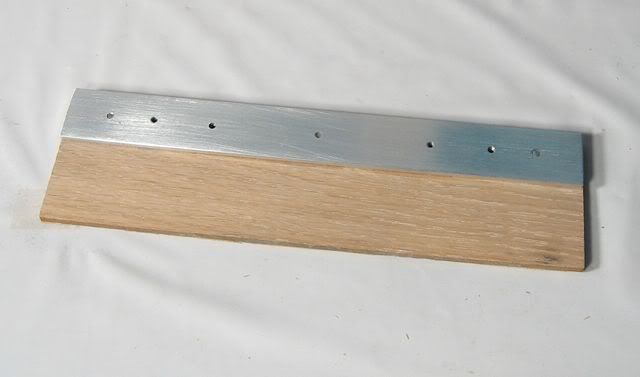
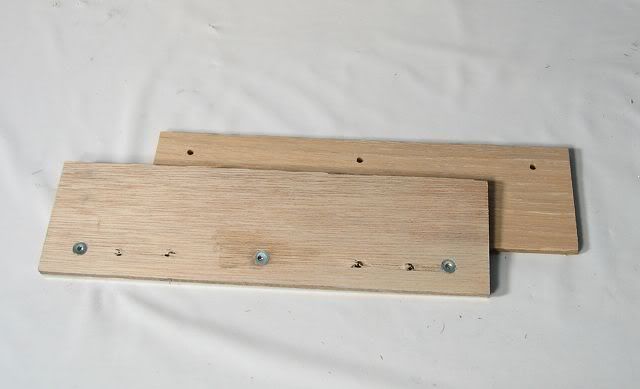
I completed the the external drive cage. I used a couple of drill bits to align everything, just to make sure both pieces were identical.
Yet another feature of this case is that each one of the drive rails can be removed for easy modding or for a custom configuration.
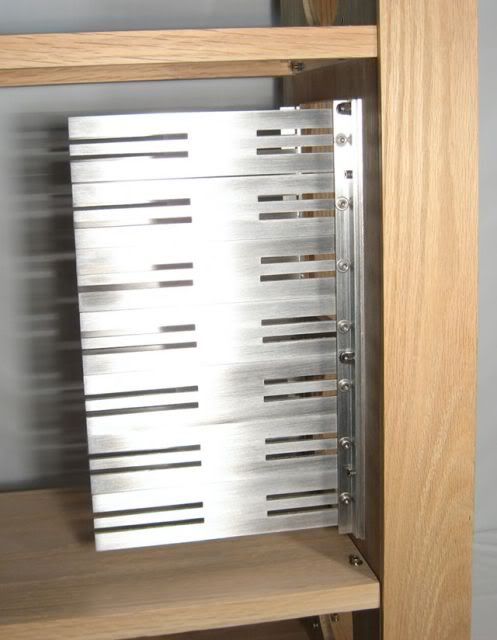
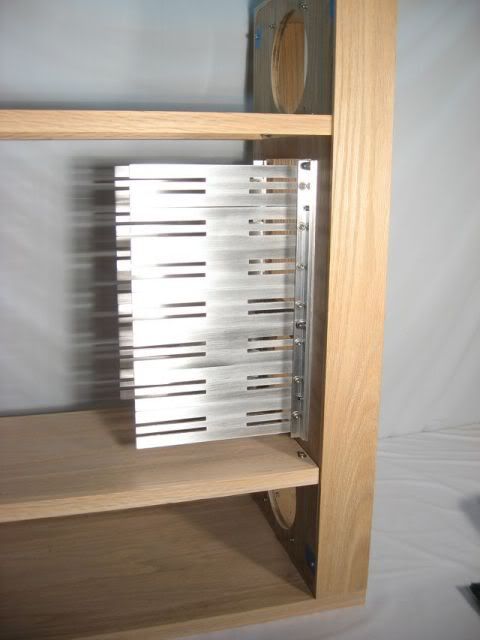
Yet another feature of this case is that each one of the drive rails can be removed for easy modding or for a custom configuration.
Hmmm...its definitely not flimsy. Its made entirely from 1/8-inch thick aluminum.I like the look of that drive cage
Hmmm...its definitely not flimsy. Its made entirely from 1/8-inch thick aluminum.
That should do the trick
Two new 5.2mm router bits arrived yesterday afternoon. In an attempt to reduce bit breakage, I "pre-grooved" the 3/4-inch oak on the table saw, cutting an 8mm deep saw kerf. Then it was two passes on the router table, one pass at 5mm deep and another at 10mm. The end result was I only broke one bit.
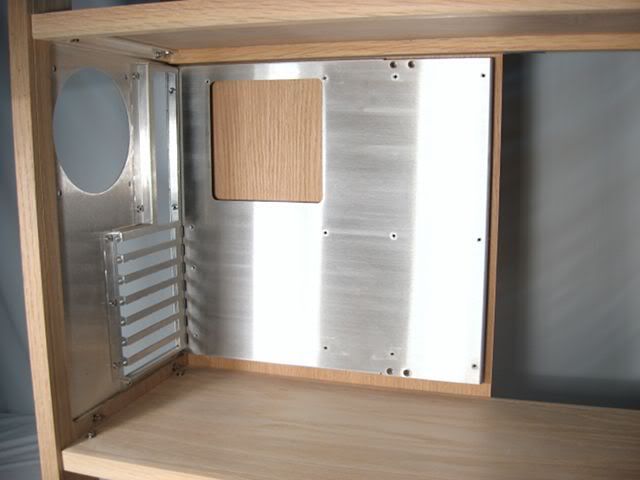
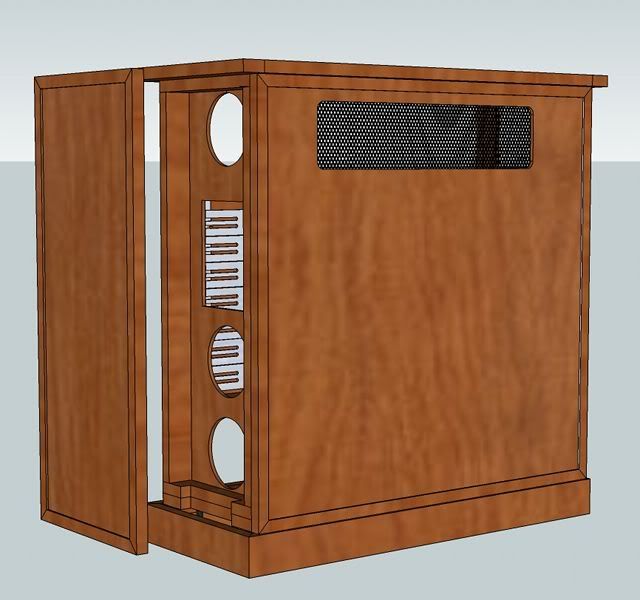
Right side panel is done:
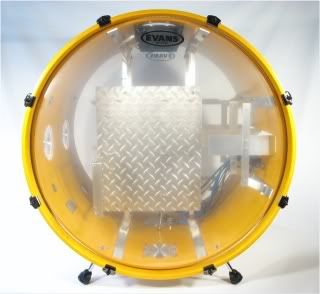
As soon as the 120x4 radiators arrive, I'll route out holes in the panels and apply some aluminum mesh, as modeled here:
Right side panel is done:
As soon as the 120x4 radiators arrive, I'll route out holes in the panels and apply some aluminum mesh, as modeled here:
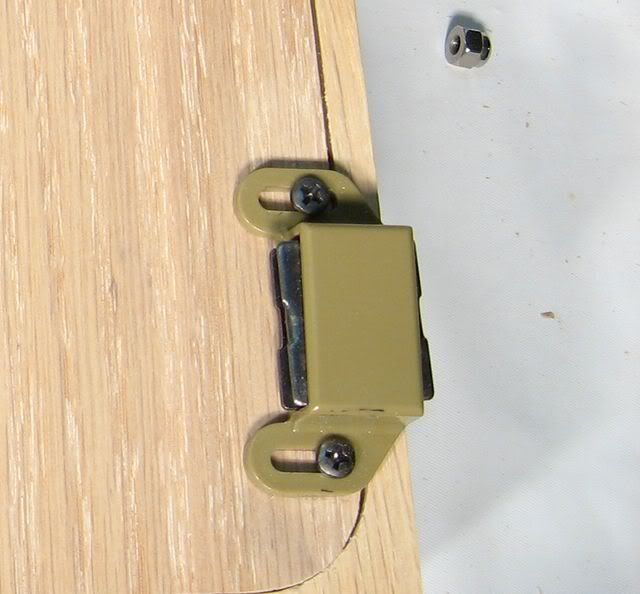
I decided to fasten the top to the case with some 'T'-nuts, but I didn't have any lying around the shop so I fabricated a simple "plate"-nut. A plate-nut is just a 1/8-inch thick piece of aluminum flat bar, taped for 6-32 bolts. The nut was bolted to a dual layer of 1/4-inch plywood which was then glued to the top. Hard to describe, but very simple to make.
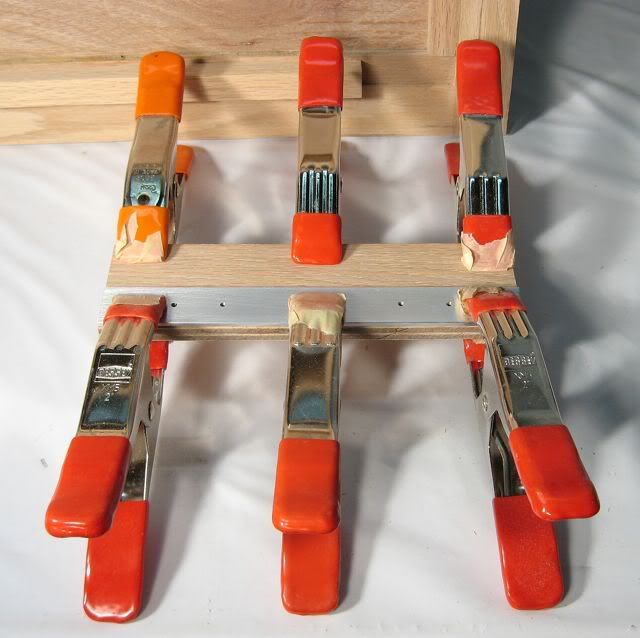
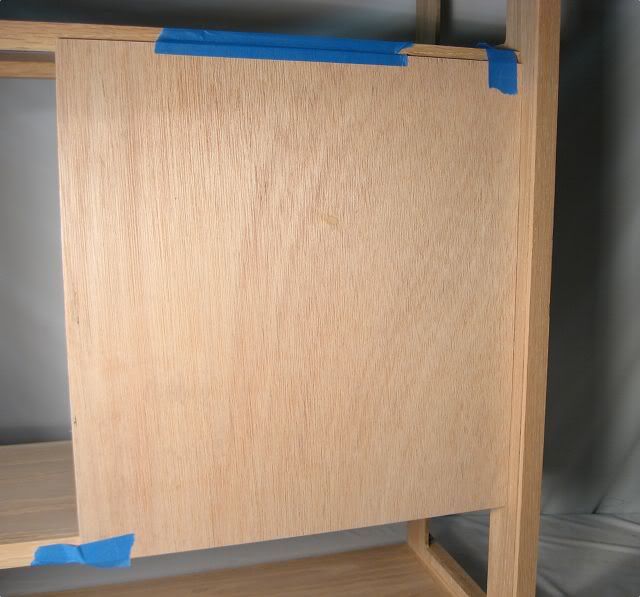
In order to accurately determine where to drill the corresponding holes in the front frame, I made some pointy marking thingies from a couple of bolts.
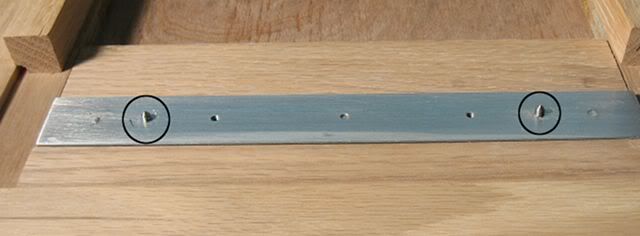
The top with the pointy thingies were then pressed down onto the case, indicating where to drill.
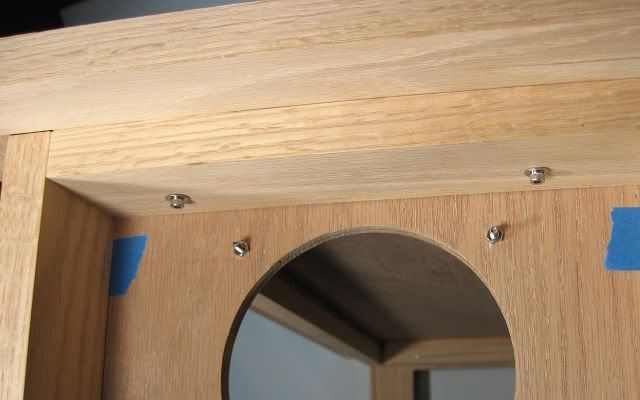
Perfect alignment!
In order to accurately determine where to drill the corresponding holes in the front frame, I made some pointy marking thingies from a couple of bolts.
The top with the pointy thingies were then pressed down onto the case, indicating where to drill.
Perfect alignment!
silent-circuit
[H]F Junkie
- Joined
- Sep 18, 2005
- Messages
- 16,136
Interesting. I'll be watching.
do you have like blueprints and spec sheets or just kinda winging it as you go? Either way its going to be awesome. You have talent!
The entire case (except for all of the fasteners, obviously
) were drawn in sketchup first. Pieces were cut and assembled within 1-2mm. However, even with such tight tolerances I managed to make a couple of mistakes by not taking that into account. If I make the next case 1.5mm shorter, I'll be able to use those two "mistakes." agrikk
Gawd
- Joined
- Apr 16, 2002
- Messages
- 933
Wow!
I love wood cases, but I haven't the skill and all of my projects turn out to be simple boxes cut from six slabs of wood or cabinets built from construction lumber (I also love the pine look). I can only dream of building a case like this one. Great job! I'd love to see the final pics with all the hardware installed from the lucky guy who commissioned this case.
I love wood cases, but I haven't the skill and all of my projects turn out to be simple boxes cut from six slabs of wood or cabinets built from construction lumber (I also love the pine look). I can only dream of building a case like this one. Great job! I'd love to see the final pics with all the hardware installed from the lucky guy who commissioned this case.