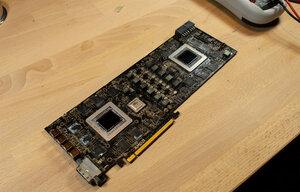
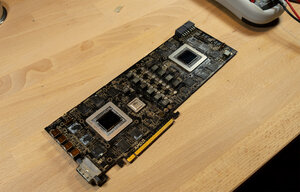
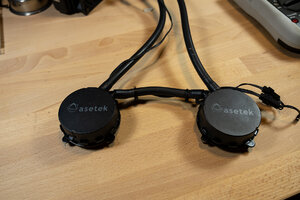
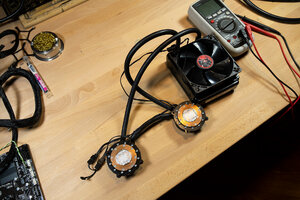
I concentrated on the video for this one, so I regrettably didn't get a ton of photos, but what we have on the bench today is 2014's king of heat, a Radeon R9 295x2. For those unfamiliar, this is two full-fat Radeon 290Xs on one board, which can be engaged together using Crossfire, or simply used to drive many displays or for compute tasks independently. I have a soft spot in my heart for these dual core cards, just because I think they're cool. They're obviously not the most practical thing in the world, especially given that this card cost $1500 when it was new, which means you're paying almost a 50% premium to get those two GPUs on one board. This particular design is also interesting in that it features a novel dual-jacket liquid cooling unit that integrates a separate pump/jacket for each GPU and one shared radiator. As far as I know, this was the first time this design was used, although AMD did release a few similar designs later, which they called "Pro Duos."
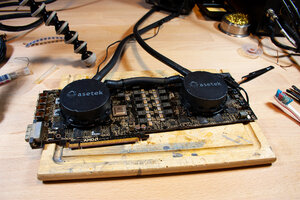
The cooling unit itself:
The cooling unit is contained inside this shroud assembly, and the two aluminum and copper plates pictured here are used as heatsinks for the memory and VRMs.
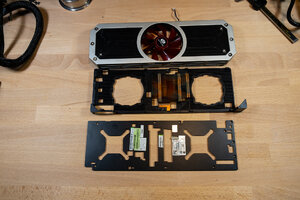
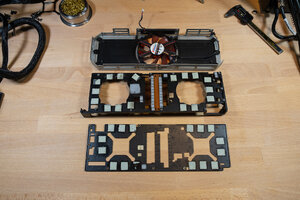
I actually have two cards, which we'll call A and B. A is the one that's stripped down here, mid-repair, and B is the one still wearing its cooling unit. Both cards came to me via ebay for about $50 apiece, not working. Card B looks pretty clean. Card A looked like it had lived a pretty hard life in a hot and humid environment, and has residue from a strange, very shiny thermal past on it. Also, note how grubby the pads look, and the corrosion on the heatsink in the photos above.
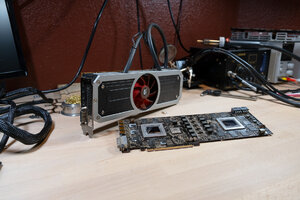
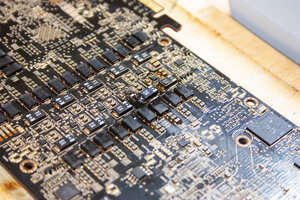
Card A had some very obvious damage to one of these tantalum caps on the #2 12 volt rail, shown here with the offending cap removed. Given the obvious physical damage, I decided this was the better candidate of the two for repair. I did some quick probing on the card when I received it, and found that I had a 100 ohm short to ground on that rail, versus ~3K ohms on the other GPU's 12 volt rail. 3K is sane for the resistance through an entire graphics card. This would explain why the card doesn't work, and also indicates the potential for further damage if I tried to power it up, so we're going to fix the obviously broken bits before we try to test it.
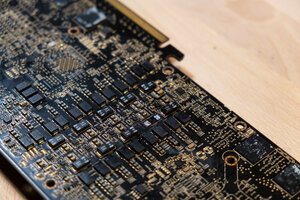
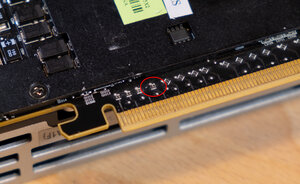
I don't know what's wrong with Card B. I have plugged it in and tested it, and it really doesn't work, but beyond some physical damage to these two tiny SMD caps that I assume are for noise filtering on one of the PCI-E lanes, I don't see anything obviously wrong with it. That's the extent of the testing I've done, though. We'll get to this card eventually, but I suspect that the problems with it run deeper than just those two caps. Note the nick in the backplate nearby - I suspect the card got dropped or mishandled after whatever actually killed it happened.
Anyway, back to Card A...
I did some resistance checks, and here's what I found:
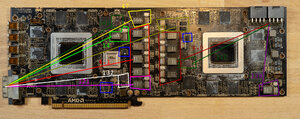
#1 Vcore (bright red): 4.0 ohms - looks ok
#1 Memory (bright purple): 121 ohms - looks ok
#1 Memory controller (light yellow): 47 ohms - probably ok
#2 Vcore (dark red) 4.0 ohms - looks ok
#2 Memory (dark purple) 138 ohms - a little high, but probably alright
#2 Memory Controller (dark yellow) 60 ohms - also a little high, but alright.
I'm not sure what the other voltage controllers do without powering the card up and checking them. I would guess that 1.8v is produced by the ones labeled in dark green (one for each GPU), the light green is a 1.8ish supply for the PLX bridge, and the white is maybe .95v, which I think has something to do with the display drive. The one by the DVI connector in dark gray is an ON Semiconductor 78M05G, which produces 5V, I assume having something to do with the display output. The ICs labeled in blue are most likely bios chips, since there are four of them, but this form factor is sometimes used for small VRMs, like we saw in my thread about the GTX 690.
Here's the back of card A, as it sits now:
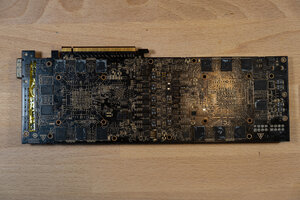
The remains of the failed capacitor. From what I can determine, this is (was) a Panasonic 16TQC100MYF tantalum electrolytic. These are among the best, most expensive capacitors on the market, prized for the SMD mounting, compactness and very good high frequency noise filtering, and they appear to be used here for space reasons. In bulk, these things cost about $2 apiece, meaning we're looking at $20 worth of capacitors just in the two 12V banks on the back of the card. Once you start thinking in those terms, it's a little easier to understand why high end graphics cards cost so much. It should be noted that there are more of these caps on the front, at the right-hand side, south of the power connectors.
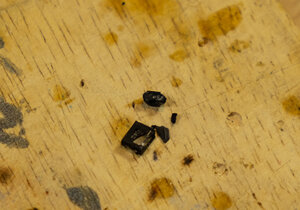
When I heated the failed cap up, it sort of disintegrated, and the ceramic casing on the outside started flaking off, as you can see there. This card has a ton of copper in that area, and it took a ton of heat to unsolder this. I'm a little worried I may have damaged something else, as the resistance on that rail went up to 20Kish once I removed it which is pretty high, but we'll see once I get the new cap installed.
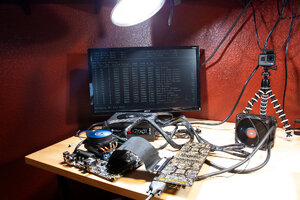
And that's where I'm at. I made a video for Youtube here, for those who prefer that:

The cooling unit itself:


The cooling unit is contained inside this shroud assembly, and the two aluminum and copper plates pictured here are used as heatsinks for the memory and VRMs.


I actually have two cards, which we'll call A and B. A is the one that's stripped down here, mid-repair, and B is the one still wearing its cooling unit. Both cards came to me via ebay for about $50 apiece, not working. Card B looks pretty clean. Card A looked like it had lived a pretty hard life in a hot and humid environment, and has residue from a strange, very shiny thermal past on it. Also, note how grubby the pads look, and the corrosion on the heatsink in the photos above.

Card A had some very obvious damage to one of these tantalum caps on the #2 12 volt rail, shown here with the offending cap removed. Given the obvious physical damage, I decided this was the better candidate of the two for repair. I did some quick probing on the card when I received it, and found that I had a 100 ohm short to ground on that rail, versus ~3K ohms on the other GPU's 12 volt rail. 3K is sane for the resistance through an entire graphics card. This would explain why the card doesn't work, and also indicates the potential for further damage if I tried to power it up, so we're going to fix the obviously broken bits before we try to test it.

I don't know what's wrong with Card B. I have plugged it in and tested it, and it really doesn't work, but beyond some physical damage to these two tiny SMD caps that I assume are for noise filtering on one of the PCI-E lanes, I don't see anything obviously wrong with it. That's the extent of the testing I've done, though. We'll get to this card eventually, but I suspect that the problems with it run deeper than just those two caps. Note the nick in the backplate nearby - I suspect the card got dropped or mishandled after whatever actually killed it happened.

Anyway, back to Card A...
I did some resistance checks, and here's what I found:

#1 Vcore (bright red): 4.0 ohms - looks ok
#1 Memory (bright purple): 121 ohms - looks ok
#1 Memory controller (light yellow): 47 ohms - probably ok
#2 Vcore (dark red) 4.0 ohms - looks ok
#2 Memory (dark purple) 138 ohms - a little high, but probably alright
#2 Memory Controller (dark yellow) 60 ohms - also a little high, but alright.
I'm not sure what the other voltage controllers do without powering the card up and checking them. I would guess that 1.8v is produced by the ones labeled in dark green (one for each GPU), the light green is a 1.8ish supply for the PLX bridge, and the white is maybe .95v, which I think has something to do with the display drive. The one by the DVI connector in dark gray is an ON Semiconductor 78M05G, which produces 5V, I assume having something to do with the display output. The ICs labeled in blue are most likely bios chips, since there are four of them, but this form factor is sometimes used for small VRMs, like we saw in my thread about the GTX 690.
Here's the back of card A, as it sits now:

The remains of the failed capacitor. From what I can determine, this is (was) a Panasonic 16TQC100MYF tantalum electrolytic. These are among the best, most expensive capacitors on the market, prized for the SMD mounting, compactness and very good high frequency noise filtering, and they appear to be used here for space reasons. In bulk, these things cost about $2 apiece, meaning we're looking at $20 worth of capacitors just in the two 12V banks on the back of the card. Once you start thinking in those terms, it's a little easier to understand why high end graphics cards cost so much. It should be noted that there are more of these caps on the front, at the right-hand side, south of the power connectors.

When I heated the failed cap up, it sort of disintegrated, and the ceramic casing on the outside started flaking off, as you can see there. This card has a ton of copper in that area, and it took a ton of heat to unsolder this. I'm a little worried I may have damaged something else, as the resistance on that rail went up to 20Kish once I removed it which is pretty high, but we'll see once I get the new cap installed.
And that's where I'm at. I made a video for Youtube here, for those who prefer that:
![[H]ard|Forum](/styles/hardforum/xenforo/logo_dark.png)
