pj-schmidt
Limp Gawd
- Joined
- Oct 12, 2004
- Messages
- 356
I just completed my first custom water cooled loop. My case has no side windows, so it only has to be functional, not pretty. Having said that, I did try to keep it reaonably clean.
Flow order: Pump ==> GPU ==> CPU ==> Radiator ==> {pump}...
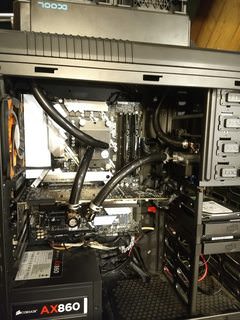
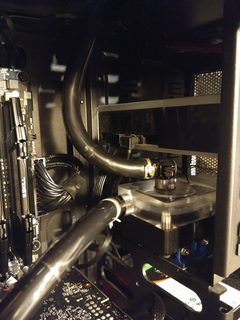
As noted in the title, I elected to not use a reservior. I decided early on that I wanted to try to mount the pump inside of the 5.25 drive cage. Due to my optical drive, this was a tight fit.
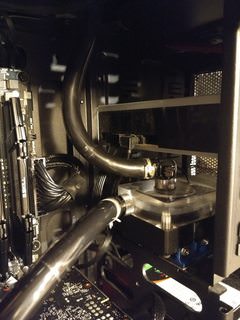
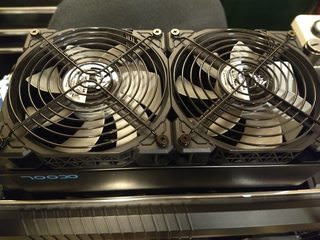
With this goal in mind I elected to use a tall (60mm) radiator in X-flow configuration (Found an open box unit in perfect condition for a really good price). Compared to a "normal" U-flow radiator with both inlet and outlet on the same end, X-flow configuration reduces the distance the coolant travels by half, but it also flows at half of the speed. This half distance / half flow rate results in the coolant spending the same amount of time in a X-flow radiator as a conventional radiator giving it equivalent cooling ability. The advantage for me with the slower flowrate is that it makes it easier to for the air bubbles to escape the flow and not continue circulating in the system. I also selected a radiator with 3x ports on each end to allow me to vent air without needing to disturb the functioning connections.
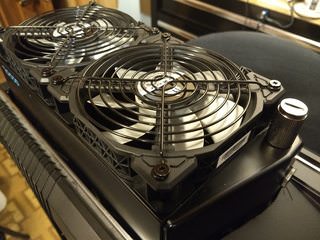
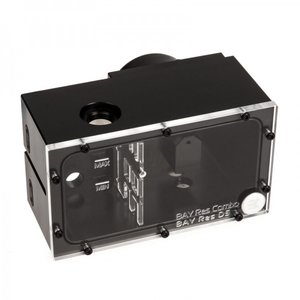
Above you can see the fill port in the top of the radiator that I can use to vent air and add coolant while the system is running. The X-flow configuration also has the added benefit of providing an inlet and out closer to the expected points of connection (CPU and pump) eliminating a long horizontal tube run. The reduced flow restiction of the X-flow radiator was an additional consideration, but I doubt it has a significant effect on my system.
With the thicker radiator, I elected to go with a push-pull fan configuration. I like the idea of running more fans at lower rpm, so I'd probably have done this even with a thinner radiator regardless of cooling performance.
Additional pictures:
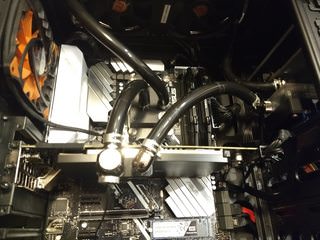
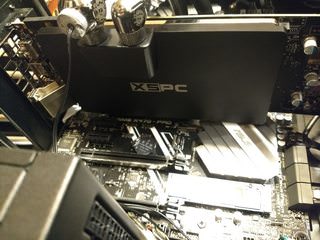
Thermistor plug in the outlet of the GPU for loop temperature monitoring using the motherboards T_probe header. The additonal plug on this manifold also gives me a convenient way to drain the loop near the lowest point without disonecting any hoses.
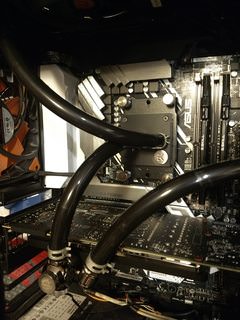
Filling and removing air from the system was silly easy. First I filled it until the radiator appeared to be about 3/4 full. Then I cycled the pump for 10 seconds before noting a bubble at the inlet of the pump. I then stopped the pump and let it sit for 30 seconds with the hope that the bubble would move up to the radiator. This worked as when I restarted the pump the bubble was gone and the pump was nearly dead silent (scary quiet). I then let it run for 10minutes while occationally tipping the unit to encouage any other bubbles to move. The radiator was then filled to max. That was nearly a week ago. Since then I have done multiple stress tests (Prime95+Unigine Heaven) which showed very good cooling ability. I have not seen any change in coolant level in this time and there are no leaks. It is certainly not a show piece, but I'm pretty happy with it.
Questions, thoughts, suggestions or critiques?
Phillip
Main Cooling Components:
Alphacool NexXxos UT60 240mm X-flow radiator
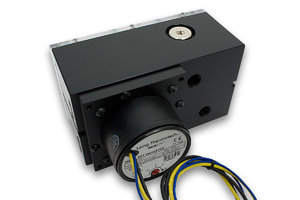
P.LOTOR Low Noise Cooling Pump
EK Supremacy MX AMD CPU block
XSPC Blade - GTX 1080 / 1080 Ti GPU block
EK CryoFuel Clear
Flow order: Pump ==> GPU ==> CPU ==> Radiator ==> {pump}...

As noted in the title, I elected to not use a reservior. I decided early on that I wanted to try to mount the pump inside of the 5.25 drive cage. Due to my optical drive, this was a tight fit.

With this goal in mind I elected to use a tall (60mm) radiator in X-flow configuration (Found an open box unit in perfect condition for a really good price). Compared to a "normal" U-flow radiator with both inlet and outlet on the same end, X-flow configuration reduces the distance the coolant travels by half, but it also flows at half of the speed. This half distance / half flow rate results in the coolant spending the same amount of time in a X-flow radiator as a conventional radiator giving it equivalent cooling ability. The advantage for me with the slower flowrate is that it makes it easier to for the air bubbles to escape the flow and not continue circulating in the system. I also selected a radiator with 3x ports on each end to allow me to vent air without needing to disturb the functioning connections.

Above you can see the fill port in the top of the radiator that I can use to vent air and add coolant while the system is running. The X-flow configuration also has the added benefit of providing an inlet and out closer to the expected points of connection (CPU and pump) eliminating a long horizontal tube run. The reduced flow restiction of the X-flow radiator was an additional consideration, but I doubt it has a significant effect on my system.
With the thicker radiator, I elected to go with a push-pull fan configuration. I like the idea of running more fans at lower rpm, so I'd probably have done this even with a thinner radiator regardless of cooling performance.
Additional pictures:

Thermistor plug in the outlet of the GPU for loop temperature monitoring using the motherboards T_probe header. The additonal plug on this manifold also gives me a convenient way to drain the loop near the lowest point without disonecting any hoses.


Filling and removing air from the system was silly easy. First I filled it until the radiator appeared to be about 3/4 full. Then I cycled the pump for 10 seconds before noting a bubble at the inlet of the pump. I then stopped the pump and let it sit for 30 seconds with the hope that the bubble would move up to the radiator. This worked as when I restarted the pump the bubble was gone and the pump was nearly dead silent (scary quiet). I then let it run for 10minutes while occationally tipping the unit to encouage any other bubbles to move. The radiator was then filled to max. That was nearly a week ago. Since then I have done multiple stress tests (Prime95+Unigine Heaven) which showed very good cooling ability. I have not seen any change in coolant level in this time and there are no leaks. It is certainly not a show piece, but I'm pretty happy with it.
Questions, thoughts, suggestions or critiques?
Phillip
Main Cooling Components:
Alphacool NexXxos UT60 240mm X-flow radiator
P.LOTOR Low Noise Cooling Pump
EK Supremacy MX AMD CPU block
XSPC Blade - GTX 1080 / 1080 Ti GPU block
EK CryoFuel Clear
![[H]ard|Forum](/styles/hardforum/xenforo/logo_dark.png)
