NorCalAthlete
n00b
- Joined
- Jul 6, 2017
- Messages
- 45
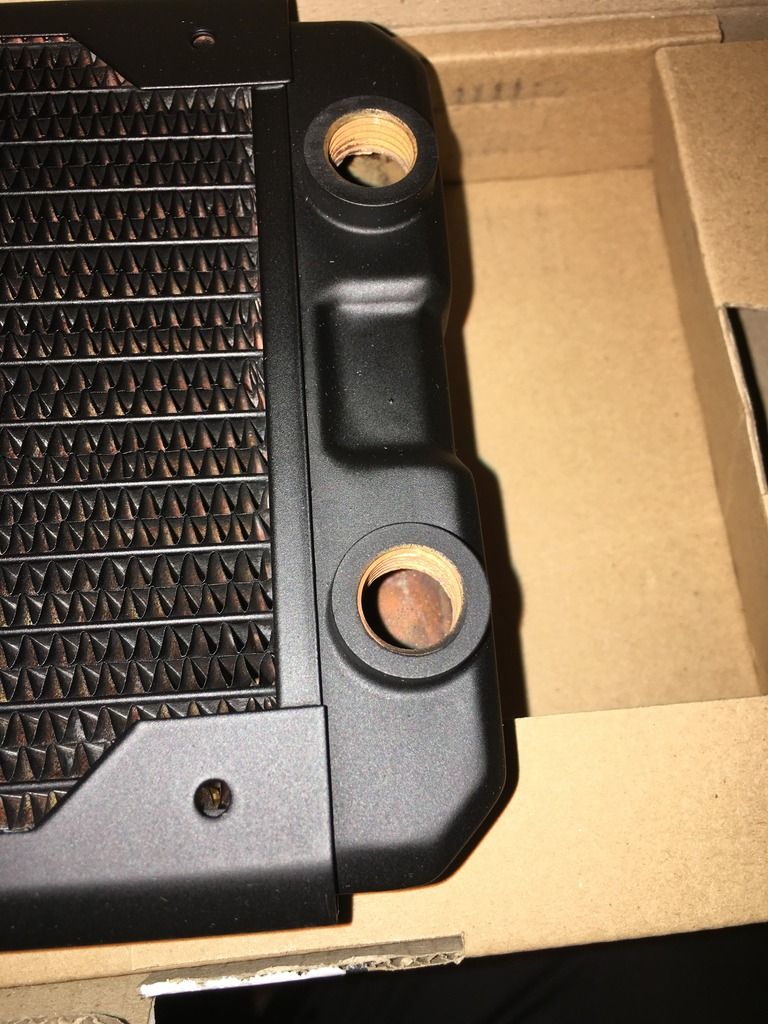
WTF? Anyone who's done watercooling, can you advise on the condition of this radiator? Brand new GTS 240, arrived today, factory seals on the box were intact, box itself was in perfect condition with no signs of moisture, but when I opened it up, this is what I saw - straight rust: