Project: Military Tech - A fundraising project in support of veterans

DDCustomMods

Weaksauce
Joined
Nov 10, 2011
Messages
97
TestSig_zpsrt3mhkbq.gif

300


** WARNING: This build log, like all the others will take some time because I'm poor :D but with the help of sponsors we will quicken this up. More sponsors = quicker build :thumb:

Good Afternoon my fellow modding enthusiasts,


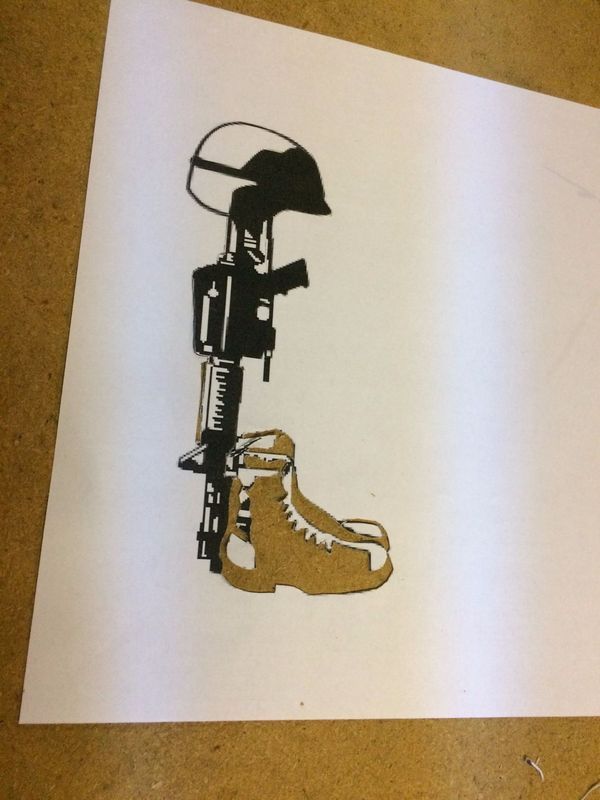
So I have tossed around the idea of doing a US Military themed mod and build, then doing a raffle drawing locally charging a small fee for the tickets. The winner would win the build and the proceeds raised from the raffle would be split between the local Veterans of Foreign Wars posts. I know I won't have any problem getting the local VFW post to get behind the project as I am a member. Other sponsors like Lowes/Home Depot is going to be slightly harder, maybe impossible. My thought would be to allow them to display the build once complete with details on how to join the raffle.

Parts List (Will be updated as time progresses)
Main Components

  • Motherboard: GIGABYTE GA-X170-EXTREME ECC
  • Processor: TBD
  • RAM: 8GB G.Skill Aegis DDR4 Kit
  • HDD: TBD
  • PSU: EVGA SuperNova G2 1000W
  • CPU Cooler: Thermaltake Water 3.0 w/ TT Ring Pro 12 fans
  • Graphics: TBD
  • Blu-Ray Drive: TBD
  • Monitor: TBD
  • Keyboard: Poseidon Z RGB
  • Mouse: Ventus Z RGB Gaming Mouse
  • Headset: Cronos RGB Gaming Headset
  • Fans: Thermaltake Ring Pro 12 x6


Case Parts

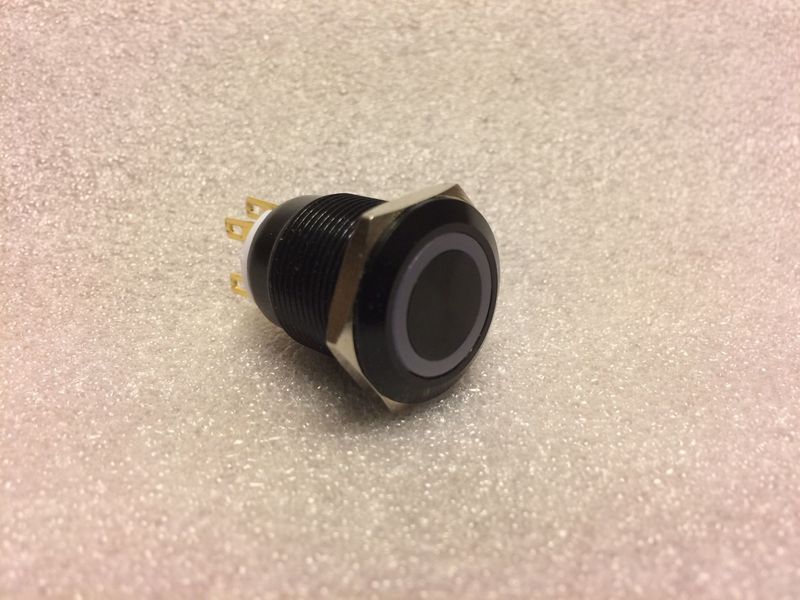
  • Phobya Vandal Resistant "Momentary" Bulgin Switch - 23mm - Black - White Ring LED
  • Phobya SlimGuide Fan Controller
  • Phobya Thermometer with Digital Display
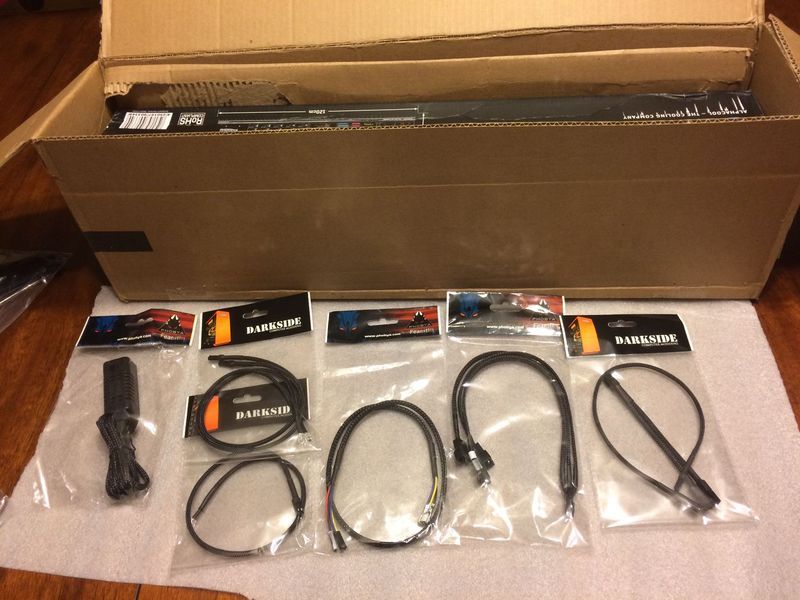
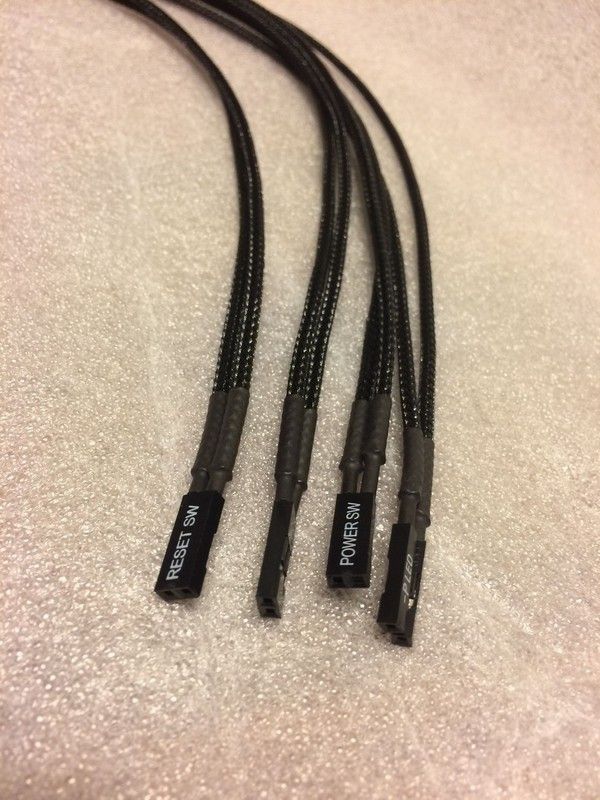
  • Darkside Front Panel I/O Connection Kit
  • DarkSide 5mm CONNECT Modular LED - Red
  • DarkSide 5mm CONNECT Modular LED - White
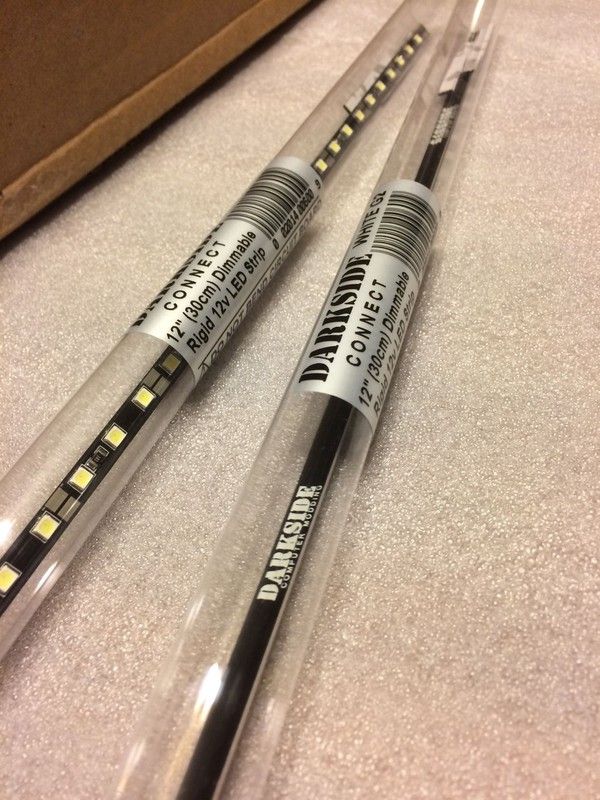
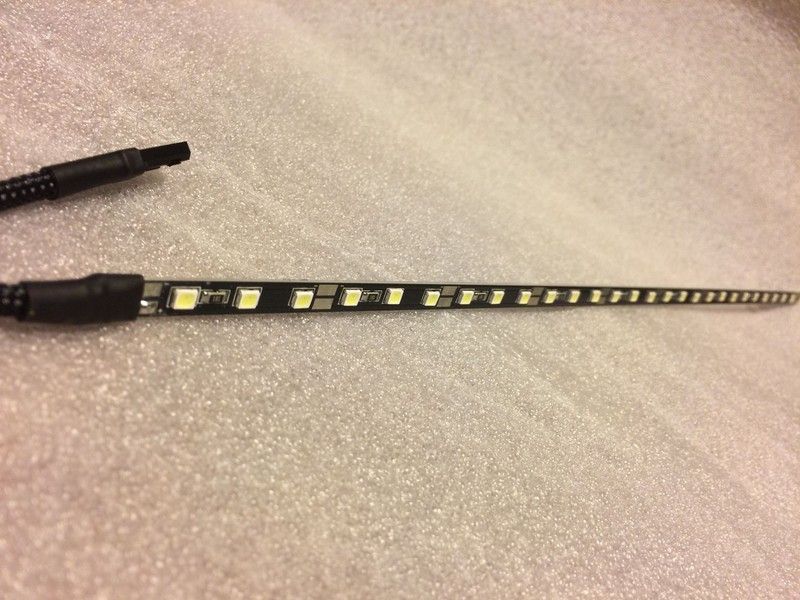
  • DarkSide 12" CONNECT Dimmable Rigid LED Strip
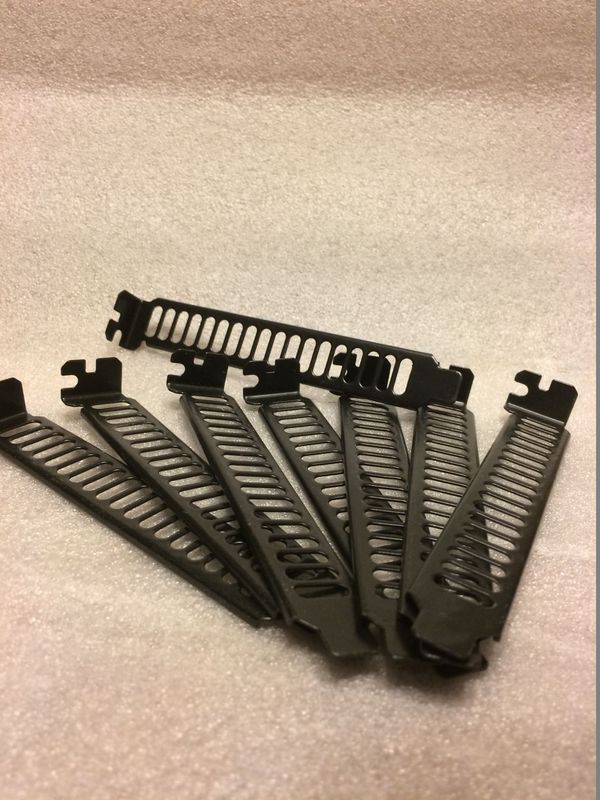
  • Phobya PCI Airslots - Black
  • Toggle Switches

Specialty Modding/Misc

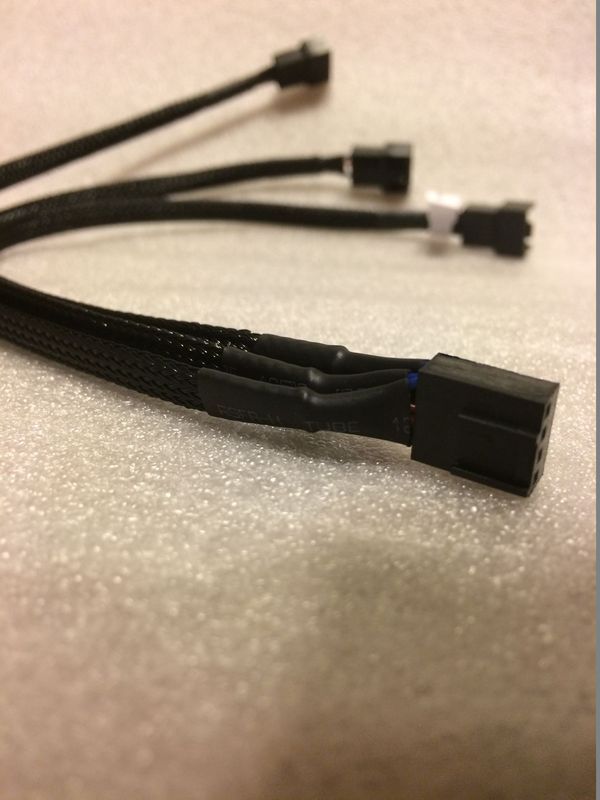
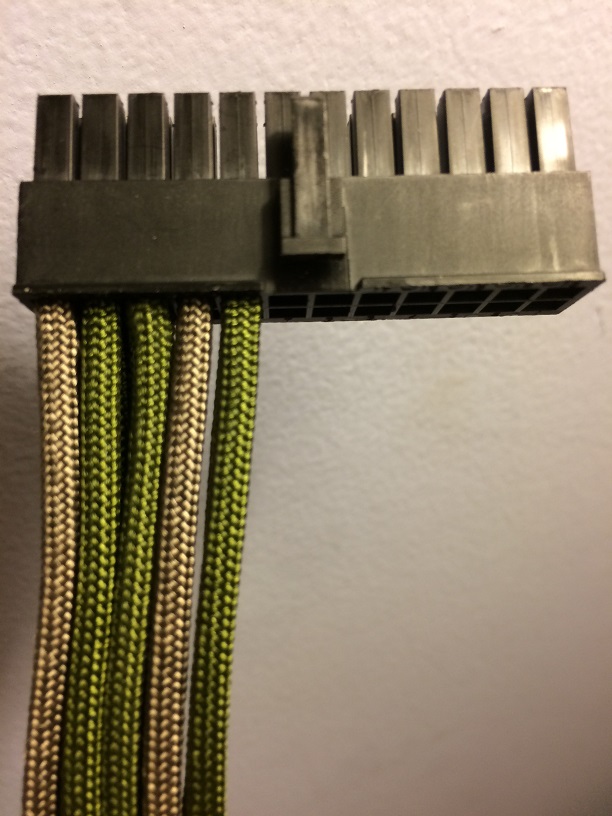
  • Sleeving: Paracord from TheParacordStore.com
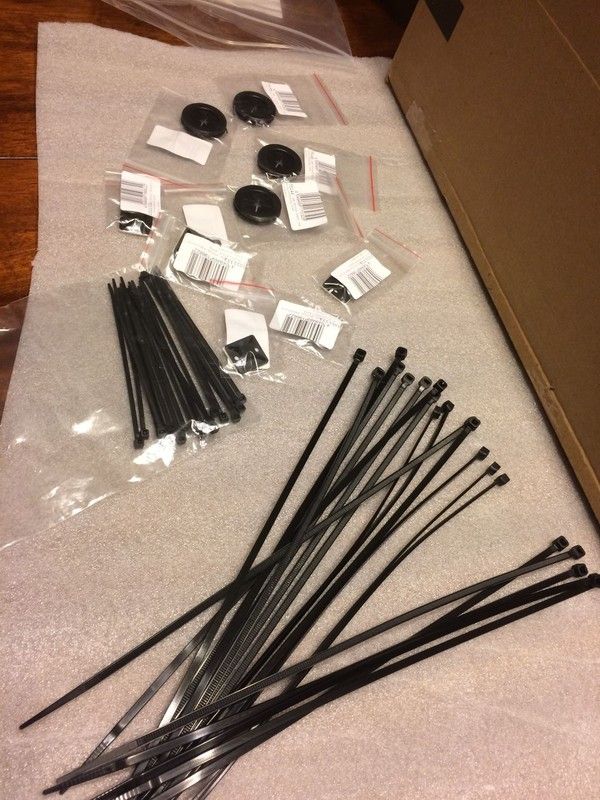
  • Cable Combs: 3D printed by DreamPC
  • Cable Rubber Grommet Round
  • Sheet Aluminum
  • Sheet Diamond Plate
  • Sheet CoPolyester
  • U Channel trim

Tools

  • Drill w/ bits
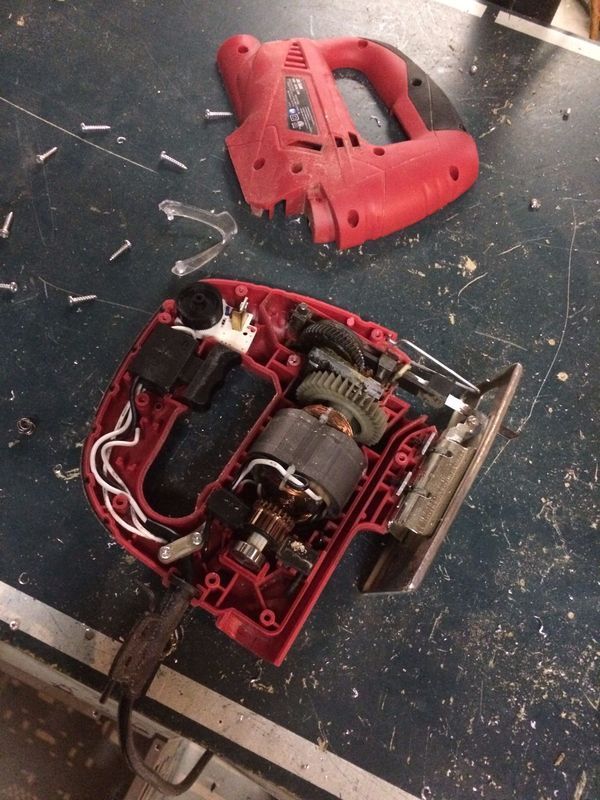
  • Jigsaw w/ Metal Blades
  • Dremel 395 Multitool w/ cutting wheels/grinding stones
  • Metal files
  • Molex tools
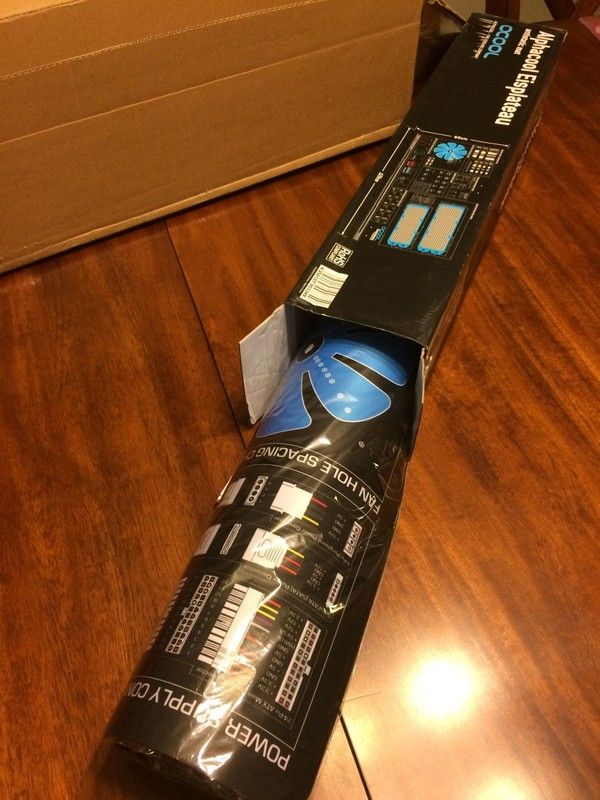
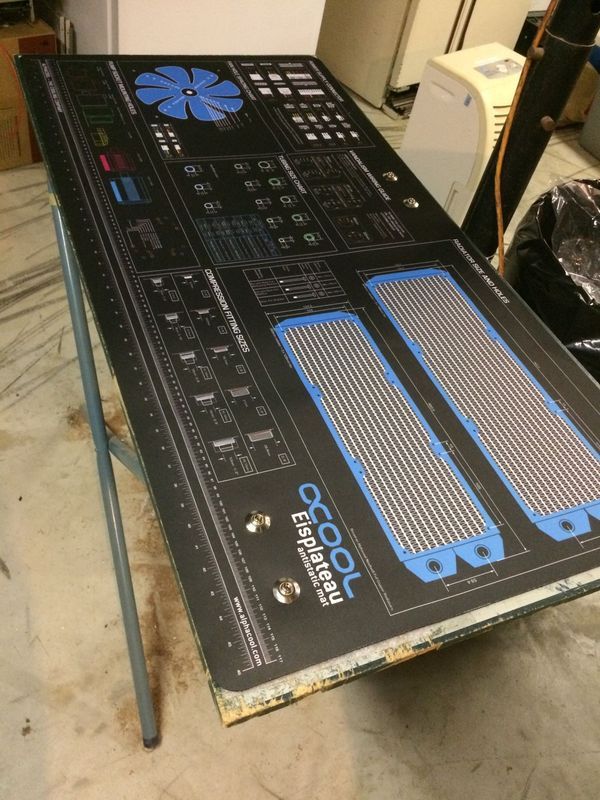
  • Alphacool Eisplateau Anti-Static Mat


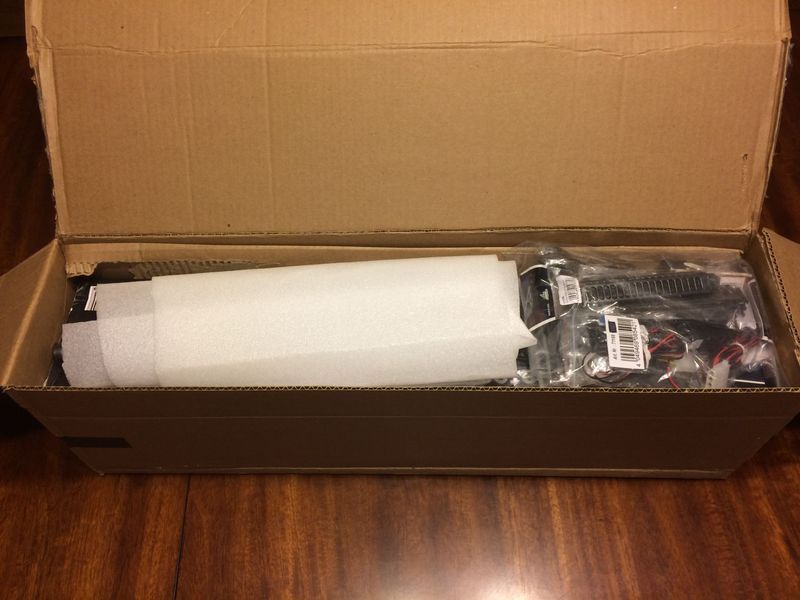
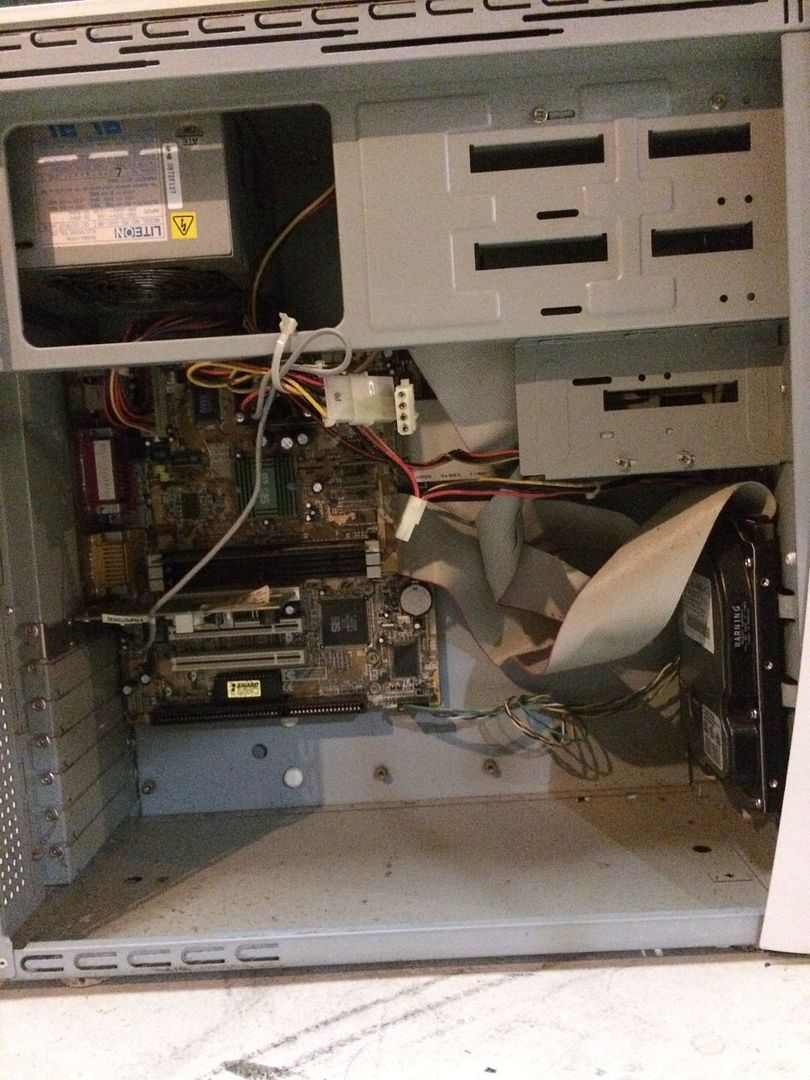
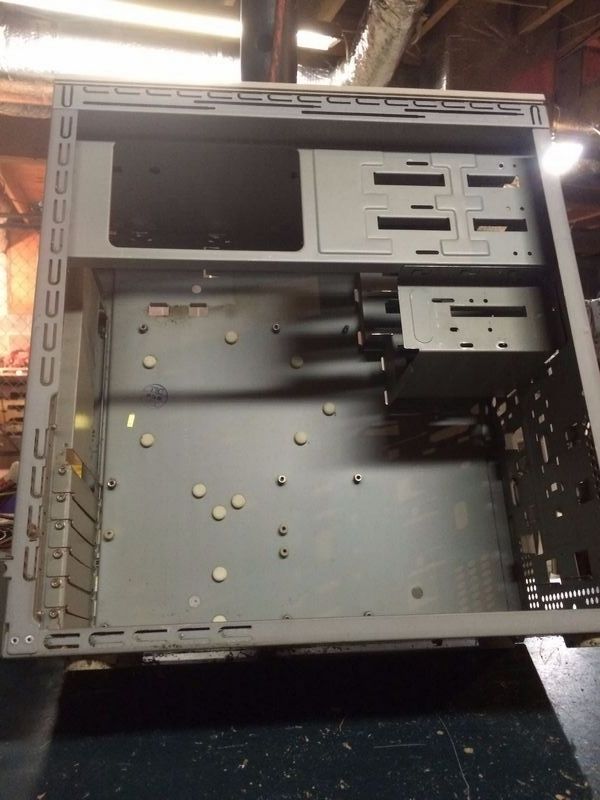
So without further ado... lets meet the patient:

Case Acquisition
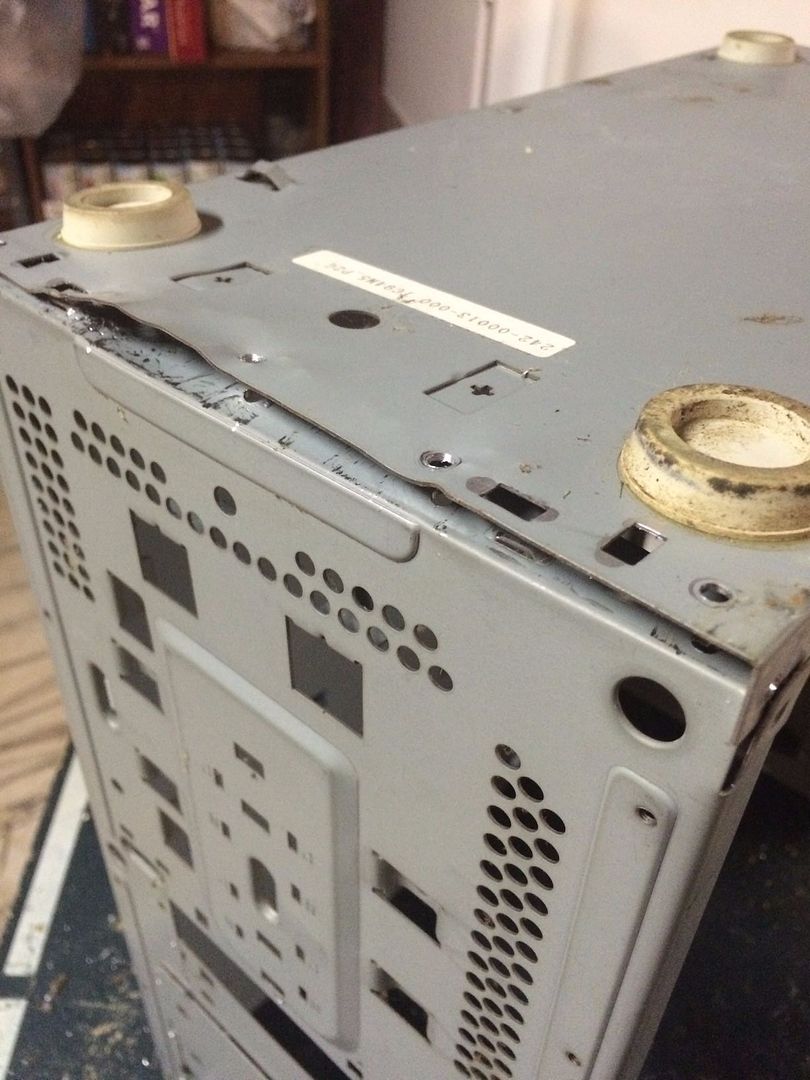
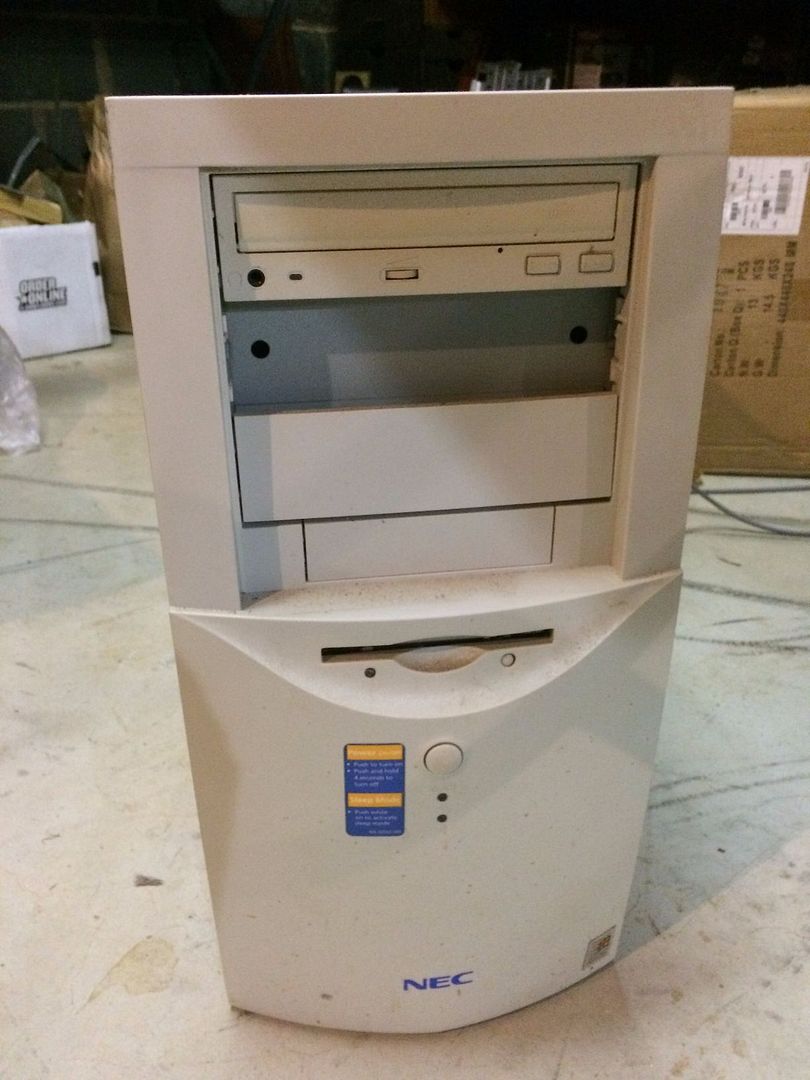
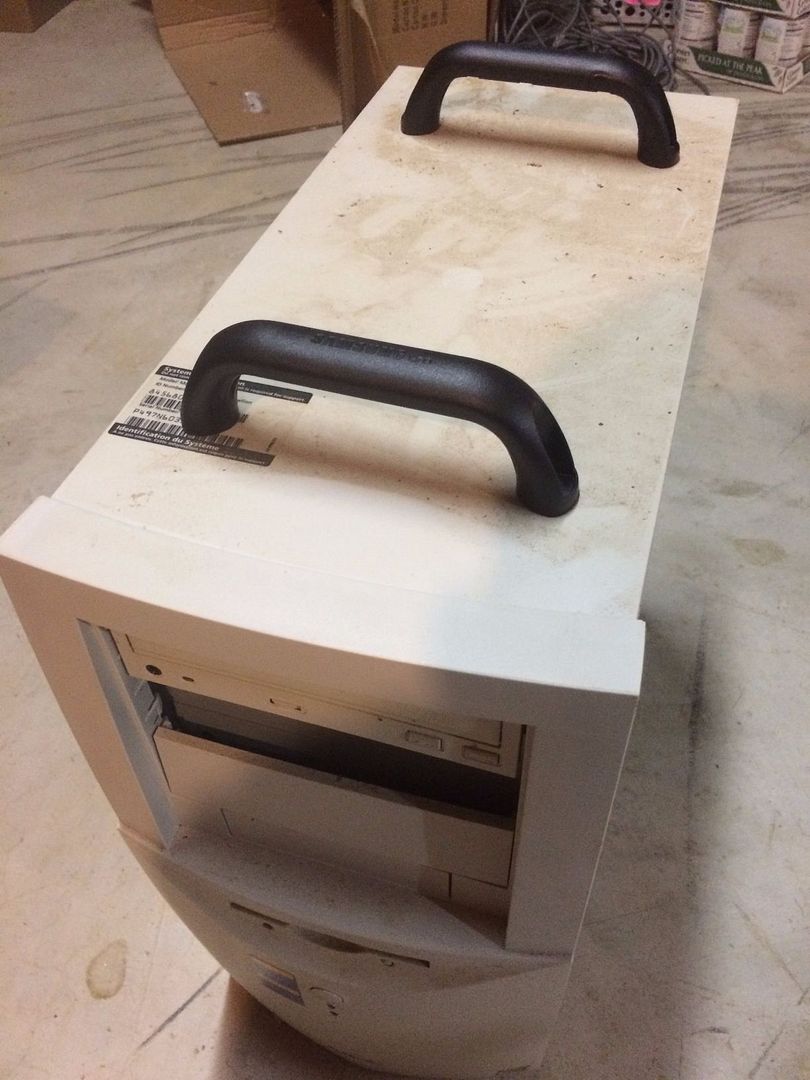
Was dropping off my trash at the local "convenience center" when i notice off in the distance tucked in between some broken CRT TVs, lays a piece of future treasure. A quick "May I..." to the guy running the center and I was off and running with my newest beige modding case.

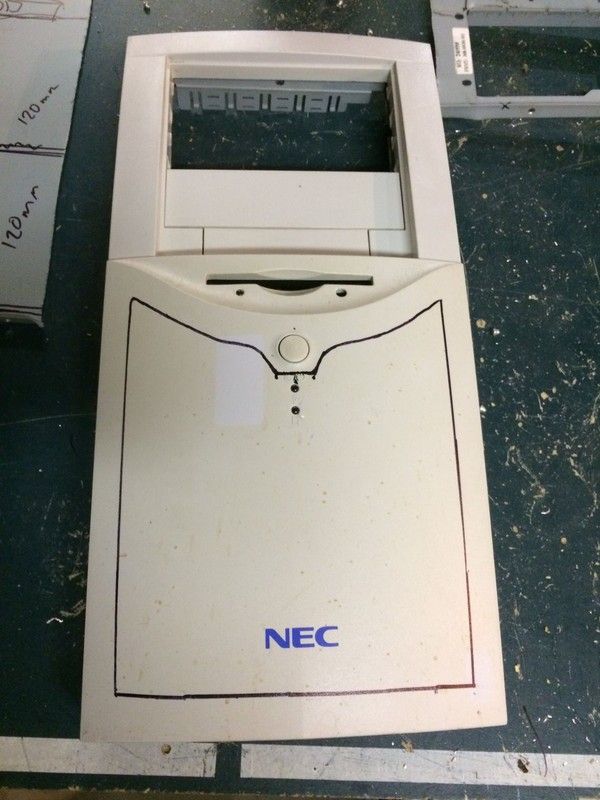
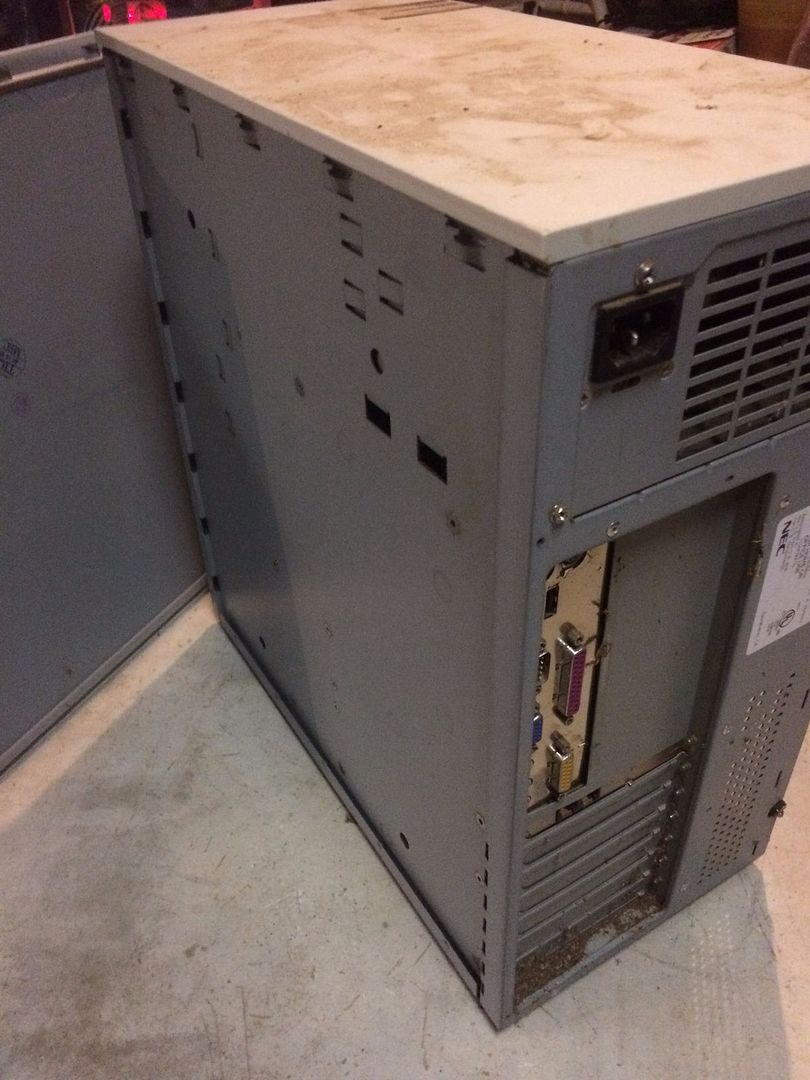
Bask in the sexy beige awesomeness...
IMG_1118_zpsv0ezi1mv.jpg


Look at that nicely rounded beveled front.
IMG_1119_zps5l338yla.jpg


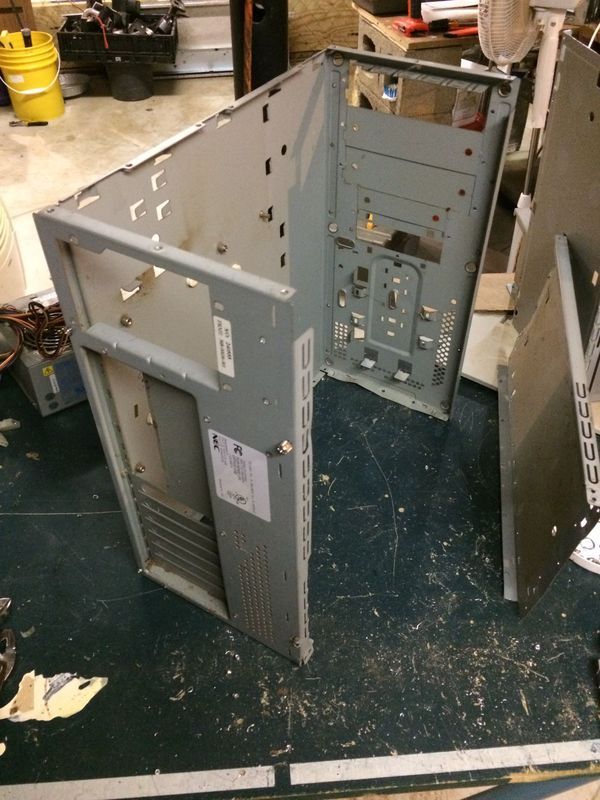
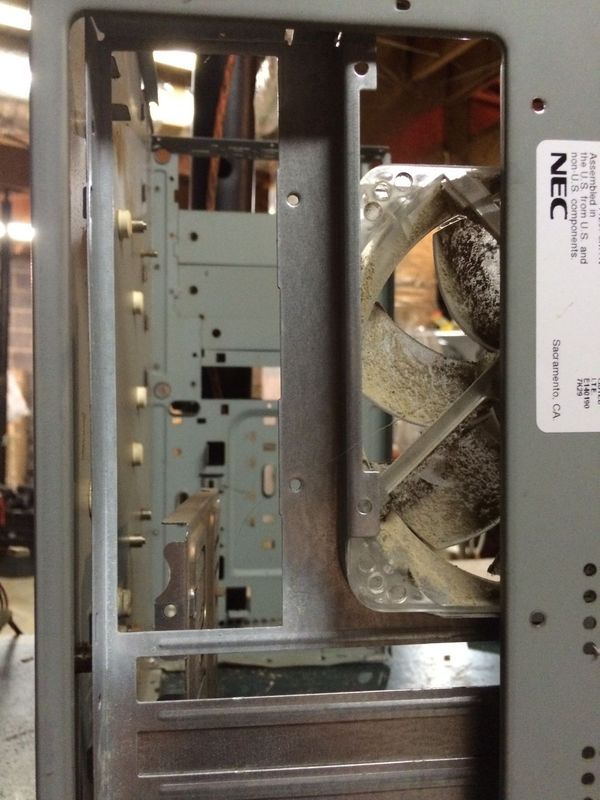
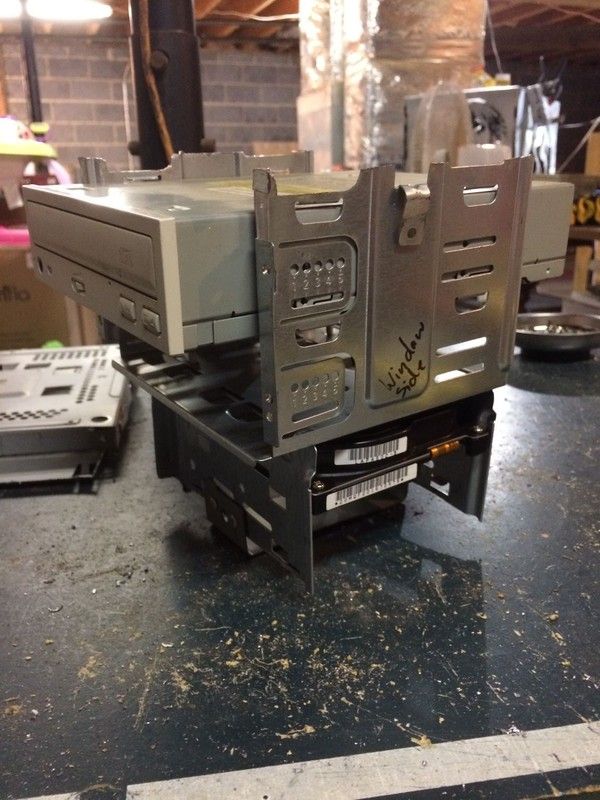
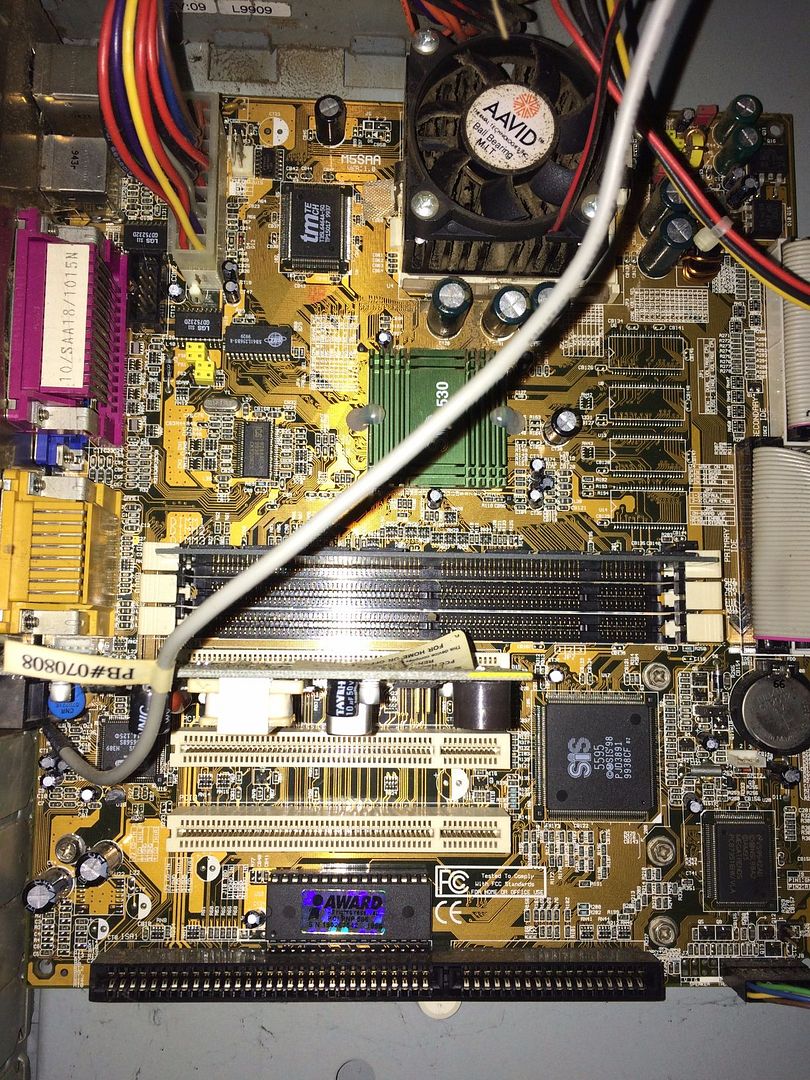
And that interior... *wolf whistles... laughs... then preps the saw*
IMG_1120_zpsdyd5q1pw.jpg


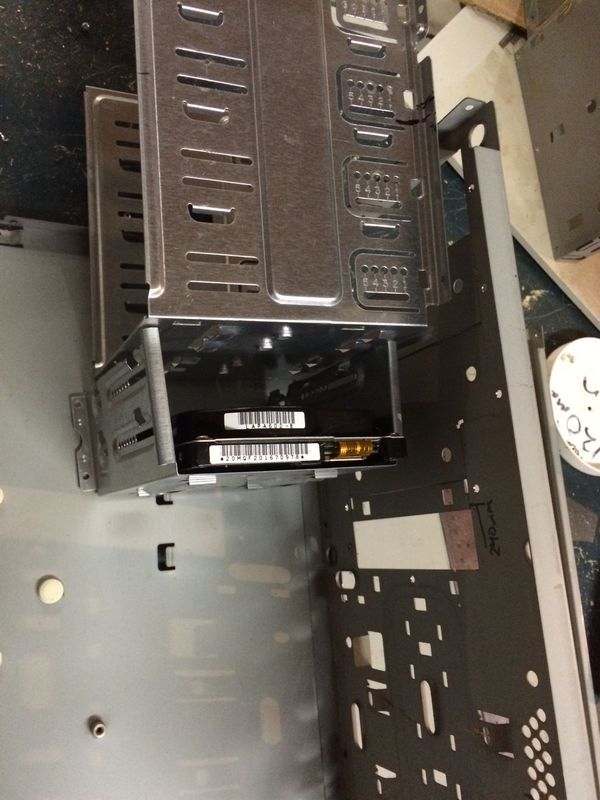
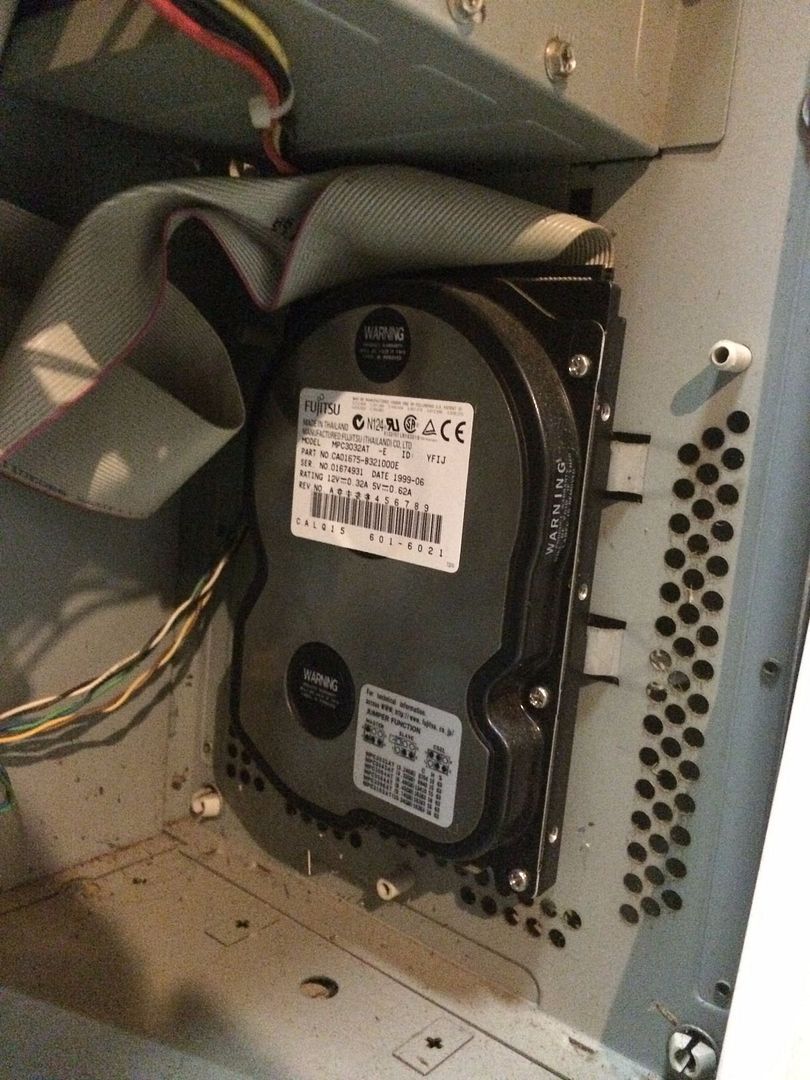
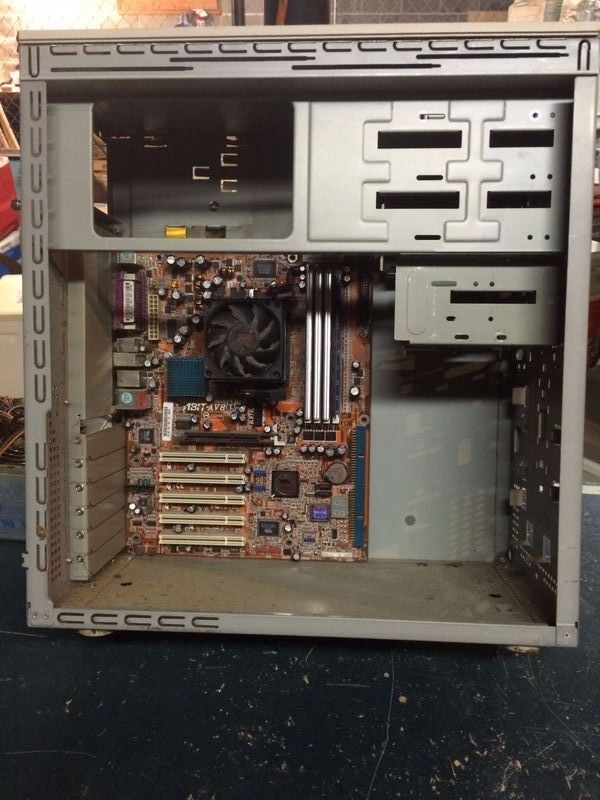
Gotta love that old hardware... 64MB RAM used to be the gold standard *laughs* those were the days
IMG_1121_zpsfujjoteb.jpg

IMG_1122_zpsxyeoptyc.jpg


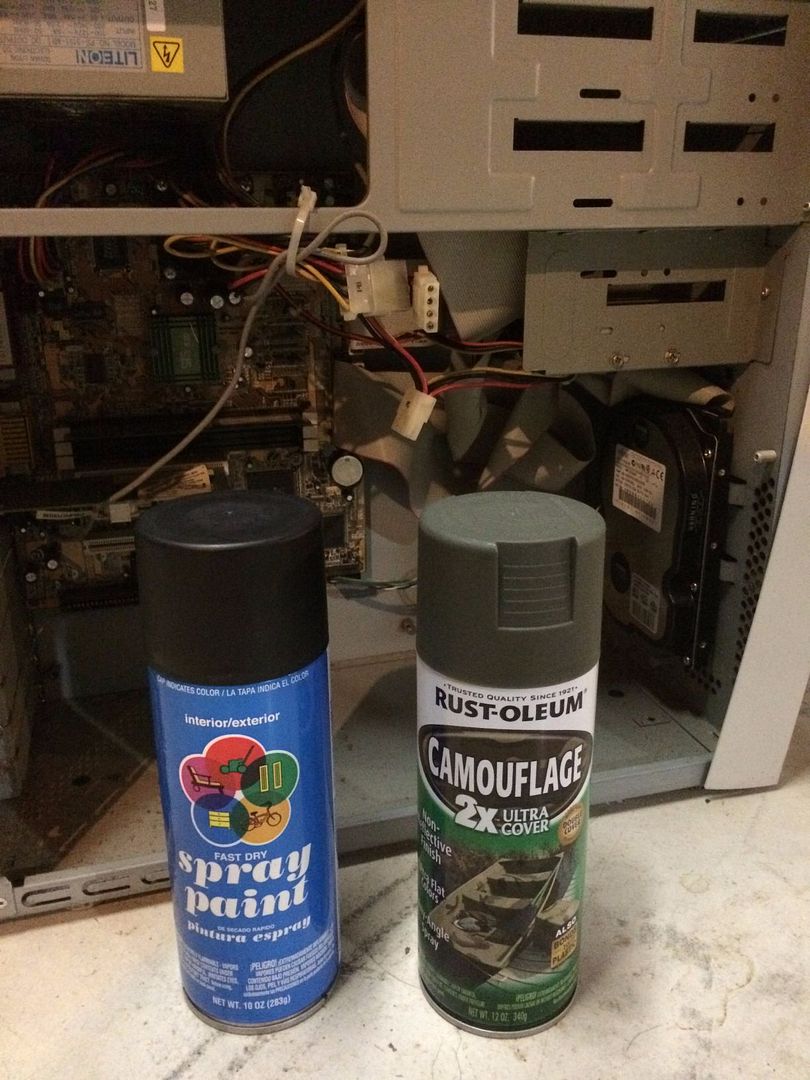
And of course a quick shot of some paint I picked up for the project
IMG_1123_zpsvfq8zaf8.jpg


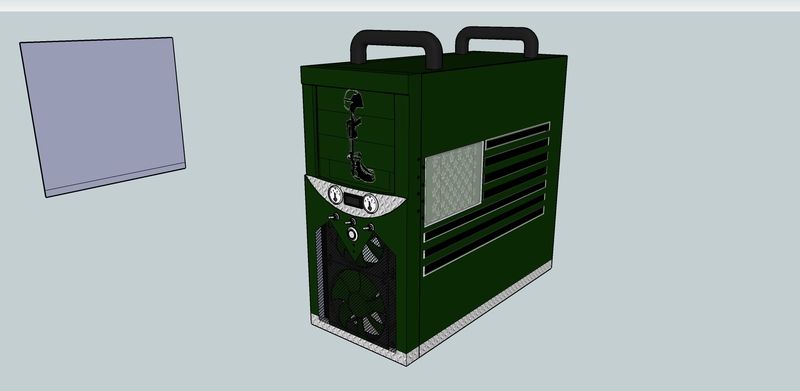
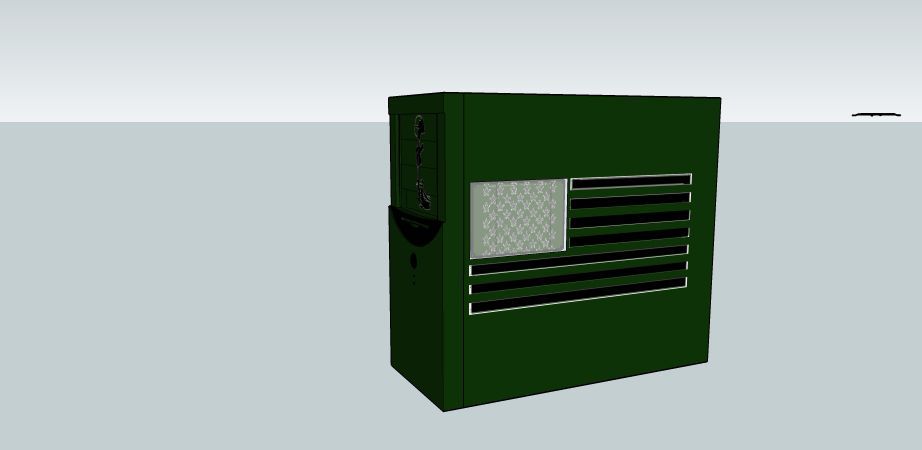
This case seemed like it would be a good platform for my military mod, so I brought up Sketchup and drafted some rough designs.

Design Concept #1 - WARNING: These concepts are guaranteed to change in one shape or another as the road progresses.

Here's my first quick concepts so let me know what you think. For the side window, I'm debating what symbol I will do the window..... I'm torn between either a grenade or a fighter jet. *UPDATE* Someone also mentioned doing a Jet/Ship/Humvee style design so I will have to play with that a bit.

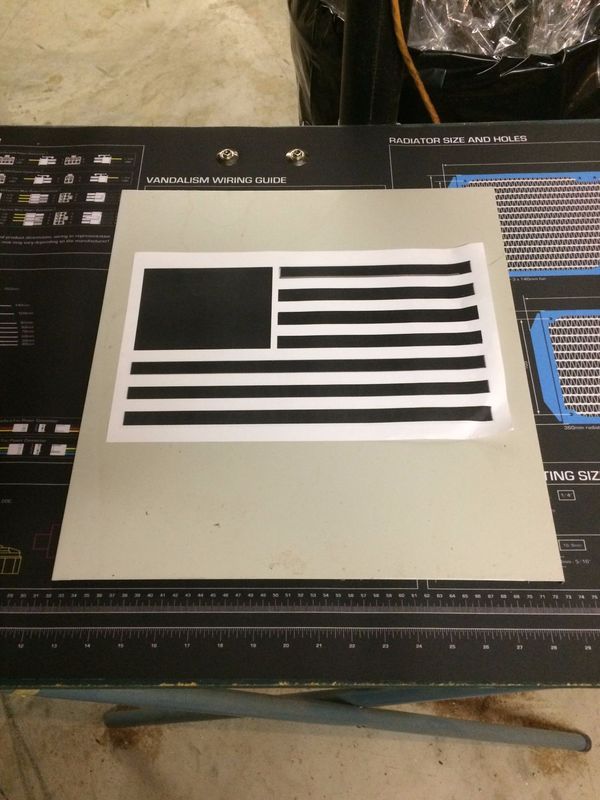
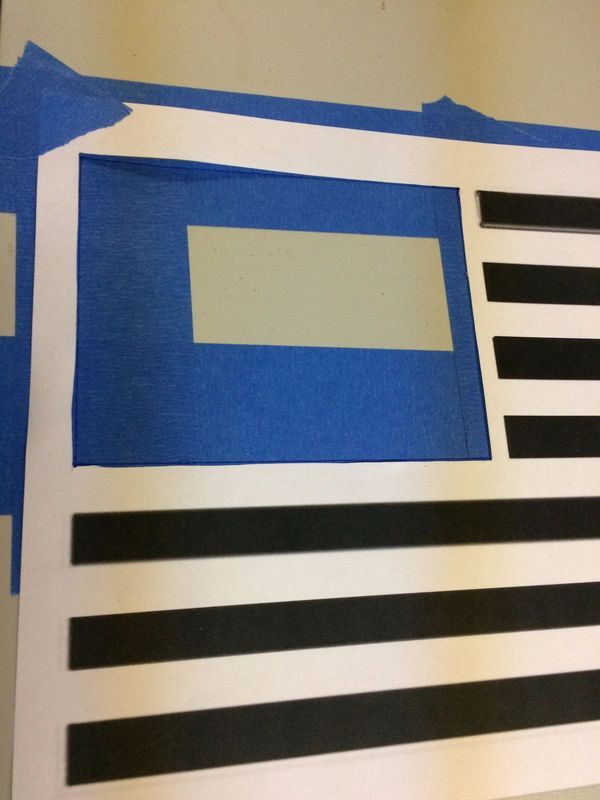
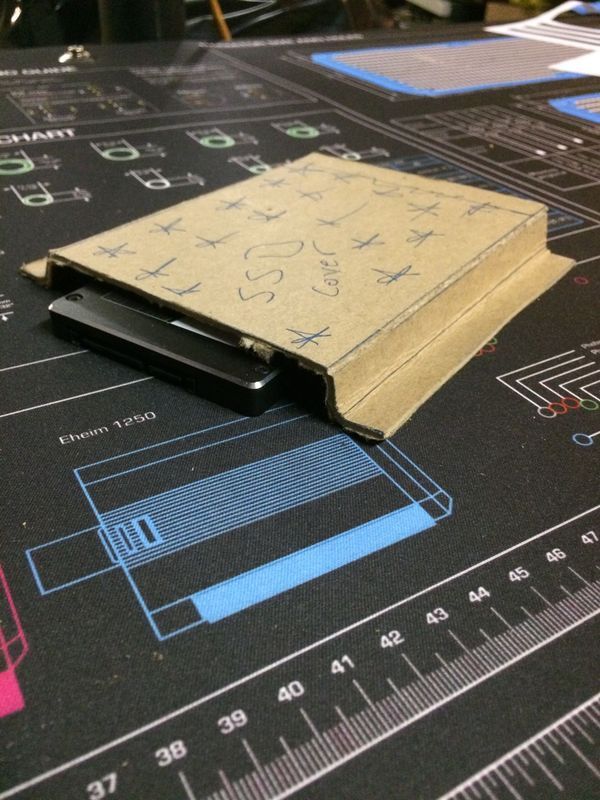
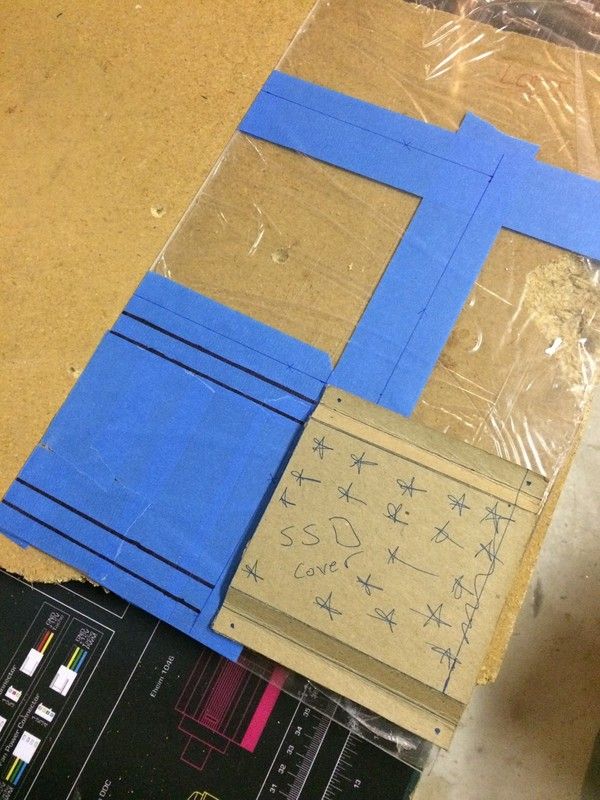
The SSD will get vinyl covered to be the stars in the flag and will sit behind a plexiglass window. Cooling for this project is undecided. If I get to do watercooling or at least an Aio, I'm thinking a 240 rad in the front will work just fine.
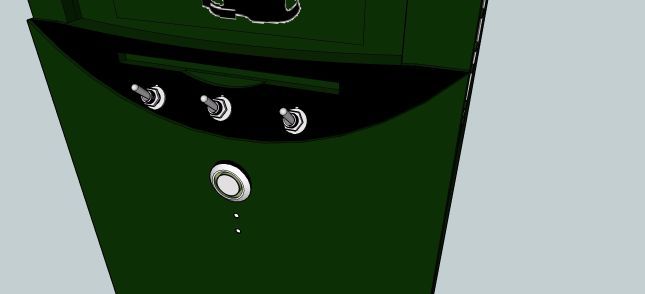
Case%20Right_zpsmy2woivu.jpg

Toggle%20Switches_zpsymoqioel.jpg


New Window Concept
Design Concept #2
Side%20Window%20All_zpsq8rguphw.png


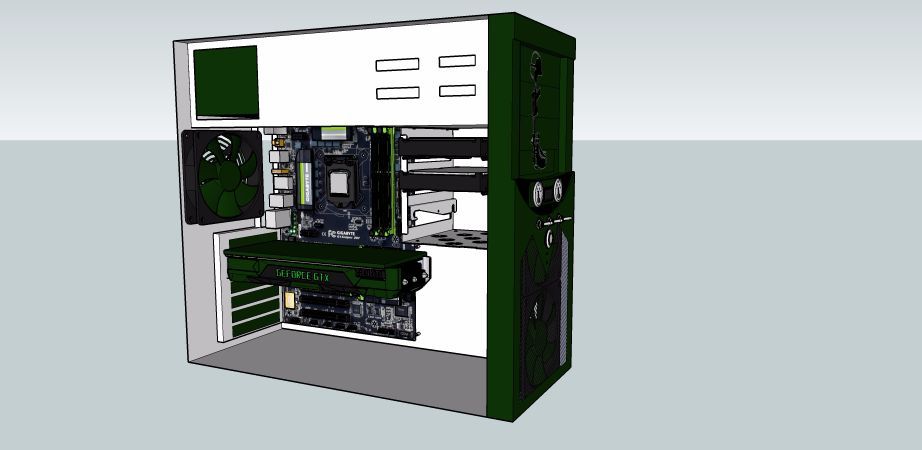
Updated front panel and inside hardware
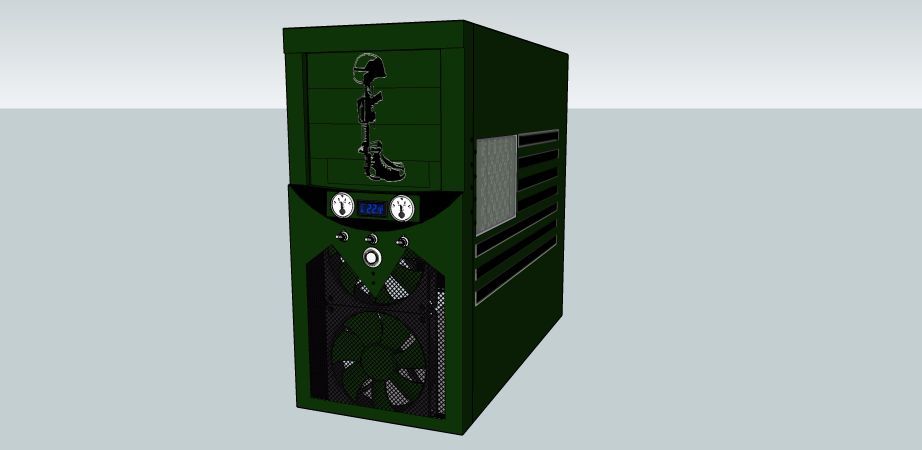
Design Concept #3
Case%20Front_zpsrzpkdp3a.jpg

Case%20HW_zpsppse8irw.jpg


I also manged to pick up these handles for free out of a trash pile( brand new) so I decided to mock them up
File_000_zps9uhkbleh.jpeg


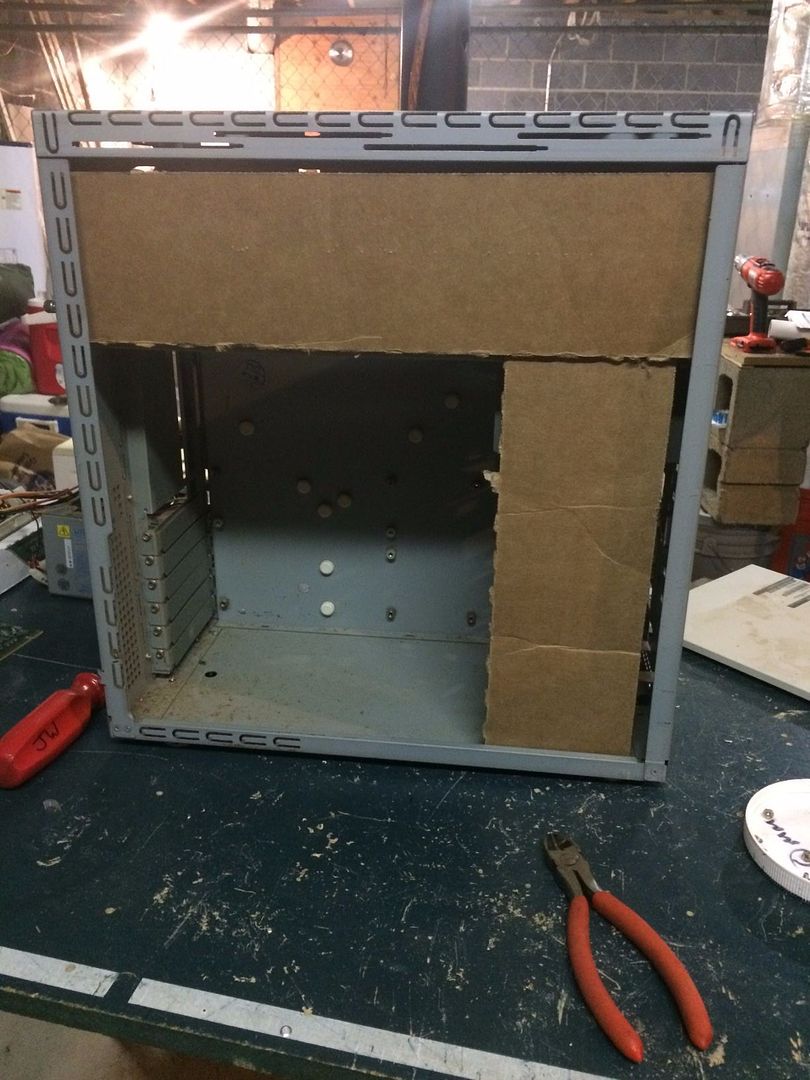
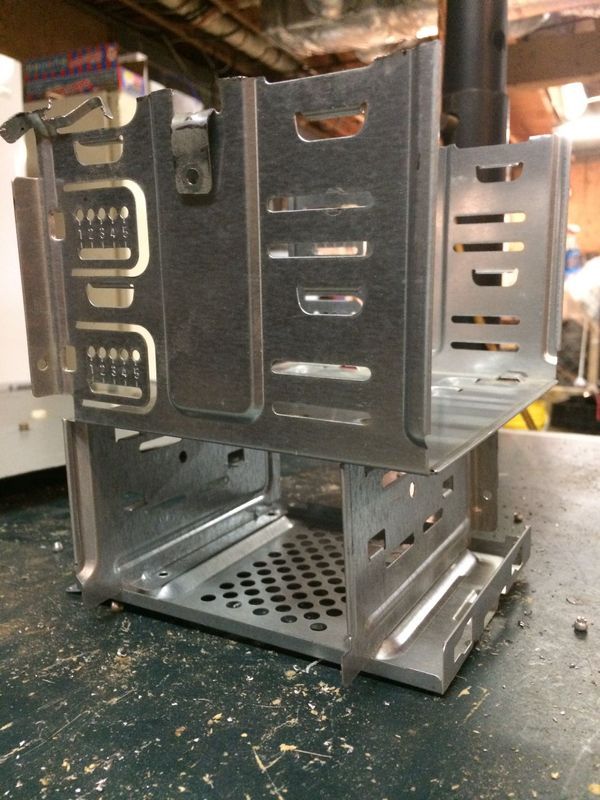
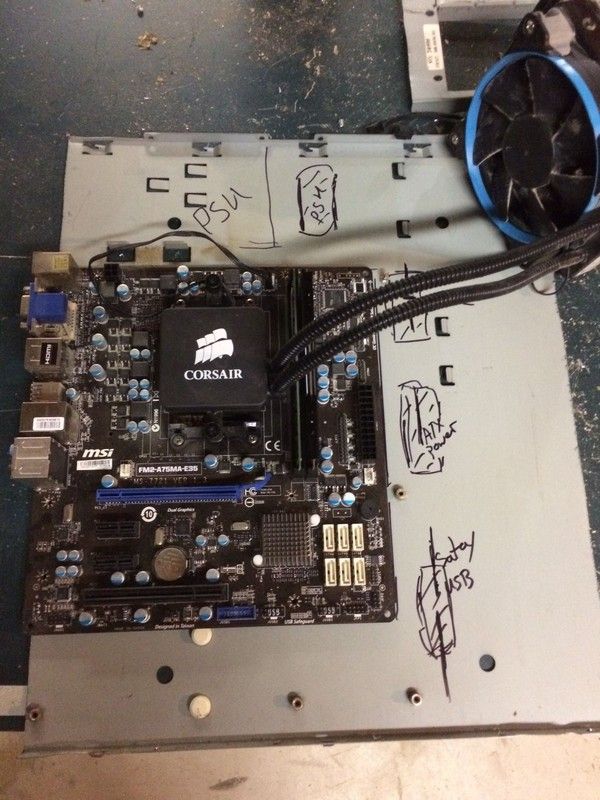
Look at this lack of cable management space, looks like I might be making a new backplate so I can shift things over.
File_002_zpsxbkviwu3.jpeg

File_001_zpsionobt62.jpeg


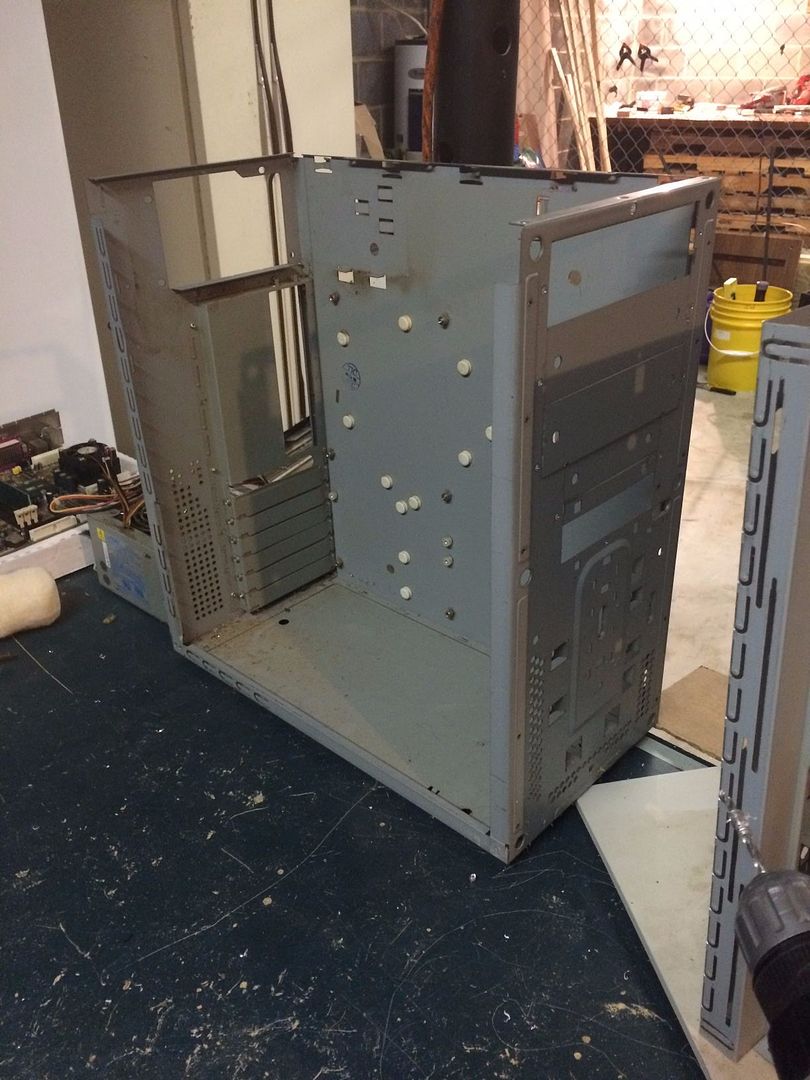
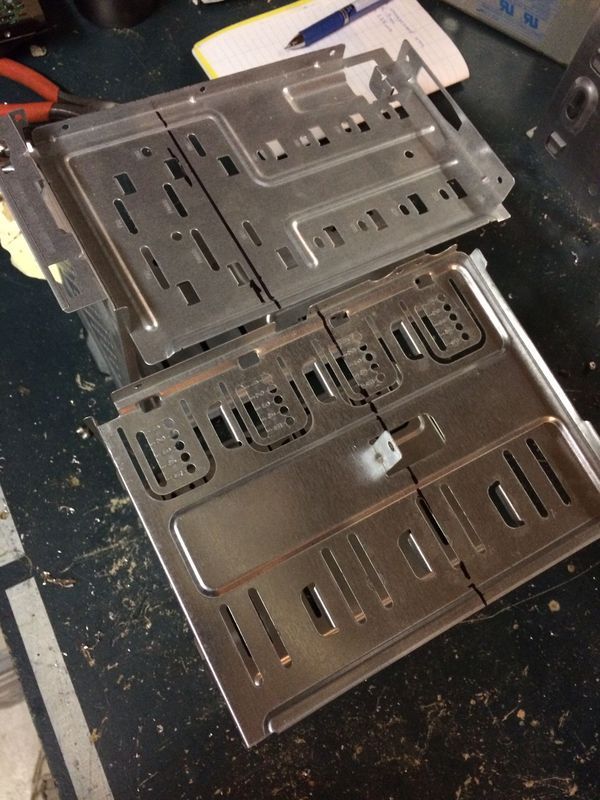
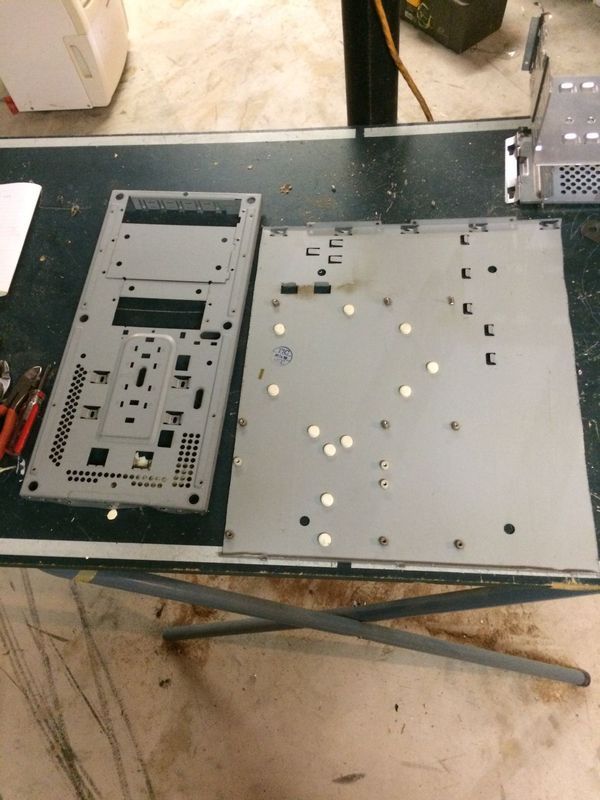
Time to remove that old dated hardware
Out with the Old
File_003_zpsxg20f5em.jpeg

File_004_zpsdcrxw6vl.jpeg


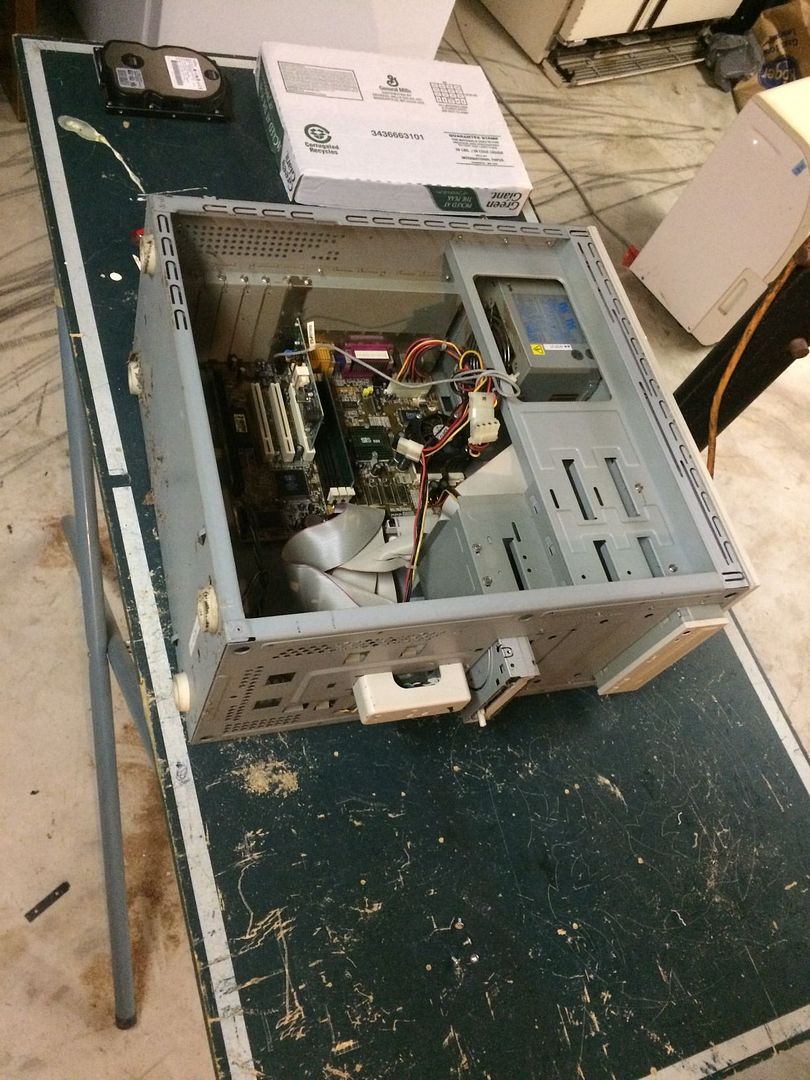
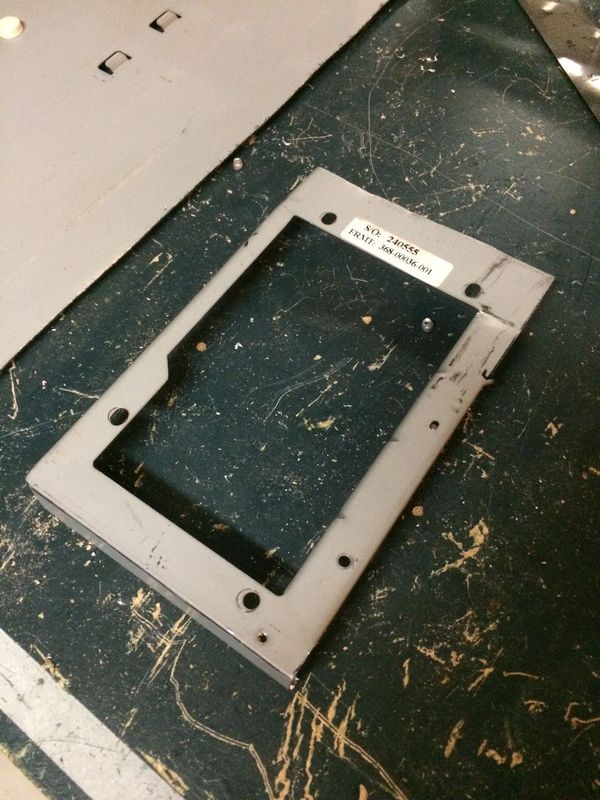
Look at all the modding potential...
59e3ea6a-5ceb-425b-bb08-20249d3f67e5_zpsxwkhd6f7.jpg


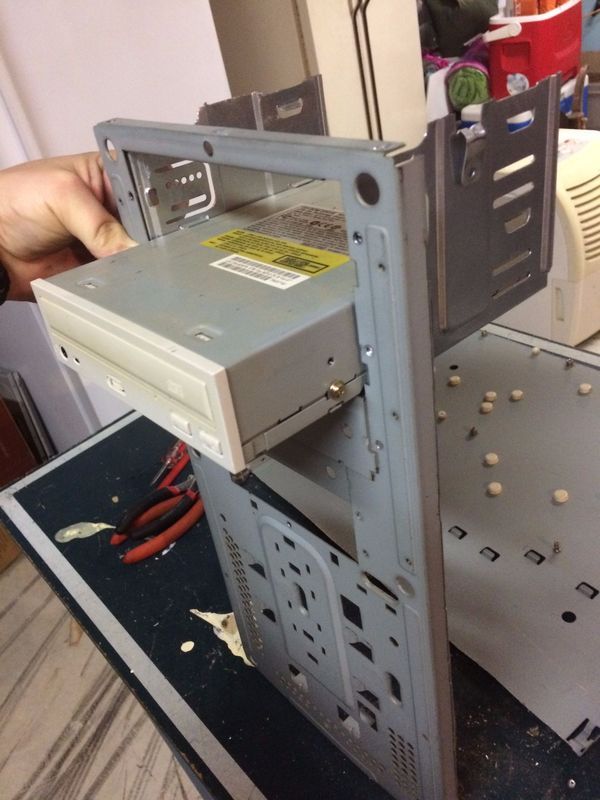
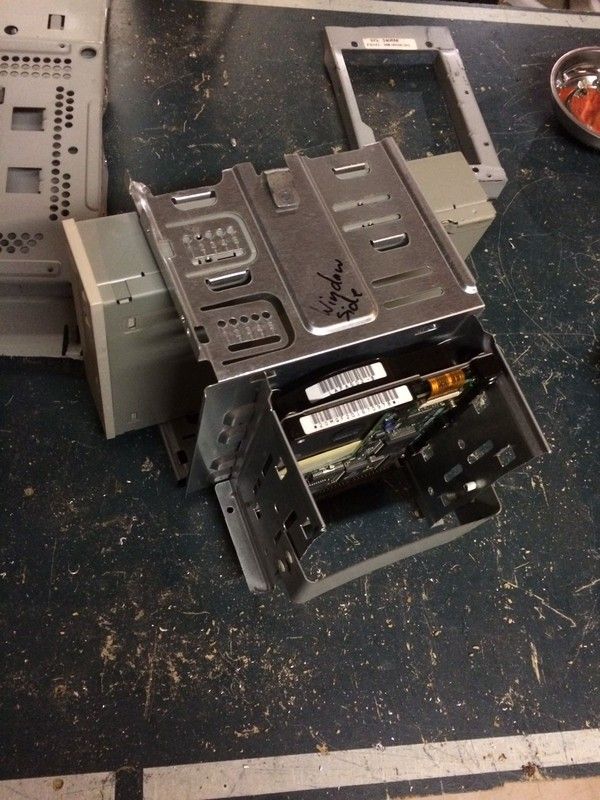
Used an old ATX motherboard to test fit, I even squeeze an optical drive to test the clearance. I tried to put my Corsair TX650 PSU in there as well, but I couldn't get it to fit because of the coverplate that extends from the optical bays. This case wasn't made for a fully ATX PSU I guess. Time to break out the tools.
cb3c9785-2607-4532-a170-002385285d2d_zpsigtxbyhu.jpg
 
Last edited:
I'm super excited to announce, for those that noticed...... We are now officially sponsored!

Our first sponsor that I'm pleased to announce is ModMyMods.com

logo_zpsgtabjsjz.gif


They have graciously agreed to handle the lighting and the needed cables to make that work. Additionally, they were nice enough to include the Vandal LED switch, zip ties and some rubber grommets for the cable pass through. Working with ModMyMods couldn't have been any more enjoyable. They were always quick to get back to me and always professional. Once the parts arrive I will get some hardware shots posted.

In the meantime, I need to get my "photo studio" *cough cough* set up.
 
As a veteran myself, I like this already. You've just kicked the gears in motion... I may have to clone the idea locally. I have family heavily involved with the veterans community in my area and I've been looking for a way I can contribute. This would be a great way to help out. (y)
 
These are some of my favorite types of mods. Cobble together a bunch of old and repurposed items and turn them into a masterpiece. Good luck with the mod and picking up some new sponsors as well.
 
As a veteran myself, I like this already. You've just kicked the gears in motion... I may have to clone the idea locally. I have family heavily involved with the veterans community in my area and I've been looking for a way I can contribute. This would be a great way to help out. (y)

Always glad I can inspire, especially when it comes to helping other veterans. Let me know if you have any questions, right now everything is still in its infancy but I will do my best. If you do clone the project just let me know and I can send you a copy of my proposal that I gave different businesses. It'll give you an idea of what kind of info you need before approaching sponsors.

These are some of my favorite types of mods. Cobble together a bunch of old and repurposed items and turn them into a masterpiece. Good luck with the mod and picking up some new sponsors as well.

I think I'm good with the luck in regards to the mod itself, but I'll take everything I can get in regards to the sponsors :) Had some important ones fall through, but just heard from someone that is offering to supply some RAM to the project. Now I just need to figure out if I'm going to build off a DDR3 or DDR4 platform.

Welcome aboard the party train... (or should I say tank?) .... grab some popcorn and enjoy the show.
 
TestSig_zpsrt3mhkbq.gif


Figured I'd mock up some quick cardboard shrouds to see how clean it would make it look. I'm definitely in favor of the top shroud but I'm still a little uncertain about the front shroud. I wanted to test fit my Corsair TX650 but the placement of the prefab shroud was too narrow to allow me to squeeze the PSU up into the space. The PSU that was in the case was almost half the size of that Corsair.

File_000_zpsnjfjvm5f.jpeg


Then the teardown begins with drilling out all those rivets to remove the top panel.

File_003_zpsdy5awsjd.jpeg


I had planned on using the optical bays and turning the hdd bay 90 degrees.... but as you can see gotta love old non-modular assembly.

File_002_zpsqj4x8qdq.jpeg


As you might've guessed previously, the front, back and motherboard tray are all ONE piece :p So taking off the bottom panel is definitely being a chore. Where the holes are used to be a tiny dot that welded the two pieces together. Since I don't plan on welding it back together, drilling out the welds allows me to rivet the case back together instead.

File_005_zpsdewxayhe.jpeg


But as you can see, popping all those welds have bent up the edge a bit. Going to need to give it a good speaking to with my mallet :)

File_004_zpsqczjqqyl.jpeg
 
Update 9/30/16

TestSig_zpsrt3mhkbq.gif


So is everyone enjoying the updates?


Well it’s time to do some more tearing down and overall destruction of the case. First, let’s remove those nasty yellowed case feet.

Remove%20those%20Feet_zpstw18mrse.jpeg


Next, we can finish taking off the bottom panel. Breaking the remaining welds along the side were only a slight annoyance. All that’s left is the front/tray/back one-piece.

Bottom%20and%20Top%20Removed_zpsscicmurc.jpeg


Everything is apart, now we can start marking cuts.

Marking%20cuts_zpstfb2xf28.jpeg


Before cutting the panels apart, lets test fit our drive bays for clearances. Looks like everything will fit nicely.

Testing%20out%20fit%20bays_zpsbgafpw0e.jpeg


In testing out the new motherboard IO panel placement, I went from 5mm clearance to 12mm. I would’ve liked to get more out of it, but that’s all I can do and still have room for a 120mm exhaust. But I think it will give me just enough to hide the cables like I need and fit the SSD in it’s place.

New%20motherboard%20placement_zpsgjodpge6.jpeg


Now everything has been spaced out and adjusted…. Lets break out the jigsaw! Welp, need to fix it first. The blade arm retention spring had broke in half, so I had to use my ingenuity and use a spacer and new spring to fix. Then I adjusted the bottom runner so the blade is back in place and secure.

Fixing%20Jigsaw_zpsyyqsvomo.jpeg


And… now we start cutting. First we cut up the one piece monstrosity. Now the motherboard tray and front panel is separate.

Motherboard%20tray%20cut%20from%20front%20and%20back_zpsizbt2jgu.jpeg


Yes I hear you saying, “But wait James, where’d the back panel go?” I give you my new PSU bracket, all that I’m keeping from the back panel(unless I steal the mesh from it later). My plan is to have the bracket that gets screwed onto the PSU, then you can slide it into the case and secure the bracket with 2 thumbscrews. I also found out I need to cut the bracket opening just a bit more to allow for the extruded power supply plug on the newer PSU models.

PSU%20Bracket_zpsp3iwbljm.jpeg


Then we can cut down the new drive bays to fit two optical drives and 2 HDDs. And lets test the look.

New%20bay%20setup_zps4kxidj9o.jpeg


Well I didn’t care for it too much, so I broke the bottom bracket off. It was just too big and clunky. Instead I will hold it with an old optical bay cover similar to what I did in my Double Dragon build.

Creating%20new%20HDD%20bays_zpshpwo80pr.jpg


I like the new placement and design, so let’s line up the optical bays with the front panel hole…. It fits perfectly with the new motherboard tray placement. Time to drill some holes for our mounting solution.

Lining%20up%20optical%20bays_zpsr1ocpy75.jpg


So in closing, my father in law walked up to me yesterday evening after getting back from Harbor Freight and tossed these to me and said “Happy Birthday.” I’m not sure if I should tell him my birthday was back in May…… oh well, I can’t complain. I can now stop losing screws and make more accurate measurements.

Late%20Birthday_zpsbagzp8sh.jpg


Until next time…. Let me know what you think, I always love to hear from my friends here in the modding community.
 
Update 10/4/16


TestSig_zpsrt3mhkbq.gif


Assembled the drive bays together to test fit and make sure I drilled the holes in the right spots. This is temporary as I will take it apart for painting. I did notice I'm going to have to figure out a solution to mount it also to the top panel as well for extra support.


IMG_1201_zpssqspvfqc.jpg


IMG_1200_zpsgznbrtnh.jpg


Marked up the motherboard tray for location of grommets and other cuts that will be needed


IMG_1202_zpsjksqk1ue.jpg


Marked the cut of the front panel that will be replaced with mesh and painted.


IMG_1203_zps53d5vk1a.jpg


First box from the sponsors(ModMyMods.com)

Feels like Christmas morning! :D

IMG_1205_zpsowztjdny.jpg


Packed tighter than soldiers in a cattle car

IMG_1206_zpsuiqla4nl.jpg


Some Darkside magic....

IMG_1209_zpsnm1rkhxl.jpg


Cable management supplies.... glad I'm moving that motherboard tray to make room

IMG_1210_zpsroeh3lo2.jpg


Mmm... look at those clean black sleeved cables

IMG_1211_zpszwv451fu.jpg


Vandal switches... I've always wanted to use one of these

IMG_1213_zpsjeh4dtv9.jpg


Darkside strip unsheathed... all those LEDs :D

IMG_1214_zpsxqqkvzx9.jpg


Front panel extensions

IMG_1215_zpsdbbvkbds.jpg


Why have dimmable LED strips without a dimmer?

IMG_1216_zpsbvtxustb.jpg


Nice clean black vented PCI covers

IMG_1217_zpsgnziru55.jpg


PWM splitter

IMG_1218_zpsuncm0l8a.jpg


*flex* always love product flair(*thinks he might need to incorporate this into the build... since they were the first onboard*)

IMG_1219_zpsmeyq6rgi.jpg


*drool* That work mat is so nice. The material feels superb! I can't wait to get this laid out on my area.

IMG_1220_zpsauzffn5k.jpg
 
Update 10/5/16

TestSig_zpsrt3mhkbq.gif


I realized that I never posted anything about the projected completion date. So for those who care about project timeline/deadlines, here you go!
smile.png
For everyone else, I give you a peek of what the next update will be about.

Timeline of Project

2016

- September 30th 2016 - Case design finalized
- October 31st 2016 - Case cutting and layout complete
- November 30th 2016 - Any additional fabrication complete
- December 31st 2016 - Case painting complete

2017

- January 31st 2017 - Case assembly complete
- February 28th 2017 - Project: Military Tech case customization to be complete
- March 1st 2017 - Raffle begins

- Advertising push starts
- Finalize case display schedule

- May 29th 2017 - Raffle winner announced and check presented to VFW
representative at local Memorial Day Ceremony


And the tedious cutting work with xacto knife....

IMG_1229_zpszymxelpr.jpg
 
Update 10/6/16


TestSig_zpsrt3mhkbq.gif


Our next steps in fabrication work..... begins with our sexy new workspace thanks to our Alphacool mat.


IMG_1222_zpsn7pdinm9.jpg


Then we can get the placement of our Flag on the side panel


IMG_1223_zpsiqt2pgq5.jpg


Cut out the star block where the SSD will line up and we can mark it up for cuts


IMG_1224_zpsthldeunl.jpg


IMG_1225_zpseshhr20u.jpg


Then drill the start holes for our favorite jigsaw.


IMG_1226_zps8hdtokcg.jpg


Switching gears to the SSD cover itself, we first make our cardboard mockup


IMG_1227_zpszc36fw8n.jpg


Then we can mark out the bends and cuts on the small sheet of plexi I have. It's super thin and should bend pretty easy. I need to make my bending station and procure some heat source to bend it. Also you can see the cuts marked out to make the drive bay cover door.


IMG_1232_zpsnreakmln.jpg


So we got our soldier memorial piece printed out to the correct size(just about 6" tall)


IMG_1228_zps4nwzvx4y.jpg


And the tedious work begins cutting out the design.


IMG_1229_zpszymxelpr.jpg


The outlines have been completed. detail cuts for the rifle and helmet will be done on the painter's mask once in place.


IMG_1230_zpsq1c3xoiw.jpg
 
  • Like
Reactions: Derf
like this
Update 10/10/16


TestSig_zpsrt3mhkbq.gif


Some friends came from out of state to visit this weekend so no work was able to be done. However, I did do some design tweaks and updates to the concepts. Wanted to show everyone my plan for the diamond plating.


Case%20Front_zpszx9tg5i1.jpg


Also cut the window design out of the side panel to replace the image that was the placeholder.


Case%20Left_zpsh7zbfpzi.jpg


It was also brought to my attention that I never posted my explanation of the side window design. Here is how the design incorporates all 5 branches of the US Military.


- The tank = U.S. Army

- The aircraft carrier = U.S. Navy

- The jet = U.S. Air Force

- The tank + the aircraft carrier = U.S. Marines

- The aircraft carrier + the jet = U.S. Coast Guard


Additionally, a local PC builder has agreed to cover any 3D printing I might need. So I came up with this GPU backplate and Fan Grill. What do you guys think?


GPU%20Backplate_zpspbupm2di.jpg


Fan%20Grill_zpscmozsap7.jpg


As always let me know what you think.
 
I like the designs. My first inclination is that "One Shot One Kill" might fly for active duty, but might be touchy for vets. I would suggest carrying the front panel boots-and-rifle to the GPU backplate.

By the way, that side-panel window is rad.
 
I like the designs. My first inclination is that "One Shot One Kill" might fly for active duty, but might be touchy for vets. I would suggest carrying the front panel boots-and-rifle to the GPU backplate.

By the way, that side-panel window is rad.

Surprisingly you're not the first to mention the same concern with the GPU backplate. I gave it another try.... your thoughts?

GPU%20Backplate%202_zps7zev97z7.jpg
 
Update 10/20/16


TestSig_zpsrt3mhkbq.gif


New%20Sponsors_zpsrra06p1l.png


That's right ladies and gentlemen! We have new sponsors to announce!


logo_zps8ohxwwev.png


First, I welcome Lowes to the mix and while they don't have the budget to donate they are willing to work with me on the prices of materials that I need. The manager is a solid guy that was quick to communicate even with his busy schedule. A big thank you to Lowes for their support so far.


logo_zpszakpnfzp.jpg


Next I want to mention Home Depot. I'm currently working with the manager to sift through my materials list so he can provide the most that budget allows. It didn't take long for the manager to come aboard the project. I happened to stop him in the middle of the store and within a couple minutes he expressed his interest in sponsoring the project with some donations.


logo_zpsqjnebsy0.png


And last, but certainly not least, I introduce The Paracord Store who have graciously agreed to provide the paracord supplies for this project. Located semi-locally, about 3 hours drive from me, they can be found online at www.theparacordstore.com. They have some great prices and shipping is actually not too bad, they offer several options for shipping. One of the biggest things of interest is they carry more than just the standard 550 cord. They have a range of sizes to include 750, 550, 425 and 275. But to the delight of the modder inside of me, they carry CORELESS paracord. To make it even more interesting is they carry 20 colors of coreless paracord and over 100 colors and patterns in 550 paracord. Needless to say they have a great selection and looking through the colors makes me start thinking of all the other builds tucked away in my cerebral mass. :D


So take a moment and help me thank these sponsors for their support on this project. As a business it's hard to make a living in our current economical state, so I can't express my gratitude enough when I see this kind of support.


Until next time, Happy Modding!
 
I'm glad you engaged Home Depot. I used to be a Lowe's shopper, but when I discovered that Home Depot has priority parking for veterans, I changed my usual stop.

Cheers on the new sponsors!
 
I'm glad you engaged Home Depot. I used to be a Lowe's shopper, but when I discovered that Home Depot has priority parking for veterans, I changed my usual stop.

Cheers on the new sponsors!

I'm glad as well, the manager at Home Depot was super easy to work with. I picked up some sheet aluminum and diamond sheet for the project and it only took a couple seconds and he had me out the door. Told me to come back when I'm ready for the other materials. I was very impressed.

On a side note, I wish they had the veteran parking here.
 
11/2/16 Small Update


Just so everyone knows I haven't fallen off the face of the earth, I wanted to say hi and share something new. I'm currently tied up finishing my Blue Fury build for Gigabyte's Mod2Win contest.


I got the samples of green paracord from TheParacordStore.com and compared them with a scrap piece of metal I painted. I first was going to do Black/Green/White color scheme(first picture), but when compared to the paint the white just was very bright. Instead, I'm going to switch it up and replace the white with their Khaki color(second picture). At the bottom is the sleeving design that I am going for. There won't be a huge amount of Khaki used, but just enough to offset the black and green.


2900633


2900632


2900634
 
The white definitely stood out too much. Good choice going with khaki. (y)

Thanks. It's always good to hear from others. Keeps me from going in a wrong direction :)

*edited* Was suppoed to read "Keeps me from going.."
 
Last edited:
Very impressive, all the more so for me b/c I don't have the patience/skills to do any serious modding for my own rig. (Love my Phanteks Enthoo Pro case for it's "built-in cable tidy mods" for that very reason, lol).
 
Update 11/28/16


Hey everyone!


I do apologize for the long delay in updates.* I had to switch focus and get my Blue Fury(link) mod complete in time to submit for Gigabyte’s Mod2Win contest.* So while the delay was a bummer, there was some good to come out of it.* But that I will save for another update.


Onto today’s update, I worked on marking and cutting both a new motherboard tray and back panel.* So far I have cut the panels out, marked the location for the standoffs, marked and cut the opening for the PSU and mounting holes.* Additionally, I riveted a L support under the PSU to give it more strength.* I will do an additional mount on the motherboard tray as well.


Well that’s it for now, keep an eye out as our focus has turned back to completing this.

LL

LL

LL

LL

LL

LL
 
  • Like
Reactions: Derf
like this
Update 12/13/16


LL


Good afternoon DDCM fans!


I hope everyone is doing well this holiday season and the number of stressful days will stay to a minimum. I finally have some more progress to share. I had taken a bit of family time and took a small trip to see some family and take my kids on the Polar Express. Needless to say, given the headaches at work it helped me refocus. Here’s a picture from the train with our awesome matching pajamas.


LL


But enough of the silliness, and onto the project. I was able to get the new panel almost all complete. Just have to tie in the corners together with some rivets and it’ll be ready to hit with primer. Seems like a lot of work to gain a few mm of cable management space.


LL


LL


LL


LL


LL
 
Update 12/13/16


LL


350


Good afternoon DDCM fans!


That is right ladies and gentlemen, it’s time for a sponsor update! And what a great one it is!


700


700


Kicking off the party we have gained sponsorship with GIGABYTE. Through some hard work and determination, with a bit of Blue Fury modding on the side, they have graciously agreed to send a GA-170X-EXTREME-ECC motherboard. How great does that tan digital camo look! I am glad that I decided to add a little tan into the sleeving instead of the white. With a little green paint this will fit well with the overall theme.


700


700


Second we have our newest sponsor, EVGA who just recently returned their response in support of Project Military Tech. I am super excited to get my hands on the EVGA SUPERNOVA 1000W G2 they are sending. Not only is it an impressive piece of hardware, I am itching to start sleeving this 1000W monster. A big thanks to EVGA for their support!


700


700


700


Finishing today’s sponsor update is one of our favorite forums, Overclockers.com! They stepped up to support the cause and sent a 8GB kit of G.Skill Aegis DDR4 RAM. This prompted me to get an e-mail out to G.Skill to see if they would match the donation and possibly throw in a SSD. But, time will tell on that one. I normally don’t see forums sponsoring builds/mods, so I appreciate the non-conventional support! Over the past year I have had the pleasure dealing with many of the moderators and other forum members. One local member was gracious enough to loan his GPU for me to mod for my last mod, Blue Fury.


To conclude today’s update, I just wanted to give a big thanks to not only the companies that have sponsored me, but also to the individuals that have stepped in and offered support. From 3D printing, decal printing, to CNC work; several people have offered help where they can. This build has been heavily dependent on sponsorships, and I am moved to have so much of the community get behind this build.
 
Update 12/28/16


LL


Good afternoon DDCM fans!


Got a bit of an update for everyone!


I was able to sneak in a little work this holiday season and have a couple pictures to share. I cut out the opening for the front panel intake and made a mount for the 2 fans. I also test fit the vandal switch in place.

700


700


700


700


700


I also posted DDCM’s first Youtube video! I figured unboxing EVGA’s PSU was a perfect opportunity to showcase my….. workspace? Haha, hope you get a kick out of the video and I’d love to hear any comments or suggestions.

YouTube Link:


Slightly off topic, #OperationChristmasSurprise went off beautifully and I crafted this plaque for my wife.

LL


As always guys, thanks for sticking with me. Until next time….

Happy Modding!
 
Update 1/2/17

LL


Good evening DDCM fans!

I hope everyone’s holiday went fantastic and safely made it through with some sense of sanity. 

To celebrate the new beginning of the new year, I figured I’d make the video giving a shout out to sponsor that helped the beginning of Project Military Tech, which is ModMyMods.com. Enjoy the video and if you’ve enjoyed the project before or got a chuckle from my newbie YouTube skills, please leave a comment or a like. I really appreciate everyone’s support up to this point. Hopefully more build log specific videos will come in the near future.

As always…. Modders Unite!


Update 1/23/17


LL


Good afternoon DDCM fans!


Just giving a update on how progress is moving….. slow…. But moving.


Got the front panel fabrication complete. Also prepped and ready for paint.... would have painted pictures if my spray can didn't clog 3 seconds into spraying. Took it back to Walmart and now waiting for them to get more in stock.


700


700


700


700


700


700


So we started prepping to begin sleeving station to hack through them all. We have our new pattern and it’s going to look awesome. It’s very non-traditional yet I think it’ll tie everything together well.


700


700


700


Only a few wires in the ATX pin extractor broke. I'm not mad though since it lasted through several sleeving jobs. When I broke I pulled out my trusty staples to continue. Before I started making my thumbs bleed on the staples I shot ModMyMods.com an e-mail asking if they had a tool they could send to help keep the process going. And like the awesome sponsors they have been so far, they already shipped one out to me this morning. Big thanks to them for helping progress keep moving forward. Until it arrives, I will do a little more using the trusty staple method. Also, I took the time to cut all the paracord for the 24 pin to the correct lengths.


700


700


Thanks again for tuning in and if you find us on social media…. Updates are a little more frequent. Until next time Happy Modding!!
 
I've never had great success with the pin extraction tools. Inevitably, I end up digging around for some staples to finish the job. I should just start soldering them to a handle and call it good :)
 
I've never had great success with the pin extraction tools. Inevitably, I end up digging around for some staples to finish the job. I should just start soldering them to a handle and call it good :)

Haha, I know the feeling! If I didn't have such an awesome sponsor I would've already broke out the soldering iron. In the meantime I used two staples to remove all the wires from the extension and have slowly started to work on getting them sleeved. The tool will be here on friday, right on time for me to do th PCIe and CPU cables.
 

Attachments

  • IMG_1811.JPG
    IMG_1811.JPG
    151 KB · Views: 33
Update 01/30/17


LL


Good morning DDCM fans!


I hope everyone had a great weekend! I was able to do a little work on Project Military Tech in the early hours of the morning before everyone woke up.

So a bit of sleeving progress, I was able to finish the 24 pin and will be working to finish the other cables shortly. Thankfully work going forward will be easier with the Billy Brown’s World Renowned Universal Dual end ATX pin removal tool! I am super excited as this tool is much more durable and the quality of the pins are even more so than my last tool. Thank you again to my sponsor ModMyMods.com for the quick response and getting this in the mail to me so quickly.


700


700


700


700


700


Additionally, I test fit the case handles and checked the bolt clearances. I need to use a bit shorter bolts, hopefully I remember to ask for some when Home Depot gives me the paint on Wednesday.


700


700


700


700


Once that was complete, I reassembled the case and made sure everything was lining up properly so I can finish my final cuts, paint and start mounting things. I can’t wait to start painting and the vision starts to take shape.


700


700


700


1/30/17 - HELP!


A call to all my supporters! HELP, I need your input!


First, we have the before and after of the motherboard and the painting of the heatsinks. Is this a good use of the green to tie it in? Open to other ideas.


700


700


Secondly, I have these two hot wheels vehicles. I want to incorporate them into the build, but I'm not sure how. Any suggestions are welcome! :thumb:


700
 
  • Like
Reactions: Derf
like this
Update 2/6/17


LL


Good morning DDCM fans!


I hope everyone had a great SuperBowl weekend! I personally didn't watch the game as I'm not a fan of football unless I'm out on a field playing myself. But I digress, let's talk PMT progress!


First, I got to cutting out the side windows, for which I made a template to mark them. The cutting actually went better than planned. I was worried about the thin strips of metal between the vehicles. Then it was prep and primer.


700


700


700


700


700


700


700


700


700


700


700


700


700


700


700


Second, we turned our attention to the drive bay door. Used a DIY material warmer (or my electric heater) to give the copolyester a slight curve to mesh with the front panel cover. The small bent strip was a test of the company's claim that you can cold bend the material without it breaking or splintering. And to my surprise.... it bent easily and with no flaws. Now I just need to create a new brake.


700


700


700


700


700


But that's it for now, I wish I had more to update but I was caught up with a daddy daughter dance and setting up my new/temporary setup. Keep tuned over the next week for some possible updates on sponsors, fingers crossed they come through!


700
 
Update 2/7/17


LL


1000


Good afternoon DDCM fans!


700


It’s that’ time again! We can now announce that Thermaltake has partnered with DDCM for Project Military Tech!! How awesome is this!! The team at Thermaltake has agreed to send the following RGB awesomeness to fill in some of the gaps of missing pieces.


First we have my original request…. The new TT Ring Pro 12 fans! I initially asked for 3 of the fans to handle the 2 front intake and 1 back exhaust. But after deciding the water cooling route and the capability to do a push/pull, they bumped the quantity up to 6! The extra fan is to be added to DDCM’s part pool for a later project. Who knows maybe these fans will make another appearance in the DDCM desk project.

700


Secondly we have the cooling solution! The TT Water 3.0 240mm Non-RGB version, because the fans don’t matter now that we have those TT Ring Pro 12. So we are going to take the individually controlled RGB LED fans and slap them all over that radiator. The fans included with the system will be added to the part pool as well. I can’t wait to see this water cooling system lit up with green and white LED patterns……. Is anyone getting as excited as I am?!?!?!

700


Next, we have the Poseidon Z RGB Keyboard w/ blue switches. Because, when you have such a pretty tower…. You have to have just as awesomely lit peripherals. I can’t wait to get my hands on this as I’ve never had the chance to own a mechanical keyboard myself. I see a product demo/review video in the near future.

700


To pair with the Poseidon keyboard, we also have a Ventus Z RGB Gaming Mouse. Why have just one peripheral lit up RGB style when you can have them all right?

700


Finally, to finish off the Thermaltake bundle of goodness is the Cronos RGB Gaming Headset. When you have all the gaming power and potential that is Project Military Tech, you are going to need some quality audio gear as well. I think these are going to pair nicely with Gigabyte’s Creative Sound Core3D Quadcore processor. I’m going to be sad to see this leave the workshop… but I think I might enjoy testing it.

700


Well that’s it for now everyone! I hope you have all enjoyed following the progress this far. Our next steps for sponsors is to fill the empty gaps of the CPU, GPU and HHD/SSD.
 
Update 2/16/2017


LL


Good afternoon DDCM fans!


First off, I would like to ask the question of what you prefer. Right now I have been saving updates and doing a write up with a bulk update with a lot of pictures. Is this what you prefer? Or would you rather see more frequent updates with just a couple pictures each time? As my updates are becoming picture heavy, I’m aware this might cause some issues for some. But, will continue if no one identifies a want to move to another option.


Now that’s out of the way, lets continue with PMT!


Let’s start out first with our sponsor hardware goodness from Thermaltake! They were gracious to send not only fans and a cooler, but peripherals as well! The peripherals will really generate some extra audience at the raffle locations!

700


Digging into the box of goodies, we first pull out the Ventus Z RGB mouse. A real thing of beauty, with sharp lines and great contrast. Design plan for it includes painting it green, excluding the buttons.

700


700


Moving onto the keyboard, Thermaltake sent us a Poseidon Z RGB. This thing is a beast! It has quite a bit of weight. In my YouTube unboxing video, I mentioned it weighed about the same as a brick… We are going to adjust the design to fit PMT by painting the keyboard body green while leaving the caps black. Over on social media I played with some of the RGB control modes, and I have to say my wife was actually impressed….. and she is a non-techie that gets bored with anything gaming/modding specific.

700


700


Finally, on the peripheral list is the Chronos RGB headset. I pulled it out of the box and test fit it to my head. When I asked if I would get weird looks at work if I used this…. She just laughed. But it does have some powerful output. When I plugged it in it took over the audio from my speakers but my wife could still hear the movie from across the room. Design plan for this is to paint all of the non-shiny pieces green. If I had the skills I would replace the red fabric with camo or green.

700


700


Moving from the peripherals and onto the rest of Thermaltake’s package, we turn our attention to the TT Water 3.0 CPU cooler. Like most AiOs the loop is very well secured, and this one is very well crafted. Nice clean lines, maximum space on the radiator, quality materials of the tubing. I’m sure the pump will perform splendidly as well, but I haven’t had a chance to push power to it. That functionality test will come with all the fans mounted and in place. I couldn’t resist and mounted the first two fans on the radiator already.

700


700


Speaking of the fans, can we say rugged durable construction. The diffuser over the LEDs really allows different colors to separate nicely. Here’s some RGB shots of playing around with possible settings for PMT.

700


700


700


700


We have also partnered with ArtMods(@artmods_ on twitter) and he is providing the vinyl cutout of the front panel design with the soldier memorial. As a veteran of the military himself, he was more than happy to help out any way he can.

700


Continuing onto some fabrication, we’ve gotten a lot more done and are preparing to get the bulk of the painting done. But first, we had a slight mishap with some heat and the front panel. It warped just enough that I can’t fix it. The positive side to that is that we get to remake a cleaner front panel and not restricted by the shape of the original panel. Also for this update we have the final shots of the side panels painted and the internal shroud created. Next steps are to finalize the motherboard tray cut outs and paint everything this weekend. Assembly of the case hopefully completed on Sunday(Feb. 16, 2017).


Front panel damage:

700


Front panel resolution:

700


700


Internal shroud:

700


700


700


700


700


700


Motherboard tray cuts:

700


700


Final disassembly before painting

700


Painting:

700
700
700

700
 
Update 03/06/17


LL


Good afternoon DDCM fans!


I apologize for the lack of updates, but I do have a lengthy one for you today! Bear with me and the massive picture overload. I’m going to start the post with a peek into the current state of the build. Oooo…. Pretty lights….


700


First, we finished painting the panels green, then assembled the case as is. The case assembled, was taken to the Veterans of Foreign Wars(VFW) February meeting. The response from the gentleman there was fantastic and they will be happy to provide members to man the donation/giveaway table at different locations around town. Now it’s on me to get the case finished and start calling around to stores for permission to set up there.


700


700


700


700


700


700


After bringing the case back, I began to clear coat the case parts (after the recommendation from ArtMods) to prevent fingerprints and such. Keeping to the matte clear coat keeps it looking nice, but I’m really digging the slight sheen it created. We also took the opportunity to cut holes and install grommets for cable management.


700


700


Once the clear coat was dry, I began to install components. First up we mounted the spare 60GB(I know I know… I’m crying a bit inside too). After which, we cut the cable management hole so we could use 90 degree connectors and hide the cables to the other side of the motherboard tray. We also painted the stripes on the side panel that will showcase the SSD window(which will have the stars).


700


700


700


700


700


After the SSD was in place and wired up, we turned our attention to the Tt Water 3.0 AIO water cooling. After receiving the longer radiator screws from ModMyMods, I attached the front fans through the bracket to the radiator on the other side. Installing the Water 3.0 system and each part afterward, I focused on doing the cable management for each piece. The RGB control box for the five Tt Riing Plus 12 fans sits in the drive cage on the bottom, allowing for good cable management out of sight. Additional length of the front fan cables was tucked in beside the fans to sit behind the front panel. The other fan cables were tucked in the crevices around the motherboard tray to hide them from view. This also maximizes the amount of space needed for all the power cables. We also took time to install EVGA’s 1000W Supernova G2 PSU, no cables were attached until we tested the lights later on. I am excited to see the finished tan digital camo plate that will cover the side of the PSU. There was even hints toward LED illumination of the logo.


700


700


700


700


700


Once the cooling and PSU were in place, I went ahead and installed the motherboard and begun routing and hooking up cables. The black sleeved motherboard front I/O connectors look sharp coming off Gigabyte’s “G Connector” and through the grommet. There will be less slack when zip tied together and connected to the switch in front. Also, we fed the SATA cable through and plugged it in as well. Then we mock installed the cooling block in place to get a feel for the path of the tubes. To finish it off we installed the G.Skill Aegis 8GB RAM donated by Overclockers.com. Now we just need to get our hands on some RAM heatspreaders so we can color match them to the build.


700


700


700


Once we had everything in place, we just couldn’t resist and tested the RGB fans and white LED strip. We will also have another LED strip up top, but I’m waiting until I receive the PSU plaque from ArtMods and figure out how that will work.


700


700


700


700


700


As for the peripherals that Thermaltake sent us, we painted them with the same green to match the build. I picked up some tan acrylic paint to do some tiny accent highlights.


700


700


700


700


Well, that’s all I have for now. I wish I had more, but have been busy on the non-computer side of DDCM. For those who only care about the computer, you can look away for the rest of the post.


First, we refurbished an old coffee table to be used as a sturdy lego table, no wobbly plastic junk for my monkey of a daughter to climb on.


700


700


700


Also, we are in the progress of building a built in headboard unit for our bed. We refurbished some old white wood drawers that were pulled out of a dentist’s office. Then painted 2x12s a semi dark brown for the structure, and some 1x12 shelving boards cut to length. Next steps is to bolt the structure to the cabinets and install the lighting(Christmas LED string lights through pegboard and covered with a black lace material)


700


700


700


Well if you made it to this point in the post, thanks for sticking with it. I hope you enjoyed the progress update and I would love to hear your thoughts. I’m sure there’s flaws, so don’t hesitate to point them out as that’s how I learn and grow as a builder.


Thank you all!


Modders Unite!
 
Update 03/20/17


LL


Good afternoon DDCM fans!


I think my newest change to my updates is to post the most current update of the rig… just to please those that don’t like scrolling through the lengthy updates haha. But I present the test fit of the painted GPU backplate(before it gets the detailing done).


700


So first we will go through a couple of the care packages that I received to finish off the hardware of this build. To coin the phrase “it’s a small world after all,” I found myself working with fellow military veterans that were happy to assist in completing the hardware acquisition. Absolutely freakin’ outstanding people. Our first help came in the form of a XFX R9 380X GPU, a 1TB Seagate HDD and a 480GB Crucial SSD (Which all is better than my current rig, and that makes me happy). He also sent me the 750ti SC that he was going to donate for PMT, with the note that he was confident I could find use for it in the future. The second veteran gave me a discount on his i5 6400 that he was selling. This was the last piece of hardware I needed to get the build complete and up and running. I’ve said it many times in the past, but I couldn’t have asked for any better companies and people that have been fantastic in their support to this project.


700


700


700


700


700


700


Now that the hardware glory shots are over, we move onto the installation of the CPU and cooler and finish up with the GPU. I still love the way those pipes on the 380X look inside this military themed case. Feels very “military vehicle”-like to me. But we are all installed and good to go, next we can install windows and get those Riing fans to the right color design.


700


700


Shifting gears, we can have a little sleeving shots. We completed all the sleeving up to the point of moving the resistors to the PSU side of the cables left in place. I was able to remove and resolder the resisters on the other side of the cable, ensuring a clean sleeving look at the GPU. At the new location, sleeving runs up to resistor and heat shrink used to secure and insulate the connection. We also installed the 24 pin and got the cable combs in place(PRO TIP: Install the cable combs before you install the cable lol). Through this process we keep working our cable organization to take advantage of the small space we have.


700


700


700


700


700


700


700


Finally, we get to the GPU backplate. We measured and cut our copolyester, gave it a quick sanding and got straight to painting. We masked off the GPU once dry to add the tan accent line. Once that was dry it was another fine sanding and laying the clear topcoat. Once we receive our vinyl template we can spray the detail design and seal it again with a clear coat.


700


700


700


700


700


700


700


With the vinyl template, we will be sent this PSU plate that will sit behind the internal window. Design and creation provided by ArtMods.


700


Build aside, we created a quick board mounted folding machine to utilize our old 670 GPU. And the SSD I used still had Ubuntu installed and so it was quick to bring online.


700


700


Also, for those that were following the headboard DIY, we finished the structure and now just need to add the detail trim and the light box.


700


Thank you all!


Modders Unite!
 
Update 03/31/17


LL


Good morning DDCM fans!


In the spirit of new traditions, I give a couple pictures of the current build status. First we have the front panel complete…... for the exception of one of the temp gauges I need to resolder together. Second we have the view from the side and a close up of the motherboard area that shows through the shroud. We are getting there people! PMT will soon be out in public raising donations for the VFW’s Color Guard fund. If you’re semi local to the East TN area and would like to enter the giveaway just let me know I can give you more details.


700


700


700


But onto our progress updates!


First we took some time to enjoy the good weather in the evening to sit outside on the porch and finish up the remaining sleeving for the GPU and CPU cables. The heat shrink and paracord worked nicely together to work around the moved resistors.


700


700


700


After we completed the sleeving, we ran the cables and got everything wire managed. We also took the time to get the cable combs in place to give them a nice clean look.


700


700


700


Once that was completed, we turned our attention to booting up the computer and installing Windows 10 which was also graciously donated by the veteran that we got the CPU from. After the OS was in place we could install all the drivers and get the fan controller software in place. This allowed us to get the fan colors configured the way we wanted.


700


700


700


700


Since the fans were now color configured, we might as well make the motherboard LEDs match.


700


A couple days later we got our package from ArtMods! Not sure if the sketch of the crazy looking guy is supposed to be him or me…. But either way it’s fitting. We can see here the vinyl is well secured inside the cardboard envelope, the PSU plate is all prepped and ready to be attached, and the nicely packaged LED kit for the PSU plate. He was nice enough to send me a kit instead of fully assembled so that I could sleeve it if I desired. However, he might have overestimated my soldering skills *laughs* but we’ll see what we can do. Look forward to continuing to work with him on future projects.


700


700


700


I tested the fit of the PSU plate, and that’s going to show nicely through the window.


700


Once I mocked up the front vinyl design, I was able to measure and cut the holes for the power button and gauges. Then it was another couple layers of paint and sealed with a layer of clear. Once it was dry and I could pop the gauges back in, we get to its current state. The black vinyl really ties it into the theme well.


700


700


700


After the front panel, I turned my attention to the other design features. First I put the star template on the SSD window and sprayed it with black and clear. Then slowly and carefully peeled off the template and placed it on the side panel to make sure my lines still matched. Hindsight we probably could’ve gone a bit bigger on the stars, but these should sit over the SSD almost perfectly. After that I began to work on the GPU backplate getting the templates in place. The letters giving me some trouble but hope to have that painted and installed tomorrow morning.


700


700


700


But that’s in for now folks, if I can carve out time this weekend I might have it finished and ready for display by Monday. Now to block out some time with our photographer to get the final pictures done!


Thank for hanging in there with me!


Modders Unite!
 
  • Like
Reactions: Derf
like this
Update 4/10/17


LL


Good morning DDCM fans!


So I just wanted to drop a quick note to say that we have completed Project Military Tech! Join me in a little happy dance wheeee! I have included a teaser cell phone pic from the photo studio while all the final pictures were being taken this morning. Hopefully I can get them all edited and be able to post the final results by next Monday…….. only a 100 or so shots to go through :p


Also, please take a moment and help me thank these sponsors for their support on this project. As a business it's hard to make a living in our current economical state, so I can't express my gratitude enough when I see this kind of support.


700


Until next time, Happy Modding!
 
  • Like
Reactions: Derf
like this
Update 4/20/17


LL


Good morning DDCM fans!


This is the moment everyone has been waiting for! We are complete with Project Military Tech and have our final pictures to show. Thank you all for the support you have given and the many bits of advice during this process. But in order not to spoil the goodness of a final update, I give you the final look at PMT!


700
700


700


700
700


700


700


700


700
700


I hope you enjoyed the pictures.... here's a sneak peek of my next project.


700


Until next time, Happy Modding!
 
Back
Top