KT-400 HTPC Case?


Nice find Thunderbird! Initially, I am not going to incorporate the IR solution. I may try my hand at it once again. I just got rid of my Antec HTPC that used the same IMON software. After all was said and done, it had many nice features but I absolutely hated the software. It was very "buggy" to say the least. When it did work, I really liked it!
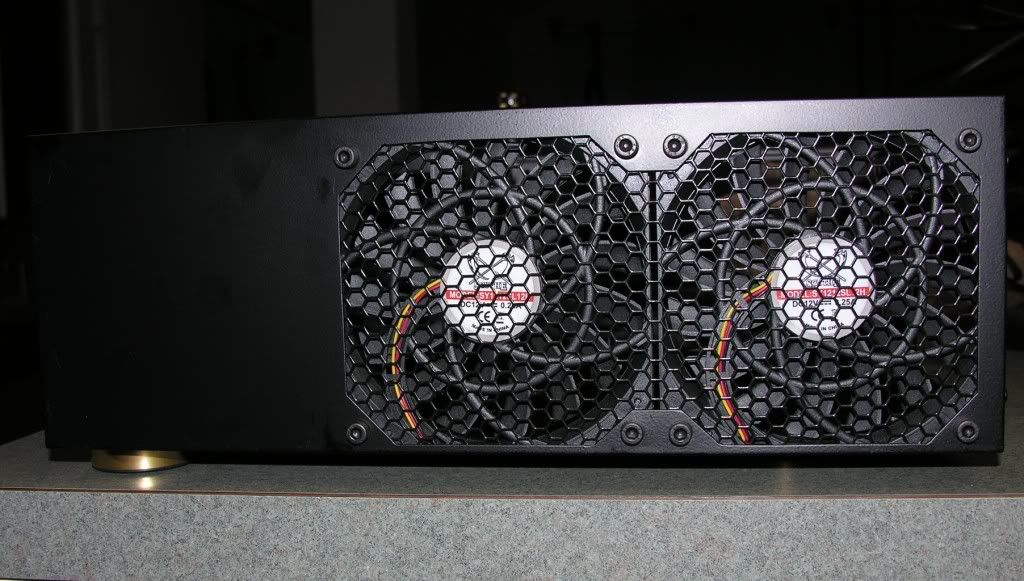
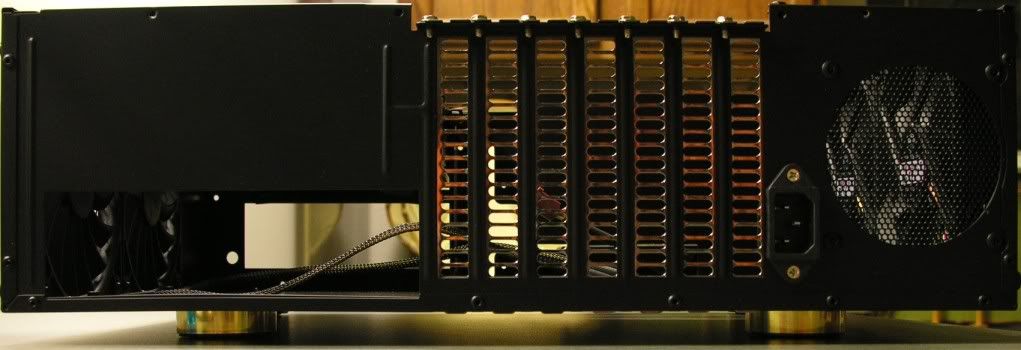
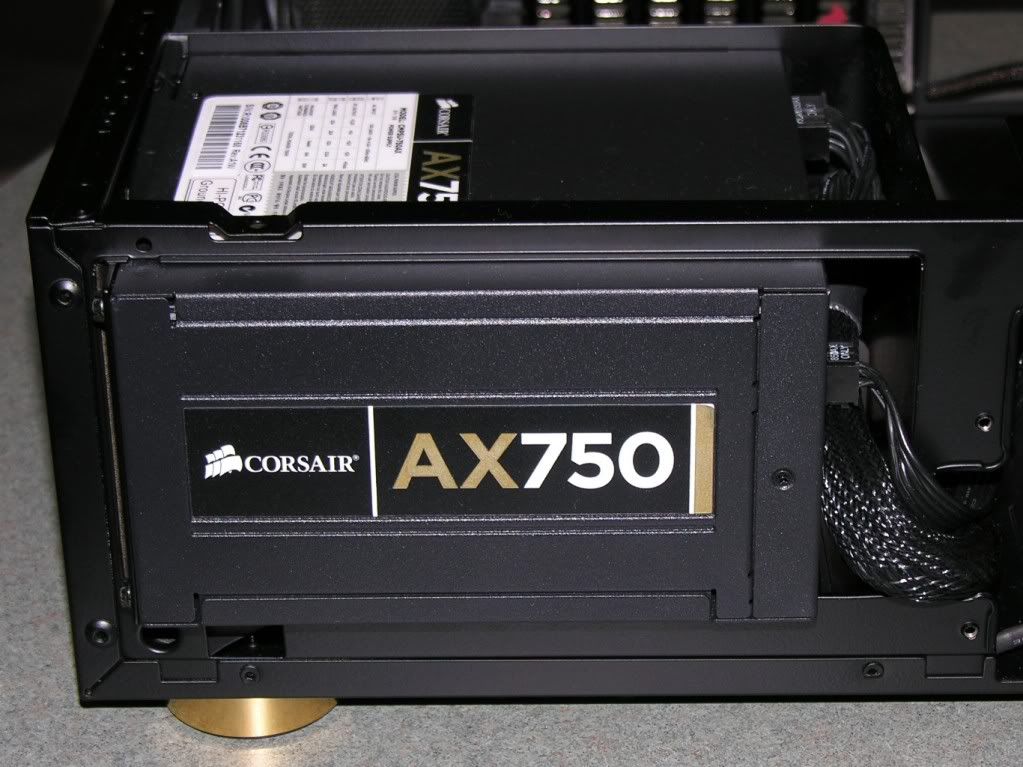
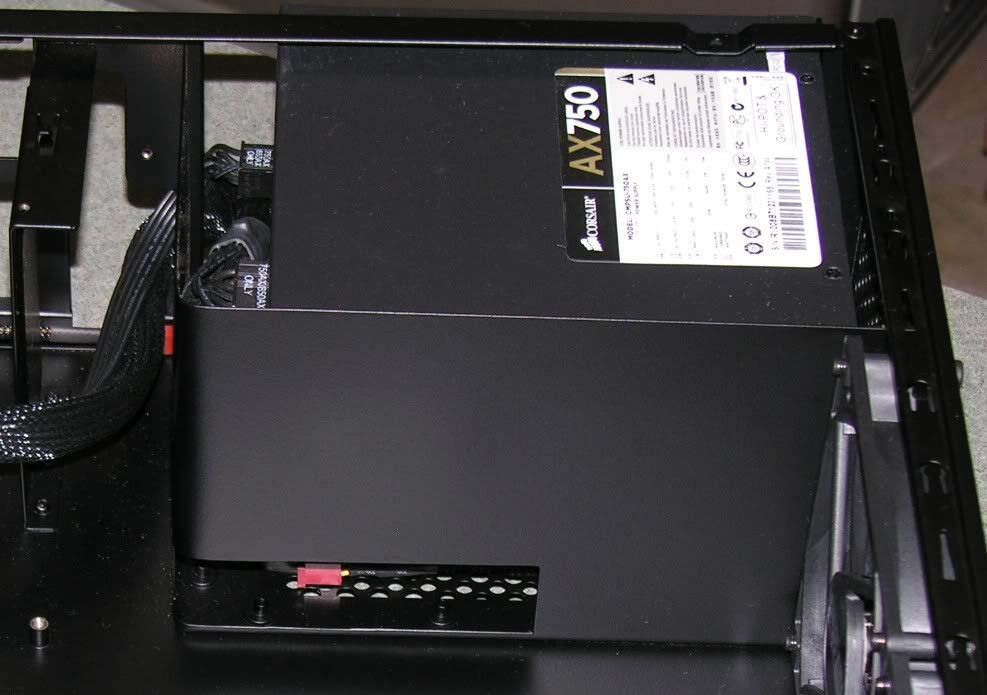
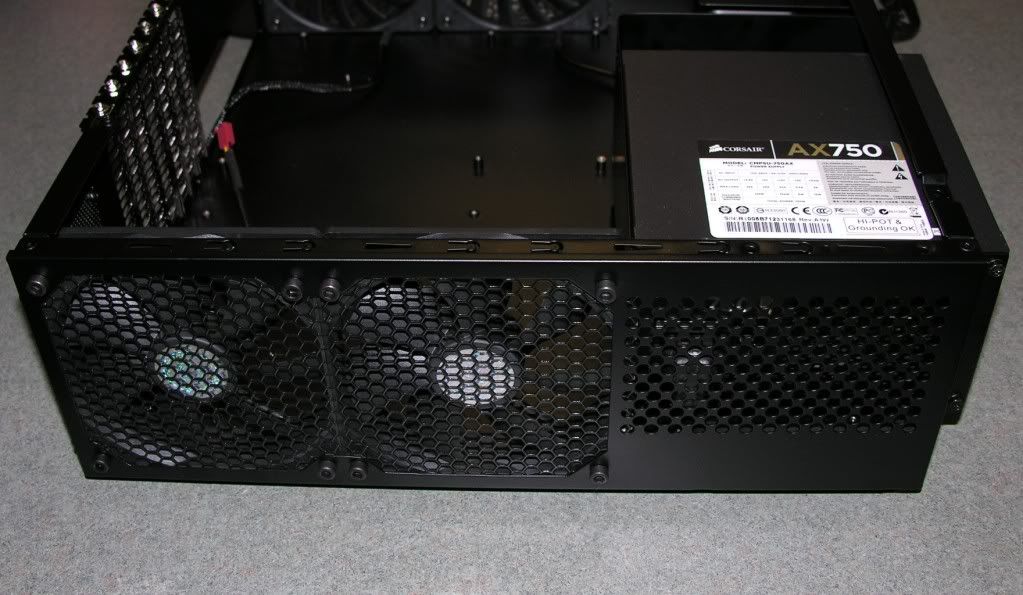
 
Well my case is here didn't realize the psu that comes with the case is that much smaller.

I am going to have to think this one through a bit.
 
Well my case is here didn't realize the psu that comes with the case is that much smaller.

I am going to have to think this one through a bit.

LOL... Yep. Are you thinking that you are going to use that stock PSU or do you have a spare one laying around? ..better yet, do you have one that you are considering for purchase?
 
http://www.newegg.com/Product/Product.aspx?Item=N82E16817189007

That is the one I have laying around. Somehow I ended up with two of them... ;) The other is still powering my old rig that I built a couple of years back. Not the flashiest PSU but it will do for now.

I like your idea about widening the holes for the PSU (hurray for dremels). I was also at Microcenter during my lunch break and picked up the following.

http://www.microcenter.com/single_product_results.phtml?product_id=0253478

and 2x

http://www.microcenter.com/single_product_results.phtml?product_id=0314157

I thought about cutting two holes for the scythes on the side of the case (right side panel). I think I can live with the 2.99 radgrill instead of paying 75-100 for a new Powder Coat.

I do also have a couple of fan controllers I can pick between for controlling the fans if they are too loud. As I said before I hope my 80W Phenom II 555 BE and passive 5450 wont put out as much heat as your setup.

Also, am I wrong to think that the case should be ok with 2 120mm blowing in and air getting out of the 80mm and all the other holes?

Current Setup:
AMD Phenom II 555 BE
GA-880GM-UD2H
4 GB DDR3
1TB Samsung Spinpoint
Samsung BR DVD Player
XCLIO GREATPOWER 600W

I think two 120's should be adequate. As for the exhaust, an 80mm fan will help I'm sure but I also tend to the think as some of the heat rises, the top of the case with the vent holes will also probably help. Be sure to post up your pics so others with this case can get an idea what works.. what is "ok" ..and what doesn't work well (or works poorly).
 
Last edited:
Well, that screen is somewhat restrictive. If I had to guess, it would probably be around 50-60%.. I think the honeycomb mesh I have is about the least restrictive stuff I could find. Anyways, I am sure you will figure out something!

Well on a different note, my powder coated parts came back today. Flat black FTW. I'll be sure to post up pics with the mesh and fans installed (still have to sleeve the fan wires)..


DSCN0677.jpg


DSCN0678.jpg


DSCN0679.jpg


DSCN0680.jpg


DSCN0681.jpg


DSCN0682.jpg
 
That looks killer! They did a great job on the powder. Smooth as can be. Nicely done, Officer!

Edit: Did you get that support over the PCI slots powdered too? (I'm sure you did, just didn't see it in the photos).
 
That looks killer! They did a great job on the powder. Smooth as can be. Nicely done, Officer!

Edit: Did you get that support over the PCI slots powdered too? (I'm sure you did, just didn't see it in the photos).

Hey, I appreciate the compliment! As for the PCI support bracket, yes, I did get it powder coated. I also had the little IR bracket that has the IR board attached to it that mounts in the middle of the case near the front, powder coated as well. Same goes for that little SPDIF / IR PCI bracket. Those extra standard PCI bracket covers, I did NOT get powder coated. Instead, I ordered (8) black Silverstone "slotted" PCI brackets for the back of the case. Even though to had the top portion of the case powder coated already, I am still playing with the idea of cutting ALL of those slots / notches out of the top of the case and replacing those areas with a "smoked" (looks tinted) Lexan window. On the top of the case nearest the CPU, I wanted to have a hole cut out for really good airflow from the CPU cooler. The hole would be covered with mesh and bolted down with a machined air intake mount (made from aluminum). Still debating. ..haha.
 
Last edited:
Just started sleeving the case fans today, after I got off of work. Here's the 120mm x 12mm fans all sleeved and bolted up in place. I think it looks very tasteful.. (minus my greasy fingerprints).. LOL!


DSCN0685.jpg


DSCN0686.jpg


DSCN0687.jpg
 
Got the other side done.. I am very pleased with the end look! Flat Black was a wonderful idea, whoever initially suggested it! I KNOW that I will have NO problems flowing a really decent amount of air. Should make a wonderful home for a Core i7 860 processor and a decent video card!


DSCN0690.jpg


DSCN0691.jpg
 
Last edited:
Look real nice Bud! A couple of questions.

1) Where is the HDD cage going to be?
2) Where do the wires for the PSU go through?
3) How is the clearance for the mobo on the psu sheld?
 
Look real nice Bud! A couple of questions.

1) Where is the HDD cage going to be?
2) Where do the wires for the PSU go through?
3) How is the clearance for the mobo on the psu sheld?

Thanks! As for the HDD cage, I am not going to run multiple drives in my HTPC. So, the HDD cage is out. Don't need it. I only plan to run only one hard drive (1 TB Western Digital Black - SATA III). Initially I was only going to run a 640 GB Western Digital Blue SATA II drive but I RMA'd it Saturday. The single HDD mounts directly under the CDROM tray (which will house my LG Bluray player). There are (4) tabs that stick out on the underside of the tray itself. Those are the mounting points for a HDD.

The wires for the PSU are going to be ran through the front bezel area and will exit the opening where the IR sensor is mounted. Since I am using a Corsair AX-750 PSU, that particular unit is COMPLETELY modular. I only intend on using the bare minimum amount of wires without the headache of having a non-modular PSU.

The clearance for the motherboard on the PSU shield was perfectly measured. I measured and measured and measured before I started making any cuts. I knew the PSU shield and the motherboard would not fit together unless I "notched" it. If you look at the shield, there is a "notch" in the middle of it, located at the bottom of the shield. Now, the motherboard and the shield play well together with several millimeters of clearance all the way around. I'll see if I can snag a picture of the exact clearance with an old EVGA 650i "test" board in place. Just for the record, I will NOT be using that board in this build. It's nothing more than just a template layout motherboard to make sure everything will fit. :)
 
-->

Boom! Too bad I don't work on commission! :D

You did an excellent job on this mod! It's going to look really good in your HT and should be plenty cool! Nicely, nicely done. :)

LOL! Yep, you nailed it then! ..Aside from mounting up my HDD, Bluray player and PSU, I am sort of at a stand still with my build until the re-introduction of P67 (full size ATX 1155 boards). ..Ugh, c'mon Intel..
 
officermartinez

I just noticed your fan setup. Aren't you going to be pulling hot air back in from your PSU.
 
officermartinez

I just noticed your fan setup. Aren't you going to be pulling hot air back in from your PSU.

Good eye.. The short answer, sort of. I've had a few similar setups such as the one I've constucted in this thread. Having switched the fans around in the different configurations, the case temps were negligible. On average, they increased 2-3 degrees. With that being said, my GPU temps would actually go down around 5 degrees (sometimes up to 7) depending on the CFM output on the fans, as they would both be forcing air into the GPU.

Now, look at the GTX 260 card installed in the case early on in this thread. It's really LONG. In fact, its sooo long that I just about completely blocks off all of the airflow to the CPU area. A minimal amount will get through I know, but the CPU Heatsink fan will be blowing air around that area.. I need that air to escape the case. That's where those two thin 120's come in. So, I plan on getting everything hooked up and when it's up and running, I will conduct the same battery of tests to evaluate my temps. Needless to say, I will obviously go with the setup that works best with this build.

Kudos for a good eye!
 
Interesting consideration about the HDD. I am also at a standstill a bit. I did fire up my components to make sure they all worked.

Other odd jobs around the house kept me busy this weekend. I hope that I can make some progress this week/weekend. Will post some pics when I do.
 
Good eye.. The short answer, sort of. I've had a few similar setups such as the one I've constucted in this thread. Having switched the fans around in the different configurations, the case temps were negligible. On average, they increased 2-3 degrees. With that being said, my GPU temps would actually go down around 5 degrees (sometimes up to 7) depending on the CFM output on the fans, as they would both be forcing air into the GPU.

Now, look at the GTX 260 card installed in the case early on in this thread. It's really LONG. In fact, its sooo long that I just about completely blocks off all of the airflow to the CPU area. A minimal amount will get through I know, but the CPU Heatsink fan will be blowing air around that area.. I need that air to escape the case. That's where those two thin 120's come in. So, I plan on getting everything hooked up and when it's up and running, I will conduct the same battery of tests to evaluate my temps. Needless to say, I will obviously go with the setup that works best with this build.

Kudos for a good eye!

I wasn't sure if you were using the 260 or if it was just to show how tight it would be. I may try this as well. Air flow towards the chip side would benefit far better than the reverse. Door bell just ran and UPS has arrived. I am now in the possession of the KT-600. As soon as I can get some good pics I'll start a new thread for those interested.
 
Interesting consideration about the HDD. I am also at a standstill a bit. I did fire up my components to make sure they all worked.

Other odd jobs around the house kept me busy this weekend. I hope that I can make some progress this week/weekend. Will post some pics when I do.

I test fired all of the fans with a Silverstone fan controller.. At the highest setting, my 120mm x 12mm fans sounded more quiet than my 120mm x 25mm fans! Interesting. My PCI slotted Silverstone brackets came in today. They are Black Chrome in appearance. They look exactly like the same color as my GTX 260 video card bracket. I wish I had a spare I/O shield for my Gigabyte GA-P55-UD4P motherboard. That's the only thing that's going to stand out on the backside of my case.. I know I know.. No one will see it.. LOL. But that's NOT the point. I worked hard to get this call all snazzed up only to have 1 single chrome piece sticking out like a sore thumb.. Hmmmmm.. If I can find a spare, I will have to powder coated as well, to match the case.

I wasn't sure if you were using the 260 or if it was just to show how tight it would be. I may try this as well. Air flow towards the chip side would benefit far better than the reverse. Door bell just ran and UPS has arrived. I am now in the possession of the KT-600. As soon as I can get some good pics I'll start a new thread for those interested.

Yeah, I will more than likely go with the GTX 260 (it's a pretty "hot" card). It's the Black Edition by XFX.. wayyyy overclocked from the factory. I look forward to seeing your KT-600 build!
 
Just got the case and started building my system.

So far I'm very disappointed. For those of you who plan on using a notebook hard drive as an OS drive, note that there isn't a place to mount one inside the case.

Also the case didn't come with screws to screw the motherboard down, nor did my brand new GB motherboard. I took two from my other case/board and it wouldn't fit in the standoffs in the new case.
 
officermartinez

Just a thought. I believe that DupliColor makes a spray on anodize for chrome. I belive I saw it at Wal-Mart or Autozone. http://www.duplicolor.com/products/shadow/

Well, I'll have to check that out!


Just got the case and started building my system.

So far I'm very disappointed. For those of you who plan on using a notebook hard drive as an OS drive, note that there isn't a place to mount one inside the case.

Also the case didn't come with screws to screw the motherboard down, nor did my brand new GB motherboard. I took two from my other case/board and it wouldn't fit in the standoffs in the new case.

Hmmmm.. I have tons of those screws so I guess I never really checked to see if my case came with any. As for the notebook HDD, a simple adapter and your back in business:
http://www.newegg.com/Product/Product.aspx?Item=N82E16811990004&Tpk=N82E16811990004
 
Last edited:
^ I think I'm going to try and suspend the drive with rubberbands.

As for the screws, I actually thought they came with the pc components.
 
^ I think I'm going to try and suspend the drive with rubberbands.

As for the screws, I actually thought they came with the pc components.

All my hardware and fasteners were in the bag with the remote, CD and manuals. Curious that they didn't include with yours. I too have a ton of odds and ends from years of building so it wasn't any concern.

As for the notebook hard drive, I don't think most ATX cases are setup for 2.5" drives. So I don't see why you're disappointed that the KT400/600 is no exception.

But I'm glad you're able to start building. Looking forward to pictures! :)
 
I checked my little plastic packaging and I received my screws. It appears that I received everything that was "supposed" to be included. As for the power supply, I finally got it all mounted inside the case last night. As you look at the back side of the power supply, the mounting point on the bottom left was a little bit of a booger to get in. I had to make use of a telescoping magnet (the kind that looks like an antenna to an AM/FM radio) to hold the screw in place while I got the screw driver lined up to complete the mounting process. The end result looks very efficient IMO!


DSCN0697.jpg


DSCN0696.jpg


DSCN0695.jpg
 
My case came with a bunch of screws and extra standoffs. Interesting that your's didn't.

I have some free time tonight, time to hack up some of the case.

PS.
Looks real nice OM!!!!!!
 
i looked everywhere and couldnt find anything. i did get several random motherboard manuals and an old video card manual. guess i got manuals instead of screws.

I also got a s-video cable, a vga-dvi adapter, and a component out cable.
 
Last edited:
I'm adding a Scythe (4) Fan Controller.. Well the bigger portion of the fan controller.. haha!


BEFORE:


fancontroller1.jpg


AFTER:


fancontroller2.jpg
 
This is fucking unbelievable. I tore apart an older computer and got the motherboard screws out of it and when I got back home they wouldn't screw into the risers on the KT-400. I don't know what kind of fucking craftmenship or lack of was used to build this case but apparently there is a huge range of quality issues.

I have a bag of about three dozen screws and none will screw into the risers. I'm e-mailing the seller on eBay and asking for a refund. I'm done putting up with this bullshit.
 
Sorry about the lack of replies guys. Work took a turn for the worse this week. Minimal progress to date:

1) Fans purchased 2x 120mm x 12mm. - DONE
2) Paracord and heat gun ordered and on the way. - DONE
3) Multipurpose bending contraption built. - DONE (Need to test it out still. Will post some picks soon (if it works and does not fail miserably).
4) Master plan for case modifications. - In progress....
 
This is fucking unbelievable. I tore apart an older computer and got the motherboard screws out of it and when I got back home they wouldn't screw into the risers on the KT-400. I don't know what kind of fucking craftmenship or lack of was used to build this case but apparently there is a huge range of quality issues.

I have a bag of about three dozen screws and none will screw into the risers. I'm e-mailing the seller on eBay and asking for a refund. I'm done putting up with this bullshit.

Try using the same type of screws you use to mount an optical drive and such. I do recall that the mounting screws for the mobo pegs are smaller and a finer thread than usual.

Sorry about your luck. Ebay; you win some you lose some.
 
Try using the same type of screws you use to mount an optical drive and such. I do recall that the mounting screws for the mobo pegs are smaller and a finer thread than usual.

Sorry about your luck. Ebay; you win some you lose some.

I ended up drilling out the risers a bit to fit the screws. I went and bought some risers but only two of them are removable on the case. The rest are soldered in or part of the bottom of the case.

Currently installing MediaBrowser and configuring the tv tuner on the new machine.
 
XBMC users. I have tried the remote functions and it seems work so far. It will let me scroll through and select menus and all video playing functions. I don't think my MB is capeable of powering/waking from USB but I'm still digging in the bios.
 
Very good to know! Looks like you guys are way ahead of me in the "up and running" department. As for me, I'm going to take my fan controller part to the powder coater.. while I was there, I figured I might as well get the pci slots done as well. Also, I was sleeving up my fan controller wires and I ran out of 1/8th tech flex sleeving.. Ugh! When it rains, it pours!
 
Ok finally got some time to work on the case.


Tried the hole expansion that OM did.


But that took forever and I was getting shards of metal everywhere...

Soooo.... Plan B.


Lets see who can notice my first moding ups in the pic above...

Then I cut some mesh I had laying around from mcmasters/carr...


It fits but will need some adjustments...


Also, got some u chan coming from McMasters/Carr. Now how to fix the ups... I have been looking at a rivet gun... Maybe if we have a piece of metal.
 
Last edited:
Now that's what I'm talkin' about! ..Lovin' it! Allowing your PSU to breathe better was the first thing I decided to mod as well. Your power supply will thank you later. As for drilling out the holes, Wowcro you nailed it. It is a VERY time consuming task, isn't it? So, if anyone is interested in drilling out the holes, I should have been a little more up front about the mess and time it took. All in all, to drill the bottom and side panel holes, it took me somewhere around 2 1/2 hours (sanding / filing included).

I never hooked up my 80mm fan but I see you still have yours installed. Are you going with a known higher quality fan or are you gonna try the one that came with your case? What about everyone else? Did y'all stick with the pre-installed 80mm or did you install a different one?
 
Back
Top