Navigation
Install the app
How to install the app on iOS
Follow along with the video below to see how to install our site as a web app on your home screen.
Note: This feature may not be available in some browsers.
More options
You are using an out of date browser. It may not display this or other websites correctly.
You should upgrade or use an alternative browser.
You should upgrade or use an alternative browser.
post pics of ur p180/p182/190s
- Thread starter mark660
- Start date
MisterSparkle
[H]ard|Gawd
- Joined
- Feb 9, 2008
- Messages
- 1,077
You can split that flat bunch of wires up, and sleeve them in a nice round bunch if you want super neat ")

seems a lot of you prefer to use the lower chamber for your hard drives instead of the one above it. I figured the top one would be better to cool the drives since there's a fan in front of them.
keep in mind, I haven't actually received my case and parts yet. I'll also have an eVGA 8800GT, which from the looks of some pics here would barely fit if I had the hard drives there
keep in mind, I haven't actually received my case and parts yet. I'll also have an eVGA 8800GT, which from the looks of some pics here would barely fit if I had the hard drives there
silent-circuit
[H]F Junkie
- Joined
- Sep 18, 2005
- Messages
- 16,136
seems a lot of you prefer to use the lower chamber for your hard drives instead of the one above it. I figured the top one would be better to cool the drives since there's a fan in front of them.
keep in mind, I haven't actually received my case and parts yet. I'll also have an eVGA 8800GT, which from the looks of some pics here would barely fit if I had the hard drives there
It'll fit fine. Only the 8800 GTX and Ultra have clearance issues there.
zmjone2992
[H]ard|Gawd
- Joined
- Jul 3, 2007
- Messages
- 1,033
seems a lot of you prefer to use the lower chamber for your hard drives instead of the one above it. I figured the top one would be better to cool the drives since there's a fan in front of them.
keep in mind, I haven't actually received my case and parts yet. I'll also have an eVGA 8800GT, which from the looks of some pics here would barely fit if I had the hard drives there
typically the top pcie card's power cord is kinda jammed into the top hard drive of the upper chamber, it gets even worse if you are using sli, plus all the heat from the hard drives is sucked right across the gpus. Also it is easier to liquid cooling with the top chamber removed.
nissanztt90
2[H]4U
- Joined
- Apr 13, 2007
- Messages
- 3,858
seems a lot of you prefer to use the lower chamber for your hard drives instead of the one above it. I figured the top one would be better to cool the drives since there's a fan in front of them.
keep in mind, I haven't actually received my case and parts yet. I'll also have an eVGA 8800GT, which from the looks of some pics here would barely fit if I had the hard drives there
The fan in the lower chamber creates a wind tunnel effect which pulls plenty of air over the hard drives. Ive got two raptors next to each other down there and they stay plenty cool enough.
Here is my P180B with my new hardware in it. I am running a OCed 420 Celeron until i get my Q9450... this was my attempt after reviewing everyone;s post there. It sure does look alot better then before...and alot quieter with the new hardware and fans.

Edit: Specs
CPU: Celeron 420 running at 3.0 Ghz. - Waiting for my Q9450
MEM: Mushkin EM 2x2gb 4-4-4-15
MOBO: Gigabyte GA-X38-DS4
GPU: Gigabyte HD 3870 512MEG (stock clock)
HD's: 2x Segate 7200.11
PSU: Enermax Noisetalker 2 485W.
Cooler: Sycthe Ninja Rev.B
Case Fans: 2x AC 1000 rpm exhaust; 2x Antec Tri Cooler intakes in center slots, Stock Antec Bottom.
GPUCommando
Gawd
- Joined
- Oct 29, 2006
- Messages
- 542
^Specs?
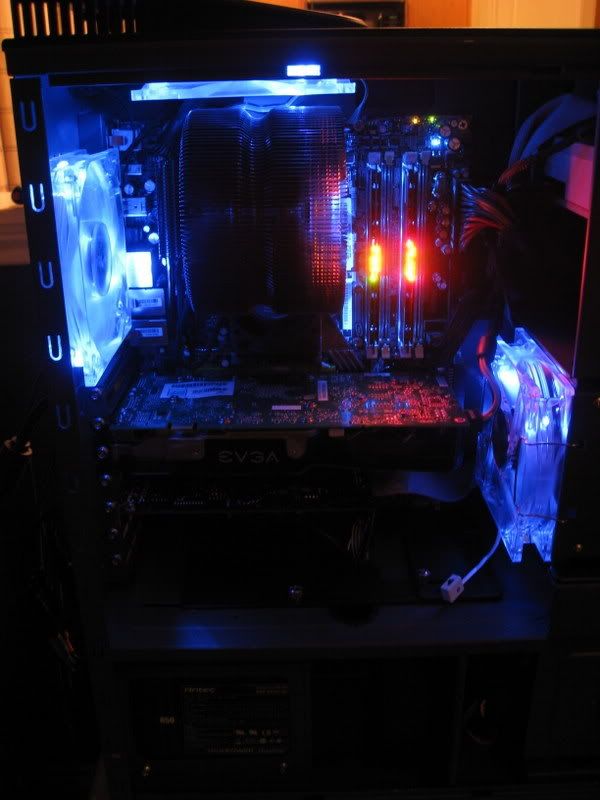
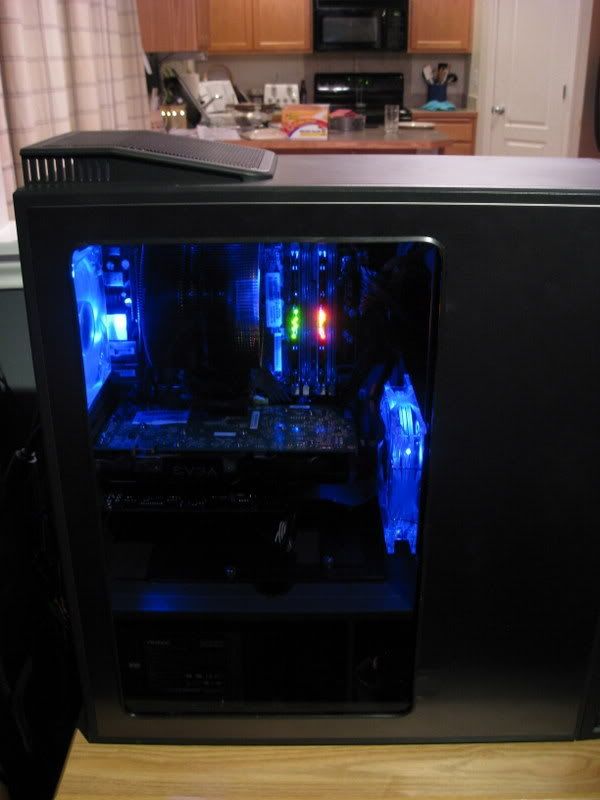
Little update to my computer. Put is a side window. Took me a while to figure out how I wanted to do it, but I think it turned out pretty good. I used clear acrylic with a grey tint, that way I could stick to my "murdered out" theme. Also got a couple more Antec Tri-Cool Blue led fans. Not sure how many will notice, but the Zalman 9700NT comes with green leds in the fan, well I took it all apart and replaced the greens with blue leds. Unfortunately I ripped part of the circuit board so only one of the two leds actually work. I will probably buy a new fan later and fix it right, but for right now it works fine. I thought about taking the fan from the 9700 led, since it was blue, but I wanted the PWM connection.
Here's some updated pics.
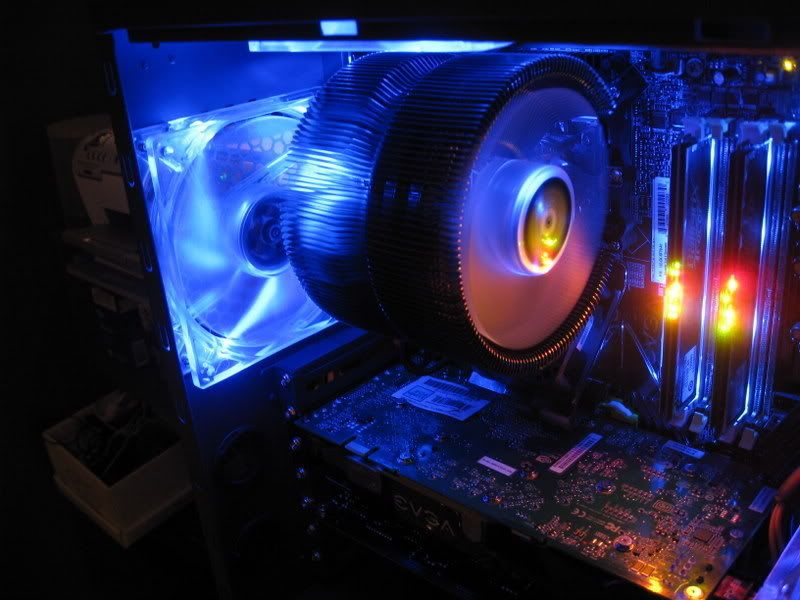

Here's some updated pics.
I put all kit together myself. Just bought all the components seperately and put it together. Here's a list of the stuff I used.
Black Window Edging
Bought a sheet of .118" Clear Acrylic w/ grey tint from www.mcmaster.com Just do a search for Cast Acrylic.
If you want more details let me know and I could take some pictures.
edit: Looks like I will put together some sort of tutorial, or atleast some more pictures. I will get it together and post it up.
GPUCommando
Gawd
- Joined
- Oct 29, 2006
- Messages
- 542
@ Fritzz - seriously classy!! I like it..
bicycle_wreck
[H]ard|Gawd
- Joined
- Nov 16, 2007
- Messages
- 1,202
I put all kit together myself. Just bought all the components seperately and put it together. Here's a list of the stuff I used.
Black Window Edging
Bought a sheet of .118" Clear Acrylic w/ grey tint from www.mcmaster.com Just do a search for Cast Acrylic.
If you want more details let me know and I could take some pictures.
edit: Looks like I will put together some sort of tutorial, or atleast some more pictures. I will get it together and post it up.
good idea ^^
more pics would be awsome
@ Fritzz - seriously classy!! I like it..
http://www.youtube.com/watch?v=WpZoE-zj0-k


bicycle_wreck
[H]ard|Gawd
- Joined
- Nov 16, 2007
- Messages
- 1,202
@bicycle_wreck That's pretty much exactly what I did, but I had to do some extra modifications since the side panel of the P182 is so thick. I will get some pics and show ya.
Sweet.
Here are some pics of my new p182 GunMetal completely put together. Complete build specs can be found here. - Link
Hows the Ultima90 treating you? The Ninja has mounting problems and the U12EX is expensive, so this looks like a good alternative.
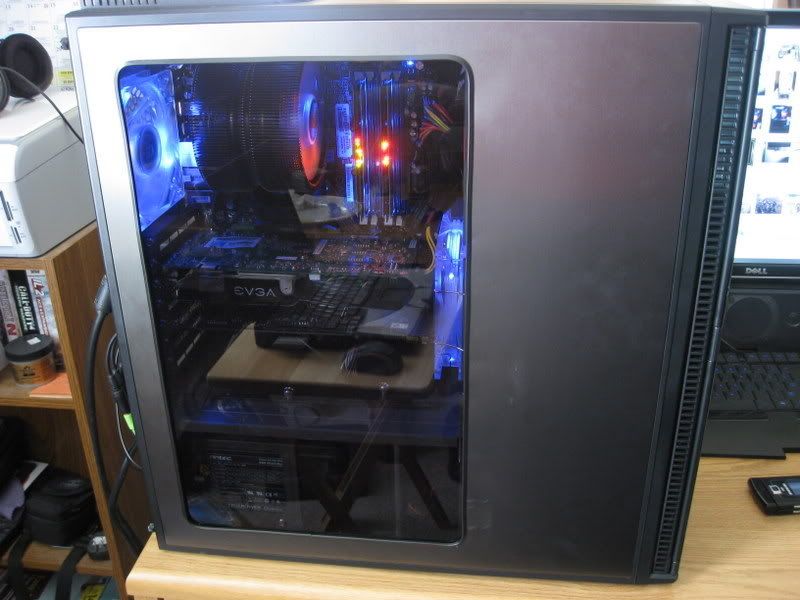
All right took some pictures.
Here's the finished look. Notice some marks on the bottom right corner. That came from pulling the plastic away from the front panel.
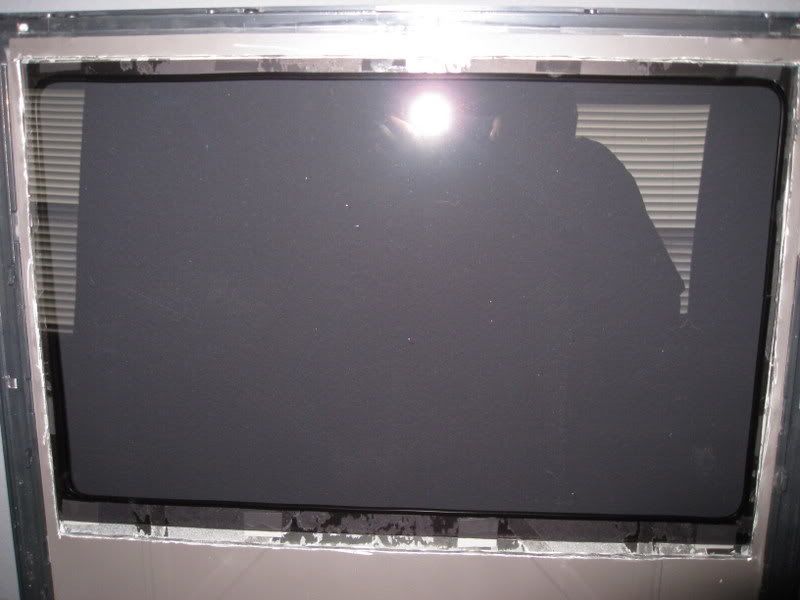
This is a shot of the U-chanel that I used. I wanted the acrylic to be as flush with the outer panel as possible. The was the smallest stuff I could find, and it very square. I used 3m double sided tape to attach the window. It's pretty secure and removable if I need it to be. I will probably add some more tape just for piece of mind.
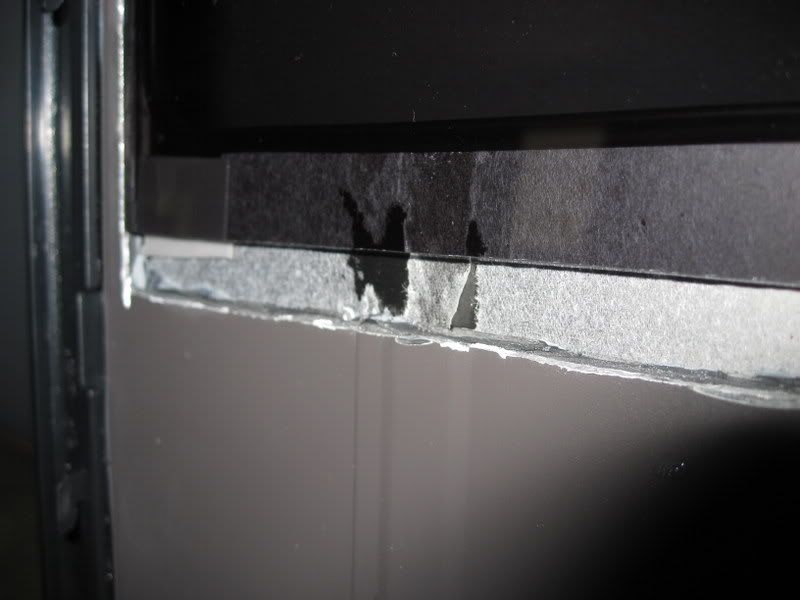
The P182 Panel has three layers to it. An outside metal panel, some plastic dampening in between, and the inside metal panel. Since I wanted the window as flush as possible I had to recess it into the panel and attach it to the outer metal panel. If I had just cut it and put some bigger u-chanel there would have been about 3/8" of difference from the outer panel to where the window would sit.
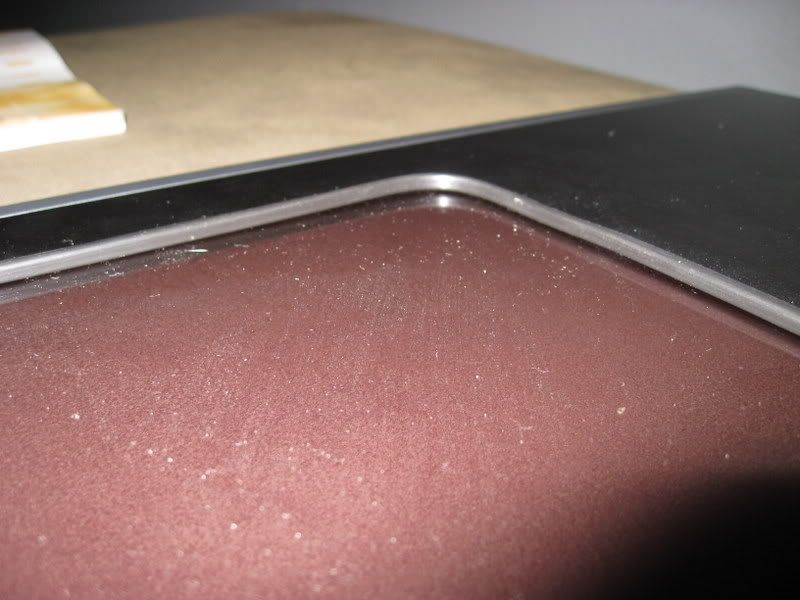
Here's a close up shot of the sunken in panel. I used a jigg saw to cut out the main window, then used the dremel to cut out the sunken in part. The indside panel pulled away just fine, but the plastic in between is what gave me the troubles. While pulling the plastice away from the outer panel it distorted the ouside panel a little. If I were to do it again I would only remove about 1/2" all the way around the window cut out, rather than 1" on one side and 1/2" on the other sides.
Here's the finished look. Notice some marks on the bottom right corner. That came from pulling the plastic away from the front panel.
This is a shot of the U-chanel that I used. I wanted the acrylic to be as flush with the outer panel as possible. The was the smallest stuff I could find, and it very square. I used 3m double sided tape to attach the window. It's pretty secure and removable if I need it to be. I will probably add some more tape just for piece of mind.
The P182 Panel has three layers to it. An outside metal panel, some plastic dampening in between, and the inside metal panel. Since I wanted the window as flush as possible I had to recess it into the panel and attach it to the outer metal panel. If I had just cut it and put some bigger u-chanel there would have been about 3/8" of difference from the outer panel to where the window would sit.
Here's a close up shot of the sunken in panel. I used a jigg saw to cut out the main window, then used the dremel to cut out the sunken in part. The indside panel pulled away just fine, but the plastic in between is what gave me the troubles. While pulling the plastice away from the outer panel it distorted the ouside panel a little. If I were to do it again I would only remove about 1/2" all the way around the window cut out, rather than 1" on one side and 1/2" on the other sides.
Heres mine,
Specs-
- Intel C2Q Q6600 G0 @ 3.4 (3420x9) - Tuniq Tower 120 - Abit IP35-E - Corsair XMS 2 DDR2 800 4X1GB - XFX 7900GT - Antec NeoPower 500w - WD 160GB Sata II HDD - Samsung Sata 18X DVD-RW - Acer AL2216Wbd 22" LCD -


Only thing that i added to the case were Two 120mm Fans in the upper HDD cage (One in front, one behind)
I'd post pics of the wiring but it was to hard for me to get the back panel on
This thread is great, i bought my p182 because of it.
Only thing that was werid is my Antec PSU's wiring was not long enough to route behind the mobo tray in my Antec Case. Somebody on the design team fckd up So i had to go out and buy a $10 8 pin mobo extension cable to route it behind the back.
Specs-
- Intel C2Q Q6600 G0 @ 3.4 (3420x9) - Tuniq Tower 120 - Abit IP35-E - Corsair XMS 2 DDR2 800 4X1GB - XFX 7900GT - Antec NeoPower 500w - WD 160GB Sata II HDD - Samsung Sata 18X DVD-RW - Acer AL2216Wbd 22" LCD -
Only thing that i added to the case were Two 120mm Fans in the upper HDD cage (One in front, one behind)
I'd post pics of the wiring but it was to hard for me to get the back panel on
This thread is great, i bought my p182 because of it.
Only thing that was werid is my Antec PSU's wiring was not long enough to route behind the mobo tray in my Antec Case. Somebody on the design team fckd up
So i had to go out and buy a $10 8 pin mobo extension cable to route it behind the back.theres 2 fans on some p180s i think they are the p182se or something.
On the top? No. Those are P190's and they have dual top 140mm fans.
On the top? No. Those are P190's and they have dual top 140mm fans.
aww p190, that's what i meant.
All right took some pictures.
That's a really sweet look. Can we get a night shot of this?
edit: doh, its 1 page back
bigbadgreen
Gawd
- Joined
- Oct 2, 2003
- Messages
- 680
wow, so many cool mods here. I've been wanting to paint my p180 for some time. Has anybody had any experience painting the plastic by the door/front of the case. I really want to paint mine all white and perhaps metallic blue stripes. sort of a muscle car type of scheme. Most of the paint jobs avoid this part of the case. I am aware that I will need a different type of paint for the plastic. My uncle is a body/paint guy and is willing to help, so painting the aluminum is no problem. It will be done professionaly. Does anybody know if there is a primer that I can spray over the plastic that will then work with the other automotive paint. I know there are flexability issues, similar to painting carbon fiber and fiberglass. I just don't want to end up buying several pints of paint just for the plastic trim, and then have a chance that it won't match or be a different sheen. My uncle was unsure of painting over the plastic because different plastics react differently to paint. It's pretty much the only thing holding me back from doing it.
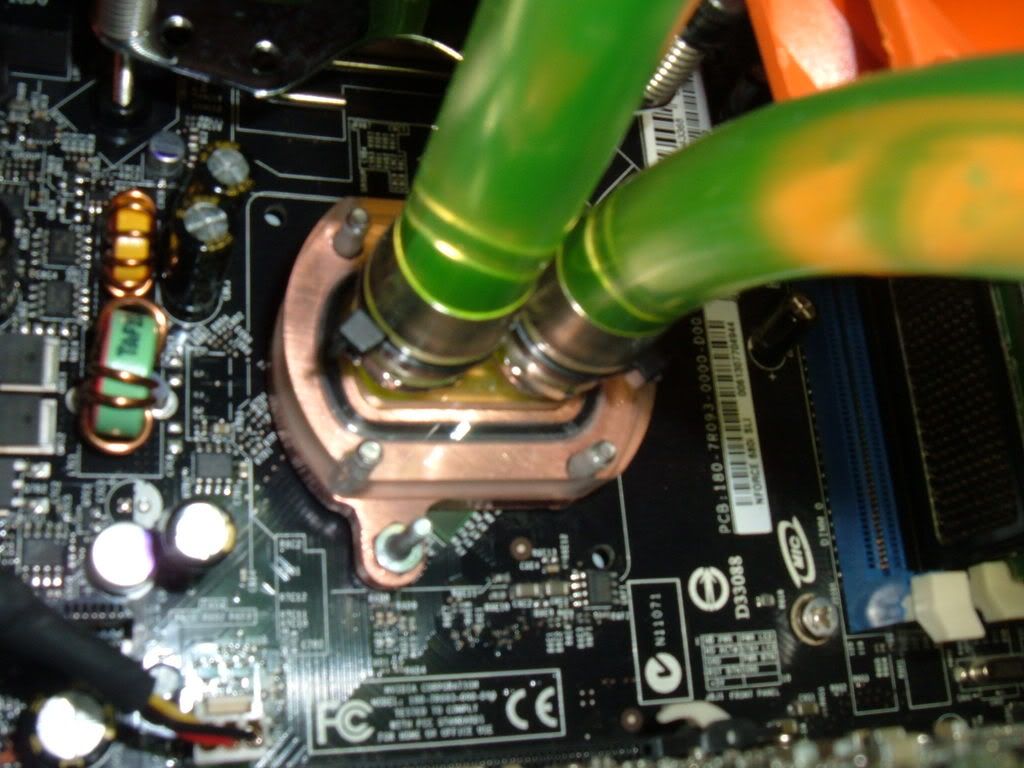
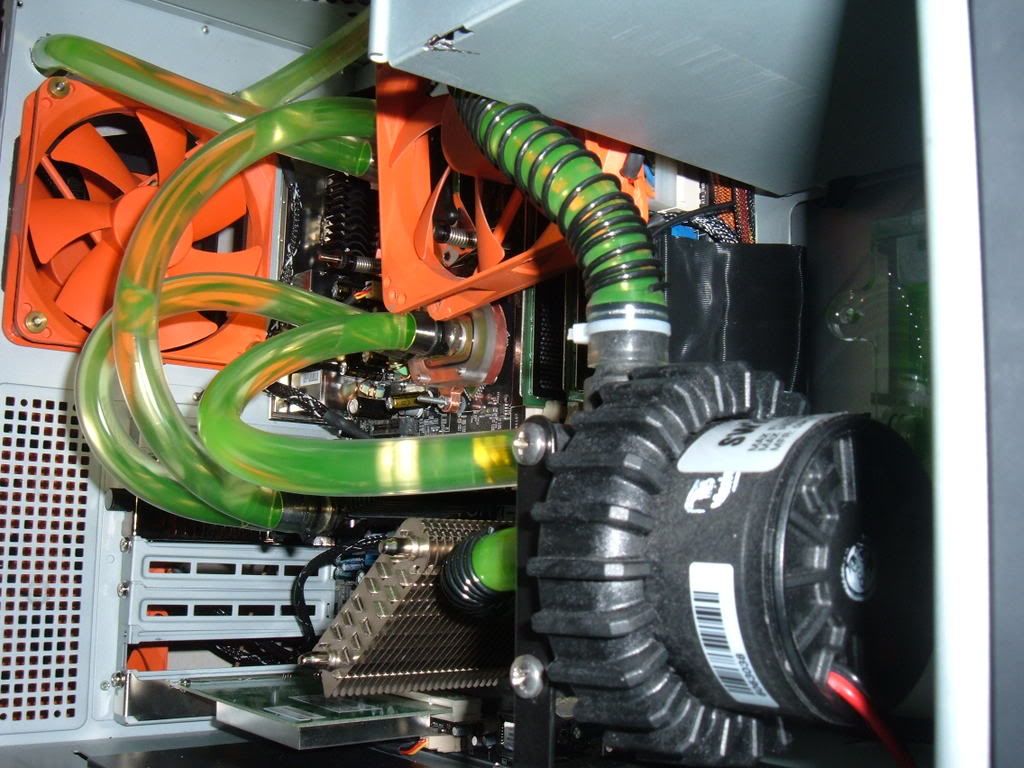
Alright, here are some pictures of finished build. It has a fully internal watercooling loop on CPU, NB, VGA with 2 Black Ice Pros radiating and a microres in the 5.25" bay.
Required a little modding, dremeled out a slot in the 5.25" bottom plate so the top of the radiator could fit through. It could fit sideways, but made the loop more difficult.
Required a little modding, dremeled out a slot in the 5.25" bottom plate so the top of the radiator could fit through. It could fit sideways, but made the loop more difficult.
Wide shot

Zoom

More zoom

After trolling here for a very long time, I've decided to get myself my own P182!
Here's the box!

Took me quite a bit to fix the cables. I use to have an accelero on that gfx card. Took it out (I don't like how it bends the card).
If anyone lives in Calgary and wants an accelero, I can sell you mine for 25CAD with the turbo module.
Here's the box!
Took me quite a bit to fix the cables. I use to have an accelero on that gfx card. Took it out (I don't like how it bends the card).
If anyone lives in Calgary and wants an accelero, I can sell you mine for 25CAD with the turbo module.
silent-circuit
[H]F Junkie
- Joined
- Sep 18, 2005
- Messages
- 16,136
Wow, you're actually the first I've seen here with the copper Ninja. How does it do?
Wow, you're actually the first I've seen here with the copper Ninja. How does it do?
who cares how it does, that thing looks freaking sexy.
Thanks.
The coppers are pretty cool. I messed up the installation the first time and got 50C idle/70C load. Then one Sunday, I took it out reapplied the paste, viola, 45C idle/60C load. It doesn't seem so well performing but you have to realize that everyone of those fans run at the absolute lowest setting. I actually hear the refrigerator downstairs more than this PC running!
Pain to put in (or could be that I messed up the installation). I had to put so much pressure on the arms to make it hold the mother board brackets. And, damn fins! It's like getting cut by a shuriken (man I'm lame).
Next time around, I'll read reviews and put it into highest consideration - the ease of installing these heatsinks.
http://www.hardforum.com/showpost.php?p=1032094146&postcount=800
did some work since last time i posted in here a few weeks ago...


did some work since last time i posted in here a few weeks ago...