urbanman2004
Limp Gawd
- Joined
- Apr 15, 2014
- Messages
- 186
Here are my system specs below:
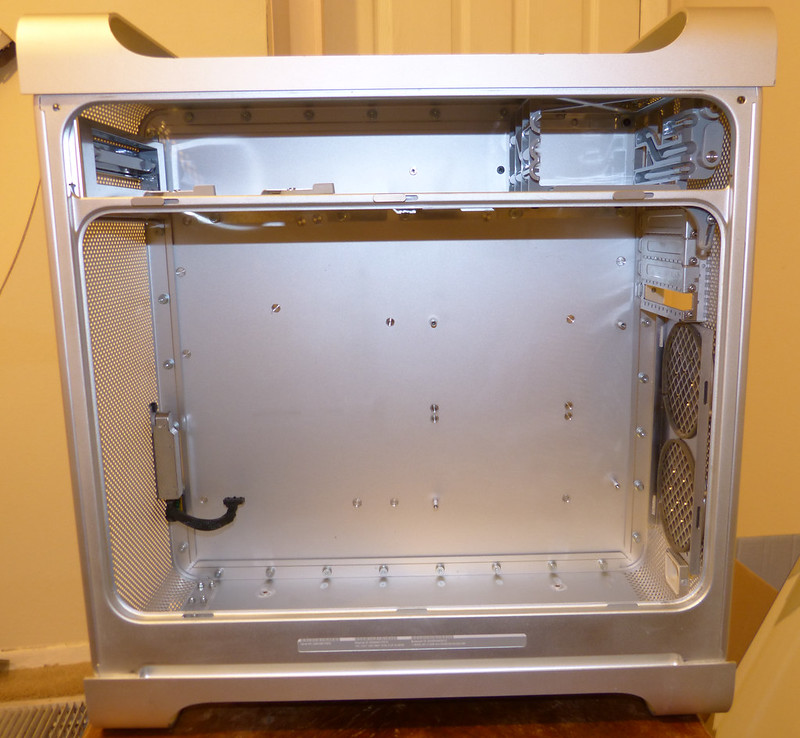
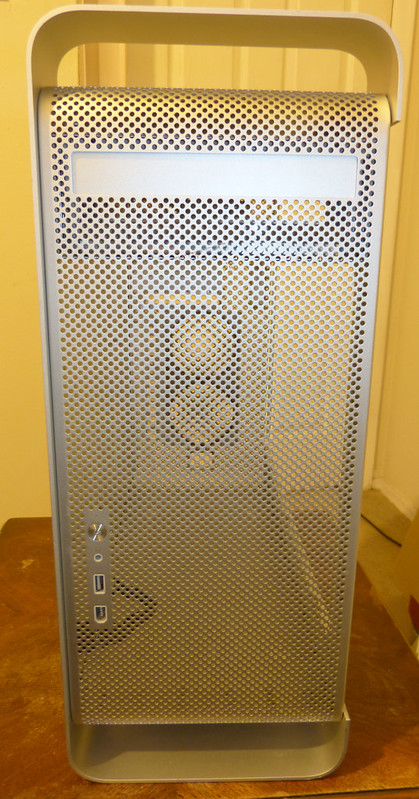
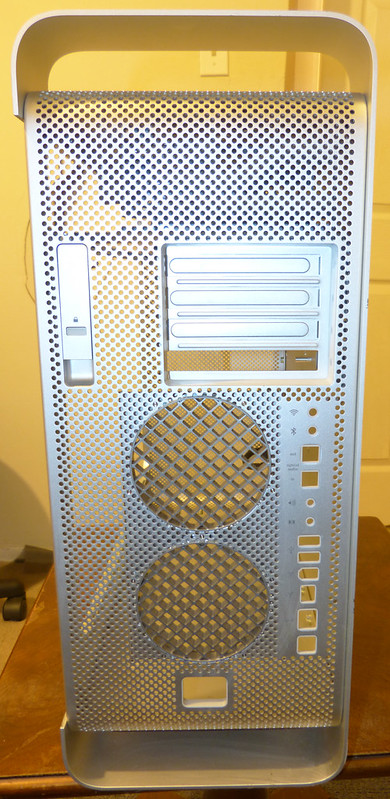
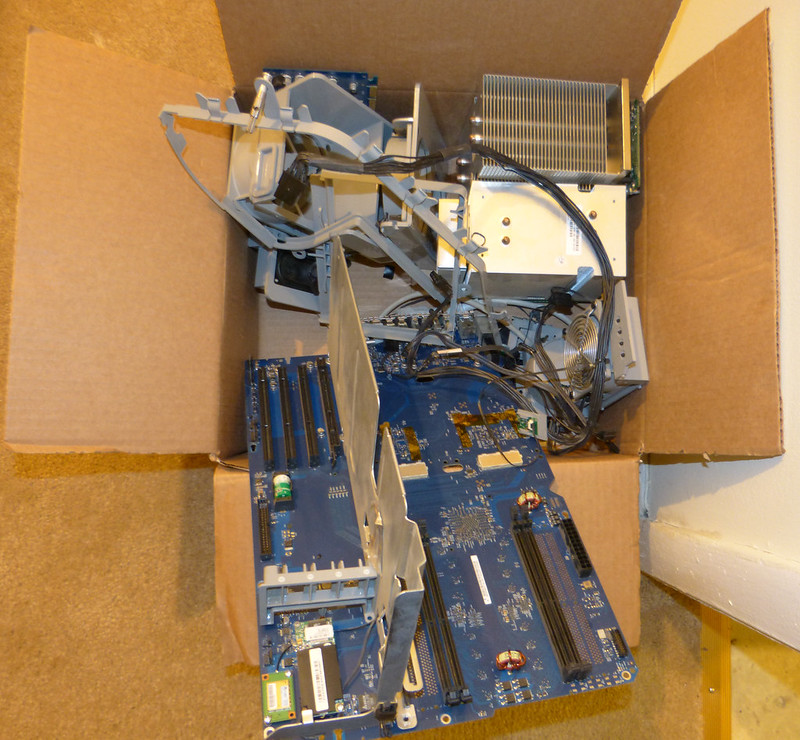
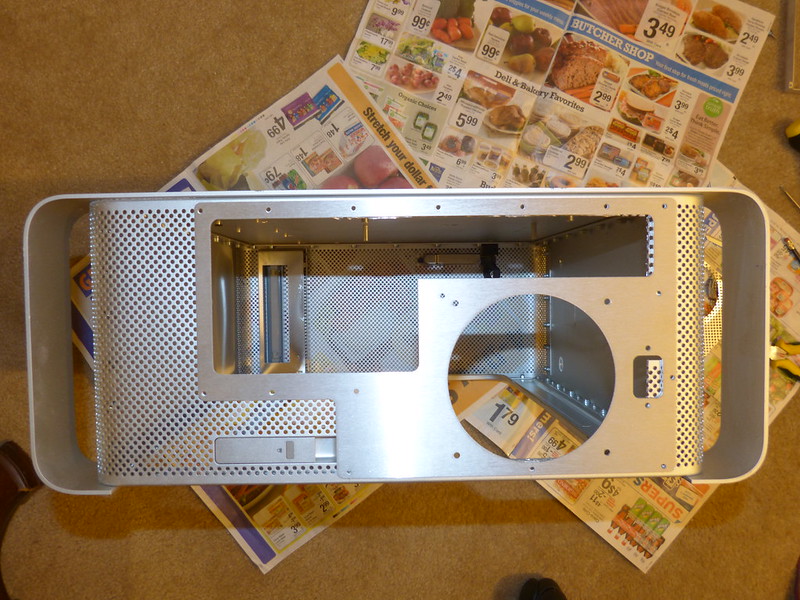
February 12th: I have gutted out the whole chassis and washed it.
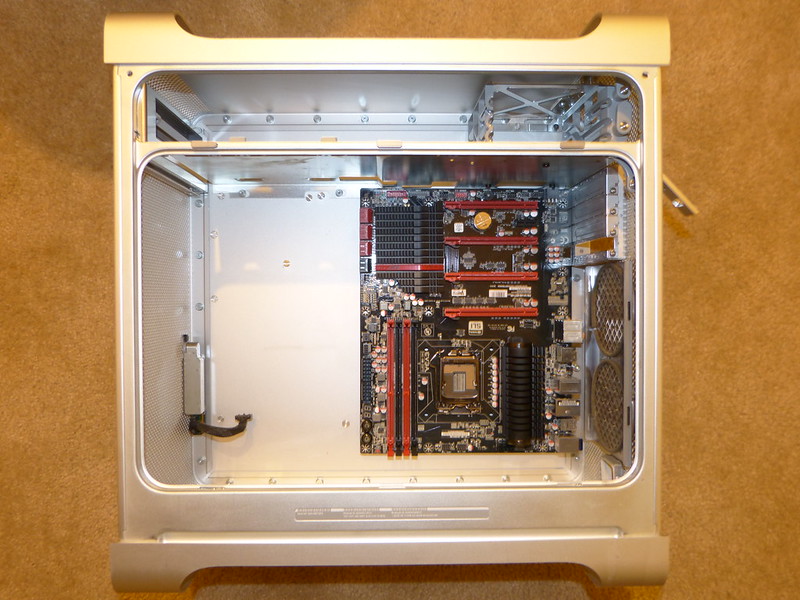
February 19th: My motherboard finally arrived for me to install OS X.
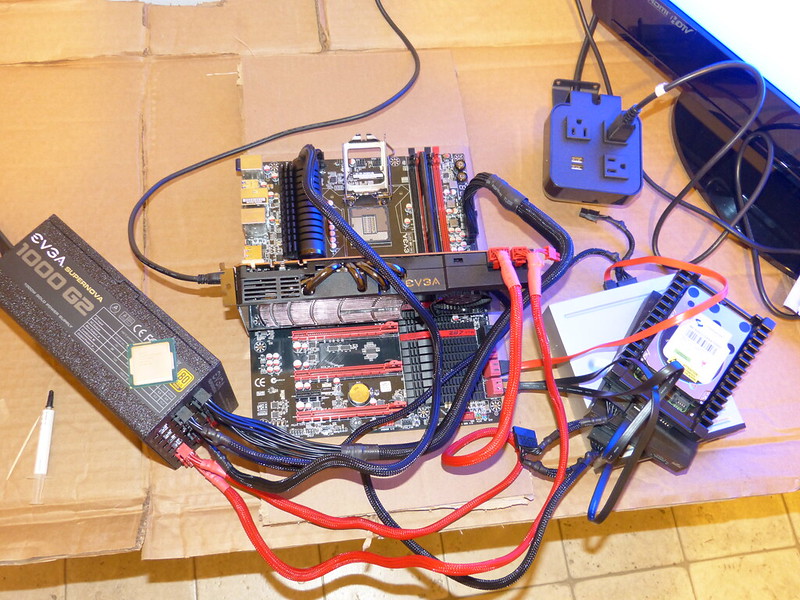
I wanted to approach the installation process by setting up everything using the just the very PC I was building without the need of another Mac and I was capable of doing so. Started out with installing 10.6.0 and was able to update to 10.6.8 with iBoot Haswell 1.0.1.
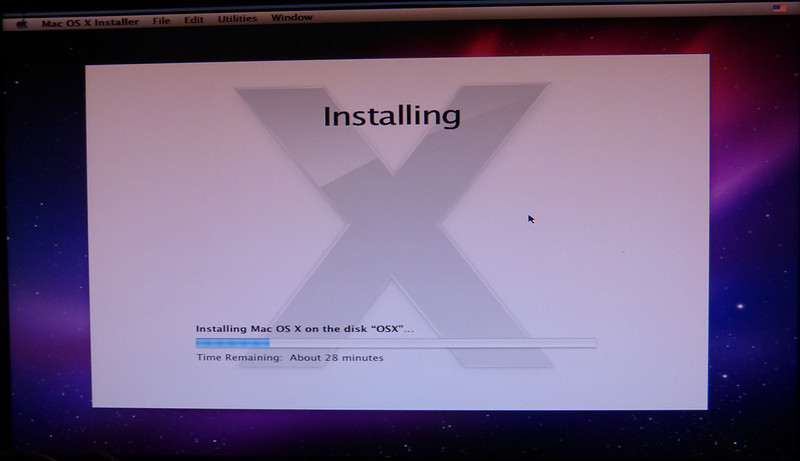
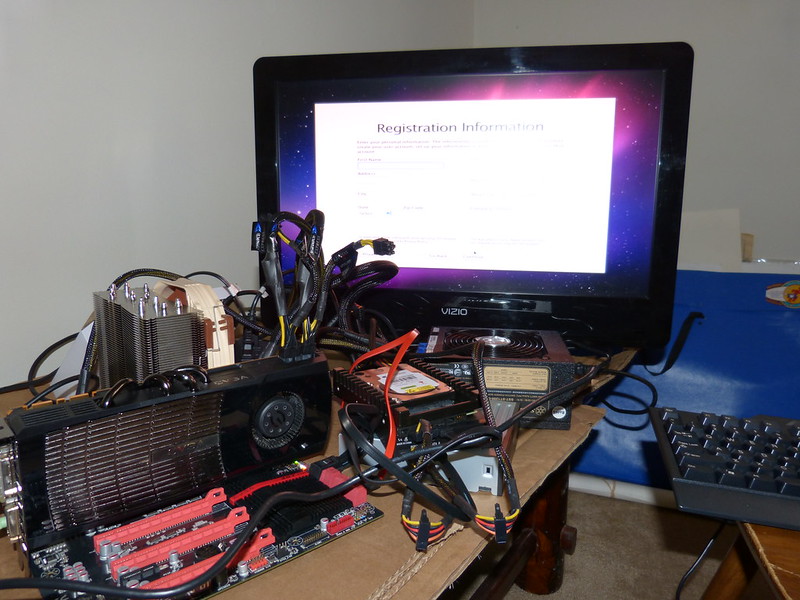
The main issue I had was the method I had to use to go about installing Mavericks 10.9.0. I almost gave up, but after venting on this thread here and with a little motivation, on March 5th, I was finally able to install Mavs on my EVGA Z87 FTW, and I have a full-length guide that details it all here.
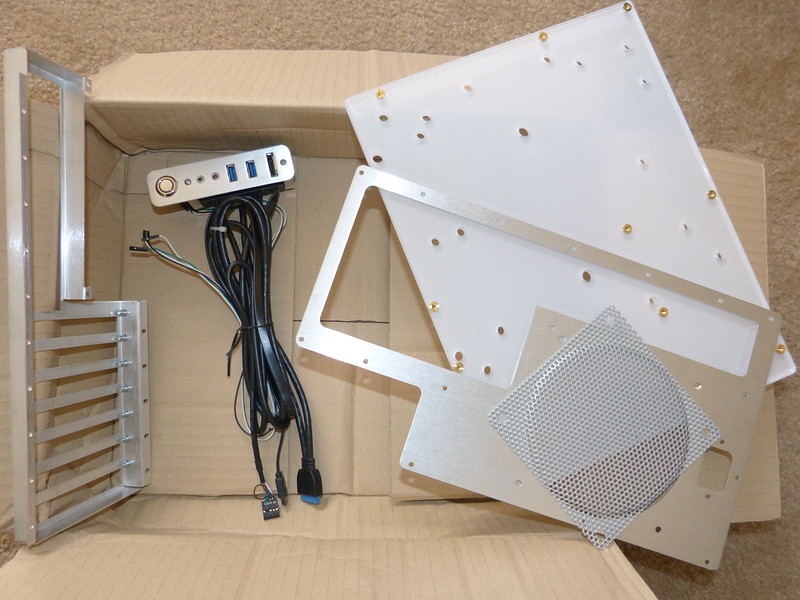
February 27: My G5 "120 low ATX Mod kit" from the Laser Hive (based out of the UK) finally arrived (thanks Neil for the referral).
I didn't immediately get started on modding my G5 case yet until I was confident that OS X could be installed using my motherboard.
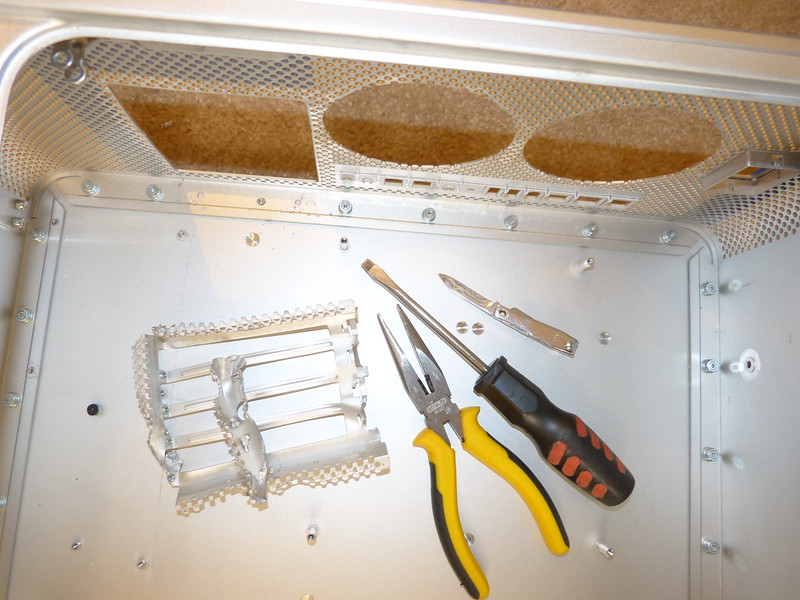
March 14: Let the games begin! I had to get my tools first.

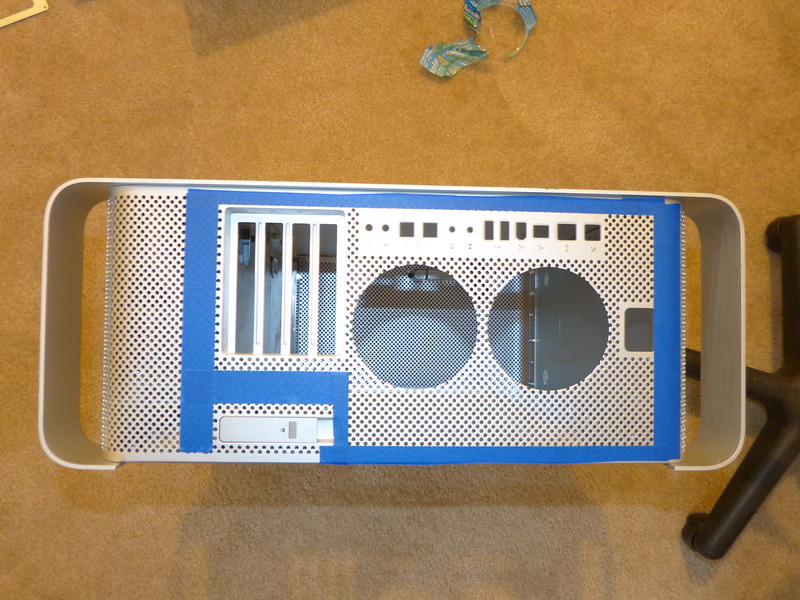
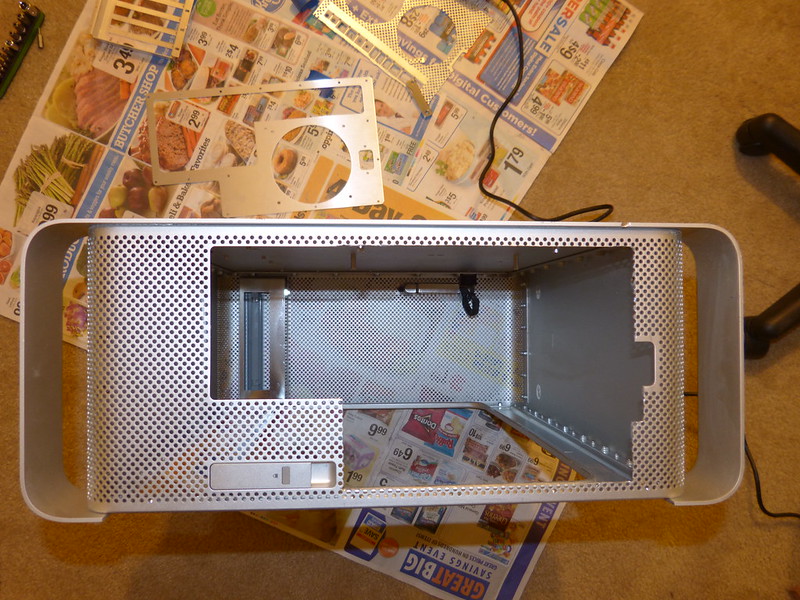
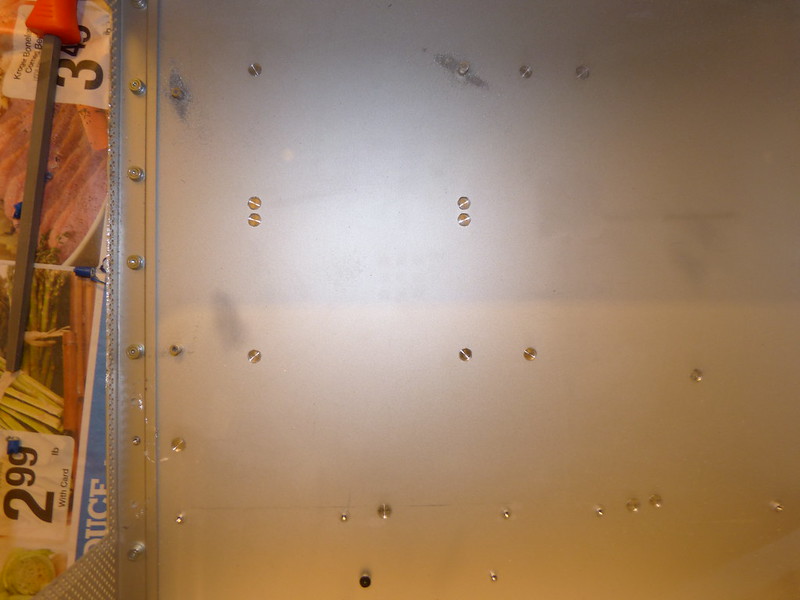
Next, I measured and marked off what part of the back of the chassis will be removed and I also pulled out the PCI slots.
After much deliberation, I decided it would be smart to be conservative about how much I would cut off during my first attempt, turns out I happened to make the right decision.
I had realigned the back panel to measure how much more I needed to cut from the chassis. I was almost on point with my first attempt.
March 15: In the wee hours of the night I continued to finish the mod by attempting to mark off and then cut off part of the front of the chassis for the front I/O panel.
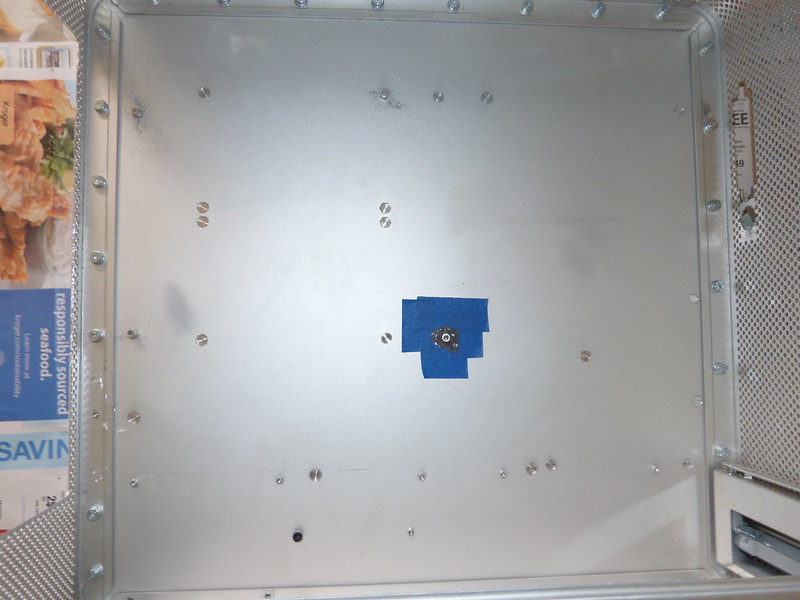
Then I had to shorten the stand-offs for the motherboard tray.
When I initially aligned the motherboard tray with the chassis, one of the stand-offs didn't line-up with the tray's perforated design so I removed it, leaving only 3 that could be used. I wanted to reattach the one stand-off so that it could also fit the tray's design. I applied JB Weld to attach the stand-off.
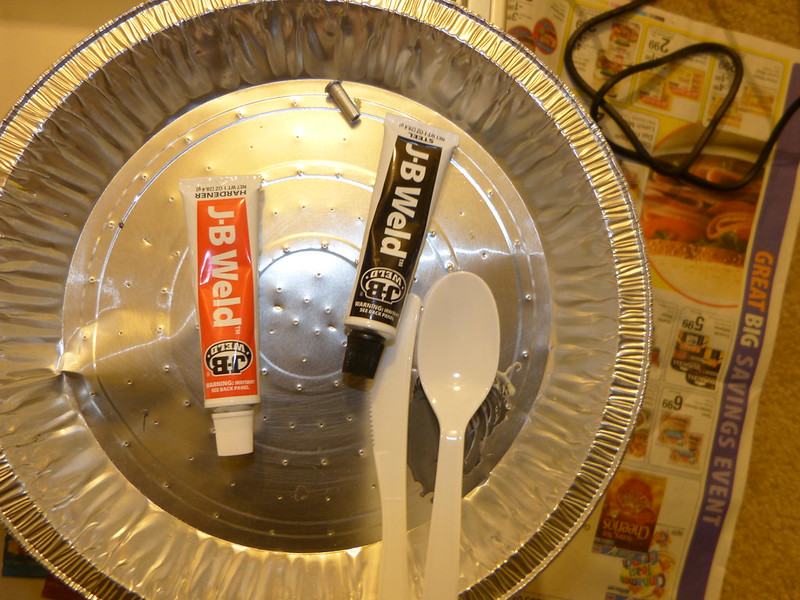
After waiting 9 hours, I felt it was dry enough for me to shorten that stand-off with a dremel so it could fit the motherboard tray. Unfortunately, the dremel moved it out of place and impatient as I was to finish, I decided I would stick with 3 stand-offs and just wash the chassis so I could finally screw on the back and front I/O panels.
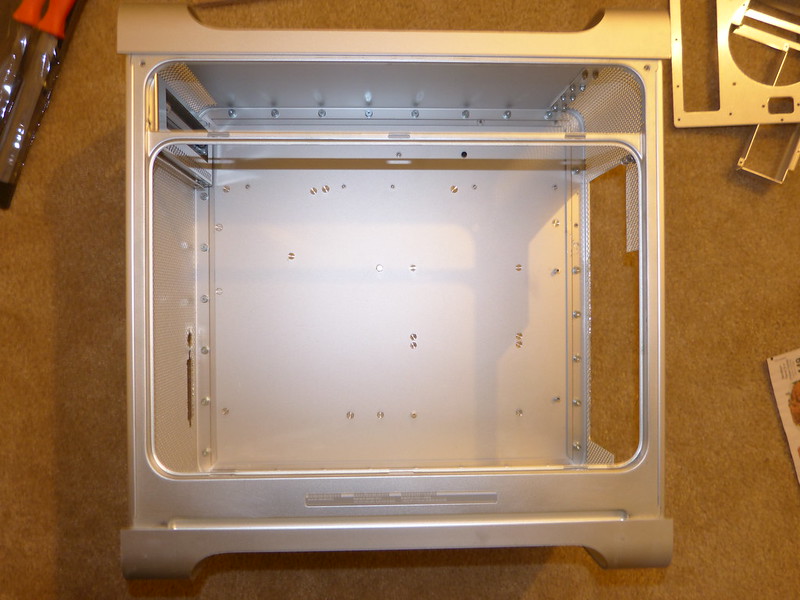
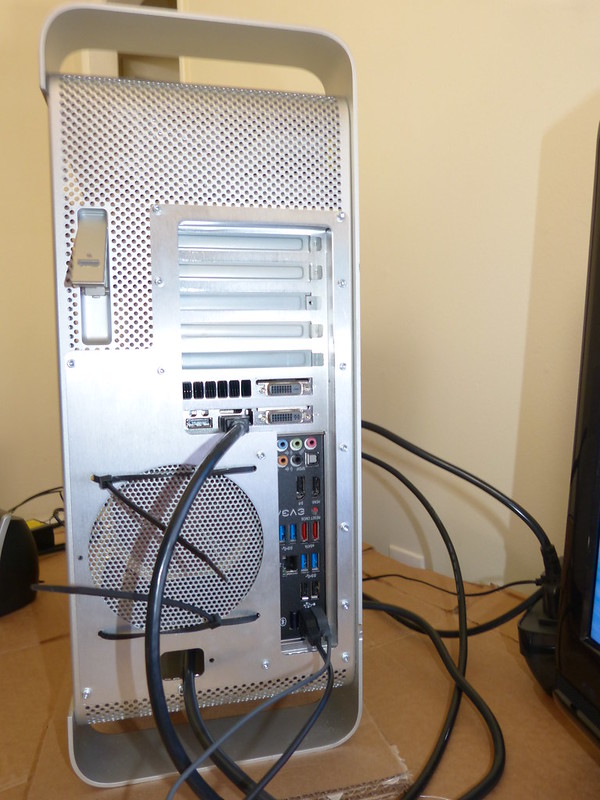
Back panel screwed on... I hadn't ordered a back fan yet, so with a little improvisation, I used cable ties to hold the screen/grill in for the mean time.
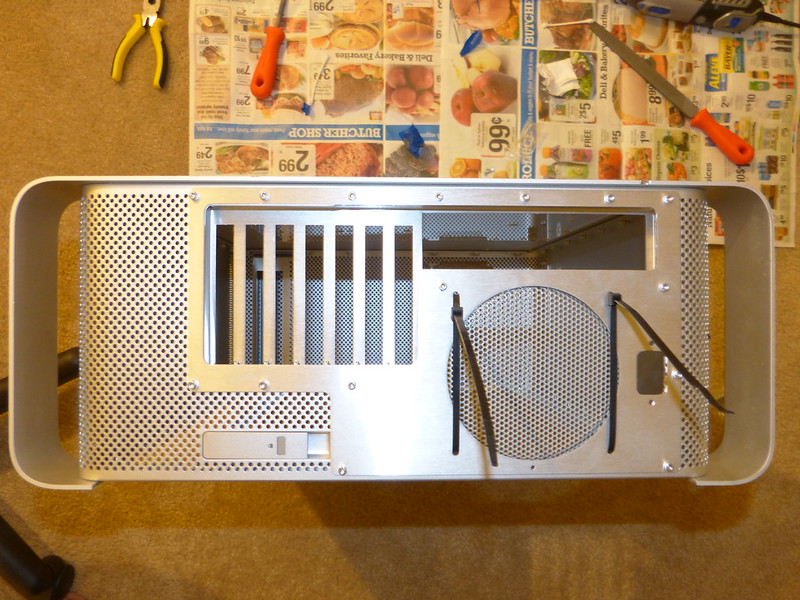
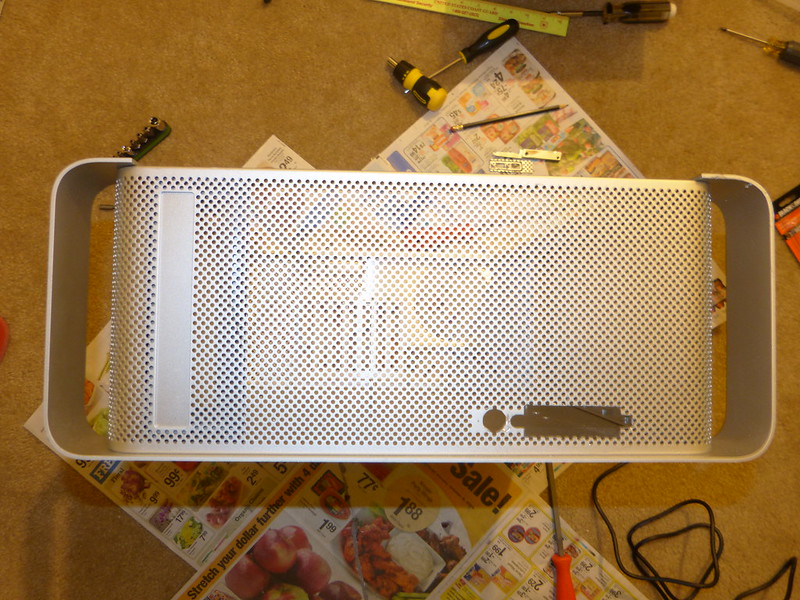
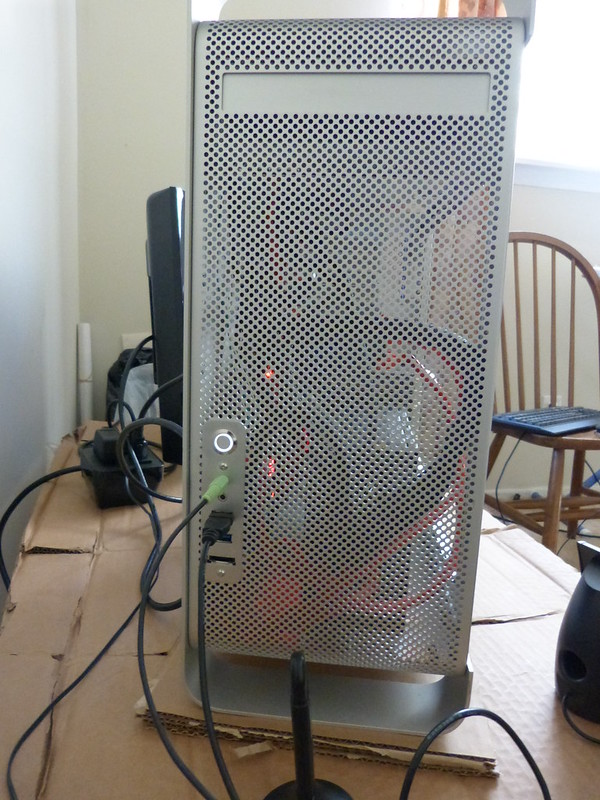
Front I/O panel screwed on...
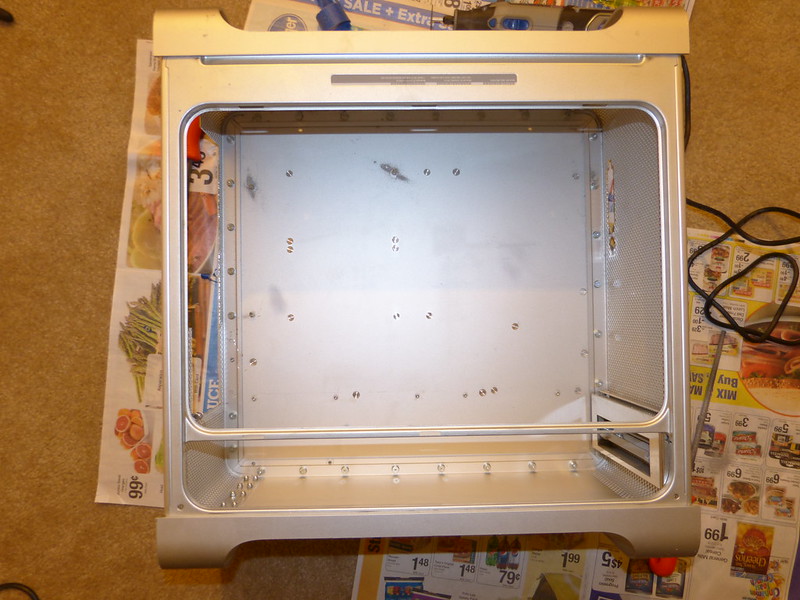
Lastly, I had to reassemble the top shelf, door lock mechanism, and hard drive bay before I could screw in the motherboard tray. Unfortunately, I had initially ordered the wrong size CPU heat sink so I am not able to attach my motherboard in the chassis just yet until my new heat sink arrives in the mail.
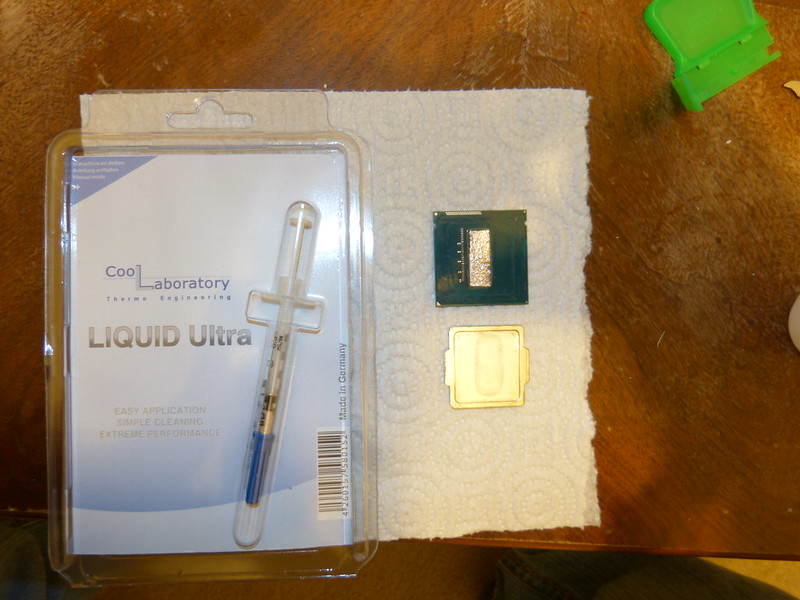
March 20: For all the folks out there with Haswells, especially the 4770Ks, I decided to do the "unthinkable" and de-lid my CPU (goodbye warranty). After watching a few YouTube videos, I had ordered myself a syringe of Cool Lab Liquid Ultra, and then I completed the process.


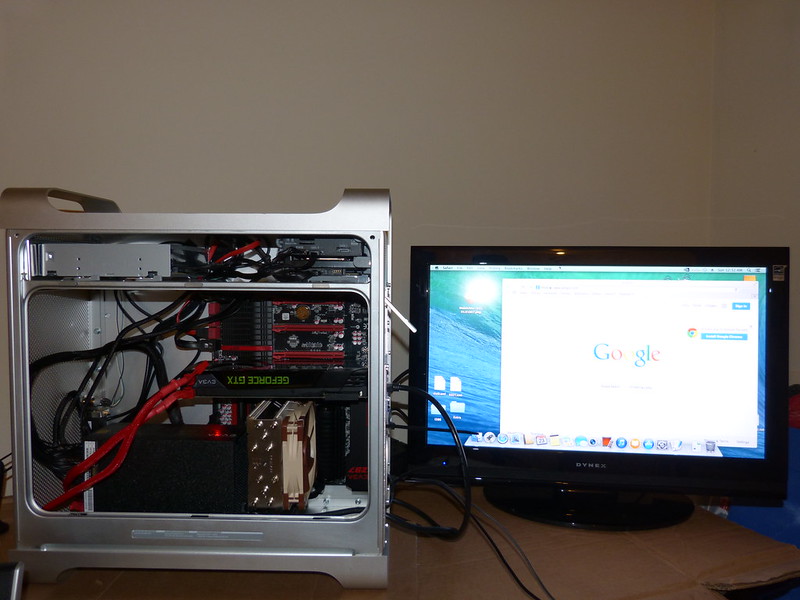
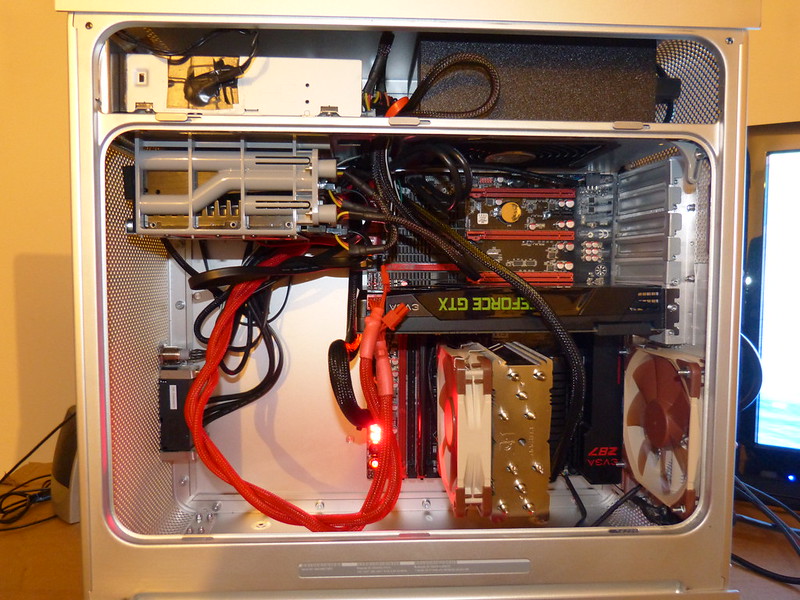
March 22: My new CPU heat sink, the Noctua NH-U12S arrived so I was able to attach my motherboard in the chassis. After assembling all the hardware in the chassis, I was able to fire it up. Now I have a fully working hack (10.9.1) that looks like a Mac. Some more good news: after the de-lidding my CPU, I did notice it was 4 degrees cooler than usual. There is still some more work to do before I feel my system is completed, but at least the hard part is done.
March 24: The way my PSU is positioned in my chassis, I was limited on options on how to mount it against the chassis. I was thinking of drilling two more holes at the bottom of the chassis to slip through cable ties to hold down PSU. Unhappy with the position of the PSU and unsure of my next step, I asked around tonymacx86.com here for a more elegant way to do this.
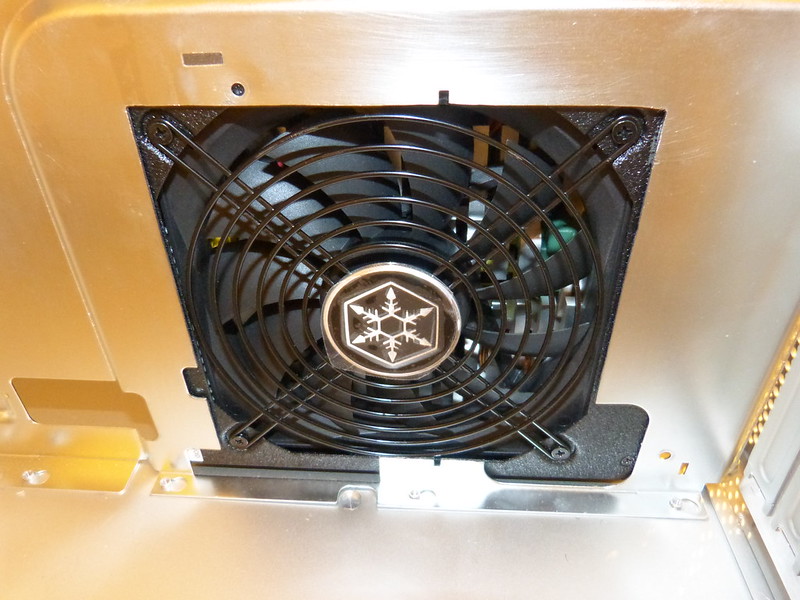
I took the advice of one of the guys and got a smaller PSU which fits perfectly in the back of the top shelf. I had a brand new Silverstone SST-ST1200-G lying around which is an inch smaller length-wise than my former PSU. I also cutout a hole for the fan.
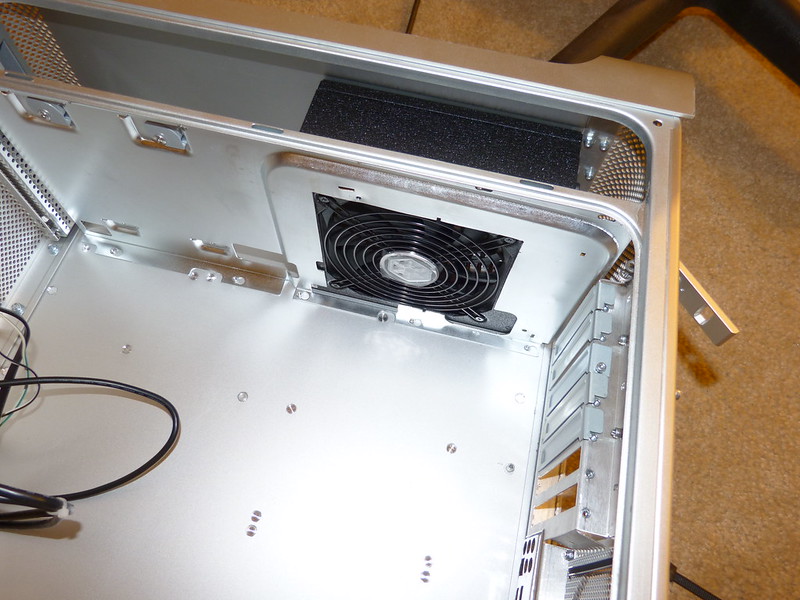
As a consequence for switching the PSU location, I had remounted the hard drive cage under the top shelf where the blu ray drive sits. That allowed me to gain better control of the cable management in the chassis since the SSDs/HDDs switched places with the PSU.
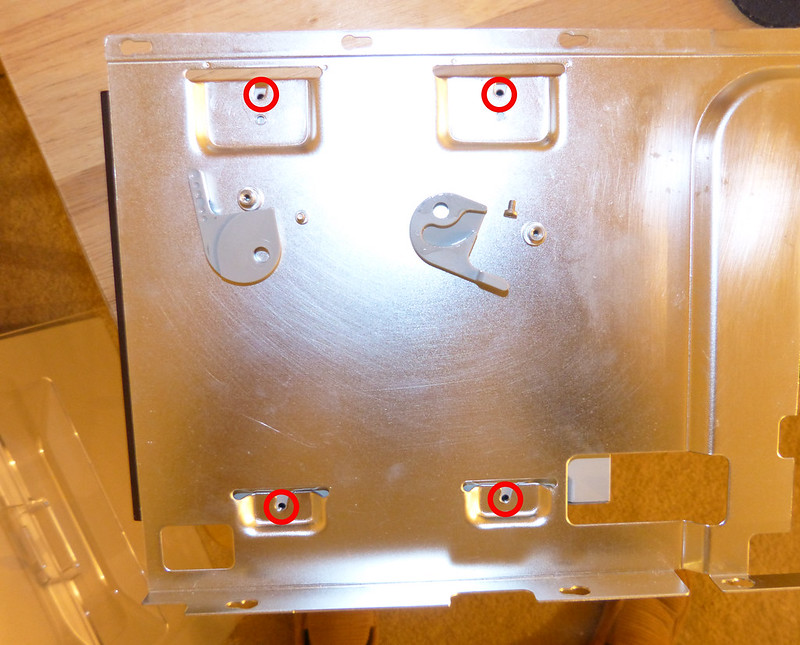
For some reason I was unaware how to mount the blu ray burner. I decided to unscrew the latches that are attached to the top shelf which revealed where I can screw on the burner.

March 28: I wanted to use some rubber edge profile to cover the sharp edges that resulted from making the cut out.

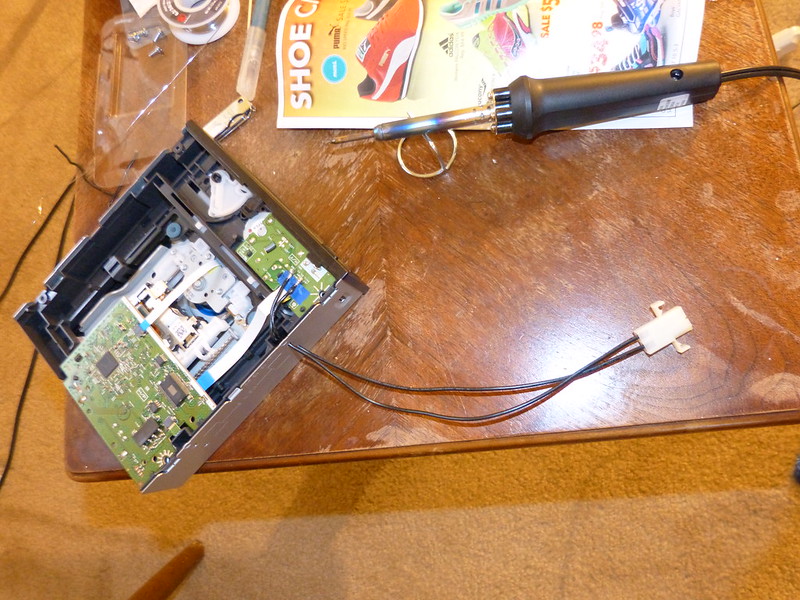
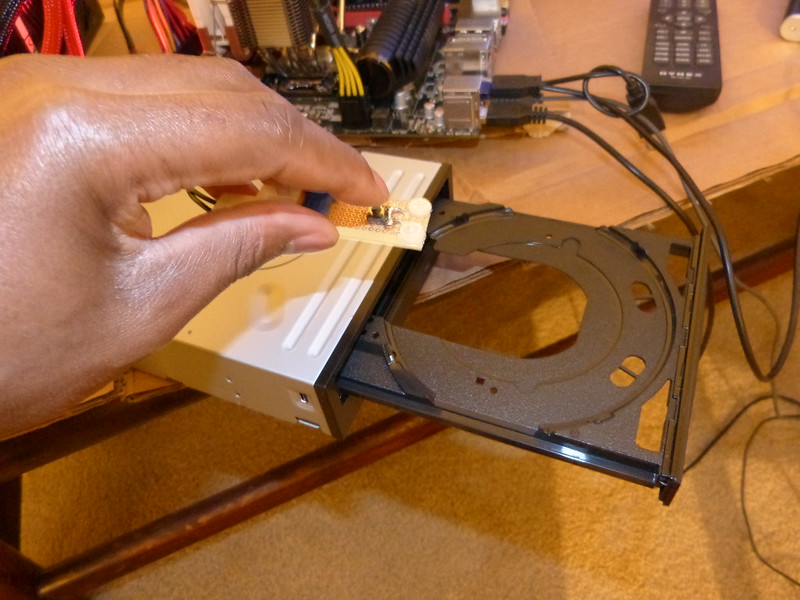
I also created a circuit switch for an external eject button for my blu ray burner.
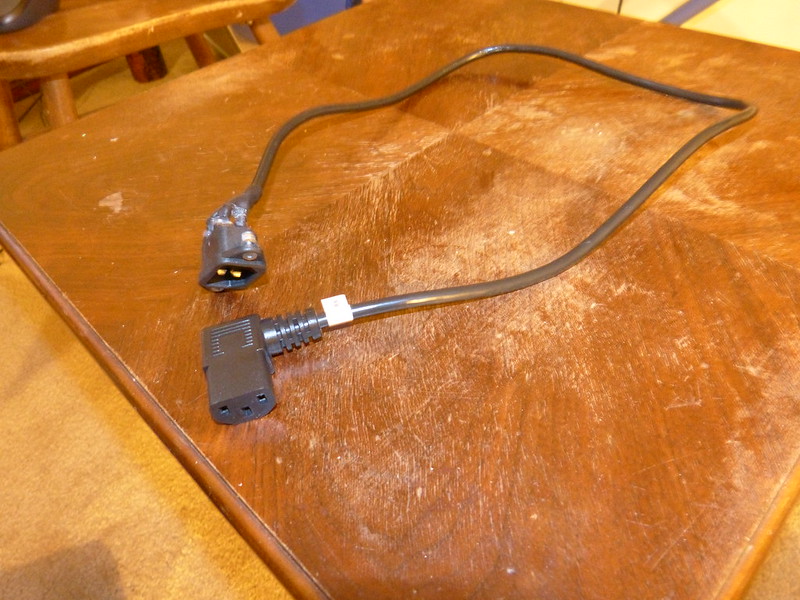
March 31: I finished creating the power plug which extends more cable from the PSU to the back of the chassis and enables my system's AC connection.
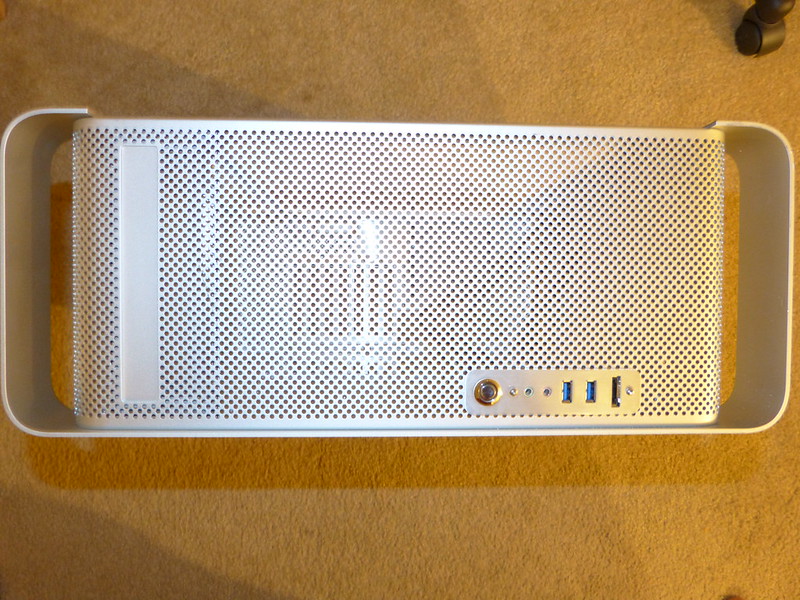
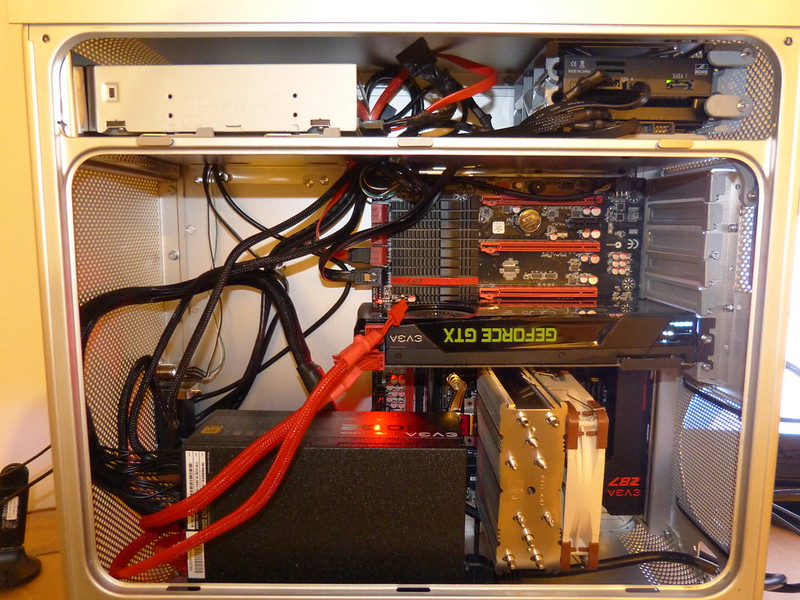
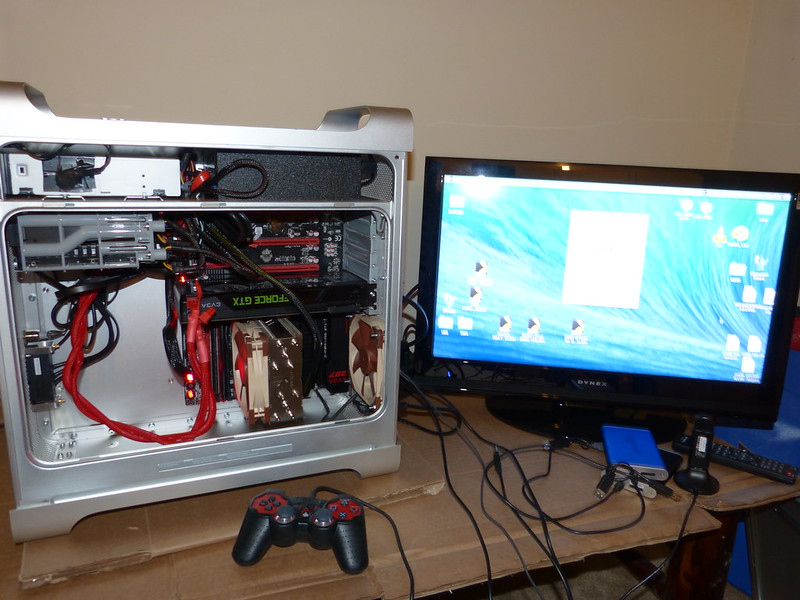
April 1: The G5 mod is finally complete.
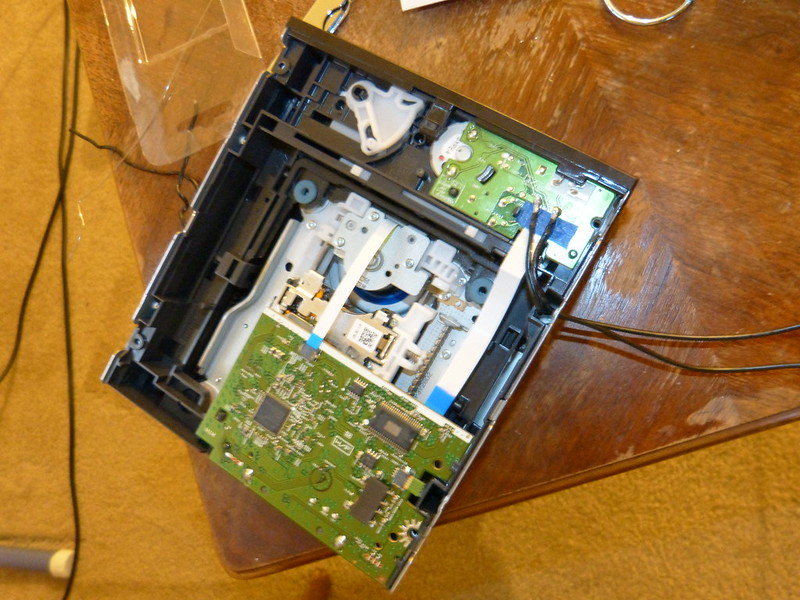
One minor issue remaining was that after creating the external eject button for the blu ray drive to open and screwing down the drive in place, each time I pressed the eject button, the drive tray got stuck. I asked around tonymacx86.com for a proper solution. I was informed of a YouTube video which instructed the process of removing the optical drive bezel here. The other fix needed was to use the Apple screws (which my chassis didn't come with) to reinforce the blu ray burner in place once you twist the latches attached to the top shelf. Unfortunately I had to rescrew those latches back on to the top shelf which which I previously removed and order the Apples screws here.
April 5: My optical drive mounting Apple screws arrived by mail and after setting them up, my optical tray can release.
One more addition I would like to make would be to attach an additional fan to the front of the chassis. Once I come up with an elegant solution to do this, then my G5 mod will be fully complete.
- Intel Core i7-4770K (De-lidded)
- EVGA Z87 FTW (ATX)
- Silverstone SST-ST1200-G Evolution Strider Gold 1200W
- Noctua NH-U12S
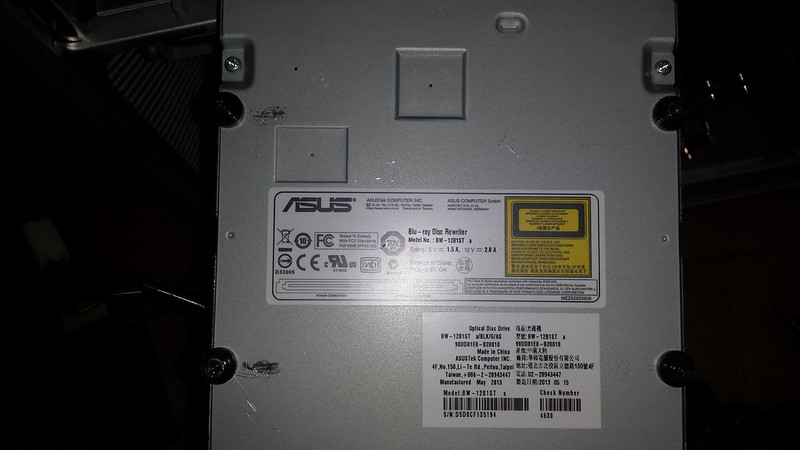
- ASUS BW-12B1ST
- Western Digital VelociRaptor 500GB
- OCZ Vertex 4 512 GB
- Patriot Dual Bay 2.5" SATA 3.5" drive bay (for SSD)
- EVGA GeForce GTX 480 SC; changed out to GTX 680 after install
- Corsair Vengeance 4GB DDR3 1600 MHz; will update to 16GB after install
- My case: Modified Apple Powermac G5 WIP
February 12th: I have gutted out the whole chassis and washed it.
February 19th: My motherboard finally arrived for me to install OS X.
I wanted to approach the installation process by setting up everything using the just the very PC I was building without the need of another Mac and I was capable of doing so. Started out with installing 10.6.0 and was able to update to 10.6.8 with iBoot Haswell 1.0.1.
The main issue I had was the method I had to use to go about installing Mavericks 10.9.0. I almost gave up, but after venting on this thread here and with a little motivation, on March 5th, I was finally able to install Mavs on my EVGA Z87 FTW, and I have a full-length guide that details it all here.
February 27: My G5 "120 low ATX Mod kit" from the Laser Hive (based out of the UK) finally arrived (thanks Neil for the referral).
I didn't immediately get started on modding my G5 case yet until I was confident that OS X could be installed using my motherboard.
March 14: Let the games begin! I had to get my tools first.
Next, I measured and marked off what part of the back of the chassis will be removed and I also pulled out the PCI slots.
After much deliberation, I decided it would be smart to be conservative about how much I would cut off during my first attempt, turns out I happened to make the right decision.
I had realigned the back panel to measure how much more I needed to cut from the chassis. I was almost on point with my first attempt.
March 15: In the wee hours of the night I continued to finish the mod by attempting to mark off and then cut off part of the front of the chassis for the front I/O panel.
Then I had to shorten the stand-offs for the motherboard tray.
When I initially aligned the motherboard tray with the chassis, one of the stand-offs didn't line-up with the tray's perforated design so I removed it, leaving only 3 that could be used. I wanted to reattach the one stand-off so that it could also fit the tray's design. I applied JB Weld to attach the stand-off.
After waiting 9 hours, I felt it was dry enough for me to shorten that stand-off with a dremel so it could fit the motherboard tray. Unfortunately, the dremel moved it out of place and impatient as I was to finish, I decided I would stick with 3 stand-offs and just wash the chassis so I could finally screw on the back and front I/O panels.
Back panel screwed on... I hadn't ordered a back fan yet, so with a little improvisation, I used cable ties to hold the screen/grill in for the mean time.
Front I/O panel screwed on...
Lastly, I had to reassemble the top shelf, door lock mechanism, and hard drive bay before I could screw in the motherboard tray. Unfortunately, I had initially ordered the wrong size CPU heat sink so I am not able to attach my motherboard in the chassis just yet until my new heat sink arrives in the mail.
March 20: For all the folks out there with Haswells, especially the 4770Ks, I decided to do the "unthinkable" and de-lid my CPU (goodbye warranty). After watching a few YouTube videos, I had ordered myself a syringe of Cool Lab Liquid Ultra, and then I completed the process.
March 22: My new CPU heat sink, the Noctua NH-U12S arrived so I was able to attach my motherboard in the chassis. After assembling all the hardware in the chassis, I was able to fire it up. Now I have a fully working hack (10.9.1) that looks like a Mac. Some more good news: after the de-lidding my CPU, I did notice it was 4 degrees cooler than usual. There is still some more work to do before I feel my system is completed, but at least the hard part is done.
March 24: The way my PSU is positioned in my chassis, I was limited on options on how to mount it against the chassis. I was thinking of drilling two more holes at the bottom of the chassis to slip through cable ties to hold down PSU. Unhappy with the position of the PSU and unsure of my next step, I asked around tonymacx86.com here for a more elegant way to do this.
I took the advice of one of the guys and got a smaller PSU which fits perfectly in the back of the top shelf. I had a brand new Silverstone SST-ST1200-G lying around which is an inch smaller length-wise than my former PSU. I also cutout a hole for the fan.
As a consequence for switching the PSU location, I had remounted the hard drive cage under the top shelf where the blu ray drive sits. That allowed me to gain better control of the cable management in the chassis since the SSDs/HDDs switched places with the PSU.
For some reason I was unaware how to mount the blu ray burner. I decided to unscrew the latches that are attached to the top shelf which revealed where I can screw on the burner.
March 28: I wanted to use some rubber edge profile to cover the sharp edges that resulted from making the cut out.
I also created a circuit switch for an external eject button for my blu ray burner.
March 31: I finished creating the power plug which extends more cable from the PSU to the back of the chassis and enables my system's AC connection.
April 1: The G5 mod is finally complete.
One minor issue remaining was that after creating the external eject button for the blu ray drive to open and screwing down the drive in place, each time I pressed the eject button, the drive tray got stuck. I asked around tonymacx86.com for a proper solution. I was informed of a YouTube video which instructed the process of removing the optical drive bezel here. The other fix needed was to use the Apple screws (which my chassis didn't come with) to reinforce the blu ray burner in place once you twist the latches attached to the top shelf. Unfortunately I had to rescrew those latches back on to the top shelf which which I previously removed and order the Apples screws here.
April 5: My optical drive mounting Apple screws arrived by mail and after setting them up, my optical tray can release.
One more addition I would like to make would be to attach an additional fan to the front of the chassis. Once I come up with an elegant solution to do this, then my G5 mod will be fully complete.
Last edited:
As an eBay Associate, HardForum may earn from qualifying purchases.