MetallicAcid
Weaksauce
- Joined
- Aug 22, 2013
- Messages
- 126
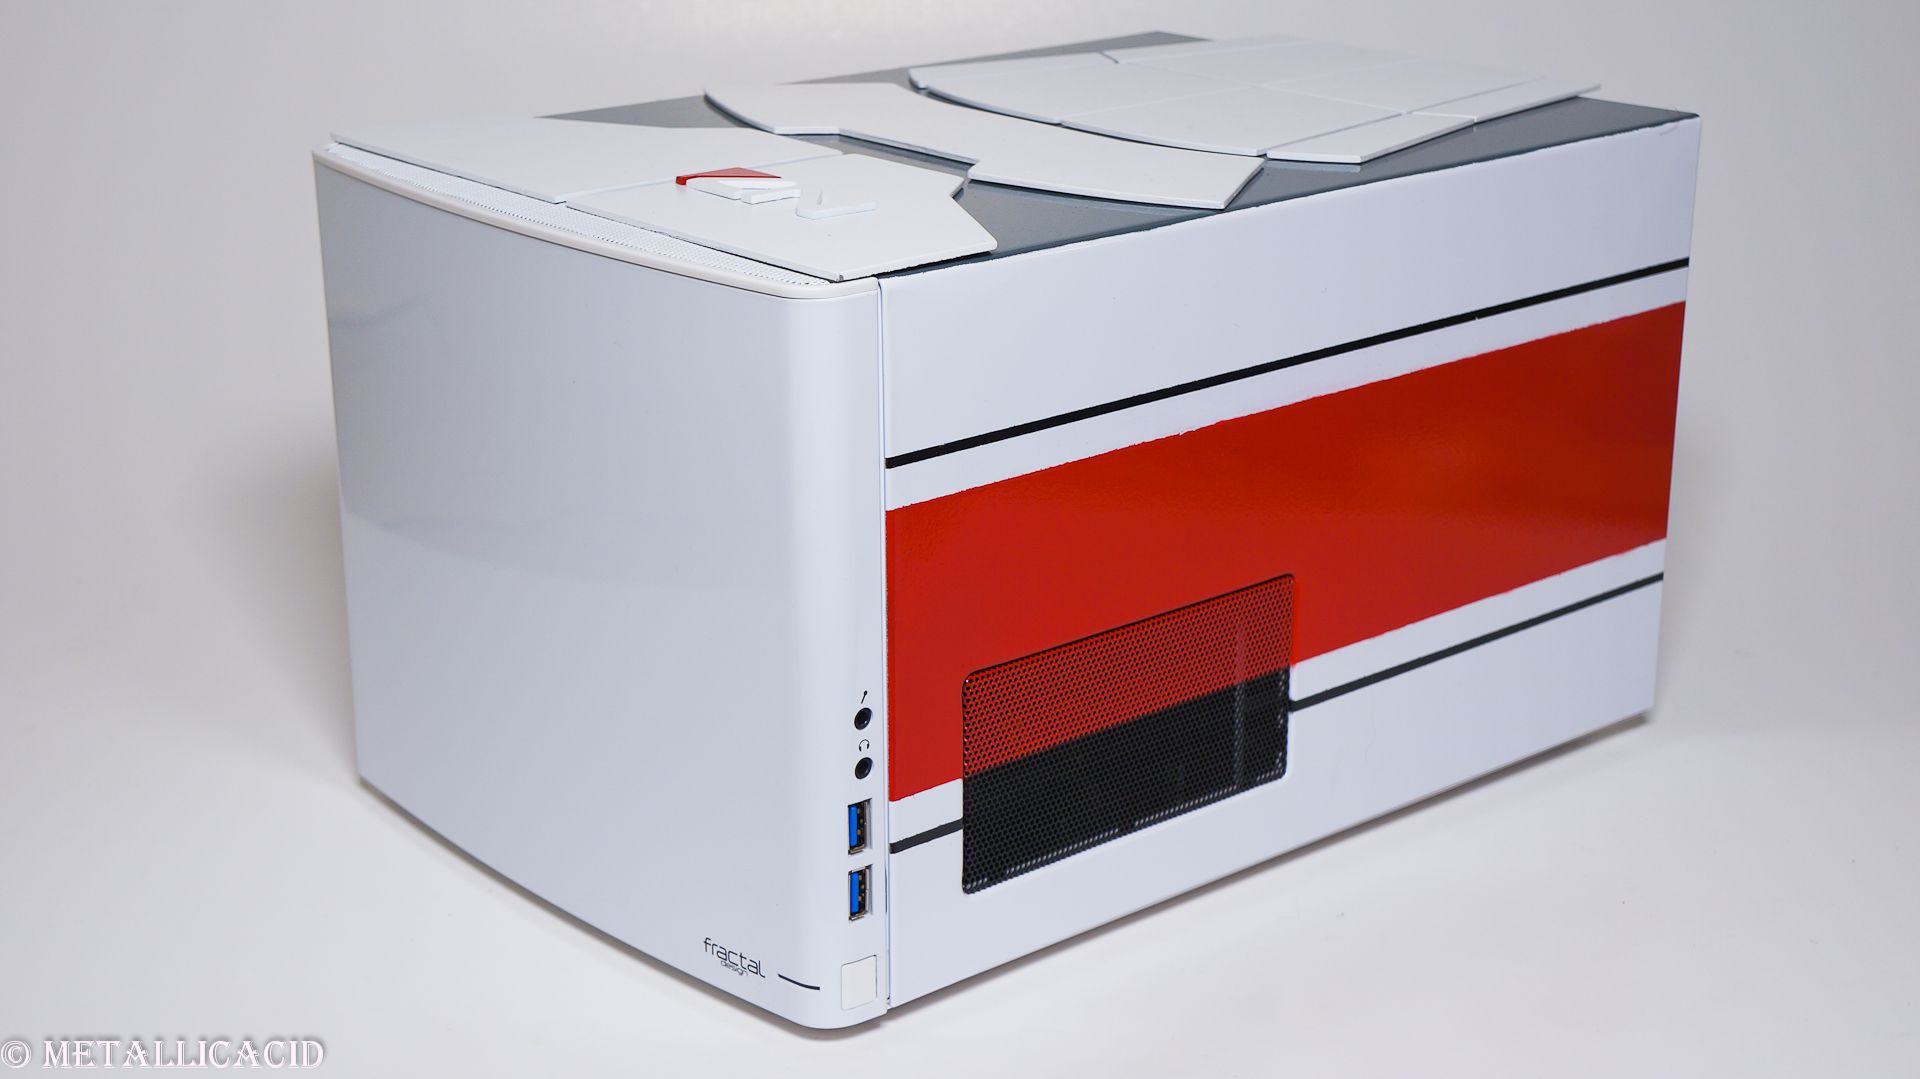
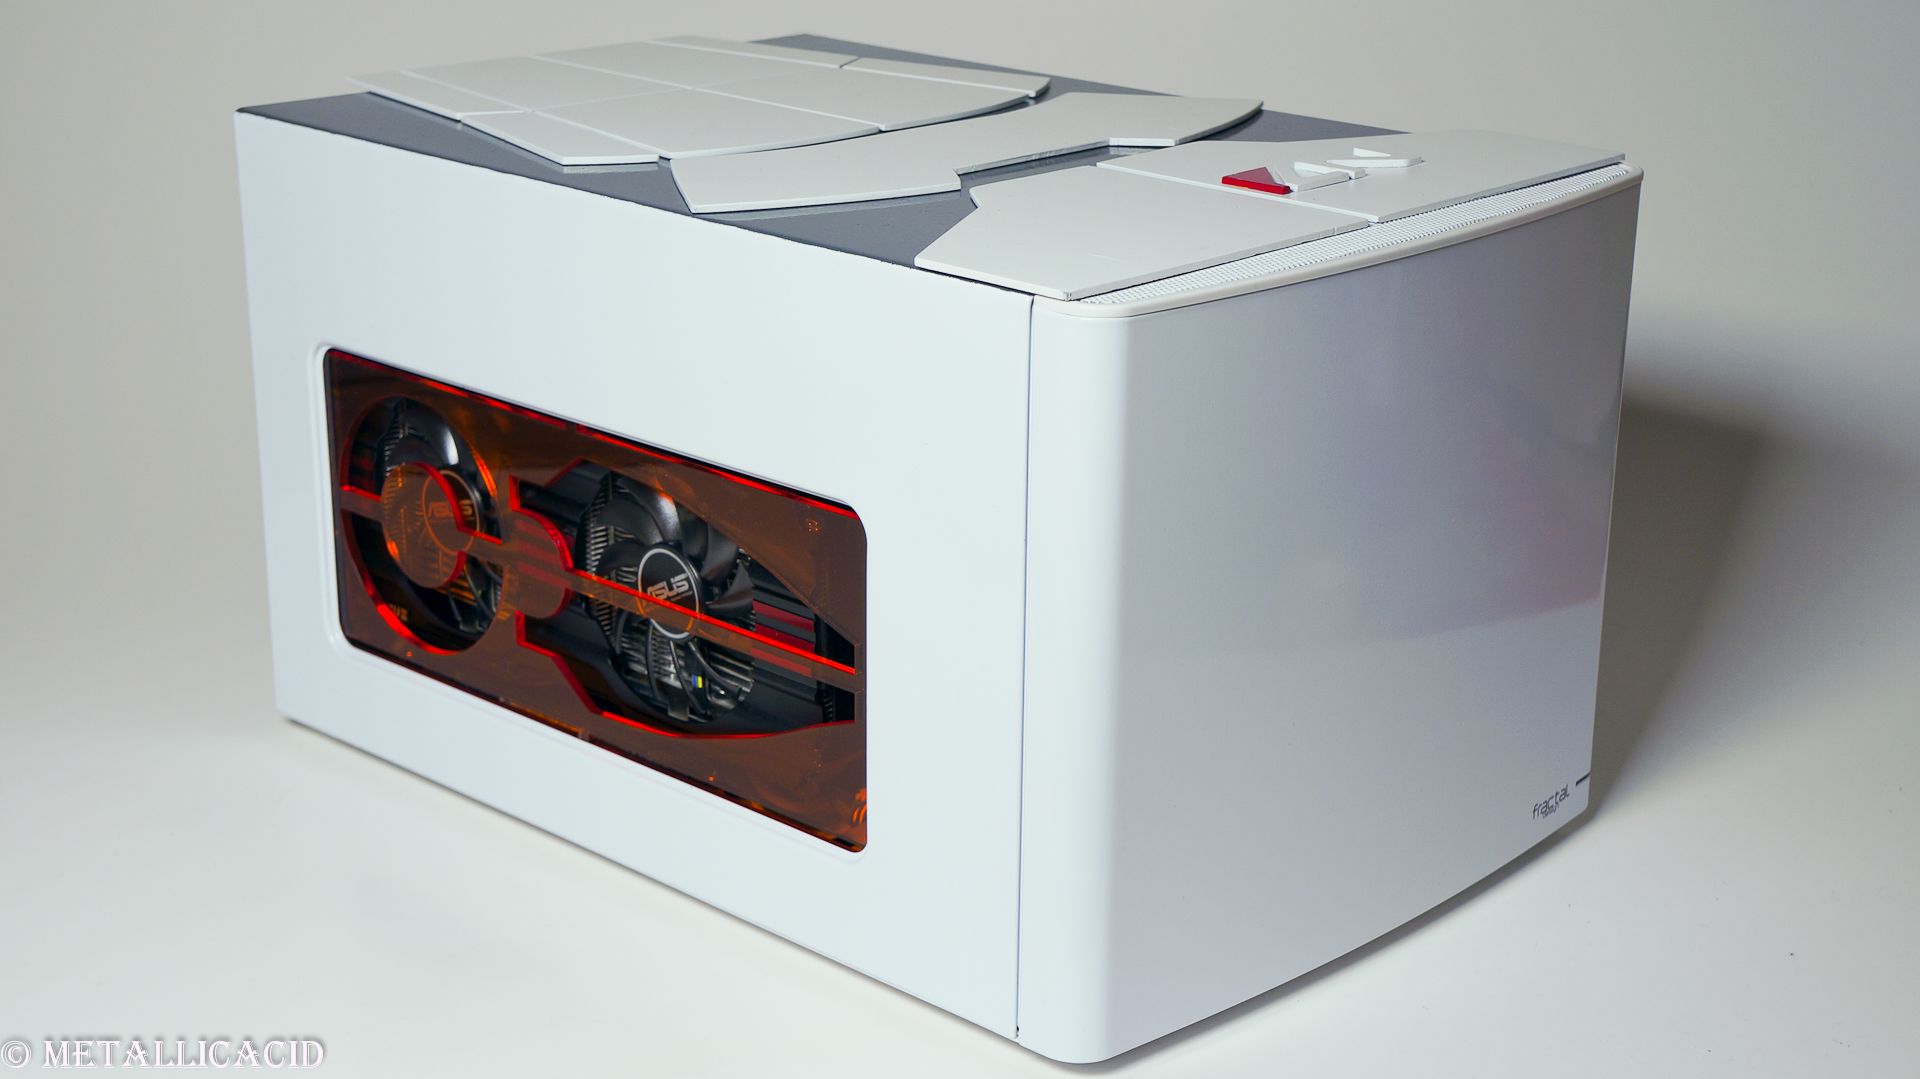
MetallicAcid's 3rd project - Fractal Effect 304
(Customer build)
Named forbes.com 1 of 3 most incredible PC's of 2014
Sponsored by:


Hello once again! I would like to present to you a build log that I am working on for a friend of mine.
My friend Henrik approached me just a couple of weeks ago and asked for me to build a computer for him, at which I jumped at the opportunity! After some spitballing about design options, Henrik decided that he really wanted his PC to have a design which was based upon Electronic Arts Mass Effect series... Henrik's most favorite gaming series ever!
Henrik gave me a couple of base guidelines to follow in the design and building of his new PC. These guidelines are as follows:
Simple
Compact
White
Hardware to be able to edit films
Play current games on high/ultra settings
One of a kind
Completed before end of December
With these points in mind, I then introduced him to the Fractal Design Node 304 to which he fell in love with right away. From these points, I came up with a design based up an armor found in game. These following pictures were used as inspiration, and a base of his design:
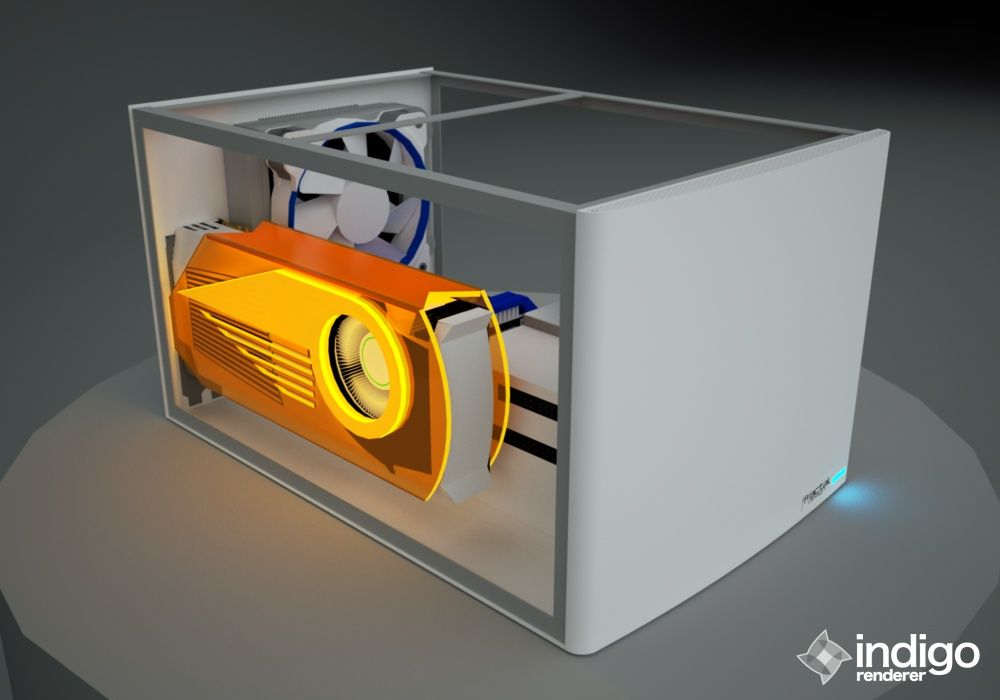
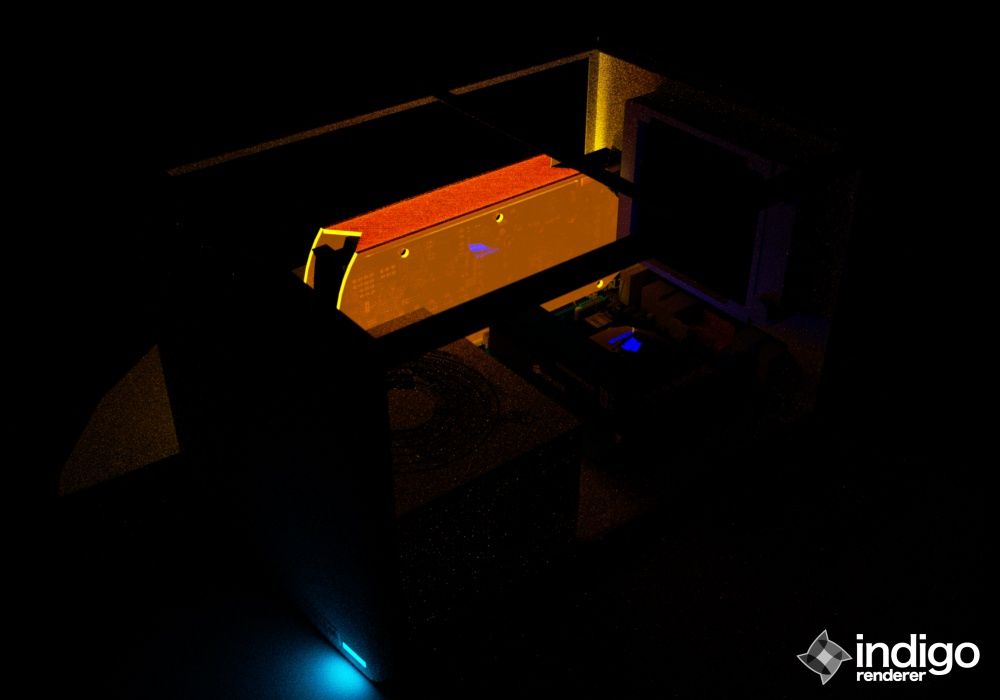
I present to you the design which was created in Sketchup, and rendered in Indigo Render.


A Quick hardware and shopping list:
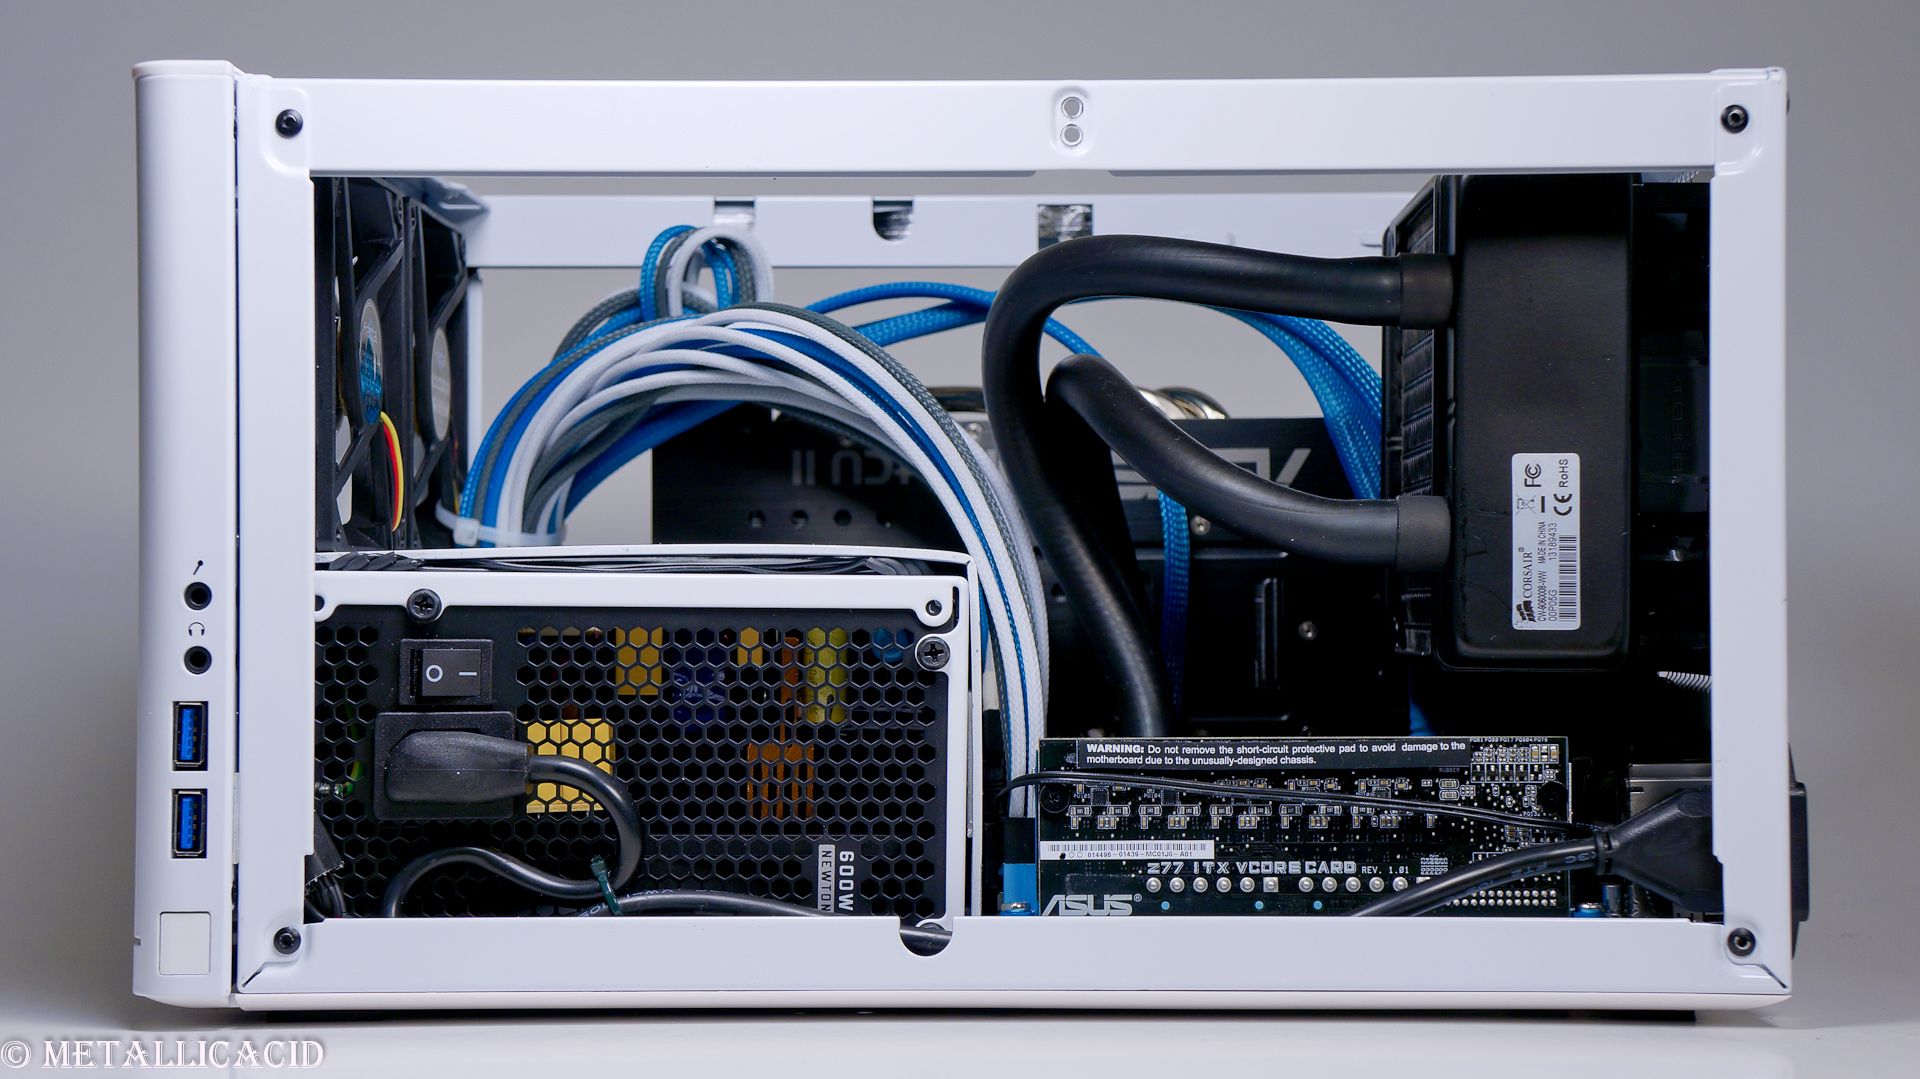
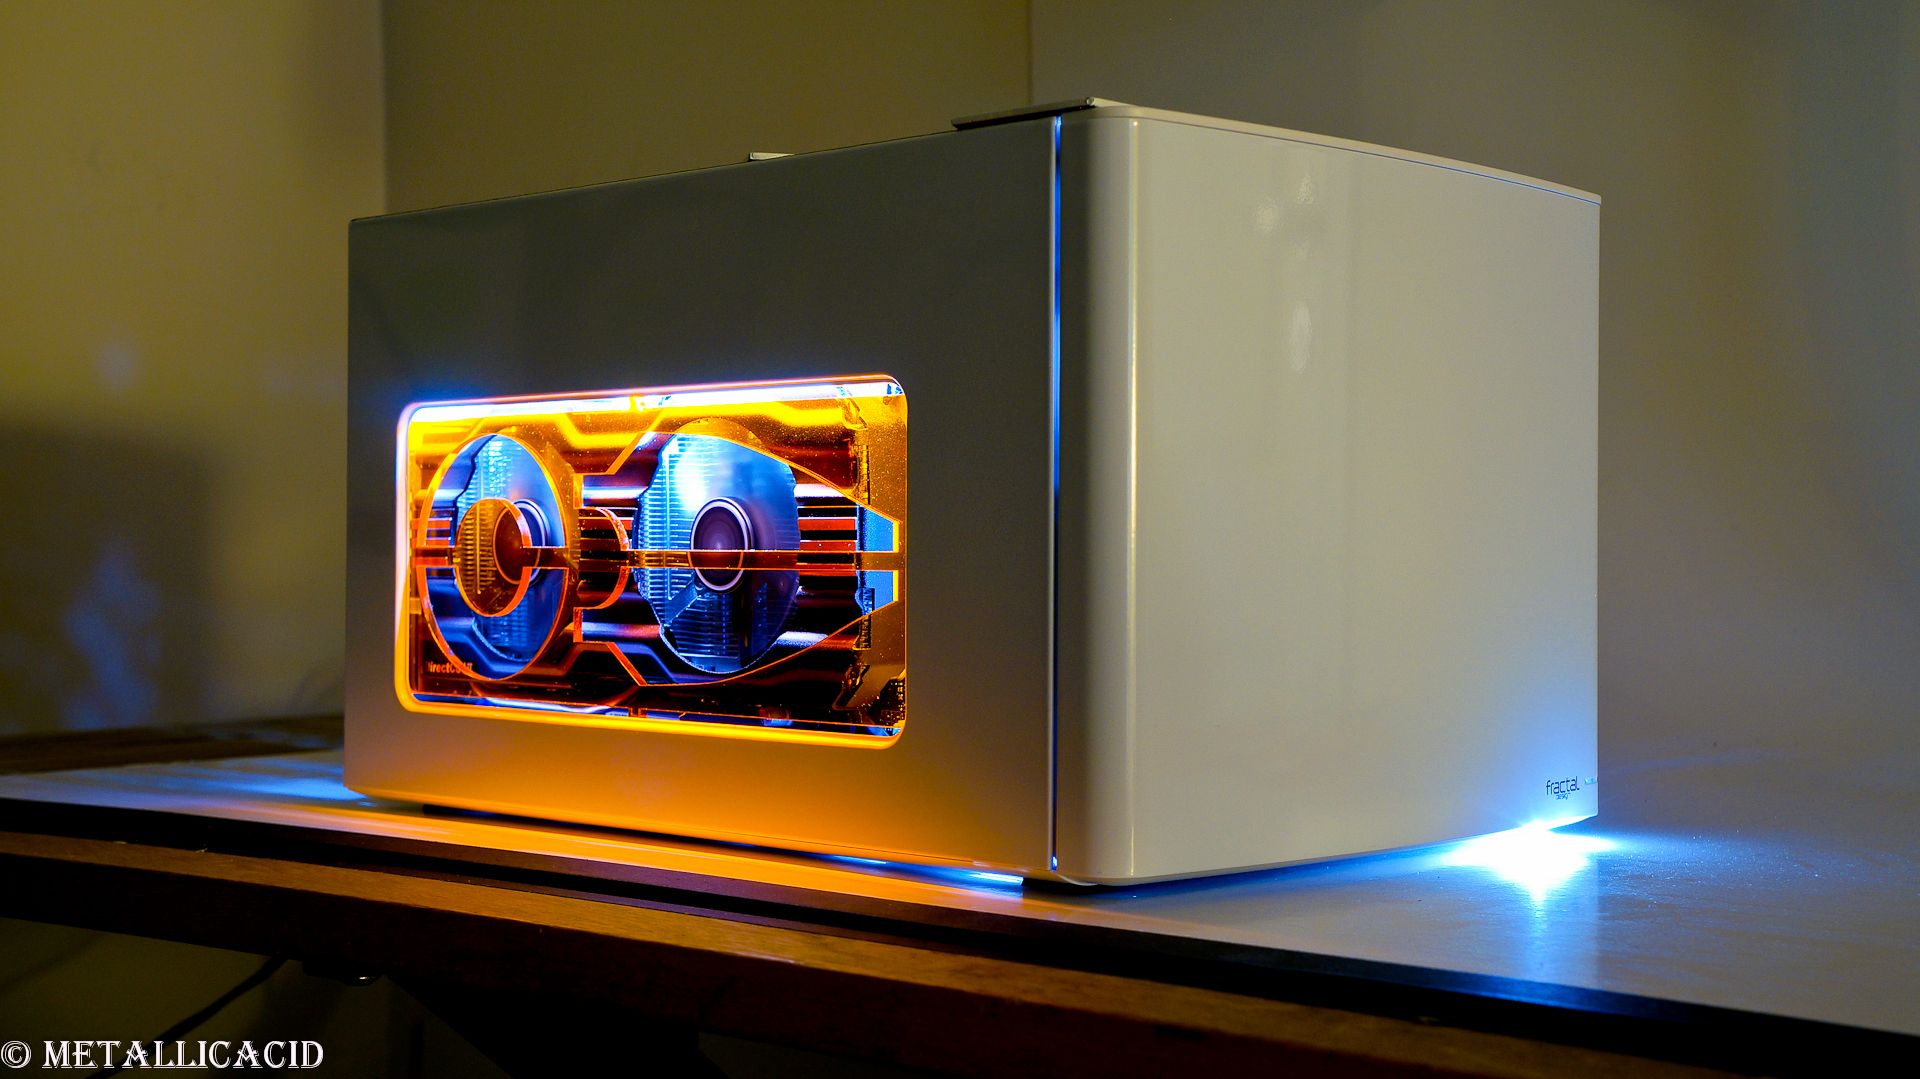
Case - Fractal Design Node 304 (Bought)
Motherboard - Asus P8Z77-I Deluxe (Bought)
CPU - Intel Core i7 2700K (Bought)
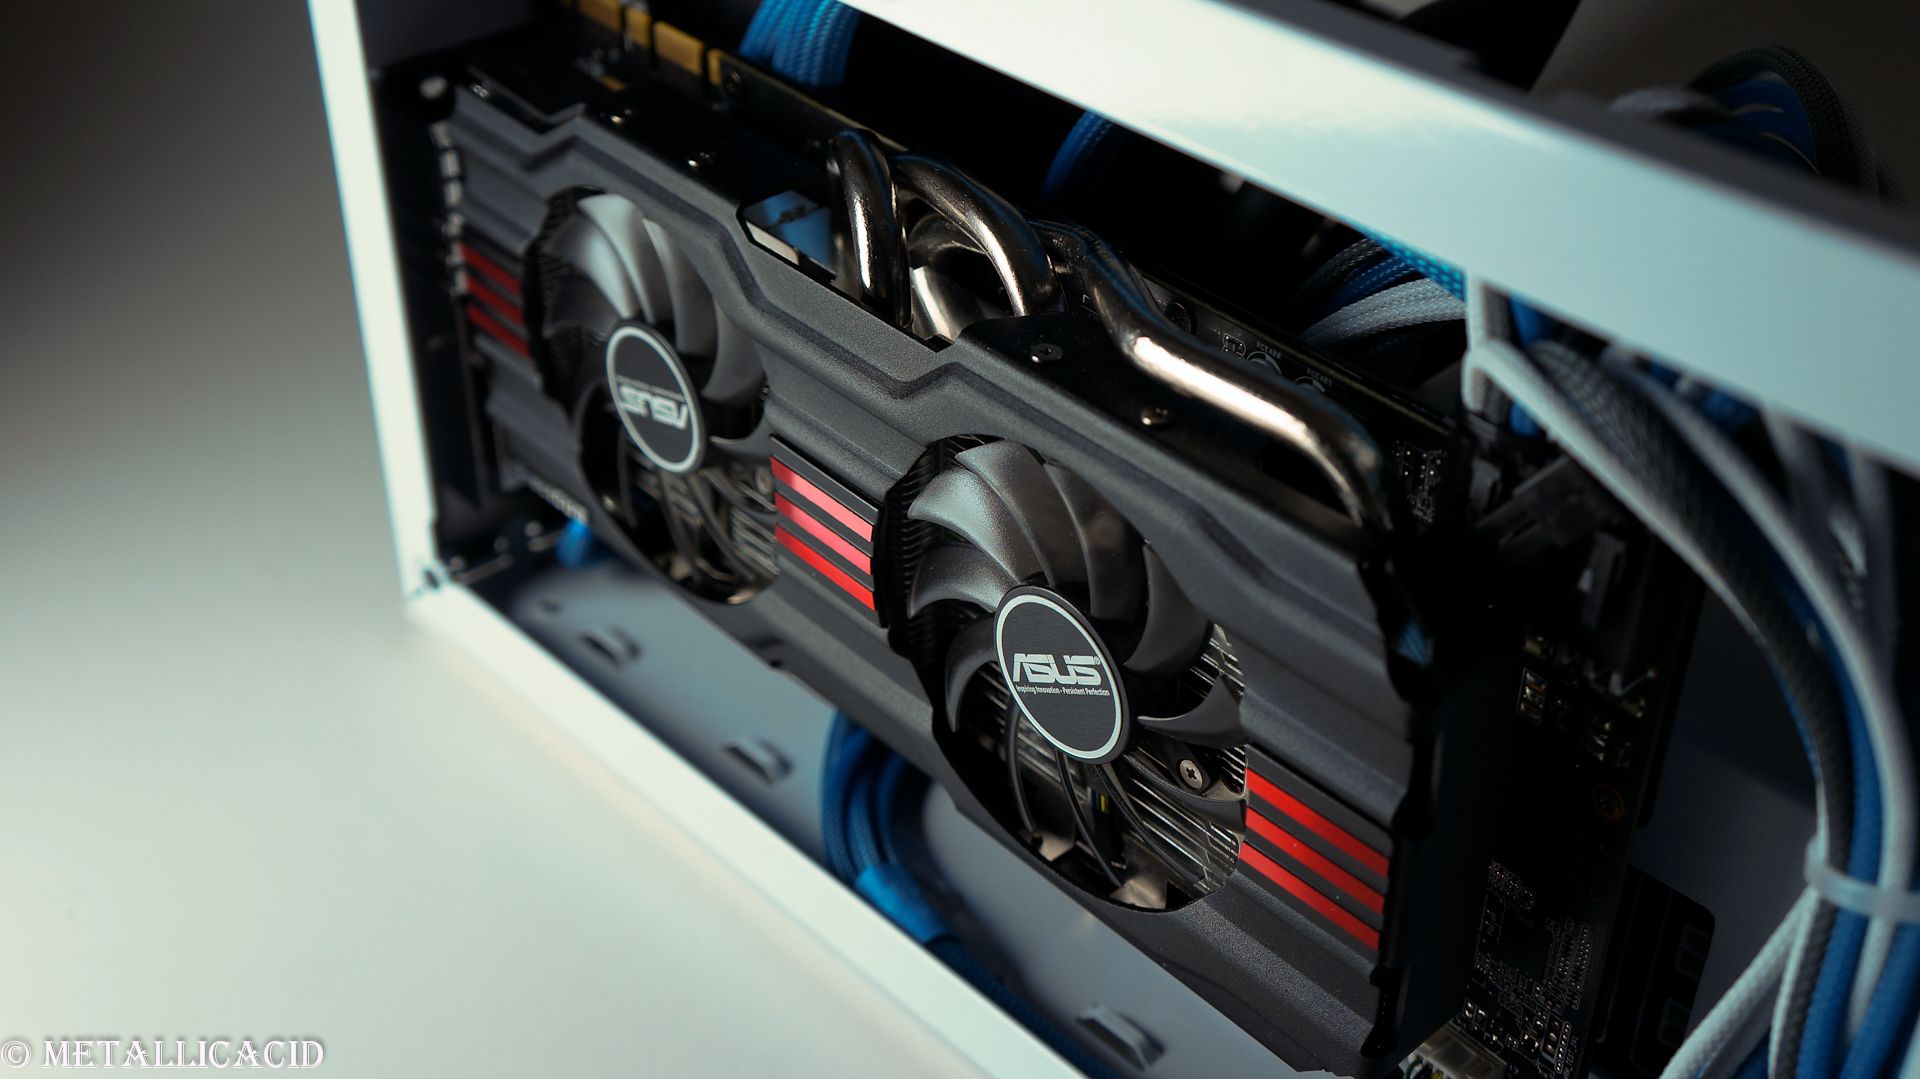
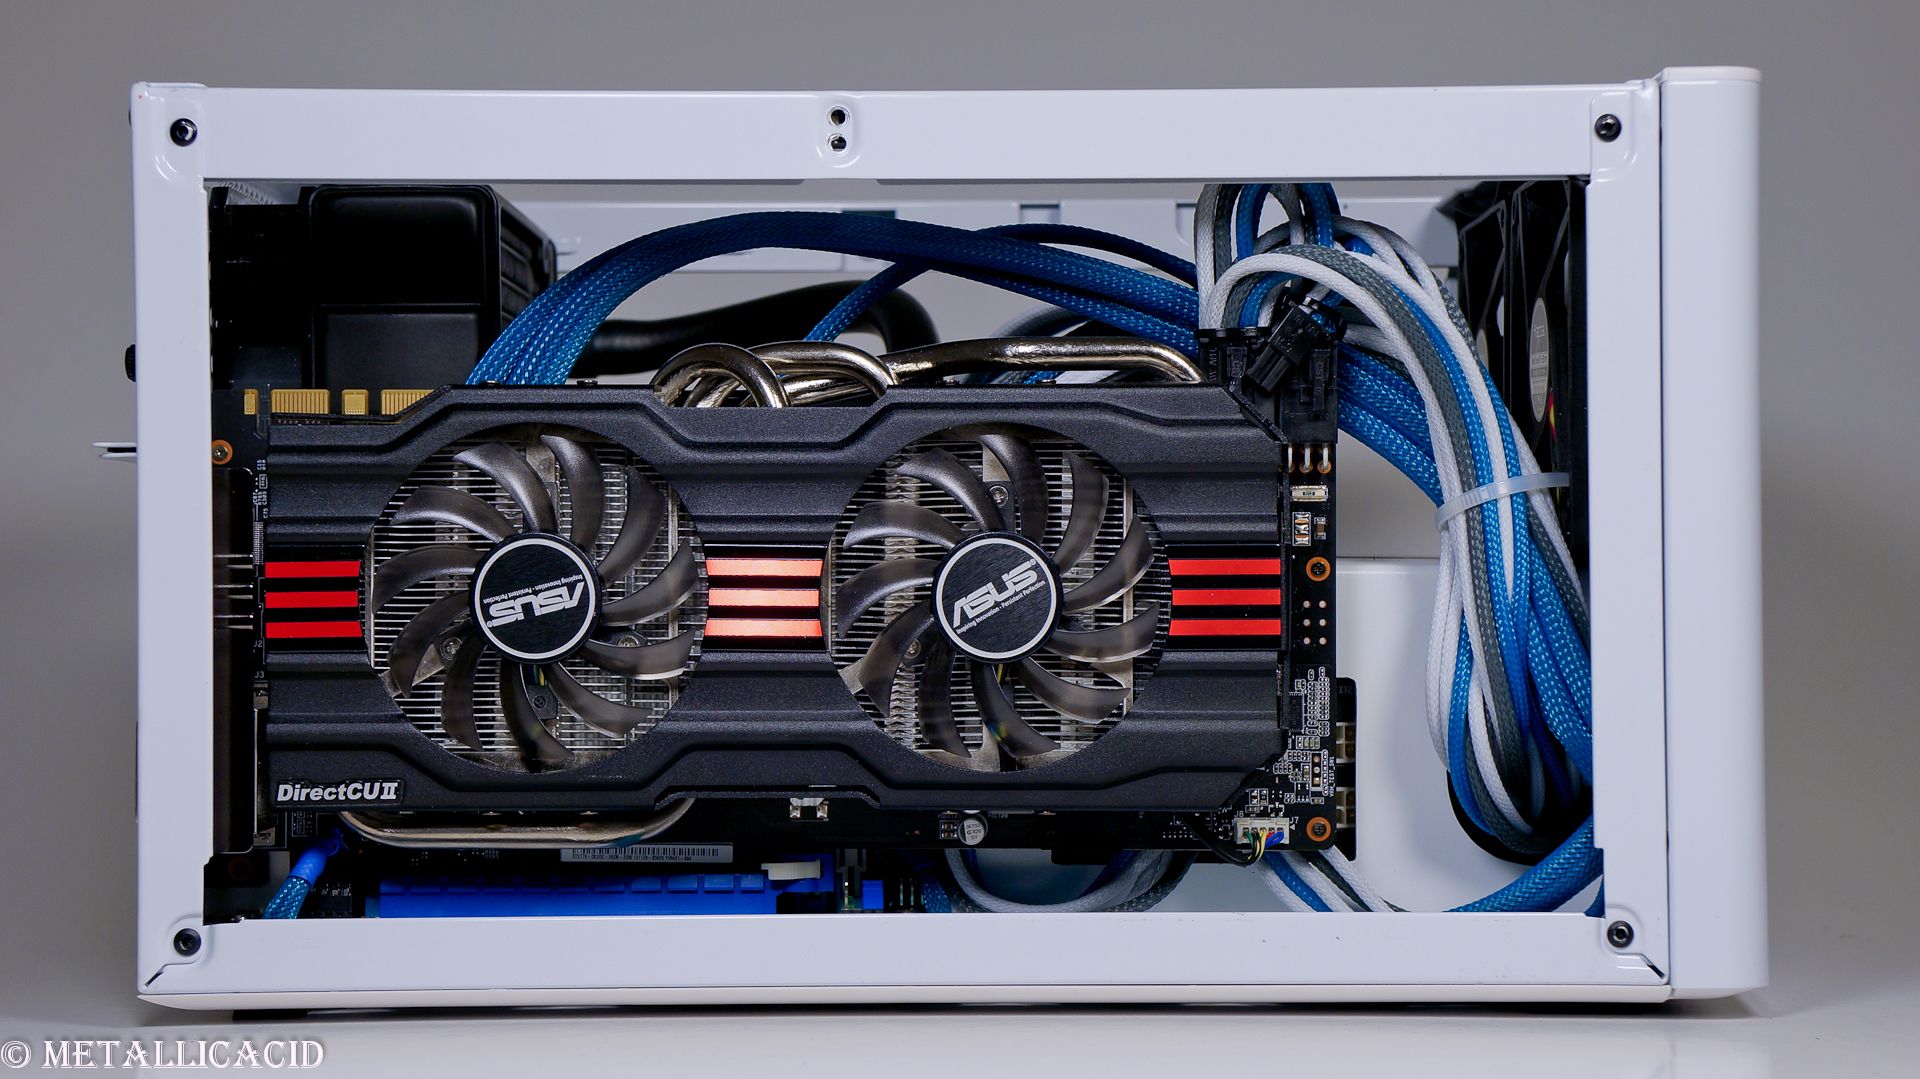
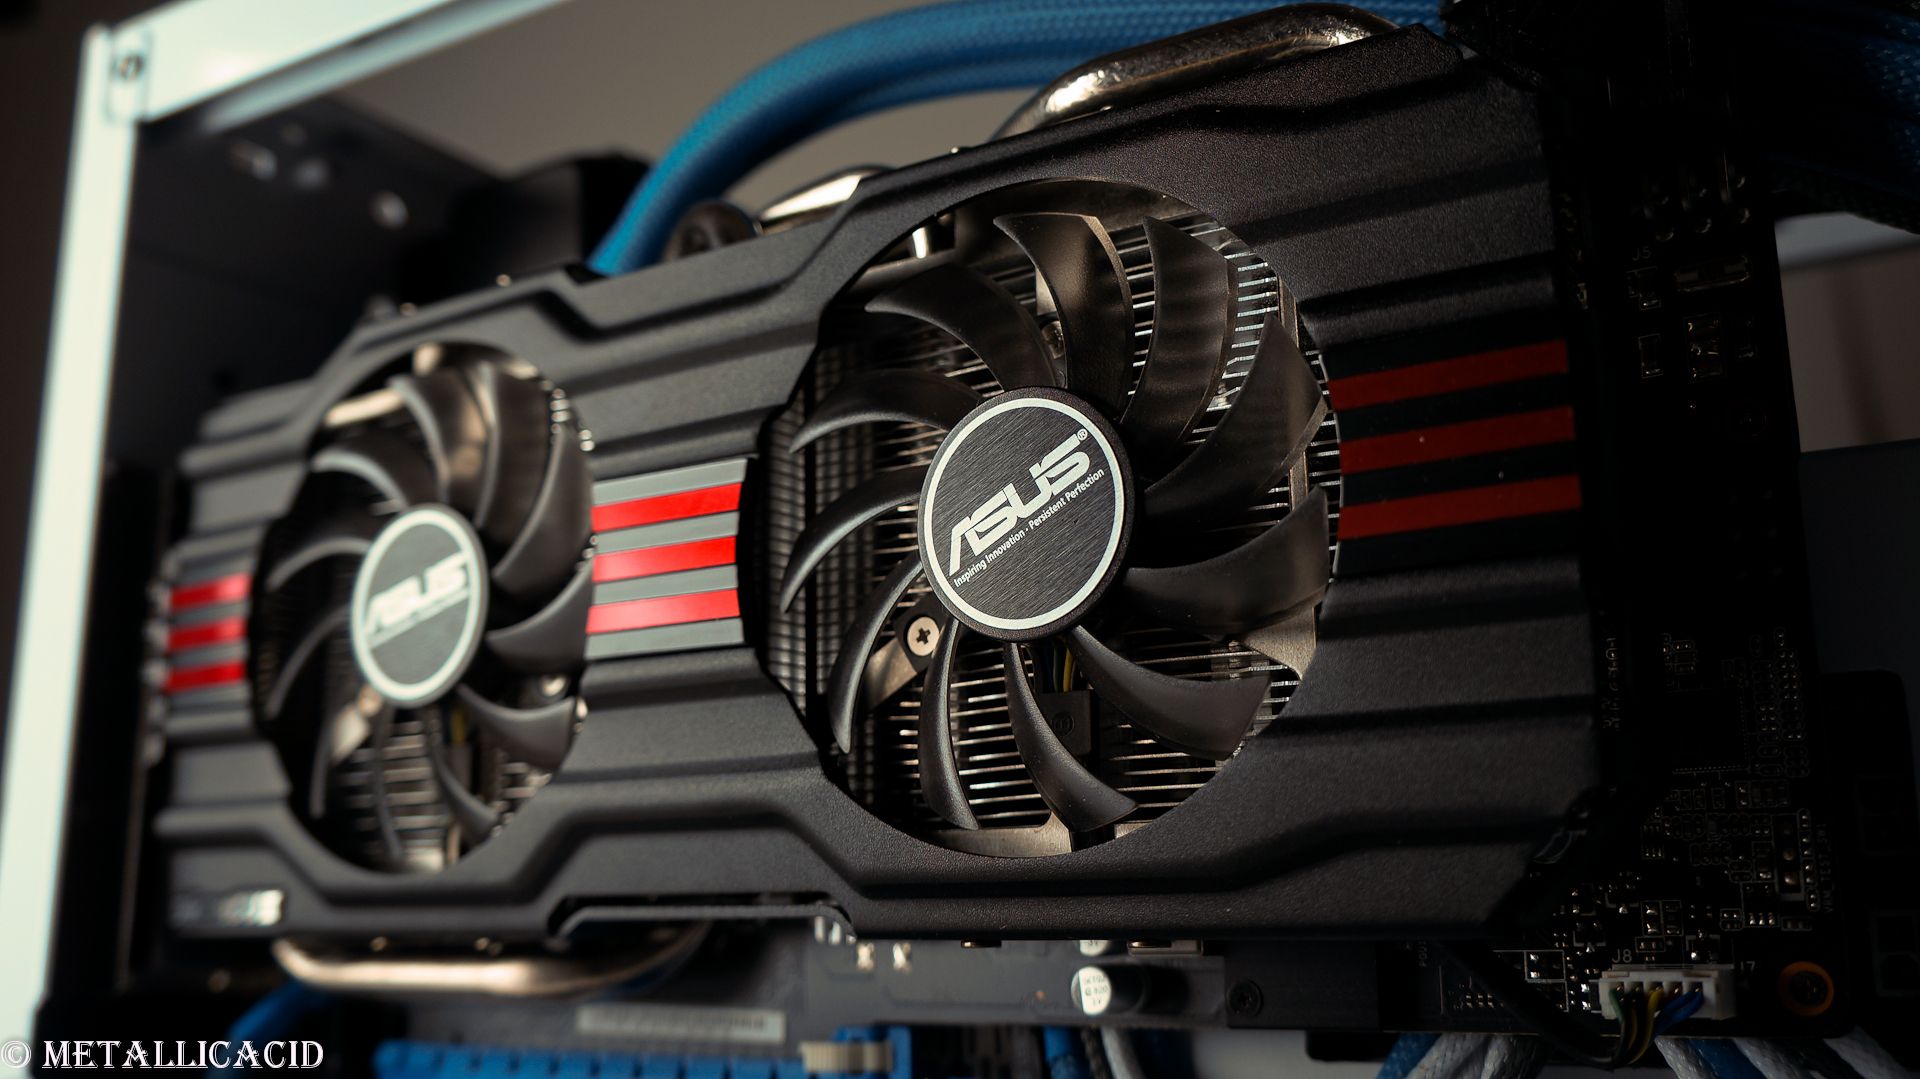
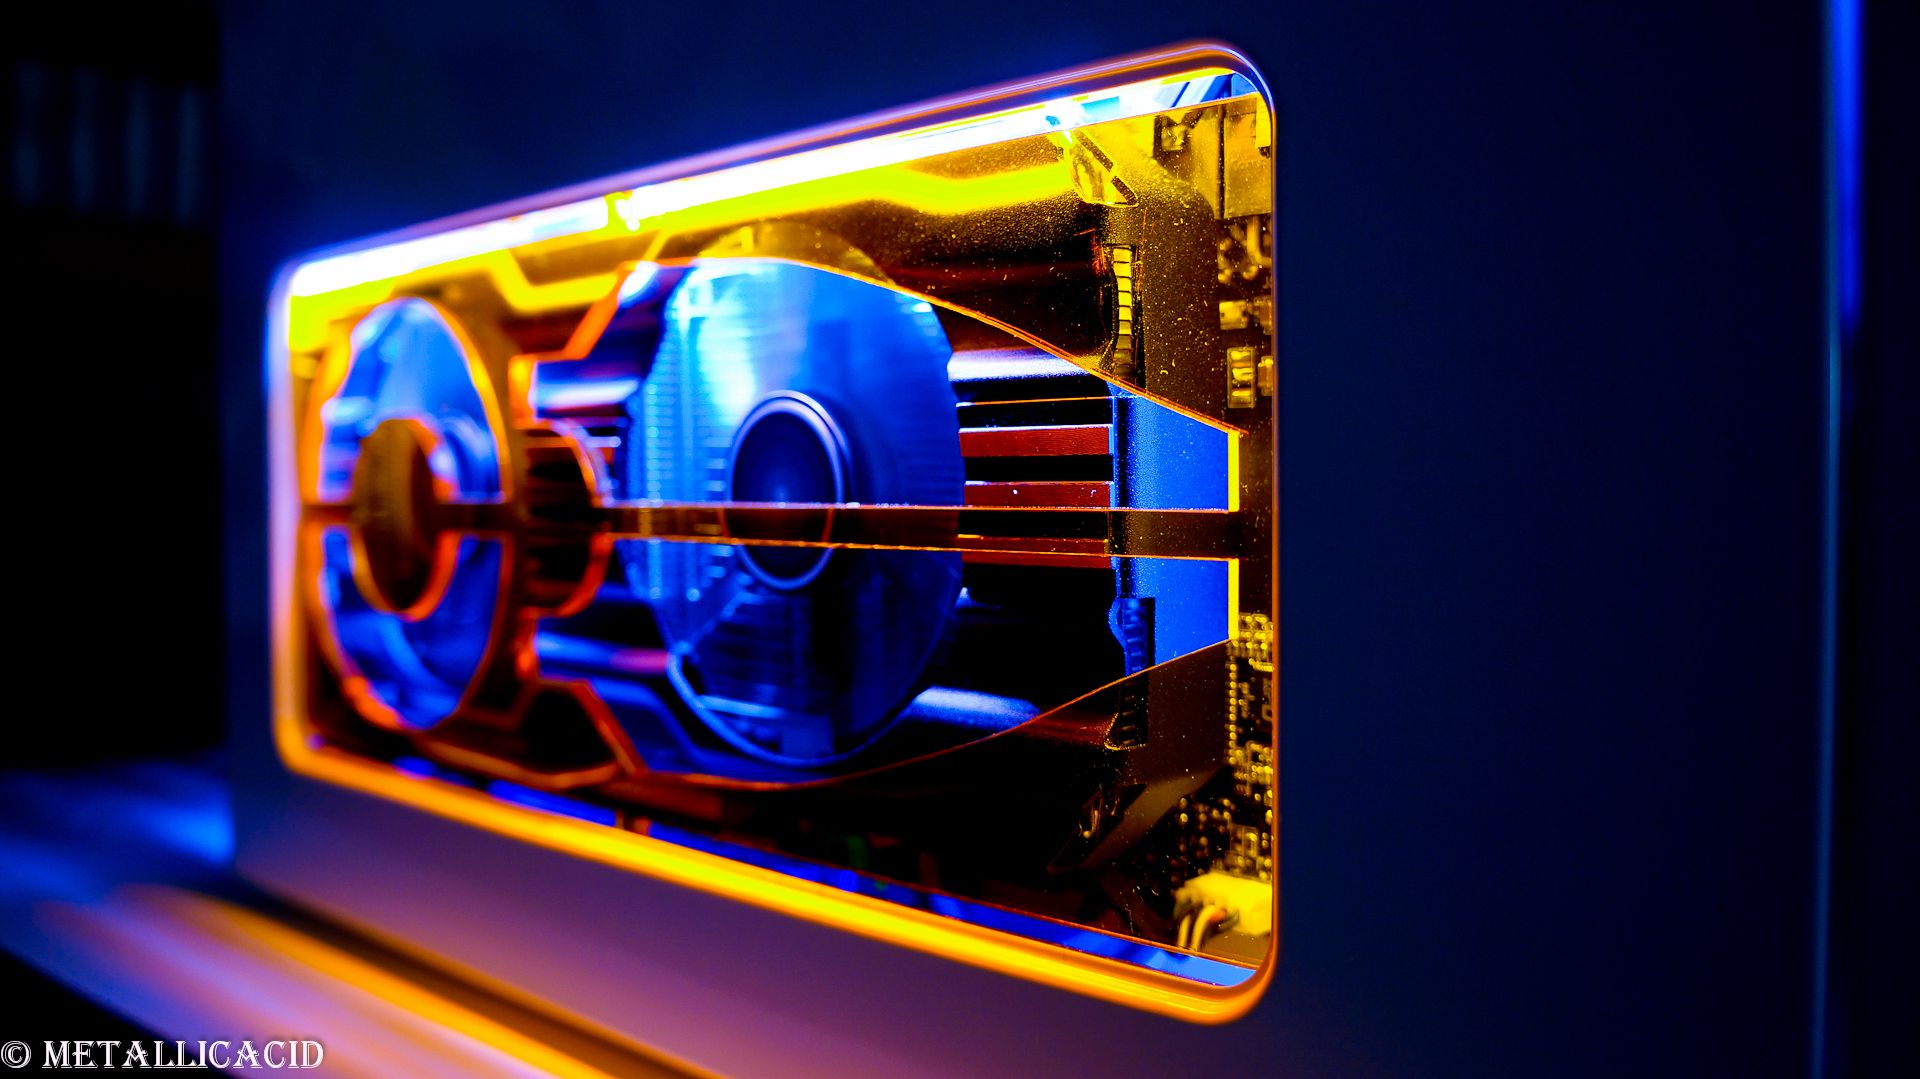
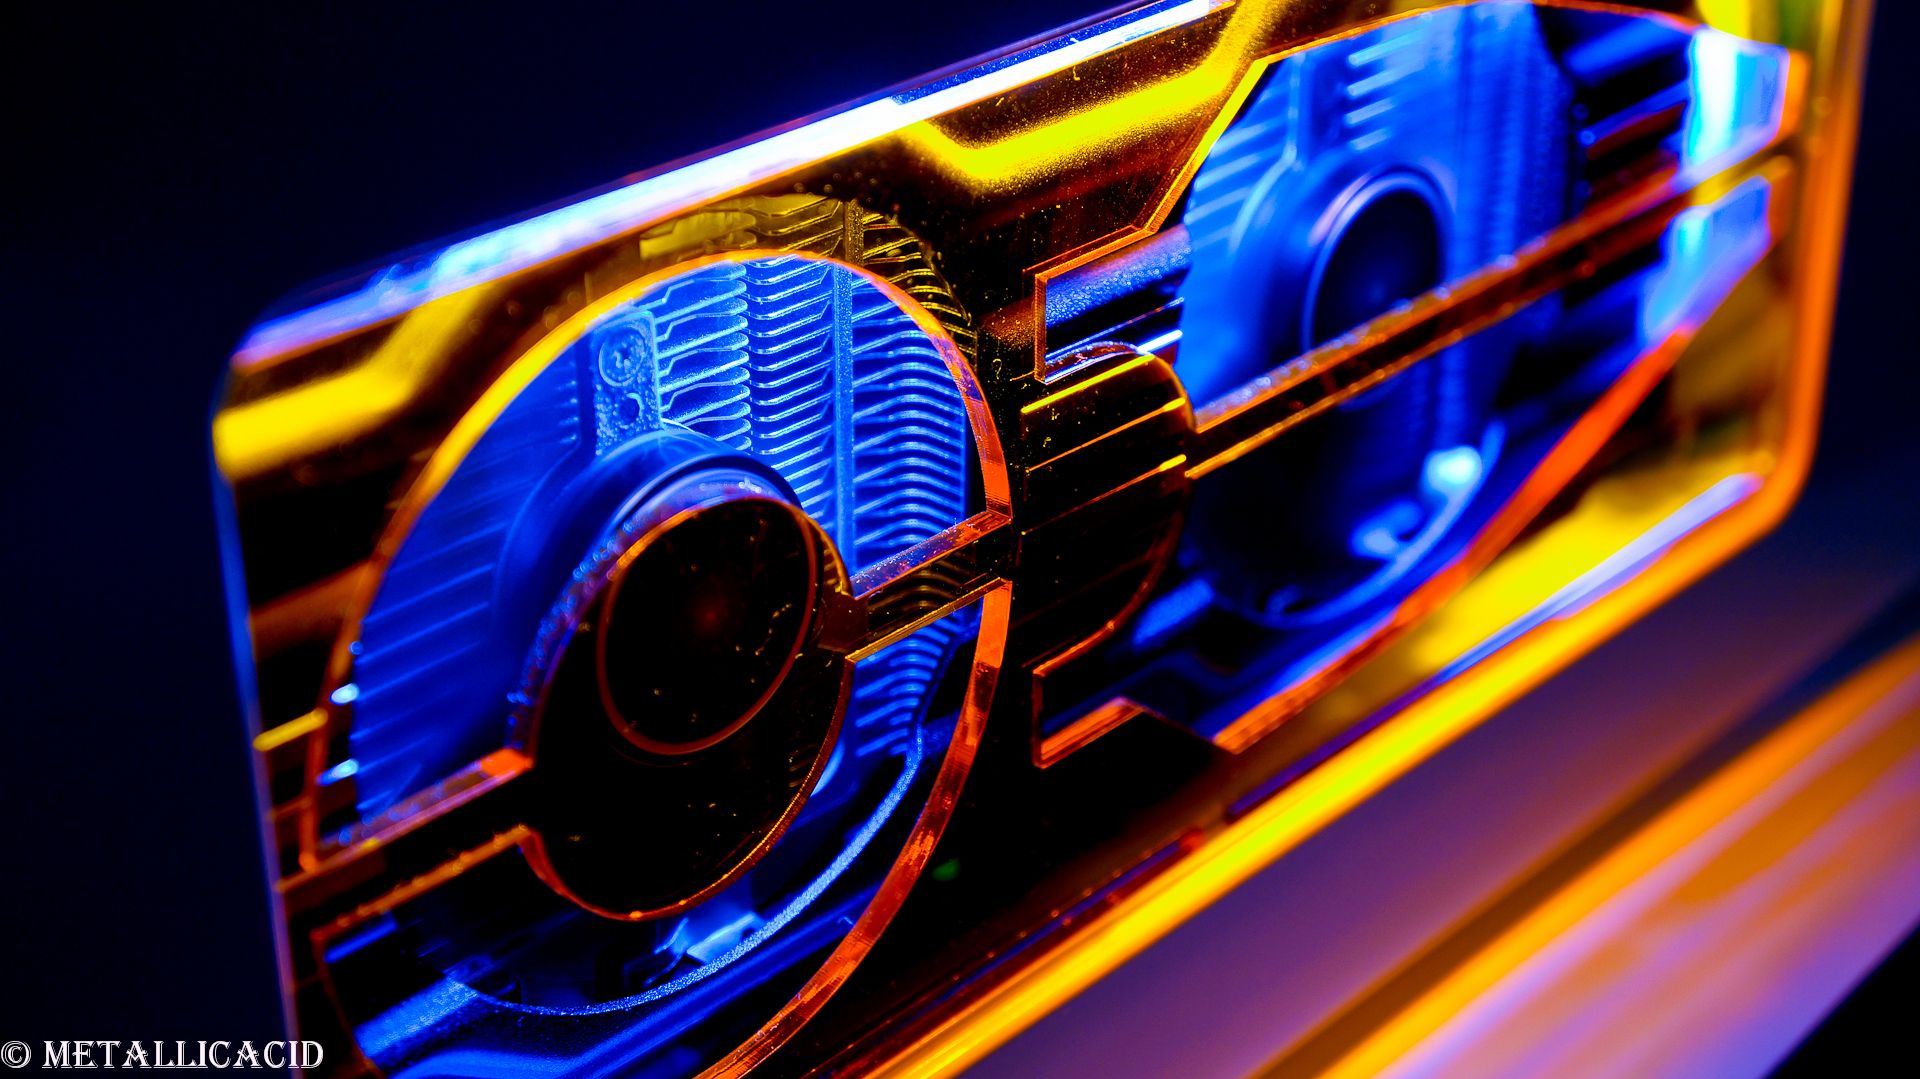
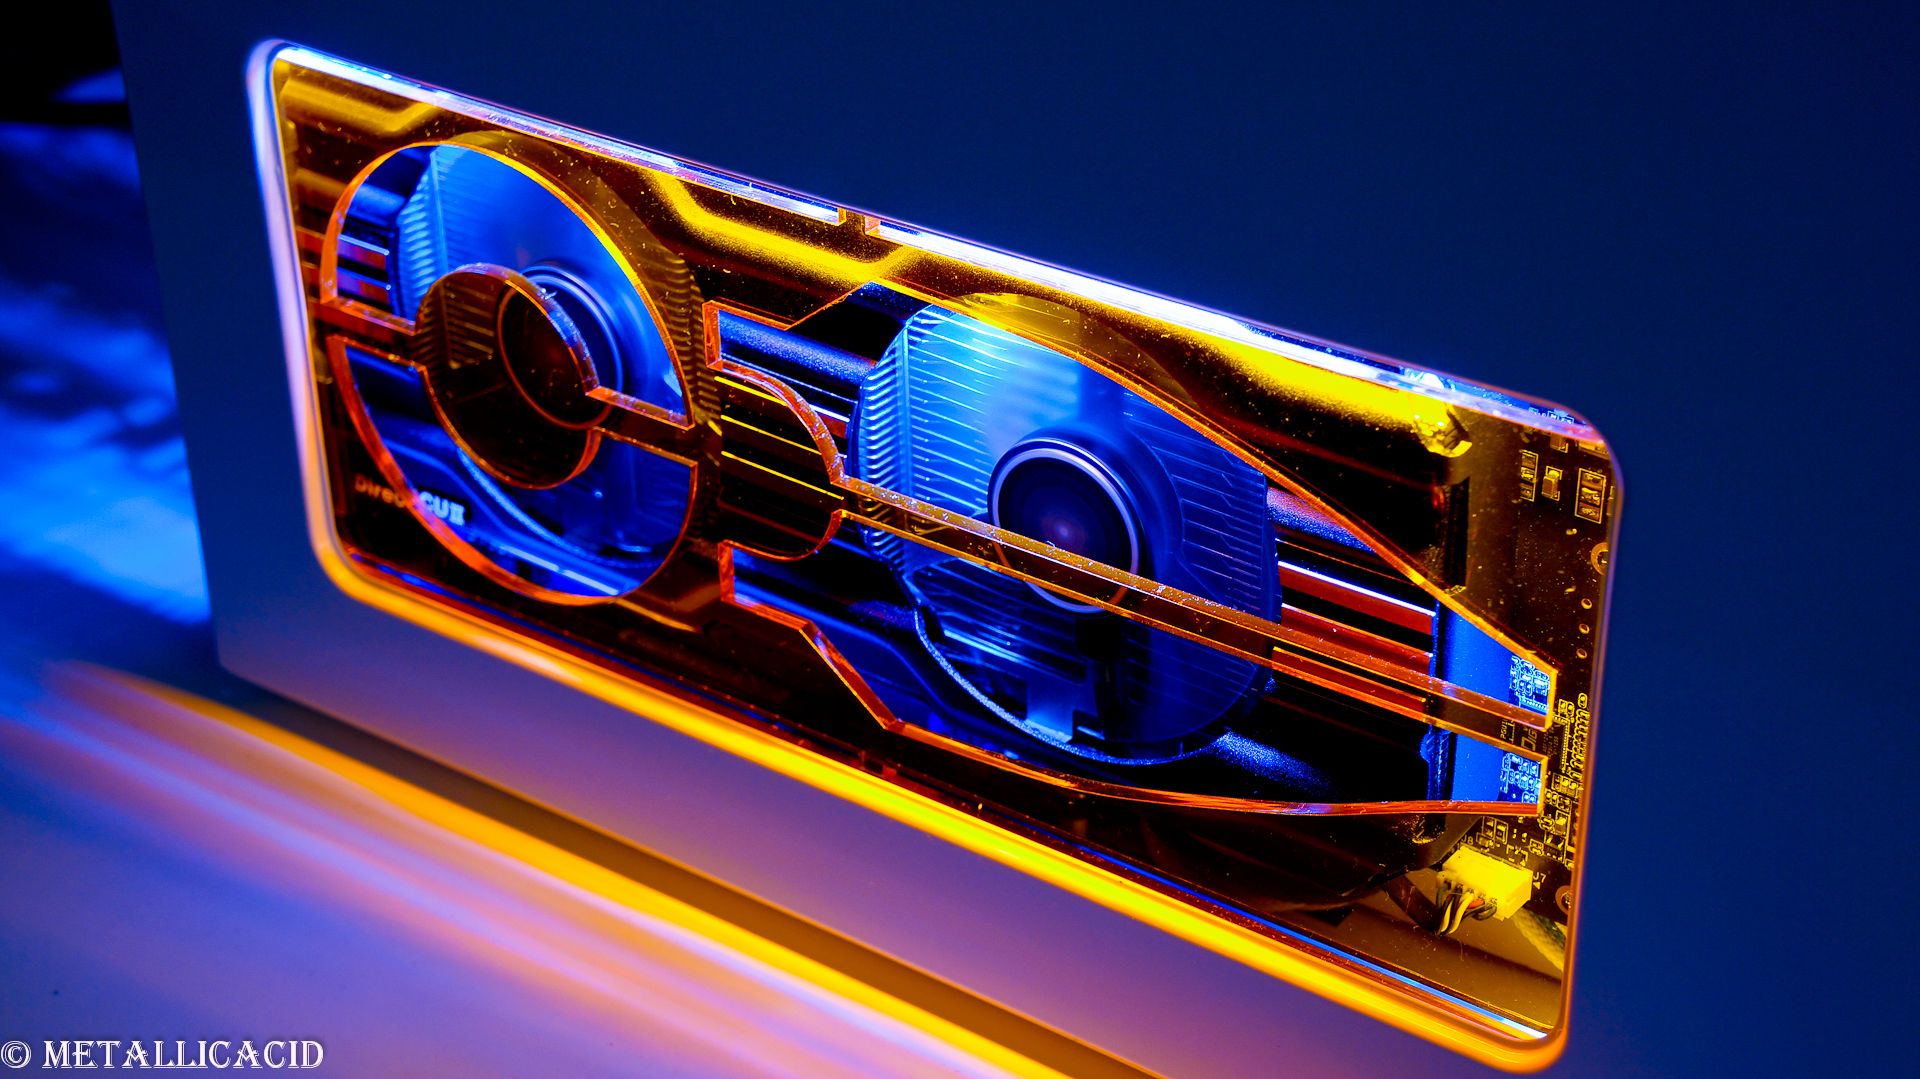
GPU - Nvidia ASUS GTX770 DCII 2GB (Bought)
RAM - Crucial Ballistix Tracer 1866mhz 8GB (2x4GB) (Bought)
PSU - Fractal Design Newton R3 600W (Bought=
SSD - Samsung EVO 250GB (Bought)
OS - Microsoft Windows 8.1
A small list of mods that will be performed:
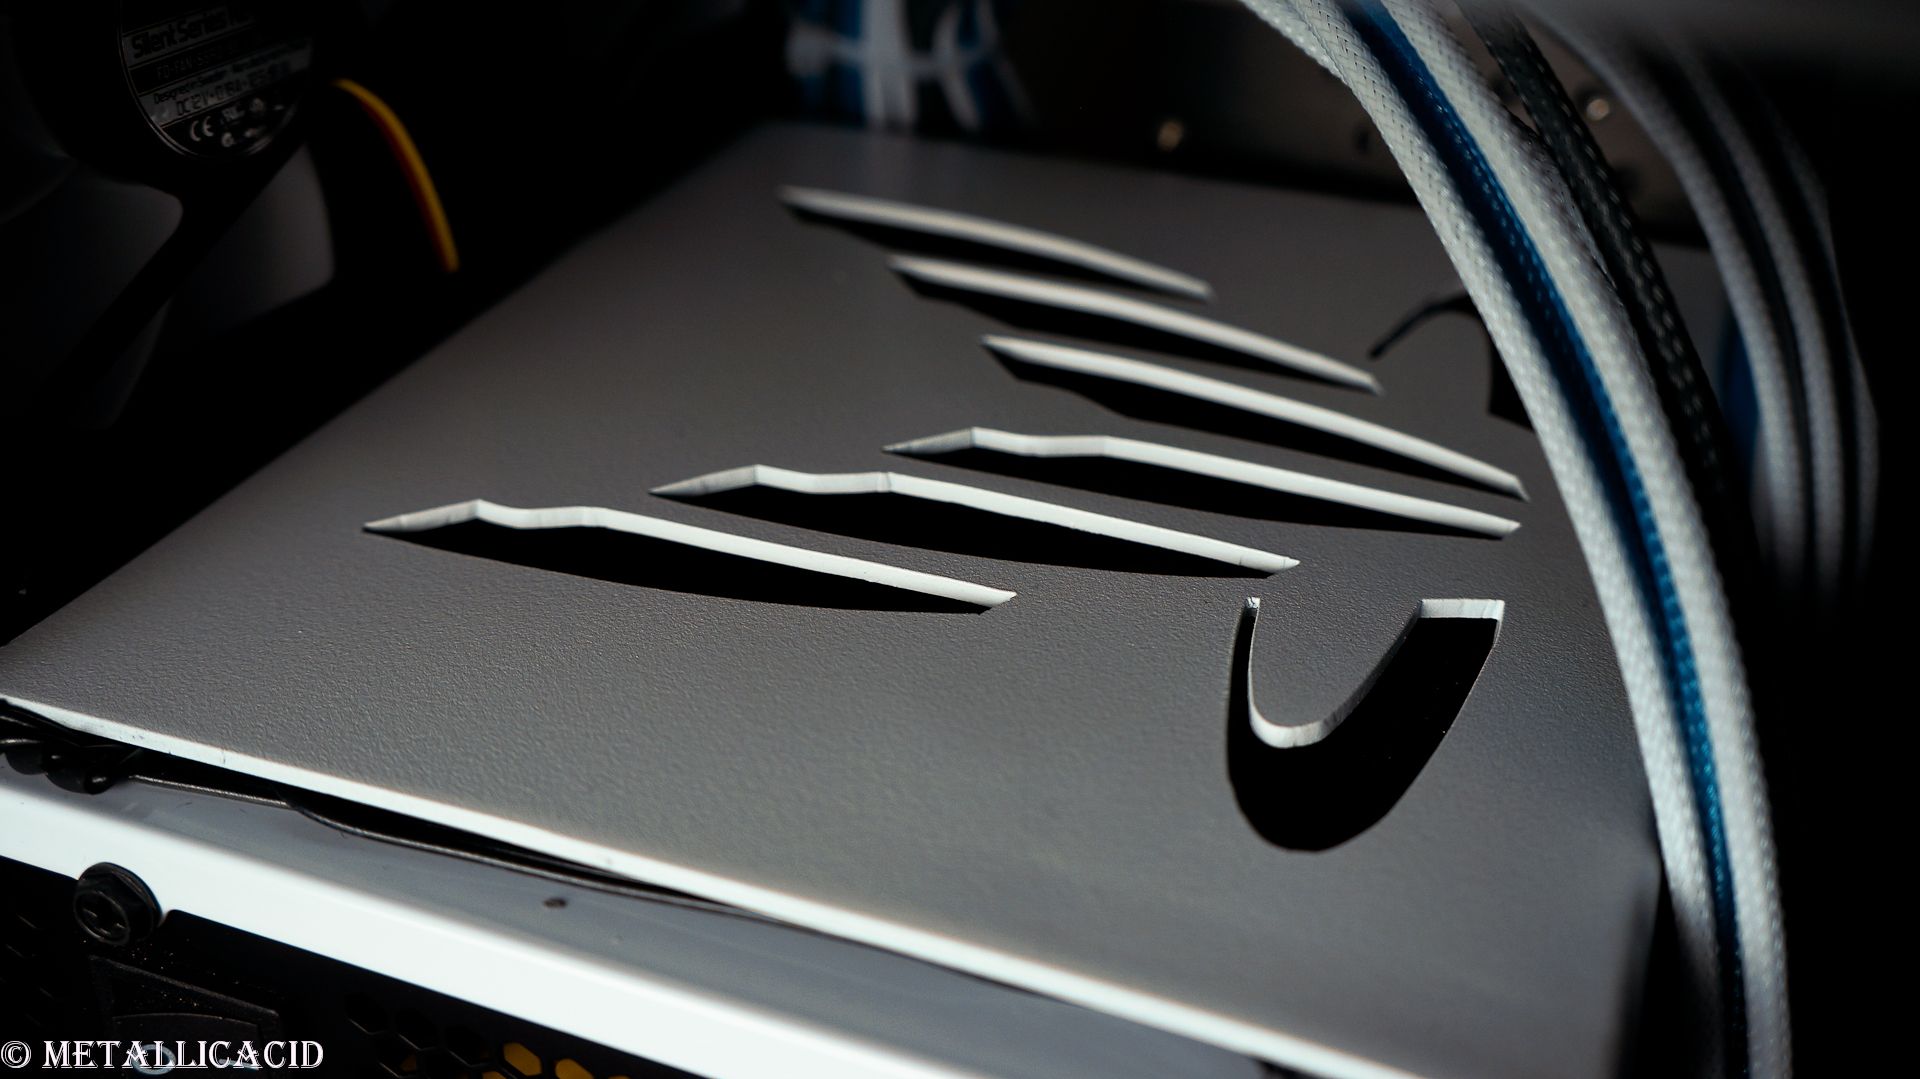
Custom GPU Shroud
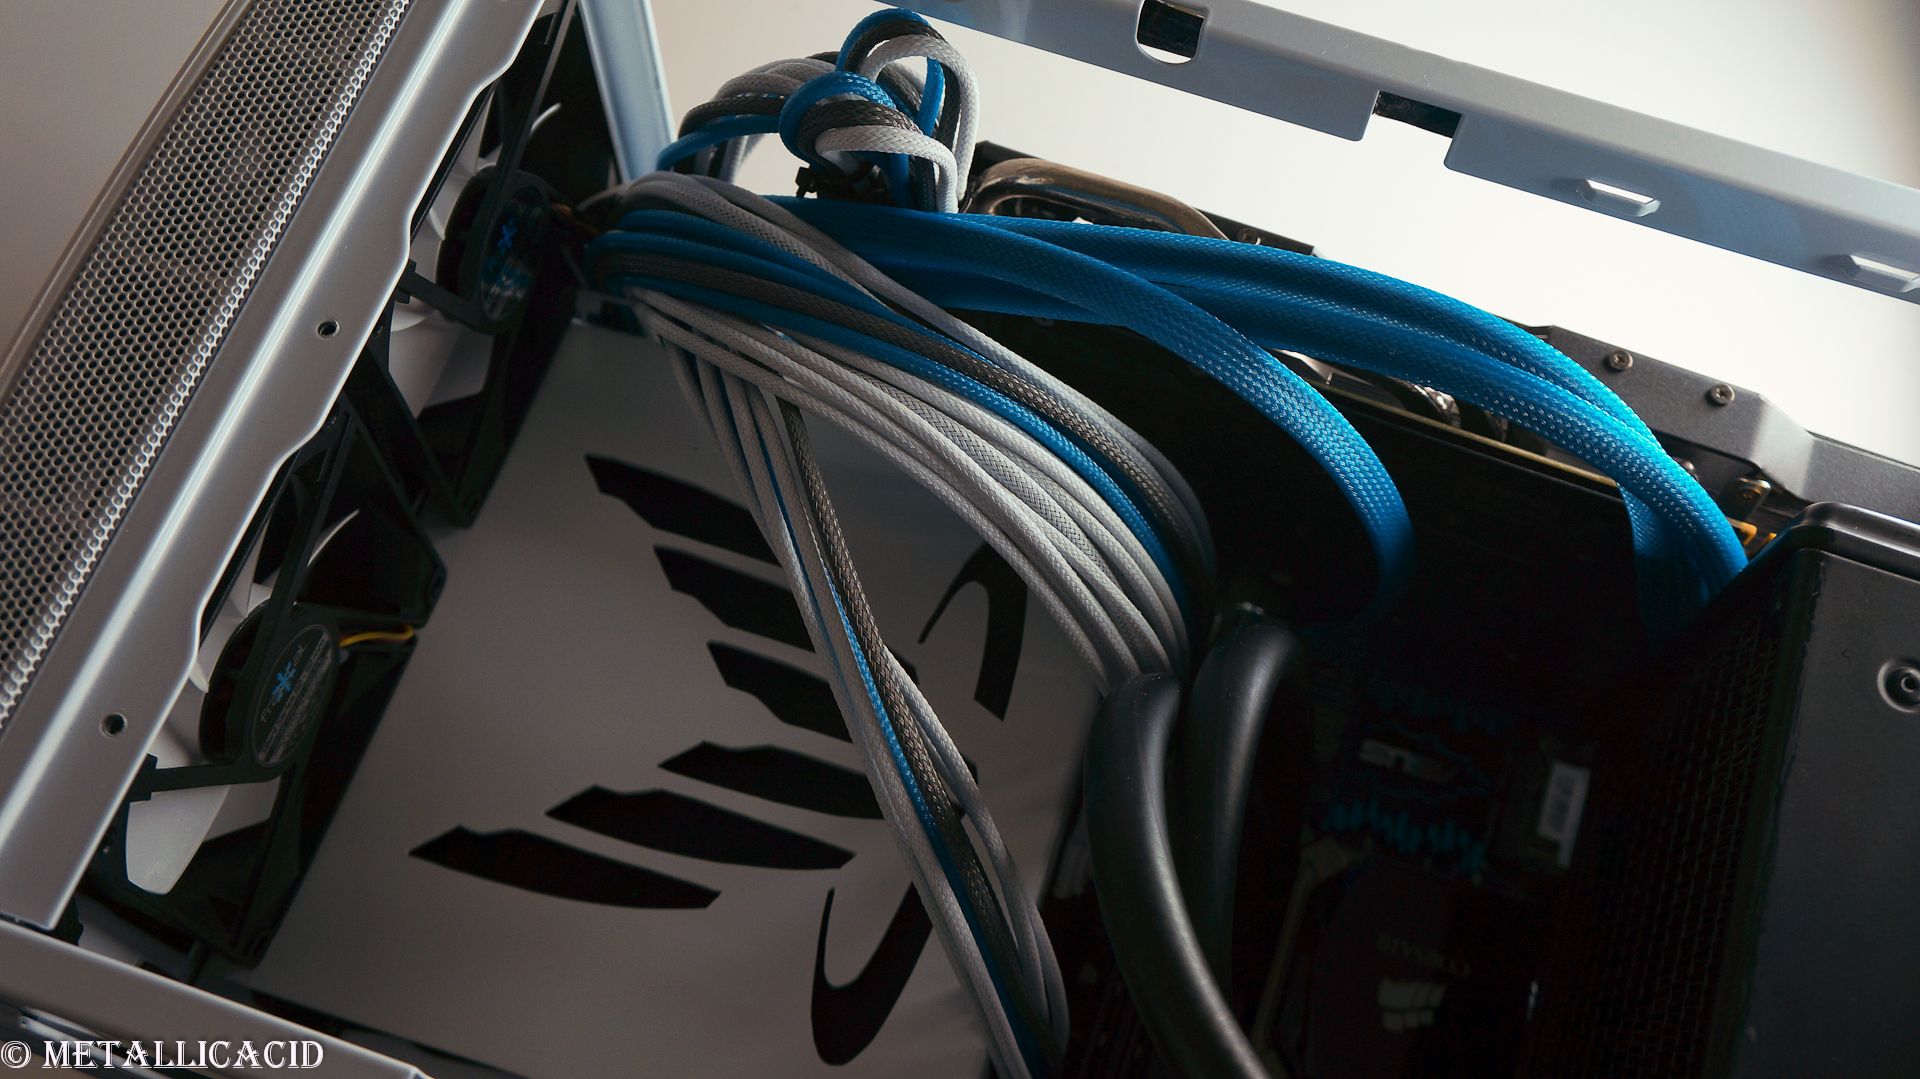
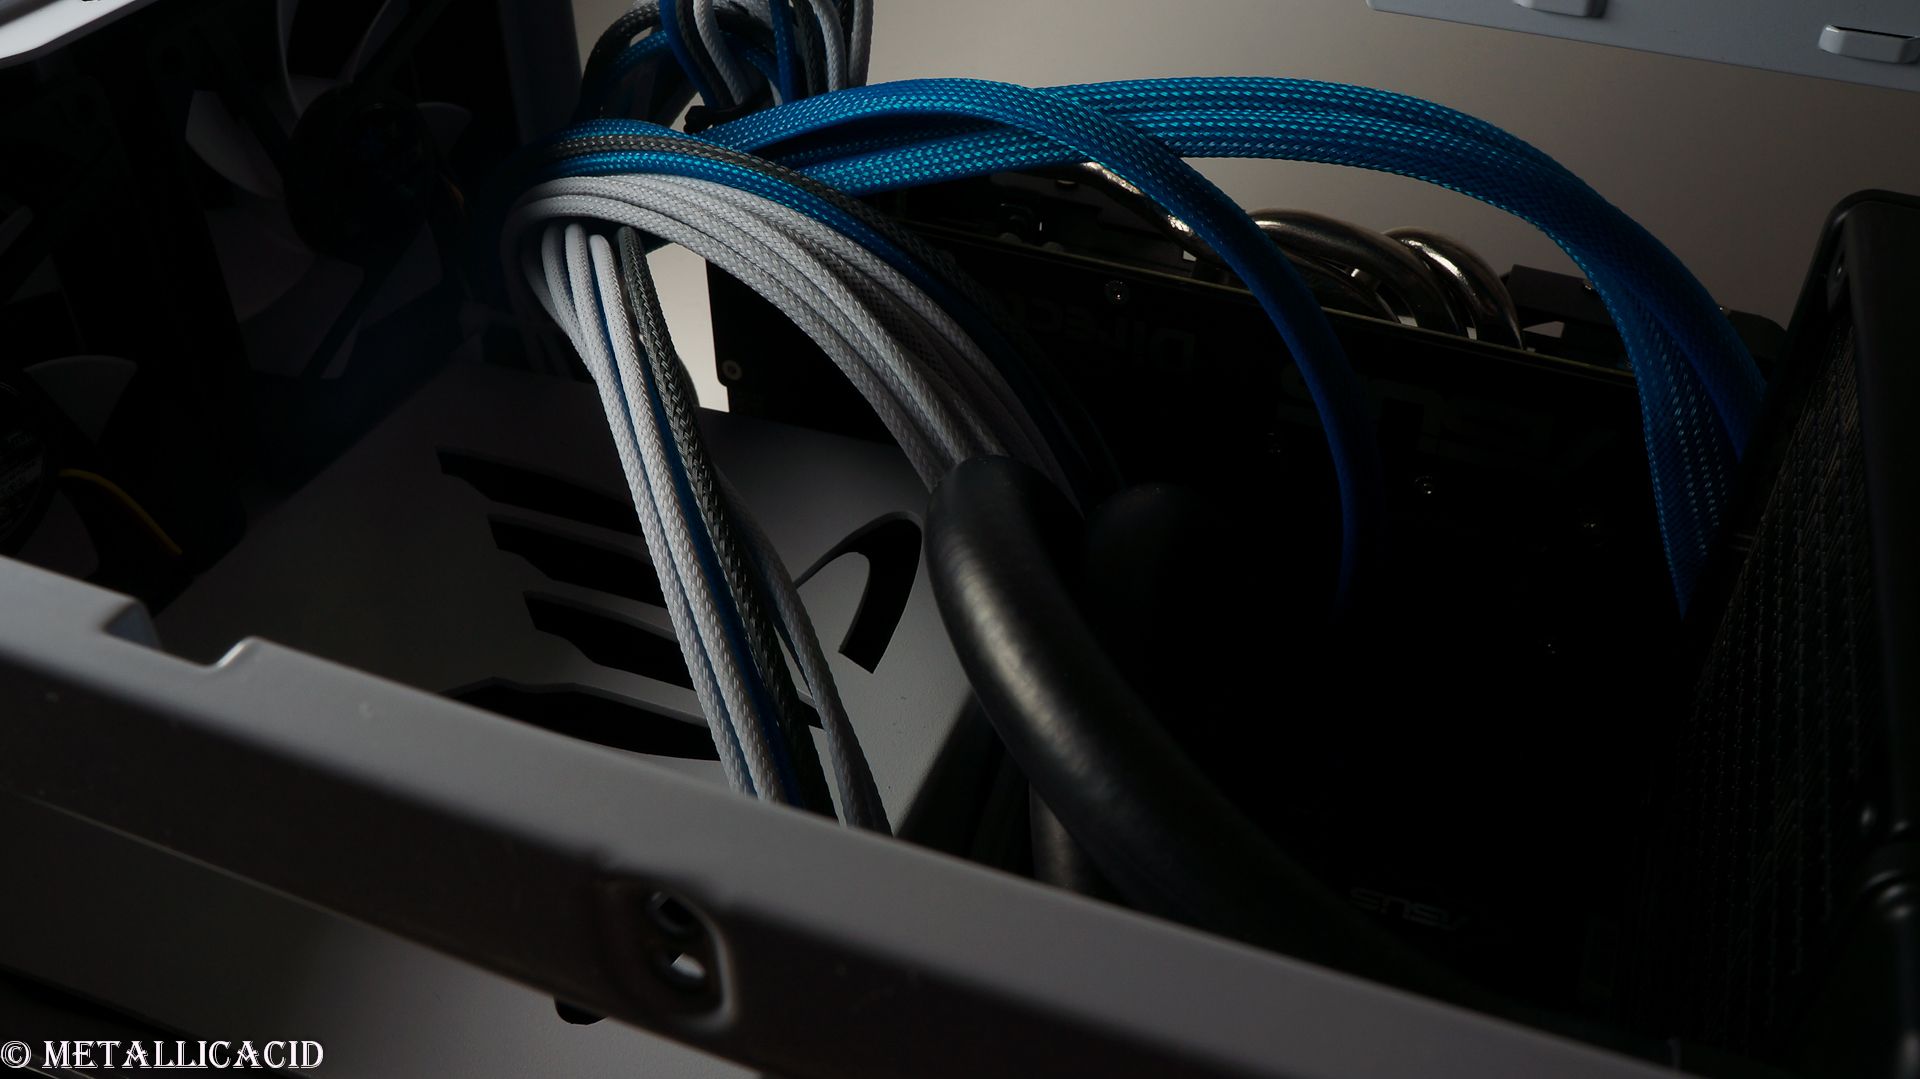
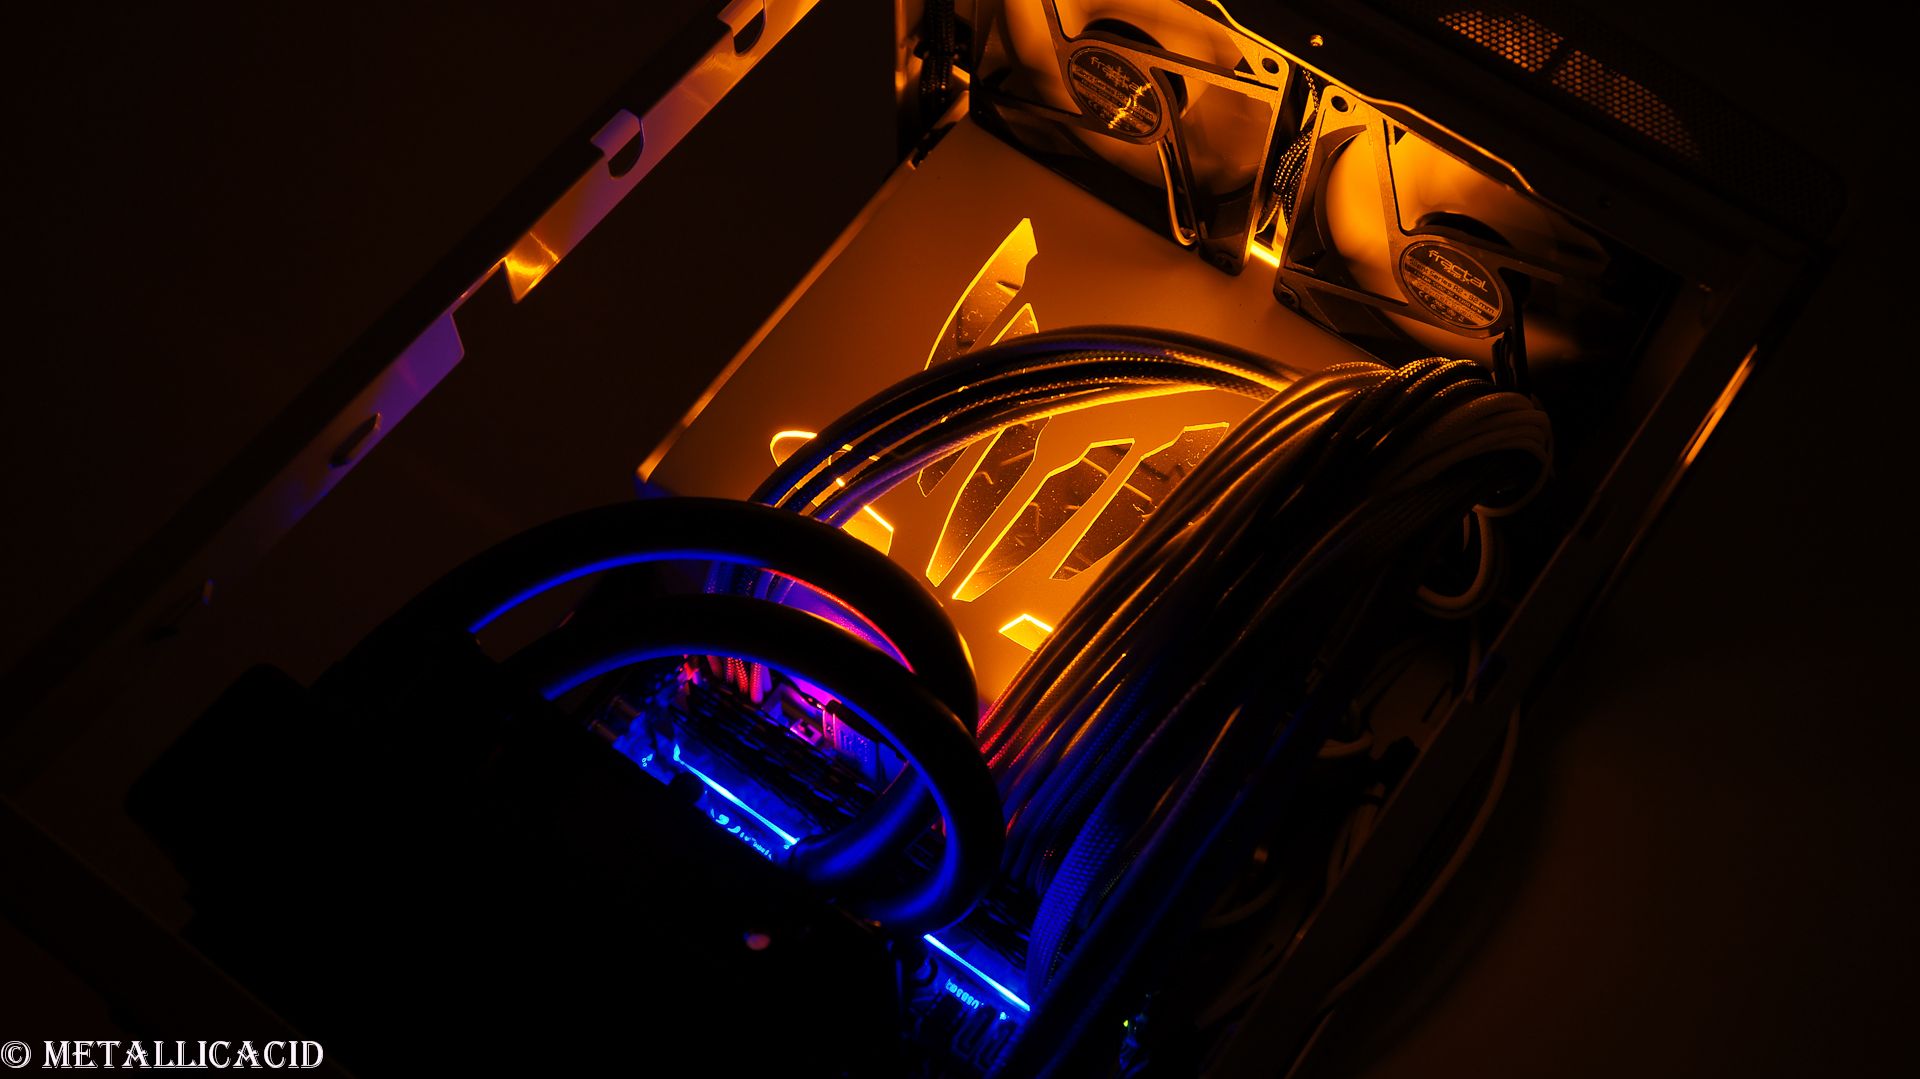
Sleeved cables
Cut aluminum panels for top of case
Custom LED lighting
Table of contents:
Update 1 - Concept and introduction.
Update 2 - Cutting begins!
Update 3 - Wild Bitfenix appears!
Update 4 - Filing, fitting, fixing.
Update 5 - The Node 304 arrives to steal the show.
Update 6 - Proud sponsor #2 MSCB.se
Update 7 - Warranty? Pfft, that's for losers and pussies (Part1)
Update 8 - Dat chestplate!
Update 9 - The PSU shroud. I am so proud! I'm floating on the 9th cloud. I hope you're WOWed! (part 1)
Update 10 - Look!! Mum look!! I sleeved my USB 3.0 cable!! (and IO panel cables") )
)
Update 11 - Warranty? Pfft, that's for losers and pussies (Part2)
Update 12 - I would like to introduce to you my biggest fans!
Update 13 - Size (length) matters!
Update 14 - The building begins!
Update 15 - Cool thrills, and Speed kills! (H80i and SSD installed)
Update 16 - The PSU shroud. I am so proud! I'm floating on the 9th cloud. I hope you're WOWed! (part 2)
Update 17 - Put on your armour soldier - We're going to battle!
Update 18 - The badge of honour.
Update 19 - Awwwww yissssss. Breadcrumbs. (Plexiglass window and final pictures)
Update 20 - Forbes.com has declaired Fractal Effect as one of the most incredible PC's of 2014


Best regards,
MetallicAcid / Justin.
(Customer build)
Named forbes.com 1 of 3 most incredible PC's of 2014
Sponsored by:

Hello once again! I would like to present to you a build log that I am working on for a friend of mine.
My friend Henrik approached me just a couple of weeks ago and asked for me to build a computer for him, at which I jumped at the opportunity! After some spitballing about design options, Henrik decided that he really wanted his PC to have a design which was based upon Electronic Arts Mass Effect series... Henrik's most favorite gaming series ever!
Henrik gave me a couple of base guidelines to follow in the design and building of his new PC. These guidelines are as follows:
Simple
Compact
White
Hardware to be able to edit films
Play current games on high/ultra settings
One of a kind
Completed before end of December
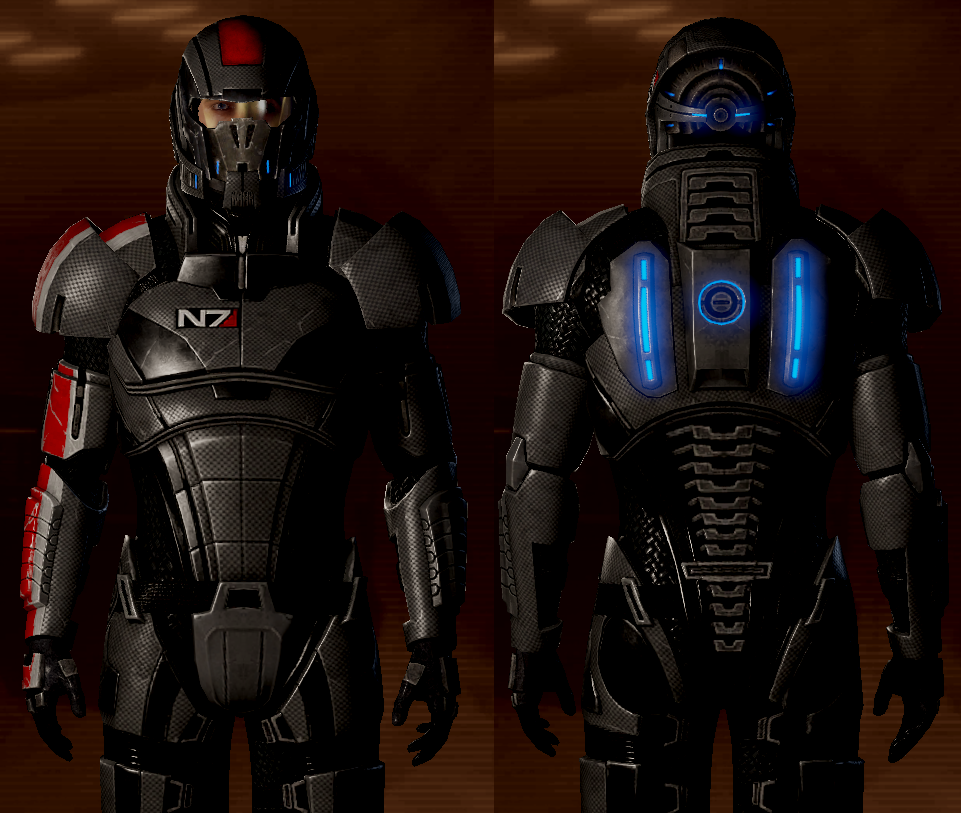
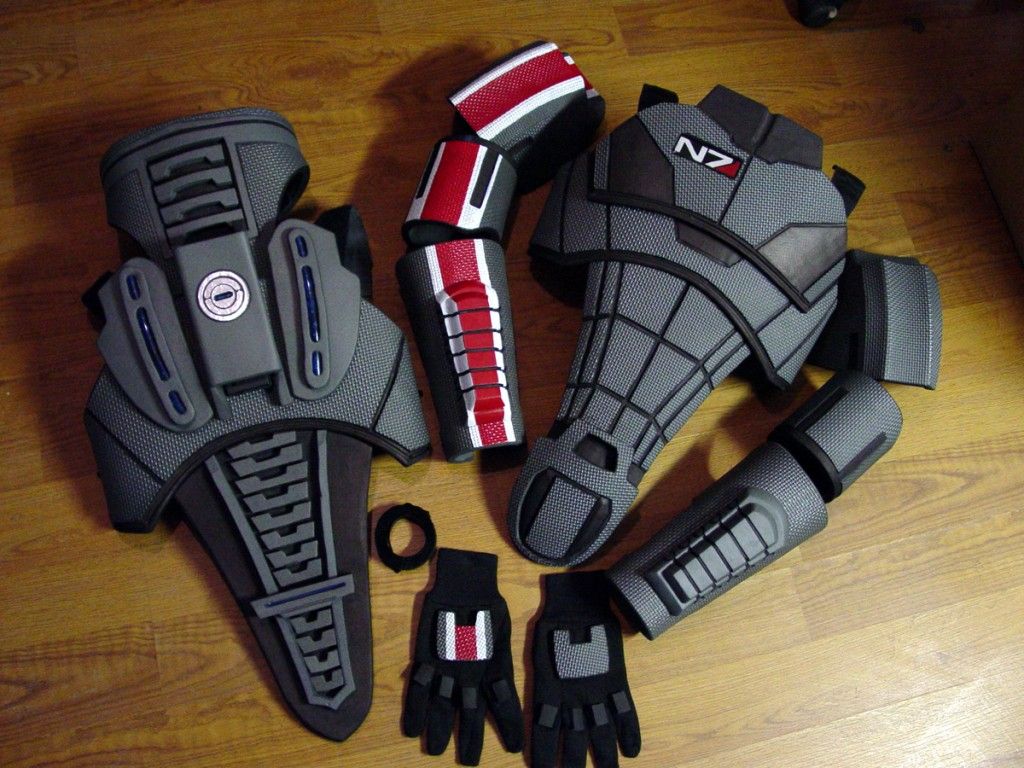
With these points in mind, I then introduced him to the Fractal Design Node 304 to which he fell in love with right away. From these points, I came up with a design based up an armor found in game. These following pictures were used as inspiration, and a base of his design:


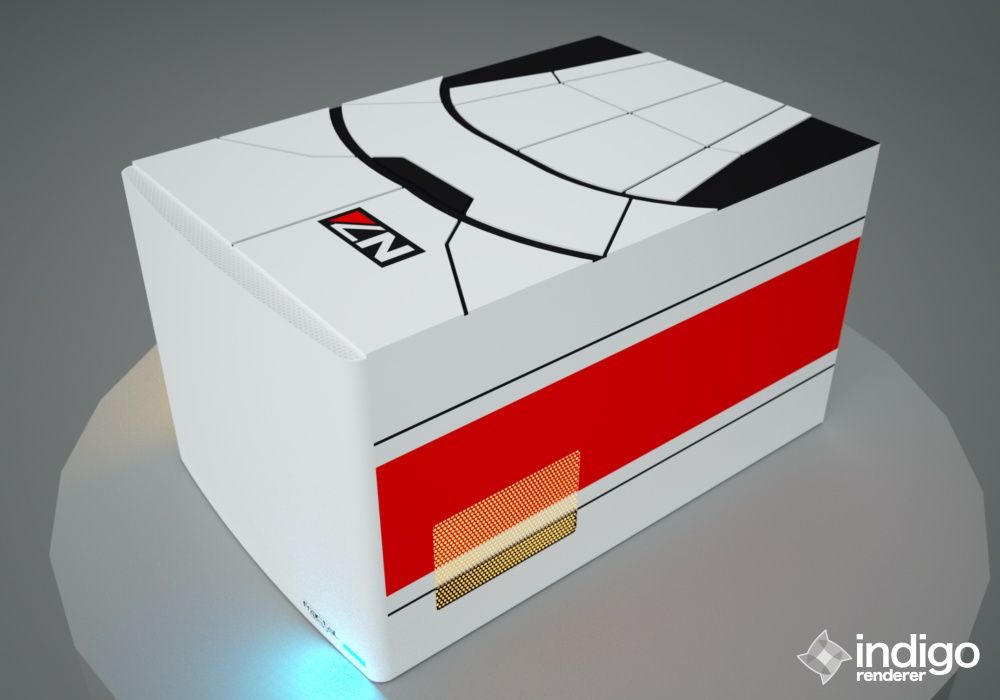
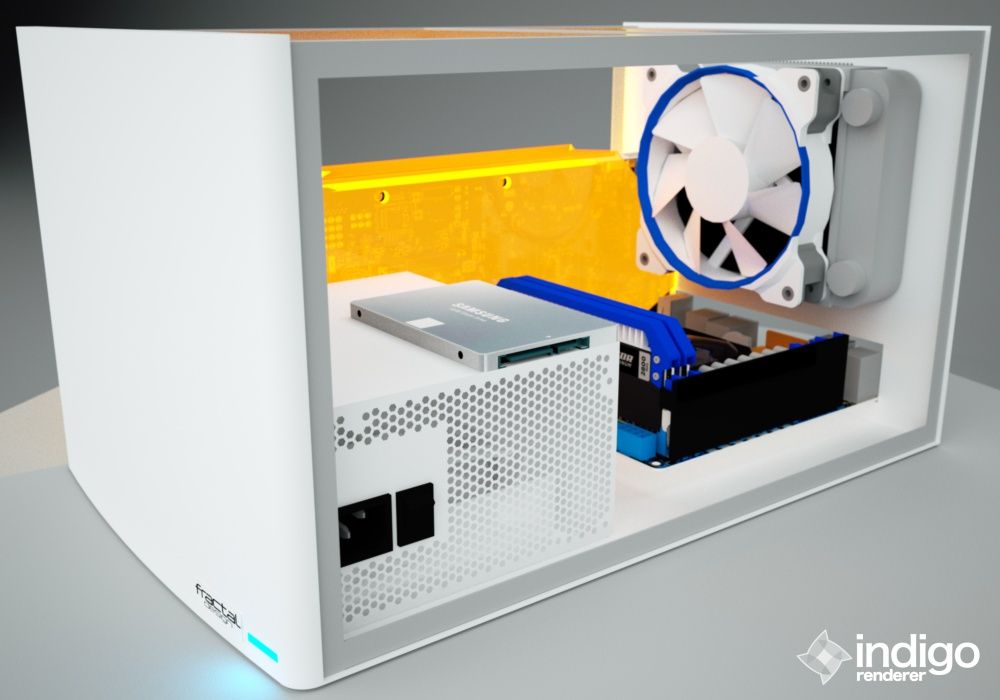
I present to you the design which was created in Sketchup, and rendered in Indigo Render.


A Quick hardware and shopping list:
Case - Fractal Design Node 304 (Bought)
Motherboard - Asus P8Z77-I Deluxe (Bought)
CPU - Intel Core i7 2700K (Bought)
GPU - Nvidia ASUS GTX770 DCII 2GB (Bought)
RAM - Crucial Ballistix Tracer 1866mhz 8GB (2x4GB) (Bought)
PSU - Fractal Design Newton R3 600W (Bought=
SSD - Samsung EVO 250GB (Bought)
OS - Microsoft Windows 8.1
A small list of mods that will be performed:
Custom GPU Shroud
Sleeved cables
Cut aluminum panels for top of case
Custom LED lighting
Table of contents:
Update 1 - Concept and introduction.
Update 2 - Cutting begins!
Update 3 - Wild Bitfenix appears!
Update 4 - Filing, fitting, fixing.
Update 5 - The Node 304 arrives to steal the show.
Update 6 - Proud sponsor #2 MSCB.se
Update 7 - Warranty? Pfft, that's for losers and pussies (Part1)
Update 8 - Dat chestplate!
Update 9 - The PSU shroud. I am so proud! I'm floating on the 9th cloud. I hope you're WOWed! (part 1)
Update 10 - Look!! Mum look!! I sleeved my USB 3.0 cable!! (and IO panel cables
)Update 11 - Warranty? Pfft, that's for losers and pussies (Part2)
Update 12 - I would like to introduce to you my biggest fans!
Update 13 - Size (length) matters!
Update 14 - The building begins!
Update 15 - Cool thrills, and Speed kills! (H80i and SSD installed)
Update 16 - The PSU shroud. I am so proud! I'm floating on the 9th cloud. I hope you're WOWed! (part 2)
Update 17 - Put on your armour soldier - We're going to battle!
Update 18 - The badge of honour.
Update 19 - Awwwww yissssss. Breadcrumbs. (Plexiglass window and final pictures)
Update 20 - Forbes.com has declaired Fractal Effect as one of the most incredible PC's of 2014
Final Pictures


Best regards,
MetallicAcid / Justin.
Last edited:


