[Build Log] Mini Elite Crusher - Cooler Master Elite 120 Advanced

xyexz

Limp Gawd
Joined
Jan 28, 2012
Messages
471
Okay, this is my first official build log that I've ever done on here, it's also my first custom watercooling build, which is also SFF.

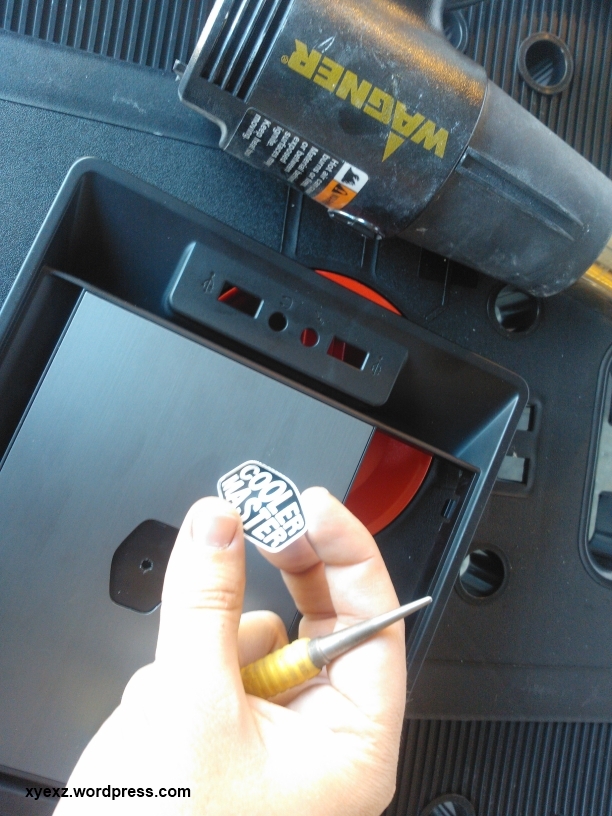
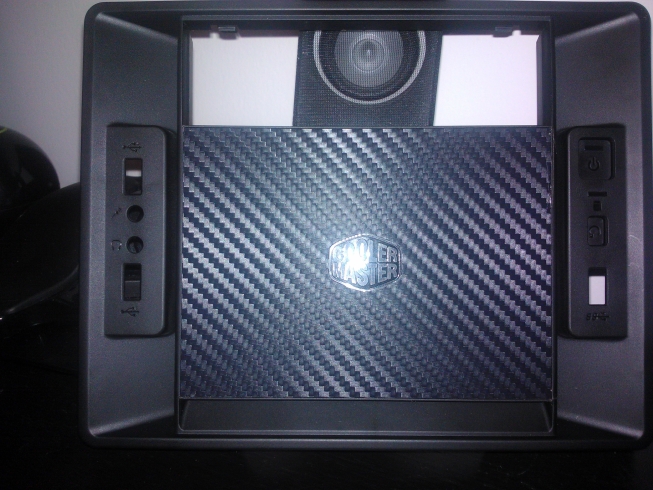
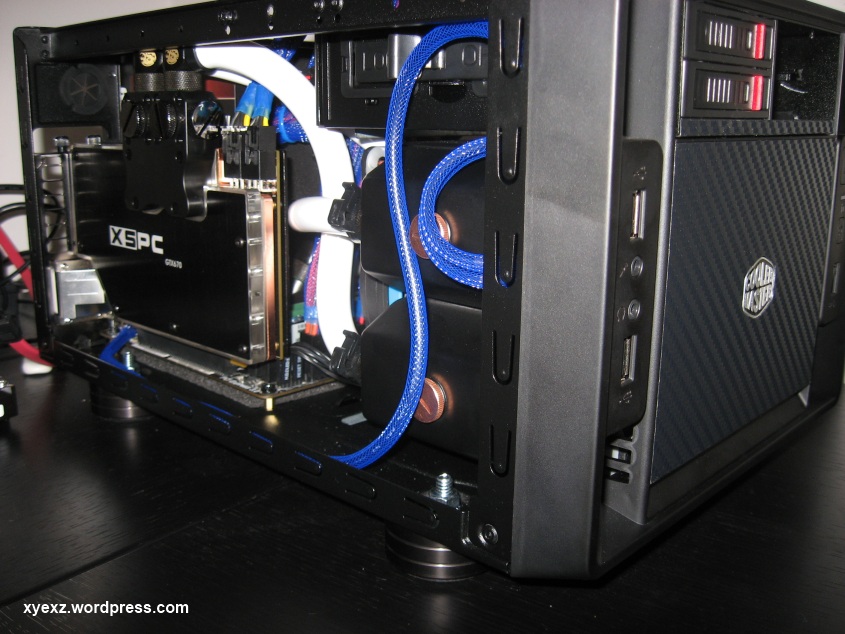
I'm using the Cooler Master Elite 120 Advanced case that came out not too long ago and have been running the hardware for a couple of days to make sure it all works before I begin the watercooling.

PC Hardware:

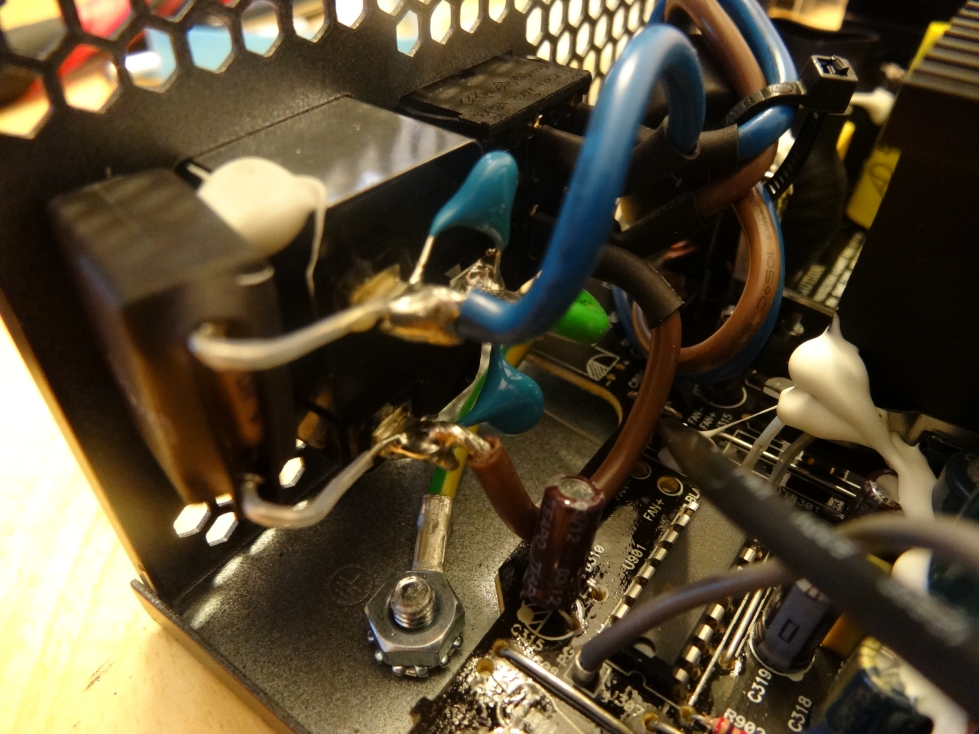
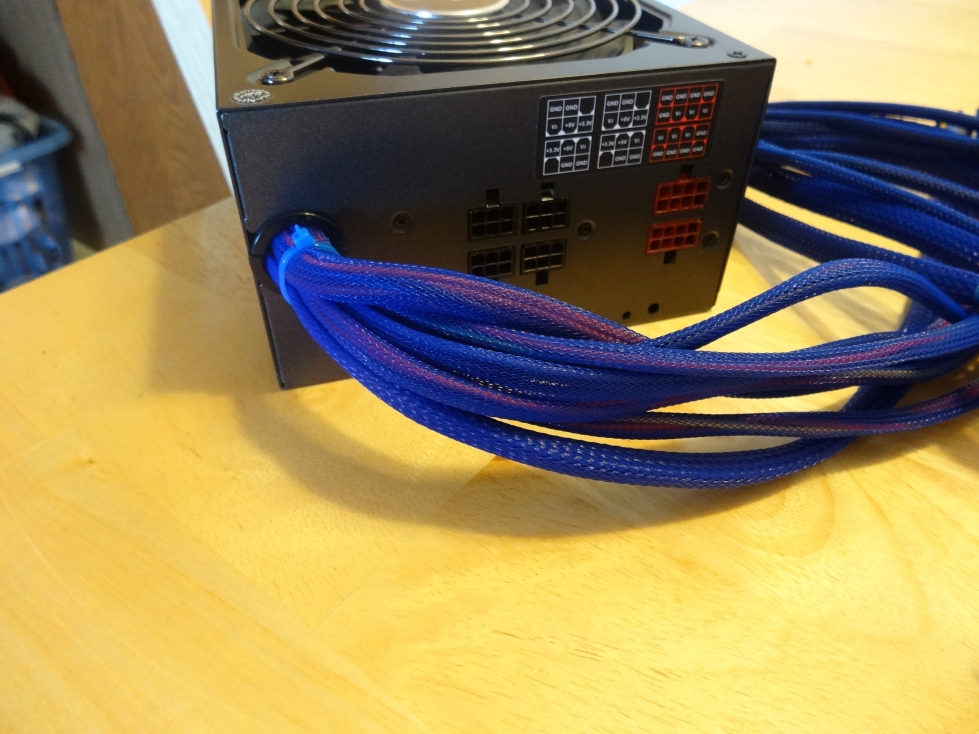
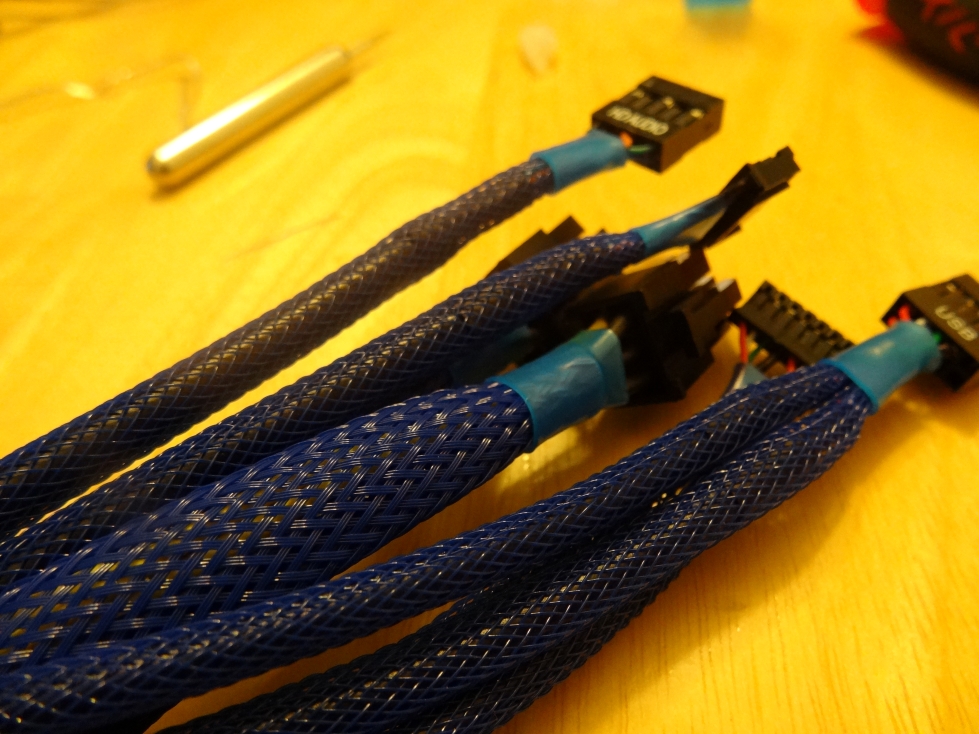
OCZ ModXStream 600 watt modular psu
ASRock Z77E ITX motherboard
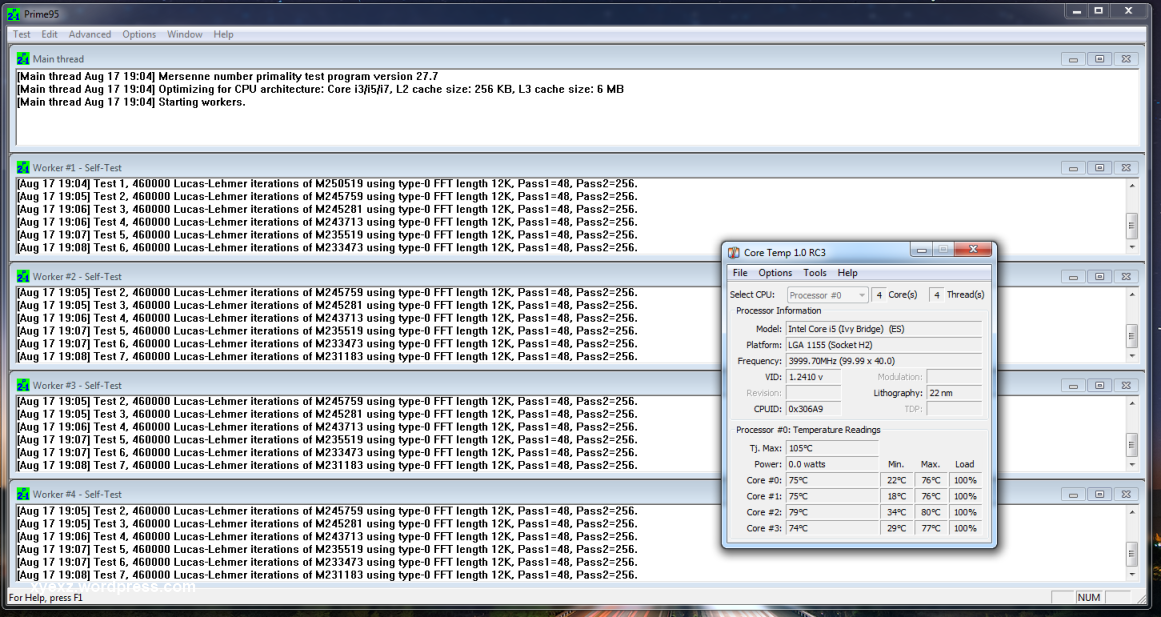
Intel Core i5 3570k processor
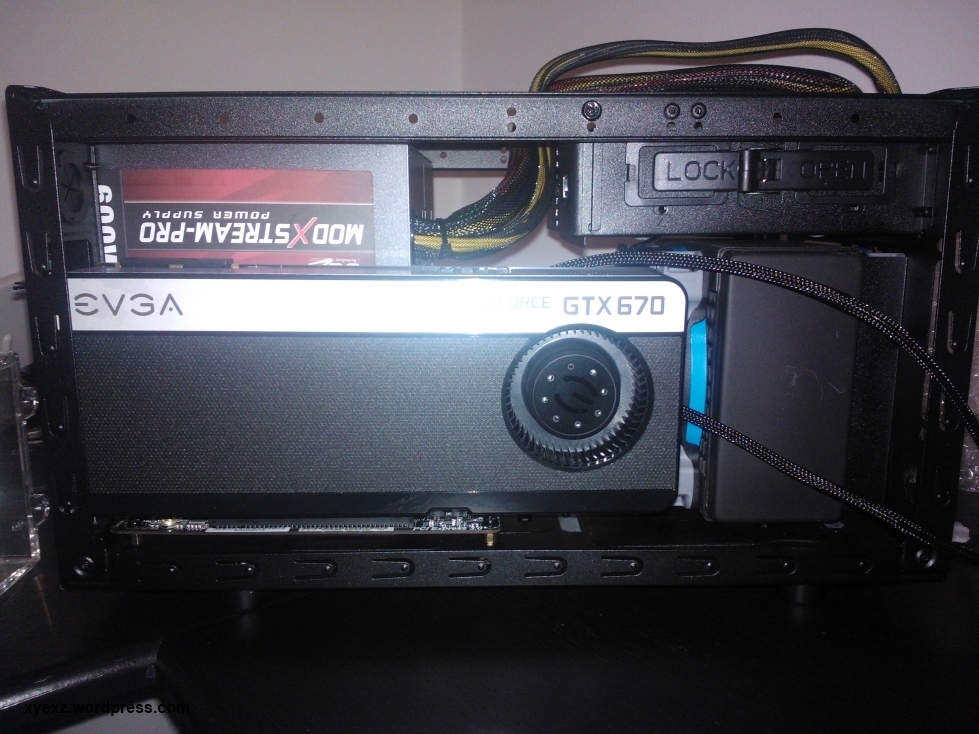
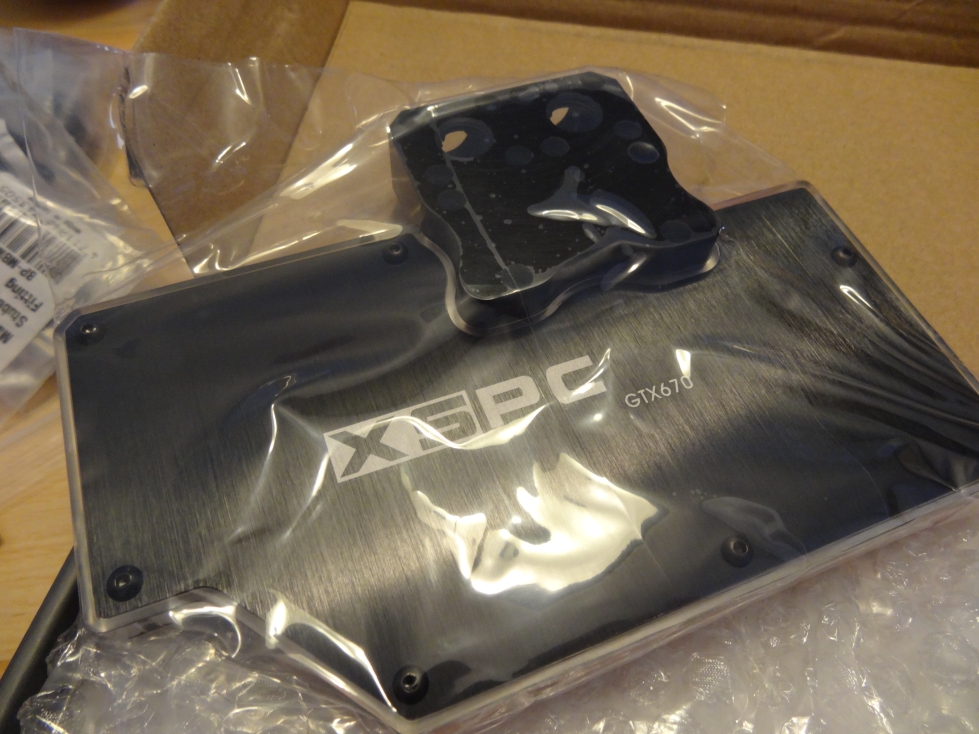
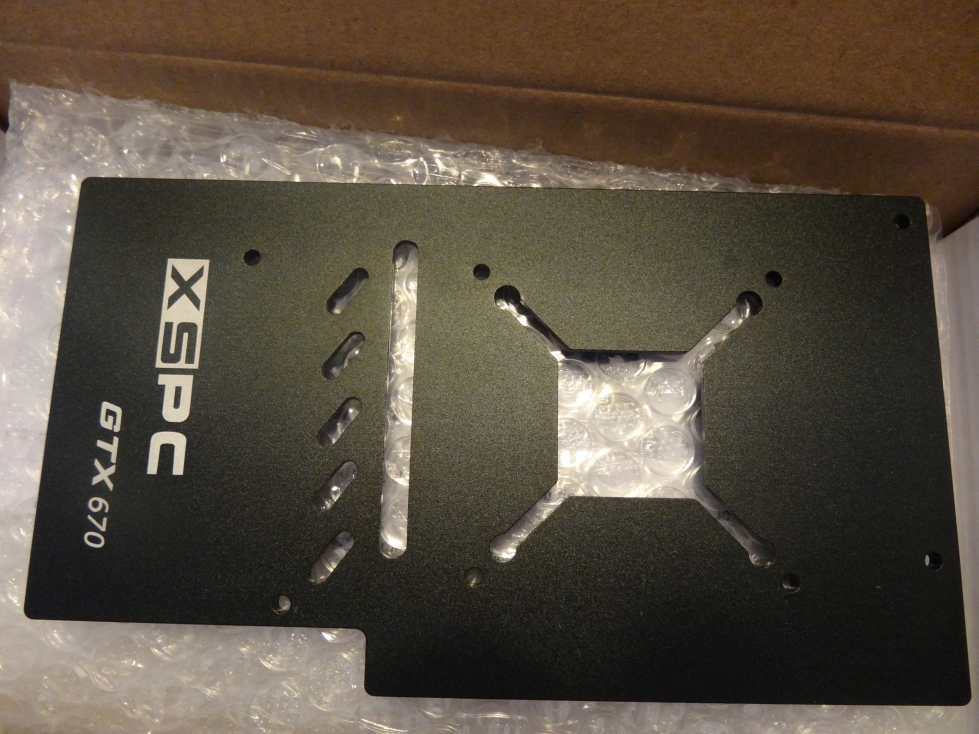
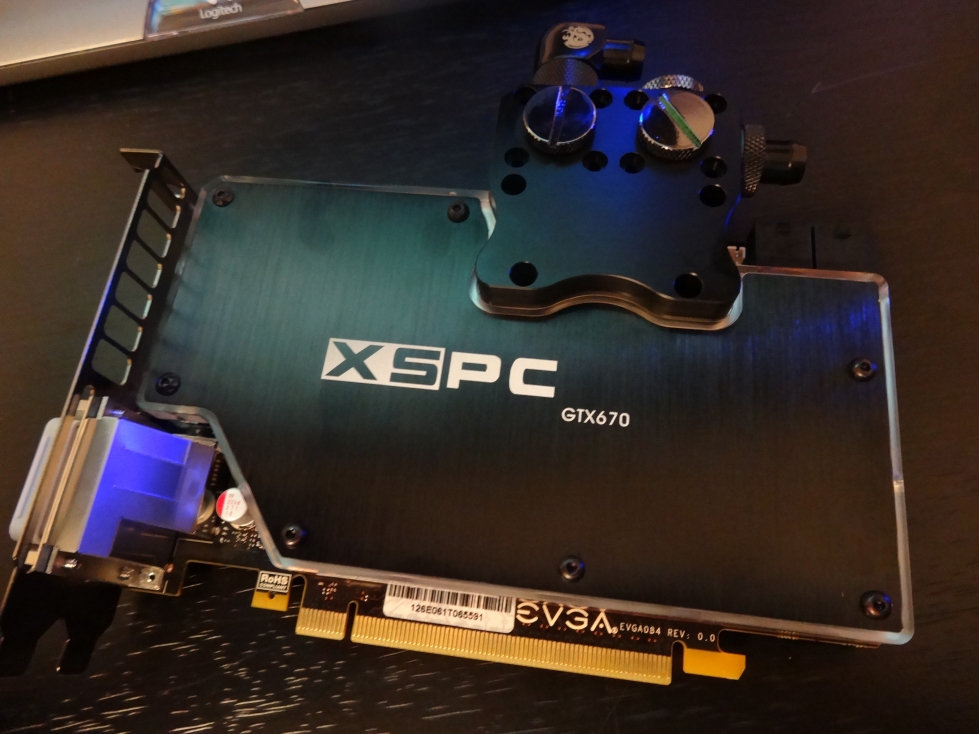
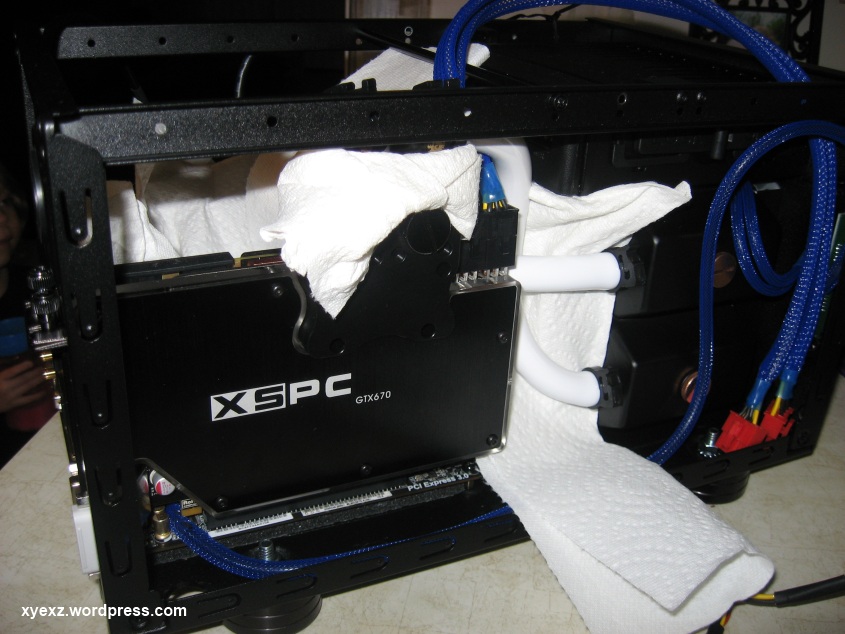
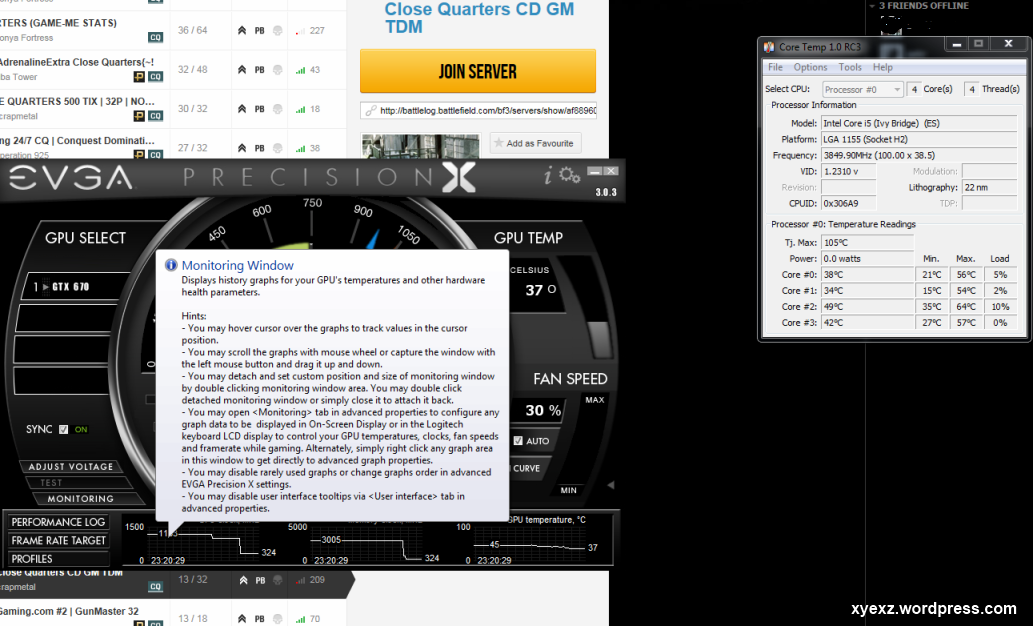
EVGA GeForce GTX 670 SC+ 4GB w/ Backplate
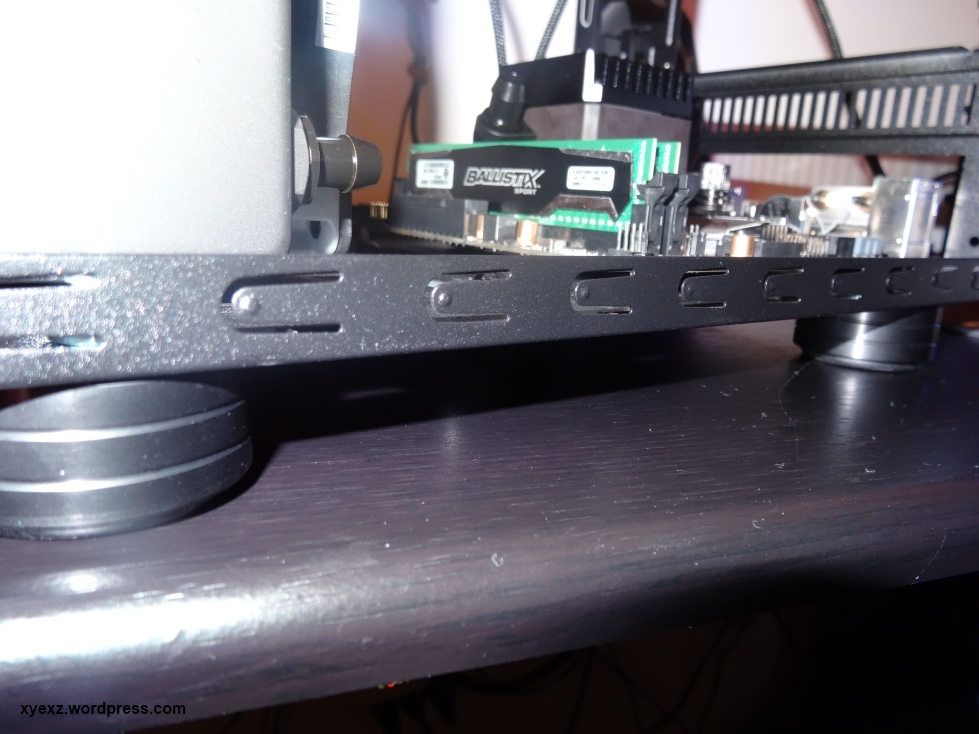
Crucial Ballistix Sport 2 x 4GB 1600MHz Dual Channel ram
Crucial M4 128GB SSD
Seagate 7200 RPM 750GB 2.5 HDD SATA 3
Vantec EZ Swap F4 5.25 to 4 x 2.5 Bay Converter SATA 3

Cooling Hardware:

Corsair SP120 120MM x 2
Swiftech Apogee Drive 2
Swiftech MCRES-Micro Rev 2
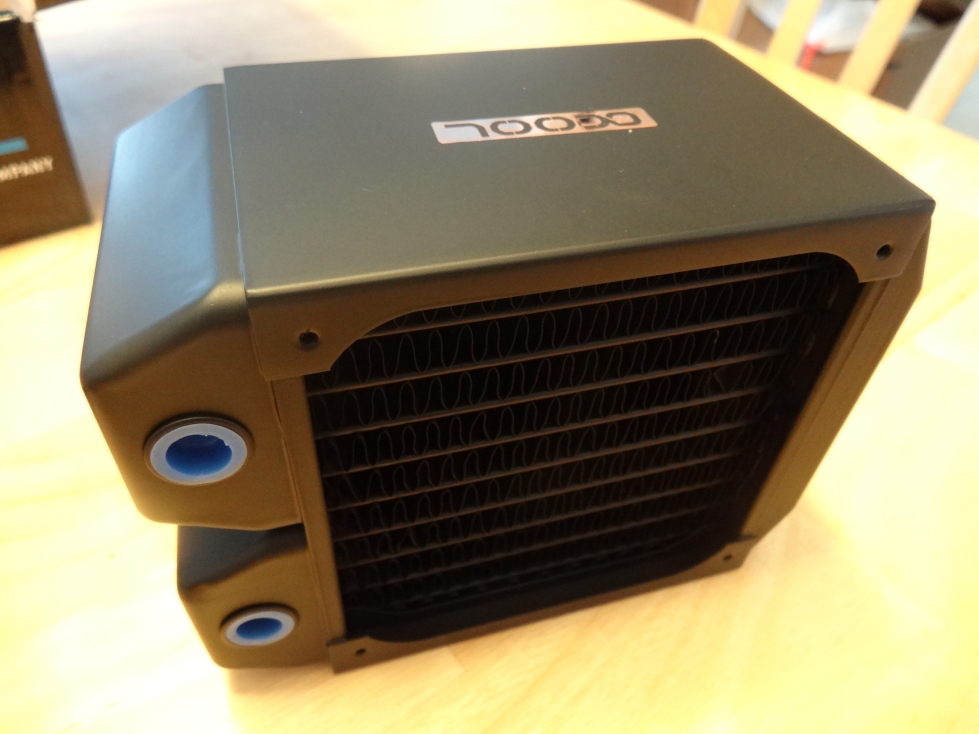
XSPC RX120 Radiator 120mm x 63mm
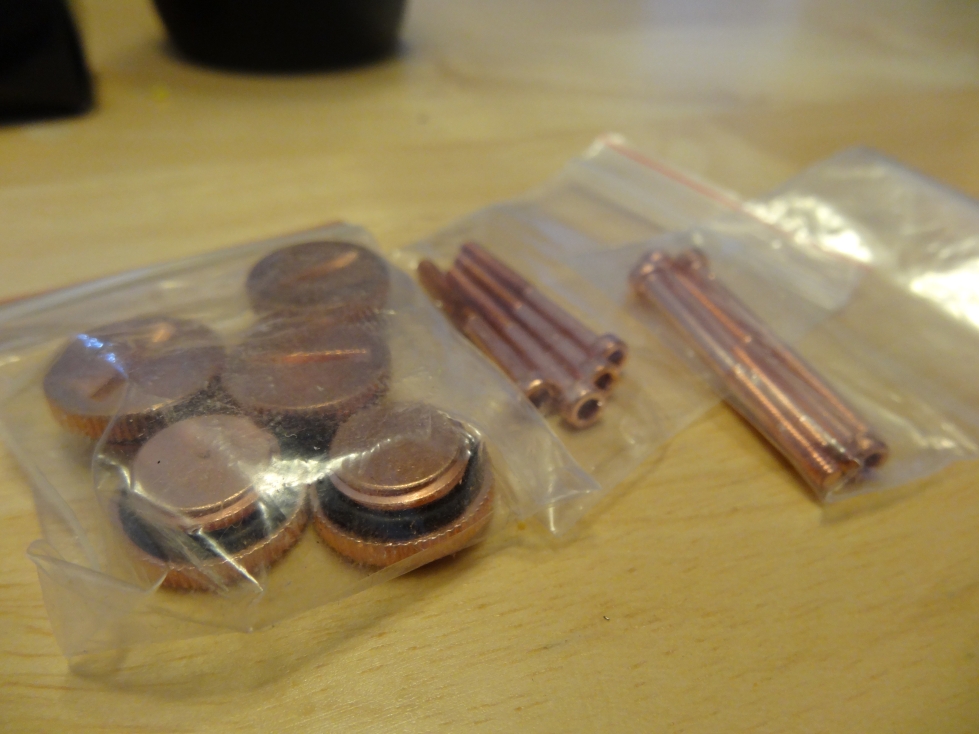
various swiftech 3/8 id fittings
3/8 id hose

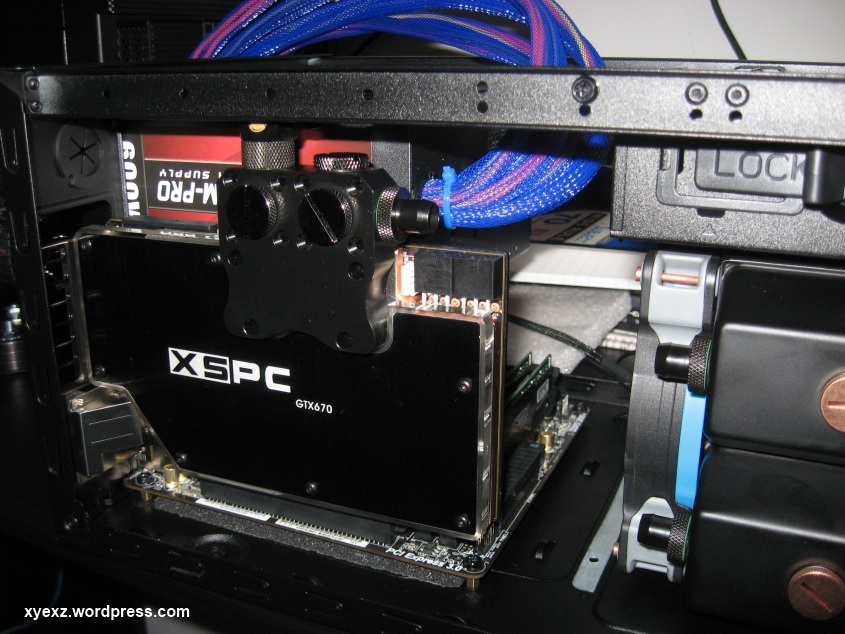
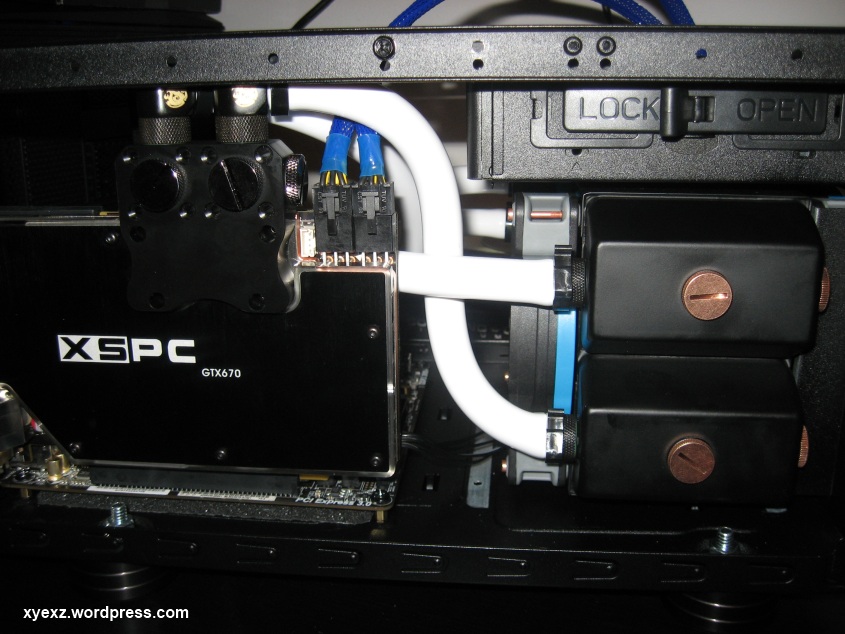
GPU Block undecided atm.

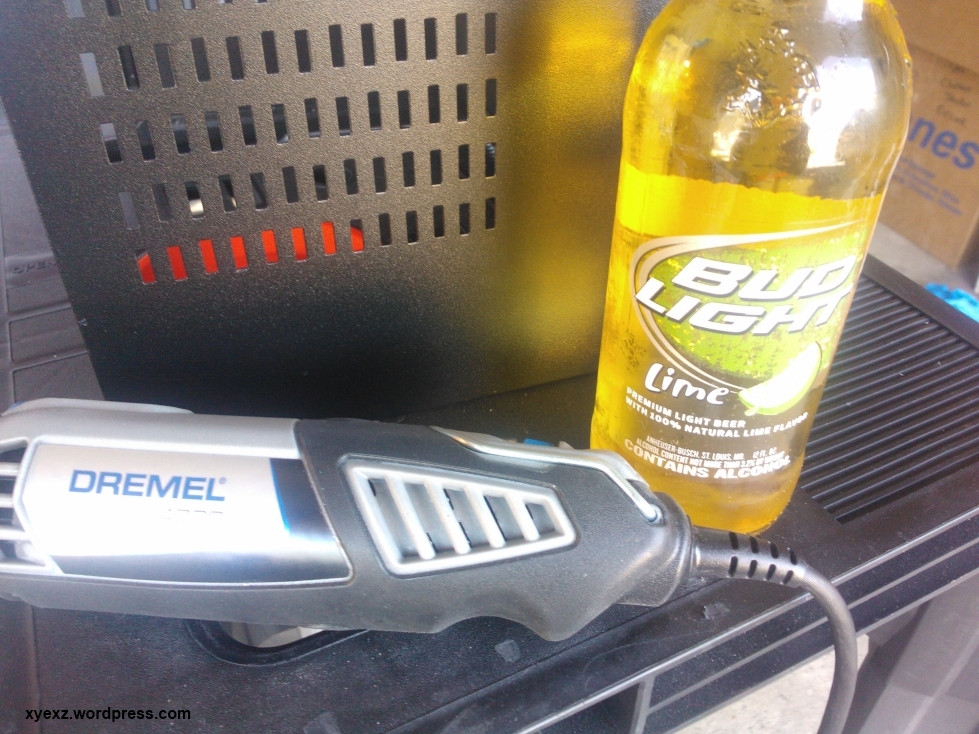
It's late so I'm only going to post a couple of pics of the build that I started tonight.

I'm planning also to change the radiator out possibly in the future to the AlphaCool NexXxos Monsta 120mm x 80mm but currently I'm working with the XSPC RX120 radiator to test it out.

I'll also be purchasing some other surprise items from mnpctech to spice up the outside areas of the case but I won't be speaking of those yet :cool:

Some may be concerned about running cpu/gpu on a single 120mm radiator but that is why I'm using dual sp120s with an extra thick rad, it's an experiment that I can't help but to try out.

Without further delay, tonights pictures:
wp_000268.jpg

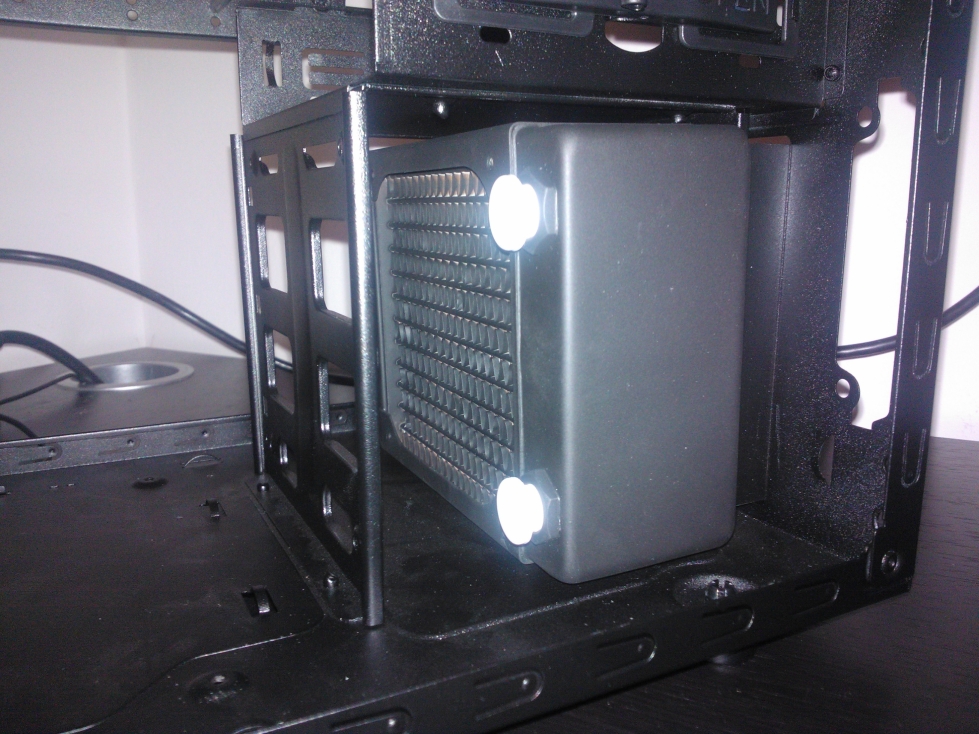
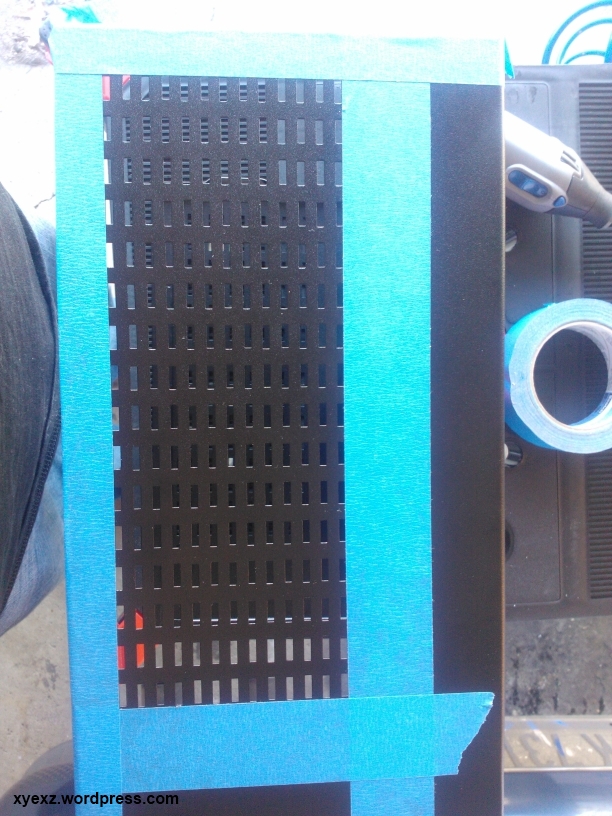
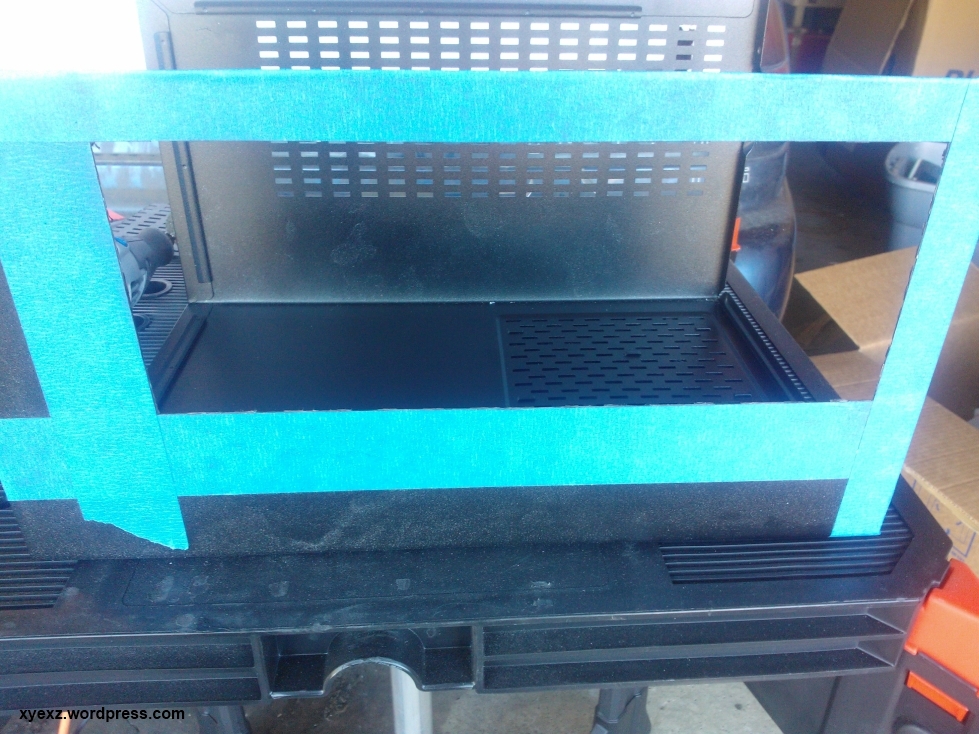
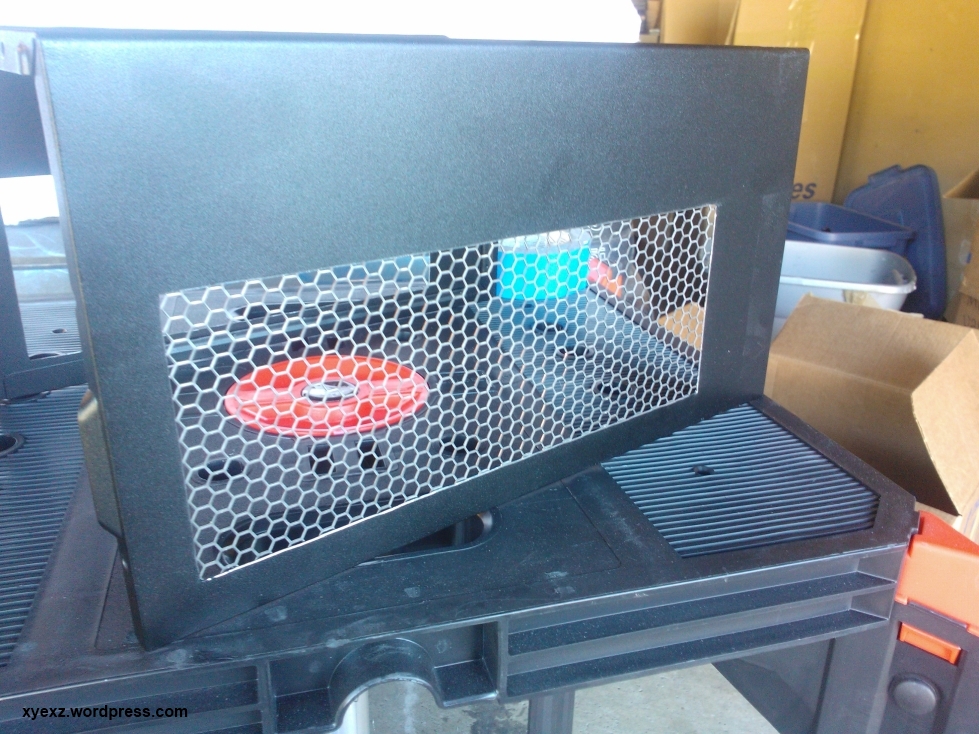
This is showing the radiator in the stock hdd bay area to test fitment.

wp_000270.jpg

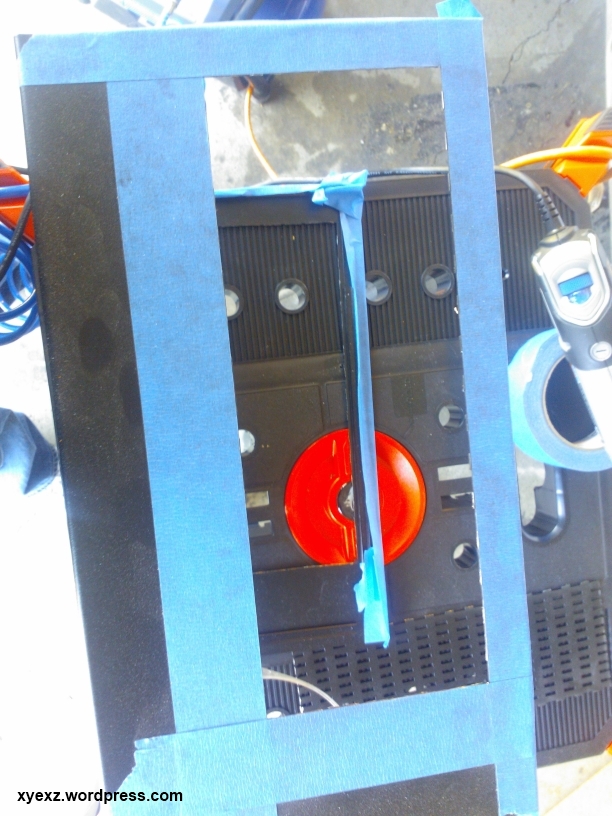
Another side shot of the radiator fitment in the hdd bay.

wp_000288.jpg

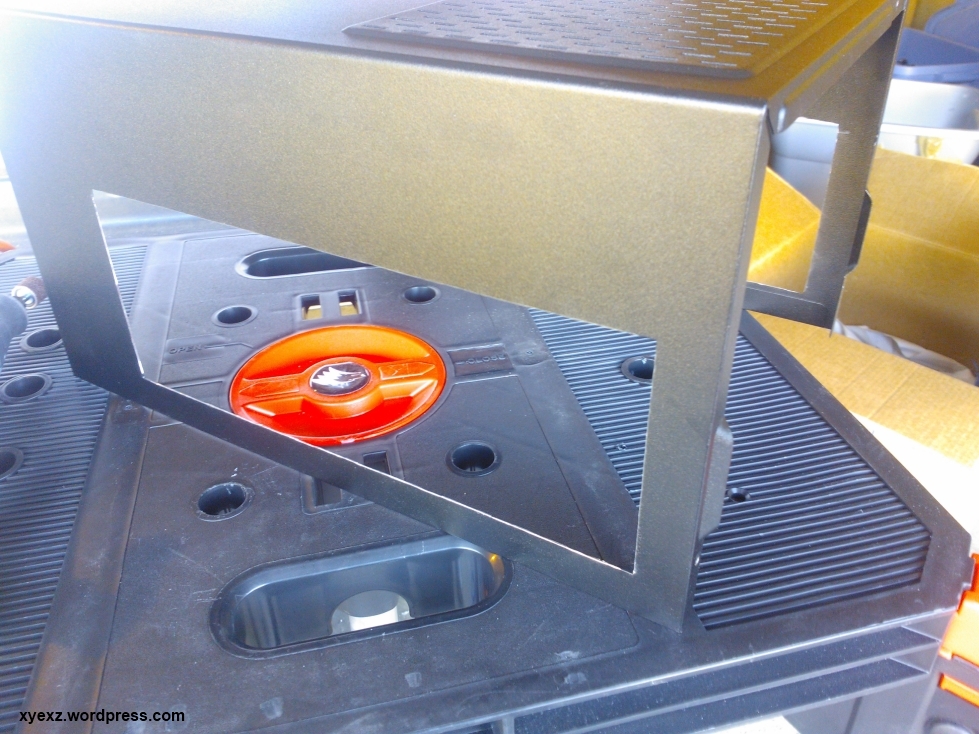
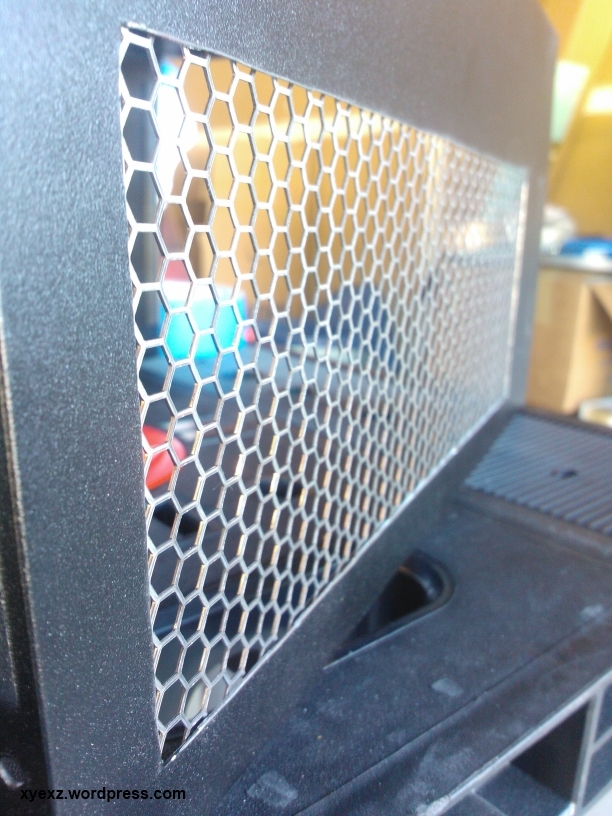
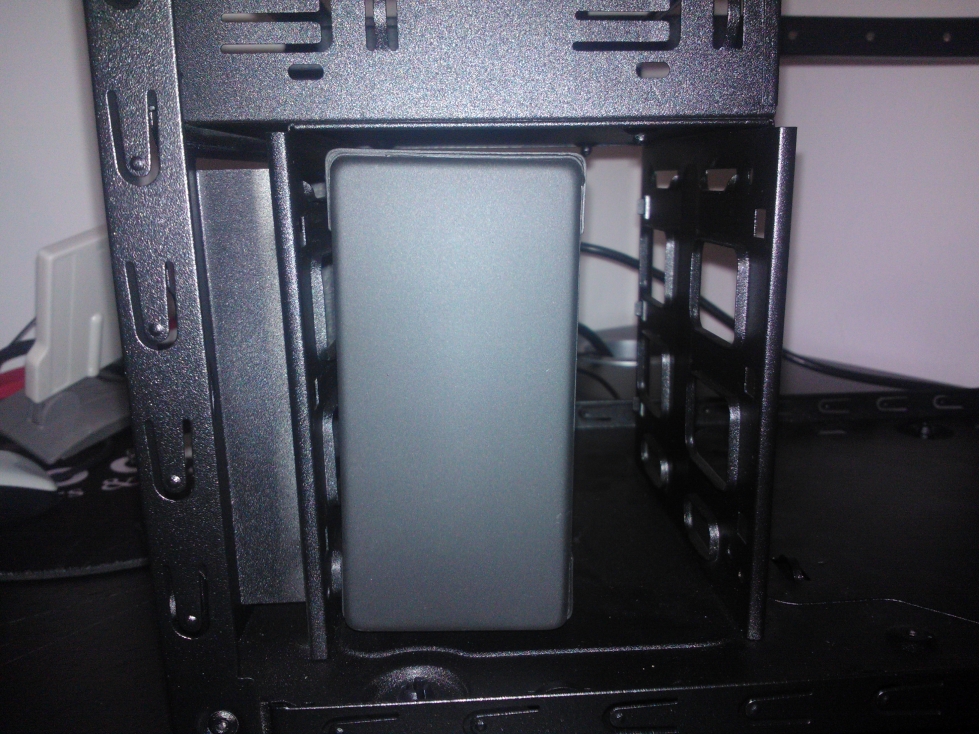
After remove the rivets for the hdd bay the radiator fits nicely with plenty of room to spare for the motherboard.

wp_000290.jpg

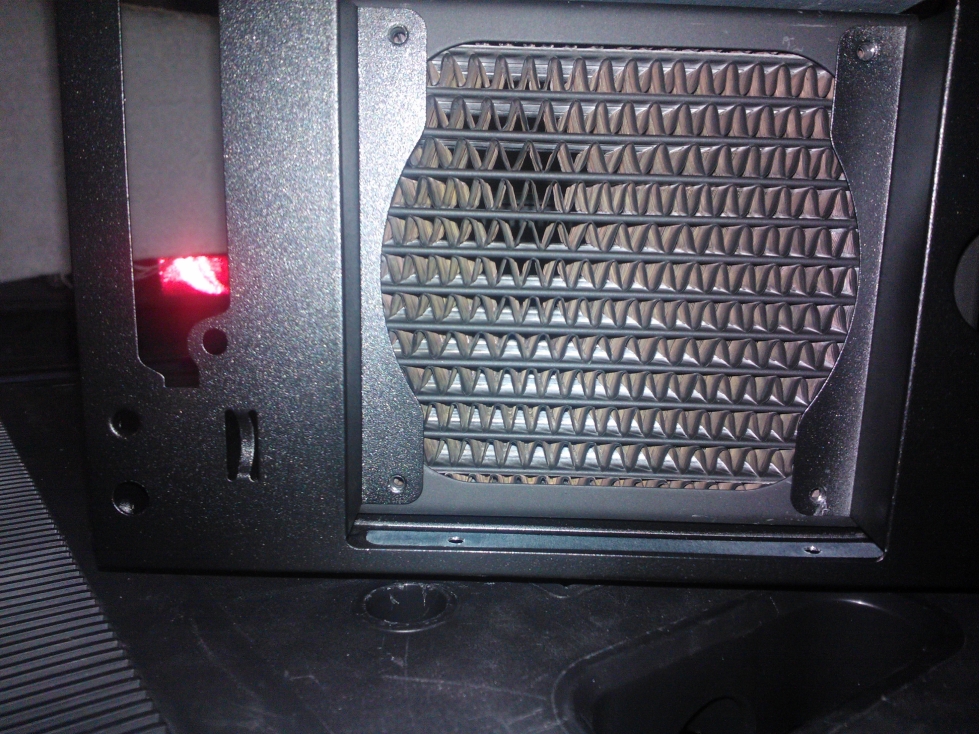
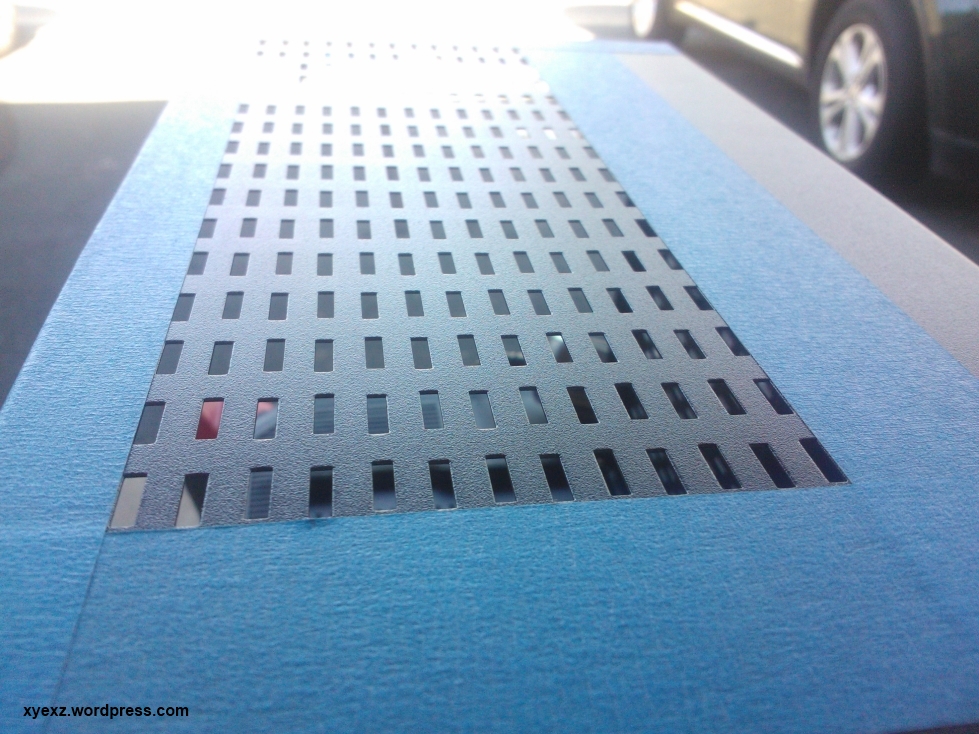
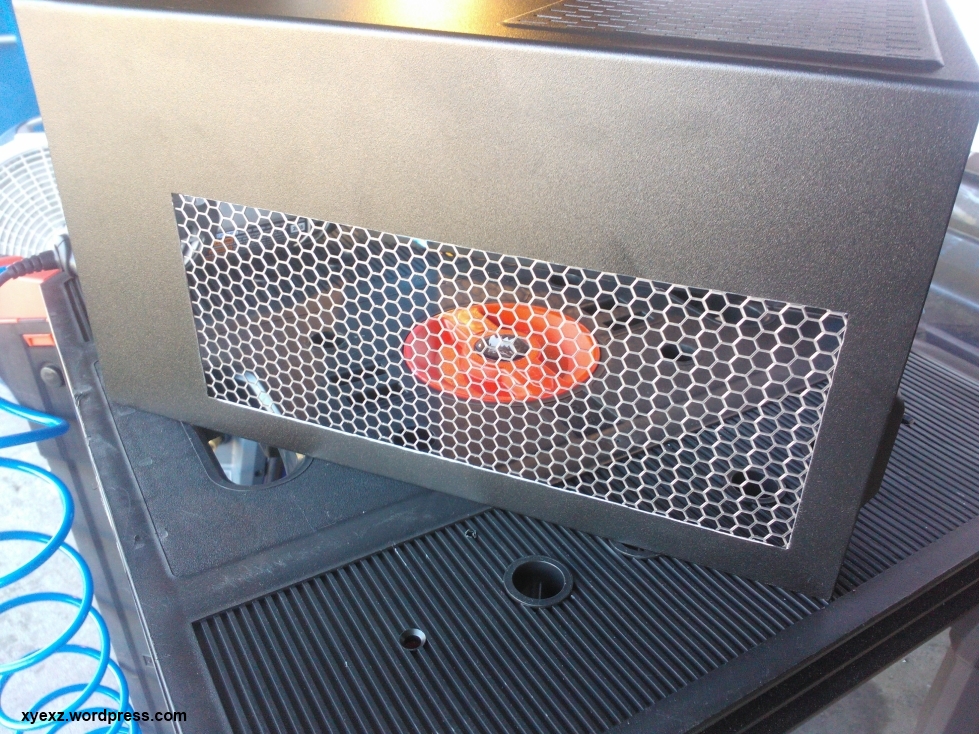
Front shot of the radiator before fan placement.

wp_000294.jpg

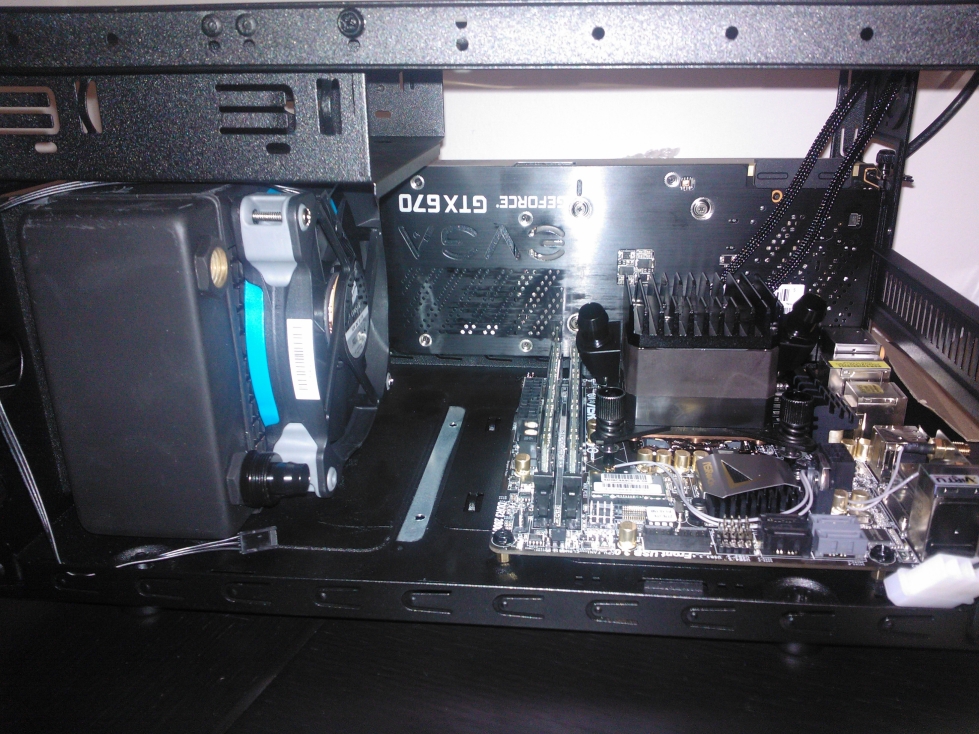
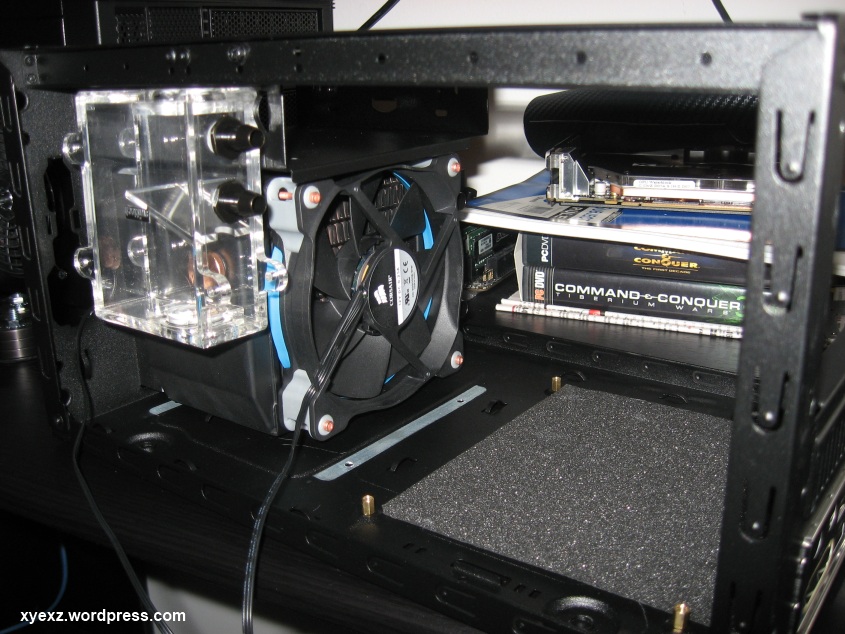
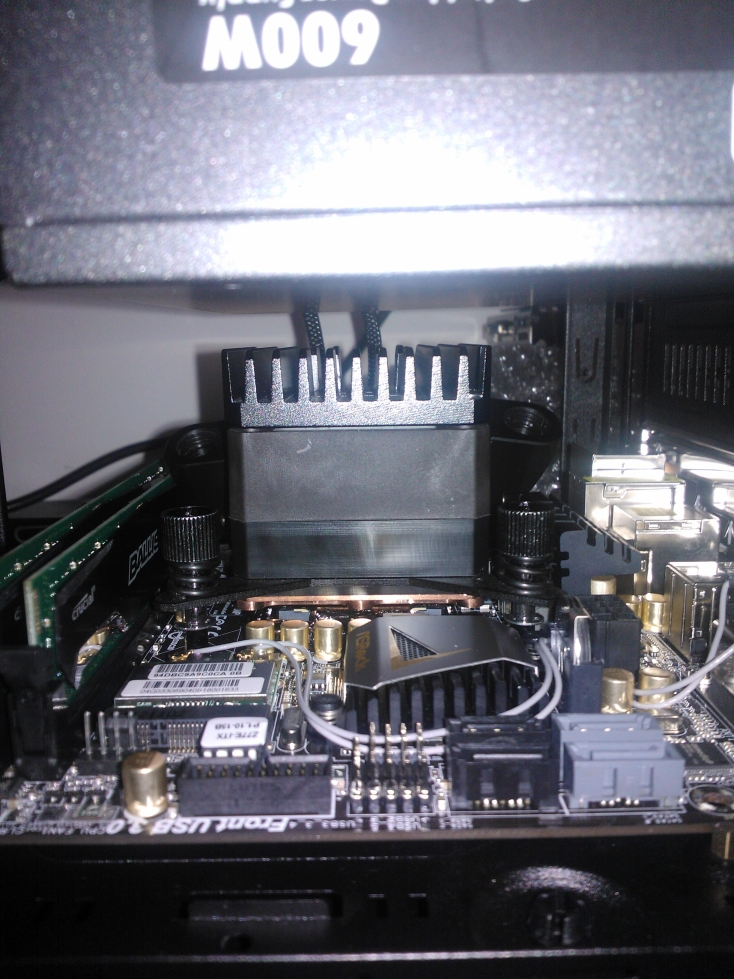
Motherboard fitment with the APD2 installed, luck was on my side as there were no clearance issues for the large bracket that supports the APD2 underneath the mobo, the CM Elite 120 case had raised mobo liftoffs just enough for this kind of install.

wp_000286.jpg

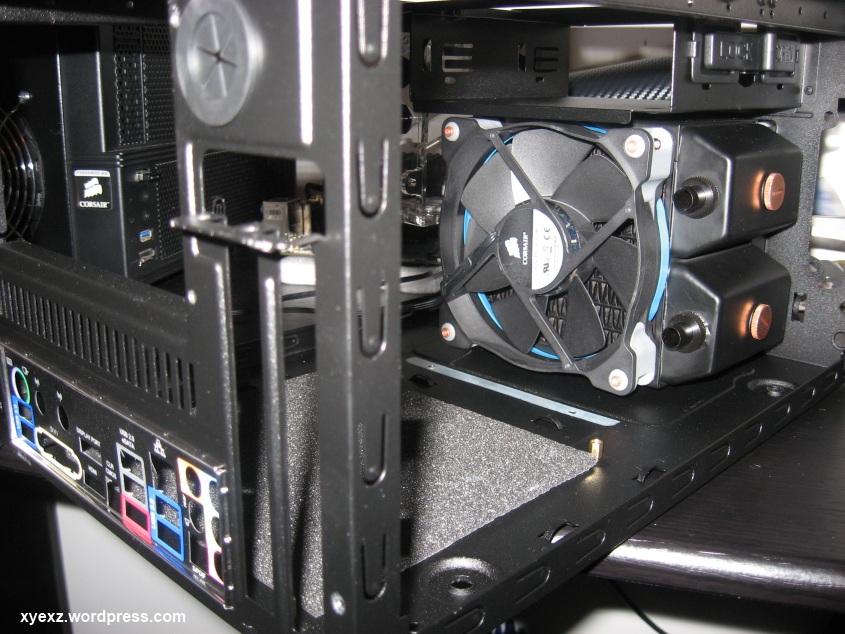
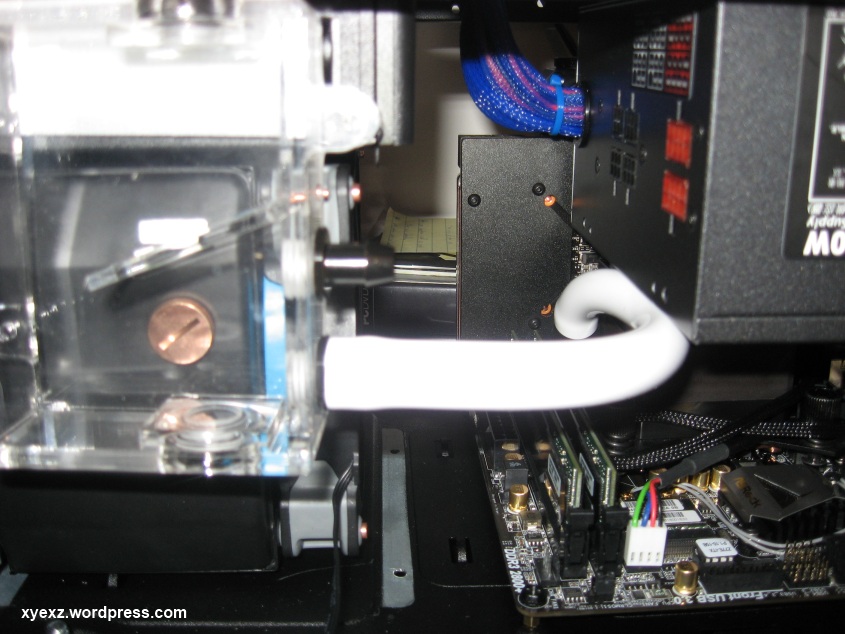
Closer look at the pump clearance against the psu, may have to use right angle fittings here so there isn't any question of kinks in the final install of the tubing.

wp_000295.jpg

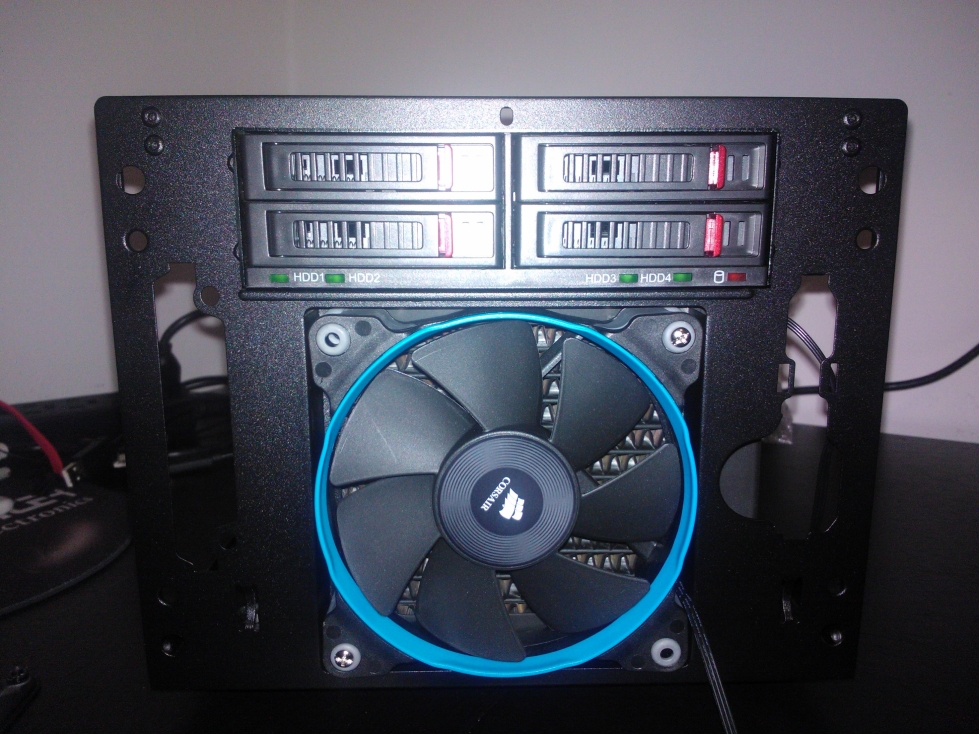
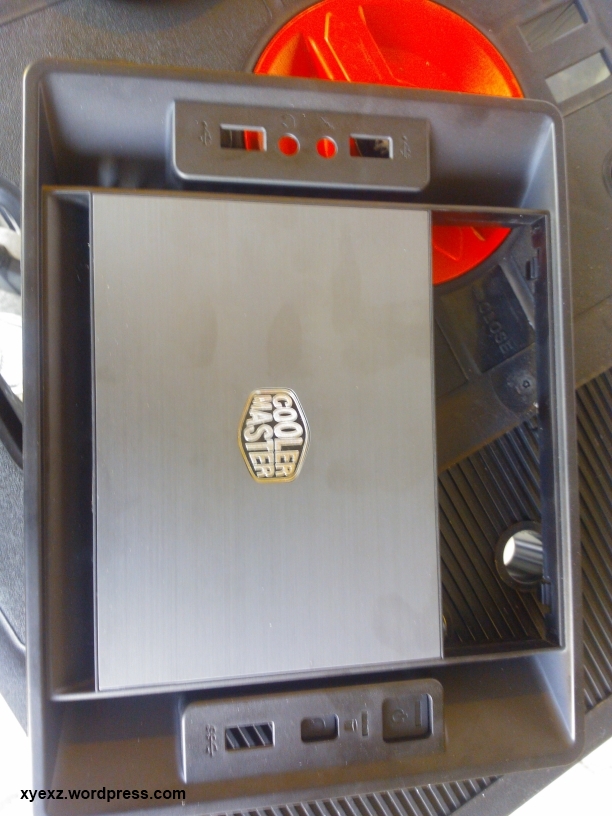
Front case shot showing fan installed as well as the Vantec bay device.

That's all for tonight, enjoy and comment!
 
Incoming updates!

I purchased the rest of the watercooling items I needed (hopefully), had some issues with some fittings I purchased at MicroCenter with mislabeled thread types so I couldn't run my single CPU loop like I wanted until my GPU waterblock arrived next week - it's all for the better though as that gives me more time to mod!

I also purchased some items from Bill @ MNPCTech.com and he was kind enough to stop by today while he was close by and drop stuff off, thanks Bill!

dsc00241.jpg

All the items from MNPCTech, fun!

dsc00244.jpg

Going to re-sleeve the psu with the UV Blue, it's a tad darker than the Corsair fans, however the heatshrink is almost near perfect match, plus different shades of blue are find by me.

dsc00245.jpg

Purchased a set of black anodized case feet with rubber inserts, these are way better than the stock hard plastic feet that came with the case plus they look great!

dsc00246.jpg

3M Di-Noc, this is going on the front of the case, because why not!?

That's it for new goodies today, tonights creativity fueled by:
wp_000304.jpg

It's creativity in a bottle!

wp_000299.jpg

Ok, so I didn't post this picture last night but it just shows the clearance of the rad and the GPU, with the stock reference cooler off this clearance will be opened up by another ~68 mm or 2.7 inches.

Kind of a terrible picture but I installed the new case feet from mnpctech, man they look nice:
dsc00257.jpg


Started modding the outside shell of the case, getting rid of the restrictive side vents, since I'm going for positive air pressure and will be counting on heat to be vented out the sides I wanted to remove them.

wp_000305.jpg

Taping everything off for dremel time.

wp_000306.jpg

It's a little hard to see but I thought it was odd that the square holes that Cooler Master punches out on the sides aren't actually lined up perfectly, some of them are just downright terrible... I guess I can't expect much for $50.

wp_000307.jpg

All cut up and naked - AHH!!

wp_000308.jpg

Both sides cut and nekked now - I see you peeking!

wp_000313.jpg

Deburred and sanded with dremel, did some more touching up after this picture - pretty happy with the results.

wp_000314.jpg

MNPCTech modders mesh cut and temporarily installed via tape method haha. This stuff is so easy to work with and Bill was kind enough to remind me to use an etching primer on this to ensure protection and proper adhesion.

wp_000315.jpg

Closeup of the mesh installed, honeycombs need to be lined up to the cut better but didn't turn out bad for a quick tack job.

wp_000317.jpg

Otherside meshed as well.

wp_000319.jpg

Here's the front faceplate of the case looking all innocent and scared.

wp_000321.jpg

Things got a little heated and I've ripped it's eye out!

Tip for anyone that tries to remove this logo - the logo is metal but thin, I had to heat up the back and front of the faceplate to loosen the adhesive tape, but a couple of times I noticed the plastic backing start to get soft and had to let it cool a bit before I pushed on it from behind with a finish nail tap.

I ran out of daylight to continue any modding tonight, Di-Noc will be placed on the metal part of the front faceplate, I'm trying to decide what to do with the logo, reinstall it or find something else to put in it's place?

There is a hole right in the center that I could easily put a screw through should I find something big enough to cover the stock hole, hmm decisions decisions, (suggestions are welcome!).

I'll give a quick rundown on the other watercooling parts I purchased today from FrozenCPU:

GPU Block I chose was the XSPC Razor nVidia GTX 670 Full Coverage VGA Block - Reference Design, it had blue leds that will fit with my blue theme but it still had a metal front so it shouldn't be too bright (if it is I'll put a resistor in the led circuit to dim them).

I also purchased the back cover for it, pretty much have to as I have the 4GB model of the GTX 670 which has ram chips on the back, and I'm not about to put heatsinks on a wc'd GPU.

I also picked up some Bitspower Matte Black Stubby G1/4" Barb Fitting both 90 degree and straight fittings.

Then the piece I'm most excited about, the Alphacool NexXxoS Monsta Single 120mm Radiator - 80mm Thick!!

I will be seeing this stuff monday via USPS 2-3 express mail, updates to follow!
 
Ok so not a huge update today, mostly going out and finding paint colors and other materials as well as some tools.

wp_000340.jpg

Roughed up the case and gave it a good rinse and let it sun dry.

wp_000341.jpg

First coat of primer towards the front of the case, I haven't really painted anything in a while and found I'm a little rusty, good thing I'm using Rust-Oleum? (bad joke I know)

wp_000342.jpg

Primer hand dry in very little time thanks to the minnesota sun, put a coat on the backside as well and let dry.

wp_000344.jpg

Sneek peek of something else I decided to do for the front of the case.

Stay tuned!
 
Incoming updates!

Then the piece I'm most excited about, the Alphacool NexXxoS Monsta Single 120mm Radiator - 80mm Thick!!

Correct me if i'm wrong, but I think this radiator should be better than dual 35mm thick rad, right? I think you should be ok with your cpu and gpu in one loop, if not heavily OCed.
This is going to be very interesting. I think single 120mm should be fine for cpu and second one like that for 670 gpu. So hopefully 80mm thickness will do the trick!
 
This is a seriously awesome build. I love seeing people's ingenuity in fitting all these parts inside a tiny case. Cowards like me stick with the mid and full towers, but badasses like you roll Mini-ITX and throw watercooling in the mix. Good luck!
 
Correct me if i'm wrong, but I think this radiator should be better than dual 35mm thick rad, right? I think you should be ok with your cpu and gpu in one loop, if not heavily OCed.
This is going to be very interesting. I think single 120mm should be fine for cpu and second one like that for 670 gpu. So hopefully 80mm thickness will do the trick!

Well when I chose this case and had the idea to watercool with the 80mm thick rad I used basic math lol. I've read in the watercooling threads countless times that you should have a 120mm rad for each block of whatever you're cooling, so I figured an 80mm thick rad is at least like have two separate 120mm rads smashed into one, we'll see if that theory works when exercised. Stick around and you'll see my results :D

This is a seriously awesome build. I love seeing people's ingenuity in fitting all these parts inside a tiny case. Cowards like me stick with the mid and full towers, but badasses like you roll Mini-ITX and throw watercooling in the mix. Good luck!

Haha! Thanks, I don't feel much like a badass, I'm finding that painting the inside of my mini-itx case was somewhat of a mistake, very hard to get all of the nooks and crannies with a spray can - in hindsight I should've drilled all the rivets and took the case all the way a part to paint it, the two thin rails at the top of the case wouldn't have been able to be re-attached with nuts and bolts so I didn't try it as I didn't have a rivet gun.

Anyways I should have some updates tonight with some pictures - I have received all of my watercooling gear, and based on my previous measurements for the watercooling block on the gpu I should clear everything when building the loop.
 
Awesome project, that seems like a great little case!

Here's my BL induced "creativity" :p I thought it would fix my crap wifi reception, it didn't :(
sprintphotobfnr1a.jpg


"Real men of genius"
 
Awesome project, that seems like a great little case!

Here's my BL induced "creativity" :p I thought it would fix my crap wifi reception, it didn't :(
sprintphotobfnr1a.jpg


"Real men of genius"

HAHA!!! I needed this laugh right now for sure, it's a great case however I'll have to postpone the build until I get another Cooler Master Elite 120 here in the next couple of days, something happened with the coat of paint I put on it and it had some kind of reaction and balled up all nasty.

I used all of the same brands of paints to make sure this kind of thing didn't happen but I guess I just won't paint the next one I get :(

I'll have to remember that wifi trick in the future, I'll have to start getting my BL in cans instead of bottles.
 
I used rattle can, did a nice rough 80 grit sanding on the stock paint, washed it and let it sun dry.

Then I applied Rust-Oleum primer, let dry for 24 hrs, afterwards I noticed it had a lot of dry particle ball like things on it, most of them brushed off but I just sanded the primer down smooth with 400 grit and then cleaned it all off and applied my first coat of Rust-Oleum white and it just all turned to sh!t.

There really is no way I could sand all of the paint off it would take me weeks with the time I have after work each day and I don't have access to a blaster to clean it quick, plus it'd probably just do the same thing again.

Really sucks too because I wanted to inside of the case to be white to go along with my theme, and I'm new to Minnesota so I don't know anyone here who could help with the painting.

Hopefully Newegg will process my case order so I can keep going with my project, albeit without the paint part.
 
Well this update is a day late for some of the stuff.

Got my watercooling parts in the mail the other day, they look glorious lol.

dsc00280.jpg

This is the 80mm radiator that is now in my possesion muahahaha.

dsc00281.jpg

Here is the radiator next to a bud light bottle for reference.

dsc00282.jpg

Radiator came with awesome looking copper caps and screws for the fans.

dsc00283.jpg

The XSPC GPU block!

dsc00284.jpg

Sexy backplate,grrrrr.

Ok so that's enough of that, onto the work portion :D

dsc00272.jpg

Funny looking sticker with some kind of unknown writing on it, what's a warranty? lmao

dsc00275.jpg

Took the PSU apart to begin sleeving and found this beauty of a soldering job, really OCZ?

dsc00265.jpg

Basically your standard stuff, numbering all of the wires and depinning everything, yes I cut myself plenty of times in the process of removing the stock sleeving - that stock heatshrink is a pita.

dsc00279.jpg

Here's the PSU all finished up, I removed the 4 pin wire as I'm not using it in this build.

dsc00271.jpg

Went through and sleeved some of the front panel connectors for usb, audio etc as well - I took the time to remove the AC'97 portion of the HD AUDIO cable as it's not used for this build and it really cleaned things up with that cable.

dsc00285.jpg

Installed the gpu block and backplate on the gpu tonight as well, installed the wc fittings on the upper block portion as well, once the next cm 120 case gets here I'll be able to test fit the placement of the fittings, I may have to move the top on to the backside.

wp_000345.jpg

Took the time to place some of the Di-Noc on the front faceplate, I think it turned out rather well.

That's the updates for tonight people, the new cm elite 120 case will be dropped off tomorrow so I should have some major updates tomorrow night!
 
Okay big update tonight! UPS dropped the case off and I didn't waste anytime putting the build together, I didn't anticipate completing the watercooling tonight but ... well you'll see :D

img_1288.jpg

So here I already drilled the rivets on the harddrive bay for the new elite 120 case, I also installed the NexXxos Monsta 120mm x 80mm radiator and the two SP120 Corsair fans.

Also I did a test fit of the swiftech micro rez which worked out beautifully since I was able to rotate the rad due to the shorter gpu pcb.

Also notice the sound dampening material that will be under the motherboard - I added it to my order from Frozen CPU last week for $0.99! There is so much of it I don't know what to do with the rest yet :D

img_1290.jpg

Another view of basic start of the case build, you can see the other side of the rad better.

img_1294.jpg

After installing the motherboard I attempted to mate the gpu to the mobo, but I had an issue, the backplace from XSPC was so thick that it was hitting the RAM clips nearest the PCI-E slot.

img_1298.jpg

I took a dremel to the clips after taping all the sockets/slots off, since these clips are stationary it doesn't hurt to do this mod but I was nervous lol.

img_1300.jpg

Here the first line was routed from the rez to the intake of the AD2, sexy.

img_1306.jpg

After taking the PSU out I decided to put 90 degree fittings on the CPU block on both sides, I simply didn't like the PSU basically sitting on the hoses even though they weren't kinking or anything.

img_1308.jpg

Here is a shot of the GPU side of things, you can see the beastly rad here.

img_1309.jpg

Moment of truth, beginning the prime of the pump as well as air removal and leak testing.

img_1311.jpg

Used a lot of paper towels to help with the leak detection.

img_1312.jpg

I let her run for about an hour and kept shaking bubbles out for some time, turning psu on and off to get pump to jostle the bubbles through the system. Here is a shot of her all hooked up and running for real!

water-oc-4ghz-prime95-temp.png

All I can say is wow, I managed 4GHz without increasing the voltage and ran prime95 for just 5-6 minutes to see where it'd get to, very impressed. You can see that my chip has the problem of the core hotter than the rest ivy bridge junk - it's not nearly as bad as others I've seen and it isn't malfunctioning or anything so I will leave it alone as during gaming it'll be just fine for me.

water-oc-4ghz-bf3-full-round.png

This is a screenshot after playing a full round of BF3 on ultra, drives set to full quality and AA, AF and Vert sync turned on. The GPU managed to get "up to" 45 degrees lol, this thing rocks!

air-oc-4ghz-prime95-temp.png

For reference, here is when my cpu was still on air after building it fresh and running prime 95 with an OC of 4GHz, no voltage increase.

I currently have the fans running at ~1500rpm and I can barely hear them with the front faceplate on.

Motherboard temps seem to be doing just fine and are better than stock air cooling, even with the stock side fan gone!

Still have plenty to do on this build, need to paint the mesh mod on the side panels and finish the wire management but I'm going to be a little busy with BF3 for a couple of days me thinks over the weekend :D
 
I think I would have sleeved the wires individually, but other than that, I think it's coming out pretty good!
 
I think I would have sleeved the wires individually, but other than that, I think it's coming out pretty good!

Sleeving them individually just creates more girth for the wires, which for SFF translates to less airflow which is a big deal.

I sleeved them the way I did as it did go along with the color theme of black white and blue but most importantly it would allow the 24pin to be more flexible, the stock sleeving was so rigid that it was going to be a major problem with all of the hoses running through that area, to each there own though, if I had a giant case I probably would've individually sleeved everything as it looks so pimp and there would be more places to tuck wires.

Thanks for the compliments, it's not completely done as I already mentioned in a previous post but i'm happy with everything up to this point.
 
Looks Great! How is it owning a game like Command and Conquer Decades and not be able to play it? When I upgraded to windows 7 the game wouldn't install again for me =/
Keep up the Awesome job!:D
 
Looks Great! How is it owning a game like Command and Conquer Decades and not be able to play it? When I upgraded to windows 7 the game wouldn't install again for me =/
Keep up the Awesome job!:D

Actually it plays just fine for me on windows 7, I was mad that I couldn't integrate my keys into steam though as I like having everything in one place.

Thanks!
 
Sweet! I think that if you can get gpu and cpu at up to 50-55C during games then it is a win!
 
Sweet! I think that if you can get gpu and cpu at up to 50-55C during games then it is a win!

Yeah I'm so pleased with this build, played some older games tonight and gpu isn't breaking 40c lol.
 
Wow that build is sick, I love scratch builds, I had one in the works but I benched it - this kinda makes me want to dig it back out lol, not sure if the wife can take any more of garage time and microcenter shopping sprees lol.

Thanks for coming by here as well - these Corsair fans "blow" me away lmao.
 
not sure if the wife can take any more of garage time and microcenter shopping sprees lol.

Baffles me as to why we don't have at least one or two more locations in the Twin Cities.... Somedays I'll just order from newegg instead of waiting in the insanely long lines for the cashier..... and I will tell that to their CEO if I'm ever given the chance someday...lol
 
Baffles me as to why we don't have at least one or two more locations in the Twin Cities.... Somedays I'll just order from newegg instead of waiting in the insanely long lines for the cashier..... and I will tell that to their CEO if I'm ever given the chance someday...lol

Yeah I like the idea of being able to pick up stuff locally and I like supporting local stores, however it's a pain when the lines, although last week had me cursing when they had 100 South closed off, it was a nightmare to get to MC.

Most times I get stuff from Amazon as I have Amazon Prime, no tax and free two day shipping - man I've made so many wrong last minute decisions on that site haha.
 
WOW!! That is one heck of a build. I have the same mobo and case; however, my mobo seems to be bending towards the middle of the motherboard because of the elavated pins. How did you manage to mount the top two screws (near the 80mm fan) of the motherboard to the case? What is the long term effect if I just leave the motherboard bending towards the middle?
 
WOW!! That is one heck of a build.

Thanks!

I have the same mobo and case; however, my mobo seems to be bending towards the middle of the motherboard because of the elavated pins. How did you manage to mount the top two screws (near the 80mm fan) of the motherboard to the case? What is the long term effect if I just leave the motherboard bending towards the middle?

Are you not using the stock mounting screws that came with the case? Is it sagging in the middle or humping upwards?

Almost sounds like perhaps the holes in the case weren't made correctly and it's cause fitment issues with the motherboard, I didn't have that kind of issue at all, I have noise dampening foam under my board to lessen the pump noise but I had it all mounted up without before I bought my foam and didn't run into those issues either.

I would say that your situation isn't ideal, I'm not sure that I would run something bending like that ever, it could cause disconnections on solder joints under heat during extended use however manufacturers solder has to get pretty hot before it starts to soften.

If it's sagging you could put some foam underneath or cardboard, if it's bowing upwards then I'm not sure what you would do, perhaps drill a different mounting hole or call Cooler Master.
 
Really like ur build!

I am thinking about purchasing this case thoug i am not sure if my GTX 670 windforce will get too hot? I have an Corsair h80 that i plan to put where u have your radiator but i am wondering how big the ventilation panel on the side is? Can u put one or two 92/120mm fans on the side?

Thanks in advance!
 
That is just such an awesome build. That is a lot of power in such a small case. That alphacool rad does a great job with the cpu and video card.
 
Really like ur build!

I am thinking about purchasing this case thoug i am not sure if my GTX 670 windforce will get too hot? I have an Corsair h80 that i plan to put where u have your radiator but i am wondering how big the ventilation panel on the side is? Can u put one or two 92/120mm fans on the side?

Thanks in advance!

Well if you're worried about stuff getting hot I will say that with the stock placement of the hdds they tend to block some of the otherwise great airflow you'd get, if you're planning on removing the stock hdd bays and putting an H80 there you're already on the right path.

With an air CPU cooler on my 3570k, two 3.5 hdds and two fans on the front and my GTX 670 in stock form, my GPU was hitting 85c and the cpu was sitting around 75c at full load. Not the best but certainly not the worst either, if you were to rotate the psu around so that it sucks hot air out of the case I think that would certainly help a lot.

The stock side vents are pretty restrictive, which is why I cut them out and put in some modders mesh from mnpctech.com, you could do the same and make provisions for some side fans.

If you want I can take a couple pictures tomorrow with some 120mm fans up against the case to give you an idea for fitment. If you use some slimline 120mm fans like these here I think you'd be able to keep the fans internal and help bring more cooler air to your GPU.

That is just such an awesome build. That is a lot of power in such a small case. That alphacool rad does a great job with the cpu and video card.

Thanks, I just reached a stable overclock on the cpu and gpu that I'm really happy with and the temps are still very reasonable considering my loop setup.

3570k @ 4.1GHz @ -0.100 V offset ~1.160V
GTX 670 @ 1250MHz, 3150MHz @ 1.175V

Playing BF3 CPU sticks around 65C and GPU around 55C, and everything is almost dead silent - I couldn't be happier.
 
I'm thinking about stealing this build and putting my own spin on it :]
 
Last edited:
I'm thinking about stealing this build and putting my own spin on it :]

You should totally do it, it wouldn't be stealing if I gave it away right?! That's the best part about these communities I think is that we all get to share the ideas and innovate, make a build log if you do something similar!
 
god thats such an awesome and cheap case. sure there are more glamorous sff cases out there, but for <$50 this thing is killer even at stock. a couple easy mods and it quickly becomes a powerhouse gaming case. love the build man, congrats.
 
Very cool, I love ITX builds, I really think you did an amazing job, I was worried that those fans wouldn't have enough static pressure to move enough air through your rad to get good temps.
 
Very cool, I love ITX builds, I really think you did an amazing job, I was worried that those fans wouldn't have enough static pressure to move enough air through your rad to get good temps.

yeah, i was thinking the same thing until i saw the fin spacing.
 
god thats such an awesome and cheap case. sure there are more glamorous sff cases out there, but for <$50 this thing is killer even at stock. a couple easy mods and it quickly becomes a powerhouse gaming case. love the build man, congrats.

Thanks for the kind words, I love how cheap it is and honestly I was going to replace the front with some custom plexi and hardware but the stock front with the DiNoc has grown on me and I actually like it how it is.

Very cool, I love ITX builds, I really think you did an amazing job, I was worried that those fans wouldn't have enough static pressure to move enough air through your rad to get good temps.

Thanks! I'm still thinking of trying different fans just to put them to the test, I feel like I have the platform to do it now, who knows though I've been too busy with work and BF3 has been a blast on this rig.

yeah, i was thinking the same thing until i saw the fin spacing.

Yeah these fans were made to produce high static pressure which I knew would be required as the design of the front faceplate for this case isn't the best for airflow, but I've noticed no temp different with the faceplate on or off on this case so the fans are doing their job and doing it extremely well.
 
Back
Top