Portal case---Take 2

Willsonman

[H]ard|Gawd
Joined
Jun 11, 2005
Messages
1,195
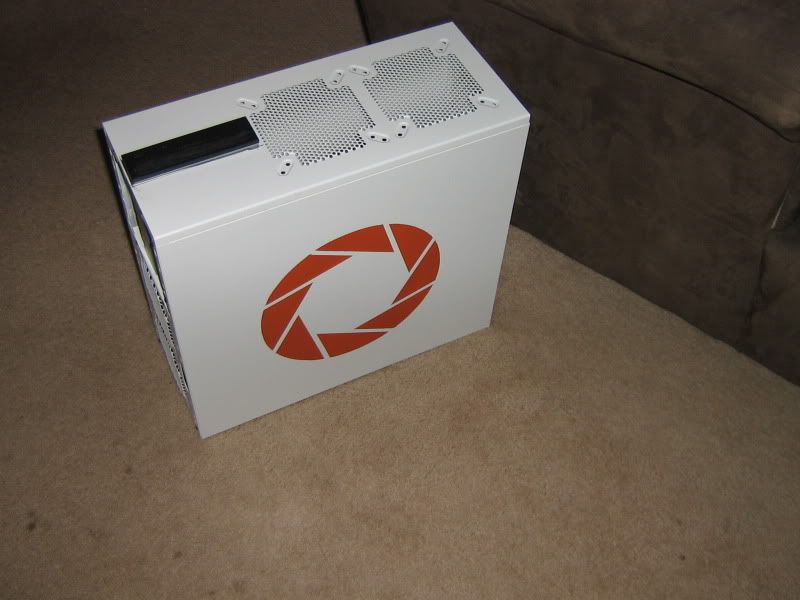
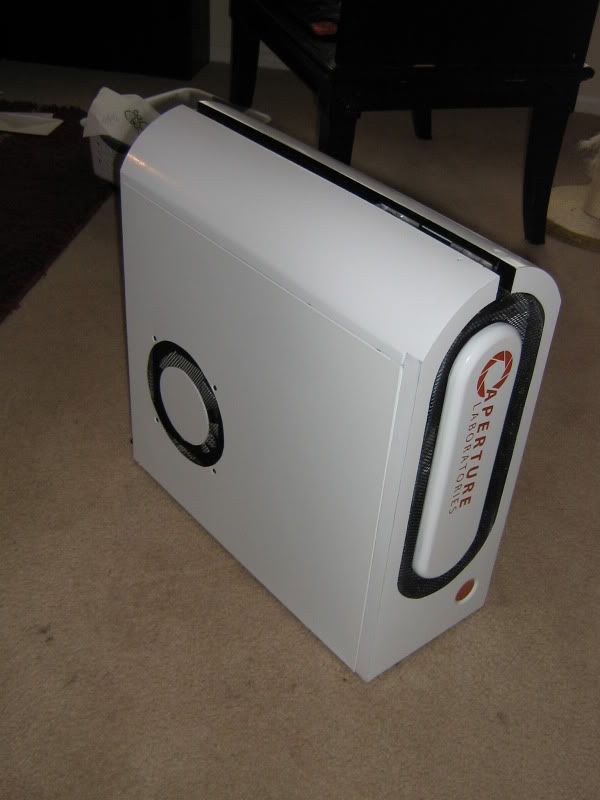
So I was asked by a fellow member here to make another Portal case for them and the project has begun!
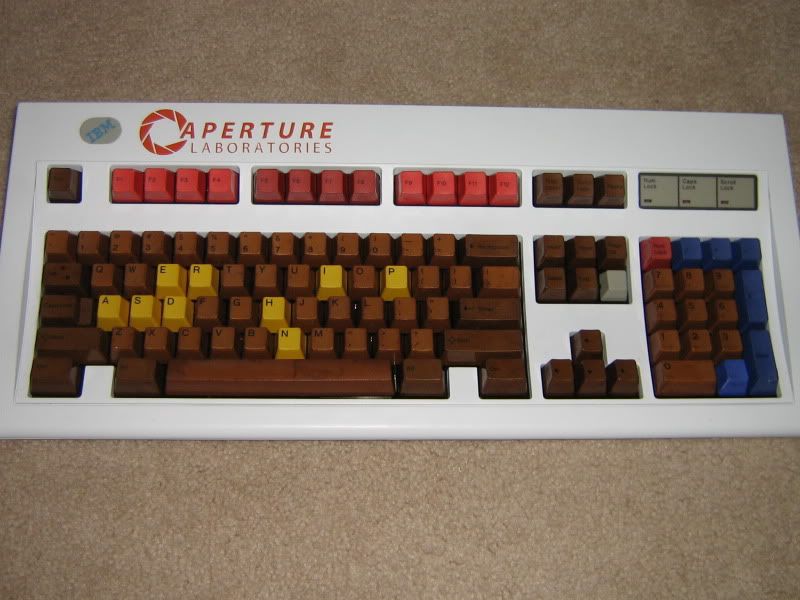
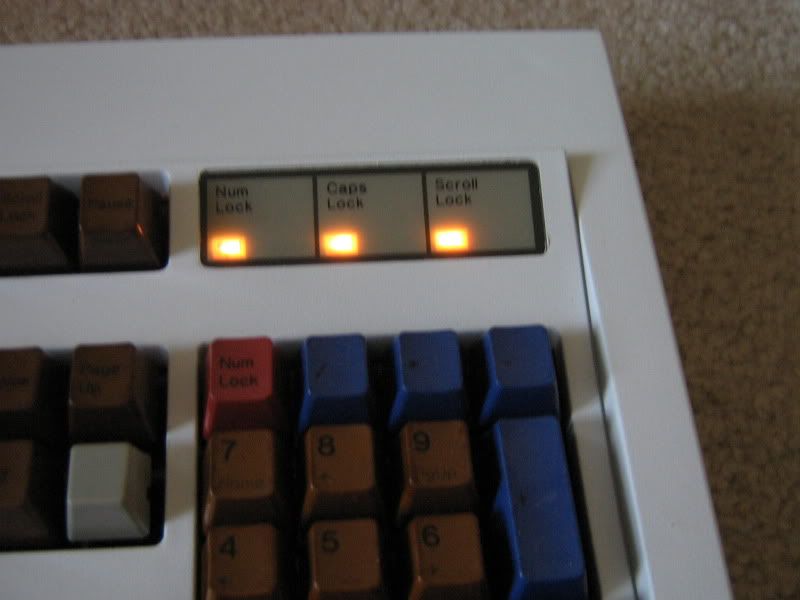
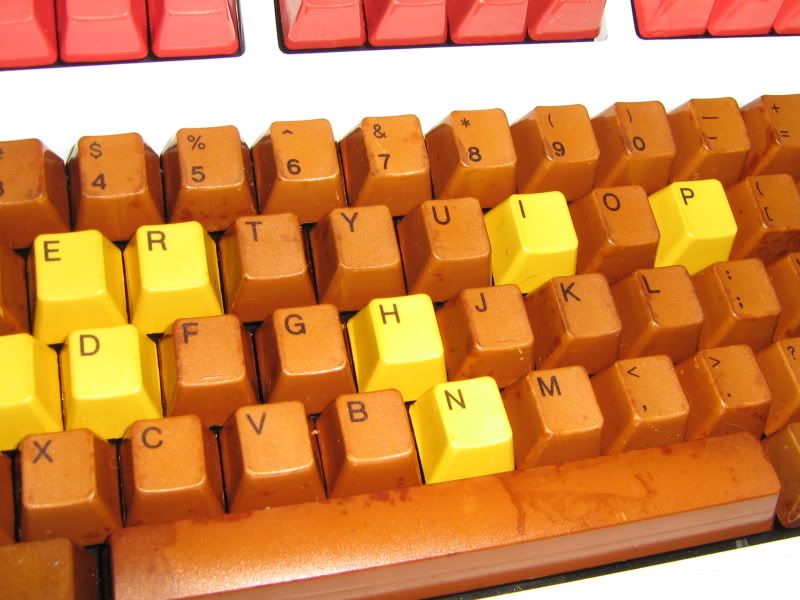
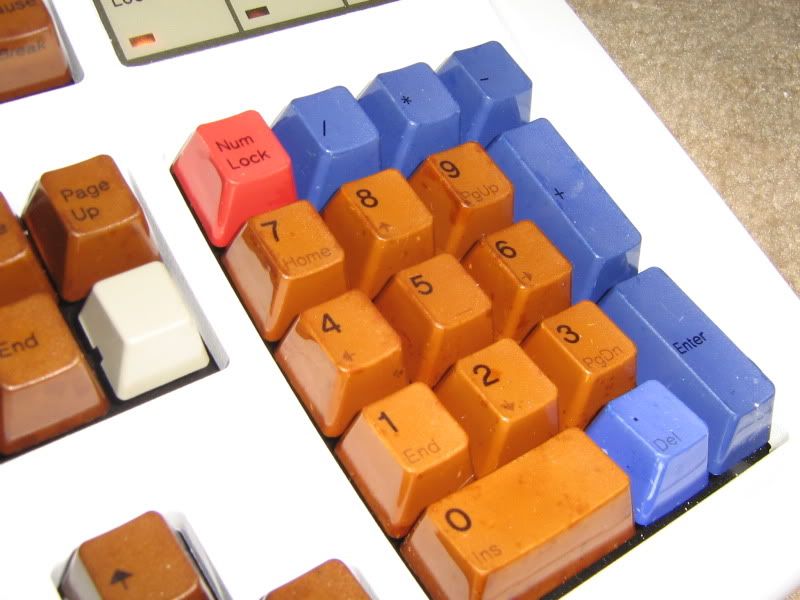
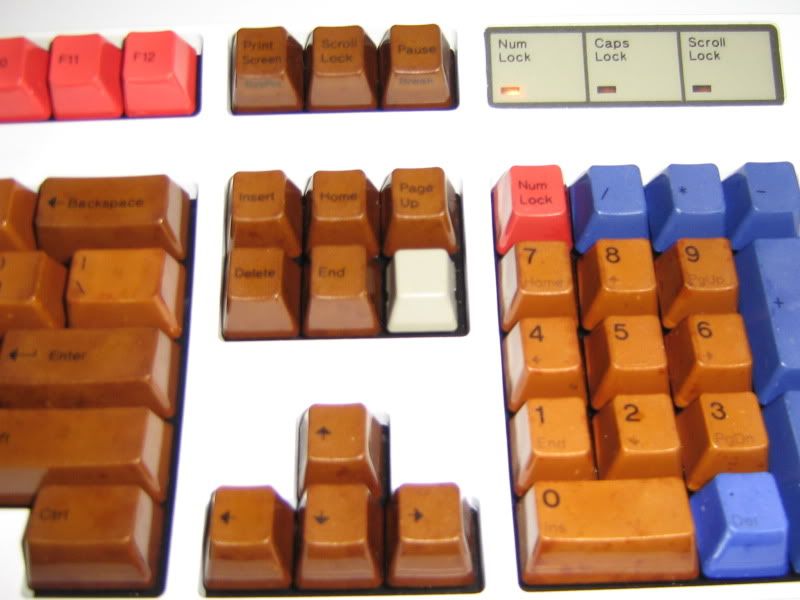
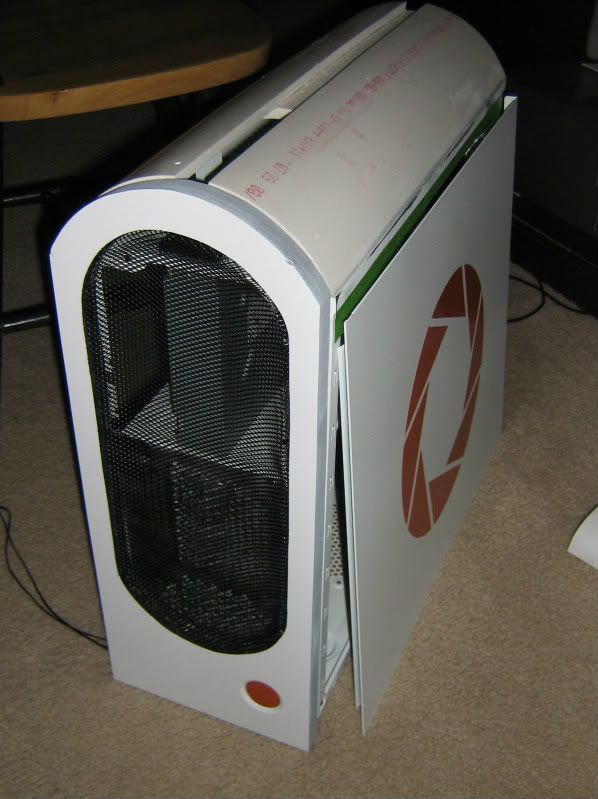
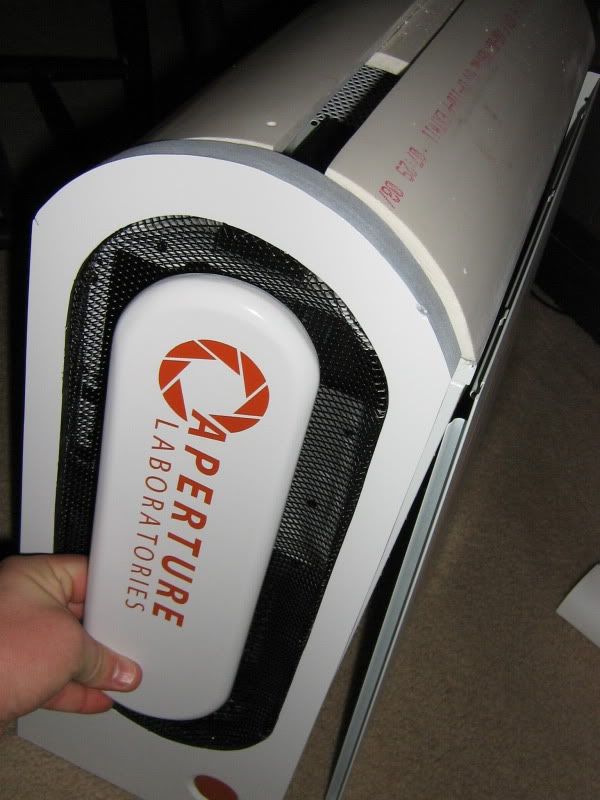
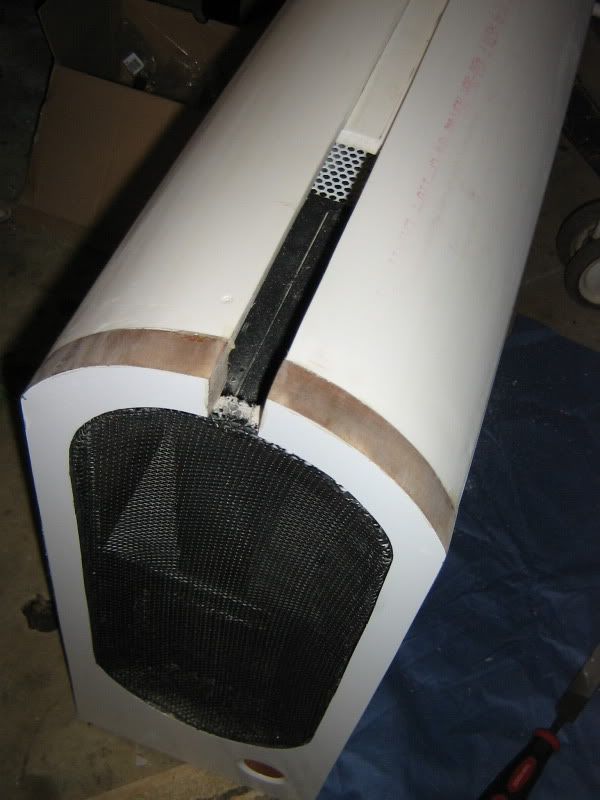
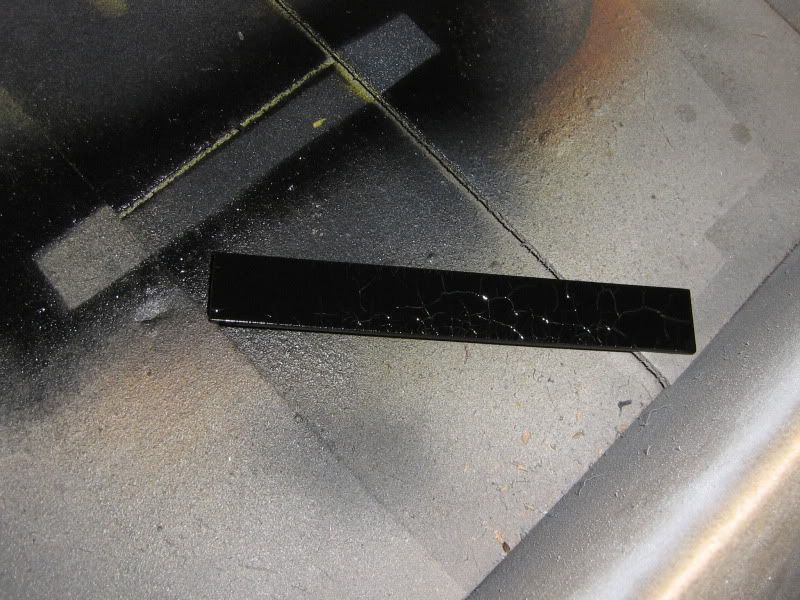
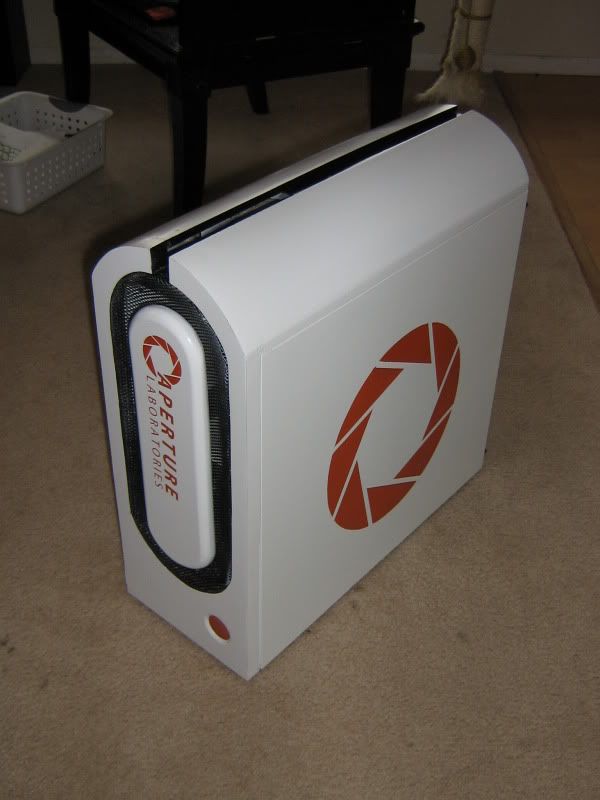
Old case found in this thread.
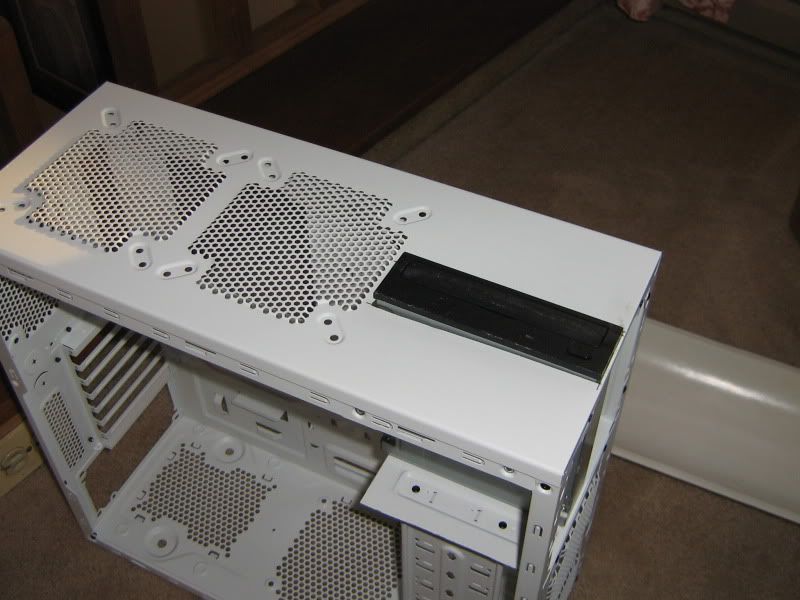
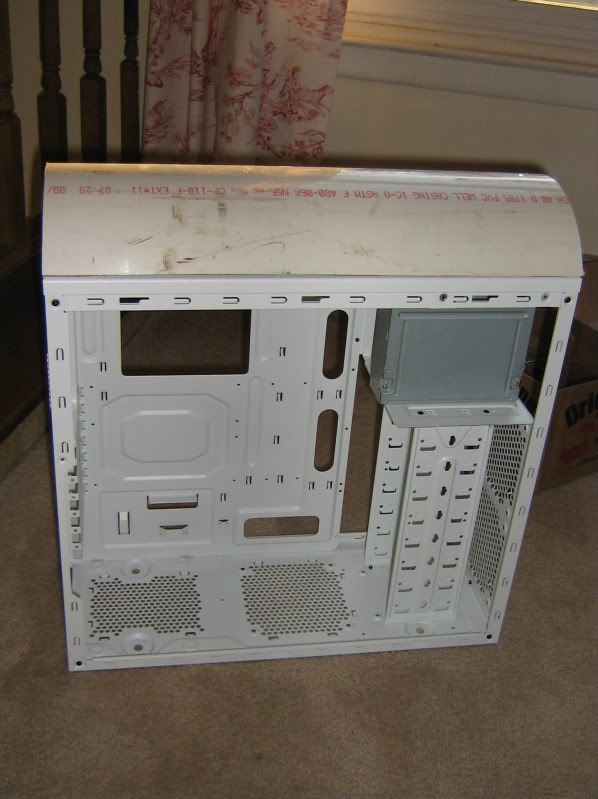
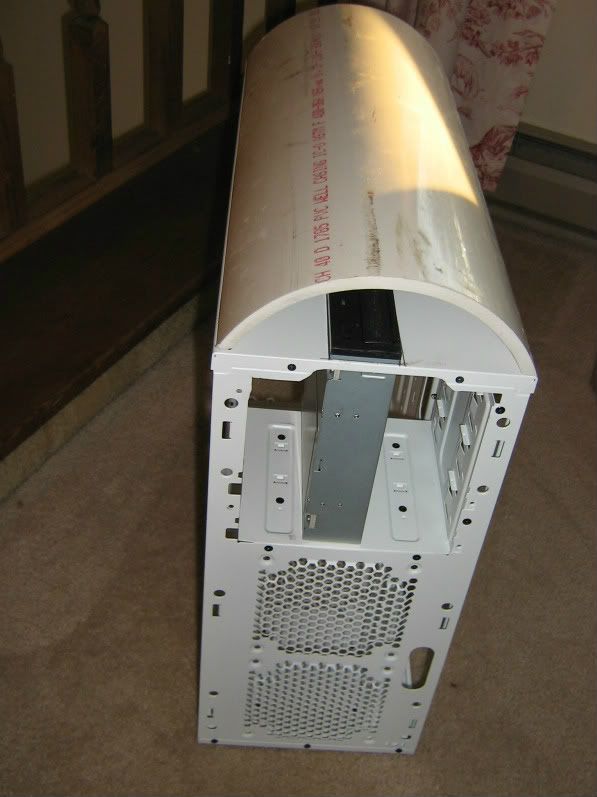
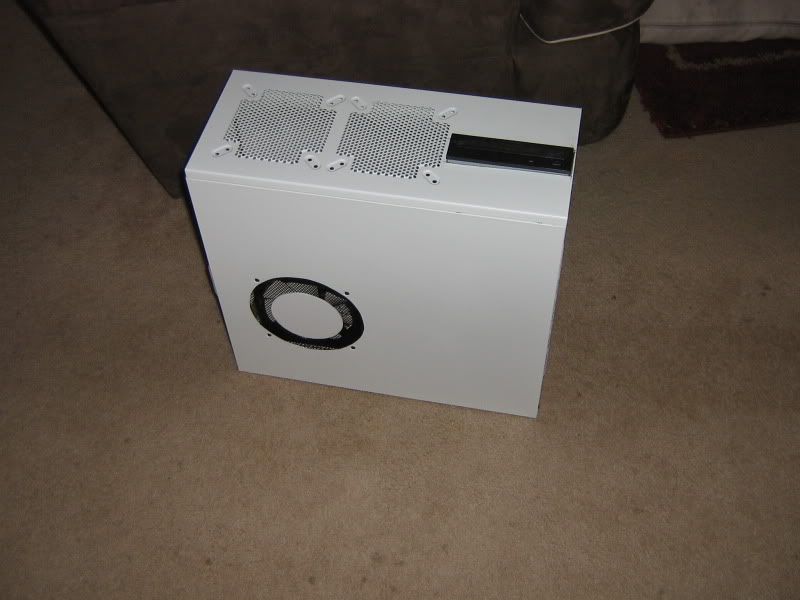
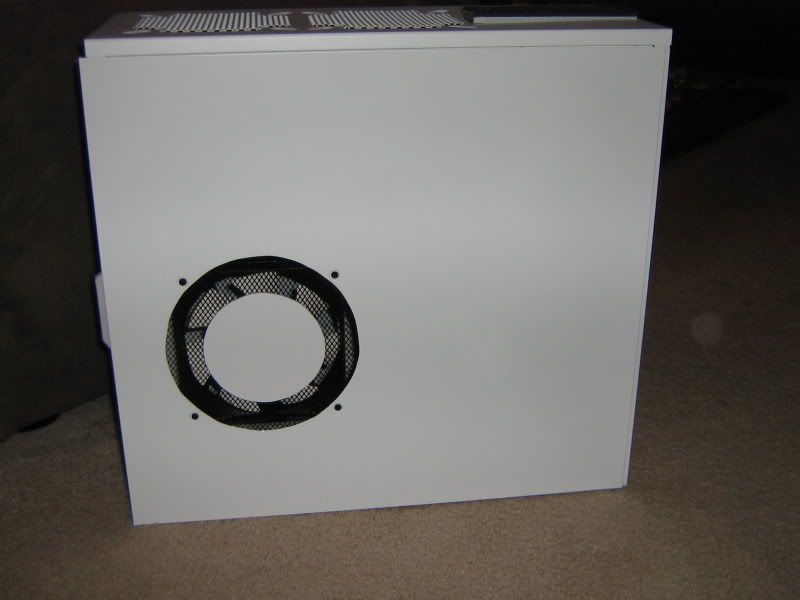
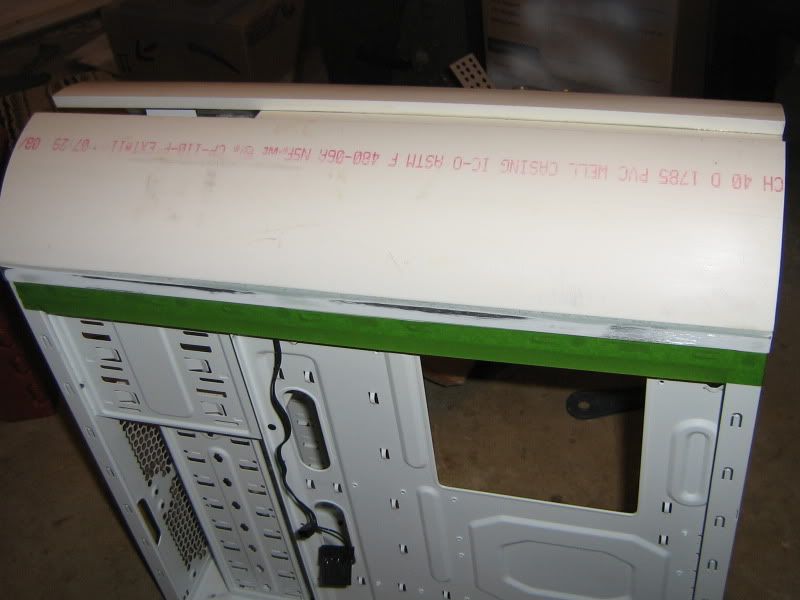
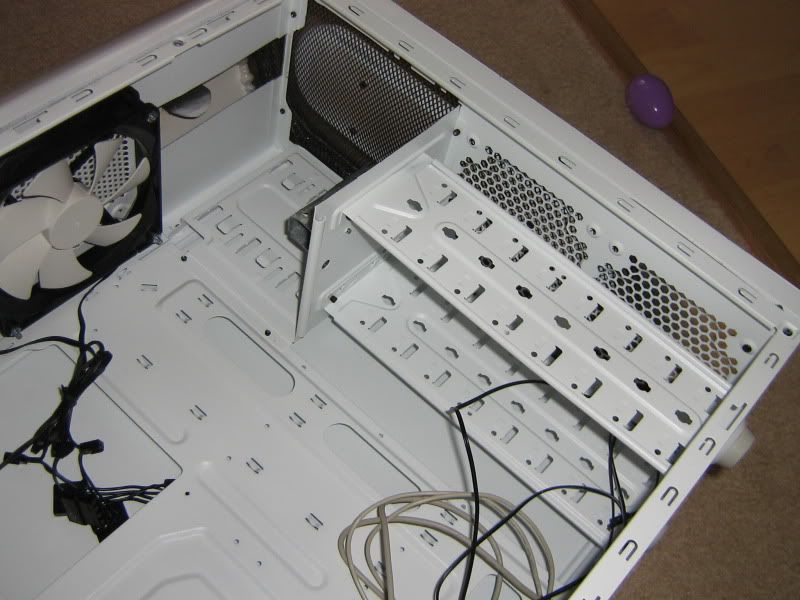
So, I'll be starting with an NZXT Source 210 white case. 2 reasons here 1: its a mid tower size for a gaming rig. 2: it requires little bondo work unlike the last mod and is already painted white, unlike the last mod.

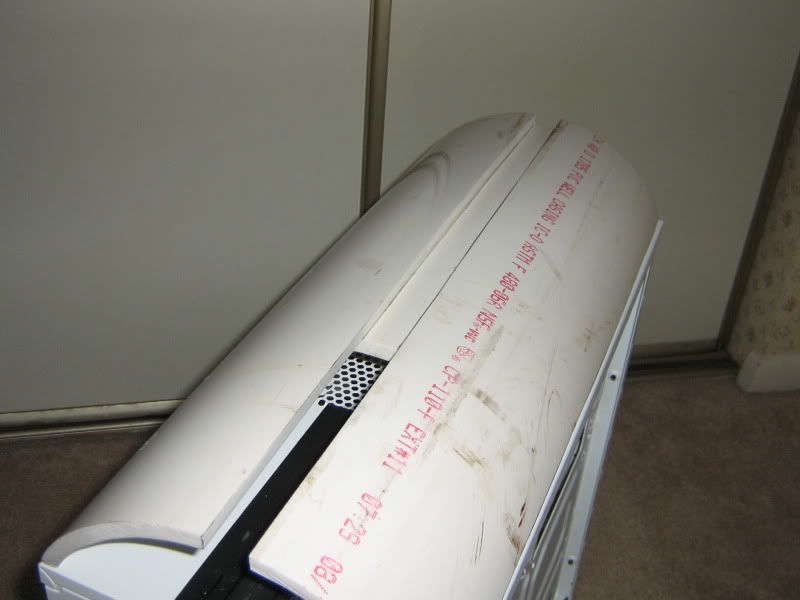
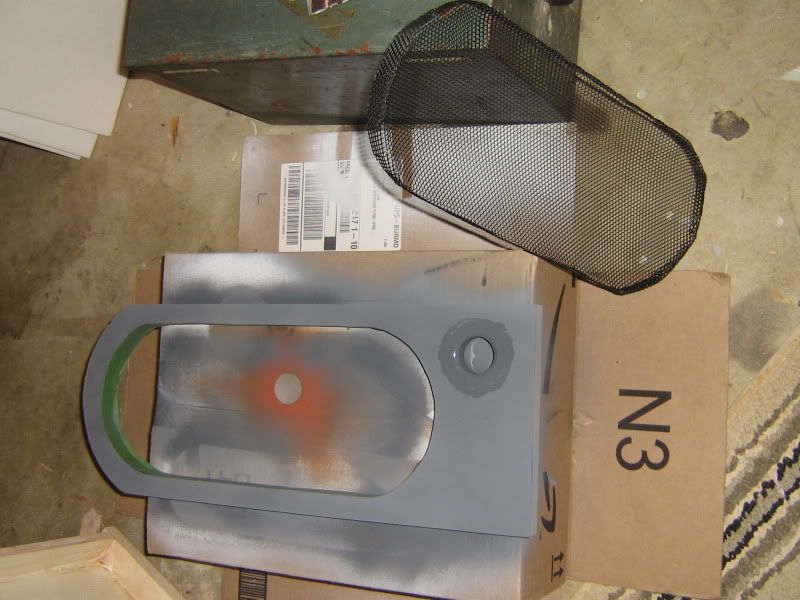
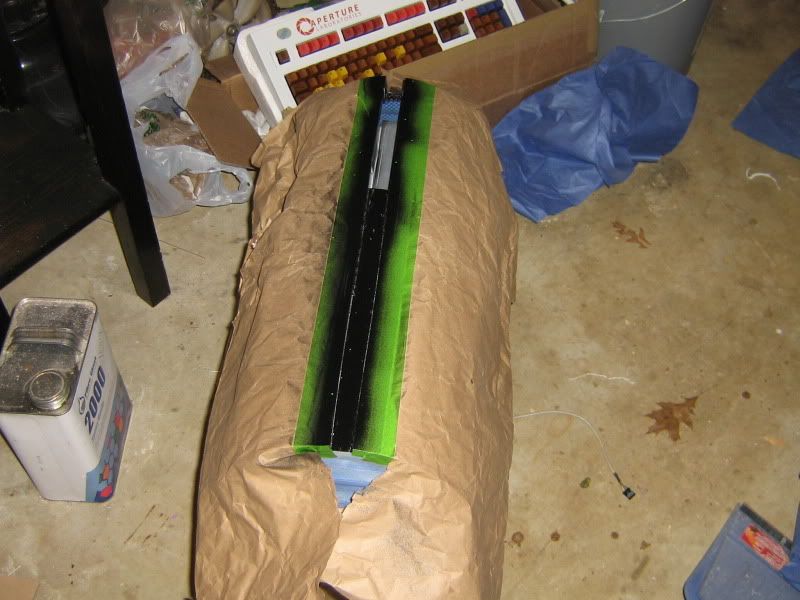
I'm an old-school modder who visualizes and attacks so no CAD pictures of the end product or assembly instructions. I'll just do it. This will be more true-to scale than the last mod as well. Any comments or suggestions along the way are welcomed.

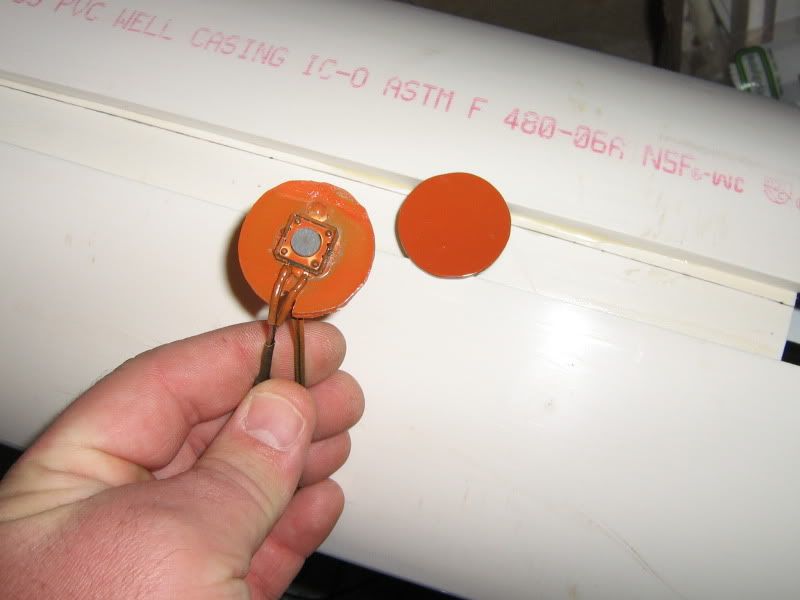
Its been 5 years since the last mod and honestly my construction skills have not been used for computers since. I've picked up scratchbuilding R/C Airplanes and that uses soem interesting techniques as well. I may incorporate them. May not. We'll see.
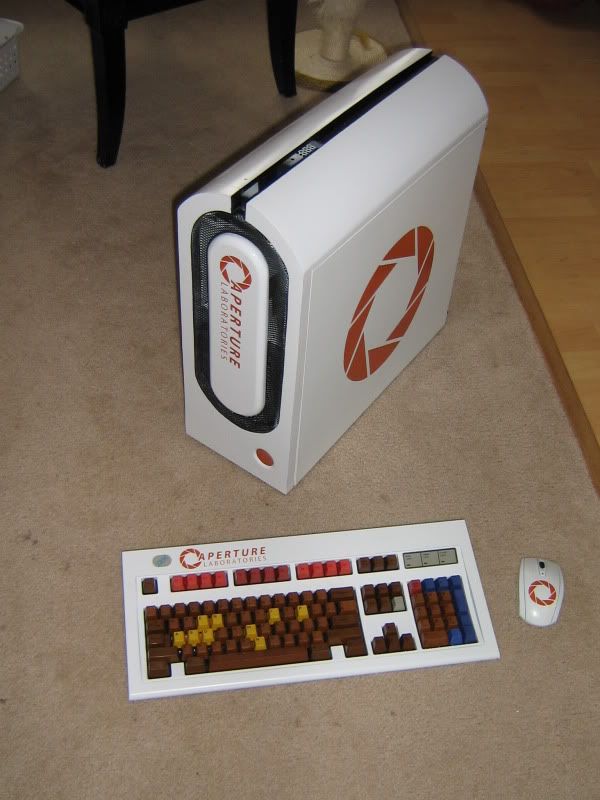
 
Picked up the 8" PVC pipe today. Scrap piece 3' long for $23 for those who are looking for this material for their own build. Kind of scuffed but nothing a quick sand cant take care of. Newegg's tracking says the case should be here today. Fantastic considering I paid for 3-day delivery and purchased at noon yesterday.
 
Ok, so I've cut the pipe pieces and sanded down the edges of the main piece to have the right angle. There will be a center piece on the under side that will be the main support connecting the two halves as I will be cutting the groove out of the center this time. Some thing I missed:cool:

So, Here is how the optical drive will work. Installation will be vertical and once the face plate is inserted through the hole a custom retainer (read bent piece of steel) will screw into the bottom of the optical drive and secured via screws to the top of the HDD cage. The one side of the Optical cage was removed for access to the installation location. A few other pieces were removed from the front for this as well because they were bent in toward the installation location.

The stock HDD cage remains in tact. Cool thing is this case will support a lot of HDDs and some of the crazy long cards that the green and red teams are pushing out these days. Also, the bottom of the case will not have any additional garbage there so a nice long 1000+ Watt PSU should fit just fine. Plenty of ventilation there too. Two 140mm fans at the top and one on the side will work well to circulate the air for sure. Negative pressure case this WILL be.
IMG_6982.jpg

IMG_6981.jpg

IMG_6980.jpg
 
I have a dozen old cases that need a facelift. I can't wait to see what you do to this one.
 
I have always wanted to take some foam and dress up a case like the HL2 Citadel wall. Always thought that might be interesting to do. Combination of 1/4" fan fold foam from Lowes and reddiboard from $tree would make it work. Maybe an idea for you?
 
So, going over some measurements tonight (had to work today) looks like the main aperature logo on the side of the case will be 10 inches in diameter. I'm reworking the image I originally worked with because after looking at it after all these years.... its not geometrically correct. So, re-working the graphics in illustrator will give nice crisp lines for me to cut the template. I'll position the template and trace the cut out parts. Then I will use frog tape (dont think it existed on the last build) to mask because the seams it leaves on painting are flawless... almost all the time. Also, I now have a vinyl cutter which will allow me to create a mask for the font panel logo area. This will be fantastic since I used that awful sticker last time that just was not perfect. The vinyl will adhere to the glossed finish very well and give me the perfect area to paint directly. It will be more permanent and look much better overall I think.
 
Side panel is all taped off and primer is drying. I'll apply some white next and the orange over that.
 
Ok, Progress but things are drying so pictures will come later. Case panel needed a couple more coats due to the marker I used bleeding through due to acetone melt. Oh well. The snow we had yesterday is not helping things to dry quickly. Cold and wet air. Anyways... the pipe pieces are epoxied together. Curing currently under clamps. Mouse and Keyboard came today. We are in for a treat. Its an IBM model M or "clicky" keyboard. I've done everything I can to preserve it as best I can. The IBM logo in the top left and the lock indicators will not change. I've covered them in frogtape and have applied a nice coat of white. The bottom information panel I also covered in frog tape to preserve it as well. These are some of the best keyboards ever made. This one appears to be made in 1993 or 8.. cannot remember off the top of my head. The guts had a nice manufacture sticker on that the adhesive has lost its stick. I will use some double-sided tape to re-apply when re-assembly comes. So, Mouse and keyboard are white at this point. Most of the parts to the mouse need a second coat. It was black to start with to Primer for sure to get a nice adhesion. The top piece, when dry, will be ready for the aperture logo to be applied.

I also finished the logo and all to be cut in vinyl. I'll probably due this later as the paint continues to dry. Illustrator made quick work of all the lines and export as dxf to have it cut. One pass and I will have the templates for the keyborad, mouse and front plate of the case.

I did buy the MDF I need for the front of the case and found a $4 trash can in black that has a nice mesh that I can use for the front face plate. Should make shorter work than modders mesh. That was overkill last time.
 
Yeah i remember those computers... Also remember throwing room fulls of them into water :p
 
Pictures as promised. Case panel looks fine. Looking a bit tatterd on the edges just the same as before. But still clean.
IMG_6992.jpg

IMG_6996.jpg

Current status of the mouse casing. Needs a bit of touch up due to bleeding. You can see what I mean from the need for a second coat.
IMG_6987.jpg

One spot needs to be touched up here. Although in my defense that triangle for that a is about 1mm high. Seriously small stuff here. The aperture symbol is 1.25 inches high. Just as a frame of reference.
IMG_6993.jpg

IMG_6995.jpg

And on to the case.
IMG_6990.jpg

Here you can visualize how I'll be doing the optical mounting. I'll be making a custom piece that will cover the drive and make things flush with the rest. After all this area will be black and the top will be white.
IMG_6991.jpg
 
So, Not much done today so far due to preparations for V-day. Had to go shopping at the grocey store and elsewhere. I did get out to get white LEDs. I could not find any online that were orange and I could order just 4 and have it not cost an arm and a leg. So I picked up the whites, soldered them in and painted them orange. Simple solution. They were quite bright but the paint helped to tone that down. Tried to repair the paint issues. I'm not happy with it entirely so I'll just let it fester a bit and come back to it later.
 
Update time.
So, With both case panels done at this point:
IMG_7004.jpg

IMG_7006.jpg

IMG_7005.jpg

I have been struggling with making some decisions.
I want this as accurate as possible BUT there are certain functional aspects that remain difficult. Not to mention there is not a lot of detail to go with on any kind of screenshot of the game.

--> Case panel with fan... I had toyed with the idea of epoxying bolts in place and covering the heads with bondo to cover them up. This would allow the case fans to be replaced... they will eventually die. I decided against this as in the future any sort of work with the bolts could potentially crack the bondo away from the case and would creat more of a problem than fix it. SO, to that end I am leaving the screws exposed.

-->The fan was to be more scale in appearance and the more I looked at it the more I pondered how a huge fan like that would fit in a HTPC sized case? So, I cut a hole slightly larger than the actual fan and made the inset circle smaller to allow air flow. I plugged in the fan to test the configuration and there is no audible turbulence to speak of. Air flow seemed good still so the idea is a keeper.

--> Keyboard. I forgot to get that picture tonight so that will have to wait. The Keyboard I decided to take some liberties with. The scale appearance I achieved last time had a serious sacrifice... The visual letters. They simply wore off. That is a difficult this to get right without some industrial help. So, I took a rather huge liberty. I thought how this could be done and what it would look like in other ways.

Imagine coming across the ruins of GlaDOS and found this keyboard? This is a testing facility so it would look used, laying out in the sun would leave it a bit faded. Being in a relatively clean environment before exposure would mean you could probably clean a bit of surface dirt off. So what I have done is used RIT dye to dye the keys. This has served two purposes... I could control the amount of shade to give a pseudo sun bleached effect and also provide mild inconsistencies of color but still get the point across. One HUGE plus is the keys would retain their original lettering that has shown the test of time.

As a part of this "hey I found this keyboard" idea I wanted to make a bunch of keys missing. as they do pop off. I started thinking what keys do I normally not use? I do use almost all of them. Ones I never seem to use are the PgUp and PgDn keys. I removed just the PgDn key just to give a hint of abuse and inconsistency. I think the effect is rather nice. Also the black keys are NOT black... they are a very much brown. This was intentional as black will fade to a brown in sunlight over time. I really should post a picture as all of this I am sure will not really make sense without the picture. Tomorrow. I'm tired.
 
Ok, Glamor shots of the keyboard.

IMG_7013.jpg

IMG_7015.jpg

IMG_7016.jpg

IMG_7017.jpg

IMG_7018.jpg


Screws for top fans are in and epoxied. Driver retainer on the top is epoxied. Top has been epoxied and is drying. I'll finalize the drive retainer for the bottom today and get the MDF ready to cut for the front of the case.
 
I love the detail! The last one came out better than I expected, I assume this one will be just as impressive!
Have you thought about making a mini one, similar to the one in the picture, with some sweet modding skills? More like the size of a Dell Studio Hybrid?
 
Thanks to all for the compliments.
Key, Yes I have considered it but never really did it as I have no need for a case that small. Not worth the effort then. Most people interested in the case are gamers and want a case for their own and that necessitates something with a bit more girth. I have always wanted to mod an old console radio to make it our home server.
 
Update, Well sort of. I've caught some sort of stomache bug on my 4-day weekend. Just got done working 5 10-hr days. So its kicking my butt but I have been able to get some done.
IMG_7024.jpg

IMG_7025.jpg


I've also cut out a piece of wood for the front but it was not quite right so I need to re-do. Plastic is in-hand for the button parts. The top managed to come off while I was checking for rigidity... Had to re-epoxy that in and also was liberal with some gorilla glue. Sturdy as a rock now. I was grateful for the warm weather yesterday to get so much done but really need to rest now.
 
Got a lot done today. The bondo is sanded down on the corners where the pipe meets the case. I got the front panel cut, the button shroud glued epoxy covered and sanded flush and primed for paint, the button parts have been made. The button has very short travel and should be better suited for this than the last one. The LED has been replaced and painted orange as you can see. The front grille has been made. Once the front has been painted I can install that and the button and begin assembly of the front end. There is a specific order here so I cannot get punchy and forget something or I'll be re-doing something. The project is really coming together and its looking more like the portal case.

IMG_7031-1.jpg

IMG_7032.jpg

IMG_7033.jpg
 
I was too tired last night to post the picture of the case. I've finished the front panel and its ready for attachment to the case. This means the power button with light is installed as well as the black grille. The button for the optical drive is now installed. The paint would not dry yesterday. Too cold and wet. Next weekend should be it. I can get some small stuff done through the next 5 days while I work and hopefully get a couple nice days to paint next thur-sat to paint and ship.
 
So, Old pictures...
IMG_7034.jpg

IMG_7035.jpg


And the new...
Additional USB and mic and headphone jack as requested. Not really appropriate at the front of the case but can be useful here as well.
IMG_7061.jpg


Front panel is permanently affixed with gorilla glue and epoxy. Filed and sanded flat. Center section removed. Getting ready for paint.
IMG_7062.jpg
 
I am so painfully close to the end I can smell the paint dry. Need to paint the groove black and do some mild touch-ups. I had a nice sunny day here but chilly... and windy. My "convertable" paint booth (ie. outside) was not the greatest place to paint but I got two coats of primer on and three coats of white on the top. Looks great... I'd love to show you but I'm out of freaking AA Batteries for my camera!!! GAAH! So I'll get final beauty shots tomorrow. Hope to ship tomorrow if at all possible.
 
Woke up to a brisk 34 degree morning... after a 65 degree day it was weird to say the least.
This is what happens when you forget that its cold and something goes wrong when you paint.
IMG_7067.jpg

Note the wrinkles... when it dries I'll sand, reapply primer and try again

Top ridge seemed to do fine with the cold.
IMG_7066.jpg


Hopefully things will warm up a bit more quickly to get this done.
 
FINISHED!!!!

Ok, so its done and ready to ship. Having company over tonight so shipping will take place later. Wanted to post the pics though.
IMG_7071.jpg

IMG_7072.jpg

IMG_7073.jpg

IMG_7074.jpg

IMG_7075.jpg

IMG_7076.jpg


Hey Steve... thanks for the publicity. Last case made it to the front page as well. Its a real honor.
 
I love it but the keyboard no so much .not due to the colors but the dye did not look so good.
 
I just played Portal the other day cause I haven't for a while and saw that computer. Then I was thinking, "damn that's a nice looking machine".
 
Just got Portal 2 last week, finished it last night. Awesome game.

You couldn't have chosen a better keyboard--I wish I had a Model M...
 
I might be retarded and missed something, but what is the reason behind the coloring scheme on the keyboard?

Looks great of course, just curious. Seriously great work, wouldn't look out of place at black mesa.
 
I might be retarded and missed something, but what is the reason behind the coloring scheme on the keyboard?

Looks great of course, just curious. Seriously great work, wouldn't look out of place at black mesa.

See end of post #17. It explains the artistic liberties I took.
 
Back
Top