Project : Toxicity

craigr1982

Limp Gawd
Joined
Jun 26, 2006
Messages
133
UPDATE - 10/5 - Woot Got Sponsored !!!! :D

Thanks to Bill at MNPCtech.com


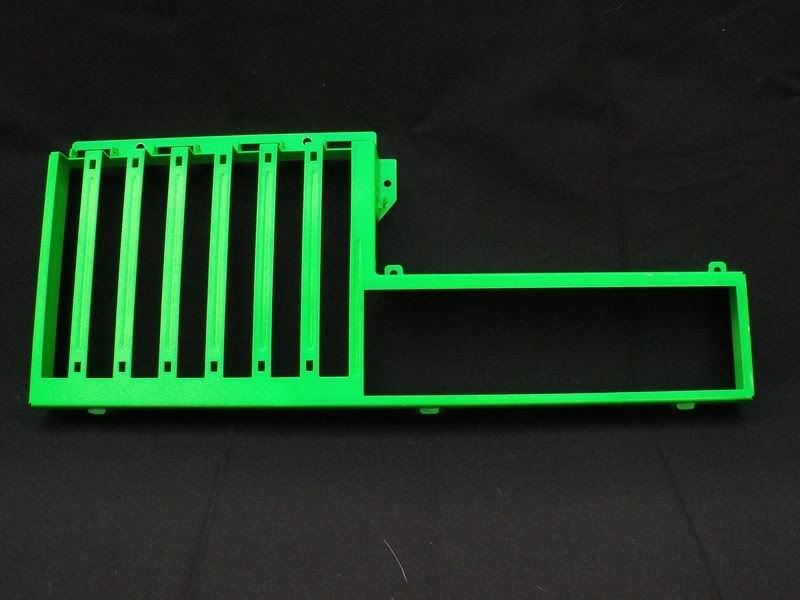
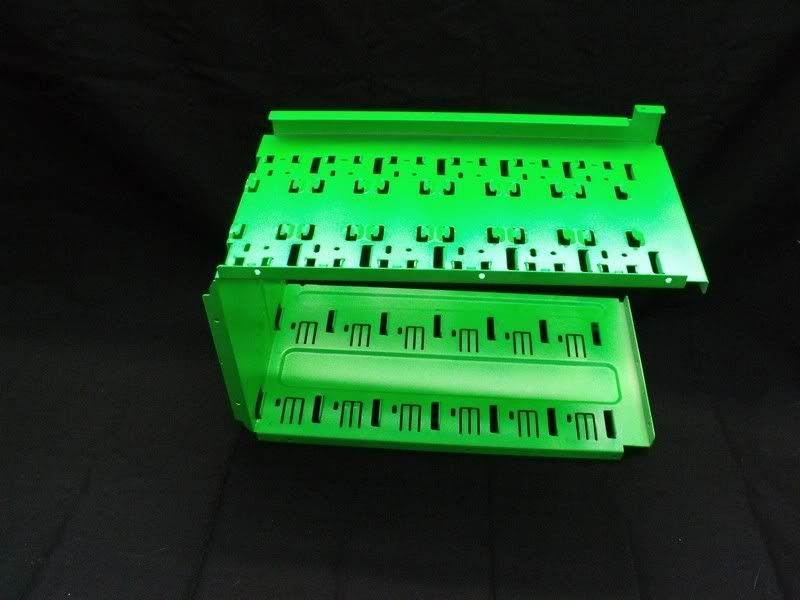
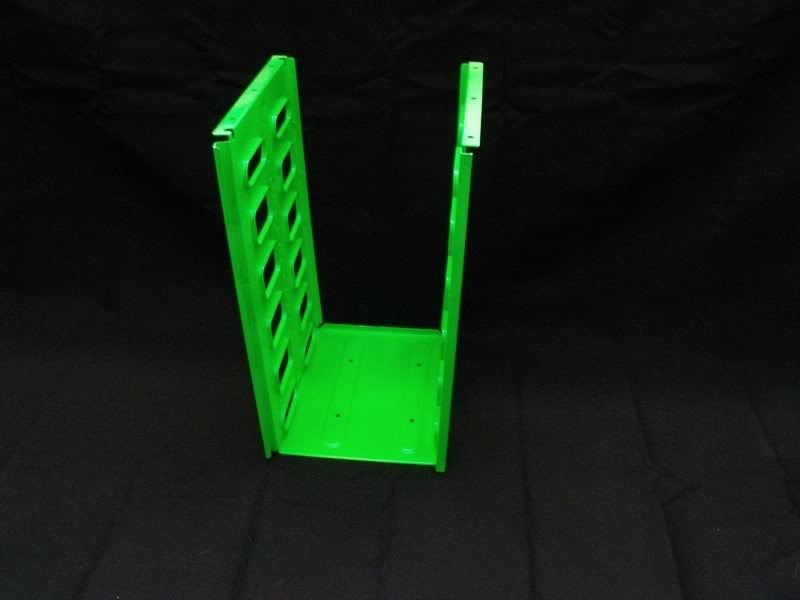
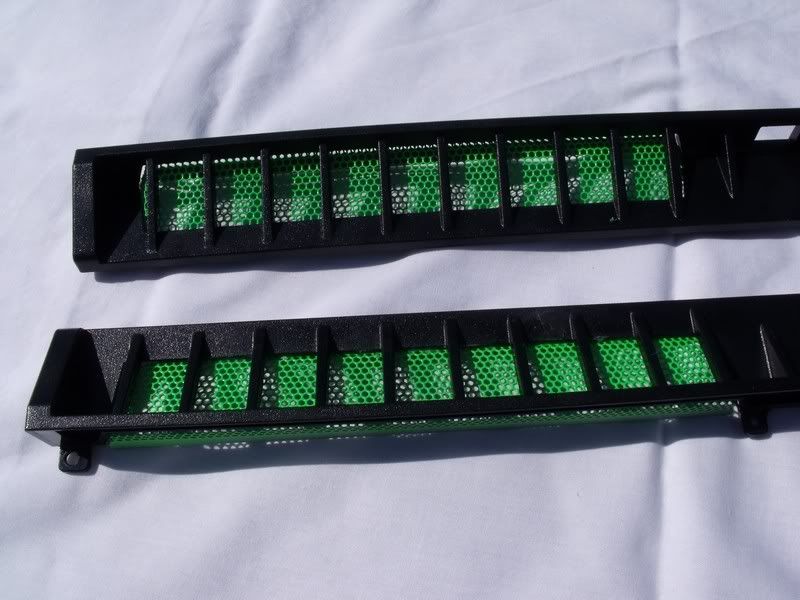
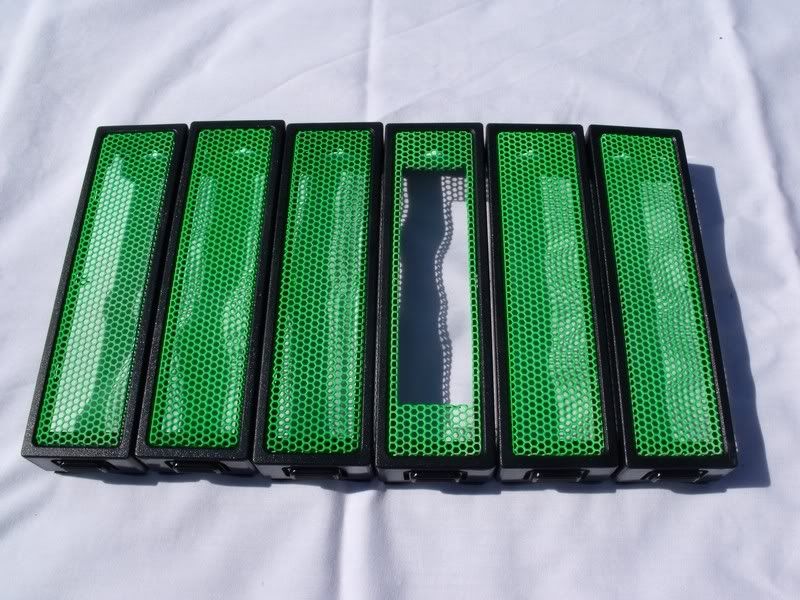
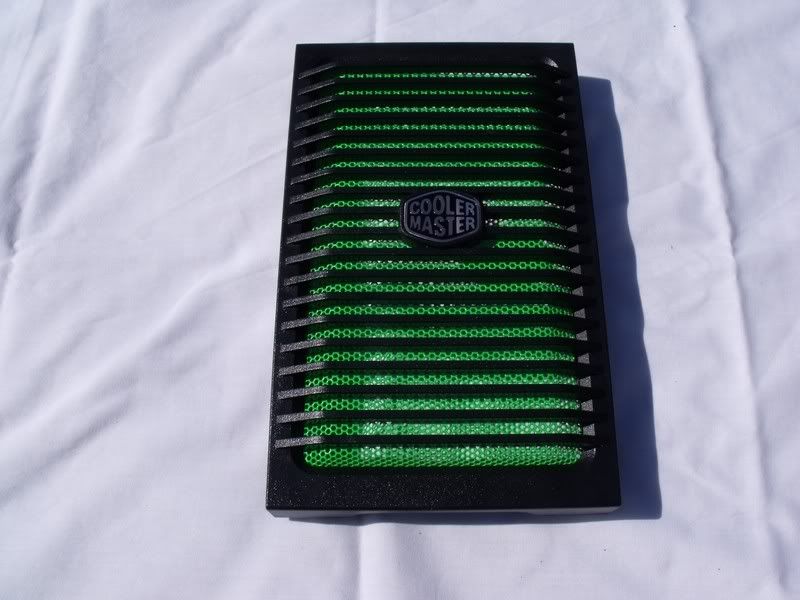
I picked up a HAF932 recently for a bargain price so I'll be using that case. It's weird but this will be the first case I have ever modded, having scratchbuilt Monolith all those years ago.

I plan on doing videos as well as some money shots so we will see how a Modding Video Worklog pans out.

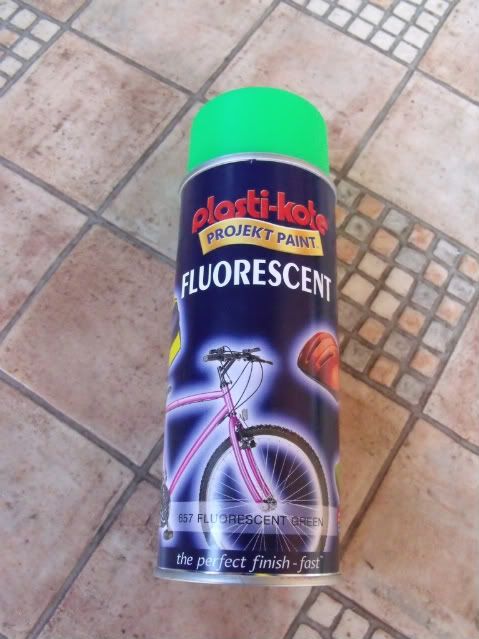
The colours will be bright Green and Black. Here's the paint I'll be using for the bright green.
DSCF1440_rs.jpg


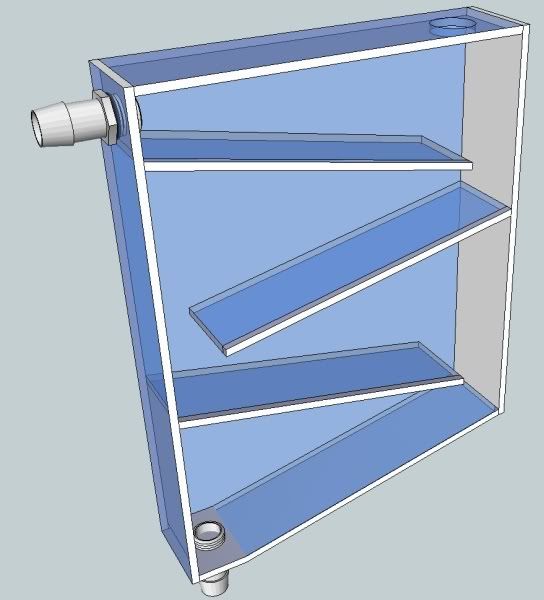
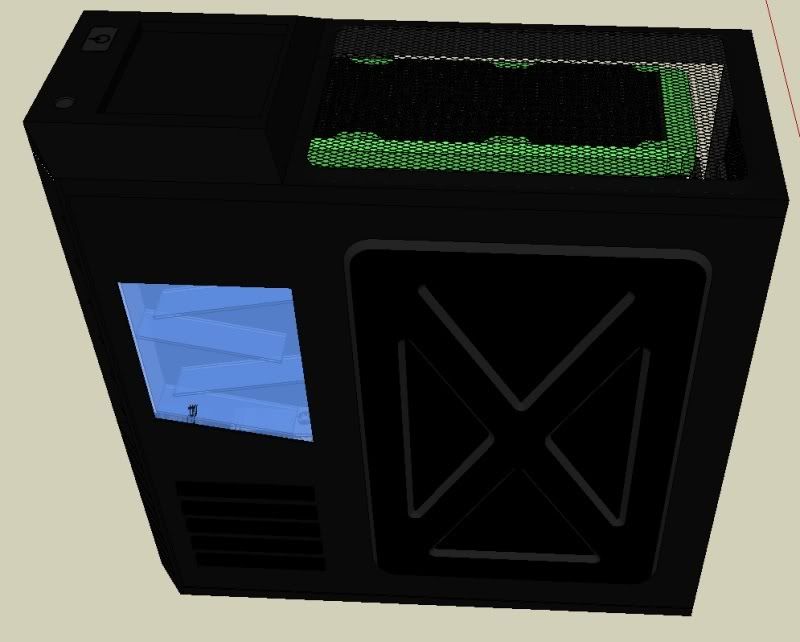
Here's a couple of Sketchup concepts to whet your appetite. Sorry I don't have time to learn any rendering software.

Concept1.jpg


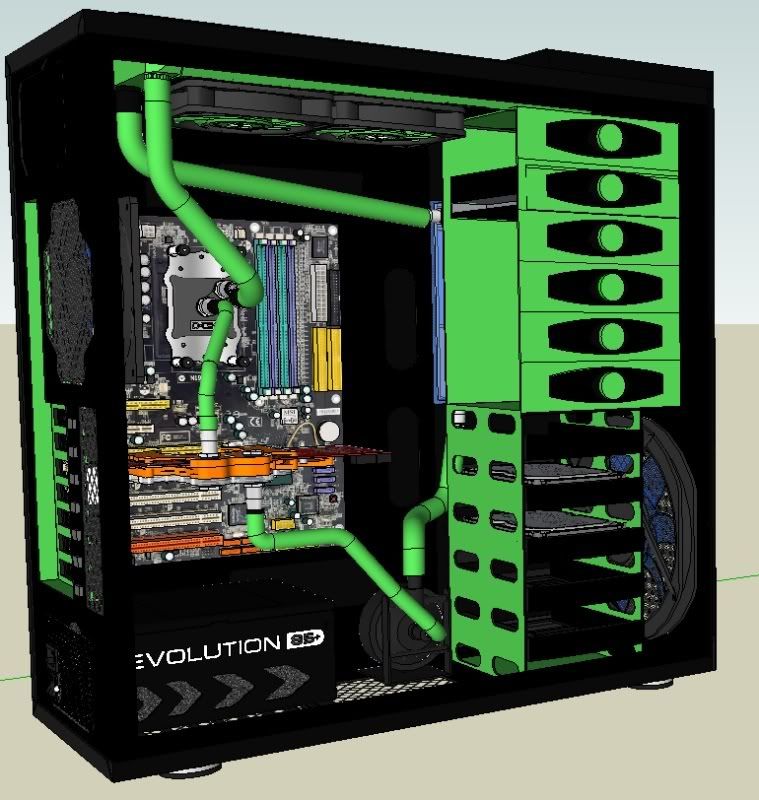
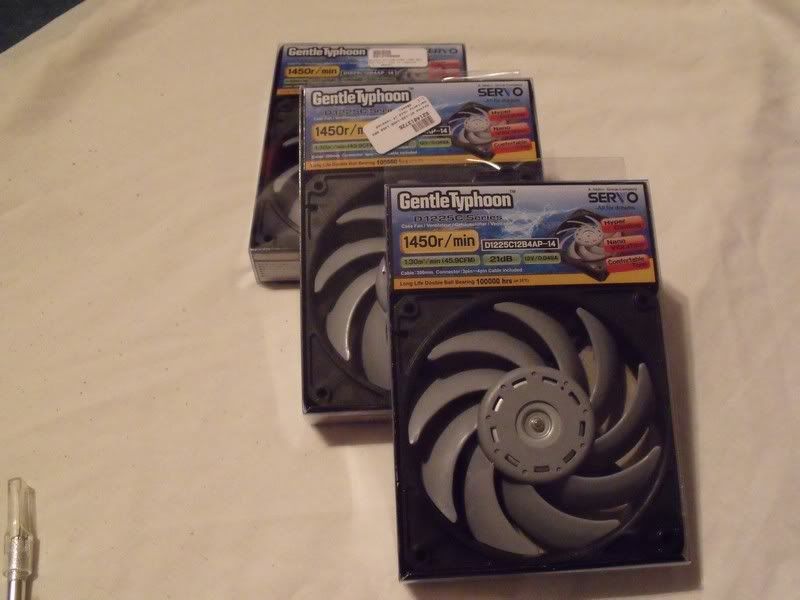
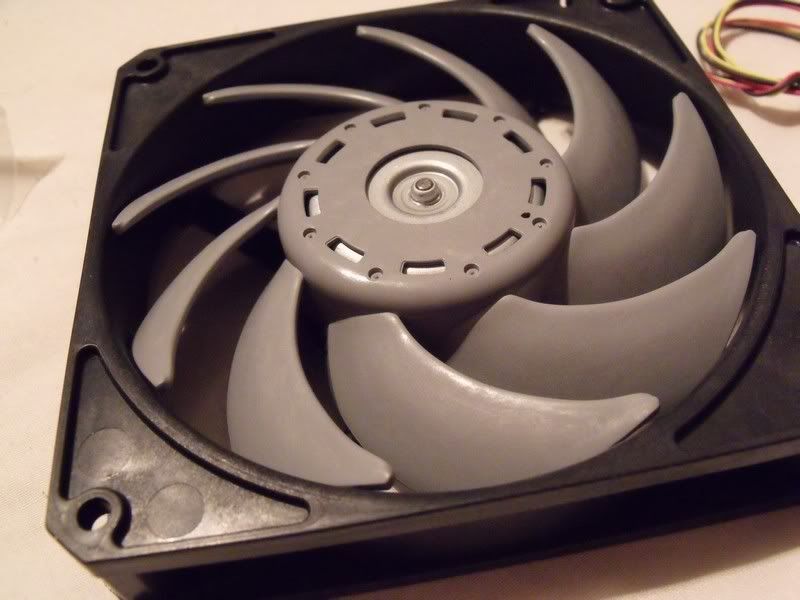
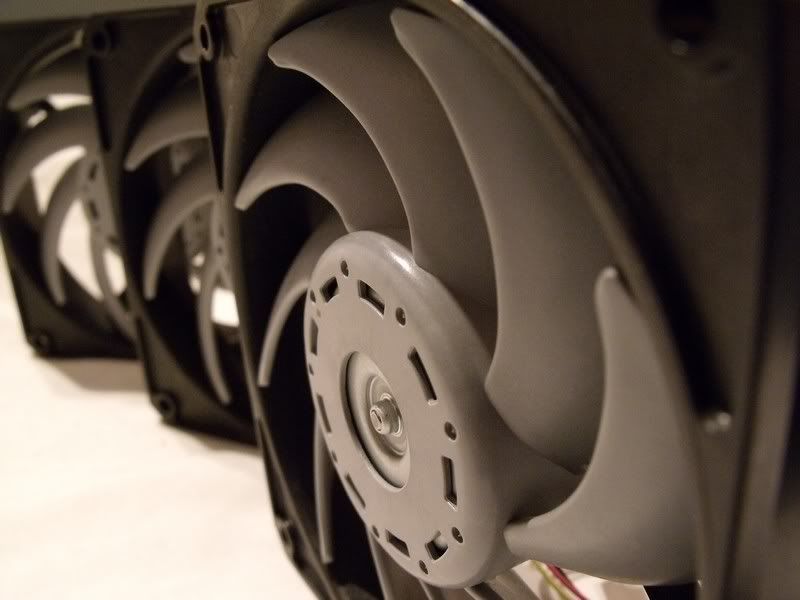
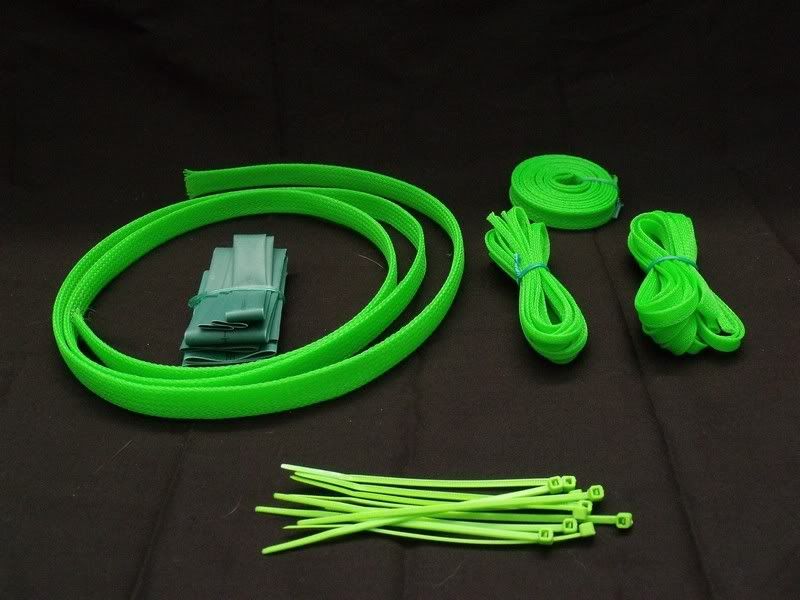
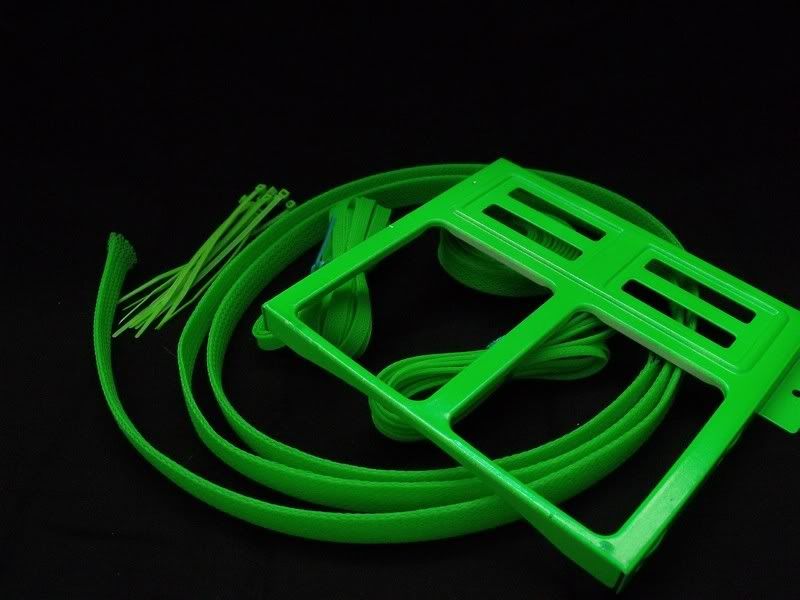
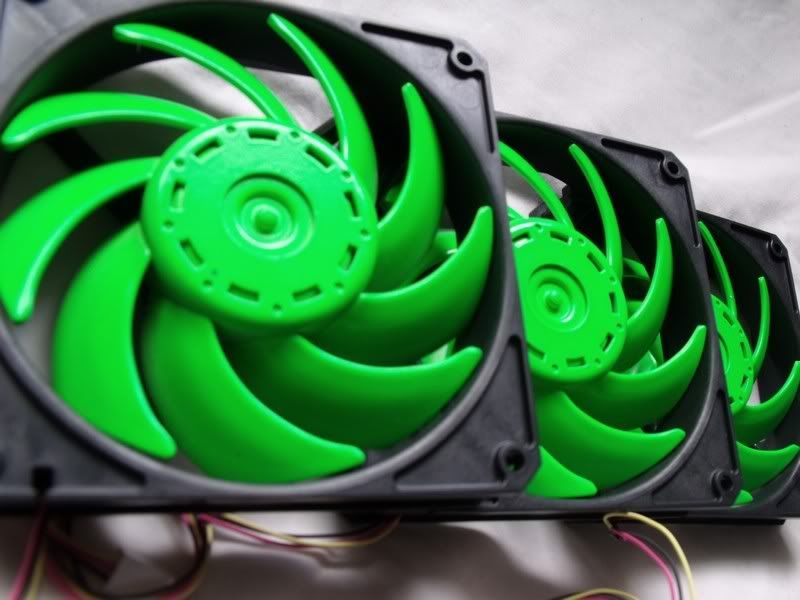
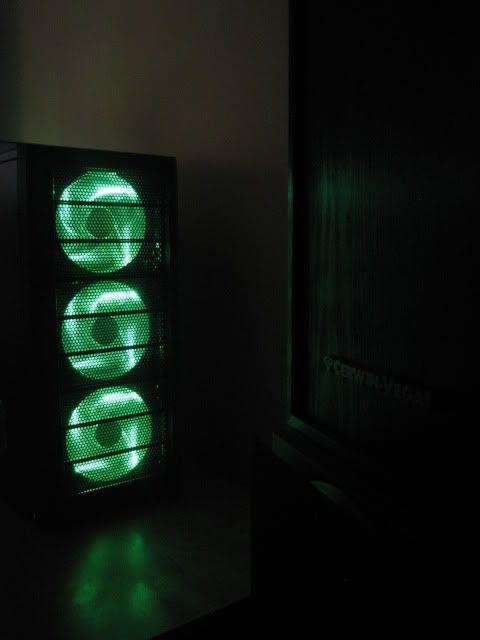
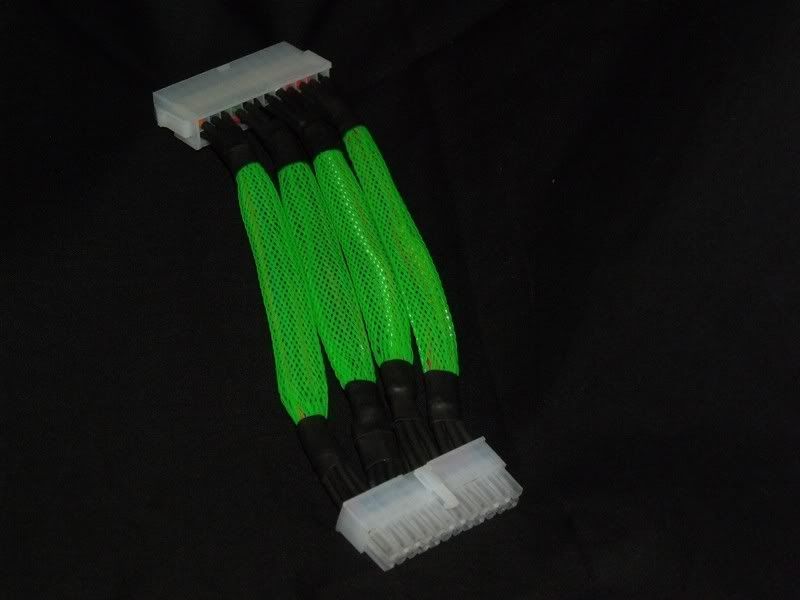
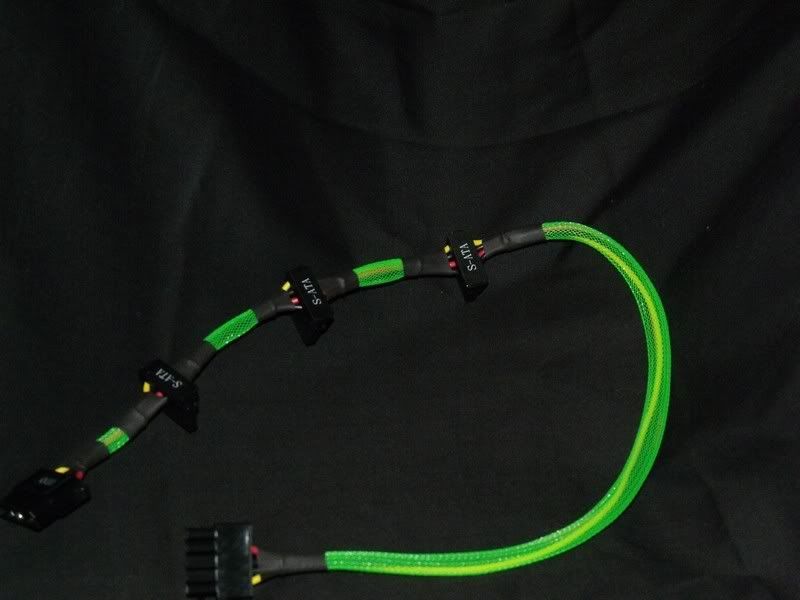
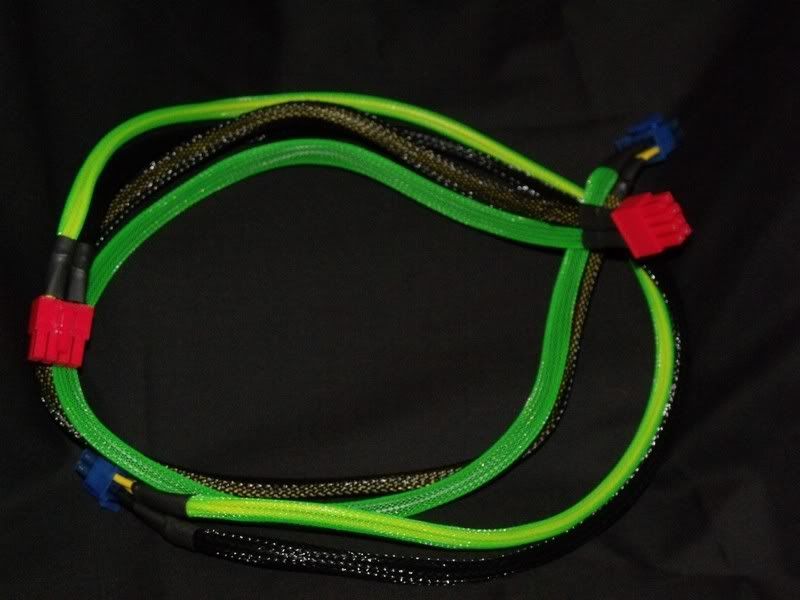
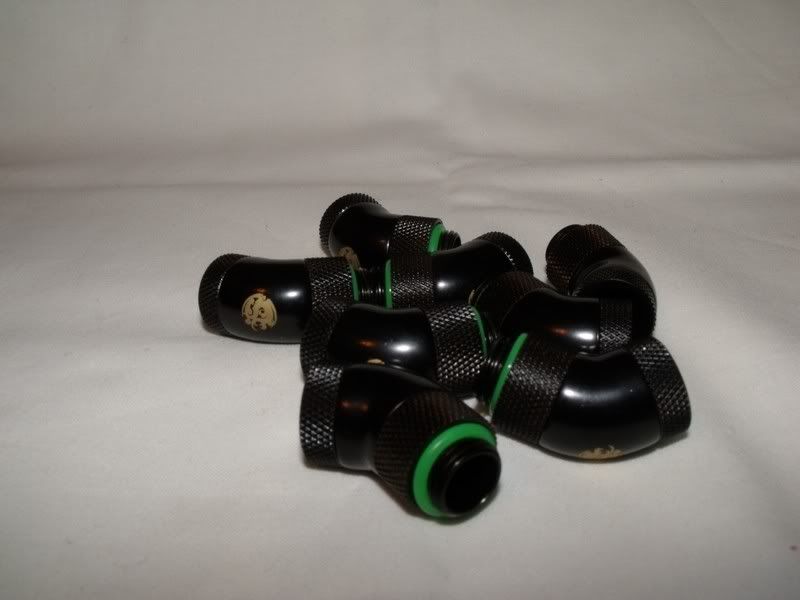
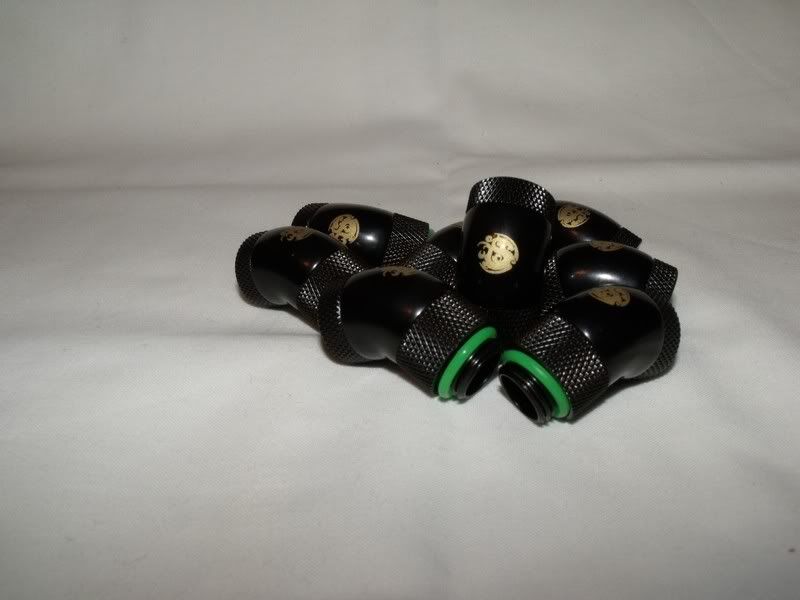
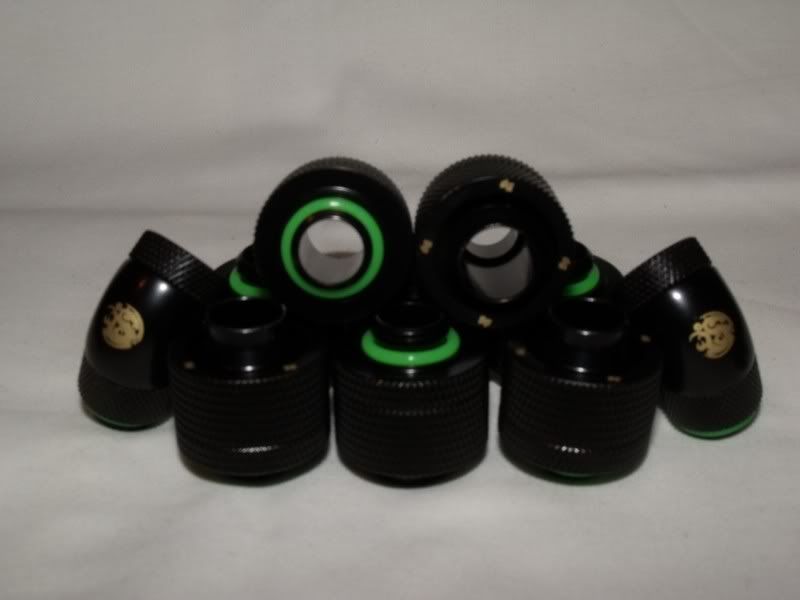
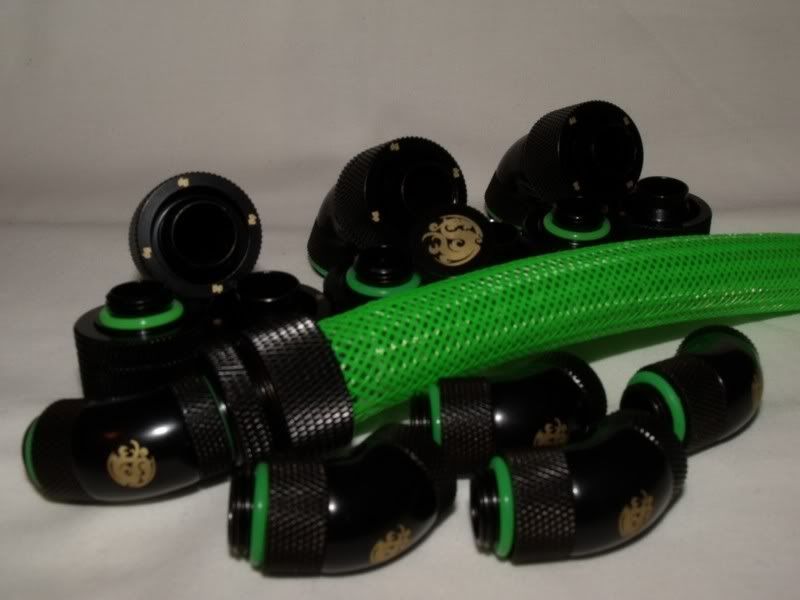
I'll be using Scythe Gentle Typhoons and painting them the lovely green to match. I'll also be braiding my PSU cabling green (not shown) and depending on what I can get watercooling hose wise I'll be looking for green again.

Concept2.jpg


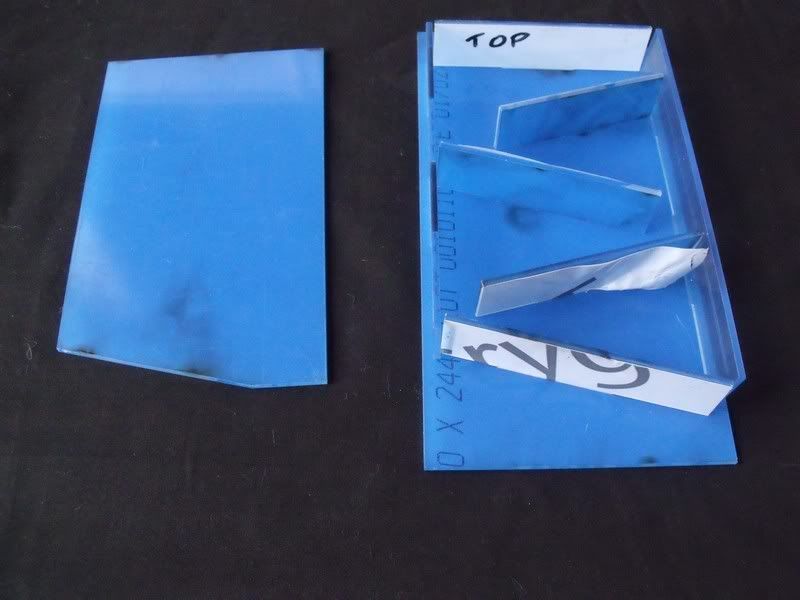
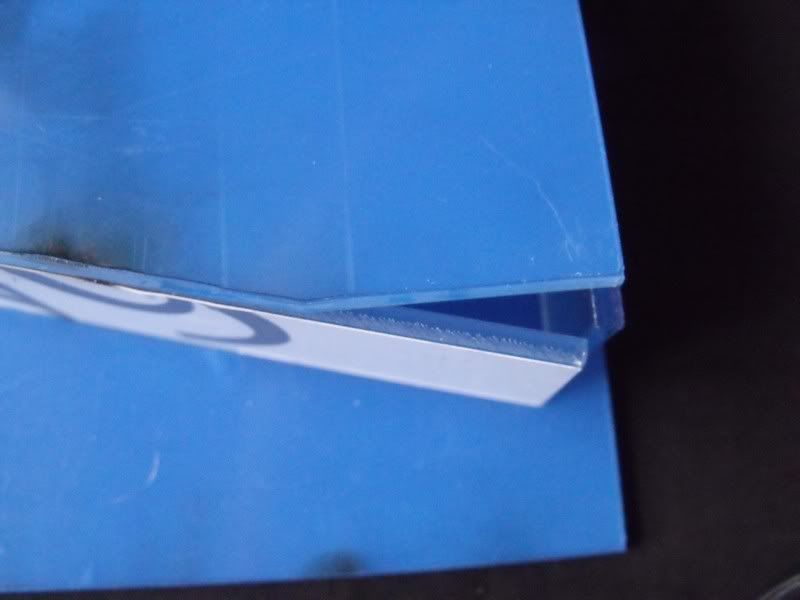
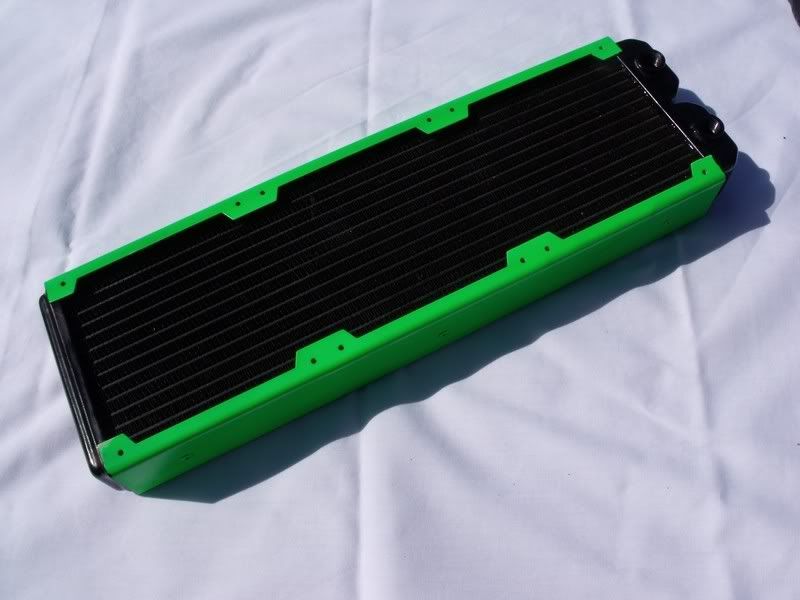
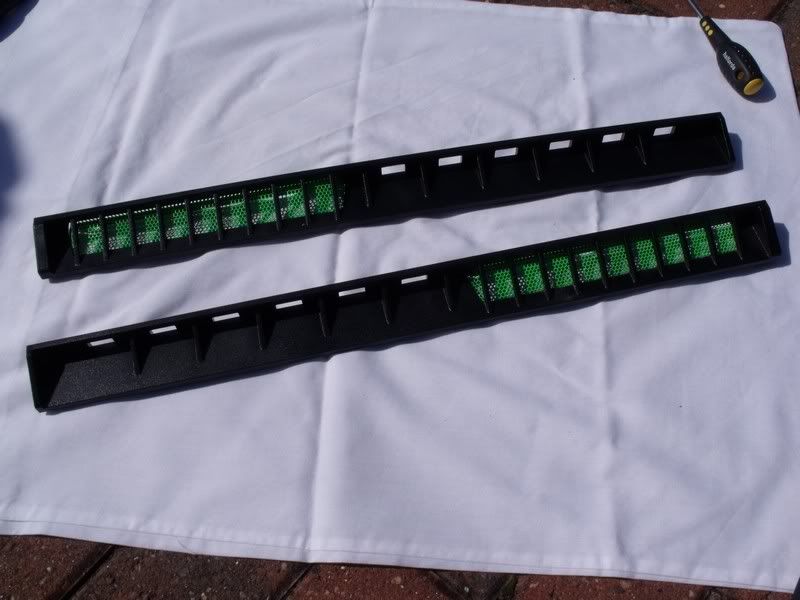
You can see in the 2nd image that I'll be making a custom reservoir for this case and also painting some of the radiator.

The unseen side panel and roof panel are still in the planning stages.

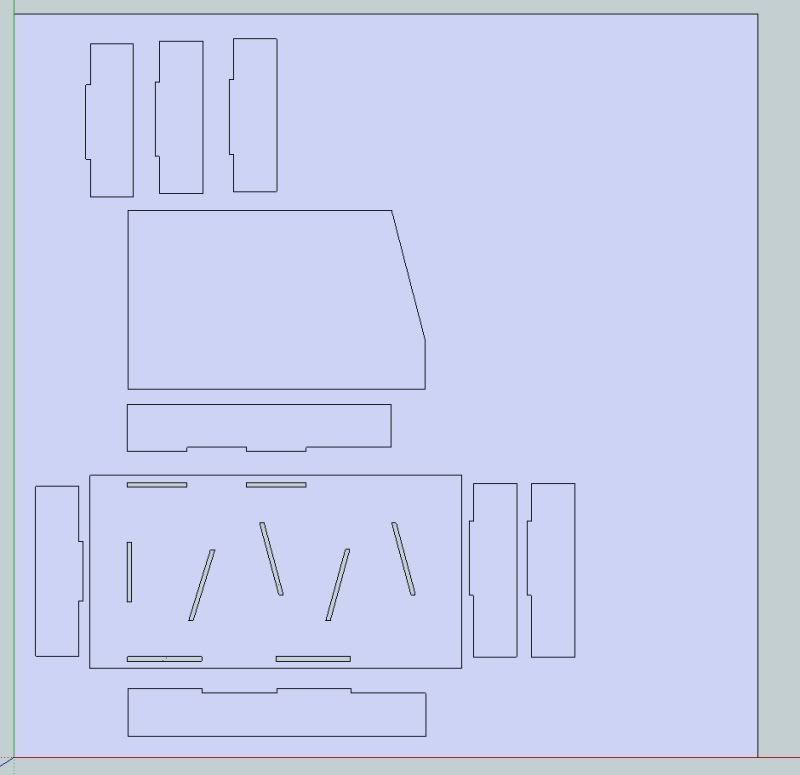
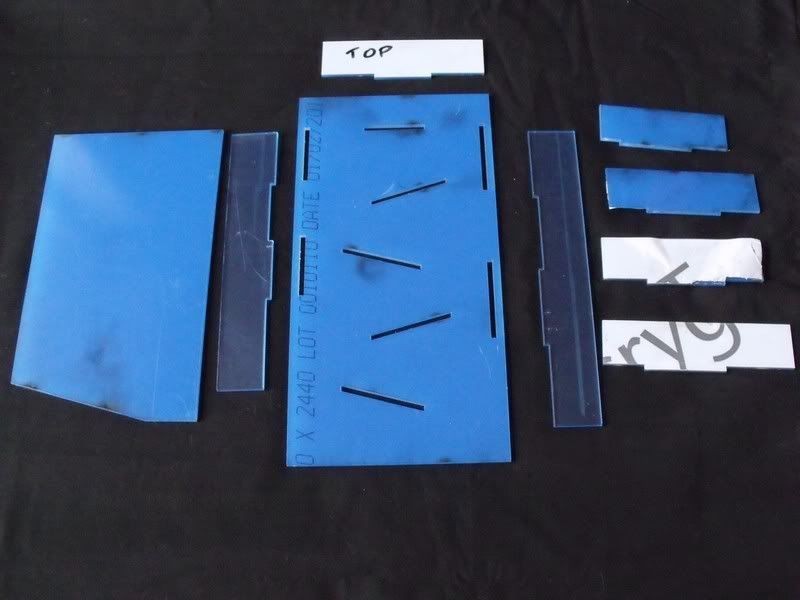
I've done some work already so the next post will just play catch up a little.
 
Last edited:
As I said I've already done some work to the case and here are the worklog videos, the first is in standard quality however all the rest will be at least 720p thanks to a new camcorder :)

Dismantling the case
http://www.youtube.com/watch?v=_JjGj-JkQdk

De-riveting the case - 720p
http://www.youtube.com/watch?v=AV4T1sAAP8M

Painting - 720p
http://www.youtube.com/watch?v=m9NBmySfJgA
I'll be taking some more photos of the parts when they have dried properly :)


Also my first set of parcels arrived, some new fans for the case. Scythe Gentle Typhoon (who thought of that name?) 1450rpm.

I decided against doing a video of my opening up a parcel, especially after I found how it had been shipped..Getting into Fort Knox would have been easier. Anyway on to some photos.

Image001.jpg


Image002.jpg


Image003.jpg


Image004.jpg


These won't be staying stock for long I have a cunning plan ;)

As you can see I'm working with my camera to try and take some more interesting shots of hardware..

There will also be a short video coming soon with regard to the fans ;)
 
So another update, including some money shots of my green spray painting adventures :)

After a couple of coats of primer, green and some clear lacquer here's how the case internals turned out.

Image005.jpg


Image006.jpg


Image007.jpg


Image008.jpg


As you can see it I can't get any closer with the braiding :)

Image010.jpg


Also I have a new video up now too. :D

http://www.youtube.com/watch?v=0vLTz9UhN1w

I still have some more painting of the case to do but first I need to get my jigsaw out and start hacking away at some panels.
 
GREEN!!!

That is probably the brightest green I have seen used in a mod for a very long time.

Great work on the paint. I am horrible at painting computer parts.
 
hehe thanks guys. i had the rest of this week all planned out modding wise and then i got called in to work for 2 days which has really thrown me.

next update will probably monday now.

any comments on the video production? pointers . things youd like to see etc?
 
Only a small update here, sorry folks. The weekend seemed to disappear before my very eyes :(

Now that the paint has dried on the fans I put clear lacquer on them and now they are very shiny :)

Image013.jpg


I still need to braid the cables but thats a task for another day.

In other news I had a small package delivered while away at work...

500 Black Pop Rivets which were actually cheaper than just buying the 80 odd that I need.

Image014.jpg


Image015.jpg


Should make the pop rivets blend in rather than having silver.

Thats it for now although I'm still working on my next video which I swear takes longer to edit than actually do.. *sigh*
 
Freakin' awesome. Green's my fave colour (hence the green meanie rig of mine). I'm looking forward to seeing how this turns out :)
 
Sorry for the double post..


So another new video. Really spoiling you this week :p

Braiding
http://www.youtube.com/watch?v=tmE5a4DZl9s

My modding plans for the rooftop have come to a juddering halt as I've ran out of cutoff wheels for my dremel clone and I'm a little puzzled on how to do the next bit. Maybe it will come to me after a drink...or two :)
 
Rossi - Nice rig :)

Thanks :)
I have a love for the green fans.
IMG_5736.jpg


Sorry for the double post..


So another new video. Really spoiling you this week :p

Braiding
http://www.youtube.com/watch?v=tmE5a4DZl9s

My modding plans for the rooftop have come to a juddering halt as I've ran out of cutoff wheels for my dremel clone and I'm a little puzzled on how to do the next bit. Maybe it will come to me after a drink...or two

Can't wait to see how this turns out, you're making me want to attack mine with more green!
 
So it's been a while since I had an update..but fear not my friends I have a shiny new video for you.

Modding The Roof Panel
http://www.youtube.com/watch?v=fqEPLfO2y5k

Sorry for the quality of the sketchup section, not sure how to sort that yet. Also the perspex will have designs on not just round holes but it was all I had time to do.

I'm hoping to get the roof modding sorted soon as without it I can't piece the case back together. Without the case being back together I can't finalise the dimensions for the custom res as (like a muppet) I forgot to measure BEFORE I ripped it to bits.

Enjoy and don't forget to comment either here or on the video :)


PS I will be away for the next week so the project is on hold until I return.
 
Cheers guys,

I'm back from my holiday and hoping to get some more modding done this week. Also planning on taking some photos of progress so far.
 
So I figured a quick catchup was due. I was hoping to take photos outdoors but it's been raining for ages so I had to make do with what I had.

As you saw I braided an ATX Extension in my earlier video, but I didn't actually take any snaps.
Image017.jpg


Since then I've braided some more of the PSU.
Seemed a shame to pull off the black braiding which was on my BeQuiet 850W PSU..
Image016.jpg


But it looks so much better in green :)
As you can see I've also shrunk the leads down to the right size. Who makes these cables which have a massive amount of cable between the SATA leads?
Image019.jpg


I also braided my PCI-E Power leads in black and green.
Image018.jpg


I've also mocked up the case ready for riveting but I still have some work to do on that before I'm ready to show :)

Thanks to my Sponsor MNPCTECH for providing the Sleeving among other things :)
2010.mnpctech.banner.jpg


Last edited:
Cheers :)

Work has been mad busy this past week with me installing 11 UPS's and various other items for work. None on the ground floor (naturally) and of course no lift.. My poor back. :(

Working 8 hours a day with a 4 hour round trip has put Toxicity on the back burner however I did get a bit of time on it before the weekend but not had chance to sort the video out yet.

I'll be sure to post an update soon.
 
So no video's as yet but I do have a little bit of a stock pile of footage which I need to "do my thang with" but work is stopping me big time.

However work on the project has not halted I have been busy beavering away on the res which I know everyone seems to want to see happen (myself included). Finally got the concept sorted and sizes finalised etc.

Res.jpg


And there we go, there is a hole up in the top corner for a fill port of some kind and the two barbs for the various hoses etc. I plan on bending the lower piece of perspex into shape so I've had an extra couple of those sizes made to allow for error.

After getting that sorted it was time to get it into some kind of pattern to be cut by a laser cutter.

Res1.jpg


As you can see everything should slot into place allowing it to be rigid without glue so it will add to the strength of the piece and also make glueing things precisely much easier (I hope).

I exported that to DXF using sketchup and sent it away to my friend with a laser cutter.

I'm still waiting on barbs so I can't put the res together until they come in.

I'm GOING to get a video done this week with an update on progress before I go on yet another holiday.
 
I would say this case is going to be glowing... but that would be the understatement of the year

nice build... as of...
 
So it's been a long time coming but I finally have a new video for you guys and gals.

As the case is all sprayed up and looking good I figured it was time to put it together.

http://www.youtube.com/watch?v=P_LNPDm_zFo

I picked up my black rivets from Spalding Fasteners and as I said the size is 3.2 x 6mm.

I'm hoping to get some photos of the case done before I go on holiday tomorrow but no promises.

As for the rest of the project here's what I have left to do.

  • - Top case panel to be finished and perspex to be routed or otherwise to fit.
  • - Res to be lasercut, tapped and then glued. Leak tested.
  • - Side panel to be cut for res placement.
  • - PSU to be modded / painted etc.
  • - Windowed panel to be modded.
  • - Acquire black barbs (preferably 45 angles).
  • - Spray 360 rad in Toxic green.

Then it's just a case of swapping hardware from Monolith (unless I decide to upgrade to i7 before then).

Comments etc always welcome :)
 
Cheers Bill - I can't wait to see it either, in fatc it's killin gme knowing I have the acrylic next to me and what it will turn out like haha.


I'm back from my hols, bright red from stayin in the sun too long.. ooops.
The custom res will be the next video as I'm having it cut this week :)
 
Cheers Rossi~

I've had the res cut this week and took a couple of photos of it cos I can't wait to put this thing together...But I have to cos I have no Barbs yet :(.

I've mocked it together for now just to see what it looks like. All the covering is still on so it looks blue but the perspex is actually clear....Honest. :p

Parts
Image022.jpg


Mocked Up
Image020.jpg


As you can see the lowest section needs to be heated and bent, thankfully I have a few of these cut so I can get some practice in. Plus all the daft little offcuts I've got from the sheet.
Image021.jpg


The black areas are burn marks which are only on the protective covering :)

As I said I have no barbs which means I can't glue it all together until I've drilled and tapped where the barbs are going.

Hope your excited as I am to see this thing hold water.
 
Another update, I've made quite a bit of progress on the res however I'm saving it all for the video, wouldn't want to spoil you too early.

However in other news I've picked up another sponsor.. Yay!

Let me introduce

Thank you very much for agreeing to supply what I required :)


My loop will consist of (although possibly not in this order)
D5 Pump - GPU - CPU - 120x3 Rad - Custom Res - Pump

These will all be fed using 1/2" tubing and I figured, new build, new barbs..Most of the gear has been bought and paid for myself however Specialtech agreed to provide a few items.

To go with my black and green case I figured it was only fitting ( :p ) to match that colour scheme with some Bitspower Matte Black fittings and some 1/2" ID Compression Fittings to lose those pesky Jubilee clips.

My camera is flat so I've had to make do with just the one shot from my better half's camera until I get some better ones taken tomorrow. And as you can see I got a little bored...


I have 10x 45' Angles with 10x compression fittings to match, also 3 blanking plugs for GPU and Res fillport.

I'm hoping to get the res finished this week but I seem to only get an hour or so free at a time recently, just enough time to get out into the garage and start and then start tidying up again :(
Or I get all night, when I can't use power tools or make noise etc, still it gives me time to edit the hours of footage I already have stockpiled.

Until next time...
 
Work has been getting ridiculous, 8 hour shifts with a 4 1/2 hour round trip travel time and 5 days a week, so this mod is taking a real back seat to real life..well sleeping actually. haha

I've not had chance to photograph the Bitspower fittings yet but I have finished my latest video. It's not as far along as I hoped but the res is taking a long time to cure in-between gluing, it's supposed to be over a week before it's under any pressure. In reality it could be another 2 weeks at least before it is actually ready for full leak testing and I couldn't wait that long to release this video. I'm hoping youtube wont take an age processing the video into 720p.

http://www.youtube.com/watch?v=7hdFZB4ZBAU

As I mention in the video this project is on a go slow / hold until work slows down. I am hoping to get some work done during the weekends but it will be slow going, I'll be sure to keep you updated if any work happens.
 
Well I've done some work to the roof panel, but ultimately I'm not happy with it so it's been binned and I have to start again with new perspex. :(

Bit of a pain but as I'll be seeing it on the roof and the glaringly obvious problem it needs to be redone. I've shot some footage of the first attempt so I can just get on with the modding up to a point without worrying about camera angles, lighting etc.

As for the res, it's still undergoing the glueing process, still lidless at the moment and I'm fairly certain it's now watertight so far. Now to just get the lid to seal correctly and I can actually run it with the pump rather than just filling it with water and watching for leaks.

And now because I can't sleep I think I'll go photograph those fittings and see if I can't get some better photos.
 
So I do believe I take better photos in the dead of night...

Been doing some prep work today for the roof (take 2) and setting up some gear but here's a selection of Bitspower photos. For those sad enough to count whats there you will notice a few items missing, mainly because they are currently already in use..Pump and res so far.

Image023.jpg


Image024.jpg


Image025.jpg


As you can see below I'm hoping I have enough braiding left to braid ALL the watercooling hose which will make a nice feature.
Image026.jpg


As luck would have it I have been given tomorrow off (hence the staying up late today) so I plan to be busy modding in the garage and maybe get a progress so far video shot or something but we will see how that goes..
 
Started Leak Testing - Hurrah.

Hmmm I think the pump is maybe a little too strong for the Res, but it is only going directly to the res and back, no blocks or rads to slow the water any.

Laing D4
Pump Speed: 1,400 LPH
Delivery head: 3.4m

Therefore it pelts water as the side of the res completely missing the first slope and then causes a vacuum for the other slopes which in turn leads it to run out of water. This then slows the pump down as part of the pump has air in and makes the flow much better and the water runs the gauntlet much better...and it is totally leak free :)

As the D4 is my old pump and the D5 I use is variable rate I will need to do further testing using that pump on its various speed settings to find the correct speed.

I shall upload a video of it in action when "management" returns with my video camera later today..sigh
 
This mod was mentioned on The Mod Brothers Podcast #19. Available HERE. This means it's been bumped into the Featured Worklog's Section within themodbrothers forum :)

Just a quick update for now.

Managed to grab a few minutes for some footage of the reservoir and play a little catch up with what else I have been doing in the background.

http://www.youtube.com/watch?v=XZlSpXJkagc

And here's a better look at the images that I used in the video.

360 Radiator after a paint job.
Image027.jpg


Side Bezels
Image028.jpg


Image029.jpg


Drive Bay Covers
Image030.jpg


Front Bezel
Image031.jpg


Thanks about all for now. Enjoy :)
 
Back
Top